Article Contents:
- What Is Kids' Room Wall Molding?
- Start With the Room's Use, Not the Pattern
- Pick one primary wall
- Decide what must remain changeable
- Are ready-made decorative kits all polyurethane?
- Behind a bed: a quiet backdrop, not a headboard
- Above a desk: room for changes in equipment
- Play area: skip low protruding decorations
- Over a dresser or reading chair
- Nursery: restrained details and careful placement
- Early school years: a room for activity and display
- Teen room: let the wall support personal style
- Measure the usable wall, not the entire wall
- Choose the measurement convention
- Use a simple proportional formula
- Keep small parts and projecting details out of reach
- Furniture anchors and electrical work must be independent
- Check older painted walls for lead-related risk
- Step 1: inspect and prepare the wall
- Step 2: mark the complete pattern
- Step 3: cut a test corner before the real pieces
- Step 4: attach according to the product instructions
- Step 5: finish joints and paint
- Same-color molding and wall
- A contrasting frame or painted inset
- Repainting later
- Is polyurethane molding a good choice for a nursery?
- What molding size suits a small child's bedroom?
- How many molding sticks do I need for two wall frames?
- Can picture-frame molding go over existing wallpaper?
- Can I paint polyurethane molding the same color as the wall?
- Should the frame be installed directly behind a crib or bunk bed?
- Can the molding hold posters, shelves, or a mirror?
- Can a renter install permanent wall molding?
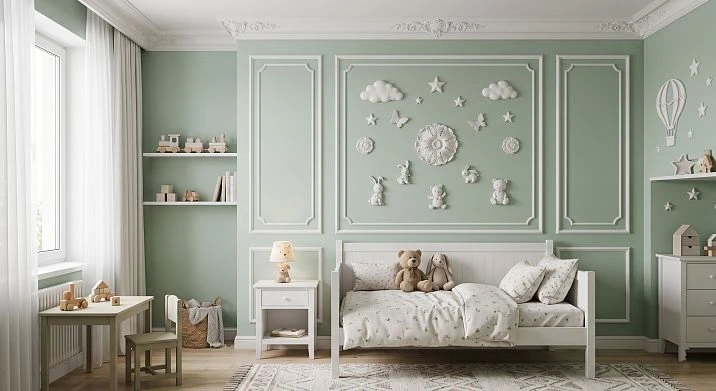
A kid's room can look thoughtfully designed without turning every wall into a theme. A measured arrangement of wall molding can frame a bed, give a study area its own visual identity, or add quiet architectural detail to a nursery that will eventually become a teenager's bedroom. The best approach is not to cover every surface. Choose one useful focal wall, draw the layout around the furniture, and use paintable trim that can change with the room.
For most projects, the practical starting point is picture frame molding on walls: rectangular outlines made from straight decorative profiles and applied to a sound, finished wall. A few slim polyurethane pieces can create the appearance of paneling without building actual recessed panels. This guide explains how to select STAVROS polyurethane profiles, measure a child's room in inches, calculate the real number of full-length sticks, install the molding cleanly, and choose finishes without making unsupported claims about the material's safety.
Quick answer: use simple, firmly attached profiles on an accessible, structurally sound wall; avoid loose ornamental pieces or sharp projections where children play, climb, or sleep; and treat the adhesive, paint, substrate, and furniture arrangement as part of the design. Decorative molding is not a guardrail, furniture anchor, protective bumper, or substitute for safe crib placement.


What Is Kids' Room Wall Molding?
In American home improvement terminology, wall trim molding is a general name for narrow decorative strips that add edges, outlines, or divisions to a wall. Panel molding often outlines a rectangular field. Picture-frame molding is the familiar four-sided arrangement with mitered corners. Wainscoting refers more broadly to a lower-wall treatment; it may include actual wood or MDF panels, applied trim over drywall, a chair rail, and a baseboard. These are related design approaches, not interchangeable products.
For a nursery or child's bedroom, applied decorative trim is usually the least complicated of these options. You are not asking the molding to support a cabinet or change the wall structure. It is simply a visible border. That simplicity makes it possible to shift colors and furniture later without reconstructing the room.
For example, a single 50-inch-wide rectangular frame above a low storage bench reads as a calm architectural accent. Painted sage green with the wall, it may work for an infant's nursery. Painted charcoal several years later, the same frame can support a teenager's books and artwork visually—provided shelves and artwork have their own appropriate mechanical attachments. The molding itself does not carry their weight.
The STAVROS polyurethane molding selection includes slim beaded and more defined decorative profiles. The category also shows other materials, so always verify that the product being selected is the polyurethane SKU, not a similarly named primed MDF or polystyrene product.




Start With the Room's Use, Not the Pattern
Before choosing a decorative profile, observe what the room actually needs. A baby room may have a crib, changing station, and one tall storage unit. An elementary school child's bedroom may include a twin bed, a toy bin, and a low desk. A teen's room may contain a wider bed, a monitor, shelves, posters, and wall lighting. Those objects—not an arbitrary proportion from a design photograph—determine where a frame can fit.
Наша фабрика также производит:


Смотреть весь Каталог продукции
Pick one primary wall
Begin with the wall you see when entering the room. If it is mostly clear and not interrupted by several doors, windows, or built-in shelves, it is often the easiest focal surface. Another choice is the wall behind a bed, provided the trim is not within the child's reach from the bed and does not interfere with safe bed or crib placement. A desk wall can work if your pattern leaves generous space for monitors, shelves, and future changes.
Sketch the wall with the entire furniture plan. Draw the location of the ceiling line, baseboard, door trim, closet doors, windows, outlets, switches, HVAC returns, heaters, and wall-mounted lights. Leave the actual rectangles blank at first. This is a useful test: if the furniture already organizes the wall, decorative trim should clarify that rhythm rather than compete with it.
Получить консультацию
Decide what must remain changeable
Children's rooms evolve faster than formal dining rooms. A framed painted section behind a crib may later become a place for a twin bed, a reading chair, or a desk. Avoid a layout that only works with one piece of furniture at one exact height. A slightly wider centered frame or a set of balanced wall rectangles is more adaptable than numerous tiny compartments organized around today's toy shelves.
For a shared room, the visual plan may need to treat both sleeping areas equally. Two separate frames can give the children their own zones, but the frames should not invite climbing, create handholds close to a bunk, or end behind moving bed hardware. In an active play space, leaving the wall plain can be the better decorative choice.
Decorative Molding, Real Wainscoting, and Other Materials
Polyurethane is one of several materials used for interior architectural detail. It can reproduce small rounded or stepped profiles and can usually be painted when the product and coating are compatible. But not every polyurethane molding is flexible, impact-proof, fire-rated, or appropriate for direct contact with children. Those properties require specific documentation for the selected product and finish.
| Material or treatment | Why choose it | What to verify for a child's room |
|---|---|---|
| Applied polyurethane molding | Raised decorative outlines over a wall; varied profile shapes | Material, dimensions, finish, adhesive compatibility, attachment location |
| Wood trim | Can be stained or painted; familiar millwork appearance | Splinters, fasteners, sharp edges, wood species and finish |
| Primed MDF trim | Smooth paintable profiles, often economical | Moisture exposure, edge finishing, cutting dust and fastening details |
| Polystyrene trim | Lightweight decorative alternative | Specific density, damage resistance, adhesive and coating compatibility |
| Real wainscoting panels | Physical paneling or boards over part of the wall | Substructure, anchors, electrical access, project scope and maintenance |
Painted drywall inside a molding frame remains painted drywall. The frame does not turn the wall into an impact-resistant panel or make it washable by itself. If you need a durable lower wall in a playroom, choose the actual wall finish for that purpose. A flat, easy-to-clean wall may outperform ornamental trim below the height where toys repeatedly hit it.
Where the design needs actual lower-wall divisions, understand the difference between wainscoting molding and a real protective wall system. A decorative chair-rail-like line is primarily visual unless specifically designed and installed to serve another function. Use a dedicated product for each technical requirement.
Choosing STAVROS Polyurethane Profiles by Actual Size
Decorative samples look very different once installed. A 0.39-inch profile may read as a fine pencil line in photographs, while a 1.38-inch molded edge casts a noticeably stronger shadow. A shallow section is often easier to incorporate into a small room with busy furnishings. A deeper section may feel better balanced on a larger, relatively empty wall.
The following product dimensions have been checked against the US-facing STAVROS listings. Width and projection are approximate inch conversions; use the metric dimensions and the product drawing for precise joinery. These are decorative polyurethane moldings, not protective rails or structural elements.
| STAVROS SKU | Width × projection | Length | Design use |
|---|---|---|---|
| MLDPU-001 | 10 × 6 mm (0.39 × 0.24 in) | 2,600 mm (102.36 in) | Fine outlines, narrow walls, quiet single frames |
| MLDPU-004 | 15 × 8 mm (0.59 × 0.31 in) | 2,600 mm (102.36 in) | Compact but more dimensional decorative frames |
| MLDPU-002 | 22 × 11 mm (0.87 × 0.43 in) | 2,600 mm (102.36 in) | Defined traditional panel molding for a larger accent |
| MLDPU-003 | 35 × 12 mm (1.38 × 0.47 in) | 2,600 mm (102.36 in) | Broad architecture; often too strong for a crowded small wall |
| MLDPU-027 | 14 × 9 or 20 × 12 mm (0.55 × 0.35 or 0.79 × 0.47 in) | 2,600 mm (102.36 in) | Half-round contours; confirm which size is ordered |
The narrowest profile is not automatically the right choice. On a 12-foot-wide painted wall, a profile that is too slight may visually disappear. Conversely, a heavy ornamental surround can make a 9-foot-wide room feel visually crowded. Compare an actual sample against a penciled frame on the wall rather than making the decision from isolated product photos.
For a calm nursery or compact playroom, start by comparing the small 10 mm polyurethane molding with 15 mm detailed molding. For a more traditional teen bedroom or spacious family room, the 22 mm panel molding may create a clearer frame. If you select the wider 35 mm model, draw its exact face width on a full-size mockup; it reduces the visual opening inside each rectangle more than a narrow profile.
Are ready-made decorative kits all polyurethane?
Not necessarily. Some coordinated STAVROS wall sets include primed MDF in addition to polyurethane ornaments. Collection names describe a style, not an assurance that every component is made of the same polymer. For any kit, inspect the individual SKU list, dimensions, number of pieces, and materials. Do not substitute a similarly named component without updating the cut drawing and fixing method.
Where to Put Picture Frame Molding in a Kid's Bedroom
Good decorative wall molding is often more about what it leaves empty than what it surrounds. Children's rooms contain an unusual combination of changing storage, active play, soft furnishings, and sometimes fixed safety clearances. Instead of tracing every piece of furniture, select a wall zone that can remain useful even if the layout changes.
Behind a bed: a quiet backdrop, not a headboard
A large rectangular outline can make a single bed appear centered on the wall. It works visually like a headboard surround, but it should never be treated as a physical headboard or a safety bumper. Place trim where a child cannot grip, scrape, or strike it during sleep or play. For a crib, do not create protrusions within reach or place detachable ornaments above the sleeping area. Follow the crib and furniture manufacturers' instructions for placement and clearances.
Think ahead to a larger bed. If the room has room for one, draw the outline with that potential change in mind. A frame only an inch wider than a current toddler bed may look oddly narrow when the child moves to a twin. The sensible choice may be a larger painted rectangle that stays visually balanced in both configurations. Before finalizing, tape the perimeter and look at it with the bedding, nightstand, and curtains in place.
Above a desk: room for changes in equipment
A school-age child's desk accumulates lamps, art supplies, small organizers, and eventually a computer. A molding frame behind it can create a tidy background, but do not make the line interfere with shelves, an outlet, a wall-mounted monitor, or a pinboard. The useful area for the child should stay free of delicate protrusions. Consider one large frame encompassing the workspace rather than two small frames separated exactly where a monitor might go.
If the room will be used for video calls, a subtle monochromatic profile creates visual depth without competing with the child in the frame. A darker paint inside the rectangle can make the area feel more intentional, but test how it looks under the actual desk lamp and window light. For a desk placed on a corner wall, consider stopping the molding before the turn rather than wrapping two independent, slightly uneven walls with one continuous pattern.
Play area: skip low protruding decorations
At play height, blocks, toy vehicles, balls, and moving storage bins can strike a raised profile. No unverified claim of impact resistance should justify using decorative polyurethane as protective trim. Keep active zones relatively plain or choose a specifically engineered protective wall finish. If you add decorative lines above the play area, use a simple continuous shape and keep small ornamental appliques out of a child's reach.
A color-blocked wall is often a safer and more flexible alternative to extra molding in the busiest part of the room. A large lower painted field can be wiped down according to the paint's guidance, while the only applied molding sits well outside the impact area. The wall can still look finished even when you choose not to install a frame near the toy bin.
Over a dresser or reading chair
Wall molding can visually connect a dresser, armchair, and floor lamp. Place the visual accent on the wall, but keep anti-tip furniture anchors independent of the trim. Do not glue an anchor to a decorative molding or use a molding strip to conceal hardware that needs inspection. The U.S. Consumer Product Safety Commission encourages securing dressers and other tip-prone furniture using appropriate anchors.
Over a reading chair, one low-contrast rectangle can define the nook while leaving room for a properly installed light. Avoid routing electrical cables behind molding or covering access to receptacles. Where wall fixtures are planned, coordinate their electrical mounting before choosing the final position of the decorative border.
Match the Design to the Child's Stage
The age of the child is not a specification for which polyurethane product to buy. It changes which parts of the wall can be reached, how the room is used, and what might be damaged. A thoughtful scheme also allows the child more choice as they grow.
Nursery: restrained details and careful placement
For a nursery, begin with a single accent field away from the crib's reach rather than numerous raised decorations. Avoid loose appliques, hanging elements attached to molding, or ornamental blocks that could detach. A pale wall with one slightly darker painted rectangle often provides all the definition required. Keep furniture anchored as directed by its manufacturer, and do not put the trim where it changes how a crib sits against the wall.
For a small nursery, a fine molding gives a better scale than ornate relief. A simple half-round polyurethane profile is an option to compare with a beaded strip, but the detailed shape must be evaluated in person for protrusions and cleanability. The visual choice is secondary to correct placement and adhesion.
Early school years: a room for activity and display
Once a desk and display area become important, plan one frame that can hold a changing arrangement of artwork. The drawings or shelves must be fixed independently; the trim is only an architectural border. A larger frame is easier to adapt than several tiny compartments. Use flat painted sections for crafts and interactive surfaces rather than assuming the raised molding can withstand repeated handling.
Ask the child what colors they like while keeping the architectural outline neutral. It is easier to repaint a large wall field than to dismantle a complex ornamental layout. That is one of the central reasons why DIY wall molding can make sense: the composition has long-term value even as the colors and posters change.
Teen room: let the wall support personal style
A teenager may prefer deep green, muted blue, warm gray, or an almost monochrome scheme. Painted picture-frame trim in the same wall color produces a sophisticated background for independent artwork, a gaming setup, or a reading corner. The design need not read as traditional molding. A single double-line border or two tall rectangles can feel contemporary when the surrounding furniture is minimal.
In a shared teen bedroom, repeat a proportion rather than every detail: matching frame widths with different paint colors can help the two halves feel related without forcing identical personalities. Leave a clear middle zone if the beds are likely to move. A carefully planned picture-frame panel layout is easier to adjust on paper than after profiles have been glued to a wall.
How to Plan a Balanced Molding Layout
There is no universal inch measurement that suits every child's room. Instead, use actual geometry, furniture positions, and a life-size mockup. A layout that fits the wall perfectly on paper may feel crowded beside a closet door or a tall shelving unit. The goal is consistent relationships among the pieces, not slavish adherence to a decorative formula.
Measure the usable wall, not the entire wall
Measure the wall's width at several heights and note where drywall corners are out of square. Mark the width of door casings, window trim, built-ins, and furniture that must remain. Subtract the zones where a profile would create a conflict. This gives you the usable decorative width. For example, a nominal 10-foot wall is 120 inches wide. If a doorway and its clearance occupy 34 inches, a large centered frame may be impractical even though 120 inches looks generous in a design photo.
Measure vertically, too. The space between the top of a baseboard and a ceiling may not be consistent along an old wall. Do not automatically put the bottom of a frame at a chair-rail height. If a bed or desk will cover most of it, align the decorative field to what is actually visible. A tape mockup will show you where the top edge makes sense at standing and seated eye level.
Choose the measurement convention
For rectangular frames, specify whether dimensions refer to the outside tips of the mitered molding, the inside opening, or the centerline. Mixing those conventions creates errors when cutting. For our cut examples, dimensions are outside-tip-to-outside-tip lengths along each piece. If you work from the inside opening instead, add twice the profile face width to obtain the corresponding outside frame dimensions on each axis, assuming a consistent square layout.
Make a full-size drawing on painter's tape. The tape's thickness does not represent the final profile, so place a real short sample against the wall to see the actual shadow. Sit on the bed, stand at the doorway, and look from the desk. A layout that seems evenly spaced when you stand close may be visibly asymmetric from the normal viewing points in the room.
Use a simple proportional formula
For two identical frames spanning a usable wall width, write down the left margin, first frame, central gap, second frame, and right margin. Their sum must equal the usable width. For a 120-inch blank wall, you might choose 12-inch side margins, a 12-inch gap, and two 42-inch frames: 12 + 42 + 12 + 42 + 12 = 120 inches. That is a design example, not a required standard.
Furniture can change the best proportions. If a window is off-center, it may be better to center the frames within the visible wall field rather than force the pattern around the room's centerline. If the desk is 60 inches wide, a 36-inch decorative frame directly behind it may look too slight; conversely, a frame that reaches behind the closet casing may look accidental. Use the plan, then let the room override it.
Cutting Plan A: One Frame for a Small Nursery Wall
Consider a mostly clear nursery accent wall with room for one framed painted field. Suppose you choose a 50-inch-wide by 38-inch-high outer frame. These are illustrative dimensions; they must be checked against the specific room and any crib or furniture placement.
The outside-tip cut list is two horizontal pieces at 50 inches and two vertical pieces at 38 inches. The perimeter is 2 × (50 + 38) = 176 linear inches, or 14.67 linear feet. STAVROS MLDPU lengths in this guide are 102.36 inches. A naive length-based estimate is 176 ÷ 102.36 = 1.72, rounded up to two sticks. Here, the piece arrangement also supports the two-stick minimum: the two 50-inch sections can come from one stick (100 inches before blade kerf), while both 38-inch sections can come from another (76 inches before kerf).
Allow the saw kerf, verify the 50-inch lengths from the long miter tips, and dry-fit the corners before committing to adhesive. If the wall is not square, refine the cutting angles from measurements instead of assuming perfect 45-degree joints. Two sticks are the theoretical cutting-plan quantity, not a guarantee against mistakes. Consider one extra stick if the project cannot tolerate a delay from a miscut or later damage.
Choose a slim wall molding profile if the objective is subtle shadow, or use a more defined 15 mm profile when the paint color is close to the wall and the line needs slightly more presence. Neither choice requires an additional inner frame.
Cutting Plan B: Two Tall Frames in a Shared Bedroom
Now imagine a shared bedroom where two tall, identical decorative rectangles are placed on a long empty wall. Each frame has outside dimensions of 44 inches wide by 64 inches tall. The complete cutting list is four 44-inch horizontal pieces and four 64-inch vertical pieces.
Total molding length is 4 × 44 + 4 × 64 = 432 inches, equivalent to 36 linear feet. Dividing 432 by 102.36 gives a theoretical minimum of five sticks by total length. However, a 64-inch piece and a 44-inch piece cannot share the same 102.36-inch stock length: together they require 108 inches before considering the blade kerf. Each of the four 64-inch vertical pieces therefore needs its own stick. The four 44-inch pieces can be paired into two additional sticks, because 44 + 44 = 88 inches. The practical no-splice cut list requires six sticks before a contingency allowance.
| Cut list component | Individual lengths | Stock allocation |
|---|---|---|
| Vertical pieces | 4 × 64 in | 4 full sticks, one vertical per stick |
| Horizontal pieces | 4 × 44 in | 2 full sticks, two horizontals per stick |
| Total installed line | 432 in / 36 linear ft | 6 sticks before contingency, not 5 |
This distinction matters especially when ordering imported decorative trim: a shortage caused by a cut-list error may be much more inconvenient than keeping a modest spare. The offcuts from the four vertical sticks are not necessarily useless. They may become samples, test pieces, or short decorative returns elsewhere—but only count them for another visible part if you have already drawn that part and verified its length.
For the second layout, a slightly stronger 22 mm polyurethane panel molding can help the rectangles remain legible from across the room. Mark the pattern on the actual wall before ordering, because the two large frames must coexist with outlets, light switches, and the possible location of two beds. A design that places molding too close to a bunk or raised sleeping area should be revised, not installed.
Why a Picture Frame Molding Calculator Is Only the First Step
A picture frame molding calculator can add frame perimeters quickly, but its output is not automatically an order quantity. The cut list must be packed into stock lengths. Blade kerf, defective ends, orientation of an asymmetrical profile, and whether you permit visible splices all affect yield. Four pieces with a total of 100 inches can fit into a 102.36-inch stick only when the actual cuts, miter tips, and blade losses leave enough room.
Use a spreadsheet or a sketch with one horizontal row for each purchased 102.36-inch stick. Place the longest pieces first and then the shorter pieces that fit in the available remainder. Record the required number of full sticks for each SKU separately. You cannot combine an offcut from one profile with a different profile merely because both are called wall molding.
A useful worksheet contains columns for location, finished outside length, profile code, quantity, proposed source stick, and remarks. Count all four corners of each rectangle. If decorative corner blocks are used instead of miters, obtain the actual connection dimensions from those products and recalculate the straight runs. Do not subtract a guessed corner-block size.
When searching how to cut wall molding, remember that an illustrated outside corner or inside corner on a ceiling cornice is not the same as a flat wall picture-frame miter. For a flat rectangular frame, the profile typically lies against the wall plane and turns at the four corners. Keep its finished face and the long/short miter points consistent as you cut. Always test with scrap before cutting a long run.
Safety and Durability: What Decorative Trim Cannot Promise
Designing for children requires a stricter approach to every component. A molding may be light and attractive, yet a loose piece, an inadequately bonded ornament, a hard projection at play height, or a solvent-containing coating can create a problem. Do not assume that polyurethane as a material automatically makes a finished installation child-safe. Safety depends on the product, substrate, fastening, paint, placement, maintenance, and age of the occupant.
Keep small parts and projecting details out of reach
One-piece simple wall frames are usually easier to inspect than ornate assemblies made of many small decorative blocks. If a design uses small appliques or corner ornaments, assess the possibility of detachment and whether a child could reach them. Do not mount loose decorations where they could fall into a crib or where a toddler could pull, chew, or climb on them. In a room with active play, a smooth painted border may be a better solution than projecting ornament.
If the wall finish or substrate is uncertain, do not rely on adhesive alone without checking the full installation instructions. An existing coat of poorly bonded paint can detach from drywall, bringing the trim with it. Choose a qualified installer when the attachment needs an assessment beyond decorative work. Check the work periodically and stop using any loose or cracked portion of the installation until it has been made safe.
Furniture anchors and electrical work must be independent
Dressers, tall bookcases, and similar furniture require appropriate anti-tip measures based on their product instructions. Decorative moldings cannot substitute for them. The CPSC's Anchor It! guidance emphasizes securing furniture to reduce tip-over hazards. Plan anchor locations before gluing trim. A molding pattern should not hide the access needed to inspect or replace those anchors.
Likewise, trim should not cover outlets, switches, junction boxes, HVAC openings, or return-air grilles. Do not route power cords inside decorative profiles or mount a wall light on the profile itself. When the design crosses the planned location of wiring or a wall fixture, coordinate the electrical work with a qualified professional before installing the molding.
Check older painted walls for lead-related risk
Some American homes built before 1978 may have lead-based paint. Scraping, sanding, drilling, and other renovation work can disturb that paint. Before preparing an older wall, review the EPA's lead-safe renovation information for DIYers and consider a certified professional. Do not assume a seemingly simple molding project is exempt from the risks of disturbing the existing coating. Keep children out of the work zone and do not proceed with ordinary sanding until the relevant precautions have been resolved.
For all homes, follow manufacturer guidance for the primer, adhesive, filler, and finish. A low-odor product is not automatically free of hazardous substances, and claims such as 'non-toxic' or 'zero VOC' require specific documentation. Plan adequate ventilation and allow each product to dry or cure as directed before putting the bedroom back into use. If an infant or child is especially sensitive, ask the relevant clinician about any additional precautions.
How to Install Wall Molding on Typical American Drywall
A good installation begins with a stable surface and accurately cut profiles. The steps below describe a common approach to applied decorative molding on interior drywall; they do not override the instructions supplied with an individual STAVROS SKU or adhesive. The most expensive mistake is often not an inaccurate measurement but installing the trim on a coating that cannot hold it.
Step 1: inspect and prepare the wall
Check for peeling paint, crumbling drywall compound, loose wallpaper, damp patches, and surface contamination. Address the underlying condition before decorating. Patch damage and allow repairs to cure. A freshly painted wall may need additional time before adhesive is applied; check both the paint and adhesive instructions. Glossy or contaminated surfaces may require a compatible preparation method, but avoid routine abrasion of pre-1978 paint without appropriate lead-safe planning.
Wallpaper is a separate concern. Bonding to wallpaper means the adhesive may rely on the wallpaper's bond to the wall, not on the wall itself. The most reliable substrate for a permanent framed design is usually the prepared surface approved by the adhesive manufacturer. If you are unsure whether the wall covering can carry the applied profile, investigate or remove the relevant strip of covering using an appropriate method rather than guessing.
Step 2: mark the complete pattern
Use a pencil, tape measure, and level or laser to transfer the layout to the wall. Mark the outside-tip dimensions of every frame and confirm that the planned left and right margins remain consistent. Check the location of all obstacles again. Painter's tape can help show the line during the review, but it does not replace a level or accurate measurements.
Take a photograph of the marked wall before cutting. Look at the image from the doorway and compare the pattern with the furniture elevations. Small variations often stand out in a photograph. This stage is also the cheapest time to change the profile size, reduce a complicated scheme, or move an entire frame away from a reach or clearance concern.
Step 3: cut a test corner before the real pieces
Use a saw and miter guide compatible with the actual molding section. Wear appropriate eye and dust protection while cutting, and keep children away from tools and cutoffs. Use short scrap pieces to test a corner. Mark which face points up and which edge is the outside of the frame; reversing a decorative profile can create a corner that appears almost correct but has a visible discontinuity in its bead or stepped contour.
For a square frame, a common starting point is two opposing 45-degree miters, but the actual wall and corner geometry may require adjustment. Dry-fit all four pieces on the floor and then on the wall before adding adhesive. If a long piece bows or a joint opens, fix it while the pieces are still dry. The STAVROS guide to gluing polyurethane molding discusses substrate preparation and joining in more detail.
Step 4: attach according to the product instructions
Select a manufacturer-approved adhesive that is compatible with polyurethane, the existing wall coating, and the room conditions. Some installers use temporary painter's tape or another approved support while the adhesive cures; follow the actual product instructions for bead pattern, open time, temporary fixation, and cure time. Do not assume that 'instant grab' or 'solvent-free' alone proves that a product is suitable for a child's room.
Press the profile into alignment without forcing it to bridge significant hollows. Keep adhesive from spreading onto the visible molding face. Work on one side at a time and check level after each placement. If the trim moves while curing, stop and adjust the support rather than trying to disguise the error with filler. Never use a wall frame as a handle to pull yourself up while checking it.
Step 5: finish joints and paint
After the adhesive has cured, inspect every joint. Use a compatible paintable filler or caulk for the type of gap it is intended to fill. A bead of caulk should not be used to conceal a major structural gap, and it will not repair a loose attachment. Allow the filler to cure, clean residue, and prime exposed cut surfaces when directed. Paint only after the preparation products are ready.
For a fuller walkthrough of cut orientation, adhesive placement, and inspection, see the polyurethane molding installation checklist. Its general principles can help plan a home project, but confirm every adhesive and coating choice for the actual substrate in the child's room.
Paint Colors and Finishes That Grow With the Room
One of the advantages of a simple molding arrangement is that the architectural structure can remain visually consistent while the room's color story changes. The paint is what children touch, clean, and live around; choose it carefully and do not assume a product is suitable purely because it is labeled acrylic or water-based. Read the paint manufacturer’s instructions for interior application, surface compatibility, preparation, ventilation, and cure time.
Same-color molding and wall
Painting the molding and wall in the same shade makes the decorative outline visible through light and shadow. It works well with warm white, pale sage, muted blue, greige, dusty pink, or deeper colors. This is often an effective option for a small bedroom because it adds detail without breaking the wall into bright competing patches.
A satin-like or other washable finish may be desirable where fingers and furniture touch the wall, but the correct sheen depends on the specific paint and the surface texture. Do not select a product on sheen alone. Test the finish on a sample and follow the curing and cleaning guidance. At night, the color can look different under an overhead LED and a bedside lamp, so check both.
A contrasting frame or painted inset
For a more graphic result, paint the wall one tone and the molding a second tone. White against pale blue creates a traditional look, while dark green on matching green makes the profile quieter. Another option is to leave the molding in the surrounding wall color and paint only the inner rectangle slightly darker. This creates the appearance of a large flat panel without another physical layer on the wall.
In a room already filled with colorful toys and patterned bedding, avoid adding three more accent colors through the molding. The trim should help the eye rest. In a teenager's room, a deep olive or navy wall with a low-contrast line can make artwork and books feel deliberate rather than crowded.
Repainting later
When the child outgrows a palette, inspect the trim for damage and check the existing coating before repainting. Wash as recommended, repair joints if necessary, and apply a compatible finish. Treat any newly discovered loose pieces as an attachment problem, not something that another coat of paint will solve. For detailed molding faces, a small brush can help avoid thick ridges of paint that blur the relief.
Whenever possible, retain the original profile code and paint notes with the room's renovation records. That makes later repairs less uncertain. If you need to add another frame several years later, the recorded SKU and outside dimensions will be more useful than a faded photograph.
Coordinating Trim With Doors, Windows, Shelves, and Baseboards
The strongest room designs share a clear visual hierarchy. Door casings, window trim, baseboards, and decorative picture frames each need a role. If a bold door casing already defines the wall, a restrained picture-frame profile may be enough. If the existing trim is very simple, a modestly shaped polyurethane frame can add character without requiring a complete millwork replacement.
Do not assume a wall-frame molding can substitute for a baseboard. Baseboards sit near floors and receive contact from cleaning tools, shoes, and furniture. They may need a different cross-section, fastening method, and durability characteristics. The STAVROS MLDPU products considered here are decorative wall profiles. Treat any use in a baseboard location as a separate specification, not as a default application.
Keep access clear around windows, especially where a window must open freely. Where a frame meets a wall switch or receptacle, adjust the frame outline rather than covering the device. When a closet door swings against the wall, check that its handle cannot strike a protruding molding. Small clearances are easy to miss in a floor plan, so physically open the doors during the taped layout review.
For a coordinated look, repeat a general profile character rather than forcing identical widths. A simple rounded wall frame can sit comfortably with crisp flat white door casings. A more layered traditional frame may work with deeper millwork but feel excessive next to very narrow baseboards. In all cases, purchase the actual products based on their listed material and dimensions, not simply on a collection's decorative name.
What to Buy for a DIY Wall Molding Project
Create a bill of materials from the final cutting plan, not from the photographed inspiration. The list must separate exact STAVROS SKUs, installation consumables, and any independent furniture or electrical work. A profile of the wrong width can change not only the style but also the outside dimensions of every frame.
- Primary polyurethane profile: select one verified molding model and record its section dimensions and 2,600 mm length. Compare MLDPU-002 with the wider MLDPU-003 profile if a more prominent design is appropriate.
- Stock quantities: calculate the number of full sticks by piece-by-piece cut allocation, then add a considered allowance for miters, damage, or mistakes.
- Adhesive: obtain a product specifically approved for the polyurethane SKU and the existing wall surface, with instructions and safety information available.
- Cutting and measuring tools: tape measure, level, pencil, appropriate saw or miter box, and suitable personal protection.
- Surface preparation: compatible repair compound, cleaning materials, and primer only as required for the actual wall and coating system.
- Finishing: appropriate paintable joint filler and interior paint, selected with the manufacturer’s guidance and adequate ventilation plan.
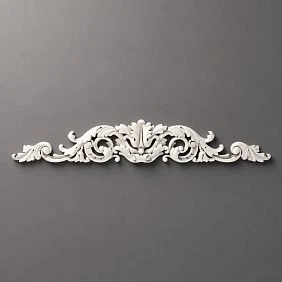
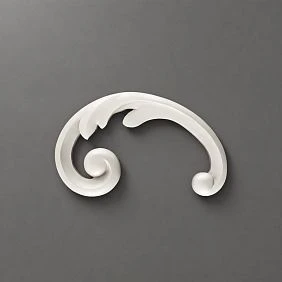
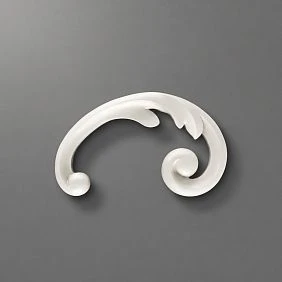
If you prefer a separate raised accent, browse the STAVROS polyurethane appliques catalog, but check each item for material, projection, size, and whether it is appropriate for a child's accessible environment. In many nurseries, avoiding small added ornaments is the better design decision. A simple framed paint field can be complete on its own.
Because catalog pricing and shipping conditions may change and the public pages may describe delivery within Russia, this article makes no promise of US stock, domestic delivery time, or final price in dollars. Confirm availability, shipping arrangements, and total landed cost directly before ordering from the United States. Save the final specifications and quantities with the purchase.
Common Mistakes to Avoid
Copying a photo without measuring: a perfectly symmetrical image may come from a room with much higher ceilings and a completely different furniture arrangement. Use your own usable wall width, furniture sizes, and door swings.
Buying by total linear feet: a simple perimeter formula does not account for lengths that cannot be paired on the same 102.36-inch stick. Build a real cut list before ordering.
Confusing polyurethane with other products: a STAVROS category can display polyurethane, MDF, and polystyrene. Verify the selected SKU and material individually.
Overdecorating active surfaces: decorative trim does not make a play wall impact-proof. Avoid projections at the height where toys and furniture repeatedly strike the wall.
Bonding over unsound paint: even the correct adhesive cannot compensate for a coating already separating from drywall. Inspect and prepare the substrate according to the manufacturer.
Assuming every product is child-safe: the finished room includes attachment, paints, curing, and access to loose parts. Check the product documentation and placement instead of relying on broad marketing claims.
Frequently Asked Questions
Is polyurethane molding a good choice for a nursery?
It can be used as decorative trim when the specific product, adhesive, wall, and finish are suitable. Keep hard projections and detachable details away from the child's reach and crib, and follow all furniture safety requirements. There is no automatic child-safety certification simply because the material is polyurethane.
What molding size suits a small child's bedroom?
A 10 or 15 mm face width is a sensible visual starting point for comparison, not a universal rule. The right profile depends on the wall's scale, lighting, furniture, and location. Hold an actual sample against a taped frame before ordering the complete quantity.
How many molding sticks do I need for two wall frames?
Calculate the cut list rather than dividing the total perimeter by stick length alone. For two 44-by-64-inch frames, four 64-inch pieces and four 44-inch pieces require six 102.36-inch sticks without splices. Allow separately for kerf, errors, and contingency.
Can picture-frame molding go over existing wallpaper?
Only if the wall covering and the adhesive system are specifically suitable; wallpaper itself may be the weak layer. A permanent installation often needs a more secure prepared substrate. Follow the adhesive and wall-finish guidance rather than relying on the appearance of the wallpaper.
Can I paint polyurethane molding the same color as the wall?
Often yes, with a compatible coating and the surface preparation specified for the selected product. Matching paint creates subtle shadows and makes later room updates simpler. Check drying and full curing instructions before returning a child to the newly finished space.
Should the frame be installed directly behind a crib or bunk bed?
Do not place a protruding decorative element where it can be grabbed, struck, climbed on, or detached into the sleeping area. Follow the bed or crib manufacturer's location requirements. When placement is uncertain, choose a different wall or use a painted rectangle without applied trim.
Can the molding hold posters, shelves, or a mirror?
No. These wall moldings are decorative outlines. Objects must have their own appropriate supports attached to suitable structure. Do not rely on molding adhesive to hold furniture, heavy artwork, a mirror, lighting, or a shelving system.
Can a renter install permanent wall molding?
Permanent adhesive can damage paint or drywall when removed, and the lease may prohibit alterations. Obtain permission before starting. If reversibility is essential, consider removable paint designs or another landlord-approved treatment rather than pretending permanent decorative trim is damage-free.
A Practical Final Decision
For a child's room, the most successful wall molding ideas usually start with restraint: one clear focal wall, a genuine polyurethane profile sized to the space, a verified cut plan, and a paint color that can evolve. Treat child access, furniture stability, existing wall coatings, and the full adhesive-and-paint system as essential design constraints. Compare actual STAVROS SKU dimensions, keep purchase notes, and test the layout at full scale before cutting. A simple, accurately installed frame can add character without sacrificing the room's ability to grow and change.