Article Contents:
- Specifications of C-006-1-1 and C-006-1-2
- What is a ready-made carved furniture decor set
- Main difference: 600 mm or 2000 mm
- When to buy C-006-1-1
- When to buy C-006-1-2
- Why the same height does not mean the same application
- Thickness 22 or 23 mm: how important is it
- Composition of C-006-1-1 and its practical meaning
- Composition C-006-1-2 and its practical meaning
- How to measure furniture before ordering
- Net facade width and free margins
- Handles, hinges, and door opening
- Why decor should not be accidentally placed at the joint of doors
- Paper or digital scale layout
- C-006-1-1 for a single tall door
- C-006-1-1 on two identical doors
- C-006-1-1 for a sideboard and display cabinet
- C-006-1-2 for a built-in wardrobe
- C-006-1-2 for furniture wall
- C-006-1-2 for facade group
- Narrow pier of built-in furniture
- How to choose between beech and oak
- Beech under enamel: when it is rational
- Oak under tinting: when texture is needed
- Sanding "Standard" or "Prestige"
- When to paint overlays — before or after installation
- How to arrange elements symmetrically
- How to connect carved decor with furniture handles
- Decor for classic interior
- Decor for modern classic
- Commercial interior kit
- How to prepare the surface before installation
- Dry layout before first adhesive application
- How to glue wooden decor to furniture facade
- Installation of C-006-1-1 on a single door
- Installation of C-006-1-2 on multiple facades
- How to avoid damaging threads during installation
- How to check the composition from a distance
- Comparison of kits by practical scenarios
- Comparison of C-006-1-1 and C-006-1-2 by tasks
- What to buy together with a carved decor set
- How not to confuse a ready-made set with individual overlays
- When C-006-1-1 may be too small
- When C-006-1-2 overloads the furniture
- Practical choice for custom-made new furniture
- Practical choice for repairing and updating a cabinet
- Main mistakes when choosing a set
- Who C-006-1-1 is suitable for
- Who C-006-1-2 is suitable for
- How to buy a set on STAVROS
- How to check scale at a distance
- How to coordinate decor with cornice, baseboard, and side panels
- How to combine a set with facade panels and moldings
- How to choose a set for the hallway
- How to choose a set for the bedroom and dressing room
- How to choose a set for the living room and study
- How to work with multiple identical cabinets
- How to accept completed work
- Why a design project is useful for C-006-1-2
- Why a ready-made set is more profitable than a random set of parts
- What to buy together: ready-made project configuration
- Test purchase before a large project
- How to organize serial installation on multiple facades
- How to check the finish on a carved relief
- How to replace a damaged element of the kit
- How to choose between a ready-made kit and individual layout
- Final acceptance before handing over furniture to the customer
- What to check in product cards before payment
- How to coordinate the amount of decor with the room size
- How to determine the central axis of a wide furniture composition
- How to understand that the selected set really matches the furniture
- How to maintain a consistent result from order to installation
- FAQ: questions about sets C-006-1-1 and C-006-1-2
- How is C-006-1-1 different from C-006-1-2?
- Which set to choose for one cabinet door?
- Which set is suitable for a furniture wall?
- Can C-006-1-2 be installed on a small cabinet?
- Can C-006-1-1 be used on a wide cabinet?
- What materials are the sets made of?
- What to choose for white enamel?
- What to choose for tinting?
- How does the "Standard" sanding differ from "Prestige"?
- Can I install decor on ready-made furniture?
- Do I need to paint the overlays before installation?
- How to measure the facade before ordering?
- Can I transfer elements across the joint of the doors?
- How many sets are needed for two identical doors?
- How to arrange elements symmetrically?
- What Adhesive to Use?
- Can I mix elements C-006-1-1 and C-006-1-2?
- When is it better to choose separate overlays?
- Where to buy C-006-1-1 and C-006-1-2?
- What to check before final purchase?
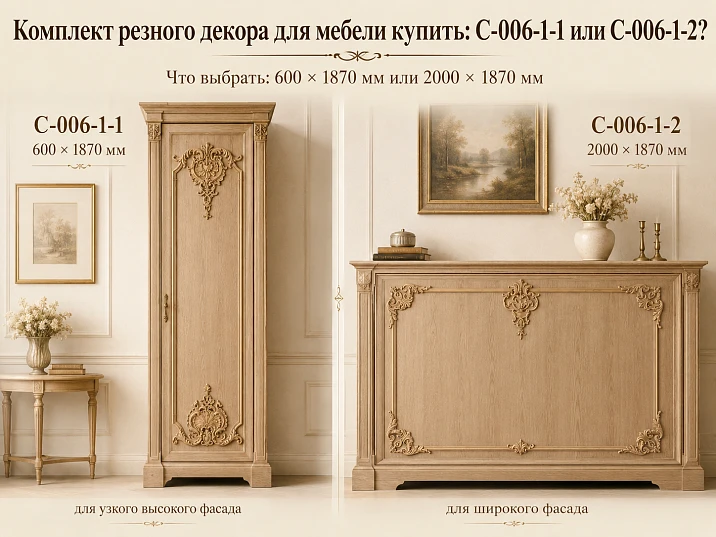
It is easier to buy a carved decor set for furniture when the buyer understands not only the style of the future cabinet but also the actual scale of the facade. This is where the most common mistake occurs: a narrow composition is chosen for a wide furniture wall, where it gets lost, while a large set is attempted to be placed on a single door, where it overlaps handles, joints, and empty spaces. C-006-1-1 and C-006-1-2 are made in the same logic of a ready-made overlay decor, but are designed for completely different tasks.
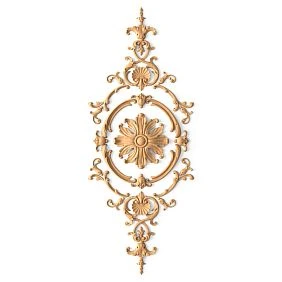
C-006-1-1 has dimensions of 600 × 1870 × 22 mm. This is an elongated, local composition for one tall section, a separate cabinet door, a narrow niche of built-in furniture, or a vertical furniture facade. It includes MLD-003, N-410, and N-411. The set is available in beech or oak, with "Standard" or "Prestige" sanding. Beech is prepared for enamel, oak for tinting.
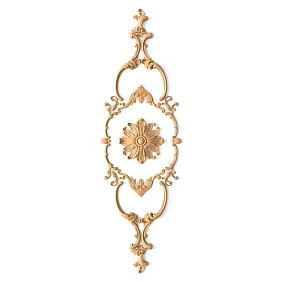
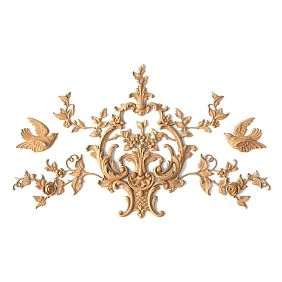
C-006-1-2 is significantly wider: 2000 × 1870 × 23 mm. It includes MLD-003, MLD-3U-1, MLD-3-1, and N-399. This set is designed not for one narrow door, but for a large furniture surface: a built-in wardrobe, a furniture wall, a group of facades, or a wide symmetrical structure. The composition requires a pre-marked central axis and sufficient empty space around the carved elements.
Both sets are made from solid beech or oak and solve one commercial task: they allow you to buy a ready-made coordinated system of wooden overlays instead of a random set of individual parts. But the choice between them begins not with the carving pattern, but with measuring the furniture. You need to understand where the door joint runs, how the handles are positioned, how much clear width remains between the edges, and whether the decor extends beyond one section.
Short answer. Choose C-006-1-1 for a narrow tall facade or a single door with a width around the composition scale of 600 mm. C-006-1-2 is suitable for a wide furniture wall, built-in wardrobe, or group of facades where the composition can unfold at a width of 2000 mm.
The final decision is made only after measuring the clear area, checking drawings, handles, hinges, and opening lines. The height of the sets is the same — 1870 mm, but the width differs by more than three times, so these models cannot be considered interchangeable.
Buy C-006-1-1 for a narrow furniture facade Buy C-006-1-2 for a wide furniture composition View all sets of decorative overlays
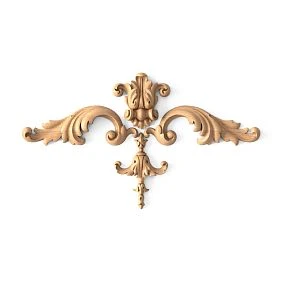
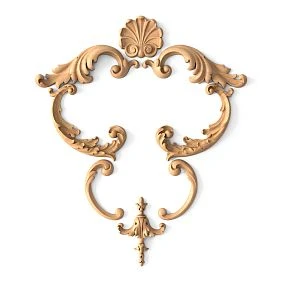
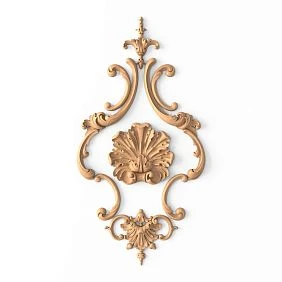
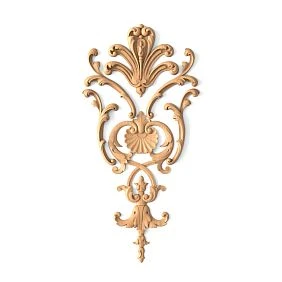

Characteristics C-006-1-1 and C-006-1-2
| Parameter | C-006-1-1 | C-006-1-2 |
|---|---|---|
| Composition size | 600 × 1870 × 22 mm | 2000 × 1870 × 23 mm |
| Material | Beech or oak | Beech or oak |
| Sanding | "Standard" or "Prestige" | "Standard" or "Prestige" |
| Preparation of beech | For enamel | For enamel |
| Oak preparation | For tinting | For tinting |
| Main elements | MLD-003, N-410, N-411 | MLD-003, MLD-3U-1, MLD-3-1, N-399 |
| Scale | Local, elongated | Large, architectural |
| Main Scenario | One section, door or narrow panel | Group of facades, furniture wall, wide cabinet |
| Main risk | Will be lost on a wide surface | Will overload a small facade |




What is a ready-made carved decor kit for furniture
A ready-made kit differs from a random set of overlays in that its elements are already united by a common geometry and designed for a specific compositional width and height. The buyer does not have to independently search for molding, a central overlay, and side elements, trying to match them by scale.
C-006-1-1 and C-006-1-2 use different sets of parts. Therefore, you cannot take the width of one kit and mentally stretch it to the size of another. The composition changes along with the facade architecture.
The practical benefit of a ready-made solution lies in predictability. You can download a drawing, check the dimensions on the furniture plane, and see in advance where the lines of molding and carved overlays run.
At the same time, the kit does not relieve you of measurements. It sets a ready-made system, but the furniture must match it in width, height, and the location of functional elements.
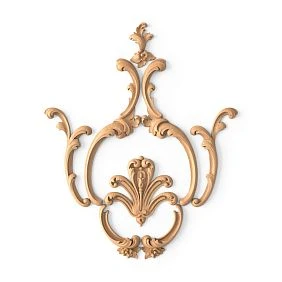
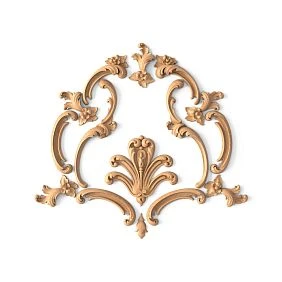
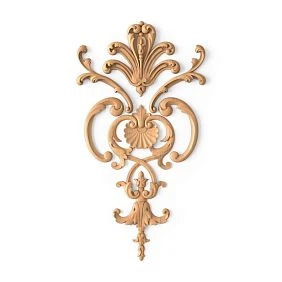
Our factory also produces:

Main difference: 600 mm or 2000 mm
A width of 600 mm makes C-006-1-1 a local vertical decor. Such a kit is easier to place on one door, a central section of a sideboard, or a narrow panel of a built-in wardrobe.
A width of 2000 mm turns C-006-1-2 into an architectural composition. It is designed for a large furniture front, where the pattern can extend over several doors or unite a group of facades.
The same height of 1870 mm does not make the kits close in scale. The narrow model is perceived as a vertical accent, the wide one as a full-fledged design of a furniture wall.
Before ordering, you need to measure not the total length of the room or the external size of the cabinet, but the pure decorative field, free from side panels, cornices, handles, and technological gaps.
Get Consultation
When to buy C-006-1-1
C-006-1-1 fits one tall cabinet door, the central section of a sideboard, a narrow wall section of built-in furniture, and an elongated furniture facade. Its width of 600 mm allows for a complete decor without overlapping adjacent doors.
The set is especially convenient when you need to highlight one section without turning the entire cabinet into a solid carved panel. This approach helps emphasize the central door, niche, or a symmetrical vertical block.
Before purchasing, it is useful view the 600 mm wide set and compare the drawing with the actual dimensions of the door.
If the furniture consists of two identical tall doors, C-006-1-1 can be considered for paired placement. However, the number of sets, central axes, and distance between doors must be calculated in advance.
When to buy C-006-1-2
C-006-1-2 fits a wide furniture wall, built-in wardrobe, group of facades, or a large central part of furniture. The width of 2000 mm requires space where the composition will not be compressed by door joints and handles.
This set unfolds where the decor should unite several furniture elements into one architectural plane. It helps connect central doors, side panels, and the top part of the cabinet.
A buyer designing a large structure should choose decor for a furniture wall and check the full drawing before manufacturing the facades.
On the small door C-006-1-2, it will not become more expressive — it simply won't fit or will be cut by joints. A large composition cannot be reduced by random trimming.
Why the same height does not mean the same application
Both sets have a height of 1870 mm, so at first glance they may seem like variants of the same vertical scheme. In reality, the width determines a completely different way of reading.
C-006-1-1 forms an elongated strip and emphasizes the vertical. It works well on a single door or a narrow furniture section.
C-006-1-2 builds a wide composition where horizontal connections between elements are as important as the vertical. It requires a distant view and a free plane.
Choosing only by height leads to a mistake. The buyer needs to simultaneously evaluate the width, number of doors, opening points, and handle placement.
Thickness of 22 or 23 mm: how important is it
The one-millimeter difference in thickness between the sets should not become the main criterion. Much more important is the overall depth of the relief, the position of elements, and the free space in front of the furniture.
Nevertheless, the protrusion of the decor must be taken into account when opening adjacent doors, placing handles, and packaging finished facades. Carved elements should not touch the wall, casing, or adjacent door leaf.
On built-in furniture, the gap to the side walls and ceiling cornice is especially important. Even a neat overlay decor can interfere if installed too close to the edge.
Checking the side profile is mandatory for both sets, although visually the main difference between them is determined by the width.
Composition C-006-1-1 and its practical meaning
Composition C-006-1-1 includes MLD-003, N-410, and N-411. These elements form a local vertical composition that can work within a single tall section.
It is important for the buyer to perceive the set as a whole. If one of the key elements is removed or replaced with a similar overlay, the composition may lose its proportions.
The ready-made composition simplifies specification for the cabinetmaker: instead of a random list of parts, a single kit article and a confirmed drawing are used.
Before installation, the elements are laid out on a full-size template, marked, and the direction of the pattern is checked. This protects against swapping parts.
Composition C-006-1-2 and its practical meaning
C-006-1-2 uses MLD-003, MLD-3U-1, MLD-3-1, and N-399. This set forms a broader architectural system.
Molding and corner elements help distribute the pattern on a 2000 mm plane, while the central overlay holds the composition together and prevents the wide field from looking empty.
Due to its scale, C-006-1-2 is especially sensitive to misalignment. A small error in the central axis repeats across the entire width and becomes noticeable near the joints of the facades.
For complex built-in furniture, it is advisable to obtain a professional layout and specification in advance, rather than transferring elements to the site from a photo.
How to measure furniture before ordering
First, measure the clear width and height of the decorative field. Exclude the cornice, base, side posts, technological gaps, and areas occupied by handles from the overall dimension.
Then, mark all vertical joints of the doors. The decor should not accidentally cross a movable seam unless such a scheme is intended by the project.
On the plan, show the position of the hinges and the direction of opening. Carved elements should not fall into areas where the adjacent door passes close to the facade.
After taking measurements, download the drawing of the set and overlay it on the facade to scale. Only such a mockup shows whether 600 or 2000 mm is suitable.
Clear width of the facade and free fields
Clear width is the space in which the decor can be placed without intersecting with functional elements. It is almost always smaller than the external size of the door or cabinet.
Equal margins are left around the carving. If the outermost overlay almost touches the side panel, the composition looks cramped and the centering error becomes more noticeable.
For C-006-1-1, free margins are especially important on the sides of the narrow vertical. For C-006-1-2, the edges of the entire wide system need to be controlled.
There is no universal offset for any furniture. It is determined by the drawing, the scale of the facade, and the visual layout.
Handles, hinges, and door opening
The handle remains the functional center of the furniture. Carved decor should not impair grip, cover hardware fasteners, or force the user to touch protruding parts.
Hinges are on the inside, but their position affects the opening trajectory. If the overlay is installed close to the edge, the adjacent door or wall may catch on the relief.
On the wide C-006-1-2, handles of several facades must be included in the overall scheme. You cannot first distribute the decor and then look for free space for the hardware.
On C-006-1-1, the handle can be located below the central zone or on the side, but the solution is checked on a full-size template.
Why decor should not be accidentally extended to the joint of doors
The joint of doors constantly changes position when opening. If one element crosses the seam, the composition falls apart and may physically obstruct movement.
On a wide cabinet C-006-1-2, it can cover multiple facades only with a specially calculated layout, where each part is fixed on its own door.
The central axis does not always coincide with the joint. Sometimes it is better to shift the composition to a central blind panel or design each door separately.
For a complex scheme, it is better to use a service where you can order a STAVROS decor specification and get a professional layout.
Paper or digital mockup to scale
The most reliable way to check the set is to see it on the facade before ordering and installation. For C-006-1-1, you can print the diagram in parts and assemble a full-size template. For C-006-1-2, a digital layout or project printing is more convenient.
The mockup should include not only the outline of carved elements, but also handles, door joints, moldings, cornice, and free fields. Then it becomes clear whether the composition crosses moving zones.
You need to check from a normal distance. Up close, any carving seems expressive, but on a large furniture wall, a narrow set can get lost.
If the project includes enamel or dark tinting, the color should also be simulated. The contrast of the finish changes the perception of scale.
C-006-1-1 for one tall door
One tall door — the main scenario for C-006-1-1. A composition 600 mm wide can occupy the central field and emphasize the vertical proportions of the door.
Before ordering, measure the internal width between the edges of the panel or molding frame. If the clear field is less than 600 mm, the set cannot be compressed or trimmed without a separate project.
A height of 1870 mm requires a sufficiently tall door. Meaningful gaps must remain at the bottom and top, otherwise the pattern will hit the cornice or baseboard.
For a narrow door, it is better to include the handle in the layout in advance. It should not fall on the main carved element.
C-006-1-1 on two identical doors
Pair placement of two C-006-1-1 sets is suitable for a symmetrical cabinet with identical tall doors. Each door gets its own vertical composition.
This option requires two full sets, unless otherwise confirmed by the card and project. Do not assume that one set is automatically designed for two doors.
The central axes of both doors must be at the same height. The slightest shift is noticeable in the closed position.
Sufficient space must be left between the two compositions for handles and the joint. The decor should not visually merge into a random overall pattern.
C-006-1-1 for sideboard and display cabinet
On a sideboard, a narrow set can decorate a central solid door, a side panel, or a tall lower facade. It helps connect the carving with the cornice and legs without overloading the entire piece of furniture.
For a display cabinet, glass inserts must be considered. The carved set should not obstruct the view or extend onto fragile areas.
If the facade is divided into upper and lower zones, a height of 1870 mm may not match a single section. In that case, it is better to choose a different set rather than break the composition.
Oak for tinting supports a wooden sideboard well, beech for enamel supports a painted display cabinet in modern classic style.
C-006-1-2 for built-in wardrobe
The built-in wardrobe provides a wide surface on which C-006-1-2 can fully unfold. A composition 2000 mm wide helps to combine several doors and create an architectural center.
But built-in furniture is strictly limited by walls, ceiling, and side fillers. Therefore, precise measurement is more important than for a freestanding wardrobe.
It is necessary to check whether the outer elements fall on the wall junctions and whether they interfere with opening the doors at the maximum angle.
If the wardrobe is designed from scratch, the decor is planned before the facades are manufactured. Then joints, handles, and overlays can be coordinated without alterations.
C-006-1-2 for a furniture wall
A furniture wall consists of several modules, but visually it is perceived as a single whole. C-006-1-2 helps to connect them with a common carved pattern.
A wide composition is especially appropriate above the central group of facades, near the TV area, or on a large closed section.
Decor cannot be transferred to open niches, appliances, or movable panels without design verification. Each element must have a stable base.
If the wall is asymmetrical, the central axis is determined not by the overall width of the room, but by the main furniture block.
C-006-1-2 for a group of facades
The group of facades requires a common layout. First, mark all vertical seams, then distribute the elements so that each is fixed to a specific door.
Overlays should not cross the gap if it interferes with opening. If necessary, the composition is divided into separate parts according to the drawing.
It is better to choose handles after approving the carved decor or simultaneously with it. Then the hardware does not conflict with the main pattern.
When the furniture is open, the composition may break into parts. It is necessary to ensure that each door individually still looks neat.
Narrow pier of built-in furniture
A narrow pier or a blind side panel often remains empty and looks technical. C-006-1-1 can turn it into a decorative vertical.
This scenario is especially useful when the main group of facades is already saturated with handles and joints. The decor is transferred to a calm, fixed plane.
The width of the pier must allow placing 600 mm with equal margins. If the space is smaller, the set will look cramped.
Installation on a blind panel is simpler because there are no hinges and door movement, but the base and finish are still checked.
How to choose between beech and oak
Beech and oak are available for both sets, but are chosen not only by the name of the species. The main question is whether the texture will be visible after finishing.
Beech under enamel is suitable for white, colored, or dark opaque finishes. It helps merge the carving with the facade into a single surface.
Oak for tinting is chosen when the wood grain should become part of the decor. The texture makes the wide C-006-1-2 especially expressive.
Mixing beech and oak in one composition without a project is not advisable. Different textures and absorption of the finish can result in noticeable inconsistency.
Beech under enamel: when it is rational
Beech is suitable for furniture that will be painted opaquely. After enameling, carved elements and the facade can be perceived as a single architectural plane.
On C-006-1-1, this approach helps maintain a modern and restrained character. The narrow set is read through shadow, not material contrast.
On C-006-1-2, enamel unifies many elements and makes the wide composition cohesive. But the coating layer should not clog small details.
The specific primer and enamel system is tested before installation. Compatibility with any paint cannot be guaranteed.
Oak for tinting: when texture is needed
Oak is chosen when the buyer wants to preserve visible wood and connect the decor with massive facades, cornices, or other oak elements.
Tinting emphasizes the grain pattern and carving recesses. On a wide composition, this creates a more complex chiaroscuro.
The shade must be matched against a real sample. Names like "walnut" or "dark oak" are too general.
If the fronts are made of a different material, oak decor can still be used, but the texture transition must be part of the design.
Sanding "Standard" or "Prestige"
Both sets are available with "Standard" or "Prestige" sanding. The choice depends on the required degree of preparation and subsequent finishing.
"Standard" is suitable for a project where the workshop is willing to additionally refine the surface before painting or tinting.
"Prestige" is chosen when more detailed manual preparation of the carved relief and less subsequent work is needed.
Sanding cannot be considered separately from the finish. Deep opaque enamel and transparent tinting impose different requirements on the surface.
When to paint overlays — before or after installation
Painting before installation facilitates access to side surfaces and recesses. This is convenient for complex elements that will be close to the molding or edge of the front after installation.
Painting after installation helps unify joints and achieve a uniform color with the furniture. But it requires careful protection of adjacent areas.
For C-006-1-2, the solution is especially important: the wide composition consists of many elements, and uneven coloring can be noticeable.
Before starting work, make a test sample and determine the sequence: preparation, dry layout, fixing, primer, enamel or tinting.
How to arrange elements symmetrically
Symmetry starts from the central axis of the furniture plane. It is marked along the clean decorative field, not along the random edge of the body.
Equal distances from the axis are set to the side elements. Height is controlled by a common horizontal line.
On multiple doors, markings are transferred only after checking the closed furniture. Individually level doors may not form overall symmetry.
Masking tape and temporary templates help to see the composition without glue. Fixing begins only after checking from a distance.
How to connect carved decor with furniture handles
Handles should be comfortable and visually subordinate to the overall scheme. They cannot be placed over thin carved details without a confirmed project.
On C-006-1-1, the handle can be located below the central element or to the side of the vertical composition.
On C-006-1-2, several handles should follow the rhythm of the doors and not break the wide system.
If the fittings are already installed, the set is selected around them. If the furniture is new, handles and decor are designed simultaneously.
Decor for a classic interior
In a classic interior, ready-made sets support panels, cornices, and furniture symmetry. C-006-1-1 is suitable for a single tall door, C-006-1-2 for a formal furniture wall.
Oak for tinting enhances the connection with natural wood. Beech for enamel suits painted classic style.
It is important not to overload the facade with additional overlays. The ready-made set already forms a complete system.
Surrounding handles, legs, and cornice should support the scale of the chosen composition.
Decor for modern classic style
Modern classic requires a calmer presentation. Here, painting the carving in the color of the facade without strong contrast often wins.
C-006-1-1 is easier to integrate into laconic furniture because it occupies a local vertical.
C-006-1-2 is only suitable for large flat surfaces with a minimum of additional decorations.
Matte or moderately glossy enamel affects the reading of the relief. The specific finish is agreed upon on a sample.
Kit for commercial interior
In a hotel, salon, restaurant, or showroom, furniture is viewed from a greater distance. Wide C-006-1-2 better maintains readability on a large wall.
C-006-1-1 is suitable for a counter, display case, or a separate tall section where local decor is needed without overloading the space.
A commercial project requires repeatability. First, a control sample is assembled, then the article numbers, material, sanding, and finish are fixed.
Care and coating durability are also checked in advance, especially in areas of frequent contact.
How to prepare the surface before installation
The surface must be flat, clean, and durable. Dust, grease, weak old coating, and glossy surface without preparation reduce the reliability of adhesion.
On new furniture, the base is checked before painting. On a finished cabinet, first assess the condition of the enamel, varnish, veneer, or other finish.
Carved decor should not be used to mask cracks, bulges, or damaged edges. First, restore the base.
If C-006-1-2 is distributed across multiple facades, the same preparation is needed on each door. Different surfaces may yield different results.
Dry layout before the first glue application
Dry layout shows the actual scale, direction of elements, and distances between them. For C-006-1-1, it can be done on one door; for C-006-1-2, on the entire furniture wall.
Each part is marked according to the drawing. Do not rely solely on visual memory, especially if the elements are similar.
During layout, check joints, handles, opening lines, and equal margins. It is easier to fix a mistake before fixing.
A photo of the approved layout becomes a working reference for the installer.
How to glue wooden decor to a furniture facade
Glue is selected based on the material of the overlay, facade, and existing coating. There is no universal composition for solid wood, enamel, veneer, and laminated surfaces.
For the kit, you can select glue for carved overlays and materials for surface preparation.
The composition is applied so that it ensures even contact and does not seep onto the front carving. Excess is removed according to the technology of the selected material.
Before the strength sets, the elements are temporarily secured in a safe way. The pressure should not damage the thin parts of the carving.
Installation C-006-1-1 on one door leaf
For one door leaf, first mark the vertical axis and the upper boundary of the composition. Then check if the side margins are equal.
Place the elements according to the drawing, starting with the main reference points. This order helps avoid accumulating height errors.
The handle and door joint remain free. If the set almost touches the edge, then the clear field was measured incorrectly.
After fixing, open the door and check that the decor does not touch the adjacent module.
Installation C-006-1-2 on multiple facades
A wide composition requires a common baseline across all furniture. Marking each door separately is dangerous: small deviations will accumulate into a noticeable misalignment.
First determine the center of the entire group of facades, then distribute the elements across individual doors.
Each overlay must be entirely on its own movable or fixed part. Crossing the joint is only allowed in a specially designed structure.
After temporary layout, open all doors several times. This reveals possible collisions before gluing.
How to avoid damaging threads during installation
Do not carry overlays by holding them by thin curls and protrusions. Support the part by its sturdy base.
Distribute temporary pressure evenly. Rigid clamps without pads may leave marks.
When drilling or adding fasteners, do not choose points randomly. Any mechanical connections require an approved design.
Before installation, store elements on a flat surface, protecting them from moisture, impacts, and pressure.
How to check the composition from a distance
Up close, the quality of the carving is easy to see, but the scale is assessed from a normal viewing point. For a cabinet, this is a few steps away; for a wall unit, it's the distance to the opposite side of the room.
On C-006-1-1, they check whether the set looks too narrow on a large plane. On C-006-1-2, they check whether it overwhelms the facades.
Lighting affects the shadow. Side lighting emphasizes the relief more strongly, while frontal lighting makes it calmer.
It's useful to photograph the layout and compare several placement options before final fixation.
Comparison of kits by practical scenarios
C-006-1-1 is better suited for a single section, narrow panel, and paired placement on identical doors. It maintains a local character.
C-006-1-2 is designed for a large cabinet, furniture wall, and group of facades. It unifies a wide plane.
If the furniture has many handles and joints, a narrow model is often safer. If the facade is almost monolithic, a wide composition unfolds more fully.
The choice depends not on the desire for more carving, but on which system matches the furniture's architecture.
Comparison of C-006-1-1 and C-006-1-2 by tasks
| Situation | C-006-1-1 | C-006-1-2 | What to Check |
|---|---|---|---|
| One tall leaf | Suitable | Too wide | Clear width, handle, and height |
| Two identical doors | Two sets can be used | A general project scheme is possible | Joint, number of sets, and symmetry |
| Built-in wardrobe 2000 mm and wider | May be lost without additional solutions | Main Scenario | Actual clear width and side extensions |
| Narrow pier | Suitable with sufficient field | Not suitable | Equal indents |
| Wall unit | Only as a local accent | Suitable for wide composition | Open niches, technical elements and joints |
| White enamel | Beech under enamel | Beech under enamel | Test swatch and layer thickness |
| Transparent tinting | Oak for tinting | Oak for tinting | Shade match with facade |
| Self-installation | Simpler in scale | Requires precise overall layout | Drawing, template, and surface preparation |
What to buy together with a carved decor kit
For installation, you will need surface preparation products, suitable glue, marking tools, and finishing materials. The specific composition depends on the facade and the chosen wood species.
If the kit size does not fit, you can select wooden overlays for furniture and assemble another composition from confirmed elements.
For a complex cabinet, it is useful to order a design project for furniture decor, to get the layout and specification.
Before choosing a style, you can look at ideas for cabinet decor and evaluate how overlays work on real facades.
How not to confuse a ready-made set with individual overlays
The set has a common article number, confirmed composition, and final composition size. An individual overlay solves a local task and does not automatically form a ready-made system.
A buyer mistake is to buy several similar elements and expect them to form C-006-1-1 or C-006-1-2. Proportions and distances may not match.
A ready-made set is convenient when the furniture matches its scale. Individual overlays are better if the facade has a non-standard width, asymmetry, or complex functional zones.
General differences are explained in the material about how to choose decorative overlays for furniture.
When C-006-1-1 may be too small
On a wide furniture wall, a 600 mm composition may look like a separate strip and not tie the facades together. This is especially noticeable with a large empty space on the sides.
The problem cannot always be solved by increasing the gaps. Sometimes the architecture itself requires a wide C-006-1-2 or an individual layout.
If C-006-1-1 is used on one central door within wide furniture, the locality may be justified. Then the other facades should remain calm.
The layout helps distinguish a deliberate central accent from an accidentally small decoration.
When C-006-1-2 overloads the furniture
On a door narrower than 2000 mm, the wide system does not fit. Attempting to reduce distances or remove elements disrupts the ready-made scheme.
Even on a sufficiently wide cabinet, C-006-1-2 can be excessive if there are many carved handles, cornices, and overlays nearby.
Painting in the color of the facade reduces contrast
Practical choice for custom-made new furniture
In a new project, decor can be planned before manufacturing the facades. This allows immediate distribution of joints, handles, and central axes.
C-006-1-1 is used as a module for one or several identical doors. C-006-1-2 becomes the overall architecture of wide furniture.
The cabinetmaker receives a drawing of the set and adapts the structure to its dimensions, rather than trying to fit the carving into an already finished field.
This approach reduces the risk of rework and allows for prior coordination of beech under enamel or oak under tinting.
Practical choice for repairing and updating a cabinet
When updating furniture, a carved set can change the appearance without completely replacing the body. But first, weak facades and coating need to be restored.
C-006-1-1 is suitable for local updating of a central door. C-006-1-2 requires a more extensive rework of the entire front plane.
If the old handles and holes do not match the new composition, they cannot simply be covered with overlays without checking.
A trial facade helps assess whether the new carving matches the furniture's design and age.
Main mistakes when choosing a kit
The first mistake is buying from a photo without checking dimensions. On screen, C-006-1-1 and C-006-1-2 may appear similar, although the width differs by more than three times.
The second is considering the overall cabinet size instead of the pure decorative field.
The third is placing elements at joints and opening areas.
The fourth is choosing beech or oak without connection to the finish.
The fifth is starting installation without a full-size layout.
The sixth is using random glue on a finished coating.
The seventh is mixing elements from different kits without a project.
Eighth — paint a wide composition without a test sample.
Ninth — consider one set sufficient for paired placement on two doors.
Tenth — try to reduce the finished system by trimming.
Who is C-006-1-1 suitable for
C-006-1-1 is suitable for the owner of a narrow tall cabinet, sideboard, display case, or built-in furniture with one free vertical section.
It is convenient for paired design of two identical doors if the buyer is ready to order the required number of sets and perform precise symmetry.
The model suits modern classics, local furniture updates, and painting in the facade color.
It may not suit a wide empty wall where 600 mm looks too small.
Who C-006-1-2 suits
C-006-1-2 suits a wide furniture wall, built-in wardrobe, group of facades, and a large symmetrical structure.
It is especially appropriate in a spacious living room, dressing room, study, hotel, or salon where furniture is viewed from a distance.
The set requires professional marking, joint control, and sufficient free space.
It does not suit a single small door or furniture already overloaded with carved elements.
How to buy a set on STAVROS
Start with measuring and a full-size mockup. Then open the card for C-006-1-1 or C-006-1-2 and check the drawing, material, and sanding.
For opaque painting, choose beech under enamel; to preserve texture, choose oak under tinting.
After selecting the set, materials for installation and finishing are added. If the layout is complex, a design project is ordered.
Prices, availability, delivery times, and current configuration are checked directly in the product card before placing an order.
How to check the scale from a distance
Carved decor is evaluated not only at arm's length. For a cabinet, it is important to step back to the opposite wall and see if the composition remains readable as a whole.
C-006-1-1 on wide furniture can blend in among doors and handles. C-006-1-2, on the contrary, can dominate and make the body visually heavier.
Daylight and artificial light cast different shadows. Therefore, it is useful to check the layout in the morning, evening, and with the room lighting on.
A photo of the facade with a temporary layout helps compare several options and make a decision without haste.
How to coordinate the decor with the cornice, base, and side panels
The cornice sets the top boundary of the furniture, the base sets the bottom, and the side panels set the vertical contour. The carved set should be within this architecture, not conflict with it.
On C-006-1-1, the top and bottom gaps are especially noticeable due to the elongated shape. If the composition almost touches the cornice, the facade looks cramped.
On C-006-1-2, the side elements must have the same distance to the outer posts. Otherwise, the wide system looks misaligned.
When designing a built-in wardrobe, it is better to coordinate the cornice and decor simultaneously.
How to combine a set with paneled and molded facades
The panel already creates a frame and an inner field. The set must either fit inside it or be part of a specially designed external system.
Random intersection of the carving and existing molding creates visual noise and complicates installation.
C-006-1-1 is easier to place in one tall panel. C-006-1-2 requires several coordinated fields or a wide common panel.
If the furniture is designed from scratch, the panel dimensions are adjusted to the set drawing, not the other way around.
How to choose a set for the hallway
In the hallway, furniture often has limited depth and is located close to the passage. Therefore, protruding elements should not catch on clothes or interfere with opening.
C-006-1-1 is suitable for a tall central section of a cabinet or a decorative side panel.
C-006-1-2 is only appropriate on a large built-in system with sufficient viewing distance.
Painting in the color of the facade helps make the thread calmer and more practical for a compact room.
How to choose a kit for the bedroom and dressing room
In the bedroom, the decor should support a calm furniture composition. C-006-1-1 is suitable for a separate central door or a pair of identical doors.
In a large walk-in closet, C-006-1-2 can combine a wide storage system and make it look like an architectural panel.
Handles and opening lines are especially important: the closet is used daily, and the carving should not interfere with movement.
Beech under enamel suits light furniture, oak under tinting suits an interior with visible wood.
How to choose a set for the living room and study
In the living room, a wide wall unit often becomes the main object. C-006-1-2 suits this role if there is enough calm space around.
C-006-1-1 can be used on a separate wardrobe, display cabinet, or tall pencil case.
In the study, oak tinting helps tie the decor to the desk, library, and wooden panels.
In both rooms, it's important to check the scale from the main viewpoint, not just next to the furniture.
How to work with several identical cabinets
If a project has several identical cabinets, first approve one reference facade. On it, check dimensions, material, sanding, finish, and element positions.
After approval, a template is made and transferred to the remaining cabinets.
For C-006-1-1, repeatability is especially convenient: one set can become a module for a series of identical doors.
C-006-1-2 requires control of the entire width of each cabinet, because a small difference in cabinets affects the side margins.
How to accept the finished work
After installation, symmetry, equal gaps, and absence of misalignment are checked.
All doors are opened and it is ensured that elements do not touch adjacent facades, walls, and handles.
The finish is inspected under side lighting. Runs, unpainted recesses, and shade differences are most noticeable on the carving.
Keep the article numbers, drawing, and finish sample for future repairs or furniture expansion.
Why a design project is useful for C-006-1-2
A wide composition affects several facades and requires coordination with the cabinetmaker. An error in one element can affect the entire wall unit.
A design project helps distribute overlays across doors, account for handles, and prepare a specification.
For complex furniture, you can select carved elements according to the facade dimensions and get a professional layout.
This is especially useful if the furniture has not yet been manufactured and the dimensions can be adapted to a ready-made set.
Why a ready-made set is more advantageous than a random collection of parts
A random set requires independently selecting the scale, pattern, moldings, and distances. An error only becomes apparent after layout or installation.
A ready-made set has a confirmed composition and size. The buyer immediately understands what surface it occupies.
Repeating the composition on multiple facades is easier because one article number and one drawing are used.
Instead of lengthy adjustments, you can focus on choosing the material, finish, and quality installation.
What to buy together: ready-made project configuration
| What to add | Why | For which scenario | What to Check |
|---|---|---|---|
| Set C-006-1-1 | Design a narrow tall facade | One door, pencil case, partition | Field 600 × 1870 mm and thickness 22 mm |
| Set C-006-1-2 | Assemble a wide composition | Furniture wall, built-in wardrobe | Field 2000 × 1870 mm and thickness 23 mm |
| Other decorative overlays | Find a solution for a non-standard facade | When a ready-made kit does not fit | Size, material, and style |
| Installation materials | Prepare the surface, glue, and finish with decor | New and ready-made furniture | Compatibility with facade and finish |
| Design project for furniture decor | Get the layout and specification | Complex cabinets and facade group | Precise dimensions and handle positions |
| Cabinet design ideas | Compare real scenarios | Style and scale selection | Do not copy a solution without measurements |
Test purchase before a large project
For a built-in wardrobe or wall unit, it is reasonable to first order one set or an agreed set of samples and test it on an actual facade. Such a test purchase shows whether the scale meets expectations and how noticeable the relief is after finishing.
On the test area, not only the pattern is checked. It is important to see how beech or oak combines with the main furniture material, how easily enamel or tinting is applied, and how the chosen adhesive behaves.
If C-006-1-2 is used, a test layout helps to understand how the elements are distributed across several doors. This is cheaper and safer than discovering an error after ordering the full volume.
After the sample is approved, the article numbers, quantity, grinding, color, position of elements, and assembly sequence are fixed.
How to organize serial assembly on multiple facades
When the same decor is repeated on several cabinets or doors, free marking of each surface leads to inconsistency. A single template with a central axis, top mark, and points for the main elements is needed.
For C-006-1-1, the template can be transferred from one door to another. For C-006-1-2, a general scheme of the entire group of facades and separate maps for each door are created.
The elements are sorted and labeled in advance. The installer must understand which set and section each overlay belongs to.
After installing the first composition, it is accepted as a reference. Only then do they move on to the remaining facades.
How to check the finish on a carved relief
Color is perceived differently on a flat sample and on carving. Recesses appear darker, protrusions reflect light more strongly, and a too thick layer of enamel smooths out fine details.
For beech under enamel, a test coating is done on a separate element or sample of comparable preparation. For oak under tinting, they check how the shade reveals the grain and whether it creates stains.
Wide C-006-1-2 is especially sensitive to differences in finish batches. It is better to process all elements with one system and under identical conditions.
The result is evaluated under the lighting that will be in the room. Daylight, warm lamps, and directed spotlights give different pictures.
How to replace a damaged element of a set
A ready-made set is convenient because its composition is known. If one element is damaged, it can be identified by the specification and the possibility of replacement can be clarified without disassembling the entire composition.
Before ordering a spare part, save photos, dimensions, the set's article number, and a sample of the finish. This helps avoid errors in pattern and color.
Dismantling is performed taking into account the glue and the base. Do not abruptly tear off the overlay: you can damage the facade, enamel, or adjacent elements.
After replacement, check not only the color but also the position relative to the common axis. A slight shift is noticeable on a symmetrical carved system.
How to choose between a ready-made set and an individual layout
A ready-made set is advantageous when the furniture dimensions are close to the confirmed composition and the buyer needs a predictable result. C-006-1-1 is designed for a local field, C-006-1-2 for a wide plane.
An individual layout is needed if the facade is asymmetrical, has unusual joints, open niches, or dimensions that do not correspond to 600 and 2000 mm.
Do not forcibly adapt a ready-made set to unsuitable furniture. Trimming, removing elements, and arbitrarily changing distances can ruin the pattern.
For a broader understanding, you can look at how to use carved elements in furniture design, and then choose a ready-made set or order an individual scheme.
Final acceptance before transferring furniture to the customer
First, check the geometry: central axes, equal margins, height, and absence of skew. On the wide C-006-1-2, inspection is carried out from several points.
Then open all doors and drawers. Carved elements should not touch handles, adjacent doors, walls, or internal parts.
The finish is inspected under side lighting. Special attention is paid to joints, recesses, glue boundaries, and shade uniformity.
The customer is provided with information about the article, material, finish, and care. This data will be useful for repairs and expanding the furniture composition.
What to check in product cards before payment
Even with a ready-made SEO scheme, before payment you need to open the current cards C-006-1-1 and C-006-1-2. There, check the size, material, sanding, preparation for finishing, and available order conditions.
The buyer must ensure that a set is selected, not a separate item with a similar name. The article numbers differ by the last digit, but the scale of the furniture changes fundamentally.
For a large order, the number of sets is recorded separately. Paired placement on two doors or repetition on several cabinets increases the purchase volume.
If there are still doubts about the layout, it is better to provide the manager with dimensions and photos of the furniture before placing the order.
How to coordinate the amount of decor with the room size
The same cabinet is perceived differently in a spacious living room and a small bedroom. In a cramped space, a wide carved system is closer to the viewer and appears richer.
C-006-1-1 is easier to use in a compact room because it creates a local vertical accent and leaves more calm surface.
C-006-1-2 requires viewing distance. In a spacious room, its width helps connect the furniture wall, while in a narrow passage it can make the structure heavy.
Before ordering, the layout is checked from the actual entry point of the room, from the sofa, bed, or workspace.
How to determine the central axis of a wide furniture composition
For a freestanding cabinet, the central axis usually passes through the middle of the main body, but built-in furniture may have side extensions, niches, and asymmetrical sections. Therefore, you cannot rely solely on the external width.
First, determine the main visual block: a group of closed facades, a central section, or a symmetrical part of the wall. Within it, find the axis for C-006-1-2.
If handles and joints form their own order, they are drawn on the plan before placing the carving. The composition should support the furniture's architecture, not fight it.
On C-006-1-1, the axis often coincides with the center of one door. On paired doors, each vertical is marked separately.
How to understand that the selected set truly matches the furniture
The right set requires no excuses after fitting. It fits into a clean field, maintains equal margins, does not cross joints, and leaves comfortable space for handles. The carving is legible from a normal distance and does not appear randomly small or excessively large.
For C-006-1-1, the main feature is precise work on one tall section. For C-006-1-2, it is the ability to unify a wide furniture plane without overloading.
If after the mockup you have to remove elements, drastically reduce distances, or move decor to movable seams, then the wrong scale was chosen.
A deliberate choice is always easier than installation with subsequent alterations: first a drawing and mockup, then material, finishing, and order.
How to maintain a consistent result from order to installation
On a long project, decisions often change between the designer, cabinetmaker, finisher, and installer. To ensure C-006-1-1 or C-006-1-2 do not lose their original proportions, all participants must work with the same drawing and the same specification. The document records the article number, composition size, material, sanding, color, position of the central axis, and distances to the edges.
A photo of the approved mockup helps preserve the concept when transferring it to the actual facade. For C-006-1-2, it is especially useful to show which elements belong to each door and where the movable joints are located.
After delivery, the set is checked against the inventory before painting begins. If a discrepancy in quantity or composition is found, installation does not start until the issue is resolved.
Such a procedure seems formal only until the first mistake. In practice, it protects expensive furniture from warping, accidental trimming, and mismatched finishes.
Before the final order, it is useful to open both cards side by side again and compare not only the width but also the composition of the sets. Such a check protects against a situation where the buyer chooses the right scale but expects a different set of moldings and overlays.
For serial furniture, this final check is especially important: one mistake in choosing a kit will be repeated on all doors, so accurately comparing cards before payment saves time on rework and refinishing.
FAQ: questions about kits C-006-1-1 and C-006-1-2
How is C-006-1-1 different from C-006-1-2?
The main difference is width and composition. C-006-1-1 has dimensions 600 × 1870 × 22 mm, C-006-1-2 — 2000 × 1870 × 23 mm.
Which kit should I choose for a single cabinet door?
C-006-1-1 is usually suitable if the clear field allows placing a composition of 600 × 1870 mm.
Which kit is suitable for a wall unit?
C-006-1-2, if there is a free field of about 2000 × 1870 mm and the decor can be distributed across the facades without crossing joints.
Can C-006-1-2 be placed on a small cabinet?
No, if the composition dimensions exceed the clear space. The finished set cannot be reduced by trimming without a separate project.
Can C-006-1-1 be used on a wide cabinet?
It can be used as a local accent on one central door. On the entire wide surface, it may get lost.
What materials are the sets made of?
Both are available in beech or oak.
What to choose for white enamel?
Beech prepared for enamel.
What to choose for tinting?
Oak prepared for tinting.
What is the difference between "Standard" sanding and "Prestige"?
"Standard" involves basic preparation, "Prestige" involves more detailed manual sanding. The choice is related to the future finish.
Can decor be installed on finished furniture?
Yes, after checking the coating, base, glue, handles, and opening trajectory.
Do I need to paint the overlays before installation?
Both options are possible. The sequence is chosen based on the type of coating and access to the relief.
How to measure the facade before ordering?
You need to determine the net width and height, excluding handles, joints, side panels, cornice, and technological gaps.
Can elements be transferred across the joint of the doors?
Only according to a specially calculated scheme. Random crossing of the moving seam is not allowed.
How many kits are needed for two identical doors?
Usually one kit per leaf, if the project involves paired placement. Check the kit contents in the product card.
How to arrange elements symmetrically?
Find the central axis, do a dry layout, check for equal margins, and only then secure.
Which glue should I use?
The adhesive is selected based on the material of the decor, facade, and existing coating. There is no universal solution without testing.
Can elements C-006-1-1 and C-006-1-2 be mixed?
Only in a custom design project. Ready-made kits have their own proportions.
When is it better to choose individual overlays?
When the facade is non-standard, asymmetrical, or does not match the dimensions of ready-made kits.
Where to buy C-006-1-1 and C-006-1-2?
In the corresponding STAVROS cards. Before ordering, check the dimensions, material, sanding, and finish.
What to check before final purchase?
Clean field of the facade, drawing, handles, joints, opening, material, sanding, finish, and installation technology.
Result: which carved decor set to choose
C-006-1-1 measuring 600 × 1870 × 22 mm is suitable for a narrow tall door, central section of a sideboard, tall cabinet, or partition of built-in furniture. It creates a local vertical composition and does not require a wide furniture plane.
C-006-1-2 measuring 2000 × 1870 × 23 mm is designed for a built-in wardrobe, furniture wall, and a group of facades. It unifies a large area and requires precise project layout.
Both sets are available in beech or oak, with "Standard" or "Prestige" sanding. Beech is chosen for enamel, oak for tinting. Before ordering, check the drawings, clean dimensions, handles, joints, and door opening.
On the STAVROS website, you can go to the card of the desired set, view the catalog of decorative overlays, select materials for installation, and order a design project. This route helps to get a coordinated composition instead of a random set of parts that have to be adjusted on the finished furniture.