Article Contents:
- Why stucco molding cannot be left "for later"
- The ideal moment: after planning, but before final painting
- What does "not yet painted with the final coat" mean
- Polyurethane moldings: when to buy and when to glue
- When to decide on moldings
- When to buy moldings
- When to glue moldings
- Calculating the amount of molding: when to calculate
- Ceiling molding: why it needs to be coordinated with lighting in advance
- What to check before buying ceiling molding
- When to install ceiling molding
- Decorative molding: when to choose accents
- Why furniture affects the choice of decorative molding
- Decorative molding and furniture facades
- Molding decor and electrical work: why it's important not to forget sconces and switches
- What to do if the electrical work is already done
- When can you buy molding after painting
- Buying molding by renovation stages: sequence table
- Features of installing polyurethane stucco during renovation
- Ready-made purchase scenarios for renovation
- Scenario 1. Renovation in a new building from scratch
- Scenario 2. Cosmetic renovation: refreshing without major intervention
- Scenario 3. Replacing a chandelier as a reason for ceiling decor
- Scenario 4. Wall decor with sconces: spot update
- What to buy in advance: a complete list for renovation with stucco
- About the company
- Frequently Asked Questions
Renovation is a chain. Each link depends on the previous one, and if one shifts out of place, rework begins. The electrician has already left, the walls are painted, the chandelier is bought. And then you look at the finished room and realize: you wanted moldings. Frames on the walls. A ceiling rosette. Stucco decor above the mirror. And now what? Glue over the paint, touch up, redo — or postpone 'until the next renovation'?
It is at this moment that most people either abandon the idea entirely or get a result worse than it could have been. Because Buy moldings — this is not the final touch. This is a decision that needs to be made in the middle of the renovation, not after its completion. And this article is a detailed answer to the question: when exactly? At what stage? What to buy first, and what later? How not to ruin either the renovation or the decor?
Read carefully. This is a practice that saves money, time, and nerves.
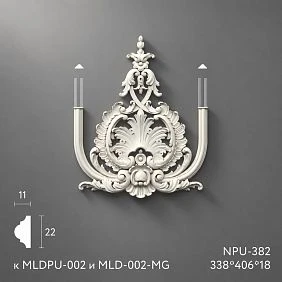
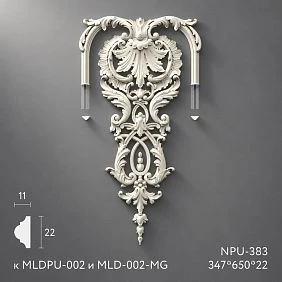

Why stucco molding cannot be left "for later"
There is a persistent misconception: stucco molding is the final decor. First everything important, then decorations. This is flawed logic that costs a lot.
Stucco molding is not decoration. It is surface architecture. Moldings made of polyurethane set the rhythm of the walls, the placement of frames affects where a switch can be installed and where it cannot. Ceiling molding is tied to the chandelier — if the light fixture is installed first and the socket is thought about later, the chandelier's mounting may not align with the center of the socket. Decorative stucco depends on the furniture — because the accent element above the headboard must be at the right height, not wherever space is left.
Everything is interconnected. And when someone "leaves stucco molding for later," they are actually leaving a whole layer of decisions for later that affect the outcome of already made decisions.
What specifically suffers if stucco molding is purchased after renovation:
-
Electrical. The switch is where it should be according to standards, not where it looks good in the molding system. It breaks the frame or ends up in the center of a decorative element.
-
Lighting. The ceiling rosette does not fit the already purchased chandelier. Or the light fixture's mounting does not allow gluing the rosette around it.
-
Painting. Moldings glued on top of the finish coat never look built-in. The joints are visible, the boundary between the wall and the profile is distinct. It feels like glued-on decor, not architecture.
-
Furniture. The cabinet is already flush against the wall — and now it's unclear how to fit the frames that were supposed to be planned for that wall.
-
Scale. Decorative stucco chosen without reference to the actual dimensions of the wall and furniture turns out to be either too small or in the wrong place.
The right time to make a decision about stucco is the middle of the renovation, when the layout is clear but the finish coat hasn't been applied yet.




Ideal moment: after planning, but before final painting
If one practical piece of advice were to be given about when to choose stucco during a renovation, it would be this: after the layout and furniture placement are determined, but before the final painting of walls and ceiling.
Why this particular moment? Because by this time you already know:
-
where the bed, sofa, console, mirror will be — that is, the accent zones are clear;
-
where the sconces and switches will be — that is, it's clear how to design moldings around the electrical fixtures;
-
where the chandelier will be — that is, you can correctly choose a ceiling rosette and cornice;
-
what color will be on the walls — that is, you can choose the right base for painting the stucco;
-
which walls will be accent walls — that is, it's clear where the frames go and Decorative stucco.
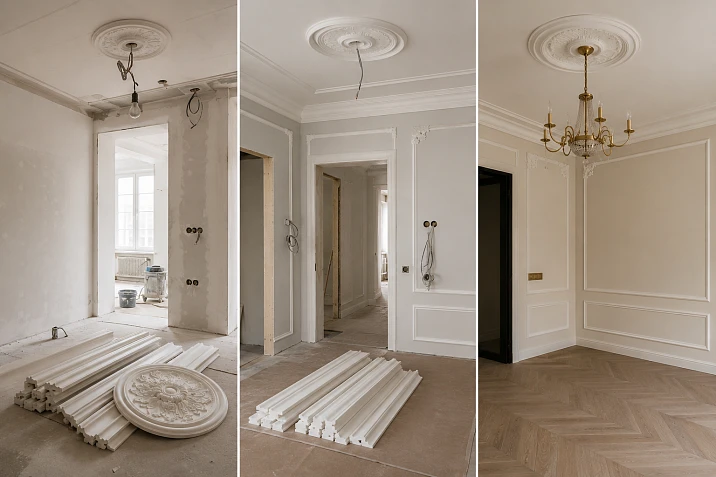
And at the same time, the walls are not yet painted with the final coat. This means: you can safely glue the moldings, putty the joints, let them dry — and paint everything together in one pass. The molding and the wall are painted with the same paint, at the same time, without a visible boundary. This is what creates the effect of built-in architecture, not glued-on decor.
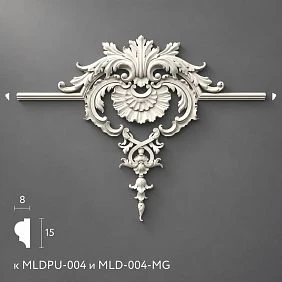
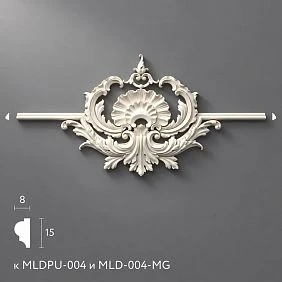
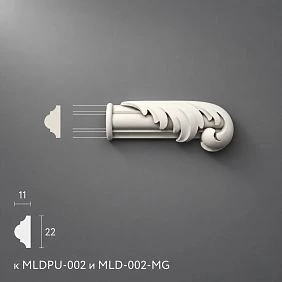
Our factory also produces:
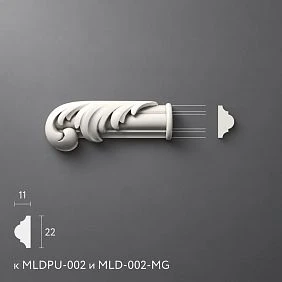
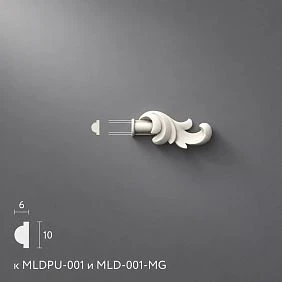

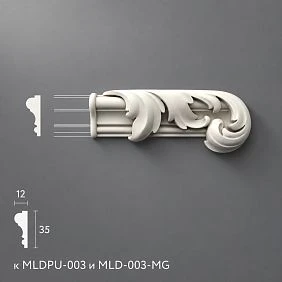
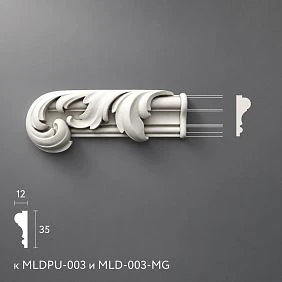
What does 'not yet painted with the final coat' mean
Many people confuse rough and finish finishing. Rough finishing is primer, initial putty, possibly the first coat of paint. Finish finishing is the final color that will be visible in the finished room. Stucco should be glued before the final paint coat. After surface preparation, after the first coat of primer — but before the walls have acquired their final appearance.
Then you can:
-
carefully putty the joints of the moldings — and they will disappear under the paint;
-
prime the moldings themselves together with the wall — and the paint will lay evenly;
-
paint everything with a single coat — and the stucco will become part of the wall, not a detail on the wall.
Get Consultation
Polyurethane moldings: when to buy and when to glue
When to decide on moldings
Ideally — at the stage when the furniture layout project is ready. Why? Because Moldings made of polyurethane they form frames on the walls — and the frames must be proportionate to the furniture that will stand against that wall. Frames behind the sofa are calculated considering the width and height of the backrest. Frames behind the bed — considering the headboard. Frames in the hallway — considering the mirror and console.
If you buy moldings without knowing where the furniture will go, there is a risk that the frames will end up in the wrong place. It's not a disaster, but it's extra rework.
When to buy moldings
Buy Moldings made of polyurethane better after:
-
wall measurements are taken and frames are calculated;
-
the electrical layout is clear;
-
the style is chosen (profile for classic, minimalism, or neoclassical);
-
the wall color is determined — to know which base is needed for the molding paint.
This can happen during the period when the walls are already plastered and primed, but the finish paint has not yet been applied.
When to glue moldings
The optimal installation moment is after surface preparation (primer, initial putty, possibly the first coat of paint), but before the finish painting.
Sequence:
-
The wall is prepared and primed.
-
The moldings are marked on the wall with a pencil.
-
The profile is cut at 45° at the corners.
-
Glued with construction adhesive.
-
The joints are filled with acrylic putty.
-
After drying — primer on the molding.
-
Final painting of the entire surface — walls and moldings together.
It is this order that gives the feeling that the moldings are part of the wall, not glued-on decor. Try it Buy polyurethane moldings and install them correctly — means getting a result that is indistinguishable in photos from real plaster stucco.
Calculating the amount of molding: when to calculate
You need to calculate the amount of moldings before purchasing — that's obvious. But you need to calculate carefully, with a margin, not "approximately."
What is needed for the calculation:
-
exact dimensions of each frame (width and height);
-
number of frames on each wall;
-
perimeter of each frame;
-
total sum of perimeters of all frames;
-
plus 15% for corner trimming (each corner — loss of about 5 centimeters plus trimming error);
-
plus a separate calculation for the ceiling cornice (room perimeter + 15%).
Never buy moldings exactly to size. Polyurethane moldings are cut at 45° — each joint requires two trimmed ends. One bad cut — and the element is ruined.
Ceiling stucco: why it needs to be coordinated with lighting in advance
The ceiling is the most vulnerable area in terms of renovation sequence. This is where conflicts between stucco and lighting most often occur. The chandelier is installed first, then they remember the rosette — and it turns out that the light fixture's mount is exactly where the center of the ceiling rosette should be. Or the diameter of the rosette doesn't fit the distance to the chandelier.
Ceiling molding — this is a system that includes several elements:
-
cornice along the ceiling perimeter;
-
a ceiling rosette for the chandelier;
-
possibly additional ornamental elements for high ceilings.
All these elements need to be chosen before installing the chandelier and before the final ceiling painting.
What to check before buying ceiling stucco
Electrical outlet location. The chandelier wire must exit exactly from the center of the ceiling rosette. If the ceiling center and the wire outlet location do not match — this is a problem that needs to be solved before installation, not after.
Diameter of the chandelier. ceiling rosettes They are selected to match the size of the light fixture. The rosette should be proportionate to the chandelier — approximately equal in diameter or slightly larger. If the rosette is significantly smaller than the chandelier, it will be hidden underneath and lose its purpose.
Ceiling height. For ceilings up to 2.7 meters — a thin, delicate cornice. For 3 meters and above — a cornice with a more pronounced relief. Buy ceiling molding It should be done considering the scale of the space.
Style of the remaining stucco molding. The ceiling cornice and rosette should match the moldings on the walls. This is a basic principle of style unity.
Type of chandelier mounting. Hook, bracket, or collet clamp — each type has its own dimensions. The ceiling rosette must have an opening of the appropriate diameter. Some rosettes come with a pre-made central hole, while others have a solid relief where you need to make the hole yourself.
When to install ceiling stucco molding
Optimal sequence for the ceiling:
-
The ceiling is prepared and primed.
-
The cornice is glued around the perimeter before final painting.
-
The ceiling rosette is glued at the wire outlet location.
-
The joints are puttied.
-
The ceiling and stucco are painted together with a finish coat.
-
After complete drying — install the chandelier.
This exact order ensures that the chandelier will be placed exactly in the center of the rosette, the cornice is painted together with the ceiling and looks built-in, and the entire ceiling system works as a single unit.
If Ceiling Molding Purchase after installing the chandelier — you will have to dismantle the light fixture, remove the shades, work around the fasteners. This is possible, but inconvenient and less neat.
Decorative stucco: when to choose accents
Decorative stucco — these are overlay elements: medallions, ornamental inserts, corner overlays for frames, horizontal friezes. Unlike moldings, decorative stucco does not form the structure — it decorates it. And that is why its choice requires a more detailed understanding of the space.
It is better to choose decorative stucco after:
-
the furniture layout is determined;
-
it is clear where the accent zones will be (sofa, bed, mirror, TV area);
-
moldings and frames are chosen — because the decor should match them in style;
-
the placement of sconces is clear — because decor is often placed near light.
Why furniture influences the choice of decorative stucco
The accent element above the mirror should be at a specific height — which depends on the height of the mirror and the console. If the mirror is tall, the decor above it starts higher. If the mirror is small and the console is low — the decor may end up too high.
The same goes for the headboard. decorative molding above the bed should be calculated based on the height of the headboard. A standard headboard is 100–120 centimeters. The decor above it is placed at a height of 130–160 centimeters from the floor. If the height of the bed and headboard changes — the entire scheme shifts.
Decorative stucco and furniture facades
If the plan includes decor on furniture (frames on cabinet facades, overlays on a dresser), then decorative elements should be chosen simultaneously with ordering the furniture or immediately after. Facades have specific dimensions, and decor for them must be selected according to these dimensions.
buy decorative moldings for furniture decor, it is better to do it before the final painting of the furniture — then the overlays can be painted together with the facades to achieve a monolithic effect.
Stucco decor and electrical: why it's important not to forget sconces and switches
This is perhaps the most practical and "painful" block for those who have already encountered this problem. A switch that ends up in the middle of a molding frame is a classic case of "first the electrician, then the designer."
Relief Decoration It is often placed near light points: above a sconce, by the mirror in the sconce area, inside the sconce frame, by the headboard next to night lights. And all of this requires that the electrical work has already been thought out — or at least documented in the project — before the stucco installation.
What to check before installing stucco decor near electrical elements:
Switch height. The standard height is 80–90 centimeters from the floor. But if a molding frame is planned at this height, the switch will end up right in the profile. Solution: either move the switch above or below the frame, or incorporate it into the molding layout — fit it into a neutral zone between frames.
Sconce placement. Sconces are installed before or simultaneously with the stucco. If sconces are installed after, you will need to drill into the already painted molding surface, which will ruin the finish.
Center of the wall. Buy Moldings and placing it symmetrically means finding the exact center of the wall in advance and ensuring there is no electrical work there.
Distance from moldings to the switch. The minimum gap is 5–8 centimeters. If the molding comes too close to the switch, it looks untidy.
Symmetry of paired elements. Paired stucco decor (for example, two medallions on either side of a mirror) should be placed symmetrically relative to the center. If sconces or outlets shift this center, the symmetry will have to be broken.
What to do if the electrical work is already done
If switches and sockets are already installed, and you are planning molding for the first time — don't panic. Design frames around the electrical points. A switch in the neutral zone between frames is not a mistake, it's a deliberate decision. Buy Molded Decoration And designing a molding scheme taking into account existing electrical points is a completely feasible task.
When can you buy molding after painting
Honest answer: you can. But with caveats.
Polyurethane Moldings It is glued with construction adhesive — it works even on painted surfaces if the paint is durable and not peeling. Technically, installation after painting is quite acceptable.
When is this justified:
-
A small accent is needed — one medallion, one overlay, a small decorative detail.
-
The wall is strong, the paint adheres well, the surface is smooth.
-
The decor will be painted separately — with a brush, carefully, in the color of the existing wall.
-
There is no complex symmetry or system of frames that would need to be calculated from scratch.
-
Stucco decor is installed as a single piece, without pairing or attachment to moldings.
When this is undesirable:
-
A molding system with multiple frames and precise joints. The joints will need to be puttied over the paint, and during the final painting of the moldings, the boundary between the old wall paint and the new paint on the molding will be visible.
-
Decor near electrical fixtures that cannot be adjusted. The switch is already installed — if it falls in the wrong place, you'll either have to accept it or redo it.
-
A large-scale project with a ceiling cornice, rosettes, and wall frames. In this case, it's better to wait for the next renovation or settle for a less-than-ideal result.
Honest conclusion: stucco after painting — is a compromise. The result will be good, but not perfect. Achieving a built-in, monolithic effect is more difficult.
Buying stucco by renovation stages: sequence table
| Renovation stage | What to do with stucco | What to buy |
|---|---|---|
| Apartment layout | Define accent zones, furniture placement, lighting | Nothing yet — just gathering ideas and measurements |
| Electrical design | Account for sconces, switches, chandelier center | Choose molding pattern, order |
| Wall preparation (plastering, priming) | Calculate frame sizes and perimeters | Moldings made of polyurethane, glue, Relief Decoration |
| Before final painting | Glue moldings, putty joints, prime | Glue, putty, primer |
| Final painting | Paint walls and moldings together | Paint (in required quantity with extra for moldings) |
| Chandelier installation | After painting the ceiling and rosette | ceiling rosettes, Ceiling molding |
| Furniture installation | Check symmetry of decor relative to furniture | Small overlays, Decorative stucco For point accents |
| After renovation | Point additional decor | Small glue-on overlays |
Features of installing polyurethane stucco during renovation
Polyurethane is not plaster. It works differently, and you need to understand this to use it correctly.
Light weight. Polyurethane elements weigh significantly less than plaster counterparts. This means the glue holds securely even without additional dowels or screws. For ceiling elements this is critical: a plaster cornice would require dowel fastening, a polyurethane one stays on glue.
Easy work. Polyurethane moldings and decor are cut with a regular hacksaw or utility knife. A 45° angle is cut with a miter box. This is work without special tools.
Moisture resistance. Polyurethane is not afraid of moisture, does not swell, does not crack with humidity changes. This means it Buy molding can be used even in the bathroom and kitchen — without restrictions.
Paintability. Polyurethane accepts any water-based paint. It paints evenly, without primer for metal or special compounds. Regular surface primer and a finishing water-based paint are sufficient.
Storage. If you bought moldings in advance but installation hasn't started yet — store them horizontally in a dry room. Long profiles should not hang — they may deform under their own weight.
Ready-made purchase scenarios for renovation
Scenario 1. Renovation in a new building from scratch
This is the best case. Walls are bare, electrical work is only planned, furniture hasn't been bought yet. You can incorporate stucco into the project from the very beginning.
What to buy in advance:
-
Moldings made of polyurethane — after planning furniture layout and electrical work.
-
ceiling molding — after choosing the chandelier.
-
decorative molding — after the final decision on accent zones.
-
Glue, primer, putty, paint.
Main link to start: Buy molding and immediately view the entire range — from moldings to ceiling rosettes.
Scenario 2. Cosmetic renovation: refreshing without major intervention
Walls are repainted, ceiling is refreshed, furniture stays. This is a good opportunity to add stucco — if done before the final painting.
What to buy:
-
Moldings made of polyurethane — frames for existing furniture and sconces.
-
decorative molding — accent decor in existing areas.
-
Relief Decoration — above the mirror, at the headboard, in the hallway.
-
Glue, putty, paint matching the wall color.
During cosmetic renovation, furniture may interfere with installation — it needs to be moved. Plan this in advance to avoid doing the renovation in two stages.
Scenario 3. Replacing a chandelier — a reason for ceiling decor
The chandelier is being changed, the ceiling is being repainted. This is the perfect moment for installation ceiling moldings and the rosette.
What to buy:
-
ceiling rosettes — diameter for the new chandelier.
-
ceiling molding — cornice around the perimeter, if there wasn't one.
-
Glue, primer, paint in the color of the ceiling.
Important: first mount and paint the ceiling molding and rosette, then install the chandelier. Not the other way around.
Scenario 4. Wall decor with sconce: spot update
There is a beautiful sconce, but the wall around it is empty. I want to add a frame and decor. The wall is already painted.
What to buy:
-
Moldings made of polyurethane — for the frame around the sconce.
-
Relief Decoration — accent above or below the light fixture.
-
decorative molding — if corner pads are needed inside the frame.
-
Glue, acrylic putty, brush, paint matching the wall color.
When working on an already painted wall, it is important to paint the moldings and joints very carefully with a brush so that the boundary between the old wall paint and the new molding paint is invisible.
What to buy in advance: a complete list for renovation with stucco molding
If you are renovating and want to include stucco molding in the project, here is what you need to consider for purchasing:
-
Moldings made of polyurethane — with a 15% allowance for trimming. Calculate separately: for wall frames and for the ceiling cornice.
-
Decorative stucco — corner pads, central medallions. Quantity according to the frame design.
-
Relief Decoration — accent elements for sconce zones, mirror, headboard, console.
-
Ceiling molding — cornice along the ceiling perimeter. Calculate the room perimeter + 15%.
-
ceiling rosettes — one or several, one for each light fixture.
-
Mounting adhesive — special for polyurethane. Consumption: approximately 1 tube per 5–7 linear meters of molding.
-
Acrylic putty — for filling joints and corners of the molding.
-
Primer — for treating the surface of moldings before painting.
-
Paint — matching the wall color. You need to take an additional amount — for painting the moldings.
About the Company
STAVROS — professional supplier of polyurethane decorative molding for residential and commercial interiors. The STAVROS catalog offers a full range for any stage of renovation: Moldings made of polyurethane for wall frames and cornices, Decorative stucco for accent zones, Relief Decoration for lighting and furniture zones, Ceiling molding и ceiling rosettes for ceiling decoration around the chandelier. STAVROS products are made of European extruded polyurethane — a lightweight, moisture-resistant, durable material that is mounted with adhesive without special tools and can be painted any color. STAVROS works with private customers, designers, and construction teams. If you are currently in the process of renovation — it's time Buy molding correctly and at the right moment.
Frequently asked questions
When is the best time to buy molding during renovation?
The best moment is after the furniture layout, electrical wiring, and lighting are clear, but before the final painting of walls and ceiling. This way, moldings can be glued and painted together with the wall — it creates an effect of built-in architecture.
When to glue moldings: before painting or after?
Before final painting. Glued moldings are puttied at the joints, primed, and painted together with the wall. This removes the visible boundary between the molding and the wall and creates a seamless surface.
Can stucco be glued after renovation?
Technically — yes. Polyurethane glue works on painted surfaces. But joints will be harder to hide, and the boundary between old and new paint will remain noticeable. For point decorative elements, this is acceptable. For a system of frames — a compromise.
When to buy ceiling stucco?
Before installing the chandelier and before final ceiling painting. First, the ceiling rosette and cornice are installed and painted — then the light fixture is installed. This ensures the rosette aligns precisely with the center of the chandelier.
What to buy in advance for stucco?
Moldings made of polyurethane, decorative molding, Relief Decoration, ceiling molding, ceiling rosettes, mounting glue, acrylic putty, and paint. It's better to purchase immediately with a 15% margin for trimming.
Do switches need to be considered when designing moldings?
Definitely. Switches should be placed in neutral zones between frames — not inside molding frames and not flush against decorative elements. The minimum distance from the molding to the switch is 5–8 centimeters.
Can polyurethane molding be used in a bathroom?
Yes. Polyurethane is a moisture-resistant material, not afraid of steam and humidity fluctuations. Buy molding for the bathroom and install it with moisture-resistant adhesive — standard practice.
How to store moldings purchased in advance?
Horizontally, in a dry room. Long profiles should not hang from a support — otherwise they will deform. Storage temperature — room temperature, without sharp fluctuations.