Article Contents:
- Polyurethane Molding for the Entire Home: A Coordinated Design, Not a Collection of Random Details
- The short version: start with three decisions
- Material labels are more important than category names
- Build a trim schedule rather than shopping by appearance alone
- Five real STAVROS profiles to compare
- Small profiles can outperform large ones
- Use actual samples or full-scale templates
- Choose the center before dividing the wall
- Decide between one large panel and a repeating grid
- Understand the difference between a framed wall and wainscoting
- Combine a clear focal panel with quieter side panels
- Make crown molding fit the room, not an abstract rule
- Define the transition between connected rooms
- Baseboards complete the system but have different demands
- Align the medallion with the activity below
- Understand the difference between a medallion and its lighting support
- When a small rosette is a better choice
- Door molding should relate to existing casing
- Compare real onlays instead of generic ornaments
- Give the hardware its own clear space
- Use furniture decoration as an echo, not a second theme
- Living room: formal structure around a focal wall
- Bedroom: one quiet treatment behind the headboard
- Entryway and hallway: repeated trim that withstands daily life
- Dining room: coordinate wall panels with the lighting axis
- Home office and open-plan family room: hierarchy without visual noise
- For modern interiors, let the shadow do the work
- For traditional spaces, preserve a hierarchy
- For eclectic rooms, repeat a quiet detail
- Example: three rectangular wall frames
- Crown, baseboard, and medallions use different quantities
- Create a final purchase worksheet
- Dry-fit, mark, and verify the profile orientation
- Select adhesives from documented compatibility
- Finish joints deliberately
- Match sheen as well as color
- Treat metallic accents as a selective detail
- Four mistakes to prevent before checkout
- Is polyurethane molding the same as urethane trim?
- Can I create wainscoting with polyurethane picture-frame molding?
- How much molding do I need for three wall panels?
- Can I put polyurethane trim on kitchen cabinets?
- Are crown molding and baseboards always polyurethane?
- Can I install a ceiling medallion around an existing chandelier?
- Should the trim always be white?
- What is the easiest whole-home starting project?
- How do I know if a STAVROS product fits an American room?

Polyurethane Molding for the Entire Home: A Coordinated Design, Not a Collection of Random Details
A home can have attractive furniture, good lighting, and freshly painted walls yet still feel visually disconnected. Often the missing ingredient is not another decorative object. It is a consistent approach to the architectural edges: where the wall meets the ceiling, how a doorway is framed, where wall panels begin and end, and how a ceiling light relates to the room below. Thoughtfully selected polyurethane molding and decorative trim can connect those areas without turning every surface into an ornament.
For U.S. homeowners, the vocabulary matters. Search for wall molding or picture-frame molding when planning rectangular wall panels; crown molding when considering the wall-to-ceiling transition; ceiling medallions around a chandelier; and polyurethane appliques or onlays for ornamental accents on doors and cabinets. Some American catalogs use urethane molding as a related shopping term. These names describe different jobs, and not every product sold under the broad heading of architectural trim is made of polyurethane. Always verify each item's material, dimensions, finish, and installation requirements.
The original STAVROS guide treats walls, ceilings, doors, and furniture as one interior composition. This U.S. adaptation turns that principle into an order-ready method: choose the room's most important lines, select real product profiles, draw dimensions in inches and feet, calculate cuts, coordinate finishes, and check shipping arrangements before purchasing. Start by exploring the STAVROS polyurethane architectural decor catalog, then build your selection from individual product specifications rather than assuming that every visually compatible component has identical properties.




The short version: start with three decisions
First, identify the focal point. In a living room it may be a fireplace or sofa; in a dining room, the table and pendant; in a bedroom, the headboard. Second, decide which element will establish the architectural rhythm: a ceiling border, wall frames, or a series of consistent doorway details. Third, select one family of profiles and a restrained palette. Individual ornaments make more sense after those three decisions. If the room already has elaborate door casing, for example, simpler new wall molding may look more convincing than an equally elaborate second pattern.
A whole-home approach does not require installing trim everywhere. It means that what you install looks related. A narrow wall-frame profile in the entry, similar framing in the living room, and a modest ceiling accent can feel cohesive even when the bedrooms remain almost undecorated. Consistency of line, proportion, and finish usually matters more than the total number of pieces.
Наша фабрика также производит:




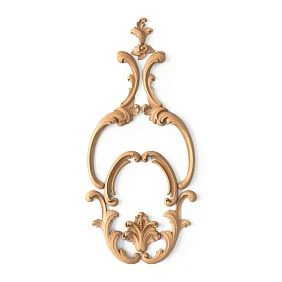
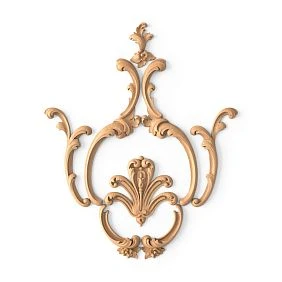
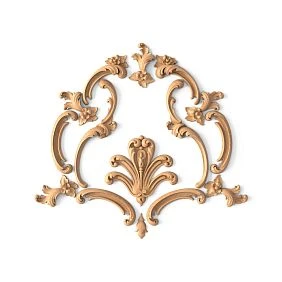
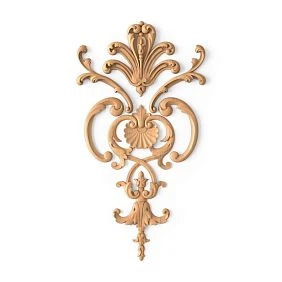
Смотреть весь Каталог продукции
What Belongs in a Whole-Home Molding Plan?
Architectural decor is best understood by function. Long profiles provide structure. Ceiling pieces mark the upper plane. Applied ornaments create isolated focal points. Doors and cabinetry benefit from their own scale of decoration. The categories overlap visually, but they are not interchangeable during design or installation.
| Component | Typical U.S. design purpose | What must be verified before ordering |
|---|---|---|
| Polyurethane wall molding | Picture-frame panels, accent walls, cabinetry outlines | Face width, projection, stock length, miter pattern |
| Crown molding or ceiling cornice | Transition between wall and ceiling | Actual material, installed projection, spring angle, corners |
| Baseboard | Lower wall boundary and transition to flooring | Material, depth at door casing, floor clearance, durability |
| Ceiling medallion or rosette | Decorative focus around a light or on a ceiling | Overall footprint, center clearance, component list, electrical access |
| Polyurethane onlay or applique | Door panels, furniture fronts, wall ornaments | Orientation, mounting surface, relief depth, hardware clearance |
| Coordinated wall or ceiling set | A planned arrangement of multiple elements | Each included part, individual materials, final dimensions |
The distinction between decorative molding and functional building trim is especially important. A small polyurethane strip can outline a beautiful wall frame but may not be suitable for use as impact-resistant baseboard in a busy hallway. A sculptural bracket may look like a structural corbel but should not support a shelf unless its product documentation specifically establishes that use. A decorative ceiling piece does not replace the electrical box or fixture support. Choose the actual component for its documented role.
Получить консультацию
Material labels are more important than category names
STAVROS sells individual polyurethane moldings, ornamental onlays, and ceiling compositions, but its broader architectural catalog also includes primed MDF and polystyrene. For instance, the site's crown-molding category features polystyrene profiles, and some matching wall-molding profiles are offered in both polyurethane and MDF. This does not make mixed-material interiors a mistake. It means your plan should name the material of every item rather than calling the entire order "polyurethane" by default.
That specificity affects the primer, adhesive, cutting method, moisture suitability, and finishing schedule. It also protects the design intent: two similarly named molding profiles may have different lengths or cross-sections. Treat a coordinated appearance as the goal while keeping the technical specification for each piece distinct.
Build a trim schedule rather than shopping by appearance alone
Create a simple schedule with columns for room, location, product code, material, profile width, total run, stock length, finish, and quantity. Mark undecided items as provisional. If you are working with a contractor, this schedule can become the starting point for a cut list and installation drawing. If you are doing the work yourself, it prevents the common mistake of purchasing enough linear footage but not enough usable long sections.
A specification that says "small white molding" leaves too much to interpretation. One that says "MLDPU-004, polyurethane, approximately 0.59-inch face, 102.36-inch supplied length, paint to match adjacent wall" can be checked against the product page and the design drawing. Exact dimensions should remain linked to the chosen SKU, not transferred casually between products.
Choose Polyurethane Wall Trim by Profile, Not Just by Style
The easiest way to unify several rooms is to repeat a recognizable molding profile or a deliberate family of related profiles. Contemporary interiors may call for a quiet curved contour. Transitional spaces often benefit from a shaped profile with moderate relief. Classical interiors can support more pronounced steps or ornament, provided the wall has enough breathing room.
Browse polyurethane wall moldings and profiles and compare their full product drawings. The contour viewed from the side is as important as the front photograph: the projection determines the shadow it creates, whether it catches on furniture, and how it meets existing baseboards or casings.
Five real STAVROS profiles to compare
The following examples are documented polyurethane profiles in the STAVROS catalog. All five product lines are supplied at approximately 102.36 inches (8.53 feet), corresponding to 2,600 millimeters. The inch dimensions are rounded conversions, not nominal American lumber dimensions.
| Profile | Approximate face × projection | Best design comparison |
|---|---|---|
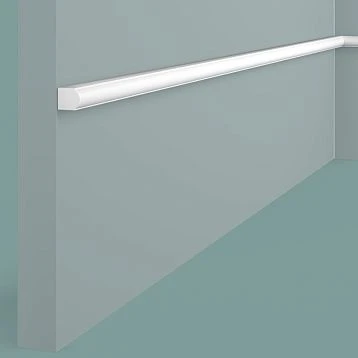
| MLDPU-001 | 0.39 × 0.24 in | Delicate bead and small furniture or wall outlines |
| MLDPU-004 | 0.59 × 0.31 in | Subtle but clearer decorative borders |
| MLDPU-002 | 0.87 × 0.43 in | A more visible shaped frame profile |
| MLDPU-003 | 1.38 × 0.47 in | Broader, more architectural wall frames |
| MLDPU-027 | 0.55 × 0.35 in or 0.79 × 0.47 in | Smooth half-round line in two sizes |
These are not five compulsory components for one house. They are alternatives whose appearance can help you choose a consistent visual weight. If you want a fine outline near a cabinet front, examine MLDPU-001. If the main living-room feature wall needs a more substantial border, compare MLDPU-002 and MLDPU-003 at full scale. The product page, not the shorthand table, remains the source of truth for exact current specifications.
Small profiles can outperform large ones
An 8-foot ceiling and a narrow passage usually benefit from less visual projection. Thin trim creates a subtle edge that can be painted in the same color as the wall, letting the light reveal the detail. A pronounced profile may be entirely appropriate above a large sofa but feel crowded beside a narrow door casing. Instead of choosing one profile for every purpose, choose one visual language: similarly rounded edges, compatible relief depth, and consistent finish.
When two profile widths are used in the same room, give them different jobs. The larger one can define the primary panel or architectural outline; the smaller can serve as an inset line or secondary detail. Avoid placing multiple thick frames almost against each other. The remaining flat wall is not wasted space; it is what makes the relief legible.
Use actual samples or full-scale templates
A 0.59-inch profile can look surprisingly prominent when viewed from a few feet away, especially under side lighting. Print a dimensionally accurate section, hold a short sample at the installation height, or tape a full-size paper outline to the wall. Photograph it from the doorway and from the main seating position. What looks balanced while standing inches from the wall may disappear across an open-plan room, or dominate it.
For historic-style interiors, repeat the shape of existing trim without automatically trying to match it exactly. An old wood door casing, a modern replacement window, and a new decorative polyurethane frame can coexist when their proportions are ordered. Exact imitation is not always possible or necessary.
Picture-Frame Molding: The Backbone of Decorative Wall Panels
Picture-frame molding is one of the most flexible ways to introduce architectural rhythm into a U.S. living room, bedroom, dining room, or hallway. It creates rectangles directly on the wall; the painted wall surface inside the molding remains visible. This differs from installing a solid wall panel, and it differs from protective wainscoting. The primary function of a picture-frame composition is visual structure.
Choose the center before dividing the wall
On a sofa wall, use the sofa or the room's architectural focal point to set the central axis. Measure the usable space between door casing, window trim, corners, switches, wall sconces, and other interruptions. Sketch the outer dimensions of each frame and record the spacing between frames. A balanced three-panel composition can be more successful than five narrow frames squeezed around an outlet.
In a dining room, the centerline may follow a buffet or the dining table rather than the exact midpoint between wall corners. In a bedroom, the headboard can set the width of the middle panel. These choices make the room feel intentional even when windows and doors are not perfectly symmetrical.
Decide between one large panel and a repeating grid
A single broad rectangle behind a headboard makes a calm backdrop, especially with bedding and art supplying the details. Multiple tall rectangles give a formal rhythm to a living-room wall. A grid of smaller rectangles can work in a stair hall or long corridor, but every added miter and gap increases measurement and installation complexity. Before drawing a grid, check how it will turn corners, meet stairs, and respond to the height of neighboring doors.
The STAVROS wall-molding and decorative wall kits offer a useful reference for how different compositions organize a surface. Compare the arrangement's overall dimensions and component materials. A style photo is inspiration; your actual wall measurements determine whether the composition fits.
Understand the difference between a framed wall and wainscoting
American homeowners sometimes use wainscoting as a broad search term for decorative lower-wall treatment. In traditional construction, wainscoting can include paneling, a chair rail, baseboard, and other components with different physical roles. Rectangular moldings attached to a painted lower wall can reproduce part of that appearance without creating solid panels or adding impact protection. Be accurate when describing the finished project, particularly if you expect it to protect drywall in an entryway.
For a lower-wall application, establish the upper rail height first, then decide whether a row of frames below it improves the room. Evaluate thermostat positions, handrails, furniture, and chair backs. The cleanest treatment may be a single consistent band with restrained frames rather than several decorative layers.
Combine a clear focal panel with quieter side panels
A feature wall often works best when the center is slightly larger or has more visual space around it. If the center panel will contain artwork, a mirror, or a sconce, leave room for the object and its mounting hardware. Do not assume the decorative trim can carry the load of the object. When the artwork changes, the wall frame should still make compositional sense.
Colors can change the visual effect dramatically. Trim painted in the same color as the wall creates relief through shadow; a contrasting color emphasizes the rectangular geometry. For a modern U.S. interior, a quiet monochromatic treatment is often easier to coordinate across rooms than stark white outlines on every wall.
Crown Molding and the Wall-to-Ceiling Transition
Crown molding is familiar in American residential design, but the words can refer to several materials and installation methods. Polyurethane, MDF, wood, and polystyrene crown profiles are not interchangeable simply because they occupy the same position. When selecting from STAVROS, check the individual product material instead of assuming that every cornice or crown molding belongs to the polyurethane family. The site's crown molding category includes polystyrene products; that can be a valid choice, but it should be specified accurately.
Make crown molding fit the room, not an abstract rule
An 8-foot bedroom, a 9-foot suburban living room, and a double-height foyer ask for different degrees of relief. Look at the installed projection of the crown profile and the amount of uninterrupted ceiling below lights, sprinklers, diffusers, or cabinetry. An oversized profile can make a low ceiling feel compressed; an extremely narrow profile can disappear in a large formal space. These are design judgments rather than universal size prescriptions.
A practical starting method is to photograph the room, draw a realistic profile at the ceiling line, and examine how it meets the tops of door and window casings. Check whether walls are level and whether the ceiling line varies. Molding highlights deviations as readily as it hides them; unusual corners may require a custom fitting plan instead of a routine 45-degree cut.
Define the transition between connected rooms
In an open-plan home, the crown line can continue from the kitchen into the dining and living area, or it can intentionally stop where the architecture changes. A continuous profile ties spaces together, but abrupt terminations need an architectural reason. If the kitchen has ceiling-height cabinets, check whether the crown can meet the cabinet trim without an awkward offset. A change of ceiling height may justify a new profile or a clean stop detail.
For rooms where a subtle ceiling edge is desired, use one clean line rather than stacking several ornate strips. If the walls already feature pronounced picture-frame panels, a restrained upper transition often provides better hierarchy. The goal is not to spend equally on every surface; it is to decide which part of the room deserves emphasis.
Baseboards complete the system but have different demands
A baseboard is handled, kicked, cleaned, and occasionally struck by furniture or vacuum equipment. That is a different use environment from a decorative wall frame located above a sofa. Select baseboards for their documented durability, finish, and clearances. Keep baseboard thickness compatible with door casing, and confirm whether a shoe molding or other floor-transition detail will be required. Avoid using a thin decorative strip as a substitute for functional baseboard unless the manufacturer supports that use.
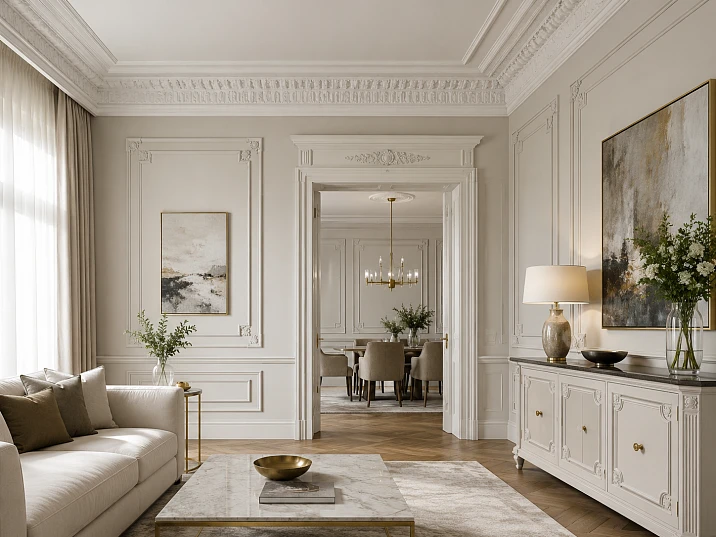
A coordinated wall should have a clear vertical order: baseboard at the floor, optional lower-wall panel treatment, uninterrupted wall where appropriate, and a ceiling transition at the top. When those boundaries agree in proportion, the entire room appears more deliberate.
Ceiling Medallions: Give the Light Fixture an Architectural Setting
In American interior design, a ceiling medallion usually means a decorative element or composition associated with a chandelier or pendant light. A ceiling rosette can refer to a smaller decorative motif, and the terms overlap in catalogs. The important questions are not the label but the actual diameter or footprint, the center arrangement, and whether the product is a single piece or a multi-part composition.
STAVROS has a category of polyurethane ceiling medallions that includes substantial ornamental compositions. For example, CRPU-070 has a listed overall footprint of approximately 30.12 by 30.12 inches. That is a large decorative arrangement, not a tiny plastic ring to conceal an electrical box. It would have a very different presence in an 8-by-10-foot bedroom than in a spacious dining room. Examine the entire layout, not just the outer diameter.
Align the medallion with the activity below
A chandelier over a dining table may be centered on the table rather than centered on the full ceiling. Over a living-room seating group, a composition can follow the seating layout. In a formal foyer, the architectural center of the entrance may be the most natural reference. Draw the furniture and light locations before selecting a medallion. If a room has been remodeled, the present electrical box may not be in the visually correct location; that issue should be resolved by an appropriate qualified installer, not disguised with decorative trim.
Consider scale from two viewpoints: from directly below and from the room's entrance. A relief that seems appropriately substantial close up can look overpowering from a doorway if it crowds recessed lighting, beams, or air registers. Conversely, a quiet ornament can be lost beside a very ornate chandelier. The goal is a relationship between elements, not a fixed percentage that works in every home.
Understand the difference between a medallion and its lighting support
A decorative medallion is not an approved substitute for a fixture-rated electrical box, ceiling structure, or the support system required by a hanging light. Do not attach a chandelier to a molded ornament. Keep access to electrical connections and required service areas, and coordinate any work involving wiring with an appropriately qualified electrician. If the selected medallion has a center opening, confirm how it fits the canopy; if it is composed of separate elements, verify the clearance around the entire lighting assembly.
Some decorative compositions use multiple individual pieces installed at measured positions. Before you order, check the set composition and decide whether you will need a full-scale positioning template. Marking the ceiling while working overhead is less forgiving than drawing a wall frame at eye level, so installation sequencing matters.
When a small rosette is a better choice
A restrained modern room may need only a minor repeating ceiling accent—or none at all. The STAVROS polyurethane rosette collection can be explored for ornamental details whose scale differs from large ceiling compositions. Confirm the actual item size and intended application before using it with a light fixture. In a bedroom with multiple recessed lights, adding a traditional medallion around just one point may create an unbalanced visual focus. Sometimes the crown line is enough.
The coordinated ceiling decor category also helps illustrate how a ceiling can be organized around an ornamental center. A multi-piece arrangement requires its own component and mounting plan, including clarity about the material of every piece.
Polyurethane Appliques for Doors, Cabinet Fronts, and Built-Ins
Interior doors and furniture offer smaller, closer-viewed canvases for decoration. A modest polyurethane onlay can make a plain cabinet front feel more tailored, but the measuring rules differ from those for a large wall. Doors need to open freely. Drawers need handles and hand clearance. Built-ins may have concealed hinges or touch-latch mechanisms that an applied ornament must not obstruct.
Door molding should relate to existing casing
Start by separating three possible treatments: trim around the doorway, a decorative frame applied to the flat door leaf, and a central ornament placed inside that frame. Each can be effective on its own. Installing all three may produce an overworked result, especially in a narrow hall with multiple doors. If the door already has deep routed panels, adding raised ornament can compete with the original geometry.
For a flat painted door, one or two measured rectangular frames can reference the style of nearby wall panels. Before cutting, inspect the surface material and confirm that adhesive and paint will bond to it. Allow room for handles, locks, hinges, edge clearances, and any weatherstripping. The decorative elements should never interfere with a fire-rated door's certification, required markings, operation, or hardware. For rated assemblies, obtain approval from the responsible authority or manufacturer before modifying the door.
Compare real onlays instead of generic ornaments
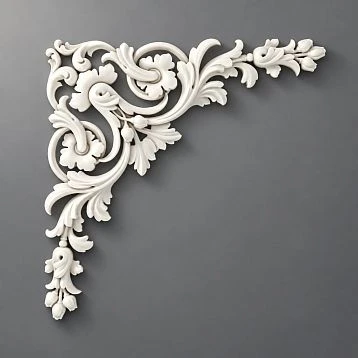
The STAVROS polyurethane appliques and onlays category contains many separate components. They vary dramatically in scale: some are small symmetrical flourishes, while others cover an area comparable to a large cabinet panel. For a narrow vertical detail, NPU-501 is listed at approximately 2.28 by 11.81 inches with 0.43-inch relief. That makes it a much more plausible starting point for a narrow furniture zone than a broad decorative ensemble.
For a smaller, more compact accent, NPU-002 is listed at approximately 5.51 by 3.03 inches with 0.47-inch depth. A larger openwork geometric option, RSHPU-007, measures approximately 17.09 by 41.54 inches. These examples demonstrate why the phrase "decorative polyurethane molding" alone is not enough information for an order. Their applications, proportions, and placement requirements differ substantially.
Give the hardware its own clear space
On cabinet doors, leave an adequate zone for handles and fingers. Check hinge swing and the gap between adjacent fronts. A decorative strip close to a drawer edge may catch clothing or make the pull uncomfortable. When using matching onlays on a pair of doors, identify each centerline and any left/right variants in the product family. A mirrored design might require two distinct SKUs instead of rotating one asymmetrical part.
The same caution applies to a recessed niche or fireplace surround. Polyurethane is decorative; do not place it in heat-exposed locations merely because a product photograph shows a similar interior. Respect the listed temperature and clearance requirements of the fireplace or appliance and use only components approved for that environment. Where there is uncertainty, keep the ornament outside the relevant clearance zone.
Use furniture decoration as an echo, not a second theme
If a home has gentle rounded wall-frame molding, a tiny floral accent on a dresser may provide a complementary note. There is no need to reproduce the same large ornament on every cabinet front. The connection could be as subtle as a shared painted color or a common symmetrical axis. For example, one decorative motif on a hallway console can relate to a ceiling medallion through repeated curves even when their sizes differ radically.
Five U.S. Room Plans That Keep the Design Coherent
A whole-home specification becomes useful when it responds to different rooms rather than blindly repeating the same trim treatment. The following scenarios are planning examples, not claims that a particular product kit automatically fits the dimensions shown. Make every selection conditional on the room's exact geometry and the selected SKU's real measurements.
Living room: formal structure around a focal wall
Start with the wall facing the primary entrance. If a sofa anchors that wall, sketch either one wide rectangular frame or three panels organized around the sofa's centerline. Use a profile with enough face width to read from the seating distance. Then decide whether a restrained ceiling perimeter line will help connect the room. You may not need an ornamental ceiling centerpiece if a large light fixture already dominates the view.
For a 9-foot ceiling, avoid treating the entire upper wall as an empty invitation for ornament. Leave deliberate breathing space above the frames and below the crown line. If a fireplace or television interrupts the wall, create a composition that respects its outline rather than building equal frames behind it. A layout that ignores the placement of electronics, ventilation, or future artwork can create expensive rework.
Use the most prominent molding on the feature wall and reduce it elsewhere. The door casing may be sufficient architectural detail on side walls. A unified paint finish can connect these surfaces even when they have different amounts of relief. For American transitional and modern-classic living rooms, painted trim that matches the wall can create a more current result than a uniform white-and-cream contrast.
Bedroom: one quiet treatment behind the headboard
The headboard wall is usually the strongest candidate for decorative panels. A single large frame may be more soothing than a complex grid. If two narrow bedside tables flank the bed, use them as spacing references without allowing the wall decoration to collide with lamps or sconces. Check what the arrangement will look like once the pillows are on the bed; the visible portion above the headboard may be much smaller than the drawing suggests.
Consider using a delicate profile and a matching wall color. Here, the shadow cast by the molding becomes the design, and the furniture remains dominant. There is no need to repeat the same panel layout on all four walls. For a compact 8-foot-ceiling bedroom, keep upper trim subtle and avoid crowding the window treatment or the closet door.
If a chandelier is the focal point, a compatible medallion may be appropriate, but a ceiling with several recessed lights may be better left simple. Bedroom decoration works when it supports rest and order, not when it reproduces every formal detail from a grand foyer.
Entryway and hallway: repeated trim that withstands daily life
An entry creates a first impression, but it is also where coats, bags, umbrellas, and people move close to the walls. Shallow decorative profiles are generally easier to live with than deep ornamental projections in a narrow route. Check actual corridor width and door swing before deciding where a frame begins. Light switches, thermostats, and access panels must stay usable.
A practical scheme might use one picture-frame pattern on the longest uninterrupted wall, consistent casing around the visible doors, and a baseboard chosen for its actual functional demands. If the hallway opens directly into the living room, carry over the profile character or paint finish, not necessarily the exact panel dimensions. Short hallway walls should not be forced into the same module width as a broad living-room feature wall.
For stairs, measure from the sloped baseboard or stringer as appropriate; frame tops and bottoms may follow different relationships. An otherwise elegant level panel grid can become visually awkward beside a rising stair. Make a scaled elevation before choosing an ornate design.
Dining room: coordinate wall panels with the lighting axis
A dining room often has three strong objects: the table, the light fixture, and a buffet or sideboard. Decide which two should align. A ceiling medallion can reinforce the dining-table center, while wall frames can organize a sideboard on the opposite wall. If the room has a large window, use that architectural feature as a natural break rather than crowding the sides with undersized frames.
A lower-wall composition can create a traditional dining-room mood, but confirm the height and projection relative to chair backs. A protruding profile that catches chairs is a poor trade for a historically inspired look. Monochromatic molding can keep the room elegant without competing with table settings or upholstery.
If the kitchen and dining room share a ceiling, decide how the crown line transitions between cabinetry and the open dining zone. A consistent upper boundary may bring cohesion; a deliberate stop at a beam or structural change can be equally successful. Unexplained changes in profile height tend to look like patchwork.
Home office and open-plan family room: hierarchy without visual noise
A home office benefits from a predictable background for video calls. Frame the wall behind the desk without running molding directly through the expected camera composition or covering outlets used by monitors and lighting. Dark monochromatic paint can emphasize relief through subtle highlights. One broad rectangle or a modest set of panels often looks more focused than a highly ornate pattern repeated around every shelf.
In an open-plan family room, treat the dining, kitchen, and seating zones as related but not identical. A quiet molding scheme around the seating wall can mark that zone without installing a physical partition. Carry the same finish or related profile through nearby architectural details. Avoid attaching purely decorative onlays to working kitchen drawers or backsplash areas without checking cleaning, heat, and moisture conditions.
An open-plan layout is where a room-by-room purchasing schedule becomes especially valuable. You can see which material belongs on which surface, where continuous lines should meet, and how a finish chosen for one space will look under different light in the next.
Choose a Style That Fits the Architecture You Already Have
Decorative trim can suggest a period, but it cannot transform the underlying proportions of a home by itself. A new construction townhome, a Craftsman bungalow, a midcentury ranch, and a traditional two-story house all have different natural rhythms. Selecting profiles with that context in mind is usually more convincing than copying one heavily decorated reference photograph.
| Interior direction | Product character to explore | Common design mistake |
|---|---|---|
| Modern or minimalist | Simple half-round or subtle linear profiles | Too many small frames and accent ornaments |
| Transitional | One shaped profile, selective feature walls | Mixing unrelated face widths in adjacent rooms |
| Neoclassical | Symmetrical frames, restrained medallions | Overcrowding doors, ceilings, and walls at once |
| Traditional | Layered boundaries and controlled ornament | Choosing an oversized profile for a low ceiling |
| Art Deco-inspired | Strong axes, geometric panels, selective contrast | Repeating metallic accents without structural logic |
| Eclectic | Neutral framework with one expressive focal point | Treating every object and surface as an equal accent |
For modern interiors, let the shadow do the work
Flat-front cabinets, clean door casings, and contemporary furniture already set a restrained tone. A smooth rounded profile such as MLDPU-027 may be enough to introduce relief. Painting the molding in the wall color reduces graphic contrast while preserving the architectural line. If the room has large windows, observe how side lighting changes the appearance through the day. Deep ornament near a strong light source can produce unexpectedly busy shadows.
For traditional spaces, preserve a hierarchy
A traditional composition may include baseboards, wall frames, crown trim, a chandelier medallion, and a modest ornament above a doorway. But these elements should have distinct visual ranks. The ceiling centerpiece might be dominant, wall profiles secondary, and door accents minor. When every detail is equally large and ornate, the room loses its center.
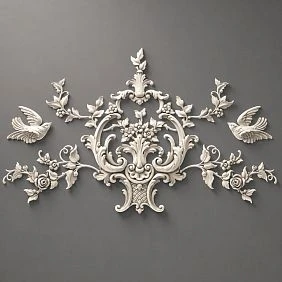
An expressive product such as the CPU-047 polyurethane decorative composition belongs to a different scale than narrow panel molding. Its documented overall size is approximately 27.36 by 16.54 inches. Consider it only where a broad accent makes architectural sense, and confirm the exact set components and installation conditions. The existence of a decorative composition does not mean it should be placed above every door.
For eclectic rooms, repeat a quiet detail
Rooms containing different periods of furniture can still have a unified architectural framework. Choose a simple wall molding and one paint finish, and let the furnishings provide visual variety. A classical mirror, a modern sofa, and vintage wooden furniture do not all need their own ornamental border. The trim's purpose is to help them coexist rather than compete.
How to Measure and Order Molding in Feet and Inches
Calculating an order requires two different measurements: the length of the finished design and the number of stock pieces from which that design can actually be cut. Confusing them is one of the easiest ways to run short of molding. Your drawings should show the reference edge for every measurement. Is a 30-inch frame measured across its outside edge, its inside opening, or the centerline of the profile? All three describe different shapes once the molding has width.
Example: three rectangular wall frames
Suppose you plan three decorative rectangles, each 30 inches wide and 54 inches tall, with the dimensions measured along the intended cutting reference. The nominal perimeter of one frame is 2 × (30 + 54) = 168 inches, or 14 linear feet. Three frames therefore contain 504 linear inches, equal to 42 linear feet of finished trim before cutting allowances. The design requires six 54-inch pieces and six 30-inch pieces.
Now compare that with a STAVROS polyurethane profile supplied in 102.36-inch lengths. Dividing 504 by 102.36 suggests that five stock pieces contain enough total material. But five lengths cannot supply six separate 54-inch sections because two 54-inch sections cannot fit into one 102.36-inch length. In this example, six stock lengths are the practical minimum, with one 54-inch and one 30-inch section coming from each length before accounting for the saw kerf and the precise miter references. That is why a cut schedule matters more than an undifferentiated waste percentage.
| Calculation | Result |
|---|---|
| One rectangle, 30 × 54 in | 168 linear inches / 14 linear feet |
| Three rectangles | 504 linear inches / 42 linear feet |
| Required straight sections | Six at 54 in, six at 30 in |
| Reference molding stock length | 102.36 in / about 8.53 ft |
| Minimum stock pieces for this cut arrangement | 6 lengths, subject to final cutting method |
These figures are an illustration, not a substitute for a measured site drawing. Actual miter dimensions depend on where the profile is measured, joint geometry, blade kerf, usable stock ends, and any pattern matching. A patterned profile may require more offcut than a plain rounded strip. If your design has several frames of different sizes, optimizing the cuts across the entire order may save material.
Crown, baseboard, and medallions use different quantities
For straight perimeter trim, add the wall lengths and subtract only openings or interruptions that genuinely do not receive the profile. A 12-by-15-foot rectangular room has a 54-foot nominal perimeter. That does not automatically tell you how many crown pieces to buy, because the stock length, corner cutting, splice locations, and unusable offcuts still matter. Long uninterrupted walls may require carefully planned joints, particularly when the product comes in a length that differs from typical U.S. stock trim.
A ceiling medallion is usually ordered by composition or piece count, not by linear feet. Read its product details to learn whether it is one molded element or a set of individual components. Likewise, count onlays and decorative corner pieces as units. A door arrangement can have a linear molding quantity plus two mirrored accent pieces; separating those quantities avoids a confusing purchase order.
Create a final purchase worksheet
Before you place the order, record the room and installation position, product code, material, finish, required cuts, number of stock lengths, number of decorative pieces, and the destination. Add a separate line for adhesive, suitable joint treatment, primer or paint where needed, and protected packaging. Ask your installer to verify the schedule before purchase. Ordering a small margin of spare material can help, but the allowance should follow the actual cut plan instead of replacing it.
Installation: What to Check Before You Glue or Paint
Good decorative molding installation starts with the receiving surface, not the adhesive tube. Inspect whether the wall is dry, stable, and reasonably flat. Loose paint, failing wallpaper, dusty plaster, or a flexible substrate can defeat an otherwise careful installation. Where there are existing coatings, follow the adhesive manufacturer's surface preparation guidance and the molding manufacturer's installation instructions. Do not assume that every product can be fixed directly over wallpaper.
Dry-fit, mark, and verify the profile orientation
Lay out the wall or ceiling design at full scale before applying adhesive. For wall frames, mark the centers, outside boundaries, and an agreed reference edge for the cuts. For a medallion made of separate parts, establish the fixture axis and check the spacing of every component. Keep product codes visible while working so similarly shaped pieces are not confused.
Use a suitable cutting method for the specific product. A miter saw or a compatible fine-tooth saw may be appropriate for some profiles, but do not assume that every polyurethane onlay cuts like a straight molding strip. Test the orientation and joint on offcuts. Older walls rarely form ideal right angles, and an accurate-looking 45-degree drawing can still produce gaps when the actual corner is out of square.
Select adhesives from documented compatibility
Choose an adhesive that is approved for the molding material, its supplied surface, and the substrate. A water-based wall finish, primed drywall, existing painted furniture, and a mixed-material ceiling composition can require different preparation. The separate STAVROS guide on adhesive selection for polyurethane molding provides additional context; the directions printed for your selected adhesive and product take priority.
Do not attempt to fix large decorative elements to an unsound surface merely by using more glue. Confirm whether the selected component requires supplementary mechanical fixing and whether the substrate can accept it. For ceiling elements, use the precautions appropriate to overhead work, and keep decorative fixing separate from electrical or load-bearing support.
Finish joints deliberately
A beautifully designed wall frame can look inexpensive if its corners show obvious gaps. Fit pieces carefully, remove squeeze-out according to adhesive directions, allow the specified cure time, then prepare the joints with a compatible filler or sealant where appropriate. Sand only where the material and finish instructions permit. Avoid relying on thick beads of caulk to correct a bad cut: they can create a rounded, inconsistent corner profile after painting.
For a more detailed sequence, see the STAVROS polyurethane molding installation guide. Test an inconspicuous joint before finishing an entire wall, particularly when the profile has intricate relief that could trap filler or paint.
Painting Polyurethane Trim for a Unified U.S. Interior
The finish is often what makes separate components read as one architectural system. A monochromatic treatment can make wall panels, decorative onlays, and existing trim feel integrated even when their relief differs. A deliberate contrasting finish, on the other hand, emphasizes geometry and can be ideal for a formal dining room or an Art Deco-inspired feature wall. Neither strategy compensates for inaccurate proportions.
Match sheen as well as color
Matte and low-sheen finishes tend to emphasize shape through natural shadows; higher sheens reflect light and can make small irregularities more apparent. If wall frames are to match the wall, check the paint under both daylight and the lighting normally used at night. Two surfaces can look the same by color code and still appear different because of sheen, substrate texture, or application method.
Whether a product arrives primed or unfinished, confirm its coating requirements before painting. Clean the piece according to the manufacturer's guidance, apply a compatible primer if required, and test the selected topcoat on a sample or offcut. Different materials in a coordinated kit may need different preparation even if the final color is identical. For a dedicated discussion, consult painting polyurethane molding: preparation and application.
Treat metallic accents as a selective detail
A restrained touch of bronze or soft gold on a central ornament can connect a traditional room with its lighting hardware. Applying metallic paint to every edge and rosette usually weakens the sense of hierarchy. Choose one focal ornament or a limited repeat, then let the rest of the trim act as a quiet framework. Confirm finish compatibility with the product surface and test the metallic effect under the room's actual light.
Buying STAVROS Polyurethane Decor for a U.S. Project
A polished interior begins with a precise order. For a homeowner, designer, or renovation contractor in the United States, the most useful first step is to select exact SKUs and verify their real material and dimensions. STAVROS product pages display dimensions in inches, but the underlying sizes often originate in millimeters. For very close-fitting elements, retain the original metric specification alongside the rounded conversion.
Begin with the architectural decor catalog and shortlist the categories that serve your actual plan. The wall molding profile is likely to be your most repeated item; decorative onlays and ceiling pieces should follow the room's hierarchy. Before ordering, verify product availability, stock lengths, whether pieces are sold individually or as sets, packaging, payment terms, and whether delivery is available to your specific U.S. address. A U.S.-oriented website, dollar pricing, or inch display does not itself establish a U.S. warehouse or a guaranteed delivery service.
Review the published shipping and payment information and contact STAVROS about your project destination. Provide the selected SKU list and quantities rather than asking whether the company can supply "some molding." For a contractor schedule, request confirmation of the relevant lead time before committing to an installation date. Do not assume a shipping time, customs cost, local tax, return arrangement, or job-site delivery service unless confirmed for the proposed order.
Four mistakes to prevent before checkout
The first is ordering by a product photograph without checking the side projection. The second is treating MDF, polystyrene, and polyurethane as identical because a catalog page displays them next to one another. The third is calculating only total linear footage without making the cut list. The fourth is purchasing decorative components before measuring electrical, hardware, and door clearances. A simple measured sketch and documented product schedule can prevent all four.
Frequently Asked Questions About Whole-Home Polyurethane Molding
Is polyurethane molding the same as urethane trim?
In American shopping terminology, the words are often used in related ways. The practical question is whether the selected product's material specification states polyurethane and whether its dimensions, finish, and intended application suit the project. Do not substitute a different product based only on a similar marketing name.
Can I create wainscoting with polyurethane picture-frame molding?
You can create a decorative lower-wall frame treatment that resembles some traditional wainscoting styles. It is not automatically the same as protective or solid-panel wainscoting. Decide whether your goal is appearance, surface protection, or both, then select materials designed for those functions.
How much molding do I need for three wall panels?
Calculate the perimeter of each planned frame using a consistent dimension reference, add the frames, and convert the result into a cut list. Three 30-by-54-inch frames use a nominal 42 linear feet, but stock-piece count depends on the individual 30- and 54-inch cuts and the supplied molding length. For 102.36-inch stock pieces in the example above, six pieces are required before a final installer review.
Can I put polyurethane trim on kitchen cabinets?
Some polyurethane decorative moldings and onlays are appropriate for furniture and cabinet fronts, depending on the selected product and surface preparation. Check handle and hinge clearances, drawer operation, cleaning exposure, and the compatibility of adhesive and paint with the existing cabinet finish. Do not assume that every wall profile or ornamental element is suitable for every cabinet.
Are crown molding and baseboards always polyurethane?
No. These are location and function terms rather than material guarantees. STAVROS offers decorative lines that include polyurethane, MDF, and polystyrene products. Check the material field on each specific crown molding or baseboard product page before specifying it for the project.
Can I install a ceiling medallion around an existing chandelier?
Possibly, depending on the size and configuration of the decorative piece, the fixture canopy, center clearance, and access requirements. Some medallions are multi-part compositions rather than split rings. The chandelier must retain its proper independent support; consult a qualified electrician for fixture-related work.
Should the trim always be white?
No. Same-color trim can create subtle relief in a modern room, while contrasting trim can emphasize geometry in a formal space. The better choice depends on the lighting, existing architectural elements, and desired focal point. Test both color and sheen before finishing the entire installation.
What is the easiest whole-home starting project?
Choose one prominent uninterrupted wall, preferably behind a sofa, headboard, or sideboard. Use one profile, a measured frame layout, and a deliberate finish. After assessing the result, you can repeat the visual language in another room without committing to a house-wide installation at once.
How do I know if a STAVROS product fits an American room?
Measure the available area in inches, confirm the chosen SKU's original dimensions and actual material, account for projections and obstacles, and prepare a cutting schedule. For tight fits, compare the original millimeter dimensions as well as rounded inch values. Verify availability and delivery to the specific destination before buying.
The Principle That Makes Coordinated Molding Work
The best polyurethane molding plan is not the one with the greatest number of ornaments. It is the one in which each line has a purpose. Wall frames organize a focal surface; crown trim defines an upper boundary; a ceiling medallion gives lighting a setting; and carefully chosen onlays can connect a door or cabinet to the larger design. Decide the architectural hierarchy first, measure the actual room, and choose material-specific products with verified dimensions. When those steps are complete, a restrained set of details can make an American home feel cohesive without sacrificing practicality or overwhelming its existing character.