Article Contents:
- What "ready-made table legs" means
- Ready-made geometry
- A leg fully ready for installation
- Example calculation for an already purchased tabletop
- If the tabletop already has an apron or a support frame
- The apron and the armrests of the chair
- The apron and a turned or carved profile
- Four questions for the mounting joint
- A knock-down table and a permanent connection
- Axes first
- Then the actual cross-sections
- Tabletop overhang
- Checking the 800 × 800 mm tabletop
- Checking the tabletop 2000 × 1000 mm
- End mounting
- Four separate supports
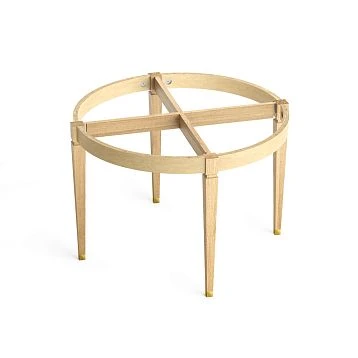
- Table base
- Turned legs
- Carved legs
- Geometric supports
- How to choose between a turned, carved, and geometric support after technical selection
- If the tabletop itself is decorative
- MN-124
- MN-106
- MN-040
- MN-203.1
- Why real dimensions need to be kept alongside the SKU
- Oak
- Oak
- When the leg material should match the tabletop material
- Finish Code for the workshop
- What exactly to record after checking
- How to do a trial assembly without a finished table
- When a set of four samples is needed
- Incoming inspection of a small batch
- Reserve for the batch
- Don't confuse a "set" with a stock keeping unit
- When changing the table is acceptable
- Search by appearance before determining height
- Comparing only height
- Place four points instead of actual contours
- Assign a universal offset from the edge
- Do not check the stretcher and chair together
- Order four units of a new SKU without a sample
- Replace SKU in purchasing without revision
- Error: choose a “set” without checking the unit of sale
- Error: use a single item code without size variant
- Error: forget about transportation
- Error: visually sort the legs after finishing
- Edge case: the tabletop has already been purchased, and its parameters cannot be changed
- Edge case: the ready-made leg fits geometrically but not in finish
- Edge case: one table in the series is different
- Repeat order after a few months

The tabletop has already been chosen. Its length, width, thickness, material, and the intended purpose of the future table are known. The decision has also been made: we will not manufacture the legs ourselves; we need ready-made ones. It is at this moment that the choice stops being a question of "which supports look nicer" and becomes a proper engineering task.
A ready-made leg already has a real geometry. It cannot be arbitrarily stretched, narrowed, or made taller after ordering. This means that before purchasing, you need to check how a specific SKU will fit into the construction: whether it will provide the required table height, whether the upper mounting area is sufficient, whether the apron will collide with the decorative profile, whether there will be room for legs, whether the desired finish can be obtained, and whether the same set can be repeated in the next order.
The working sequence looks like this:
tabletop → table purpose → final height → apron construction → required leg height → upper cross-section → support type → material → coating → actual SKU → sample → set of 4 pcs. → BOM → order.
This order is especially useful for a furniture maker and a small workshop. A mistake in choosing one support is repeated four times on one table and dozens of times in a small series.
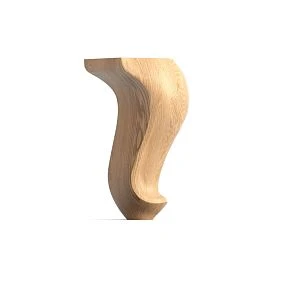
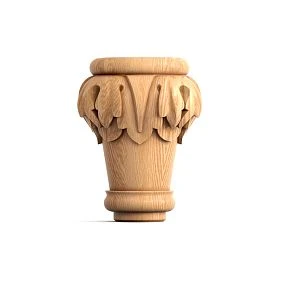
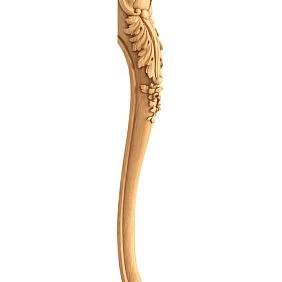
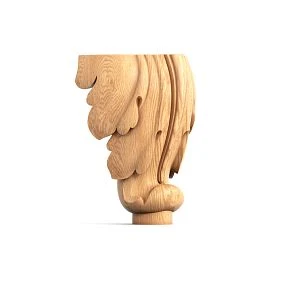
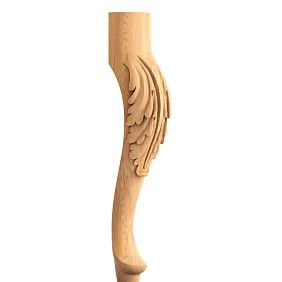
What "ready-made table legs" means
The word "ready-made" is often understood too narrowly: as if it necessarily refers to a fully painted part that only needs to be screwed on.
In practice, there are two different levels of readiness.




Finished geometry
The leg is already manufactured. It has:
- article number;
- actual dimensions;
- shape;
- profile;
- the material;
- a specific design.
However, it may be supplied without the final decorative coating.
For a workshop, this is already a finished component. The most labor-intensive geometry is done, and the finishing can be carried out within your own production cycle.
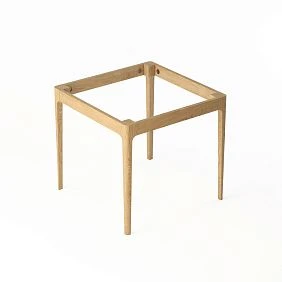
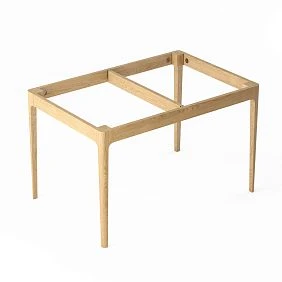
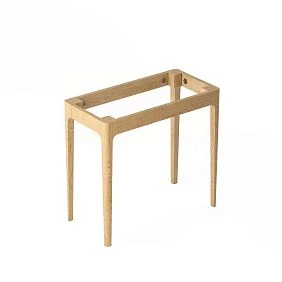
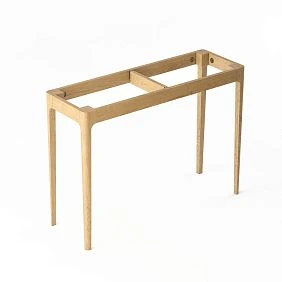
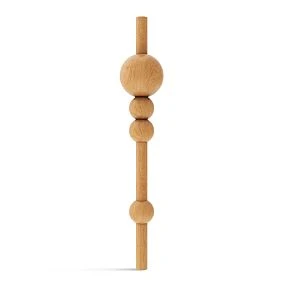
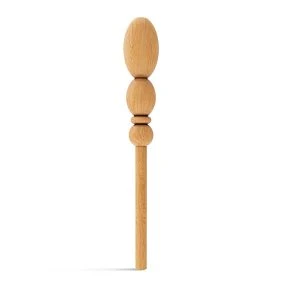
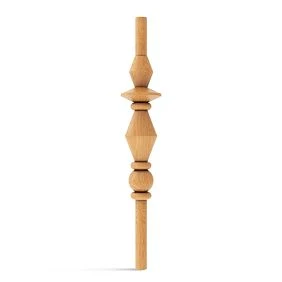
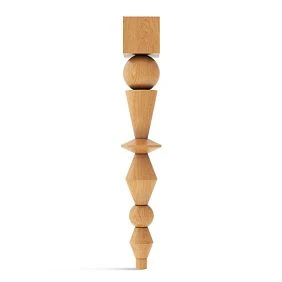
Our factory also produces:
A leg fully ready for installation
It has both the geometry and the decorative coating.
This option is convenient if the factory color and level of readiness suit the project, and the workshop does not want to add its own painting operation.
Therefore:
a finished leg ≠ necessarily a painted leg.
For an initial selection, you can use the section ready-made wooden table legs and within it, compare actual SKUs by geometry and purpose. The STAVROS catalog does indeed filter furniture legs by the "Table" application and by dimensional parameters.
Get Consultation
You should start the selection with the tabletop, not with the leg catalog
Before opening the product category, write down the parameters of the tabletop itself:
- length;
- width;
- thickness;
- the material;
- estimated weight;
- overhangs;
- table purpose;
- desired final height.
A 700 × 700 mm tabletop and a 2200 × 1000 mm tabletop require completely different approaches, even if both can technically be placed on four wooden legs.
For a small square tabletop, a large carved leg may take up too much visual and physical space. For a long dining table, on the other hand, thin compact supports may look lost, and the structure itself may require a different base scheme.
The size of the tabletop determines not just one leg parameter, but several at once:
- required height;
- position of the four supports;
- maximum allowable profile;
- overhangs;
- distance between the legs;
- stretcher type;
- free space for seating.
Therefore, the product page should open only after the table exists at least as a basic geometric scheme.
How to determine the required height of the finished leg
For the simplest construction, the calculation looks like this:
H of the leg + thickness of the tabletop = H of the finished table.
But only if there are no other parts between the leg and the tabletop that change the vertical dimension.
If used:
- mounting plate;
- hidden frame;
- separate frame;
- shim;
- recessed fit;
- additional top panel,
the formula must be calculated based on the actual assembly.
It is more convenient to think in terms of a vertical stack:
floor → bottom of leg → top of leg → mounting joint → bottom of tabletop → top of tabletop.
For example, if a table height of 750 mm is required and the tabletop is 30 mm thick, the reference for the leg in the simplest scheme is 720 mm.
But a leg height of 720 mm by itself does not yet mean that the final structure will automatically be 750 mm. The mounting joint needs to be checked.
That is why height is the first filter, but not the final selection criterion.
Example calculation for an already purchased countertop
Suppose a craftsman received a ready-made countertop 40 mm thick and wants a table with a total height of 760 mm. In the simplest scheme, the reference point for the leg is:
760 − 40 = 720 mm.
Now a list of candidates around 720 mm appears. But the calculation is not finished yet. For each candidate, you need to check:
- whether the mounting plate adds height;
- whether the leg is recessed into the frame;
- whether there is a lower shim part;
- whether an adjustable support is provided;
- whether the actual countertop level changes because of the frame.
If the hidden frame adds another 15 mm to the total assembly, a 720 mm leg will already give not 760 but 775 mm.
The math is simple. The error arises not in the subtraction, but in an incomplete list of parts.
If the countertop already has an apron or a support frame
A thick visual edge does not always equal the actual thickness of the work slab. The countertop may have an additional band around the perimeter.
Then a distinction must be made between:
- the top mark;
- the actual bottom plane of the countertop;
- the lower mark of the decorative apron;
- the level where the leg joins.
For choosing a ready-made support, it is specifically the mounting level that is critical.
If the leg is attached to the inner frame while the decorative edge drops lower, it visually begins not where the slab itself ends.
Such a table may look more massive, although the actual height of the leg remains the same.
Why two legs of the same height can be completely different solutions
In the catalog, you can see two models with a height of 720 mm and assume they are interchangeable.
For a furniture maker, this is a dangerous oversimplification.
On the current STAVROS product pages:
- MN-106 measures 720 × 138 × 88 mm;
- MN-124 — 720 × 160 × 100 mm.
The height matches, but the cross-sectional geometry is already different.
On one model, the upper part may be more compact, while on the other it may be more substantial. What differs:
- visual mass;
- space for the stretcher;
- indent from the edge;
- free span;
- the character of the profile;
- scale relative to the tabletop.
Therefore, the wording "a ready-made leg of 720 mm is needed" is insufficient.
A specific SKU is required.
The apron must be checked before purchasing the legs
If the table has an apron, the upper part of the leg becomes the working connection zone.
Check:
- the width of the apron;
- the height of the drawer rail;
- the connection method;
- the available upper surface of the leg;
- the space for fasteners;
- the distance from the connection to the start of the decorative profile;
- the lower mark of the apron.
The last point is especially important for a dining and writing table.
The user perceives not the overall height of the item, but how much free space remains under the tabletop.
Two tables may have the same 750 mm to the top, but one will be more comfortable due to a higher lower edge of the apron.
Apron and chair armrests
If chairs with armrests are planned, check:
Armrest height + operational clearance < height to the lower edge of the apron.
There is no need to use a universal clearance value. Take a real chair or its dimensions.
Otherwise, you may end up with a table that is comfortable to sit at, but the chair cannot be fully pushed in.
Apron and turned or carved profile
On a decorative leg, the working upper part may quickly transition into a roll, ball, carving, or widening.
If the apron joint falls within this zone, the assembly becomes inconvenient.
Therefore, on the working drawing it is useful to show not a conventional rectangle of the leg, but the actual side profile.
The upper mounting area matters more than a beautiful leg face
The finished leg is already manufactured. After purchase, the upper part cannot be "added" to the required width.
Therefore, before ordering, check:
- the width of the upper zone;
- the depth;
- shape;
- the presence of a straight section;
- the position of the holes or associated fasteners;
- the ability to access with tools;
- the distance to the edge of the countertop or apron rail.
On the face, a wide leg may look great, but the mounting part may turn out to be too large for a narrow frame.
And the opposite situation: a visually massive model may have a quite compact mounting assembly.
It is unreliable to determine this from a photograph.
Use the dimension diagram for the specific SKU.
Four questions for the mounting assembly
Before approving the SKU, it is useful to answer in writing:
1. What is the leg attached to?
Directly to the tabletop, to the apron, to a hidden frame, or to a separate plate.
2. How is it attached?
With a wood joint, a dowel, a mounting plate, screws, or another system provided by the specific design.
3. Is there space for the fastener?
Not only on the part, but also for the tool during assembly.
4. Can the assembly be disassembled?
For a large table, a collapsible design can be important for transportation.
These questions help distinguish a furniture leg that simply matches the external dimensions from a support that is genuinely convenient to use in production.
Collapsible table vs. permanent joint
For a single stationary table, a craftsman may prefer a permanent joinery joint.
For furniture that needs to be moved through narrow openings or shipped to the customer disassembled, the priorities change.
Then you need to check in advance:
- whether the selected leg allows re-installation;
- where the hardware is located;
- whether access to the fasteners remains after installing the apron;
- how the user will assemble the product.
The finished leg must match not only the geometry of the table, but also the logistics of the finished product.
Layout of four supports under the tabletop
After choosing the approximate size of the leg, you need to place four real geometries under the tabletop.
Not four points.
Specifically four outlines.
First the axes
Fix:
- end offset;
- side offset;
- support axes.
If the length of the tabletop L, and the offsets of the axes from the ends E1 и E2, the distance between the axes:
L − E1 − E2.
This is only the initial dimension.
Then the actual cross-sections
The physical dimensions of the legs must be subtracted from the center-to-center distance.
For a geometric leg, this may be a rectangular cross-section.
For a turned leg — the maximum diameter at the relevant height.
For a carved leg — the most protruding relief.
It is this dimension that determines how much actual space remains between the four supports.
Tabletop overhang
The overhang does not need to be assigned by a universal rule of "50 mm" or "100 mm".
It depends on:
- tabletop size;
- leg width;
- aprons;
- design;
- stability;
- seating.
A small overhang visually connects the support to the edge. A large one hides the legs further inward.
Both scenarios can be correct.
The main thing is to draw them in advance.
Checking a tabletop 800 × 800 mm
On a compact square tabletop, four massive supports quickly occupy a significant portion of the lower space.
If the outer profile of each leg reaches approximately 120 mm, and the axes are positioned close to the corners, the free inner square is reduced not only by the offsets but also by the dimensions of the legs themselves.
In this case, it is useful to compare two SKUs not by photograph, but on the same 800 × 800 mm plan. The difference between an 80 mm and 120 mm profile, repeated four times, already significantly changes the density of the base.
Checking a 2000 × 1000 mm tabletop
On a long table, the opposite risk appears: the legs are far apart, and the structure of the apron and tabletop begins to work over a larger span.
Here, a geometric layout alone is not enough to assess strength, but it quickly shows:
- how many seating places remain along the long side;
- whether the end seat can be used;
- whether the legs interfere with the chairs;
- where the apron runs;
- how far the supports are from the corners.
If, after the layout, it becomes clear that four separate legs require an overly complex reinforcement system, this is a signal to consider a connected underframe or another type of base.
End seating
At a dining table, the person sitting at the end is often overlooked.
Check not only the longitudinal span between the side legs, but also the distance from the end edge of the tabletop to the inner surface of the supports and the apron.
A beautiful large overhang can improve end seating.
Too small an overhang will force a person to sit between massive legs.
This is especially noticeable on carved and heavily turned models.
Clearance for legs should be calculated based on the actual profile
It is especially easy to make a mistake with decorative legs.
The upper cross-section may be 80–100 mm, while the profile widens lower down.
If the CAD shows only the vertical axis or a simplified rectangle of the upper part, the free span appears overstated.
To check, mark:
- the maximum overall dimension of the leg;
- the height at which it occurs;
- the side rail;
- the position of the chair;
- the position of the knees;
- the armrests, if present.
On a turned part, the maximum diameter may be at a level where it hardly interferes. Or it may be right in the working zone.
Therefore, it is useful to examine the leg at several horizontal sections.
For example:
- at the tabletop;
- under the apron;
- at knee level;
- closer to the floor.
This makes it clear where the support actually occupies space.
Four ready-made legs are not suitable for every table
For a small or medium table, four supports are a natural scheme.
But a long tabletop may require:
- an additional support;
- a more developed frame;
- a different apron system;
- ready-made table base;
- a different base structure.
You cannot automatically apply the rule:
table = four legs.
The number and layout of supports depend on:
- lengths;
- width;
- the tabletop material;
- its thickness;
- the frame;
- connections;
- the expected load.
This article does not replace a structural calculation for a long table.
If four separate legs cease to be a rational solution, it is better to switch in time to a ready-made base framerather than trying to force four decorative supports to solve a task that requires a connected frame.
Ready-made separate legs and a ready-made base frame are different levels of readiness
A separate leg is a ready-made component.
A base frame is a ready-made system.
Four separate supports
The craftsman independently determines:
- the width of the base;
- length;
- the distance between the legs;
- the side rail;
- joints;
- overhangs.
This gives maximum freedom.
But it is the workshop that is responsible for the entire structure.
Base
Already exists as a connected base.
This can be more rational if you do not want to design the relative position of the supports and the rigidity of the system yourself.
For a custom table, four separate legs often provide more options.
For a quick project, a ready-made base can eliminate more production operations.
The main thing is not to mix these two scenarios in one article and one specification.
How to choose the type of ready-made wooden leg
After checking the basic geometry, you can move on to the type.
Turned legs
The shape is built around the axis of rotation.
The character is defined by:
- beads;
- necks;
- spheres;
- cones;
- radii;
- transitions.
They can work in both a classic and a more modern table.
A separate catalog turned furniture legs is convenient when the profile itself should be the main expressive element.
But for this article, turning is only one option, not the main intent.
Carved legs
Here, ornamental relief is added to the geometry.
Check:
- the direction of the pattern;
- visual mass;
- adjacency to the apron;
- orientation of the four parts;
- free space.
For such projects, there is carved legs for tables.
Geometric supports
The decorative effect is built on:
- facets;
- cross-section;
- tilt;
- proportions;
- pure geometry.
They are especially interesting when the table does not need an active ornament.
For comparison, you can use geometric furniture legs.
It makes sense to choose the type after checking the height and installation area.
A beautiful type that is not part of the construction remains just a beautiful product.
How to choose between turned, carved, and geometric support after technical selection
Once models unsuitable in height and installation have been excluded, you can compare the character of the remaining options.
A turned leg reads well through its silhouette. Even without carving, it can be very active due to the alternation of diameters.
A carved one adds a second layer — the chiaroscuro of the ornament. On a table this is especially noticeable because the legs are below eye level, and the relief is often seen at an oblique angle.
A geometric one works with large planes. It is easier to match with a laconic tabletop and a straight apron, but a slant or unusual cross-section can have a stronger impact on installation.
A convenient selection sequence:
geometric compatibility → installation → proportion → type → material → finish.
Not the other way around.
If the tabletop itself is decorative
The tabletop may have:
- a shaped edge;
- live edge of solid wood;
- parquet pattern;
- inlay;
- active texture;
- complex color.
In this case, the leg does not have to become a second main decorative object.
Sometimes a calm ready-made support allows the tabletop itself to be shown better.
In another project, on the contrary, a simple rectangular tabletop becomes a neutral background for expressive carved or turned legs.
This is not a question of style “in general,” but of the distribution of visual weight between the top and the base.
Real SKUs show why “for a table” does not yet mean “suitable for my table”
A single purpose in the catalog does not make models interchangeable.
MN-124
turned furniture leg MN-124 on the current product page measures 720 × 160 × 100 mm and is available in beech and oak options.
This is an example of large ready-made turned geometry.
During design, it is necessary to check:
- scale relative to the tabletop;
- the side rail;
- upper block;
- overhang;
- free span.
MN-106
MN-106 on the current product page measures 720 × 138 × 88 mm and is also offered in beech and oak.
The height follows almost the same logic — 720 mm, but the cross-section is different.
That is exactly why the choice cannot end with filtering by A.
MN-040
Carved Furniture Leg MN-040 has several size versions: the current product page presents options with heights of 650, 740, and 900 mm, in beech and oak.
This is a good example of a different logic: a single SKU family can have multiple sizes, so it is not enough to record only MN-040.
The specific size variant must be preserved.
MN-203.1
MN-203.1 has a size of 740 × 52 × 56 mm, a metal decorative element, and is intended for legless table and console structures. The product page describes straight and corner installation options via the corresponding hardware.
This is already a completely different structural scenario.
Comparing MN-203.1 with a solid turned leg by height alone is pointless: both the mounting, the look, and the logic of the base differ.
Why real dimensions need to be preserved alongside the SKU
A link to the product page is useful, but the project should not depend only on a web page.
After approving the candidate, save the following in your specification:
- article number;
- dimensional specification;
- the material;
- verification date;
- mounting scheme;
- internal Project Code.
If the assortment or the product page changes a few months later, the production archive will remain clear.
For MN-040 this is especially obvious: a single product model has several height and cross-section options. The entry MN-040 × 4 without a size is insufficient.
More correctly:
LEG-02 | MN-040 | 740 × 64 × 100 | material ... | qty 4
with the material that is actually approved for the project.
How to compare several ready-made SKUs without endlessly browsing the catalog
It is convenient to make a short working table.
| Parameter | SKU A | SKU B | SKU C |
|---|---|---|---|
| Height | By card | By card | By card |
| Top cross-section | Verified | Verified | Verified |
| Maximum overall dimension | Verified | Verified | Verified |
| Type | Turned | Carved | Geometric |
| Apron | Suitable / not | Suitable / not | Suitable / not |
| Installation | node A | node B | node C |
| Material | Beech / Oak | Beech / Oak | Beech / Oak |
| Finish | own / ready-made | own / ready-made | own / ready-made |
| Sample | needed / no | needed / no | needed / no |
After such a table, most unsuitable options are filtered out without discussing style.
For example:
- geometry doesn't allow for a stretcher — excluded;
- height doesn't fit the calculation — excluded;
- profile too large eats up space — excluded;
- required material unavailable — excluded.
And only among the remaining ones do they choose visually.
This saves more time than comparing dozens of photos.
Beech or oak: material is chosen together with the finish
No single species should be declared universally best.
Beech
Practical in scenarios where:
- an opaque enamel is planned;
- texture is not the main visual effect;
- the legs and apron should receive a uniform color.
Oak
Especially logical when the project is built around visible wood:
- oil;
- clear varnish;
- stain;
- Tinting;
- natural grain.
But the material cannot be chosen separately from the specific product page.
You need to check whether the selected SKU is available in the required species and size.
For a transparent finish, it is useful to make a test sample. Wood is a natural material, and a match in on-screen color does not guarantee the same visual perception of the finished parts.
When the leg material must match the tabletop material
Not always.
If the tabletop is oak, the legs do not automatically have to be oak. Two different scenarios are possible.
Material as a unified system.
An oak tabletop and oak legs then receive the same clear or tinted finish. Here, matching the species makes sense because the wood remains visible.
Material as a structural base for an opaque finish.
The tabletop can be made of one material and the legs of another, but after enamel they are visually unified by color.
The main thing is not to pass off a visual match as a material one.
The BOM must list the actual species, even if it is not visible after painting.
Finish Code for the workshop
If the legs are painted separately, instead of the entry paint in white it is better to use the internal code:
F-01
and a separate finish chart:
F-01 = primer / enamel / color / gloss level / workshop technology.
This allows you to finish identically:
- legs;
- the side rail;
- decorative elements;
- other parts of the same table.
When reordering, the SKU and Finish Code restore not only the shape, but also the production result.
Unpainted finished legs: serial geometry plus custom finish
For a furniture workshop, this is one of the most practical scenarios.
The craftsman receives a finished complex part:
- turned;
- carved;
- geometric;
- combined.
But the finishing is done independently.
The advantage is not that the leg is "cheaper than a painted one." This depends on the specific product and the production process.
The advantage is different: the workshop does not start manufacturing complex geometry, but retains control over the finish.
Workflow:
ready SKU → fitting → preparation → own finishing → installation.
This way you can match the legs with:
- an apron;
- a tabletop;
- other wooden parts;
- with a common enamel or tinting system.
There is a separate section for this scenario unpainted furniture legs.
Coated legs: when a ready-made finish is more advantageous than your own
If the finish already suits the project, a factory coating reduces the number of operations in the workshop.
The process becomes shorter:
receiving → inspection → installation.
Instead of:
acceptance → preparation → primer/tinting → finish → drying → inspection → assembly.
A ready-made coating is especially convenient if:
- you don't have your own paint shop;
- the color doesn't need to match the custom facade exactly;
- the project is a one-off;
- the finishing operation would become a separate production cycle.
But it is better not to treat the color from a photo as final confirmation.
If the shade is critical, you need a physical sample or an actual part next to the countertop.
In the STAVROS catalog, finished products with a coating are placed in a separate category furniture legs with a coating.
One trial leg before buying four
For a new SKU, a practical sequence:
SKU → SAMPLE → fitting → height check → stretcher → fastening → finish → APPROVED → set.
On a physical part, they check what is hard to sense in the product card:
- the real scale;
- surface;
- upper mounting geometry;
- protruding parts;
- combination with the countertop;
- work with the apron;
- the result of a custom finish.
If the project is a one-off, after the sample you can order the remaining three parts.
If it is a series, the sample becomes part of the prototype.
For an expensive or complex table, it is sometimes wiser to assemble the first set of four right away and treat the first table as the control sample of the series.
What exactly to record after the check
Not just:
was suitable.
But:
- SKU;
- dimensional specification;
- the material;
- mounting scenario;
- Finish Code;
- APPROVED status;
- date of verification.
Then, when reordering, you don't have to remember why this particular leg was chosen.
How to make a trial assembly without a finished tabletop
You don't have to manufacture the entire tabletop right away.
To test a new SKU, you can assemble a test corner:
- a fragment of the side rail;
- a piece of material simulating the underside of the tabletop;
- one finished leg;
- the selected fasteners.
Such a mock-up will show:
- the actual joint;
- access to fasteners;
- the position of the profile;
- the actual lower mark of the apron rail.
If the problem appears on the test angle, the project is corrected before cutting the full set of parts.
When a set of four samples is needed
One leg checks the geometry of the part.
Four check the composition and relative position.
For a large profile, inclined supports, or a complex custom table, it is reasonable to consider the first instance of the product a full-fledged prototype.
After it, you can freeze:
SKU
Mounting
Finish
Qty/table
and launch a small series.
How to format four legs in the BOM
On the drawing, it is convenient to use a short code:
LEG-01
In the BOM:
| Field | Value |
|---|---|
| Project Code | LEG-01 |
| Manufacturer | STAVROS |
| SKU | specific |
| Application | table |
| Type | turned / carved / geometric |
| Material | approved |
| Size | specific configuration |
| Finish | project / factory |
| Mounting | selected node |
| Qty per table | 4 |
| Sample Status | APPROVED |
| Revision | current |
| URL | Product |
For a series:
LEG-01 | qty/table 4 | tables 10 | total 40
This is better than the line:
wooden legs — 40 pcs.
Because a year later, the general description alone cannot reliably restore the exact model.
Incoming inspection of a small batch
After receiving the batch, check more than just the number of boxes.
Verify:
- SKU;
- dimensional specification;
- the material;
- quantity;
- the surface condition;
- completeness of the associated hardware, if it was ordered separately.
For a clear finish, look at how the four parts look together.
Natural wood has variation in grain. This is normal, but it is better to assemble a set for one table deliberately, especially if the supports are visible from all sides.
If part of the batch will be stored for a repeat order or repair, label the remainder by SKU and material. Signature table leg almost useless a year later.
Reserve for the series
There is no universal reserve percentage for finished legs.
The reserve depends on:
- batch size;
- ability to quickly reorder;
- own finish;
- risk of damage;
- project duration.
For ten tables, the calculated requirement 4 × 10 = 40. Whether to order exactly 40 or keep a reserve is a separate production decision.
The key is not to hide the reserve inside Qty per table.
Store separately:
Calculated Qty = 40
Reserve Qty = ...
Order Qty = ...
Do not confuse a “set” with a stock-keeping unit
In conversation, it is convenient to say:
table leg set.
But if the product card does not sell four legs as one set, it is better to count physical items in the BOM and order.
That is:
Qty = 4
And not:
Qty = 1 set
if the manufacturer does not use such a sales unit themselves.
What to do if a ready-made leg almost fits
The most dangerous situation is not "doesn't fit at all," but "almost."
For example:
- the height differs by 15 mm;
- the top part is slightly wider;
- the apron falls into the profile;
- the finish is different;
- the maximum overall dimension is too large.
Decision order:
- check another size option;
- look at another SKU;
- check whether the table design can be changed without making it worse;
- reconsider the apron or mounting scenario;
- if necessary, move to a custom part.
You should not start by modifying a finished leg.
If a serial SKU requires significant rework, the main advantage of a ready-made component is lost — repeatability.
When changing the table is acceptable
If the project is still at the drawing stage and the change does not break ergonomics, a small adjustment may be reasonable.
For example, you can change:
- overhang;
- the width of the apron;
- the position of the supports;
- the thickness of an individual structural part.
But you cannot "fix" a leg at the cost of poor seating at the table or an inconvenient attachment.
When a ready-made support is more rational than making your own
A ready-made component is especially interesting when complex, repeatable geometry is needed:
- turned profile;
- Carving;
- a combined decorative element;
- four identical parts;
- a small batch.
For a workshop, making such a leg yourself means:
drawing → blank → program/setup → test part → adjustment → batch → sanding → inspection.
By purchasing a ready-made SKU, the craftsman takes this block off his plate.
But a ready-made leg is not always more rational.
If a simple square support is required from the same material already in production, making it in-house may be easier.
If a unique historical profile or custom shape is needed, a ready-made catalog may also fail to provide the right solution.
The point is not to always buy ready-made.
The point is to quickly understand when a ready-made serial component truly saves production operations.
Typical mistakes when choosing ready-made table legs
Searching by appearance before determining the height
Why it happens: catalogs are more convenient to browse visually.
Consequence: liked SKUs do not fit the project size.
How to prevent: start with table H and vertical stack.
Comparing only height
Why it happens: A seems to be the main parameter.
Consequence: the top section, apron, or profile does not fit.
How to prevent: compare at least height + top geometry + max profile + mounting.
Use four points instead of real contours
Why it happens: the plan is simplified.
Consequence: legroom is overestimated.
How to prevent: use real dimensions.
Assign a universal edge clearance
Why it happens: you want a standard rule.
Consequence: different SKUs produce different overhangs and visual mass.
How to prevent it: calculate the overhang for the specific countertop.
Don't check the apron and the chair together
Why it happens: they look only at the table.
Consequence: the armrests don't fit under the apron.
How to prevent it: check the actual chair or armchair.
Ordering four units of a new SKU without a sample
Why it happens: the product page seems sufficient.
Consequence: the mistake is discovered only on the full set.
How to prevent: sample or first prototype.
Replace SKU in procurement without revision
Why it happens: the new model seems similar.
Consequence: dimensions and mounting point change.
How to prevent: the new SKU undergoes a drawing re-check.
Mistake: choosing a "set" without checking the unit of sale
In search, "buy a set of table legs" sounds natural.
But the item may be sold individually.
Consequence: an incorrect unit appears in procurement.
Check: look at the specific SKU's product page and count the actual number of items.
Error: using a single SKU without a size variant
This is especially dangerous for models with multiple size options.
Consequence: a repeat order arrives with a different height.
Check: store SKU + size.
Error: forgetting about transportation
The finished table is assembled in the workshop but does not fit through the customer's doorway.
Consequence: you have to disassemble a joint that was not designed to be disassembled.
Check: decide at the fastening stage whether the leg should be removable.
Error: visually sorting legs after finishing
If a clear finish reveals a strong difference in the wood grain, swapping pairs between tables becomes more difficult.
Check: pre-assign parts to kits before final assembly.
How to buy ready-made table legs and avoid redoing the project after delivery
Before ordering, do a final check:
tabletop → final height → apron → legroom → upper mounting zone → type → material → finish → SKU → Qty.
To search by purpose, use Legs for tables.
If the type is not yet determined, the general catalog of wooden furniture legs allows you to compare different designs. The current catalog filters legs by application, type, and dimensional parameters.
After selection, do not keep the project only as a link to the product.
Edge case: the tabletop has already been purchased, and its parameters cannot be changed
This happens when working with a ready-made stone, wood, or reclaimed tabletop. It already has its final dimensions, thickness, holes, or decorative edge.
In such a situation, it is not the top that needs to be adapted, but the base.
The procedure becomes stricter:
- record the actual dimensions of the countertop;
- determine the allowable mounting zone from below;
- set the final table height;
- determine whether a stretcher is needed;
- find an SKU that fits this geometry without trimming the support itself;
- make a trial layout of the four legs.
If none of the ready-made legs fit, you should not shave down a serial profile just because you already like the product. First check another SKU or a different base design.
Edge case: a ready-made leg fits in geometry but not in finish
Here the solution is simpler.
If the model is available unfinished, you can keep the geometry and move the finishing to your own production process.
If only a ready-made finish is available that does not suit the project, you need to compare three options:
- another SKU in the required finish;
- repainting using an approved technology;
- dropping this model.
Do not assume that any pre-finished painted leg is automatically a good base for repainting. Preparation depends on the existing finish and the workshop's approved technology.
Edge case: one table in the series is different
For example, eight tables are identical, and the ninth is longer.
Do not change the shared row LEG-01 for the entire series, if the long table receives a different base design.
Better to create:
LEG-01 — standard table;
LEG-02 — extended table or a different SKU.
This preserves reproducibility and doesn't force the purchaser to manually remember the exception.
Repeat order after several months
A link to the product is useful, but insufficient for a production archive.
Save alongside:
- a screenshot or PDF of the dimensional diagram;
- your own assembly unit;
- the material;
- Finish Code;
- dimensional specification;
- quantity per product;
- the date of the last purchase.
If the card changes later, the workshop will retain a locked version of the solution used to manufacture the original table.
This is exactly what distinguishes a random purchase of four legs from a proper serial component.
Save:
- SKU;
- dimensions;
- the material;
- installation method;
- finish;
- quantity;
- revision;
- own drawing of the assembly.
For a series, add Qty per table и Total Qty.
The main principle is simple:
a ready-made leg is chosen not because it "fits the table" by category name, but because the specific geometry of a specific SKU physically fits your tabletop, apron, mounting, and assembly method.
Then a ready-made wooden support really speeds up production: the workshop buys an already manufactured repeatable part and does not defer design decisions to the assembly stage.