Article Contents:
- What is a wooden border and what problem does it solve
- Border as a frame
- Border as a dividing line
- Border as a panel finish
- Border as an independent line
- Why the border is chosen before finishing
- Small furniture fronts
- Frame around the panel
- Decorative layout on the chest of drawers
- Thin frames on the wall
- Framing of an interior insert
- Inner contour of a complex frame
- Tall wardrobe doors
- Large kitchen and sideboard fronts
- Wall panels and boiserie
- Large mirror framing
- Niche design
- Headboard and wall panel
- Outer contour of double frame
- Width reduces inner field
- Thickness affects relief
- Scale is evaluated from normal distance
- Frame frequency changes choice
- Adjacent elements set a reference
- MDF under enamel
- Beech for enamel
- Oak for tinting
- Can oak be painted with enamel
- Can beech or MDF be tinted under enamel
- Opaque enamel
- Semi-transparent tinting
- When to paint — before or after installation
- Why ends cannot be left open
- Living Room
- Bedroom
- Entry Hall
- Kitchen and dining room
- Office
- Children's room
- Walk-in closet
- Commercial interior
- Perimeter formula
- Why you can't just divide the total footage
- MDF and solid wood length
- Allowance for corners
- Allowance for wood sorting
- Allowance for future repairs
- Part marking
- Accounting for the face side
- Test frame
- Frame at 45 degrees
- Why a wide profile is harder to join
- A thin profile also requires precision
- Internal corner of the niche
- External corner
- Straight joint along the length
- Painted wall
- MDF facade
- Solid wood and veneer
- Wall panel
- Dry fitting
- Single template
- Temporary fixation
- Control of squeezed-out glue
- Corner protection
- Border
- Molding
- Plank (or strip)
- Baseboard
- Molding as a system
- Need to decorate a small cabinet front
- Need to decorate a tall cabinet
- Need to separate wallpaper and painted wall
- Need to create wall panels
- Need to frame the mirror
- Need to decorate a soft headboard
- Need to match the furniture front color
- Need to preserve natural oak
- Need to design a commercial interior
- When the curb cannot be used as a casing
- When the batten does not replace the curb
- When a complex molding is needed
- Selection based only on the product photo
- Ignoring thickness
- Calculation based only on total footage
- Lack of reserve
- Mixing lengths of 2400 and 2600 mm
- Tinting material to match enamel
- Painting without a test sample
- Installation on an uneven wall
- Attempt to hide a wide drop with a single curb
- Using MLD-042 on a too small facade
- Using MLD-041 on a large empty wall
- Incorrect finishing sequence
- Acceptance of the batch
- Sorting of oak
- Acclimatization
- Protection after finishing
- Painted border on the wall
- Border on furniture facade
- Oak under a clear finish
- Angles and Joints
- Geometry
- Corners
- Fit
- Finishing
- Furniture operation
- Furniture facade mock-up
- Wall frame layout
- Check near furniture
- Check multiple frames
- Test corner
- Number of each frame
- List of segments
- Material and finish
- Installation sequence
- Reserve
- How is a wooden border different from molding?
- What to choose: MLD-041 or MLD-042?
- What are the dimensions of MLD-041?
- What are the dimensions of MLD-042?
- Is MLD-041 suitable for a small furniture facade?
- Where is it better to use MLD-042?
- What to choose for enamel?
- What to choose for tinting?
- Can MLD-041 and MLD-042 be used together?
- How to calculate the amount of border?
- What margin is needed for trimming?
- How to join the border at the corner?
- Can I glue a border to a painted wall?
- Can I use a border as a trim?
- Is a border suitable for framing a mirror?
- Can I use a border for wall panels?
- Do I need to paint the border before installation?
- Can I leave oak without a protective coating?
- How to choose a border for a dresser?
- Where to buy MLD-041 and MLD-042?
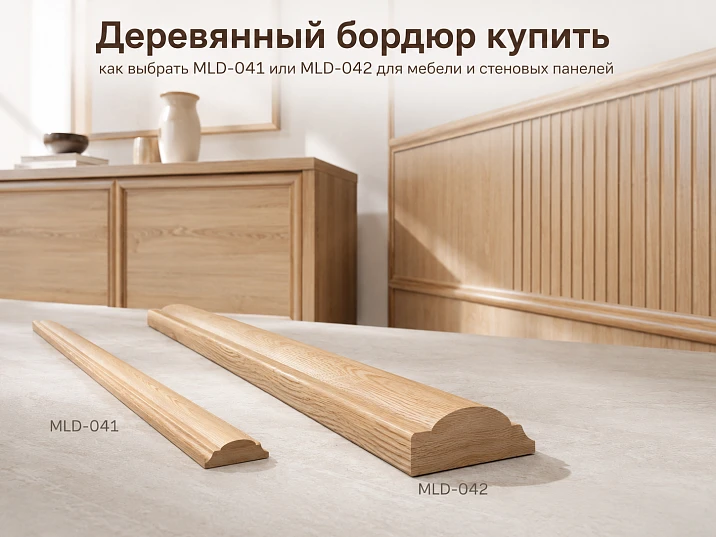
Buy wooden border usually used when a flat surface lacks a clear boundary. On a furniture facade, the profile creates a frame around a panel or insert. On a wall, it separates the painted part from the panel, highlights a niche, forms a rectangular panel, or completes a boiserie. Around a mirror, it creates a neat wooden frame. But the same profile does not suit all tasks: a thin line can disappear on a large wall, while a wide border can overload a small dresser door.
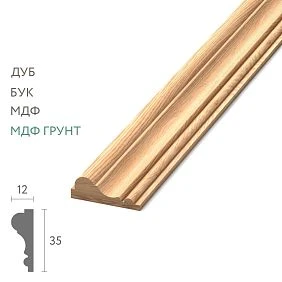
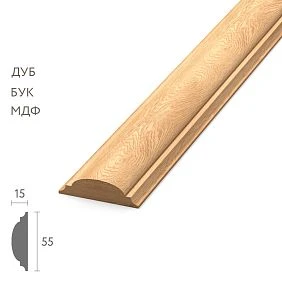
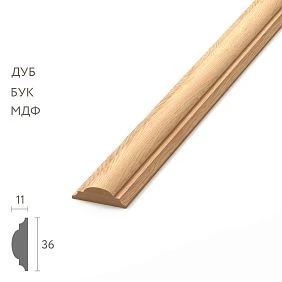
MLD-041 and MLD-042 are conveniently compared by scale. The first model has a cross-section of 36 × 11 mm and is suitable for a more delicate frame. The second — 55 × 15 mm — is more noticeable in width and depth, thus separating one surface from another more strongly. A difference of just a few centimeters on a sample turns into a fundamental difference after installation around the perimeter of a large facade or wall composition.
Both models are available in MDF, beech, and oak. MDF 2600 mm long and beech for enamel are suitable for opaque painting. Oak for tinting allows the wood texture to remain visible. Solid wood options have a length of 2400 mm. When ordering, you need to choose not only the material and color but also the exact perimeter, corner scheme, number of whole planks, cutting allowance, and joining method.
The article helps determine where a thin wooden profile 36 × 11 mm is needed and where a border 55 × 15 mm works better. We will analyze furniture facades, wall panels, frames, niches, mirrors, headboards, and decorative panels; compare MDF, beech, and oak; calculate the footage; consider 45-degree joints and errors that cause the finished line to look uneven.
What is a wooden border and what problem does it solve
A wooden border is a linear profile that creates a boundary, frame, or dividing line on furniture and in interiors. Its value is not just that it 'decorates the surface.' It helps organize the plane: separate the central part of the facade, edge a panel, highlight a mirror, break up a large wall into proportionate fields, and close the transition between different types of finishes.




Border as a frame
Four segments form a rectangle around a panel, insert, or mirror. This technique makes a flat facade more cohesive and helps repeat the same geometry on multiple doors. For a small frame, the accuracy of the corners is important: the thinner the profile, the more noticeable even a small gap at the joint.
Our factory also produces:
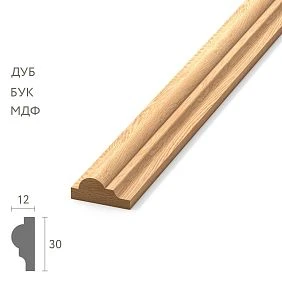
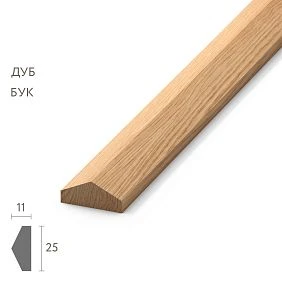
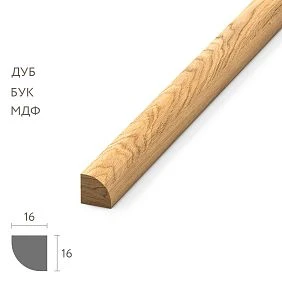
Border as a dividing line
On a wall, the profile can separate the lower panel from the painted upper part or create a horizontal line above the headboard. It creates a physical and visual boundary, so the two finishes do not look randomly brought together. However, the profile should not replace a technical seam if the materials require an expansion gap.
Get Consultation
Border as panel finish
The edge of an MDF panel, veneered insert, or furniture panel can be framed with a profile strip. The border covers the end boundary and makes the transition neater. But first, check the thickness of the elements: the decorative overlay should not protrude so much that it catches on an adjacent door or interferes with opening.
Border as an independent line
Rectangular frames on a painted wall can be assembled without a central insert. In this case, the border works as a graphic element: it sets margins, supports the height of doors and furniture, and helps align the composition relative to a sconce, console, or headboard.
Why the border is chosen before finishing
The cross-section affects the offsets, frame sizes, and material consumption. If the wall has already been painted and the profile is chosen later, it may turn out that the wide MLD-042 does not fit between the socket and the panel or overlaps the decorative insert. The border plan is drawn up together with the furniture and wall layout.
After determining the function, you can buy a wooden border for furniture and walls, comparing models in the category by cross-section, material, and length.
MLD-041 and MLD-042: confirmed specifications
| Parameter | MLD-041 | MLD-042 |
|---|---|---|
| Product type | Compact wooden border | Wider wooden border |
| Cross-section | 36 × 11 mm | 55 × 15 mm |
| MDF | 36 × 11 × 2600 mm, for enamel | 55 × 15 × 2600 mm, for enamel |
| Beech | 36 × 11 × 2400 mm, for enamel | 55 × 15 × 2400 mm, for enamel |
| Oak | 36 × 11 × 2400 mm, for tinting | 55 × 15 × 2400 mm, for tinting |
| Sanding quality | «Prestige» | «Prestige» |
| Visual character | Thin, calm, delicate line | More massive and noticeable framing |
| Typical tasks | Small facades, thin frames, interior inserts | Large facades, wall panels, wide frames and panels |
The cards show the same material logic: MDF and beech are designed for opaque finishing, oak for tinting with visible texture. The difference between models is primarily in the cross-section. MLD-042 is 19 mm wider and 4 mm thicker than MLD-041. On one short strip, this difference seems moderate, but on a two-meter-high frame, it noticeably changes the scale.
MLD-041 or MLD-042: how to make a quick decision
| Situation | MLD-041 36 × 11 mm | MLD-042 55 × 15 mm |
|---|---|---|
| Small cabinet door | More suitable in scale | May take up too much of the facade |
| Standard dresser facade | Creates a light frame | Suitable for a more expressive framing |
| Tall cabinet door | Suitable with a narrow frame and calm design | Reads better on a large surface |
| Wall panel | Delicate division and frequent grid | Noticeable frame, large margins, and boiserie |
| Framing of a small mirror | Does not overload the reflective surface | Suitable if a massive frame is needed |
| Headboard or interior panel | Thin inner line | Main outer contour |
| Niche on a large wall | May visually get lost | More often matches the wall scale |
| Frames in several rows | Convenient for the inner contour | Suitable for external border |
Quick selection is not based on the principle of "thin profile modern, wide classic." Both models have a simple rectangular cross-section and can be used in different styles. The ratio of the border to the surface area, distance between frames, and other details determines the choice.
Where to use thin border MLD-041 36 × 11 mm
MLD-041 is suitable for projects where the profile should mark the border but not become the main decorative element. The 36 × 11 mm cross-section remains noticeable at close range and does not take up too much area from a small panel. This model is convenient for a frequent grid of frames when several rectangles are repeated on one wall or facade.
Small furniture facades
On a bedside table, narrow cabinet door, or top dresser drawer, a wide strip can leave too small an inner field. MLD-041 forms a neat outline and helps maintain proportions. Before ordering, it is useful to draw the outer and inner rectangles at full scale: the buyer will immediately see how much free facade remains inside the frame.
Frame around the panel
The compact profile works as a transition between the central insert and the main plane of the door. It can repeat the existing furniture geometry or add a frame structure to a smooth facade. The border should not overlap technological gaps or interfere with adjacent doors, so the 11 mm thickness and actual distance between facades are taken into account.
Decorative layout on a dresser
Several identical drawers require a calm, repeatable line. MLD-041 does not overload the row and allows space for a handle. If the facade already has large hardware, a thin border is usually easier to match with it than a 55 mm wide profile.
Thin frames on the wall
On a small wall, in a narrow space, or next to a doorway, a compact line helps create a frame without feeling cramped. It is especially useful when there are many frames and the distance between them is small. But on a tall empty wall with large furniture, 36 mm may seem too delicate.
Framing an interior insert
MLD-041 can be used around a fabric, veneered, painted, or other decorative panel if the materials and installation method are compatible. The profile creates a finished edge and helps hide small thickness differences. The exact junction assembly is designed before purchase.
Inner contour of a complex frame
In a composition of two profiles, MLD-041 can become the inner line, and a wider border the outer one. An even field is left between them. This technique adds depth without carved decor, but requires very precise marking and identical corners.
For small facades and delicate frames, you can buy a wooden border MLD-041 measuring 36 × 11 mm, choosing MDF, beech, or oak and the appropriate preparation for finishing.
Where the MLD-042 55 × 15 mm profile is needed
MLD-042 forms a wider and deeper line. The 55 × 15 mm section is better readable at a distance, making it suitable for large furniture fronts, wall panels, and frames that should noticeably organize the surface. The profile protrudes more, thus requiring more free space around it.
Tall wardrobe doors
On a two-meter-high facade, a thin frame sometimes gets lost. MLD-042 creates a confident outline and helps connect a large door with a cornice, baseboard, or other wide interior detail. Before choosing, check whether the inner field will become too narrow and whether there will be room for a handle.
Large kitchen and sideboard fronts
A wide border suits doors where the frame should be part of the design, not a barely noticeable line. In the kitchen, consider frequent cleaning, proximity of adjacent fronts, and drawer opening. The 15 mm thickness increases the relief, so gaps need to be checked.
Wall panels and boiserie
MLD-042 is convenient to use as an outer contour of a large field or as a horizontal finish of a panel. On the wall, the 55 mm profile matches the scale of a tall room and large furniture. It can separate the lower part of the wall from the upper, but the line should be related to the height of the windowsill, door handle, sofa back, or another clear reference point.
Framing a large mirror
The wide profile creates a noticeable frame and helps the mirror be perceived as an independent interior object. However, the border itself is not a ready-made load-bearing structure for the mirror. The base, fasteners, and method of fixing the glass are designed separately.
Decorating a niche
On a large wall, MLD-042 emphasizes the geometry of the niche and makes its border more expressive. If the niche is narrow or filled with complex decor, a wide strip can reduce the usable area. First, create a mockup.
Headboard and wall panel
The 55 × 15 mm profile is suitable for the outer frame of a soft headboard, wooden insert, or decorative panel. It helps separate the central material from the wall. The joint must account for the thickness of the upholstery or panel so that the border fits without gaps.
Outer contour of a double frame
MLD-042 can be the main border, and MLD-041 the inner one. The difference in profiles creates hierarchy: the wide line holds the entire composition, the thin one refines the central field. For this solution, identical finishing and precise offsets are especially important.
For large furniture and prominent wall compositions, you can buy a wooden border MLD-042 measuring 55 × 15 mm, after checking the length of the strips and the future finish.
How the size of the border changes the perception of the frame
Width reduces the inner field
The profile is installed around the perimeter, so its width is subtracted from both sides. If the outer frame size is 500 mm, MLD-041 will leave more internal space than MLD-042. The difference must be considered on small facades, otherwise the decorative insert will visually appear cramped.
Thickness affects the relief
11 and 15 mm are not just technical values. The thicker MLD-042 casts a stronger shadow and protrudes more noticeably above the surface. On a wall, this adds depth, but on furniture it may increase the risk of contact with an adjacent facade or handle.
Scale is assessed from a normal distance
A cabinet door is viewed from one to two meters, a wall frame from several meters. A thin line that seems convincing in hand may disappear in a large room. A wide plank, on the other hand, can sometimes look heavy up close. The mockup is checked from the point where a person usually sees the object.
Frame frequency changes the choice
If there is one large frame on the wall, MLD-042 may be appropriate. If there are ten small fields, repeating a wide profile overloads the surface, and MLD-041 is calmer. You cannot evaluate a single plank separately from the overall grid.
Adjacent elements set a reference
A high baseboard, wide casing, and massive cornice support MLD-042. Light doors, thin slats, and compact furniture are more often combined with MLD-041. This is not a strict formula, but a way to avoid accidental scale.
MDF, beech, or oak: what to choose
| Material | Confirmed length | Preparation | When it fits |
|---|---|---|---|
| MDF | 2600 мм | For enamel | Smooth opaque finish, wall frames and furniture without visible wood texture |
| Beech | 2400 мм | For enamel | Solid wood furniture, painted frames and projects where a wooden base is needed under a solid color |
| Oak | 2400 мм | For tinting | Transparent or semi-transparent finish with visible texture |
MDF under enamel
MDF is convenient for a smooth opaque surface and has a length of 2600 mm. A longer plank reduces the number of joints on tall frames. The material is not chosen for its natural pattern: it is covered by enamel. Before installation, edges and cut areas are prepared according to the technology of the selected system.
Beech for enamel
Beech is suitable for furniture and interiors where a wooden base is needed, but the texture should not remain visible. The 2400 mm long option can be painted together with facades, legs or handles. Matching color codes does not guarantee the same appearance on different materials, so a test paint-out is required.
Oak for tinting
Oak is chosen when the border should look wooden. Tinting changes the shade, while a transparent finish preserves the fibers. On planks from the same batch, the pattern still differs naturally. For a frame, adjacent pieces can be pre-selected by tone.
Can oak be painted with enamel
An opaque finish is only possible with compatible preparation, but the meaning of the oak texture will be lost. If a solid color is required, it is more rational to consider MDF or beech under enamel. The decision is made before ordering, not after receiving the material.
Can beech or MDF be tinted for enamel
Preparation for enamel does not guarantee a consistent lamella pattern for a transparent finish. MDF generally does not reproduce natural wood texture without additional technology. If an oak look is needed, choose an oak position for tinting.
For enamel or for tinting
These designations describe the future finishing method, not the finished coating. The buyer receives a profile without the final decorative and protective layer. Before use, the border must be finished, and cut areas and corners must be treated especially carefully.
Opaque enamel
It allows the border to be matched to the wall or facade in one color. The profile can almost dissolve into the surface, leaving only relief and shadow. Contrasting enamel, on the other hand, emphasizes the frame. The gloss is chosen together with the main object.
Semi-transparent tinting
It preserves the oak texture and helps match the border to the countertop, doors, baseboard, or furniture. A sample is made on a real profile: on a narrow and wide plane, the color is perceived differently than on a large board.
When to paint — before or after installation
The main finishing is often more convenient to do before installation to treat all visible surfaces and ends. After cutting, corners still require local touch-ups. The final scheme depends on the glue, base, and requirements for seamlessness.
Why ends cannot be left open
A 45-degree cut and a straight end absorb the compound differently than the face surface. Without preparation, the corner may become darker, rougher, or more noticeable after painting. Each cut is part of the overall finishing system.
Application of border in different rooms
Living room
In the living room, the border can gather frames behind the sofa, highlight the TV area, frame a mirror, or connect a wall panel with a console. MLD-042 suits a large central composition, while MLD-041 suits side fields and a more frequent grid. The height of the frames is linked to the furniture: the bottom line should not accidentally cross the back of the sofa or the console tabletop.
Bedroom
Behind the headboard, wide MLD-042 creates an outer contour that reads from a distance. Thin MLD-041 can be used inside the composition or on the fronts of bedside tables. If the border runs next to a fabric headboard, the joint area is designed so that the fabric is not pinched and does not form an uneven edge.
Hallway
In a narrow space, wide frames can visually reduce walls, so MLD-041 often looks lighter. On a tall built-in wardrobe, MLD-042 helps support the scale of the doors. The finish must withstand frequent contact and wet cleaning near the entrance.
Kitchen and dining room
The border is used on the fronts of a sideboard, kitchen cabinets, a decorative panel, or the wall of the dining area. On the backsplash and near the sink, humidity and cleaning conditions must be separately assessed. Wooden profile is not installed in a complex area solely for visual effect without appropriate protection.
Cabinet
MLD-042 forms strict large fields behind a desk or library. MLD-041 suits the fronts of small cabinets and inner frames. Oak for tinting can be matched with the countertop and bookshelves.
Children's room
The thin profile is convenient for small fronts and calm wall frames. All corners and joints must be carefully finished. Large relief near an active play area may receive more impacts, so the placement and finish are chosen practically.
Wardrobe
Tall doors require precise proportion. MLD-042 is more noticeable on full-size fronts, MLD-041 suits narrow sections and drawers. All frames are aligned along one horizontal line so that the wardrobe does not look assembled from different modules.
Commercial interior
In a hotel, restaurant, salon, or showroom, the border helps repeat the brand geometry on walls and furniture. For a series, a single material, finish, and profile stock are important. A damaged plank is easier to replace if the article number, color, and cutting scheme are preserved.
How to calculate the number of planks
The calculation starts with pure geometry, not with the number of frames by eye. For each rectangle, two heights and two widths are added. Then horizontal dividers are added, if any. The resulting length is converted into the number of planks, taking into account the length of the selected material.
Perimeter formula
For a frame with a width of 800 mm and a height of 1200 mm, 2 × 800 + 2 × 1200 = 4000 mm is required, that is, 4 meters of profile without allowance. One plank 2400 mm long does not cover such a perimeter, so at least two will be needed. The remnants are distributed to other frames.
Why you can't just divide the total length
Theoretically, 12 meters can be divided into five planks of 2400 mm. In practice, the specific sides of the frames may not fit into the remnants. For example, after two long verticals, short pieces remain that are not suitable for another tall frame. A cutting map is needed.
Length of MDF and solid wood
MDF has a length of 2600 mm, beech and oak — 2400 mm. The difference of 200 mm can reduce the number of joints on a tall panel or allow cutting a frame side from one plank. The material is chosen not only by price and finish, but also by cutting.
Allowance for corners
When cutting at 45 degrees, additional length is required, especially if the master first makes a test corner. An error of a few millimeters can ruin an entire side of the frame. The allowance is calculated based on the number of corners, the complexity of the object, and the experience of the installer.
Allowance for wood sorting
For oak, you may need to select adjacent frame sides by tone and pattern. Not every leftover visually matches any side. A small reserve helps assemble a more cohesive composition.
Reserve for future repairs
For a large project, it is useful to keep one whole plank or several long pieces from the same batch. Repeating the shade of oak or enamel after a few years is harder than replacing a damaged area with spare material.
| Calculation stage | What to do | Why |
|---|---|---|
| Take measurements | Record the width and height of each frame | Get the exact perimeter |
| Choose material | Determine length 2400 or 2600 mm | Understand possible solid sides |
| Create a cutting map | Distribute sides across whole planks | Reduce waste and joints |
| Add allowance | Account for corners, test cuts, and sorting | Don't stop installation due to one mistake |
| Keep reserve | Leave material from the same batch | Simplify future repairs |
How to create a cutting map
A cutting map is a list of all segments indicating length and frame membership. First, distribute the longest sides, then use leftovers for short horizontals. This sequence reduces the risk that a long piece at the end won't fit into any remaining plank.
Marking of parts
Each segment is marked on the reverse side: frame number, side, and direction. After cutting at 45 degrees, similar parts are easy to confuse. Marking saves time during fitting and helps preserve the oak pattern.
Accounting for the front side
In solid wood, adjacent planks may differ in tone. Before cutting, the material is laid out with the front side up and distributed across frames. The segments closest in pattern are placed next to each other.
Test frame
Before serial cutting, one sample is assembled. It shows how accurately the tool is set, whether the inner field width is sufficient, and how the selected profile looks on the actual surface.
Internal and external corners
Frame at 45 degrees
The classic connection of four sides is made with a miter cut. Two planks form a right angle, and the joint line runs diagonally. Such a joint looks neat if the ends match across the entire width and do not separate after fixation.
Why a wide profile is harder to join
MLD-042 has a large width and thickness. The angle error is noticeable on the longer diagonal, and the wall drop can expose the joint. The base is checked before installation, and the corners are adjusted during a dry fit.
A thin profile also requires precision.
MLD-041 is lighter in scale, but the gap on a thin frame looks disproportionately large. You cannot rely on paint to completely hide an inaccurate cut. Corner preparation starts with a working tool and a stable stop.
Internal corner of a niche
If the border runs along an internal corner of the wall, a simple 45-degree cut does not always account for the curvature of the base. The profile is fitted on site. Sometimes it is safer to finish one plane and start another separately than to try to assemble a perfect furniture corner on an uneven wall.
External corner
On a protruding wall, the border is more susceptible to impacts. The joint must be tight, and the ends fully protected. For a passage area, assess whether the protruding profile creates an inconvenient edge.
Straight joint along the length
If the frame side is longer than the plank, a connection is required. A straight transverse joint is more noticeable than an oblique elongated one, but the specific method depends on the material, finish, and skill. If possible, place the joint in a less visible area and avoid aligning it with the main center of the composition.
How to prepare the base
The border follows the geometry of the wall or facade. If the base has a bump, the profile will not lie flat, and the corner will open up. Before installation, check the flatness, coating strength, and compatibility of the adhesive bond.
Painted wall
The paint must adhere firmly. If the layer is weak, the border may peel off along with the finish. The preparation method depends on the chosen adhesive and coating. Do not glue onto a dusty or damp surface.
MDF facade
The facade must be level, and the markings must account for hinges, handles, and adjacent doors. If the border is painted together with the furniture, the installation sequence is coordinated with the production technology.
Array and veneer
The surface requires careful fastening, especially if the finish has already been applied. Unsuitable adhesive or mechanical fastening may damage the face layer. The joint is tested on a sample.
Wall panel
The edge of the panel and the base of the border must form the intended transition. The profile is not used to compensate for a large height difference without a backing and a design solution. Otherwise, it will replicate the unevenness or leave a void.
Installation without a dry run: what to actually check
The fastening method depends on the base, the border material, the future finish, and the frame size. There is no universal adhesive for all surfaces. It is much more important to properly prepare the project and perform a test installation.
Dry fitting
All four sides of the frame are assembled without final fastening. The corners, internal dimensions, and position relative to furniture, outlets, and light fixtures are checked. On oak, the grain pattern is also evaluated.
Single template
For multiple frames, a single marking system is used. Lines are checked with a level and relative to the room's architecture. Even a perfectly assembled rectangle looks crooked if it is not aligned with the door or furniture.
Temporary fixation
If the technology requires holding the profile until the compound sets, the method should not damage the front surface. After removing temporary elements, no noticeable holes or dents should remain.
Control of squeezed-out glue
Excess is removed according to the compound's technology before it damages the wood or paint. On oak, a glue stain can interfere with tinting. Therefore, the sequence of "installation — finishing" and "finishing — installation" is chosen in advance.
Corner protection
After assembly, corners should not have sharp chips. The joint area is treated and coated as carefully as the front surface. On furniture, the corner is additionally checked when opening adjacent doors.
Border, molding, batten, or trim
The names of linear profiles sometimes overlap, but it is important for the buyer to focus on the function and cross-section.
Border
Creates a frame, border, or dividing line. MLD-041 and MLD-042 have a rectangular cross-section and are suitable for furniture and interior panels.
Molding
A broader group of decorative profiles. Molding can have a complex relief, convex and concave transitions. If you need not a simple rectangular line but a pronounced profile shape, it is worth buying decorative wooden moldings for walls and compare other options.
Slat
Often used for vertical or horizontal layout, solid slatted panels, and structural grids. A simple slat does not always have the same proportions and purpose as a border.
Casing
Frames a door or window opening and is usually designed for a different scale. Using MLD-041 or MLD-042 as a full-fledged casing is only possible after checking the width, thickness, joint with the frame, and overall composition. Automatically replacing a specialized profile is not recommended.
Linear products as a system
The border can be combined with slats, cornices, baseboards, and other linear details. For a unified project, it is convenient to select wooden trim for furniture and interior, while maintaining a consistent wood species, finish, and scale.
What to buy together with the border
The border itself is only one part of a complete solution. The frame requires precise dimensions, suitable finishing, a prepared base, and installation materials. However, not all related items can be selected in advance from a universal list. The adhesive, primer, and finish must be compatible with MDF, beech, or oak, as well as with the specific wall or facade.
In a complex interior system, it is useful to select the border together with other profiles. The thin MLD-041 can serve as an inner contour, and MLD-042 as an outer one. Slats, moldings, cornices, or baseboards may be used nearby, but only after checking the scale. The more different profiles appear on one wall, the more important a unified finish and clear hierarchy become.
| What to add to the purchase | Why | For which scenario | What to Check |
|---|---|---|---|
| Spare plank | Test corners, trimming, and future repairs | Any frame, especially oak for tinting | Same material, cross-section, and batch |
| Finish sample | Match color and gloss | Enamel in the color of the wall or facade, oak for tinting | How the coating looks on the actual profile |
| Corner template | Check 45-degree cut | Serial furniture and wall frames | Match diagonals and joint width |
| Mounting materials | Secure profile to base | Walls, MDF, solid wood, panels | Compatibility with base and future finish |
| Primer and finish | Protect profile and achieve desired color | All unpainted options | System for MDF, beech, or oak |
| Adjacent trim | Assemble a complete system of walls and furniture | Boiserie, double frames, interior panels | Species, scale, length, and finish |
Practical choice for specific tasks
Need to design a small cabinet front
Make a paper frame 36 mm wide and compare it with 55 mm. On a compact door MLD-041 usually leaves more free space and does not compete with the handle. MLD-042 is chosen only when the wide frame is the main element and the dimensions of the front allow it.
Need to design a tall cabinet
On a door about two meters high, a 36 mm profile may look too thin. MLD-042 more often remains noticeable from a distance. But if the cabinet consists of many narrow sections, a wide frame may overload the overall row. Check the entire group, not just one door.
Need to separate wallpaper and painted wall
A border creates a finished boundary between materials, but does not fix an uneven edge or replace base preparation. The width is chosen according to the room scale. MLD-041 gives a light line, MLD-042 a more pronounced belt. The height should be related to the furniture and architecture of the room.
Need to make wall panels
For a frequent grid of small frames, MLD-041 is suitable. For large fields or wainscoting, use MLD-042. First, mark all rectangles on the wall with painter's tape, then check the distance between them, the baseboard, and the ceiling. Only after the grid is approved, count the slats.
Need to frame a mirror
Determine whether the profile should be a thin border or a full frame. MLD-041 preserves more reflective area, MLD-042 creates a massive framing. The load-bearing fixation of the mirror is designed separately; the border should not take on a function not confirmed by the design.
Need to design a soft headboard
Wide MLD-042 is suitable for the outer contour, thin MLD-041 for the inner line or small side inserts. Consider the thickness of the textile and padding. The border should adhere to a hard base, not deform the soft part.
Need to match the color of the furniture facade
Choose MDF or beech for enamel and make a test paint out. If the facade is MDF, the same coating may look closer in texture on an MDF border. If a wooden base is important, choose beech. The solution is coordinated with the painting system.
Need to preserve natural oak
Oak for tinting is suitable for furniture, wall panels, and mirror frames with visible wood. Before cutting, lay out the slats and distribute the pattern. Adjacent sides of one frame are better matched by similar tone.
Need to design a commercial interior
Choose a profile considering the viewing distance and likelihood of damage. MLD-042 is better read in a hall or showroom, MLD-041 is convenient for small furniture facades and hotel rooms. Keep a material reserve and a finish map.
How not to confuse a border with a casing or furniture molding
A similar rectangular cross-section does not mean the same purpose. A border is designed for frames and dividing lines. A casing must cover the installation gap around the opening. Furniture molding may have a different seating or function. Before ordering, look not only at the width but also at the thickness, length, and installation scheme.
When the curb cannot be used as a casing
If the profile does not cover the gap between the frame and the wall, does not align with the hinges, or is too thin for the opening, it will not fulfill the task. MLD-041 and MLD-042 can only be considered in a decorative project with a calculated base.
When the batten does not replace the curb
The batten may have a similar simple shape, but a different scale and finish. For a frame, repeatability of width, precision of corners, and a suitable face surface are important. A random piece of lumber can look rougher and require more preparation.
When a complex molding is needed
If the interior requires a classic relief, grooves, beads, or a smooth profile, a rectangular curb may be too simple. In that case, it is better to choose a specialized molding. MLD-041 and MLD-042 are strong precisely because of their clear geometry.
Mistakes when choosing and buying
Choosing only by the product photo
Without scale, 36 and 55 mm appear almost identical. On the wall, the difference becomes significant. Make a mockup of the actual width and look at it from a normal distance.
Ignoring thickness
The buyer compares only the width, but MLD-042 protrudes by 15 mm, while MLD-041 protrudes by 11 mm. On furniture, these 4 mm can affect the opening of an adjacent door and contact with the handle.
Calculating only by total length
Total length is sufficient, but the long sides do not fit into the remnants. A cutting map is mandatory, especially with several frames of different sizes.
Lack of margin
One wrong angle stops the entire installation. Margin is needed for test cuts, oak sorting, and future repairs. The exact percentage depends on the project, so it is determined by the master after cutting.
Mixing lengths of 2400 and 2600 mm
The buyer calculates the planks as identical, but MDF is longer than solid wood. This changes the cutting map and the number of joints. The material is chosen before the final calculation.
Tinting the material for enamel
Preparation for an opaque coating does not guarantee a consistent wood texture. For a transparent finish, oak is selected for tinting.
Painting without a test sample
The color on a narrow profile looks different than on a large wall. On oak, tinting can emphasize end cuts and fiber areas. First, approve a sample.
Installation on an uneven wall
The profile follows bumps, corners diverge, shadow becomes uneven. The base is leveled and checked before gluing.
Attempting to hide a large difference with a single border
A decorative strip does not fix a serious thickness difference between the panel and the wall. Such a transition requires a calculated joint or additional backing.
Using MLD-042 on a facade that is too small
A wide frame leaves little inner space and interferes with the handle. First, check a paper mockup, then order the profile.
Using MLD-041 on a large empty wall
A thin line gets lost and does not organize the composition. Increasing the number of frames does not always solve the problem. Sometimes it is better to choose MLD-042.
Incorrect finishing sequence
Glue interferes with tinting, corners remain unfinished, or enamel cracks at the joint. The order of operations is coordinated with the material, glue, and painting system before installation.
Who is MLD-041 suitable for
This model is suitable for small and medium furniture facades, frequent grid of wall frames, thin mirror framing, and the inner contour of complex compositions. It is chosen when a clear boundary without heavy relief is needed.
MLD-041 may not be suitable for a large empty wall, a massive cabinet, or the outer frame of a large panel if the profile needs to be noticeable from a distance. In such cases, 36 mm may not be expressive enough.
Who is MLD-042 suitable for
The wide model is suitable for tall facades, large wall fields, boiserie, outer frames, large mirrors, and headboards. It creates a stronger shadow and more noticeably separates the central surface.
MLD-042 may be excessive on a small cabinet, narrow drawer, or in a frequent grid of small frames. The 15 mm thickness also requires checking furniture gaps.
Storage, transportation, and preparation for work
Long strips are stored on a flat support in a dry room. They should not be placed at an angle so that the profile experiences bending for a long time. MDF is protected from water, solid wood from sudden changes in humidity and heat.
Acceptance of the batch
Check the article, cross-section, length, and material of each group. Compare strips for straightness and the condition of the front surface. Damage is recorded before cutting and finishing.
Sorting of oak
Lay out the material in good light. Select planks with similar tones for one frame and mark the direction of the grain. After tinting, the differences will become more noticeable.
Acclimatization
Before installation, the profile is conditioned in the room or workshop according to the project's technology. A sharp temperature change can affect the wood and the coating.
Protection after finishing
Painted planks should not be stacked face to face without a soft compatible interlayer. The finish must fully cure before transportation and installation.
How to care for the border after installation
Care depends on the finish. Enamel, varnish, and oil react differently to water and cleaning agents. The universal rule is a soft cloth, no abrasives, and quick removal of moisture. On the wall, the profile usually gets less dirty than on furniture, but dust accumulates on the upper horizontal edge.
Painted border on the wall
Dust is removed with a dry or slightly damp cloth. If the border is painted together with the wall, local damage is repaired with the same system. New paint of a similar shade may differ in gloss, so it is better to keep a sample.
Border on a furniture front
It is touched more often by hands, especially near the handle. The coating must withstand regular cleaning. If a chip appears, it should be sealed before moisture begins to absorb into the wood or MDF.
Oak under clear finish
A scratch is noticeable by a change in gloss and color. The repair method depends on the varnish or oil. Do not use random stain over a finished coating: the spot may become darker than the main frame.
Corners and joints
They are inspected after seasonal humidity changes and after impacts. If a joint has opened, the cause must be determined before cosmetic filling. Sometimes the problem is related to the base or insufficient fixation.
How to buy MLD-041 and MLD-042 on STAVROS
Purchase starts with the exact cross-section. For a small frame and a delicate line, choose MLD-041 36 × 11 mm. For a more prominent framing, choose MLD-042 55 × 15 mm. Then determine the material: MDF or beech under enamel, oak under tinting.
After selecting the material, count the strips by length of 2600 or 2400 mm. The cutting plan must account for the longest sides, corners, and allowance. Only then does it make sense to compare the final quantity and project cost. The price of one strip does not show the real budget if one option has more waste.
Before ordering, open the product cards and check the current options. For a thin frame, you can review the thin border made of MDF, beech, or oak MLD-041 again. For a large framing, the wide border made of oak, beech, or MDF MLD-042. It is convenient to verify the overall group through the category of wooden borders for furniture and walls.
If the project includes many frames, non-standard angles, or a combination of several profiles, it is useful to send the manager a plan with dimensions. This helps clarify the number of strips and avoid confusion between materials and lengths. Availability, current price, and lead times should be checked directly before placing the order.
What to check before payment
- exact article — MLD-041 or MLD-042;
- section 36 × 11 or 55 × 15 mm;
- material — MDF, beech or oak;
- plank length — 2600 or 2400 mm;
- preparation for enamel or tinting;
- number of frames and their sizes;
- cutting map;
- longest side;
- allowance for corners and test cuts;
- location of straight joints;
- border thickness relative to furniture gaps;
- fixation method on the specific base;
- installation and finishing sequence;
- color and gloss sample;
- compatibility with adjacent profiles;
- need for a backup plank;
- storage conditions before installation;
- current price and availability.
How to check the finished work
Geometry
The diagonals of a rectangular frame must match, and the sides must be at the specified level. If the wall intentionally has complex geometry, the deviation should be part of the design, not the result of inaccurate marking.
Angles
45-degree joints are closed across the entire width. There should be no gaps, steps, or chips. On MLD-042, the difference is especially noticeable due to the greater thickness.
Fit
The profile lies on the base without voids or waves. An uneven shadow along the edge often indicates that the wall or facade was not prepared.
Finishing
Color and gloss are uniform on straight sections, ends, and corners. On oak, the pattern may vary naturally, but adjacent sides should not look like they were randomly assembled from unrelated batches.
Furniture work
All doors and drawers open without touching the border. Handles do not press against the frame, and adjacent facades maintain the necessary gap.
How to check the design on a mockup before ordering the entire batch
A paper strip of the required width shows only part of the result. For a final decision, it is useful to assemble a small three-dimensional sample from a real profile or material of similar thickness. It shows the shadow, the protrusion above the surface, the behavior of the corner, and the distance to the handle or adjacent panel.
Furniture facade mockup
Take a sheet of cardboard the size of the door, mark the handle, and glue strips 36 and 55 mm wide. Then add thickness: 11 or 15 mm. Look at the facade from the side and front. Check that the central part is not pinched and that the border does not come too close to the edges.
Wall frame mockup
Use painter's tape to mark the outer contour on the wall, and glue paper strips of the actual width inside. Leave the mockup for a few days. Look at it in the morning and evening, with wall lights on and in natural light. The wide MLD-042 creates a stronger shadow, so lighting can significantly change perception.
Check near furniture
The frame should coordinate with the sofa, console, cabinet, or headboard. If the bottom line is only a few centimeters above the countertop, the space looks random. If the side frame almost touches the trim, the composition lacks breathing room. These errors are easier to fix on tape.
Check multiple frames
One frame may look good, but a row of five may be too tight. Make at least three adjacent fields. Evaluate the distance between them and the overall profile volume. A frequent grid more often requires MLD-041, while rare large fields allow MLD-042.
Test corner
Before cutting the entire batch, make one corner from short pieces. It will show the cut quality, material behavior, and future joint line. For oak, the sample can simultaneously be used to approve the end grain tinting.
How to prepare a specification for the craftsman
A good specification contains not only the model name. It records the cross-section, material, length, number of slats, dimensions of each frame, direction of the oak grain, finish, and installation location. Such a document links the STAVROS order with the actual work on site.
Number of each frame
Number the furniture fronts and wall fields. For each, specify the outer dimension, inner dimension, and installation height. This reduces the risk that two similar parts will be mixed up.
List of pieces
Record all verticals and horizontals separately. Distribute the long sides across whole planks. For oak, mark which segments should be adjacent in the pattern.
Material and Finish
The wording must be precise: "MLD-041, MDF 36 × 11 × 2600 mm, for enamel" or "MLD-042, oak 55 × 15 × 2400 mm, for tinting." A general entry like "wooden border" does not protect against errors.
Installation sequence
Specify whether the profile is painted before installation, after it, or in two stages. Record the treatment of cuts and corners separately. This helps avoid situations where finished planks have to be sanded again on site.
Reserve
In the specification, separate the material for installation from the repair stock. If all the remainder is used for test corners, nothing will be left for future replacement after the project is completed.
How to check the border after the first week of use
A few days after installation, it is useful to inspect the frames again in daylight and side light. On a fresh site, a small gap or difference may be unnoticeable due to the overall impression of the renovation. Later, an uneven shadow becomes more noticeable.
On furniture, check whether doors touch the adjacent profile, whether the handle catches on the frame, and whether a chip has appeared at the corner. On the wall, evaluate the fit of long sections and the condition of joints. If the profile is painted, the color and gloss at the corners should match the straight sides.
Such inspection helps fix a local problem before it affects the finish of the entire frame. For oak, it is useful to keep the remaining tint and a signed sample; for enamel, the exact color and gloss level.
Frequently asked questions
How is a wooden border different from a molding?
A border usually creates a frame or dividing line and can have a simple rectangular cross-section. Molding is a broader group of profiles, including complex relief shapes. MLD-041 and MLD-042 are laconic borders.
What to choose: MLD-041 or MLD-042?
MLD-041 suits small facades and thin frames. MLD-042 reads better on large furniture, wall panels, and big frames. The decision is verified with a full-size mockup.
What are the dimensions of MLD-041?
The cross-section is 36 × 11 mm. MDF has a length of 2600 mm, beech and oak — 2400 mm.
What are the dimensions of MLD-042?
The cross-section is 55 × 15 mm. MDF is produced in lengths of 2600 mm, beech and oak — 2400 mm.
Is MLD-041 suitable for a small furniture facade?
Yes, the compact width often preserves the correct inner field and does not compete with the handle. The exact result depends on the door size and hardware placement.
Where is it best to use MLD-042?
On tall cabinet doors, large facades, wall panels, boiserie, large mirrors, and the outer contour of panels.
What to choose for enamel?
Current cards offer MDF and beech under enamel. MDF has a length of 2600 mm, beech — 2400 mm. The choice depends on the base, cutting, and finishing technology.
What to choose for tinting?
Oak for tinting is suitable for preserving visible wood texture. It is better to sort the planks by tone before cutting.
Can MLD-041 and MLD-042 be used together?
Yes. The wide profile can be the outer frame, the thin one — the inner contour. Leave the same gap between them and use a consistent finish.
How to calculate the amount of border?
Add up the perimeters of all frames, then create a cutting map based on planks of 2400 or 2600 mm length. Add a margin for corners, test cuts, and material sorting.
What margin is needed for trimming?
There is no single percentage. The margin depends on the number of corners, frame sizes, cutting layout, and the installer's experience. For a complex project, it is better to provide an additional whole strip.
How to join a border in a corner?
For a rectangular frame, a 45-degree cut is most often used. The sides are first dry-fitted and the diagonals are checked. An inaccurate cut should not be expected to be hidden only with paint.
Can a border be glued to a painted wall?
Only if the coating is strong and the adhesive is compatible. The base is cleaned and tested on a trial area. Weak paint may peel off along with the profile.
Can a border be used as a trim?
Only if the cross-section covers the required gap and the assembly is designed for the specific opening. MLD-041 and MLD-042 are not automatic replacements for a specialized trim.
Is a border suitable for framing a mirror?
Yes, as a decorative frame. But the load-bearing fixation of the mirror is designed separately. MLD-041 creates a thin border, MLD-042 provides a more massive framing.
Can a border be used for wall panels?
Yes. For a frequent grid of small fields, MLD-041 is more suitable; for large frames and boiserie, MLD-042 is better.
Do I need to paint the border before installation?
It depends on the system. It is convenient to apply the main finish in advance, but cuts and corners require touch-ups after fitting. The sequence is coordinated with the glue and the base.
Can oak be left without a protective coating?
No, if the profile will be used regularly. The tint and protective finish must match the room conditions and purpose.
How to choose a border for a dresser?
Compare paper frames with widths of 36 and 55 mm, leave space for handles, and check that the inner field does not shrink too much. On small drawers, MLD-041 is usually calmer.
Where to buy MLD-041 and MLD-042?
Both models are featured in the STAVROS catalog. Before ordering, you need to select the cross-section, material, length, finish, and calculate the number of slats based on the cutting map.
Conclusion: the border cross-section determines the entire scale of the project
MLD-041 and MLD-042 are similar in their simple rectangular shape, but solve different tasks. The 36 × 11 mm profile creates a thin frame on small furniture fronts, in the frequent grid of wall frames, and around compact inserts. The 55 × 15 mm size forms a more noticeable line on tall doors, large panels, mirrors, and boiserie.
The material is chosen together with the finish and cutting. MDF 2600 mm long and beech 2400 mm long are prepared for enamel. Oak 2600 mm long is for tinting. The difference in length affects the number of joints, and the natural pattern of oak requires sorting.
Before purchasing, you need to make a layout, calculate perimeters, create a cutting map, add a margin, and check the installation method. STAVROS allows you to move from a general idea to a specific MLD-041 or MLD-042 card and assemble a project from coordinated linear elements without randomly choosing width, material, and finish.