Article Contents:
- Which Table Legs Are Actually Worth Making Yourself
- Straight Leg with a Square or Rectangular Cross-Section
- Simple tapered leg
- Turned leg
- Carved leg
- The Cross-Section Is Best Determined Before Profiling
- Don't copy the size from one random leg
- Solid wide board
- Glued-up blank
- Flat structural support
- Option 1. Full DIY
- Option 2. Ready-made legs
- Option 3. Ready-made base
- A unique size is needed
- Simple geometry
- Material is already in use
- Equipment is already set up
- Need a custom unique shape
- Complex turned profile
- Carving
- Need four pieces
- Need a quick prototype
- No suitable equipment
- Found an SKU that already matches the project
- Mistake 1. Treating one successful leg as proof that the set is ready
- Mistake 2. Not counting the setup
- Mistake 3. Saving on a test piece
- Mistake 4. Calculating length without a joint
- Mistake 5. Making the apron after the legs
- Mistake 6. Comparing a finished leg only with the price of the timber
- Mistake 7. Buying a ready-made set without a sample for a complex project
- Mistake 8. Treating BUY as giving up on a custom piece
- How to make wooden table legs with your own hands?
- What is the best material for simple table legs?
- How to make four legs the same height?
- How to calculate the height of the legs?
- Which is easier — timber legs or ready-made supports?
- Is it worth turning four legs yourself?
- When is it more cost-effective to buy ready-made table legs?
- Can you buy unfinished legs and paint them yourself?
- Which is better — four legs or a ready-made table base?
- Where to buy ready-made wooden table legs?
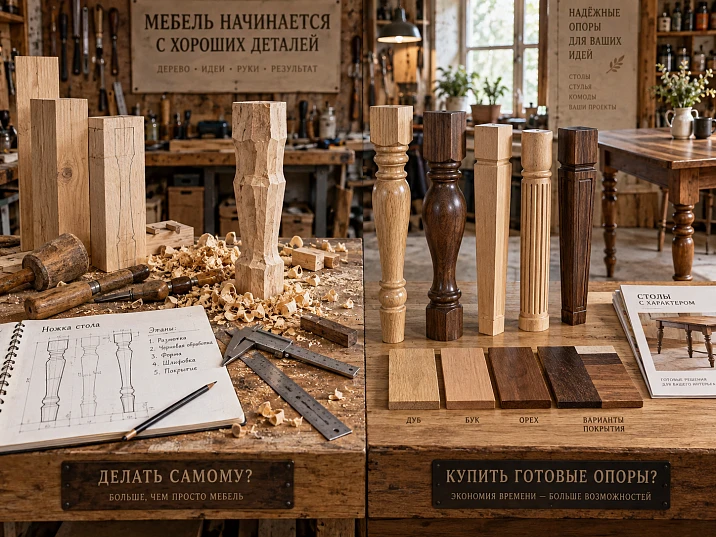
One straight leg made from a timber blank is a normal carpentry task. Four identical turned legs with several profile transitions are already a separate production operation. And four carved supports with deep relief can require more time for fabrication, calibration, and sanding than the tabletop and aprons combined.
Therefore, the question "how to make wooden table legs with your own hands" should reasonably begin not with choosing a router bit and not with a drawing of the first support that comes to hand. First, it is worth determining exactly which geometry will need to be repeated four times and what is already available in the workshop for this.
If the leg is a dry planed timber blank with a straight or very simple taper, making it yourself is often logical. The craftsman controls the size, material, and connection to the apron, and introducing a separate purchased component may offer no advantage at all. But with each new complication — a turned profile, multiple diameters, threading, a cabriole shape, complex sanding — the economics of the task change.
What must be calculated is no longer the price of the wood. What must be calculated is working time, equipment setup, making a test piece, the probability of defects, repeatability of the set, and subsequent finishing.
It is precisely at this point that DIY turns into MAKE vs BUY: make the supports yourself, send them out for a separate operation, or use ready-made table legs and keep the tabletop, aprons, joinery, and finish for yourself.


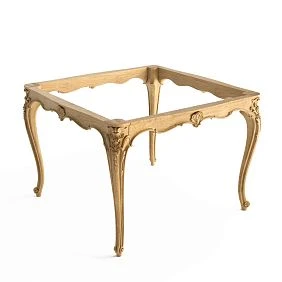
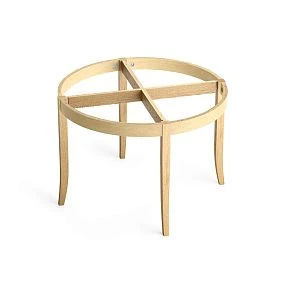
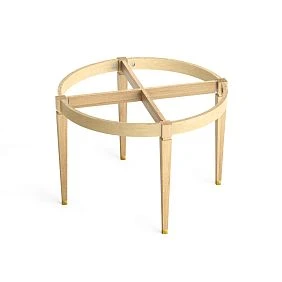

Which table legs are actually worth making with your own hands
Making them yourself is especially rational where the geometry is clear without complex tooling.




A straight leg with a square or rectangular cross-section
This is the most obvious candidate for DIY.
If the workshop already works with solid wood, four identical blocks can be prepared as part of the usual process: cutting, jointing, thickness planing, cross-cutting, sanding. There is no need to start a separate lathe or develop a complex contour.
But even here there is one caveat: the table needs more than just four similar blocks. It needs a set of identical length, with identical end geometry and a predictable connection to the apron.
A leg that could individually be called "normal" may turn out to be problematic in the set if one part is 2–3 mm longer than another or has a different end angle. On the table, this difference turns into wobbling, skewing, or the need to compensate for the error during assembly.
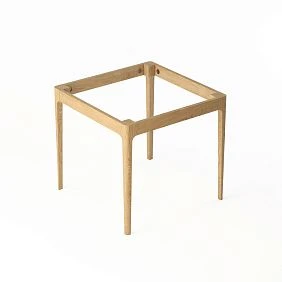
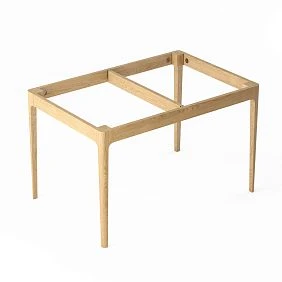
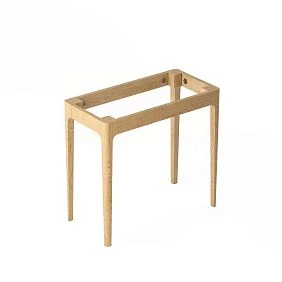
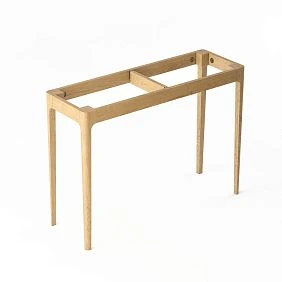
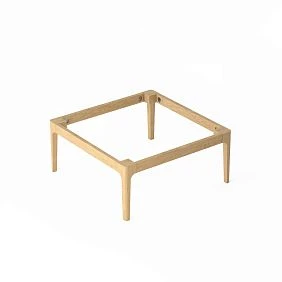
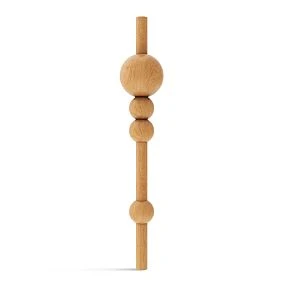
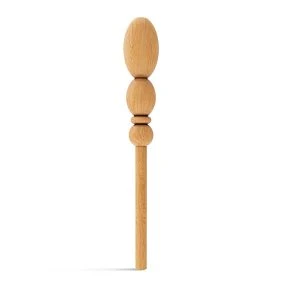
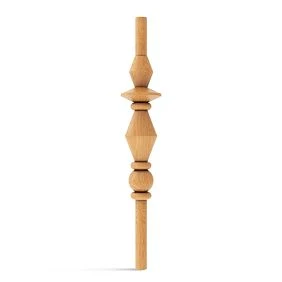
Our factory also produces:
Simple tapered leg
A slight taper can also be made independently if the workshop can consistently reproduce it on four parts.
This is where a template comes in. The first part should not become an "eyeballed reference." It is better to determine right away:
- initial cross-section;
- height at which the taper begins;
- final cross-section;
- length;
- the side or sides along which the taper runs;
- method of subsequent sanding.
If all four parts are machined with a single setup and a single template, the task remains quite reasonable.
Get Consultation
Turned leg
From this point on, the question changes.
The lathe itself does not solve the problem yet. You need to produce four parts with matching diameter transitions, positions of the beads, grooves, thickenings, and narrow sections.
One beautiful leg can be turned by hand and adjusted as you go. Four identical ones already require a template, reference dimensions, and a stable process.
Carved leg
Carving adds yet another layer of production.
If the pattern is simple and the workshop regularly does similar work, making it yourself can be part of a normal process. But if, for the sake of one table, you need to learn a CNC program for the first time, make jigs, sand a complex relief, and then try to repeat it all three more times, "doing it yourself" no longer necessarily means "doing it cheaper."
In such a situation, it makes sense to look at ready-made carved furniture legs and compare not the price tag with the price of the timber, but the full scope of your own operations.
The main difficulty is making not one leg, but four identical ones
This is the central problem of DIY legs.
When a craftsman makes the first piece, it almost inevitably receives more attention. You can sand the transition longer, fix a small mistake, slightly change the line of the taper, adjust the turned profile.
The second must repeat the first. The third — the second and the first. By the fourth, everything that was done "by feel" in the first but never recorded becomes apparent.
For a simple square timber, repeatability is easy to check: length, cross-section, straightness.
For a turned leg, there are already more control points:
- overall length;
- top and bottom cross-section;
- position of each characteristic transition;
- diameters;
- length of cylindrical sections;
- depth of recesses;
- profile symmetry.
For a carved one, the pattern itself is added to the geometry.
On an assembled table, small differences are more noticeable than on individual blanks. The four legs create a rhythm. If one baluster-like transition is higher, one volute is wider, or one conical section begins earlier, the eye reads the deviation as a flaw in the set.
Therefore, even before making the first part, it is useful to answer the question: how will I guarantee that the fourth leg matches the first?
If there is no answer, that is already an argument in favor of a ready-made serial SKU.
First we design the table, then the legs
The legs should not exist separately from the table.
Before cutting the blanks, you need to know:
- final height of the furniture;
- countertop thickness;
- the presence and height of the apron;
- distance between supports;
- end and side overhang;
- the connection method;
- chair dimensions;
- legroom requirements.
A bad order looks like this:
make four legs about 750 mm each → find a tabletop for them → realize the final height is too large → shorten the finished profile.
Good:
determine the finished table → get the allowable leg height → make or select a specific option.
This is especially important for turned and carved parts. With a simple straight leg, a few millimeters can sometimes be removed from the bottom without destroying the look. With a complex shape, the bottom may be part of the composition. Shortening changes the proportion, the position of the pattern, or leaves too short a lower section.
Therefore, in a DIY project, the leg size must be designed, not "adjusted later."
How to calculate the height of a wooden leg
For the simplest scheme, the guideline is indeed elementary:
finished table height − tabletop thickness = base leg length
For example, if the design height of the table is 760 mm, and the tabletop is 40 mm and sits directly on top of the support:
760 − 40 = 720 mm.
In such a conditional design, a leg with a height of 720 mm is used in the calculation.
But this formula ceases to be complete if another structural element appears between the leg and the tabletop.
For example:
- finished height — 760 mm;
- tabletop — 30 mm;
- there is another structural layer of 10 mm above the leg.
Then the base height of the support is:
760 − 30 − 10 = 720 mm.
And vice versa: if the top of the leg partially fits into another part or the actual assembly scheme is arranged differently, the calculation will change.
Therefore, it is better to write the working formula as follows:
leg length = design height of the finished table − actual height of all elements above the support.
This is not a building code and not a universal number. It is the geometry of a specific assembly.
Before manufacturing the four parts, the calculation should be confirmed on a scaled section of the joint.
Apron and legroom
A table can have the correct overall height and still be uncomfortable.
The reason is the apron.
It runs below the tabletop and takes up part of the vertical space. The taller the apron, the lower its bottom edge is. This may be justified for the rigidity of the structure, but a person perceives not the height of the tabletop, but the actual clearance to the obstacle.
Therefore, in addition to the overall height, check:
floor → bottom edge of the apron.
This is especially important if the table:
- is designed for tall users;
- comes with armchairs;
- is used with chairs with armrests;
- has massive wide aprons;
- should allow the seat to be pushed in deeply.
Imagine a person can sit at the table, but the armrest of the armchair is above the lower edge of the apron. Formally, the table height is correct. In practice, the armchair does not slide under.
Such a mistake cannot be fixed by choosing a different finish or a prettier leg. It is built into the geometry of the base.
If the furniture is being designed from scratch, draw a chair next to the table. In the workshop, this takes a few minutes and saves much more time on rework.
DIY timber legs: a rational DIY approach
For a simple table, a beam remains the most straightforward blank material.
The working sequence can be as follows:
- Choose a dry and stable material.
- Bring the blanks to the same cross-section.
- Cut four parts with the same machining allowance.
- Process them with a single setup.
- Bring the set to its final length.
- Compare the parts in pairs.
- Perform sanding.
- Only after the geometry has stabilized should you proceed to holes, fastening, and joints.
Why is it better not to drill at the very beginning? Because while the length and position of the faces are still changing, the hole may end up tied to intermediate geometry.
There is also a simpler way to check the set: after cutting to length, assemble all four legs together and compare the ends on a single plane. For a complex profile this is not enough, but for straight parts such visual and dimensional inspection is very useful.
It is better to bring the section to size before profiling
If a leg should be, for example, 70 × 70 mm, it is useful to first produce four stable identical blanks of this size, and only then add the taper or decorative element.
If you start forming the profile on blanks that themselves differ by 1–2 mm, the next operation will only lock in the difference.
Do not copy the dimension from one random leg
If one part already exists, measure it at several points and make a working sketch.
The phrase “let’s make three more just like it” without a drawing works only until the first mistake.
Legs from a board: when this makes sense
The query “DIY wooden table legs from a board” sounds simple, but the word “board” can hide different types of blanks.
Solid wide board
If the thickness and width are sufficient, a simple flat support or several elements can be cut from it.
But for a classic four-legged construction, a single ordinary board is often insufficient in cross-section. Then gluing becomes necessary.
Laminated blank
Several lamellas can be glued into a thicker block, and then processed like a beam.
This is a normal woodworking technology, but it already requires control:
- the direction and quality of the lamellas;
- the gluing;
- planes;
- further removal of the allowance;
- the behavior of the seams during profiling.
For painted furniture, the visual task is one thing. For clear finishing, it is another: the glue lines and texture matching become part of the appearance.
Flat structural support
A wide flat leg can also be made from a board if the table itself is designed in that style.
But that is already a different type of base. There is no need to try at any cost to turn a board into an imitation of a solid turned leg.
The main takeaway is simple: the fewer operations required after obtaining the blank, the stronger the DIY position.
A straight leg is a good candidate for DIY manufacturing
There are situations where a ready-made product is truly excessive.
For example, a workshop makes a work table with four straight square-section oak supports. Oak is already in production, the thickness planer and miter saw are used every day, the connection to the apron is standard, and no profile is needed.
In such a situation, making your own leg:
- does not require a separate purchase;
- is easily adjusted to the required height;
- uses the same material as the other elements;
- can be manufactured simultaneously with the aprons;
- does not add a complex operation.
Here MAKE is quite rational.
The same applies to a unique size that is not available in the ready-made assortment. If the whole task comes down to simple geometry, searching for a compromise SKU can take more time than manufacturing.
An article about ready-made legs should not deny this. Buying makes sense where a ready-made component truly replaces complex work.
A turned leg is already another level of production
A turned leg looks like a single part, but technologically it consists of a sequence of dimensions.
The simplest profile may include:
- cylindrical sections;
- spheres or ovals;
- rings;
- beads;
- grooves;
- diameter transitions;
- tapered sections.
To repeat it four times, the craftsman must either work from a template and reference dimensions, or use a more automated technology.
Grinding is added to this. The leg must be processed so as not to "eat away" the sharp transitions of the profile and not to leave tool marks.
If the machine is idle and turning work is a regular part of production, MAKE can remain profitable.
If the machine needs to be readjusted specifically for four parts, and the operator is distracted from other work, the situation is already different.
In this case, it makes sense to compare your production with the category of ready-made turned legs.
Carved leg: DIY becomes a separate project
With a carved leg, the very word "leg" conceals several stages:
blank → forming the overall geometry → carving → refinement → sanding the relief → inspection → finishing.
If the pattern is deep, sanding can turn out to be one of the most labor-intensive parts. A flat surface is processed quickly by machine. In inner corners and undercuts, you have to work more precisely.
Repeatability here is more difficult than with a simple turned part.
With hand carving, four elements can naturally have slight differences. In author furniture this is sometimes acceptable and even valuable. But if the task is a serial identical set, the requirements change.
With CNC, repeatability is higher, but other costs appear:
- program;
- setup;
- tool selection;
- workpiece fixturing;
- machine time;
- subsequent manual finishing;
- Sanding.
If the workshop already produces such carving serially, this is a working process. If the entire cycle has to be created from scratch for a single table, a ready-made carved leg can replace several operations at once.
You need to count not only the cost of wood
The weakest MAKE vs BUY economics looks like this:
four blanks cost 4,000 rubles, four ready-made legs cost significantly more, so making them yourself is more profitable.
This comparison is missing production.
For a workshop, the real cost of DIY is closer to the formula:
wood + waste + blank preparation + labor time + machine time + setup + test parts + sanding + probability of defects + finishing = the real cost of making it yourself.
Some elements of the formula may add almost nothing.
If the machine is already set up for this profile, the template exists, the operator makes such legs every week, and the material is purchased in volume, the cost can be very good.
But for a one-off project, it's the opposite. Setup is spread across just four parts.
An example without tying it to specific prices:
- 1 hour to prepare the drawing and template;
- 1.5 hours to select and calibrate the blanks;
- 2 hours of machine processing;
- 2 hours of hand sanding;
- one additional test part.
This is no longer "four pieces of wood."
It's working hours that often change the decision.
When ready-made legs are cheaper not in price, but in time
In a small workshop, machine and craftsman time is a limited resource.
If a customer needs one table, but the legs require occupying equipment for half a day, the workshop turns down other work. That lost output also has a cost.
That is why BUY can be more profitable even when a finished part costs more than raw material.
This happens especially often with quantities:
- 4 legs;
- 8 legs;
- one prototype;
- two identical tables;
- a small batch, where setting up a new operation has not yet had time to be spread across dozens of items.
As the batch size increases, the balance may change.
If you need 400 identical legs, in-house tooling and automation may already pay off. But a decision for four parts cannot be automatically transferred to four hundred — or vice versa.
A finished leg does not mean a finished color
Buying a ready-made support does not necessarily deprive a workshop of its own finishing.
There is an intermediate scenario:
ready-made complex geometry + in-house preparation and finishing.
That is exactly why the DIY audience finds this section interesting unpainted furniture legs.
A craftsman can avoid spending time on complex turning or carving, but keep for themselves:
- color matching;
- enamel;
- stain;
- tinting;
- oil;
- varnish;
- patination;
- alignment with the apron and tabletop.
This is not a "rejection of handwork." It is transferring the most labor-intensive geometric operation to a ready-made component.
For a custom table, this approach is often the most convenient: the piece remains one's own in design and finishing, while the serial SKU works as a high-quality blank of complex shape.
MN-124 instead of turning four parts yourself
turned furniture leg MN-124 — a clear example of make-or-buy.
The product card lists the size as 720 × 160 × 100 mm, with options available in beech and oak.
For the article, the price and any attempt to call this model universal are not what matters. The scenario itself is what's interesting.
The craftsman makes:
- his own tabletop;
- his own aprons;
- his own joint;
- his own finish.
But instead of developing and repeating a complex turned profile four times, he takes four ready-made identical components.
As a result, the piece is still designed in the workshop, but one technological operation is eliminated.
Before purchasing, checks are still needed:
- Whether the 720 mm height fits the planned assembly.
- Whether the other dimensions are compatible with the stretcher.
- How the upper assembly is constructed.
- Which material is needed — beech or oak.
- How the selected species will behave with the intended finish.
- Whether four parts can be used in the required orientation.
A ready-made SKU saves operations, but does not eliminate design work.
MN-106 as another ready-made turned component
Turned furniture leg MN-106 also has a height of 720 mm, but the product page lists a different size: 720 × 138 × 88 mm.
This pair alone reveals an important rule:
the same height does not mean the same geometry.
MN-124 — 720 × 160 × 100 mm.
MN-106 — 720 × 138 × 88 mm.
For DIY thinking, this is a useful example. If a maker decides to skip custom turning, it is not enough to find a “ready-made 720 mm leg.” You need to choose a specific profile and check how it fits the project.
Two stock SKUs let you choose between two ready-made geometries instead of creating a third from scratch.
If neither fits the assembly, proportions, or visual scale, MAKE becomes stronger again.
That is why the decision cannot be reduced to advertising a ready-made product.
If threading is needed, a ready-made SKU replaces even more operations
Carved leg MN-040 shows the next level.
The product card offers three size options:
| Option | Size per card |
|---|---|
| 650 мм | 650 × 56 × 88 mm |
| 740 мм | 740 × 64 × 100 mm |
| 900 мм | 900 × 78 × 122 mm |
This is not just “one leg in different heights.” Along with the height, the other listed dimensions change as well.
For in-house production, this means three different sets of geometry. For the buyer, it means choosing a specific option and checking its drawing.
The scenario might look like this:
your own tabletop + your own apron + your own finish + ready-made complex carved geometry.
This is exactly where the commercial transition from DIY feels natural. The user isn't told "don't do it yourself." They're given a criterion: if the chosen design requires setting up a separate production run for just four parts, a ready-made carved support becomes a real alternative.
Full DIY, ready-made legs, or a ready-made base
Make-or-buy has not two, but at least three levels.
Option 1. Full DIY
The craftsman makes everything independently:
- legs;
- aprons;
- joints;
- tabletop;
- finishing.
Advantages:
- maximum freedom of size;
- custom profile;
- no dependence on a catalog.
Disadvantages:
- all operations stay within the workshop;
- repeatability is needed;
- all defect risks are your own.
Option 2. Ready-made legs
The craftsman makes everything independently:
- tabletop;
- aprons;
- joints;
- finishing,
and uses the legs as a ready-made component.
This is a compromise between freedom and speed.
Option 3. Ready-made base
You purchase a higher level of assembly readiness — the base.
In this case, the craftsman deals less with the geometry of the base and works more with the tabletop and the overall piece.
You can view the category in the section wooden furniture frames and bases.
Which level to choose depends not on the "premium" nature of the project, but on which operations the workshop wants to keep in-house.
When DIY is more rational than a ready-made part
Making it yourself has strong arguments.
A unique size is needed
A ready-made SKU may simply not exist.
If a table must have an unusual height, a narrow cross-section, or a specific mounting assembly, searching for a suitable ready-made product can lead to too great a compromise.
The geometry is simple
Straight timber, a simple cone, a flat support — operations that are often easier to perform in your own production.
The material is already in use
If the workshop makes the entire table from a single batch of wood, it is easier to include its own legs in the overall material flow.
Equipment is already set up
A series of identical furniture radically changes the economics. A profile that is unprofitable to run for four parts can be profitable for forty or four hundred.
You need your own unique shape
A ready-made SKU by definition cannot be a unique custom profile.
If the leg itself is the main design object, MAKE can be part of the item's idea.
When it is better to look for a ready-made leg
BUY becomes stronger under other conditions.
Complex turned profile
The more transitions and control dimensions, the more expensive the one-time setup.
Carving
Deep relief requires additional operations and control.
Need four pieces
A small quantity distributes setup costs poorly.
Need a fast prototype
A ready-made component allows you to test the table as a whole faster.
No suitable equipment
Buying a machine for a single order is almost never a reasonable part of the cost of one product.
Found an SKU that already matches the project
If a ready-made leg matches in height, dimensions, and style, independently reproducing the same geometry may not add new value to the project.
One ready-made sample before abandoning your own manufacturing
It is not necessary to make a BUY decision based only on the catalog.
A more reliable workflow:
find SKU → get one part → measure → attach to project → evaluate finish → compare with own production → make MAKE/BUY decision.
A physical sample answers the questions that a photograph leaves open:
- real visual mass;
- surface quality;
- accessibility of the joint area;
- ease of sanding and finishing;
- scale of the profile relative to the countertop;
- behavior of the relief under side light.
If the sample does not fit, the craftsman loses far less than after ordering a full set.
If it fits, it can be used as an approved part for further specification.
How to compare DIY and BUY in the table
| Parameter | Do it yourself | Buy a ready-made leg |
|---|---|---|
| Simple geometry | Often rational | may be overkill |
| Unique size | Strong advantage | you'll have to find a compromise SKU |
| Complex turning | separate operation | profile is already formed |
| Carving | requires its own process | ready-made geometry |
| Four parts | setup is spread over a small quantity | convenient for a one-off project |
| Large series | custom tooling can pay for itself | depends on price and supply stability |
| Custom finishing | Fully under control | possible on an unpainted leg |
| Repeatability | needs to be provided by the technology | serial SKU simplifies the task |
| Prototype lead time | depends on workshop workload | can be shortened if a suitable part is available |
| Unique design | maximum freedom | limited to the catalog |
This table does not choose for the workshop. It shows where the real costs are.
How to calculate your own time
For a fair comparison, it helps to keep a small calculation.
For example:
| Operation | Time |
|---|---|
| Drawing preparation | ___ h |
| Material preparation | ___ h |
| equipment setup | ___ h |
| test part | ___ h |
| 4 main parts | ___ h |
| Sanding | ___ h |
| Control and corrections | ___ h |
| Preparation for finishing | ___ h |
Then the working time is multiplied by the internal hourly cost of the workshop.
Added separately:
- the material;
- waste;
- tools;
- machine time, if calculated separately;
- defect;
- finish.
Only after this does comparison with a ready-made SKU become economic rather than emotional.
The phrase "I'll just do it myself anyway" can be a conscious choice. But then you need to understand: part of the project's cost is paid with the craftsman's time.
How to make four legs the same height
Even for a simple DIY project, there's a useful principle: the final length is set for the set, not for four independent parts.
Working approach:
- Prepare four blanks with extra allowance.
- Bring them to the same cross-section.
- Shape the profile.
- Assemble the parts into a single set.
- Check the top and bottom reference points.
- Perform the final trimming using a single setting.
- Number the legs.
- Re-measure the length.
If the profile allows, it is more convenient to check the parts from a single base plane.
After assembly, the table is still checked on a flat surface. The cause of wobbling may not only be the length of the legs: the error may be in the apron, the joint, or the tabletop itself.
There is no need to immediately sand down the "long" leg until it is clear where the geometry has gone off.
The connection to the apron cannot be chosen after the leg has been made
For a DIY table, the connecting joint is best designed before profiling.
Why?
Because enough material must be left in the upper part of the leg for the connection. If the craftsman first made a beautiful taper or turned transition, and then decided to place the apron higher, the structure may end up in the decorative area.
This is especially critical when:
- mortise-and-tenon joints;
- dowels;
- threaded rods;
- mounting plates;
- additional brackets;
- complex threading in the upper part.
The article cannot prescribe a single universal fastener for all tables. But the principle is the same: the connection point is part of the leg's geometry from the very beginning.
An unfinished finished leg as a semi-finished product with a high degree of readiness
For a workshop, it is useful to view an unfinished mass-produced leg not as a finished product, but as a complex semi-finished product.
Its geometry is already in place, but the project can still gain its own character through:
- wood species;
- toning;
- enamel;
- patinas;
- combinations with the apron;
- countertops;
- hardware;
- proportions.
This is similar to using ready-made furniture decor in a custom piece: a manufacturer does not have to produce every complex part from scratch to preserve the authorship of the entire piece of furniture.
The main thing is that the SKU is consciously included in the design.
How to organize the specification if BUY wins
After choosing a ready-made leg, do not leave the decision in the correspondence.
In the specification, record:
SKU → full size → material → quantity → URL → project version → finish → orientation method.
For a model with multiple sizes, you cannot write only the name.
For example, the entry MN-040 is insufficient. It has variants 650, 740, and 900 mm with different other dimensions.
It is more correct to store the full string.
If one table requires four legs, and the series has ten tables:
4 × 10 = 40 legs.
Then the workshop independently determines whether a technological reserve is needed and which one exactly. There is no universal percentage for all projects.
When a ready-made table base is more rational than both DIY and four separate legs
Sometimes the main question is formulated incorrectly.
The craftsman chooses between:
making four legs himself or buying four ready-made ones.
But the project itself does not require four separate supports. A ready-made base may suit it better.
This happens if:
- you want to reduce the amount of base construction;
- the table geometry works better with a different support scheme;
- you need to free up space at the corners;
- a ready-made connected base is required;
- the workshop wants to focus on the tabletop and finishing.
Then the third option should be included in the comparison before purchasing material.
Mistakes in a DIY leg project
Mistake 1. Treating one successful leg as proof that the set is ready
One part shows that the profile can be made. It does not show that it can be repeated four times in an acceptable amount of time.
If the first leg took forty minutes, and each subsequent one takes an hour due to constant adjustments, the cost is already different from the original estimate.
Mistake 2. Not accounting for setup
If the machine is set up for two hours for four parts, those two hours belong to the project. You cannot count only the time of the actual turning.
The same applies to preparing the template, the trial run, the tooling, and cleaning up the workplace after a specific operation.
Mistake 3. Saving on the test part
On a complex profile, a defect in one of the four final parts forces the operation to be repeated at the very end of the process.
A test blank seems like an unnecessary expense until the first mismatch. After it, it becomes clear that it was insurance for the setup.
Mistake 4. Calculating the length without the joint
The height formula must account for the actual assembly, not just the countertop.
If the leg fits into the upper base element, is attached via a plate, or has a different mounting scenario, simply subtracting the countertop thickness no longer gives an accurate length.
Mistake 5. Making the stretcher after the legs
The joint may land on the profile or the thread.
In the best case, you will have to change the stretcher height. In the worst case, you will have to redo already manufactured parts or make a weak compromise joint.
Mistake 6. Comparing a finished leg only with the price of the timber
This removes from the calculation the main cost of complex production — time.
A correct comparison should include operations, not just raw materials.
Mistake 7. Buying a ready-made set without a sample for a complex project
A photograph does not show the exact visual mass and all the details of the joint.
If the support is large, carved, or of an unusual shape, a single physical sample can reveal a conflict with the tabletop, apron, or chair even before ordering the full set.
Mistake 8. Treating BUY as a rejection of a custom piece
A ready-made support can only be one component of your own design.
The tabletop, proportions, frame, finish, color, joints, and the entire piece remain part of the workshop's project.
Where to buy ready-made wooden table legs
If the calculation shows that a ready-made component is more rational, look for the best option based on the task.
For items with a base under the table, there is a section ready-made wooden table legs.
The entire assortment is in the category of wooden furniture legs.
If you need geometry without a ready-made finish, you can look at Unpainted legs.
To replace an in-house turning operation — Turned Legs.
For complex relief — carved legs.
This search order is more logical than opening dozens of product pages without a predetermined height and design.
First, you need the allowable height range. Then — the maximum dimensions and the position of the stretcher. After that, incompatible models are filtered out. Only at the end are the pattern, species, and finish compared.
Practical MAKE vs BUY decision tree
Before manufacturing, you can go through a short sequence.
1. Is the geometry simple?
Yes → go to question 2.
No → go to question 3.
2. Is the equipment already set up and is the material available?
Yes → DIY looks rational.
No → calculate setup and labor hours, then compare with a ready-made SKU.
3. Turned or carved profile?
Yes → evaluate the full production cycle and repeatability of four parts.
No → a custom template and milling may be sufficient.
4. Need a unique size?
Yes → MAKE's advantage grows.
No → compare standard models.
5. Need only four parts?
Yes → the costs of launching your own complex production are poorly distributed.
No → for a large series, calculate your own tooling separately.
6. Does the ready-made SKU fit geometrically?
Yes → order or obtain one sample for verification.
No → don't try to adapt the entire table to an unsuitable leg; go back to MAKE or another model.
7. The ready-made leg fits, but you need your own color?
Choose the unfinished option and keep the finishing within your own process, if the specific model and material are compatible with it.
8. Even four legs create too complex a base?
Check whether a ready-made table base would be more rational.
This is the mature version of the answer to the question “make it yourself or buy it.”
What ultimately remains with the workshop, even if the legs are purchased
A ready-made leg does not turn the project into an assembly from a catalog.
The workshop still makes decisions about:
- the size of the tabletop;
- its shape;
- the material;
- the position of the supports;
- the construction of the aprons;
- the method of joining;
- the overhangs;
- finish;
- the color;
- in combination with chairs;
- the overall proportions of the item.
Therefore, MAKE vs BUY is better understood not as a debate of "handmade versus ready-made goods," but as a distribution of operations.
A rational workshop does not have to make every component from scratch. It must understand which operation adds value to the item and which simply consumes time.
If a simple straight leg is made in one work cycle together with the aprons, there is no point in complicating procurement. If a carved profile requires a separate program, setup, and several hours of hand finishing, a ready-made component can free up time for those parts of the table that are truly original.
Mini-specification before the MAKE or BUY decision
Before making the final choice, you can fill out one table.
| Parameter | Value |
|---|---|
| Table type | ___ |
| Final height | ___ mm |
| Tabletop thickness | ___ mm |
| Required leg length | ___ mm |
| Apron | Yes / no |
| Clearance | ___ mm |
| Leg type | straight / tapered / turned / carved |
| Parts needed | ___ pcs. |
| Material in the workshop | Yes / no |
| Suitable equipment | Yes / no |
| Setup time | ___ h |
| Production time for the set | ___ h |
| test part | needed / not needed |
| Suitable SKU found | Yes / no |
| Sample is checked | Yes / no |
| Solution | MAKE / BUY / base |
Such a table is more useful than the intuitive “we’ll probably make it ourselves.” It forces you to separate the real advantage of in-house production from the habit of doing everything inside the workshop.
When the decision changes after the first prototype
MAKE vs BUY doesn't have to be decided once and for all.
The first table can be assembled on ready-made legs to quickly test demand for the model. If the product starts selling in series, the workshop has grounds to recalculate its own production.
And vice versa: the first set can be made in-house, and then you find out that sanding a complex profile takes too much working time. For the next batch, the decision shifts in favor of a ready-made SKU.
This is normal production logic.
The most important thing is to keep the numbers from the first project:
- how long preparation took;
- how long — processing;
- how long — sanding;
- whether there were defects;
- how much the material cost;
- how long the assembly took;
- whether the profile had to be adjusted.
Then the second choice is based not on assumption, but on the workshop's own data.
FAQ
How to make wooden table legs with your own hands?
For a simple leg, first determine the design length and cross-section, prepare four identical blanks, process them using a single template, bring them to the final length, and only then make the joints and finishing. A complex turned or carved profile requires a separate technology for repeating four identical parts.
What is best to make simple table legs from?
A massive wooden leg requires a stable blank of suitable cross-section. This can be a solid beam or a properly prepared glued blank. The choice depends on the size, finish, and available material in the workshop.
How do you make four legs of equal height?
Do not bring each part separately "to the required length." Prepare a set with an allowance, process the geometry, then perform final length calibration using a single setting and compare all four parts again.
How to calculate the height of the legs?
For simple assembly, subtract the actual thickness and height of the elements located above the top of the support from the design table height. If a 40 mm thick tabletop sits directly above the leg and the final height should be 760 mm, the reference for the leg is 720 mm. For a different construction, the formula changes.
Which is simpler — timber legs or ready-made supports?
Straight timber legs are often easier to make yourself. Complex turned and carved supports may be more rational in ready-made form, especially for a single table or a small series.
Is it worth turning four legs yourself?
Yes, if turning is a routine workshop operation, there is a template, equipment and time. If the machine needs to be specially set up for four complex parts, first calculate the full cost of labor and machine time.
When is it more advantageous to buy ready-made table legs?
When the profile is complex, few parts are needed, repeatability is critical, there is no suitable equipment, or a serial SKU has been found that already fits in size and construction.
Can you buy unfinished legs and paint them yourself?
Yes. This scenario allows you to buy ready-made geometry but keep your own finishing system — enamel, tinting, oil, lacquer or another finish compatible with the project.
Which is better — four legs or a ready-made base?
These are different base designs. Four separate legs offer more freedom for a custom apron and dimensions. A ready-made base reduces the amount of independent design work on the base. The choice depends on the table's construction.
Where to buy ready-made wooden table legs?
Suitable models can be selected in the section table legs STAVROS, and then filter by type — turned, carved, and other options. Before ordering a specific SKU, check the full dimensions, material, and compatibility with your assembly.