Article Contents:
- First, determine how the console will be used
- Record the console's dimensions and the free space beneath it
- How to determine the required leg height
- The main feature of a narrow console is the limited installation depth
- Why a separate side view is needed
- The usable opening is measured between the inner surfaces of the supports
- Example: the same axes but a different opening for a bench
- A console for a pouf is checked as a three-dimensional opening
- What changes on a console with a drawer
- Edge setbacks change both the appearance and the construction
- The apron and the mounting section must be coordinated
- Two or four supports are chosen according to the structural design
- How to read the dimensions of ready-made legs
- The shape is assessed within the calculated opening
- Beech or oak is coordinated with the finish of the entire console
- Unpainted leg or ready-made finish
- The specific leg is chosen before the final drawing
- What to check on a single sample leg
- How to record console legs in the specification
- Check before ordering the full set
- Where to buy wooden legs for a console table
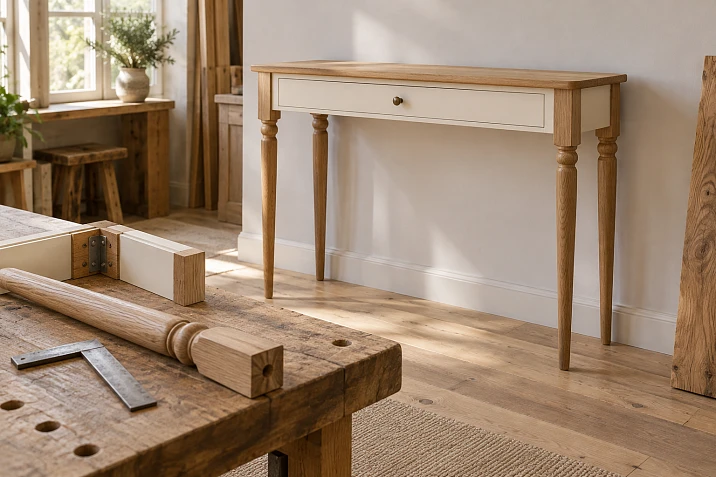
The console can be wider than the pouf that is planned to be pushed under it, and still leave no room for it. Part of the width is taken up by the legs, part of the height by the drawer body, and at a shallow depth the fasteners may intersect with the apron or the runners. Therefore, a suitable support height does not yet mean that the entire piece of furniture will be convenient and suitable for assembly.
Wooden legs for a console are chosen based on three related dimensions: the final height of the furniture, the available depth of the mounting area, and the free opening between the supports. Then the shape, material, and finish are checked. This order helps to select a ready-made part before the final drawing is issued and to preserve the space for which the narrow body is created.
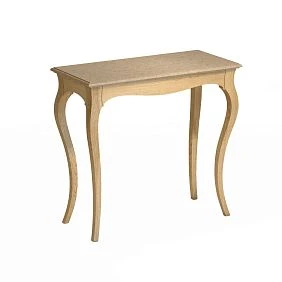
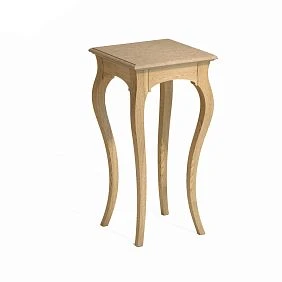
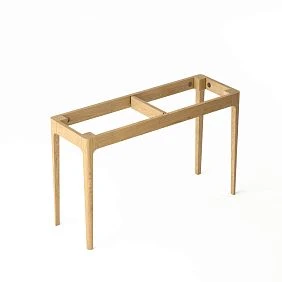
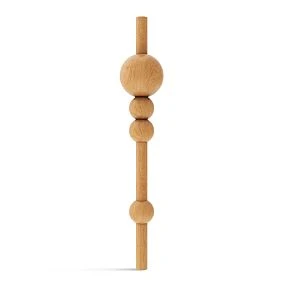
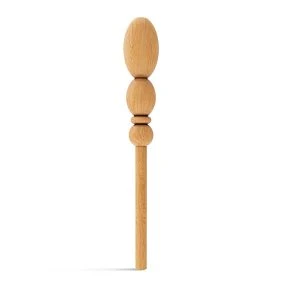
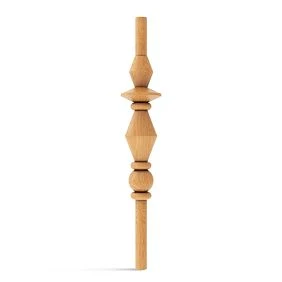
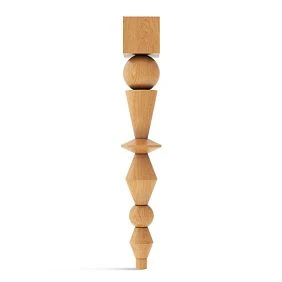
First, determine how the console will be used
A wall-side table for keys and decorative items, a dressing table with a pouf, and a small work surface solve different tasks. Therefore, the height of a dining table should not be automatically transferred to any console project.
If someone is expected to sit at the console, it is evaluated together with the chosen seat: the position of the top surface, knee space, and access to the drawer are important. If the furniture serves only for placing things, the free opening may be needed for a bench, storage, or visual lightness. The requirement must be determined before selecting the legs.
For a preliminary comparison, you can look at Legs for tables, but the purpose of the category does not replace checking the console structure. A model that works well under a deep tabletop may not fit under a narrow body in terms of the mounting part or the side dimension.




Record the overall dimensions of the console and the free space underneath it
The initial scheme should include a general view, a side view, and a bottom plan. At this stage, the main dimensions and the body structure are sufficient. Decorative details can be refined after checking the placement of the supports.
| Initial parameter | What exactly to measure or specify |
|---|---|
| Final height | Distance from the floor to the top surface of the finished furniture |
| External width | Full size of the countertop or cabinet, indicating the selected reference base |
| Depth | Countertop dimensions and the actual depth of the lower mounting area |
| Body height | Dimension from the selected leg mounting plane to the top surface of the furniture |
| Lower obstructions | Position of the stretcher, drawer bottom, slides, crossbars, and fasteners |
| Required opening | Clear width, height, and depth for a person or an item to be placed |
The countertop depth and the available space for mounting may vary. An overhang above the cabinet, a rounded edge, a lower frame or a decorative band reduce the area in which a support can actually be installed.
For a console under a bench, its actual dimensions are recorded straight away, including the upholstery, legs and protruding parts. The seat size in the model name may not match the maximum width of the entire product.
Our factory also produces:
How to determine the required leg height
First, find the vertical zone from the floor to the plane under which the supports are installed:
Support zone = final console height − height from the mounting plane to the top of the furniture.
Then take into account the elements that fall within this zone together with the wooden leg: the mounting plate, the glide, and any intermediate parts. If part of the support goes inside the cabinet, take the actual fit into account. For angled installation, check the vertical dimension of the assembly, not just the length of the part.
An illustrative example: the design height of the console is 800 mm, and the distance from the lower mounting plane to the top of the cabinet is 120 mm. This leaves 800 − 120 = 680 mm for the supports. If the chosen assembly adds 6 mm to the wooden part and the glide adds another 4 mm, the vertical leg itself requires 680 − 6 − 4 = 670 mm. All numbers here illustrate the calculation; these are not the dimensions of a specific product.
The same element must not be added twice. If the installed mounting plate is already included in the catalogue dimensions of the support, adding its thickness again will overstate the result. Nor should the countertop be added separately if its thickness is already accounted for in the cabinet height.
When the nearest ready-made leg does not match the calculation, check another version or an agreed design change. Find out in advance whether the part can be shortened: the upper part may be needed for mounting, and trimming from below may change the profile and the bearing surface.
Get Consultation
The main feature of a narrow console is the limited mounting depth
The leg must fit the cabinet not only in frontal width. In the bottom view, its upper contour, plate or other mounting element, holes and surrounding furniture parts are shown. Then it is checked whether the entire assembly fits within the available area.
If the design has front and rear supports, space is required for them on both sides. At a shallow depth, mounting plates may come close to the side rails, the drawer bottom panel, or each other. Tool access also matters: a screw that fits on the drawing still needs to be installed and tightened if necessary.
For each item, check:
- the position of the top plate relative to the front and rear edges;
- the location of the fasteners in the cabinet material;
- the distance to the side rail, runners and other parts;
- the feasibility of assembly with the selected tool;
- the suitability of the assembly for the specific base and load.
A universal offset in millimeters does not help here. The size depends on the support, hardware, cabinet material and joint design. If the mounting area is small, first the assembly or leg model is revised, and then the remaining dimensions are checked again.
Why a separate side view is needed
A wide support may look proportionate on the front and turn out to be too deep under the tabletop. On a shaped leg, the lower part is sometimes offset relative to the upper part, and the protruding relief takes up space outside the main cross-section. These features are not always visible in a frontal photo.
The side view marks the top mounting, the full profile down to the floor, and the edge of the tabletop. If a leg protrudes forward or backward, this is taken into account in the overall dimensions of the finished console. Such an overhang may be part of the design, but it must not be discovered only after assembly in a narrow passage.
For a wall-mounted model, check the position of the wall and the skirting board. The tabletop may reach the wall, while the rear support or crossbar may hit a protruding skirting board first. The possible gap and the position of the furniture are agreed based on the actual room, without assuming that any cabinet can be pushed flush against the wall.
The plan and the side view must refer to the same version of the structure. Moving a leg for the sake of the fastening changes not only the mounting but also its position relative to the wall, the edge of the tabletop, and the clear opening.
The useful opening is measured between the inner surfaces of the supports
The external width of the console shows how much space the furniture occupies in the room. For a pouf or a seated person's legs, a different value matters — the distance between the nearest inner surfaces of the supports in the relevant zone.
The distance between centerlines is not enough: different models have different profile widths. For two vertical supports at a chosen level, the calculation can be written as follows:
Clear opening = distance between centerlines − protrusion of the left support into the opening − protrusion of the right support into the opening.
For symmetrical sections, the inner protrusion equals half their width at that level. For carved, asymmetrical, or slanted shapes, it is determined from the actual contour. The maximum diameter from the product card does not always describe the section that restricts the movement of the object.
With shaped legs, the opening width may vary with height. Therefore, the area near the floor, the zone where the pouf upholstery passes, and the space under the lower panel of the cabinet are examined separately. If there are several rows of supports, both the front and rear pairs are checked.
For ordering, the opening after assembly and finishing is what matters. If the calculation is based on nominal dimensions, tolerances for the manufacture of parts and the position of the fastening, as well as dimensions after the coating is applied, are taken into account separately. The required clearance is set for the specific object and how it will be used. The pouf width being equal to the calculated opening does not confirm that it can be slid in and out freely.
Example: identical axes, but a different opening for the bench
Suppose that in a hypothetical project the tabletop width is 1000 mm, and the axes of the two outermost supports are 100 mm from its side edges. The distance between the axes is 1000 − 100 − 100 = 800 mm. Let us compare two symmetrical profiles at the level where the bench is to pass.
| Parameter | Option with narrower supports | Option with wider supports |
|---|---|---|
| Distance between axes | 800 мм | 800 мм |
| Width of each leg at the checked level | 80 мм | 140 мм |
| Protrusion of each leg into the opening | 40 мм | 70 мм |
| Clear opening | 800 − 40 − 40 = 720 mm | 800 − 70 − 70 = 660 mm |
| Bench 680 mm wide | In terms of width, a total of 40 mm remains | It does not fit in terms of width |
The first option allows the check to continue, but it does not prove ease of use. The remaining 40 mm is the total geometric difference, not an established clearance standard. It is necessary to assess the upholstery, protruding parts, the person's position when moving the bench, and the other dimensions of the opening.
In the second option, the issue cannot be resolved with a single reference to the console's external width: its one metre of tabletop does not cancel out the 660 mm opening. You will have to choose a different support model, a different bench, or reconsider their placement together with the installation diagram.
The numbers in the example do not refer to specific product codes. For a real order, use the contour of the selected leg at the required height. If the profile widens further along the movement path, checking only the front section will not be sufficient.
A console for a pouf is checked as a three-dimensional opening
A pouf or bench requires three dimensions of free space. The width is limited by the legs and side elements, the height by the lowest part above the item, and the depth by the rear supports, crossbars, wall, and other obstacles.
Start with the largest actual dimensions of the pouf. The upholstery may protrude beyond the base, and the seat legs may occupy a different width at floor level. If the item has to be turned when sliding it in, check the entire path, not just the final position.
Decide in advance whether the pouf should be fully hidden under the tabletop or may remain partially exposed. With a narrow console, these scenarios impose different requirements on the free depth. A wide frontal opening by itself does not ensure that the seat is fully accommodated inside.
For a dressing table, additionally check the person's position: the ability to sit down, move closer, and use the drawer. A pouf that passes through empty does not confirm that there is enough room for the knees under the cabinet. Comfort is assessed with the selected seat and the actual furniture construction.
If a finished seat is not yet available, a lightweight full-size mock-up of its outer volume can be made for a preliminary trial fit. The upholstery protrusions and the position of the legs are marked on it, then it is passed through the opening along the intended trajectory. This helps to detect an obstruction at the rear pair of supports or under the drawer. The mock-up does not replace checking with the actual pouf, but it allows an obvious error to be corrected before the carcass is manufactured.
What changes on a console with a drawer
The drawer increases the height of the carcass and takes up space under the tabletop. If the overall height of the console is maintained, the support zone becomes smaller. Therefore, a leg selected for a thin tabletop is not automatically carried over to a project with a drawer.
The section shows not only the drawer front but also its box, bottom panel, runners, fasteners and the surrounding frame. The clear height is determined by the lowest element above the used zone. A handsome tall clearance between the front legs may be partially blocked by a part located deeper.
The installation of the supports is coordinated with the placement of the runners. The plate or protruding fastener must not fall within their working zone. It is also checked whether the assembly can be assembled and serviced with the drawer installed, or what assembly sequence is provided.
If the required opening cannot be achieved, the height and construction of the carcass together with the supports are considered. Simply fitting longer legs means raising the entire console — this change must be agreed with its purpose.
Edge setbacks change both the appearance and the construction
Moving the legs inward within the carcass reduces the clear width between them and changes the tabletop overhang and the position of the mounting point. Moving them outward may create restrictions at the edges or a conflict with the apron rail. Therefore, the setback is not chosen as a separate decorative value.
On the plan it is useful to distinguish three lines: the edge of the tabletop, the boundary of the load-bearing part of the carcass and the axis of the leg. They do not necessarily coincide. For example, a large tabletop overhang does not mean that there is a suitable base for attachment beneath it.
For a shaped support, the most protruding contour is additionally marked. The same position of the axes in two models does not yet give the same overall dimensions of the finished underframe. A change in the installation direction is also checked against both views and the mounting surface.
When the offset is agreed upon, it is recorded from a specific reference: the edges of the cabinet, the edges of the tabletop, or the axis of another part. An instruction such as "place approximately at the corners" does not ensure repeatability across a series.
The apron and the mounting part must be coordinated
The apron may be involved in joining the legs and forming the underframe. For the chosen scheme, it is important where it meets the support, how much room remains for fastening, and whether the joint falls on a profile transition or a carved section.
If the design uses a separate mounting plate, its full outline and holes are shown on the plan. The size of the wooden top part does not always match the size of the metal element. Fasteners are selected taking into account the thickness and material of the base, not just thread compatibility.
Some models come with their own hardware. For example, support MN-241 is supplied with a pre-installed 2 mm thick metal mounting plate. The product page states that screws or self-tapping screws for fastening to the tabletop must be selected separately. To calculate the overall height, it is necessary to clarify how the plate is accounted for in the product dimensions.
This example does not make such a scheme universal. Another leg may require a different joint, a different frame, or additional processing. furniture hardware are selected after checking the specific mounting part and cabinet.
Two or four supports are selected according to the structural scheme
A console can have different support configurations. The number of legs is determined by how the body transfers load and maintains stability. You cannot specify two supports for the sake of a clear span without accounting for how the rest of the structure works.
In a wall-mounted solution, you need to understand the role of the wall connection. Supporting the rear of the body and preventing tipping are different tasks. Simply placing furniture against a wall does not create either of these connections. If wall mounting is part of the design, it is engineered with the substrate and the required function in mind.
Four legs are also not automatic proof of stability for a narrow, tall body. What matters is the position of the supports, overhangs, drawers, load distribution and rigidity of the connections. These parameters are checked for the finished design.
From a procurement standpoint, one thing matters: first the configuration is approved, then the number and position of the parts. The usable span is calculated within that configuration, and recalculated if it changes.
How to read the dimensions of ready-made legs
In the product card, you need to find the dimensions of the selected version and compare them with the drawing. The A/B/C designations are useful as a guide, but the set of letters varies between models. A letter in the table does not by itself explain whether the dimension refers to the maximum cross-section, the mounting part or a separate section of the profile.
This can be seen in examples from the STAVROS console range:
| Model | Dimensions listed in the product card | Example version, mm |
|---|---|---|
| Turned leg MN-029 | A × B × F | 740 × 80 × 167 |
| Turned leg MN-116 | A × B × D | 720 × 140 × 97 |
| Modern support MN-241 | A × B × C | 742 × 160 × 95 |
The table illustrates differences in the description of geometry and does not imply interchangeability of models. For a narrow console, the actual depth dimension, the upper mounting surface, and the contour limiting the internal opening must be determined separately.
MN-029 has several size versions, so an item number without a selected size does not complete the selection. When switching to another variant, the transverse parameters and the position of the support are checked again. Changing only the height of the conventional image on the drawing while keeping the other dimensions from memory is not allowed.
The shape is evaluated within the calculated opening
Once the main dimensions are checked, several models are compared on the same cabinet. For a console, the side view is especially important: the long profile remains open, while the furniture depth is limited. Evaluating a support only by its similarity to the facade ornament is not enough.
Turned furniture legs provide smooth diameter transitions. For them, the position of the wide sections relative to the pouf, the apron rail, and the lower band of the cabinet is checked. A narrow neck in one place does not guarantee a large opening over the entire height.
geometric furniture legs can support the strict lines of the tabletop and the smooth facade. But a wide front face is sometimes combined with a different depth or an inclined surface. The installation direction is confirmed by the model and the mounting, and is not changed freely for the sake of a nice projection.
У carved furniture legs the relief, curvature, and orientation of the pattern are taken into account. Protrusions may reduce the free space or extend beyond the cabinet. Separate positions are kept in the specification for the left and right versions.
Ornateness by itself does not require a massive base. What matters more is how the volume is distributed over height and depth. If the support is visually heavier than the narrow cabinet, compare another profile with the same specified furniture dimensions and recheck the opening.
Beech or oak is matched with the finish of the entire console
Solid wood furniture legs are chosen together with the future appearance of the cabinet. Beech is convenient to consider for opaque enamel and a uniform color across all parts. Oak — when the wood grain, tinting, oil or clear lacquer matter. At the same time, no species is limited to only one type of finish.
The material must be specified in the order. The same model name in beech and oak does not mean the same appearance after applying the same stain. For a clear finish, wood selection and blank workmanship are also taken into account.
Information on preparation and manufacturing options is available in the section "Quality of solid wood products". For the selected leg, the actual surface quality and available workmanship are confirmed. The wood species does not replace checking the entire bracket structure for the intended load.
Unfinished leg or a ready-made finish
from STAVROS open boundless possibilities for designers, furniture makers, and anyone striving to create unique high-quality furniture. are suitable for a workshop that finishes the cabinet, drawer front, handles and supports using its own technology. The geometry of the part is already formed, and preparation for coating is determined by its condition and the requirements of the finishing system.
The test color sample is compared with the actual cabinet. On a rounded or carved profile, the shade and sheen are perceived differently than on a flat panel. It is important to preserve neat edges, the relief and the functionality of the mounting areas.
Mounting and finishing materials are selected for compatibility with the substrate and other layers. The color name should not be taken as a complete specification: the coating composition, preparation and an approved sample are required.
furniture legs with finish are considered if the existing workmanship suits the project. This option may eliminate a separate finishing operation for the supports. But the color, texture and sheen are still compared with the furniture, and the dimensions and fastening are checked independently of the finish being ready.
The specific leg is selected before the final drawing
First, a bracket layout is created with the required function and dimensions. Then the actual item code is selected, dimensions and mounting are confirmed, the supports are placed and the clear opening is calculated. After this check, the final drawing is issued.
This order does not require subordinating the entire project to an incidental detail. It allows you to see in time which ready-made models suit the given task. If the choice does not work by depth or opening, the adjustment is made before manufacturing the carcass.
On the final drawing, the position of each axis, the installation contour and the critical dimensions of the free zone are retained. When replacing an item code, it is precisely these parameters that are checked. Matching the height of two legs does not confirm an identical result in width and depth.
What to check on a single trial leg
For a new model or a new assembly, it is useful to obtain one unit before ordering the full set. It is measured, compared with the documentation and test-fitted to the actual installation zone or a full-size mock-up. The top platform, access for fasteners and the position of the profile under the carcass are checked.
A single part confirms local geometry but not the stability of unfinished furniture. During test-fitting, the carcass is supported separately. The overall opening is checked against all supports on the drawing or mock-up, and the finished structure — after full assembly within the approved project.
If a custom finish is needed, the agreed cycle is carried out on a sample and the result is compared with the carcass. In the section "Product samples" the available samples are specified, however, to check installation a specific leg is required, not just a wood sample.
After approval, the model, size, material, fastening, position under the carcass and finish are recorded. The control unit that remains in the workshop is counted separately from the quantity for installation.
How to record console legs in the specification
The production record must link the purchased part to its place in the furniture. It needs not only the item code and quantity, but also the data that allows the installation to be repeated and the usable opening to be preserved.
| Field | What to specify |
|---|---|
| Position | H-01 or another designation on the plan |
| Model and finish | Exact SKU, selected size, link to the product page |
| Material and surface | Species, preparation option, approved finish |
| Installation | Hardware, base, mounting plane position |
| Layout | Axis coordinates from selected datums, part orientation |
| Final height | Verified dimension of the finished assembly |
| Free zone | Width at critical levels, height and depth of the opening |
| Quantity | Per the approved drawing; sample and reserve on separate lines |
| Approval | Drawing date and version, control finish sample |
If the front and rear supports differ, they are not combined into a single "leg set" line. The same applies to left and right versions. The assembler must understand which part goes in each position and which way its profile faces.
Fasteners are counted by the selected assemblies, not automatically by the number of legs. The scope of supply is also checked: an installed plate, separate hardware, a glide and the attachment to the cabinet may be counted as different line items.
Checking before ordering a full set
First, the request is compared against the final drawing: item codes, dimensions, material, finish and quantity. Then the three results for which the supports were selected are checked: the final height, the placement of the assembly along the depth, and the usable opening.
For a console under a pouf, it is also useful to record its dimensions in the documentation. If the seat is replaced after the furniture has been approved, the opening will need to be checked again. Approval of legs for one item does not automatically extend to another with a similar name.
Before a series purchase, it is determined whether all the selected versions are identical and whether a full set can be obtained within the required timeframe. If some of the supports are proposed to be replaced with another model, the change is first made through the drawing and specification.
On receipt, the marking, geometry, surface and completeness are checked. Issues with the dimensions and condition of a part are resolved before painting or reworking. This keeps the problem from being carried over from purchasing into the assembly of the finished furniture.
Where to buy wooden legs for a console
In the STAVROS catalog wooden legs for a console are organized by purpose. For selection, use the model's actual dimensions, its mounting part and the material. A broader section of wooden furniture legs helps compare shape and version options.
Before buying legs for a console table, prepare the cabinet dimensions, the required height and the layout of the supports. If a pouf or bench is to stand under the furniture, specify the required clear dimensions. The supply request must include specific item codes, dimensions, wood species, finish and quantity.
It is useful for workshops to study in advance conditions for manufacturers and to coordinate the purchase of a sample together with the subsequent set. Availability, price and lead time are confirmed for the selected version, and payment and delivery are linked to the schedule for manufacturing the body and finish.
Suitable legs for a console preserve the specified furniture dimensions and the required clearance. Once the height, depth mounting and the opening between inner surfaces have been checked, the shape and finish can be approved as part of a completed project. The order includes a specific set for which installation locations and assembly method have already been determined.