Article Contents:
- What to buy for a decorative box: complete list of materials
- Wooden items
- Polyurethane items
- Consumables
- Decorative box vs. construction box: what's the fundamental difference
- Construction box: isolating the problem
- Decorative box: integration into the interior
- Why plastic doesn't solve the problem in a classic interior
- Where a decorative pipe box is most often needed
- Heating riser: vertical from floor to ceiling
- Corner pipes: volumetric structure in the corner of the room
- Communications by the window: horizontal or vertical box
- Pipes in the hallway: strength comes first
- Pipes in the kitchen: moisture resistance and easy maintenance
- Vertical protrusion by the wall: turning a problem into a resource
- Junction with ceiling and floor
- Wood in the box: what to use and where
- Frame from a bar: strength and geometry
- Trim and layout: visible surface
- Lower base: reinforced zone
- Removable panel: access to utilities
- Polyurethane in a box: decorative shell
- Moldings on the front plane: creating a pilaster
- Top finish: cornice or shelf strip
- Decorative lines: horizontal rhythm
- Overlays: point accents
- Connection with baseboard and wall moldings
- Ready-made kits by task type
- Vertical box in the corner: pilaster solution
- Box next to the cabinet: furniture solution
- Box for painting: maximum cleanliness
- Box as a pilaster: classic design
- Box in the hallway: durability and practicality
- What to buy together: a complete list in one visit
- Finishing: surface unity
- Preparing wooden surfaces
- Preparing polyurethane surfaces
- Painting: one color — one surface
- Mistakes when designing a pipe box
- Non-standard situations: when the box requires a special approach
- Pipes with a diameter of more than 100 mm
- Multiple pipes of different diameters and directions
- Metal heating pipes
- Box on a load-bearing brick wall
- About the Company STAVROS
- FAQ: Answers to Popular Questions
- How to beautifully conceal pipes in an interior?
- Can polyurethane molding be glued onto a pipe box?
- What to buy for a box to be painted?
- Is it necessary to leave access to the pipes?
- How to make a box not look like a technical protrusion?
- How to connect the top edge of the box to the ceiling?
- How to ensure a uniform look for wooden and polyurethane parts?
Pipes in an interior are that very detail commonly considered an inevitable evil. A heating riser against the wall, hot and cold water pipes in the corner, utilities running up to the ceiling, wiring near the window — all of this remains after renovation as a reminder that behind the beautiful surfaces lies an engineering reality. Most people solve this problem cheaply and quickly: a plastic box from a hardware store, and the issue is closed. Closed — but not resolved. Because such a box does not disappear from view: it stands as a technical object amidst the interior and says exactly what it is — a cover-up, not a design.
A completely different story is a decorative pipe box assembled from wooden molding, layout, and a block, and finished polyurethane moldings. This is no longer a plug, but an architectural element: a pilaster, a vertical panel, a furniture column, or simply a neat protrusion that has become part of the overall interior system. How to do this is the subject of this article.


What to buy for a decorative box: a complete list of materials
One of the main mistakes when designing a box is starting purchases "on the go." You go for molding, come back for glue, then it turns out you don't have enough block — and three trips instead of one. The right approach: make a complete list of everything you'll need in advance and buy with a reserve.


Wooden positions
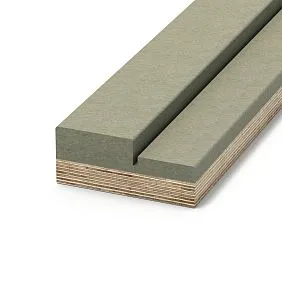
Wooden block — for assembling the load-bearing frame of the box. Rectangular or square blocks with a cross-section of 30×40 mm or 40×40 mm are mounted to the wall with dowels and create a rigid skeleton of the structure, to which all other elements are then attached. For tall boxes (from 200 cm), the block installation step is no more than 60 cm; for low ones (up to 100 cm), it is 80 cm.
Pogonazh iz massiva — the main material for the front, side, and corner strips of the box. These are profiled or straight strips made of beech or oak: they cover the frame, form the visible surface of the structure, and create clear horizontal and vertical lines. Solid wood molding is the choice for all areas where mechanical contact is possible: the lower part of the box, side strips, areas that can be accidentally bumped into.
wooden floor — for closing joints between the front panel and the side wall, between the box and the room wall, as well as for decorative design of corner connections. A layout with a width of 20–40 mm closes the gap and creates a neat, even line along all corners of the box.
Wooden trims — flat or profiled strips for covering technological gaps between the box and the wall. A trim with a width of 30–50 mm and a thickness of 8–12 mm is mounted around the perimeter of the box where the structure adjoins the wall surface.
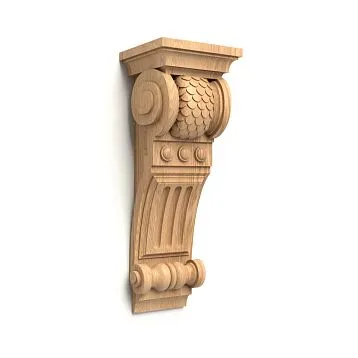
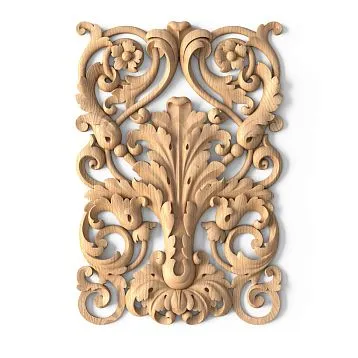
Wooden decoration — carved or milled overlay elements made of solid wood to enrich the front plane of the box. If the box is designed as a pilaster or vertical panel, wooden decorative overlays create relief on the plane.
Our factory also produces:


Polyurethane positions
Moldings made of polyurethane — vertical and horizontal profiles for decorative design of the front part of the box, its top and bottom finishing, and frame structures on the visible plane. Molding creates the decorative relief that turns a technical structure into an architectural element.
Polyurethane trim — lightweight profiles for horizontal wall lines near the box, to connect the box decor with wall moldings and the room's baseboard. It is through the polyurethane trim that the box integrates into the overall wall finishing system and ceases to look like a foreign object.
Polyurethane appliqués — corner decorative elements for the external corners of the box, relief inserts on the front plane, ornamental overlays at the intersection points of moldings.
Decor for Molding — keystones, brackets, corner elements for key points of the decorative composition on the box.
Polyurethane wall decor — molding frames and pilaster elements on the wall near the box, creating a unified decorative system.
Get Consultation
Consumables
Liquid nails and special adhesive for polyurethane — the article details the selection and application technology what to glue polyurethane molding with. Dowels and self-tapping screws — for attaching the timber to the wall. Finish nails — for attaching the wooden trim to the frame. Acrylic sealant — for final sealing of all joints. Acrylic primer — for both materials. Finish enamel, oil, or varnish. Inspection hatch or removable panel — a mandatory element. A 10–15% spare for all profiles.
Decorative box vs. construction box: what is the fundamental difference
This is not a matter of aesthetics — it is a matter of approach. A construction box and a decorative box for pipes solve the same technical task — to hide utilities — but they do it fundamentally differently.
Construction box: isolating the problem
A plastic or drywall construction box is an isolation tool. Its task: to cover the pipes so they are not visible. No connection to the interior, no dialogue with the finish. It simply 'removes' the problem from sight — and stands there as a reminder of technical awkwardness.
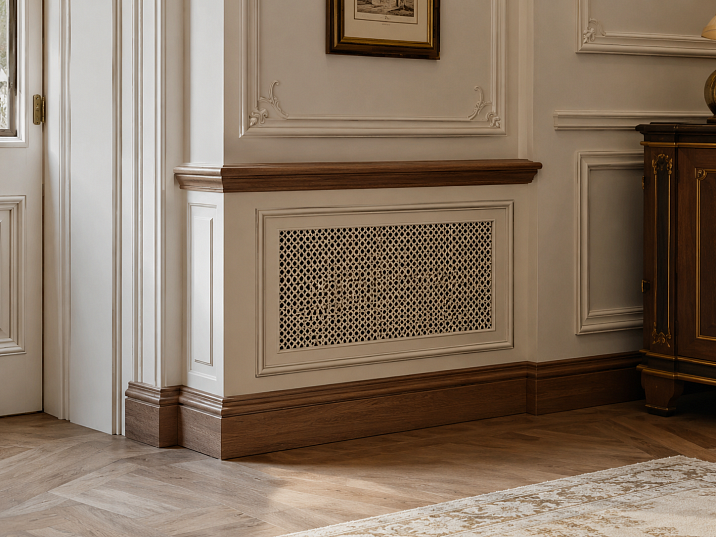
Decorative box: integration into the interior
The decorative box sets a different task: not to hide pipes, but to turn the place where they pass into an interior element. This is a pilaster by the wall that sets the vertical rhythm of the entire room. This is a furniture column that echoes the adjacent cabinet. This is a vertical panel with a frame structure of moldings, continuing the wall finishing system. The box ceases to be a problem — it becomes a solution.
It is this difference that determines the materials: wooden floor for a solid base and neat corners, Polyurethane moldings for the decorative shell, final painting — to make everything one whole.
Why plastic does not solve the problem in a classic interior
In an interior with wooden panels, moldings, classic furniture — a plastic box looks like an installer's mistake forgotten after renovation. Plastic does not paint convincingly, does not have the required relief, the thin profile crumples on contact. A wooden frame with trim and polyurethane decor is a different level: strength, relief, the possibility of a single painting in any room color.
Where a decorative box for pipes is most often needed
The task occurs in every interior where there are visible communications. It is important to understand what exactly is being closed — the type of structure and set of materials depend on this.
Heating riser: vertical from floor to ceiling
The riser is the most common object. A pipe with a diameter of 32–50 mm runs vertically from floor to ceiling near a wall or in a corner. Here, a full vertical box 2.4–2.8 m high is needed, with a wooden frame, linear side strips, and decorative finishing of the front plane. The width of such a box is usually 120–200 mm, depth 80–120 mm.
The box at the riser is almost always a public element: it is in plain sight, in a living area or hallway. Therefore, its decor matters. Polyurethane trim — vertical ribs on the front plane — turns a simple box into a pilaster. Molding at the bottom (base capital) and top (top capital) — and the structure reads as an architectural pillar.
Corner pipes: volumetric structure in the corner of a room
Pipes in a corner are the most geometrically complex case. The box here has an angular shape: it covers two adjacent wall sections in the corner and forms a triangular or rectangular cross-section. A wooden block for the frame is attached to both walls. There are two or three front strips, depending on the shape of the box. The corner joint is closed wooden trim or with a polyurethane corner molding.
Communications near the window: horizontal or vertical box
Pipes approaching the radiator from the floor or wall horizontally often pass in the window area. Here, the box can be horizontal — in a baseboard format, hiding the pipe along the wall — or vertical, rising from the floor to the radiator. Wooden trim for the horizontal box creates a smooth transition from the baseboard to the radiator: the box looks like an extended baseboard profile, not a standalone object.
Pipes in the hallway: durability first
The hallway is an area of maximum mechanical load. The box here is bumped by bags, umbrellas, and furniture when moving. The lower part of the box in the hallway should be made of dense solid wood trim — beech or oak. Polyurethane elements — only above 120–130 cm level, where mechanical contact is unlikely. Finish — hard enamel or alkyd varnish.
Pipes in the kitchen: moisture resistance and easy maintenance
In the kitchen, the pipe box is an area that is regularly washed. A wooden frame is acceptable here provided there is a moisture-resistant coating. Trim — made of beech with alkyd enamel or two-component varnish coating. Polyurethane decor — only in the upper zone, where humidity is minimal. The lower part of the box and the base — exclusively wood.
Vertical protrusion on the wall: turning a problem into a resource
Sometimes pipes, fittings, or a bundle of cables form a large vertical protrusion on the wall that is too massive to hide with a thin box. Here, the best approach is not to fight the protrusion, but to turn it into an architectural accent. A large decorative box, designed as a column or pilaster, with a full system of moldings, top and bottom cornices, becomes the decorative core of the wall. A shelf or console table is placed next to it, and the protrusion begins to look intentional.
Junction with ceiling and floor
The top finish of the box at the ceiling and the bottom at the baseboard are two critical points. At the ceiling: the box goes under the ceiling cornice or ends with a small cornice profile made of polyurethane. At the floor: the lower base is designed with a wooden plinth element — the same as on furniture — and transitions into the floor baseboard in a single horizontal line.
Wood in the box: what to use and where
Wooden elements — the load-bearing skeleton and visible armor of the lower zone of the box.
Frame from a bar: strength and geometry
The load-bearing frame made of wooden beams forms the geometry of the entire structure. A beam with a cross-section of 30×40 mm is attached to the wall with 6×60 mm dowels in a staggered pattern. Important: the horizontal crossbars of the frame must be at least at two levels — near the floor (the first beam at a height of 50–80 mm from the floor) and under the ceiling. If the box height exceeds 150 cm, an intermediate horizontal crossbar is added at mid-height.
All planes of the frame are checked with a level: if the frame is not vertical, the entire box will be "skewed" relative to the wall and floor — this is immediately visible and ruins the entire result. The beam is treated with an antiseptic before installation, especially if the wall is damp or the box is located near hot water supply pipes.
Trim and layout: visible surface
Pogonazh iz massiva is attached to the frame beams with finishing nails or screws through hidden holes. The front panel is the main visible plane. The side panels adjoin the walls. Corner joints of the front and side panels are covered wooden trim or with a corner trim profile. Horizontal joints (top and bottom) are covered with trim plugs or wooden overlays.
Important: all wooden parts are treated with acrylic primer before installation — at least one coat. This reduces the absorption of the finishing paint and improves adhesion.
Lower base: reinforced zone
The lower 60–80 cm of the box is the zone with the highest risk of mechanical contact. Here, the wooden trim should be made of dense wood and covered with a hard finishing film. The lower base is additionally finished with a wooden baseboard profile: it creates a horizontal "pedestal" line near the floor and connects with the room's skirting board.
Removable panel: access to utilities
One of the wooden elements of the box must be removable — for access to pipes during maintenance. In the simplest version, this is a wooden front panel that is attached with magnetic latches or two hidden screws. In a more complex version, it is an inspection hatch with a decorative overlay under the molding. It is fundamentally important: do not wall up the pipes tightly, even if they seem reliable. Emergency access must be provided.
Polyurethane in a box: decorative shell
polyurethane decor — is what turns a wooden box around pipes into an architectural interior element.
Moldings on the front plane: creating a pilaster
A vertical molding along the entire height of the front panel is a classic technique for creating a pilaster. Two symmetrically placed vertical of the polyurethane molding along the edges of the front plane and a central molding in the middle — and before you is not a pipe box, but a pilaster insert with ribs. This solution is appropriate in a classic or neoclassical interior, especially if there is a cabinet or bookcase with similar vertical lines next to the wall.
Profile selection: for a narrow box (width up to 150 mm) a molding 20–30 mm high. For a wide one (150–250 mm) — 30–45 mm. Exceeding these values on a small plane creates visual overload.
Top finish: cornice or shelf strip
The top of the box at the ceiling is decorated with a polyurethane cornice profile. This is a small cornice 40–60 mm high: it creates a horizontal accent, visually 'completes' the vertical of the box and connects it with the room's ceiling cornice. The technique for correctly installing polyurethane cornices at the junction with the ceiling is discussed in detail in the article about installing polyurethane moldings.
An alternative to the cornice is a horizontal wooden shelf above the box. A wooden shelf 80–120 mm wide is mounted above the top end of the box and serves both as a decorative finish and a functional element — for a book, vase, or lamp.
Decorative lines: horizontal rhythm
Polyurethane trim on the walls next to the box — horizontal lines at the level of the "belt" (130–150 cm from the floor) and the lower end of the box — includes the box in the overall horizontal system of wall finishing. If there are already horizontal molding lines in the room, they should continue on the wall sections surrounding the box or go around its contour.
Overlays: point accents
Polyurethane appliqués in the corners of molding frames on the box, at the intersection points of vertical and horizontal moldings, on the upper corner of the box near the ceiling — these are details that are noticeable upon close inspection and indicate that the work was done by a professional. Decor for Molding — lock elements, corner overlays with ornament — used in rich classical boxes designed as portals or pilasters.
Connection with baseboard and wall moldings
This is the most subtle aspect of the entire decorative box. If the wall next to the box is decorated polyurethane wall decor — with molding frames, horizontal belts — this system should "reach" the box and either go around its contour or organically end at its edge. A box that stands in the center of a decorative wall as a "hole" without moldings destroys the entire system. A box where wall moldings continue onto its sides or frame it as a separate pilaster — is part of the system.
Ready-made kits by task type
Vertical box in the corner: pilaster solution
-
Wooden block 40×40 mm — frame, attachment to both walls of the corner
-
Pogonazh iz massiva — front and side strips
-
wooden floor — closing corner joints
-
Two vertical of the polyurethane molding along the edges of the front plane
-
Polyurethane cornice profile on top, base strip on bottom
-
Acrylic sealant, primer, white enamel
Box next to the cabinet: furniture solution
-
Wooden block and Pogonazh iz massiva — profile matching the furniture color
-
Wooden architraves — joints with the cabinet side
-
Thin Polyurethane molding — matching the cabinet moldings
-
Unified finish coating with furniture
This option is the most delicate. The box is hidden by fully visually merging with the adjacent furniture. The width and height of the wooden profiles must exactly match the furniture facade profiles.
Box for painting: maximum purity
-
Wooden block — frame
-
Wooden molding — all visible strips
-
Polyurethane trim — vertical decorative ribs on the front plane
-
Acrylic sealant — at all joints
-
Acrylic primer (2 coats) + white enamel (2 coats)
The result is a monolithic white structure with no visible boundaries between wood and polyurethane on the surface. Ideal for light interiors where surface purity is important.
Box as a pilaster: classic design
-
Wooden beam — load-bearing frame
-
Pogonazh iz massiva — front plane and side panels
-
Three vertical of the polyurethane molding — create pilaster flutes
-
Polyurethane appliqués — at the corners of molding frames
-
Decor for Molding — locking element on the cornice part
-
Cornice profile at the top, base profile at the bottom
-
White or cream enamel for painting
Pilaster as a decorative box — the richest solution. It looks especially organic in rooms where there are already real or decorative columns, door pilasters, or rich wall finishes.
Box in the hallway: durability and practicality
-
Wooden block — frame with a double horizontal crossbar at the bottom
-
Pogonazh iz massiva made of beech — the entire lower part up to a height of 120 cm
-
Polyurethane molding — horizontal line at a height of 120 cm, separating the sturdy lower zone and the decorative upper zone
-
Alkyd enamel — hard finish coating
What to buy together: a complete list in one visit
Wooden items:
-
Wooden block 30×40 or 40×40 mm
-
Wooden cover strips
-
Wooden decoration — overlays and relief elements
Polyurethane items:
-
Polyurethane wall decor — for the wall next to the box
Consumables:
-
Dowels, screws, finishing nails
-
Polyurethane adhesive
-
Acrylic sealant
-
Acrylic primer
-
Finish enamel or oil
-
Access hatch or material for removable panel
-
Profile allowance 10–15%
Finishing: surface unity
The main goal of the decorative box's finish is to make the boundary between wood and polyurethane disappear. This is achieved through a unified preparation and painting process.
Preparation of wooden surfaces
Sanding with 120-grit sandpaper, then 180. Dust removal. Apply acrylic primer in 2 coats with 3–4 hours drying between coats. Wood putty — on all visible nail holes and minor surface defects. Re-sand with 180 after puttying.
Preparation of polyurethane surfaces
Dust removal with a dry cloth. Apply the same acrylic primer as on wood — for uniform adhesion. All joints between wood and polyurethane, as well as between polyurethane and wall — acrylic sealant smoothed with a spatula. Sealant drying time — 24 hours, then sand the joints.
Painting: one color — one surface
Finish enamel is applied to all elements — wooden and polyurethane — in a single process: 2 coats with 6–8 hours drying between coats and light sanding with 220 between coats. As a result, the box looks like a monolithic architectural structure, not a set of different materials. The boundary between wood and polyurethane is only visible through the surface relief — and this is an architectural, not a technological, boundary.
Errors when designing a pipe box
Practice shows: almost all errors can be anticipated if you know about them in advance.
Closing pipes without access for maintenance. This is mistake number one. Pipes are engineering communications. Valves, connections, heat meters require access. Without an inspection hatch or removable panel, the first visit from a plumber will turn into dismantling the entire box.
Forgetting about the inspection hatch. The hatch must be included in the box design, not added after the fact. A decorative inspection hatch with a molding overlay or matching the enamel color is almost invisible on the finished structure — but provides full technical access.
Making the box too narrow. The minimum gap between the pipe and the inner surface of the box is 30–40 mm. A smaller gap creates a risk of overheating wooden elements near hot water pipes and complicates installation.
Not accounting for thermal expansion. Heating pipes expand when heated and can move vertically by 5–10 mm. If the box is rigidly attached to the pipe, it will deform. The box should only be attached to the wall and floor, without touching the pipe itself.
Using polyurethane in a high-heat area without verification. Near heating pipes, the surface temperature can rise to 40–50°C. Polyurethane does not deform at this temperature, but the glue may lose adhesion. In the area of hot water supply pipes, it is better to use only wooden elements with mechanical fasteners.
Not connecting the box to the baseboard. The bottom edge of the box and the floor baseboard should be on the same horizontal line or connected via a transition element. A gap between them disrupts the visual logic of the entire lower tier of the room.
Choosing a molding that is too large for a narrow box. On a box 120 mm wide, a molding with a relief of 40 mm takes up a third of the visible plane. The scale of the profile should match the scale of the structure.
Not allowing extra material for trimming. Corner cuts and end trims require additional material. A 10–15% reserve is mandatory.
Forget sealant for finishing joints. Joints between wooden planks, joints with polyurethane elements, and lines adjacent to the wall — all of this must be sealed with acrylic sealant before final painting. Without sealant, all joints will open up within six months.
Make the box stylistically "foreign." If the room is modern minimalism, a pilaster with stucco will look absurd. If it's classic with moldings, a simple wooden box without decor will get lost. The style of the box must be consistent with the interior style.
Non-standard situations: when the box requires a special approach
Pipes with a diameter of more than 100 mm
A large pipeline (for example, a 110 mm sewer pipe) requires a box with a larger cross-section. Here, a wooden block of larger cross-section is used — 50×50 mm or even 50×70 mm — for frame rigidity. The width of the box can reach 200–250 mm, making it a truly architectural column. With good decor, such a box becomes a room decoration.
Several pipes of different diameters and directions
When pipes of different diameters converge in one place, running in different directions, the task becomes more complicated. Here, it is important to first sketch the entire assembly and determine the minimum required cross-section of the box that will cover all pipes with a gap. The frame from the block is assembled taking into account all protrusions and turns. The decorative layer does not reflect the complexity of the "filling" — it simply creates a smooth geometric shape on the outside.
Metal heating pipes
Metal heat transfer pipes create thermal radiation. If a wooden frame is mounted closer than 30 mm to such a pipe without insulation, the wood begins to dry out and deform. Solution: a thermal insulation layer on the pipes (foamed polyethylene or mineral wool 20–30 mm thick) before installing the wooden frame.
Box on a load-bearing brick wall
Attaching a wooden beam to a brick wall requires a hammer drill and dowels 8×80 mm or 10×100 mm — depending on the thickness of the plaster. The dowel spacing is 40–50 cm. Before installation, the wall is checked for voids: a hollow sound when tapping is a sign of unreliable plaster that can pull out the dowel along with the frame.
About the company STAVROS
Behind every wooden profile, trim, molding, and polyurethane overlay in this article is a specific production facility with a specific history. STAVROS is a company founded in St. Petersburg in 2002 by two artists who opened a workshop for carved products from solid oak. From the first years — work on objects of the highest state importance: Konstantinovsky Palace, the Hermitage, Alexander Palace, Sheremetyev Mansion. These are not just big names — it is experience working with those who know the value of every millimeter of profile and every hour of manual processing.
Today STAVROS produces a full line of products from solid oak and beech: trims, layouts, furniture decor, carved overlays — and simultaneously releases a wide range of polyurethane stucco: moldings, cornices, trims, overlays, decor for moldings, wall decor. Showrooms in St. Petersburg and Moscow. Delivery throughout Russia. All links in this article lead to real pages of the STAVROS catalog with current assortment, sizes, and prices.
FAQ: Answers to popular questions
How to beautifully hide pipes in the interior?
A decorative box for pipes made of wooden trim and of polyurethane moldings is the optimal solution. Wood creates a durable frame and visible surface of the lower zone, polyurethane profiles create a decorative relief for painting. A single enamel binds both materials into a monolithic structure.
Can polyurethane stucco be glued to a pipe box?
Yes, provided the conditions are met: the surface is prepared (dust-free, primed), the area does not overheat (distance from heating pipes — at least 30 mm, pipes should preferably be insulated). In areas with high temperature or mechanical load, wood with mechanical fasteners is preferable to glue.
What to buy for a box for painting?
Pogonazh iz massiva and a wooden block — for the frame and base. Polyurethane trim — for vertical decorative ribs. Moldings for top and bottom finishing. Glue, fasteners, sealant, primer, enamel. Reserve 10–15%.
Do I need to leave access to the pipes?
Absolutely. An access hatch or a removable wooden panel on magnetic latches is a requirement that cannot be ignored. Emergency maintenance of pipelines happens without warning.
How to make the box not look like a technical protrusion?
Add a decorative system: vertical moldings create a pilaster, a horizontal cornice on top and a base profile at the bottom provide architectural scale. Connect the box with wall decor — the wall moldings nearby — and it ceases to be a foreign object, becoming part of the overall architecture of the room.
How to connect the top edge of the box to the ceiling?
Cornice profile made of polyurethane is mounted at the point of contact with the ceiling and creates a horizontal transition from the vertical plane of the box to the horizontal plane of the ceiling. If there is already a ceiling cornice in the room, the box profile should match it in height and relief.
How to ensure a uniform appearance of wooden and polyurethane parts?
Unified preparation technology: both materials are primed with the same acrylic compound. All joints — acrylic sealant. Finish enamel — in one color in two coats. After painting, the boundary between wood and polyurethane is only readable by relief, which is an architectural rather than a technological difference.