Article Contents:
- First screen: what to buy for decorating children's furniture
- Why children's furniture requires a special approach to decor
- What is important when choosing decor for a children's room
- Wooden handles for children's furniture: a complete breakdown by type
- Knob handles: for small drawers and dressers
- Star-shaped handles: accent decor without overload
- Paw handles: for themed interiors
- Wooden pull handles: for cabinets and tall fronts
- Uncoated handles: for self-painting
- Polyurethane furniture overlays: what they are and how they work
- Advantages of polyurethane overlays for children's furniture
- Where to place overlays in a children's room
- Moldings for furniture: frames on the facades of a children's wardrobe and dresser
- How a molding frame works on a facade
- How to choose the width of molding for children's furniture
- Vertical or horizontal frame orientation
- How to combine handles, overlays, and moldings in a children's room: the main principle
- Option A: handle + molding frame (without overlay)
- Option B: handle + overlay in the center of the facade (without molding)
- Option C: molding frame + overlay inside the frame (without handle or with a small button)
- Main placement rule: handle — not on the relief
- Ready-made kits for specific tasks
- Kit for a children's dresser
- Kit for a children's wardrobe
- Kit for a children's bed headboard
- Kit for a girl's room
- Kit for a boy's room
- Marking for handles: how to avoid mistakes with placement
- Three markup rules
- How to create a markup template
- Preparing facades for decor installation and painting
- Preparing MDF facades
- Preparing for polyurethane decor installation
- Painting decor for children's furniture: what you need to know
- Paint for children's furniture
- How to paint wooden handles
- How to paint polyurethane overlays and moldings
- Eight mistakes in decorating children's furniture
- Comparative table of decorative elements for children's furniture
- Decor scenarios by child's age
- Up to 3 years: minimum decor, maximum function
- 3–7 years: beginning of style
- 7–12 years: conscious interior
- Teenager: neutral base decor
- Buying as a set: checklist before placing an order
- Frequently Asked Questions
- About the Company STAVROS
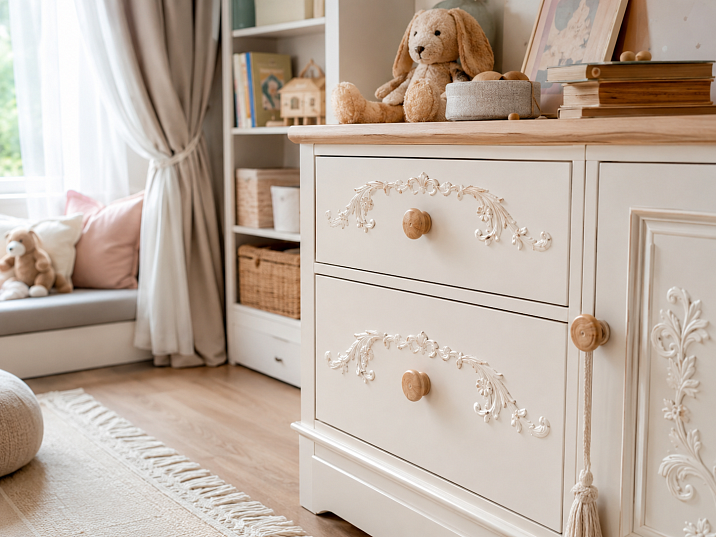
A children's room is a special space. Here every detail works not only for beauty, but also for safety, practicality, and durability. The handle on a drawer that a three-year-old child pulls must be comfortable, sturdy, and without sharp edges. The decorative overlay on a wardrobe facade must be securely attached, not catch on clothes, and be easy to clean.
Decorating children's furniture is a task with several variables at once. And when a parent or designer is looking for what to buy for a children's wardrobe, dresser, or bed, the answer must be specific: wooden furniture handles, polyurethane furniture overlays, thin moldings, glue, primer and paint.
This article is a practical breakdown. No lyricism or abstractions. Only what you really need to buy, how it works, and how not to make a mistake.




First screen: what to buy for decorating children's furniture
If you're reading concisely — here's the commercial answer:
Basic kit for decorating children's furniture:
-
Wooden handles for children's furniture — buttons for drawers, brackets for cabinet doors.
-
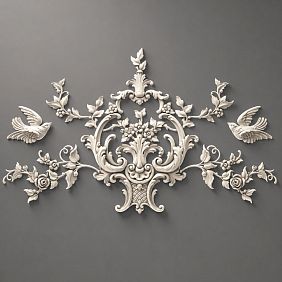
polyurethane furniture overlays — decorative relief on facades.
-
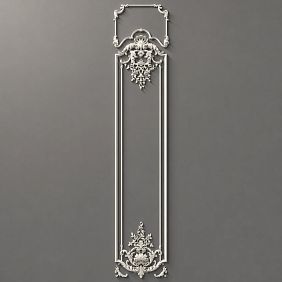
Polyurethane moldings for furniture — frames around facades.
-
Glue for MDF/particleboard — the base of most children's furniture.
-
Acrylic primer.
-
Acrylic paint, washable.
-
Acrylic sealant for molding joints.
-
Sandpaper (grit 150–180).
-
Spare decor 12–15%.
-
Template for marking handles (or tape measure + level).
If the child is under five — focus on handles. Decorative overlays and moldings are acceptable but should be chosen with minimal relief and no sharp corners.




Why children's furniture requires a special approach to decor
Here I want to say directly: the decor of children's furniture is not just aesthetics. It is also safety. A sharp corner of an overlay, an unstably glued element, a handle with a broken screw — this is not just an inconvenience, it is a risk.
Therefore, when choosing decor for children's furniture several requirements must be considered simultaneously.
Our factory also produces:


What is important when choosing decor for a child's room
Safe shape. Handles without sharp protrusions, overlays without sharp corners, moldings with smooth profile transitions.
Reliable fastening. An overlay that starts peeling off after a month is not beauty, but danger. Correct glue + correct surface preparation = decor that lasts for years.
Easy cleaning. Children's furniture is washed regularly. Polyurethane elements painted with durable acrylic paint easily withstand wet cleaning. Deep reliefs in a child's room are harder to clean, this must be considered.
Resistance to mechanical stress. A child does not handle furniture like an adult. Doors slam, drawers are pulled out with force, handles are pulled sideways. Wooden handles made of hardwoods are reliable.
Age appropriateness. Decor for a one-year-old child's room — minimal, calm tones, nothing extra. Decor for an eight-year-old child — frames, overlays, accent handles are already possible.
Longevity. A well-chosen decor for furniture should fit into the interior not for a year, but for the period of the child's growing up. Neutral colors, calm profiles, wooden handles — they are relevant at three and ten years old.
Get Consultation
Wooden handles for children's furniture: a complete breakdown by type
wooden furniture handles — a tactile, warm, and durable choice for a child's room. Unlike metal ones, wooden handles don't feel cold to the touch in winter, aren't slippery, and look organic with painted or veneered furniture.
Knob handles: for small drawers and dressers
A knob handle is a small round or oval handle mounted with one screw through a hole in the facade. A simple mounting type, convenient for children: no need to grip a wide bracket, just pull on a small protrusion.
For a children's dresser with narrow drawers, knob handles are optimal. buy handles for children's in the shape of a heart or star — means adding an obvious decorative accent to practicality, understandable to a child.
Size: knob diameter is usually 30–50 mm. For a child's room, 35–45 mm is optimal: large enough to grip, small enough not to overwhelm the facade.
Star-shaped handles: accent decor without overloading
children's furniture handles in the shape of a star — one of the most popular options for a child's room. The shape is immediately recognizable, thematically linked to a child's space, yet not intrusive and won't overpower the rest of the interior.
A star looks equally good in white, pastel tones, and natural unpainted wood. For painting — paint it together with the facade or in a separate accent color.
Paw-shaped handles: for themed interiors
handles for children's furniture in the shape of an animal paw — for children's rooms with themed decor: "forest", "zoo", "animal world". Works as a decorative accent: one paw handle on a drawer is a story that a child notices.
An important nuance: such handles are best used uniformly — either across the entire dresser, or as an accent on one or two drawers. Mixing different handle shapes on the same piece of furniture is not recommended.
Wooden bracket handles: for cabinets and tall fronts
wooden hook handle — a horizontal or vertical bar with two mounting points. For a cabinet, wardrobe, or children's closet door, this is the right choice: comfortable to grip with the whole palm, securely held at two points, provides good leverage when opening heavy doors.
Center-to-center distance (distance between mounting points) is a key parameter when purchasing. Standard: 96 mm, 128 mm, 160 mm. Be sure to measure the distance between the holes in the front before ordering.
Uncoated handles: for self-painting
Uncoated wooden handle — a base for self-painting. Ideal if you need to match the exact color of the front or children's room walls. Sand, prime, paint with acrylic paint — the result is perfect.
Nuance: for a children's room, uncoated handles are better painted, not left in bare wood. The open wood structure collects dirt faster than a painted surface.
Polyurethane furniture overlays: what they are and how they work
decorative polyurethane elements — Volumetric relief elements that are glued to the facade surface. In children's furniture, they serve a decorative function: adding relief and visual depth without replacing facades.
Advantages of polyurethane overlays for children's furniture
-
Lightweight. Do not weigh down the facade and do not affect hinge operation.
-
Precise relief. The pattern is reproduced serially with consistent accuracy.
-
Painted together with the facade. One painting session — a uniform tone.
-
Moisture resistant. Withstand washing normally.
-
Do not deform. Stable under temperature and humidity changes.
-
Safe. No sharp metal parts.
Where to place overlays in a children's room
On cabinet facades. A small symmetrical overlay in the center or in the upper third of the door facade — a delicate accent. Key point: not in the handle area and not where the child constantly places their hand.
On the dresser. For a dresser with multiple drawers, one overlay on the top "formal" drawer is sufficient. Or a decorative overlay on the side panel of the dresser.
On the headboard. The headboard is the most "prominent" part of the bed. decoration for polyurethane furniture on the headboard creates a light architectural completeness. An oval medallion, a small cartouche, or a symmetrical pair of overlays.
On the bedside table. A small overlay in the center of the bedside table door + a wooden handle on top.
On the built-in wardrobe. Overlays on the facades of a built-in wardrobe in a children's room — to add a "furniture" feel to the built-in element, which otherwise looks like part of the wall.
Moldings for furniture: frames on the facades of a children's wardrobe and dresser
Moldings made of polyurethane on furniture facades are decorative frames. They visually make the facade "more expensive": instead of a flat painted panel, a finished surface with clear geometry.
How a frame made of moldings works on a facade
The idea is simple: four pieces of molding at 45° form a rectangle on the facade. The frame size is slightly smaller than the facade. The gap between the edge of the frame and the end of the facade is 20–40 mm.
Result: the facade acquires two levels — the flat "field" of the facade and a relief frame around it. When painted in one tone, the subtle shadow from the relief makes this effect even more expressive.
How to choose the width of molding for children's furniture
Children's furniture is usually smaller than adult furniture. Wardrobe fronts in a children's room are 400–500 mm wide. A dresser drawer is 200–300 mm high. Molding for such fronts should be thin: 20–40 mm is the optimal range.
Wide molding of 60–80 mm on a narrow dresser drawer will create a feeling of "heaviness." A thin profile of 20–30 mm is delicate and correct.
Vertical or horizontal orientation of the frame
On a tall wardrobe front — a frame with vertical orientation (rectangle taller than wide). On a horizontal dresser drawer — a horizontal frame. This follows the proportions of the front.
How to combine handles, overlays, and moldings in a children's room: the main principle
This is where most people make a mistake. They buy handles separately, overlays separately, moldings separately — and end up with an overloaded front where everything is present but nothing works.
The principle is one: three elements on one front — maximum. And even three requires carefulness.
Option A: handle + molding frame (without overlay)
The most concise and safe. Wooden handle + thin molding frame of the polyurethane molding on the facade. Painting in one color. The result is clean, calm, modern.
Option B: handle + overlay in the center of the facade (without molding)
Wooden handle on top + symmetrical polyurethane overlay in the center of the facade. Works on tall cabinet facades where there is room for two elements without competition.
Option C: molding frame + overlay inside the frame (without handle or with a small button)
On doors without a pull handle — frame + overlay inside the frame. The button handle is installed outside the frame, at the bottom or top. This option is expressive and works well in classic and neoclassical children's interiors.
The main placement rule: handle — not on the relief
The handle is never placed on an overlay or molding. Firstly, it's impractical: the decorative element is not designed for the mechanical load of the mounting screw. Secondly, visually it's a conflict of two elements at one point.
Ready-made kits for specific tasks
Kit for a children's dresser
A dresser is furniture with several drawers. The task: give each drawer a comfortable handle and, if desired, add light decor to the facades.
What to buy:
-
handles for children's furniture in the shape of a star or heart — one for each drawer plus one spare.
-
polyurethane panels — a small symmetrical overlay on the top drawer (if you want decoration).
-
MDF glue.
-
Screws for handles — included in the set, but check the length against the thickness of the facade.
-
Acrylic primer.
-
Paint that is resistant to abrasion and washing.
How to install: First paint the facades with decor, then install the handles. Handles are the last step. Otherwise, during painting, you will have to remove them or cover them with painter's tape.
Set for a children's wardrobe
A wardrobe is larger furniture. Tall door facades allow for a molding frame.
What to buy:
-
wooden hook handle — on each door.
-
Polyurethane moldings for furniture — based on the linear footage of the frames plus 15% spare for trimming.
-
decorative polyurethane elements — corner inserts (4 per frame).
-
Polyurethane adhesive for MDF. About choosing — what to glue polyurethane molding with.
-
Acrylic sealant for joints.
-
Acrylic primer.
-
Paint.
Installation sequence: Marking frames → installing moldings → sealing joints → priming → painting → handles.
More about the correct sequence — in the article installation of polyurethane molding.
Headboard kit for a children's bed
The headboard is the most "architectural" place in a children's bedroom. Decor here is appropriate and clearly visible.
What to buy:
-
polyurethane furniture overlays — a symmetrical pair or one central medallion.
-
Moldings made of polyurethane — a frame around the perimeter of the headboard (if it is flat and made of MDF).
-
Glue.
-
Sealant.
-
Primer and paint.
Feature: The child leans on and periodically touches the headboard. Choose overlays with a smooth, soft relief without sharp protrusions. Deep ornaments with sharp edges are not for a children's headboard.
Set for a girl's room
Girls most often want: a light interior, soft tones, rounded shapes. Decor — delicate, with a hint of "princess," but without flashy elements.
What to buy:
-
Heart-shaped handles — a delicate shape, readable and thematic.
-
Overlays with an oval or floral ornament.
-
Thin molding 20–25 mm with a smooth profile.
-
Painting: white, dusty rose, pastel mint, milky.
Style principle: Everything is calm. One accent element — the handles. The rest is background.
Boy's room set
Boys are most often: energy, movement, thematic interests (space, technology, sports, nature). Furniture decor is practical and restrained.
What to buy:
-
Wooden handles of simple shape — brackets or small buttons without ornament.
-
Moldings with a geometric profile — straight or stepped.
-
Minimum overlays or complete rejection of them.
-
Painting: white, gray, blue, green, natural wood tone.
Style principle: Constructive, concise, without stucco relief.
Marking for handles: how to avoid mistakes with placement
Marking is what is done before drilling. And it is here that most practical mistakes are made.
Three rules of marking
Rule one: symmetry. Handles on a single piece of furniture must be positioned symmetrically relative to the vertical or horizontal axis of the facade. Check with a level — mandatory. "By eye" does not work.
Rule two: uniform distance from the edge. On each drawer of a chest, the handle must be at the same distance from the edge. If the top drawer is 25 mm from the top edge, then all others are also 25 mm.
Rule three: center-to-center distance. For a pull handle, this is a critically important parameter. The center-to-center distance of the handle (distance between the centers of the two mounting holes) must exactly match the distance between the holes in the facade. Standard: 96 mm and 128 mm. Before buying handles, measure or check the furniture specification.
How to make a marking template
Take a piece of cardboard, place the handle on it, mark the centers of the holes. This is your template — apply it to each facade and prick with an awl. Fast, accurate, without marking each facade separately.
Preparing facades for installing decor and painting
Before installing decor and handles, prepare the surface. This is not an extra step, but the foundation of a good result.
Preparing MDF facades
MDF is the most common base material for children's furniture. It is a smooth, dense material with a flat surface.
If the facade is already painted:
-
Degrease the surface.
-
Lightly sand with 180–220 grit sandpaper.
-
Apply a thin layer of acrylic primer.
-
Attach moldings and overlays.
-
Sealant on joints.
-
Final painting.
If the facade is bare MDF:
-
Prime the surface.
-
After drying — light sanding.
-
Installation of decor.
-
Sealant.
-
Painting.
Preparation for installation of polyurethane decor
Polyurethane moldings is mounted using specialized glue. The surface must be:
-
Dry.
-
Degreased.
-
Free of dust and packaging residues.
Apply glue in a zigzag pattern to the back of the profile, press firmly, hold for a few seconds. For large elements, use painter's tape for additional fixation until set.
Painting decor of children's furniture: what you need to know
Children's furniture is painted at least once every few years — either when updating the interior or when changing the age concept. It is important to use the right materials.
Paint for children's furniture
Requirements:
-
Acrylic base (not alkyd).
-
Low volatile organic compound content.
-
High resistance to abrasion and washing.
-
Suitable for use in children's rooms.
Semi-matte or matte finish is preferred: does not collect fingerprints like gloss.
How to paint wooden handles
Wooden handles are painted before installation:
-
Light sanding with 120–150 grit.
-
Wood primer or acrylic primer.
-
Paint in 2 coats.
-
After drying — installation.
Or leave it in natural wood — without coating or with clear varnish. A natural handle on a white facade is a pure, warm contrast.
How to paint polyurethane overlays and moldings
Polyurethane is painted together with the facade after installation:
-
Acrylic primer — 1 coat.
-
Paint — 2 coats with intermediate drying.
Result: the molding and facade are a single surface of one color. The relief is read only by light and shadow. This is the effect that creates the feeling of "expensive" furniture.
Eight mistakes in decorating children's furniture
Mistake one: buying handles without checking the center-to-center distance.
The handle arrived, but the center-to-center distance does not match the holes in the facade. The result is new holes or a return of the item.
Mistake two: placing an overlay that is too large on a small facade.
An overlay 150×100 mm on a drawer 150 mm high is not decor, it's a 'plug'. The overlay should occupy no more than one third of the facade area.
Mistake three: handle over relief.
Mounting a handle on a molding or overlay is not acceptable. The handle should be in an area free of decor.
Mistake four: not accounting for drawer movement.
An overlay that catches on a neighboring element when the drawer is pulled out haunts the craftsman. Check the gap.
Mistake five: mixing children's decor with heavy classical stucco.
A large ornamental cartouche on a children's dresser is a mismatch of scale and style. For a child's room, use light relief and soft shapes.
Mistake six: buying polyurethane decor without glue.
decorative polyurethane elements Require special glue. Without it, they won't stay on.
Mistake seven: not checking paint compatibility with polyurethane and wood.
Polyurethane alkyd paints may remain sticky. Acrylic paints work correctly on both materials.
Mistake eight: forgetting about symmetry.
Handles at different levels, overlays not centered — this is immediately noticeable. A level and a template are mandatory.
Comparative table of decorative elements for children's furniture
| Element | Where to use | Restrictions in the children's room | Material |
|---|---|---|---|
| Knob handle | Small dresser drawers | No sharp protrusions | Wood |
| Handle bracket | Cabinet doors | Center distance — strictly to size | Wood |
| Thematic pen (star, paw) | Accent box, chest of drawers | 1 type for furniture | Wood |
| Molding frame | Cabinet fronts, doors | Thin profile 20–35 mm | Polyurethane |
| Decorative overlay | Top drawer, headboard, doors | Without sharp corners | Polyurethane |
| Corner inserts for moldings | In the corners of the frames | Smooth relief | Polyurethane |
Decor scenarios by child's age
Up to 3 years: minimum decor, maximum function
At this age, furniture is primarily safe and practical. Handles are small wooden knobs without sharp edges. Decorative overlays are only at inaccessible heights or with very secure fastening. Painting is white or light pastels. Moldings are optional.
3–7 years: beginning of style
The child is active, furniture is used intensively. Handles are wooden, thematic, comfortable. Moldings on cabinet fronts are appropriate, thin. Overlays on the headboard are possible. Painting is white, pastel, accent color on one element.
7–12 years: conscious interior
The child already has preferences. Decor can be more expressive: molding frames, wooden pull handles, thoughtful facade color. The style is built with a reserve for several years ahead.
Teenager: neutral basic decor
For a teenager's room, furniture decor should be neutral and "adult." Simple wooden handles, thin moldings without ornamentation, neutral color. Themed children's stucco is no longer appropriate.
Bundle purchase: checklist before placing an order
Before finalizing the order, check:
-
Center-to-center distance of handle brackets matches the holes in the facade.
-
Overlay size — no more than 30–35% of the facade area.
-
Molding width — proportional to the facade height.
-
All elements — from the same style line.
-
In the order — glue, sealant, primer, paint.
-
Decor reserve — 12–15%.
-
Paint — acrylic, for children's rooms.
-
Handles — smooth shapes, without sharp protrusions.
Frequently asked questions
Which handles are best to choose for children's furniture?
Wooden handles for children's furniture without sharp edges: buttons for dresser drawers, brackets for cabinet doors. Thematic shapes (heart, star, paw) add character. For painting — handles without coating.
Can polyurethane overlays be used on children's furniture?
Yes, if they are attached with the right glue, placed outside the constant impact zone, painted with durable paint, and have no sharp protrusions. polyurethane furniture overlays in a children's room — it's delicate decor, not heavy stucco molding.
What to buy for updating a children's dresser?
handles for children's furniture, small decorative overlays or thin moldings, glue, primer, acrylic paint. Complete update without replacing facades.
Can wooden handles and polyurethane decor be painted the same color?
Yes, but the preparation is different: wood — sanding + wood primer; polyurethane — acrylic primer. The painting result for polyurethane is more uniform.
How not to overload children's furniture with decor?
Rule of one accent: either expressive handles, or overlays, or moldings. All together — only in a calm scale and a single style.
Is a special glue needed for polyurethane elements?
Mandatory — specialized glue for polyurethane on MDF or chipboard. More about selection: what to glue polyurethane molding with.
How to check the correct size of the overlay for children's furniture?
The overlay should occupy no more than 30–35% of the facade area. For a drawer 150 mm high — overlay no more than 50–55 mm in height.
About the company STAVROS
STAVROS — manufacturer and supplier of decorative elements for furniture: wooden handles, decorative appliqués for wooden furniture, polyurethane appliqués, of polyurethane moldings и moldings from polyurethane for any interiors — including children's rooms.
STAVROS's assortment includes themed wooden handles for children's rooms, lightweight polyurethane overlays with a soft relief, and thin moldings proportional to children's room furniture. Everything — in one catalog, with the ability to assemble a complete set: decor + consumables + spare parts.
STAVROS advises on selection, calculates the required amount of materials, and helps avoid mistakes when ordering — from handle size to molding width.