Article Contents:
- Why light without decor looks technical
- Sconce on the wall: why it needs a frame
- Where sconces most often remain without decor — and what to do about it
- Moldings around sconces: how to create a light frame
- One sconce inside a frame
- Two sconces on either side of a mirror in a frame
- Sconce inside a vertical panel
- Repeating frames in a hallway
- Bedside sconce: a relaxation area with light architecture
- Decorative stucco near light: where accent is needed
- Size of the decorative element under the light
- Stucco decor and switches: how to remove the technical look of the wall
- Stucco decor around electrical fixtures: is it possible
- Chandelier and ceiling stucco: how to connect the top of the room with the walls
- Why a ceiling without a cornice doesn't work
- Light and shadow: why relief looks more expensive in the evening
- How to choose relief for your lighting scheme
- Ready-made purchase scenarios for lighting zones
- Scenario 1. Sconce by the mirror in the hallway or living room
- Scenario 2. Sconces on both sides of the bed in the bedroom
- Scenario 3. Chandelier in the living room: full ceiling system
- Scenario 4. Hallway with light points
- Details that unite light and stucco into a single whole
- Typical mistakes when designing light zones with stucco
- About the company
- Frequently Asked Questions
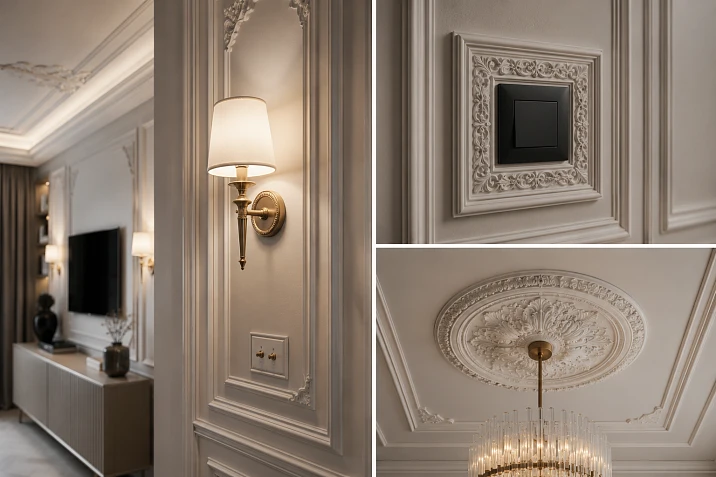
There are things that are not noticed immediately, but are always felt. Entering a room, a person does not think: "Oh, what a beautiful ceiling rosette" or "Here are the moldings, they set the frame for the sconce." He simply feels — it's expensive here, it's thoughtful here, there is architecture here. And exactly the opposite: you enter another room, there is an expensive chandelier, beautiful sconces, a good switch — but still something is wrong. Empty. Random. Unfinished.
The reason is almost always the same: the light is installed, but not integrated. The luminaire itself does not make the interior expensive. What makes it expensive is the surroundings. Buy moldings — this is not just wall decoration. It is a way to turn a technical device into an architectural element. Moldings create a frame for the light, Decorative stucco catches the shadow and enhances the zone, stucco decor forms an accent, and Ceiling molding connects the chandelier with the overall life of the room.
This article is about how light and stucco work together. About why a switch on a beautiful wall can ruin everything — and how to avoid it. About how a sconce transforms from a solitary point into the center of an elegant light zone. And about how a chandelier stops hanging in emptiness and becomes part of a whole.
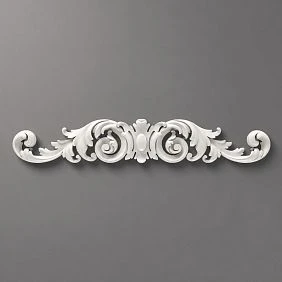
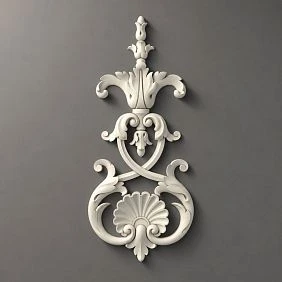

Why light without decor looks technical
Imagine a white wall. On it — a sconce. A good sconce, expensive, with a beautiful shade. It hangs at a height of 170 centimeters from the floor, the wire is neatly hidden. Everything is clean. Everything is correct. But — empty.
Why? Because a sconce is a fixture. A fixture without context always looks technical, even if it is expensive. Just like a toilet in a marble bathroom remains a toilet, not an architectural element. A fixture becomes part of the interior only when it is integrated into a system. When there is a wall with character around it.
This is where the work begins moldings. Moldings create a frame that turns the sconce from a random point into a deliberate accent. Decorative stucco above the light fixture creates a vertical line that draws the eye upward — and the sconce no longer seems lonely. Stucco decor on the sides creates symmetry, which the human eye perceives as order and quality.
The same logic works for a chandelier. A chandelier under a high ceiling without a cornice and rosette looks like a lamp hung on a hook. Add ceiling molding around the perimeter and a ceiling rosette — and the same ceiling becomes a complete architectural plane. The chandelier suddenly finds its place.
Light should not just be a fixture. Light should be part of the architecture.




Wall sconce: why it needs a frame
A wall sconce is one of the most finicky light fixtures in terms of design. It is placed at the head of the bed, by the mirror, by the console, in the hallway, in the study — but it is in these areas that the wall most often remains empty. The owner thinks: "I bought a beautiful sconce, that's enough." The designer thinks differently: "I need to figure out how to frame this light point so it works."
A sconce on a bare wall is a point without context. It can be any shape, any metal, any height, but if the wall around it is empty, the sconce will look like a temporary solution. Even when it costs a significant amount.
What changes with the addition of moldings and decor:
-
A sconce inside a molding frame is a zone. The frame says: this is intentional. There is a solution here.
-
Decorative stucco above the sconce creates a vertical axis that visually "lifts" the light fixture.
-
Stucco decor on the sides or below the sconce creates a horizontal line that balances the light point.
-
Moldings combined with decor turn a section of wall into a small architectural form.
To create such a zone, relatively little is needed: Moldings made of polyurethane for the frame, Decorative stucco as an accent, Relief Decoration to finish, glue and paint in the color of the wall. Installation is possible without special skills — polyurethane elements are easily cut, glued with mounting adhesive, and painted in any color.
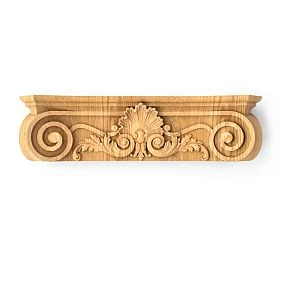
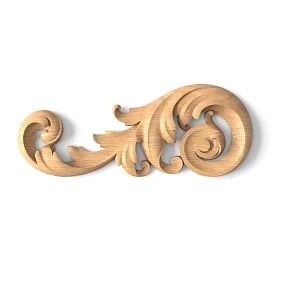
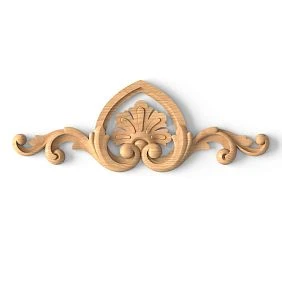
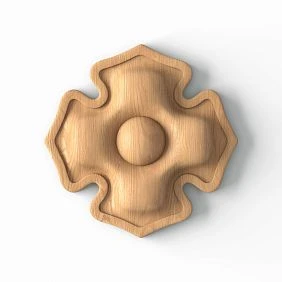
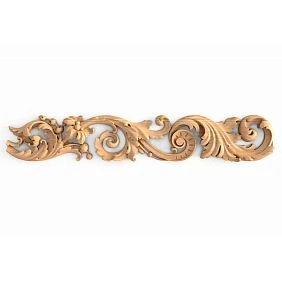
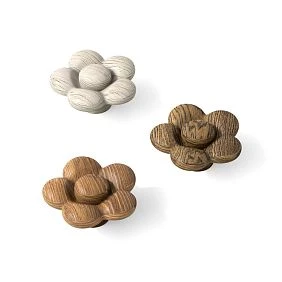
Our factory also produces:


Where sconces most often remain without decor — and what to do about it
At the head of the bed. A pair of sconces on each side is a classic. But on an empty wall, they look like two fixtures. If you place molding frames behind the headboard — horizontal or vertical panels — the sconces suddenly find themselves within a well-thought-out zone. buy polyurethane moldings for this task, it's easiest: they can be trimmed exactly to size, no need to groove the wall, no special fasteners required.
By the mirror in the hallway or living room. Two sconces on each side of the mirror is an architectural technique you've seen in hundreds of beautiful photos. But only when the mirror is set into a molding frame, and above it there is decorative stucco or stucco decor. Without this context, the sconces simply illuminate the mirror.
In the corridor. Several sconces on a long wall create rhythm. If you add Moldings made of polyurethane in the form of repeating panels between the lights and opposite them — the corridor ceases to be just a passage and becomes a complete architectural space.
In the study or library. Sconces above the desk or reading chair work best when surrounded by vertical molding panels that imitate library partitions.
Get Consultation
Moldings around sconces: how to create a light frame
This is the main practical block. A molding frame around a sconce is one of the most effective and accessible techniques in modern interiors. It works in classic apartments and in modern neoclassical interiors, in studios and in country houses, in hallways and in bedrooms.
The essence of the technique is simple: Moldings made of polyurethane they form a rectangle on the wall — a frame, inside or next to which a sconce is placed. The lamp is not in emptiness, but in an architectural field. In the evening, the side light from the sconce falls on the relief of the molding — and the frame gains volume, depth, and liveliness.
Let's consider the options.
One sconce inside the frame
The simplest and most elegant option. The sconce is placed inside a rectangular frame of moldings in the center. The frame is slightly taller and wider than the lamp. There is a small indent at the bottom, and space for a decorative element at the top. This scheme works by a console, by a mirror, in a niche, on an accent wall.
An important nuance: the frame should not tightly squeeze the sconce. You need 'air' — at least 15–20 centimeters from the molding to the base of the lamp on all sides. Otherwise, the frame will seem cramped.
Two sconces on the sides of a mirror in a frame
The mirror is inscribed in a molding frame. Two sconces symmetrically to the right and left of it, at the same level. Above the frame is decorative stucco or stucco decor. This is a classic vanity area that is found in all high-quality interiors and is easy to reproduce using polyurethane decor.
For this option you need: moldings for the mirror frame, paired Relief Decoration above the mirror or on the sides, glue, paint in the color of the wall.
Sconce inside vertical panel
A vertical panel made of moldings is a tall rectangle from the level of the console or baseboard to the cornice line or up to 20 centimeters short of the ceiling. The sconce is located in the upper part of the panel. This is a powerful design technique that creates the feeling of tall architectural niches — even with standard ceiling height.
buy polyurethane moldings for such panels you need with a margin: vertical elements are longer than horizontal ones, and there are more joints.
Repeating frames in the hallway
The hallway is an area that is often overlooked. But it is here that the rhythm of molding frames with a sconce inside each creates the effect of an expensive hotel. Three, four, five frames in the same rhythm — with a sconce inside every second or every one — turn a narrow passage into an architectural space. Narrow Moldings made of polyurethane are preferable here: they do not overload the limited space.
Sconce behind the headboard: a relaxation area with light architecture
The bedroom is a room where the lighting solution is especially important. Two sconces on either side of the headboard are functional and aesthetic. But only when the wall behind the headboard is decorated. Molding frames that occupy the entire wall behind the bed from the baseboard to the ceiling or a limited area 120–150 centimeters high are the base. Sconces are superimposed on it, Decorative stucco in the upper part of the frames, possibly — Relief Decoration on the central axis above the headboard.
In the evening, the sconces turn on — and the relief of the frames comes alive in the side light. The wall becomes deep, rich, truly beautiful.
Decorative stucco near light: where an accent is needed
Here's what is rarely said openly: light enhances relief. This is physics and optics. Side light from sconces or directed light from a spot creates shadows on the protrusions of molding and decorative stucco. The deeper the relief, the more expressive the shadow becomes. The larger the shadow, the richer the surface looks.
That is why Decorative stucco it is especially effective right next to light points. It doesn't just decorate — it interacts with light, creating a lively play of surfaces.
Where specifically to use:
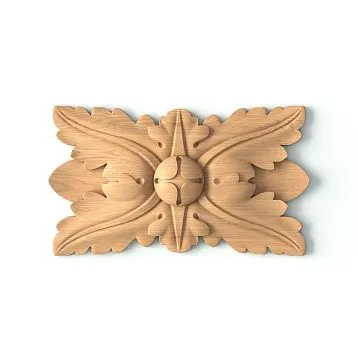
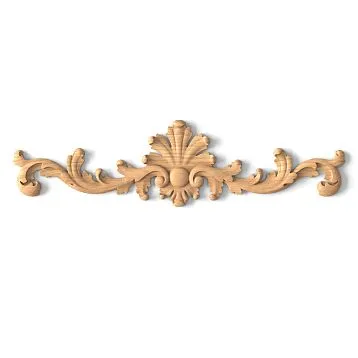
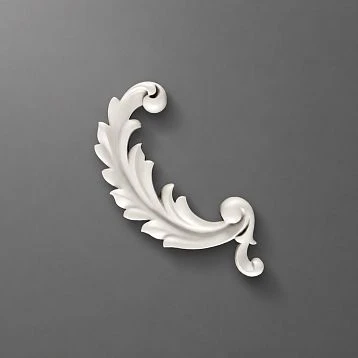
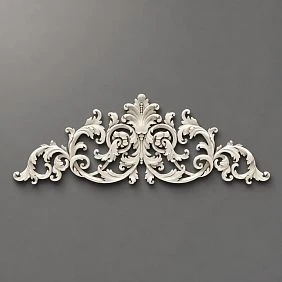
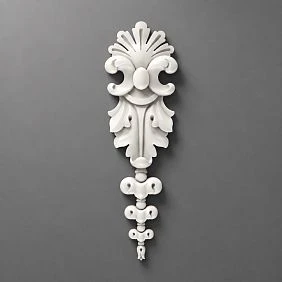
Above the sconce. A decorative element located 10–15 centimeters above the light fixture falls into the zone of direct lighting — and the relief reads very clearly. This could be a medallion, leaf ornament, cartouche, or scroll.
Below the sconce. A less common but very interesting technique. A small horizontal ornamental element under the light fixture — as if the sconce stands on a decorative pedestal. This creates a sense of weight and completeness.
In the center of the frame. If the sconce is located above the frame, and there is a decorative element inside the frame — it works as a response to the light zone. The eye moves from the light downward — and finds the decor.
On the sides of the light fixtures. Two symmetrical elements on the sides of a sconce or chandelier — a classic technique that creates visual balance. buy decorative moldings in this case, they need to be in pairs — for absolute symmetry.
In the headboard area. A large central element above the headboard — in the light beam from the sconce — creates that feeling of an "expensive hotel" achieved with simple means.
At the console in the hallway. A console with a mirror, two sconces on the sides, Decorative stucco above the mirror — the entire hallway in one architectural solution.
Above the mirror in the bathroom. Polyurethane elements are moisture-resistant. Decorative stucco molding above the bathroom mirror with lighting is a solution found in expensive spas and is completely reproducible in an ordinary bathroom.
Size of the decorative element under the light
The closer the decorative stucco molding is to the light source, the more noticeable every detail of the relief becomes. Avoid choosing too small elements: up close, they look fragmented and messy. For the area near the sconce, elements sized from 15 to 35 centimeters are optimal — large enough to work in the light zone, but not so big as to block the light fixture itself.
Stucco decor and switches: how to remove the technical look of the wall
Here's a topic rarely discussed but always thought about. A switch on a beautiful wall is a moment of truth. If it falls in an inconvenient spot relative to moldings and decor, the entire system falls apart. The switch breaks the frame, disrupts symmetry, and ends up in the middle of a decorative element.
This is not fatal. But it requires planning.
First rule: electrical work needs to be planned before installing stucco. Not the other way around. If you already know where the molding frames will be, then you know where switches can and cannot be. A switch that falls into the corner of a frame, the center of a decorative element, or the line of a molding is a mistake that is difficult to fix.
Second rule: it is best to place the switch between the frames, outside the decor zone. The space between two frames is a neutral zone. There, the switch does not conflict with the decor but exists in parallel.
Third rule: if the switch is already installed and you are just starting to think about stucco molding, design the frames around it. A slight asymmetry in the arrangement of frames that accommodates the switch looks better than perfectly symmetrical frames with a gap in the middle.
What else you need to know:
-
Do not place Moldings made of polyurethane close to the switch — a minimum gap of 5–8 centimeters on each side.
-
Sockets are best hidden at the bottom of the wall, below the baseboard line or in the neutral zone between frames.
-
It is better to choose switch plates in the same color as the wall — then they become less noticeable against the molding composition.
-
If the switch will be visible, make it part of the logic. Some designers deliberately frame the switch with a small decorative frame made of thin moldings. This turns a technical detail into a deliberate accent.
Stucco decor around electrical fixtures: is it possible
Yes, with proper planning — it is possible. Buy decorative molding and you can place it next to the switch if the distance is at least 10 centimeters. The decorative element should not cover the mechanism and should not be too close to it — otherwise, vibrations may occur when pressed, which over time will damage the adhesive seam.
Chandelier and ceiling stucco: how to connect the top of the room with the walls
The chandelier is the center of attraction of the room. When entering the room, the gaze automatically searches for the chandelier — and through it evaluates the ceiling. If the ceiling is bare, if there is no cornice, if there is no rosette — the chandelier hangs in a vacuum. A good chandelier in a bad context is a loss.
Ceiling molding creates this context. And it is important to understand here: it is not only about the rosette under the chandelier. It is about a system that connects the chandelier to the ceiling and the ceiling to the walls.
What the complete system looks like:
Ceiling cornice around the perimeter. The line of stucco around the perimeter of the ceiling sets the horizontal — the transition from the vertical world of walls to the horizontal world of the ceiling. Without a cornice, this transition is abrupt. With a cornice, it is soft and architectural. Buy ceiling molding for this task means laying the foundation for the entire ceiling composition.
Ceiling rosette for the chandelier. A round relief element in the center of the ceiling from which the chandelier wire comes out. The rosette should match the diameter of the chandelier: not smaller and preferably not much larger. If the chandelier is 60–70 centimeters in diameter, ceiling rosettes with a diameter of 60–80 centimeters will create the right framing.
Style connection. Key point: the style of the ceiling rosette and cornice should match the style of the moldings on the walls. If the walls have strict geometric frames — the ceiling should have a laconic rosette. If the walls have a classic ornament — the ceiling should have the same motif.
Additional ceiling elements. If the ceiling height is 3 meters or more, you can add an ornamental frieze between the cornice and the main ceiling plane, a coffered system, and decorative medallions in the corners. Ceiling Molding Purchase In the form of ready-made frieze strips — a convenient way to add detail without complex installation.
Why a ceiling without a cornice doesn't work
Try to imagine an interior with flawless walls — frames, decor, the right color — and a bare ceiling without a single line. There will be a feeling of incompleteness. Like a frame without glass. A ceiling cornice is what 'closes' the interior from above. Without it, everything on the walls loses half its power.
Thin cornice made of ceiling moldings 5–7 centimeters wide for a ceiling of 2.6–2.7 meters — this is the minimum that always works. It doesn't overload the space, but creates that very horizontal line that makes the room complete.
Light and shadow: why relief looks more expensive in the evening
This rule is known to all professional interior photographers, but few ordinary buyers. Stucco molding in photos is often shot in the evening or with side lighting — precisely because it is under these conditions that the relief looks most expressive.
During the day, stucco works as a form — you see the pattern, profile, motif. In the evening, when side light from sconces or spotlights is turned on, the stucco begins to work as a sculpture. Each protrusion casts a shadow. Each recess is filled with depth. The wall acquires that very liveliness that distinguishes an expensive interior from an ordinary one.
How to use this effect intentionally:
Moldings near a sconce. If the sconce is located to the side of the frame, the molding receives side lighting, and its relief becomes a relief in the literal sense: with shadows and light accents.
Relief decorative stucco under side light. Ornaments with deep relief (acanthus leaves, classic volutes, lush cartouches) are especially good in side light. Under direct lighting, they look flat — under side lighting, they "come alive."
Ceiling rosette around a chandelier. When the chandelier provides soft diffused light rather than bright directional light, the rosette around it receives an even light environment. But if there are additional sources in the room — spotlights, sconces — the rosette begins to play with light and shadow.
Vertical moldings in a hallway. In a narrow hallway with side sconces, vertical molding panels create a sense of movement — light glides along the surface, and the rhythm of the frames becomes visible, tangible.
Stucco decor near a mirror. The mirror reflects light, scatters it — and Relief Decoration near the mirror receives double lighting: direct and reflected. This creates a very lively play of surfaces.
How to choose a relief for your lighting scheme
If the room primarily has overhead light (chandelier, ceiling spots), it is better to choose a deeper relief for the moldings with a pronounced profile. It will create shadows even under overhead light.
If the main light is side light (sconces, floor lamps, standing lamps), any relief is suitable, including delicate ones. Side light will enhance even a minimal profile.
If the light is mixed — this is the best option. The stucco will work in both modes.
Ready-made purchase scenarios for light zones
Here are four practical scenarios. Each one is a specific task and a specific list.
Scenario 1. Sconces by the mirror in the hallway or living room
Task: design the mirror area with two sconces on the sides so that it looks like an architectural detail, not a random combination.
What to buy:
-
Moldings made of polyurethane for the frame around the mirror. The frame size is slightly larger than the mirror (the gap from the mirror edge to the inner edge of the molding is 5–8 centimeters).
-
Decorative stucco above the mirror — one large element or a symmetrical pair.
-
Buy Moldings for the area under the mirror or on the sides of the frame.
-
Construction adhesive, acrylic putty, paint matching the wall color.
Important: sconces are installed before or simultaneously with the moldings so that the wires are neatly hidden.
Scenario 2. Sconces on both sides of the bed in the bedroom
Task: create an architectural wall behind the headboard with two sconces and a decorative system.
What to buy:
-
Moldings made of polyurethane to create frames behind the headboard. A system of two vertical frames is recommended — one on each side of the central axis. The sconce is placed inside the upper part of each frame.
-
Paired Decorative stucco — in the upper part of each frame, above the sconce or in the central zone of the frame.
-
Buy decorative molding — one large central element above the headboard, on the central axis between the two sconces.
-
glue, primer, paint.
Result: the wall behind the bed becomes the central architectural accent of the bedroom. In the evening, with the sconces on, the relief comes alive — and the bedroom gains depth and warmth.
Scenario 3. Chandelier in the living room: full ceiling system
Task: connect the chandelier to the ceiling and the ceiling to the walls.
What to buy:
-
ceiling rosettes — diameter for the chandelier.
-
Ceiling molding — cornice around the perimeter of the ceiling. Calculate the perimeter of the room.
-
Moldings made of polyurethane — for frames on the main wall or on all walls.
-
Decorative stucco — an accent element on the main wall or above the fireplace area.
-
Buy ceiling molding better with a 10–15% margin for trimming corners.
-
Glue, primer, paint matching the ceiling color.
Result: the ceiling, walls, and chandelier form a unified system. The room looks complete under any lighting.
Scenario 4. Corridor with light points
Task: transform a long corridor from a technical passage into an architectural space using rhythmic molding frames and sconces.
What to buy:
-
Narrow Moldings made of polyurethane — profile width of 2–4 centimeters for a delicate rhythm in a narrow space.
-
Repeating rectangular frames — their number depends on the corridor length. Sconces are placed inside each frame or every other one.
-
Decorative stucco — small corner overlays at molding intersections, for an additional accent.
-
Glue, primer, paint matching the wall color.
-
buy polyurethane moldings For a hallway, considering the ceiling height: if the ceiling is up to 2.7 meters, frames are made 100–130 centimeters high.
Result: a hallway with sconces lit in the evening looks like a gallery. The rhythm of the frames creates perspective, and the side light from the fixtures emphasizes every line of the molding.
Details that unite light and stucco into a single whole
There are several principles that are important to follow if you want the lighting zone with stucco to look like a designed interior, not a randomly assembled one.
Unity of color. Stucco, moldings, and the wall are the same color. The light fixture can be any metal, but the decor around it should blend into the wall. Only then does the relief work for shadow and volume, not for contrast.
Unity of style. Moldings A classic motif next to a modern minimalist sconce creates dissonance. Either choose neutral moldings with a simple profile—they are compatible with any style of light fixture—or select a sconce that matches the style of the decor.
Proportionality. A large light fixture requires large moldings and large decor. A miniature sconce requires a delicate profile. Disproportion between the light fixture and the decor is one of the most common mistakes.
Symmetry. Most lighting zones are built on symmetry. Two sconces—symmetrically. Two decorative elements on the sides of a mirror—symmetrically. Breaking symmetry should be intentional and justified.
Depth of relief. For lighting zones, it is better to choose elements with pronounced relief—a depth of 1.5 centimeters or more. Then the shadow from the side light will be visible. Flat relief is lost in a lighting zone.
Typical mistakes in designing light zones with stucco molding
Knowing mistakes means not making them. These are the five most common miscalculations encountered when designing light zones with stucco molding.
Mistake one: buy a sconce — then think about stucco. This is the reverse order. First, you need a concept — where the light point will be, what surrounds it, what size the frame is, where the moldings are. Then — purchase the light fixture for this system.
Mistake two: the switch breaks the molding frame. A classic. Plan the electrical work simultaneously with the stucco planning — or at least before installing the moldings.
Mistake three: too small decor near the light. Side light is merciless to details. Small ornament near the light source looks untidy. The minimum size of a decorative element for a light zone is 15 centimeters.
Mistake four: ceiling stucco without connection to wall moldings. The ceiling lives separately — the walls separately. This is one of the main signs of an unthought-out interior. The ceiling cornice should be a continuation of the wall styling.
Mistake five: different styles of light fixtures and stucco. A modern Scandinavian sconce and Baroque stucco decor is a clash of languages. If you want to combine the incompatible — you need a neutral buffer: a common color, minimalist moldings, a delicate scale of decor.
About the Company
STAVROS — professional supplier of decorative polyurethane stucco for designing interiors of any complexity. The STAVROS catalog has a full range: Moldings made of polyurethane for frames and light zones, Decorative stucco for accents near sconces and mirrors, Relief Decoration to create architectural accents, Ceiling molding и ceiling rosettes for decorating the center of the ceiling around a chandelier. All STAVROS products are made from European extruded polyurethane: lightweight, moisture-resistant, and non-deforming over time. The material is easy to paint, cut with a regular hacksaw, and mounted with glue. STAVROS works with private clients and designers, providing professional consultation on the selection and calculation of elements for any lighting zone — from a single sconce to a complete lighting system in the living room.
Frequently asked questions
How to decorate a sconce on the wall with stucco molding?
The best way is to place the sconce inside a molding frame or next to decorative stucco molding. The frame of polyurethane moldings turns the light fixture from a random point into a deliberate architectural accent. Above the sconce, you can place a decorative element, and below it, a small ornamental decor.
Which moldings to buy for a sconce?
For a lighting zone with a sconce, medium-width moldings — 3–6 centimeters — with a pronounced relief are usually suitable. The width depends on the ceiling height and wall size. For a hallway, narrow profiles of 2–3 centimeters. For a living room or bedroom, 4–7 centimeters.
Can decorative stucco molding be used near switches?
Yes, but switches need to be considered in advance. The distance from decorative molding to the switch is at least 10 centimeters. It is better to place the switch in neutral zones between frames, not inside molding panels.
Is ceiling molding necessary if the room has a chandelier?
Yes. Ceiling molding connects the chandelier with the room's architecture. Without a cornice and rosette, even an expensive chandelier hangs in emptiness. With a cornice, it becomes part of a complete composition.
What to buy for a lighting zone with molding?
Standard set: Moldings made of polyurethane for frames, Decorative stucco for accents, Relief Decoration to complete the zone, mounting adhesive, primer, paint matching the wall color. For the ceiling zone — Ceiling molding и ceiling rosettes.
Is polyurethane molding suitable for a bathroom with wall sconces?
Yes. Polyurethane is a moisture-resistant material, not afraid of steam and humidity fluctuations. Buy molding for the bathroom and install it above a mirror with backlighting — an absolutely workable solution.
How to choose the size of a ceiling rosette for a chandelier?
The diameter of the rosette should be proportional to the diameter of the chandelier — approximately equal to it or slightly larger. If the chandelier is 50 centimeters in diameter, the rosette should be 50–70 centimeters. A rosette smaller than the chandelier gets lost; a rosette much larger overloads the center of the ceiling.