Article Contents:
- What is confirmed regarding NPU-190 and CRPU-069
- Why the new article should not repeat the general material on stucco restoration
- How to identify NPU-190 among the 64 elements of CRPU-069 and choose a reference
- 1. Article number as part of the set
- 2. Size
- 3. Repeatability
- 4. Pattern and orientation
- Surface scuffing or local scratch
- Small chip without loss of characteristic relief
- The original chipped fragment is preserved
- A noticeable section of the carved pattern is lost
- The element cracked through the entire body
- NPU-190 partially peeled off, but not destroyed
- 1. General plane of the relief
- 2. Side lighting
- Stage 1. Geometry
- Stage 2. Installation
- Stage 3. Composition
- 1. Frontal view
- 2. Side lighting
- 3. Comparison with a symmetrical NPU
- 4. Before/after photo from a single point
- 5. Check across multiple lighting scenarios
- Contour 1 — the module itself
- Contour 2 — the installation seam
- Contour 3 — final blending
- Mistake 1. Identifying the NPU-190 only by external similarity
- Mistake 2. Buying a new part for a simple scuff
- Mistake 3. Removing the old NPU before taking photos and measurements
- Mistake 4. Using only the old glue trace as a marking
- Mistake 5. Leaving the new NPU in its factory white color
- Mistake 6. Leveling the part height with a thick layer of glue
- Mistake 7. Damaging adjacent modules when prying up
- Mistake 8. Ignoring the cause of the crack
- Can NPU-190 be identified if only a part of it remains?
- Do I need to order an NPU-190 of the same year of manufacture as the old CRPU-069?
- Can NPU-190 be replaced without removing the chandelier?
- What to do if the new NPU-190 matches in size but does not fit into the old place?
- If the old NPU-190 has been painted several times, will the new one look thinner?
- Can one of the seven intact NPU-190s be used as a position template?
- Do I need to buy the entire CRPU-069 if the NPU-190 and one other element are damaged?
- What to do if the damaged NPU-190 was not removed as a whole?
- Can the new NPU-190 be painted in advance on a table?
- Where can I view other central overlays if it turns out that a different SKU is damaged?
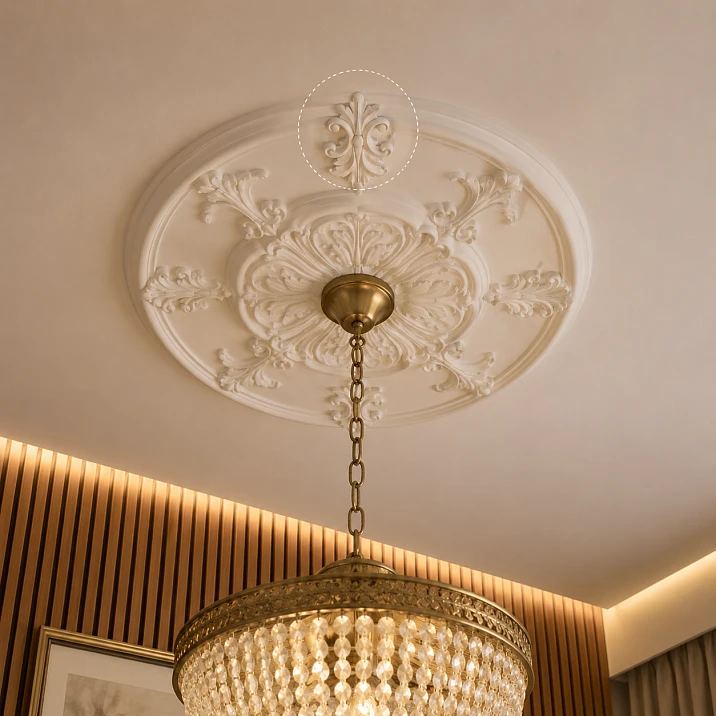
The ceiling rosette CRPU-069 is already installed, the interior around it is finished, and a slat wall is working nearby. The problem is local: one small carved piece has a chip, crack, or other damage. In this situation, the main question is not "how to redo the ceiling," but whether only the damaged module can be replaced without purchasing the entire CRPU-069 set again.
For NPU-190, the answer is fundamentally favorable: this carved decorative overlay is sold separately by STAVROS.
For the current NPU-190, the following are confirmed:
-
material — polyurethane;
-
size — 50 × 82 × 8 mm;
-
current price — 690 ₽.
The ceiling rosette CRPU-069 is a modular polyurethane composition of 910 × 910 × 15 mm costing 62,560 ₽. It consists of 64 elements of 15 types, and NPU-190 is included in its composition 8 times.
Therefore, the correct repair logic looks like this:
determine that it is NPU-190 that is damaged → assess whether repair or full module replacement is needed → verify the position against one of the seven undamaged NPU-190 units → order 1 new overlay for 690 ₽ → locally restore the node and finish.
If the damage is indeed limited to one NPU-190, repurchasing the entire CRPU-069 for 62,560 ₽ is not the first rational step.
But the other extreme conclusion is also wrong: you can't just see a similar small detail, buy an NPU-190, and immediately tear the old one off the ceiling. First, you need to confirm the part number, the method of initial installation, the nature of the damage, and the possibility of local dismantling.
This is exactly what the article is about.
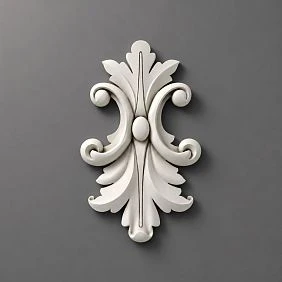
What is confirmed for NPU-190 and CRPU-069
| Parameter | NPU-190 | CRPU-069 |
|---|---|---|
| Type | Carved decorative overlay | modular ceiling socket |
| Material | Polyurethane | Polyurethane |
| Size | 50 × 82 × 8 mm | 910 × 910 × 15 mm |
| Current price | 690 ₽/pcs. | 62,560 ₽/set |
| Role in this article | replaceable module | already installed composition |
| Number of NPU-190 in CRPU-069 | 1 product unit | 8 pcs. |
| General composition of CRPU-069 | — | 64 elements of 15 types |
The official STAVROS polyurethane overlay filter decodes:
-
A — width;
-
B — height;
-
C — thickness.
Therefore, for NPU-190 Dimension Orientation Gate is closed:
A = 50 mm in width, B = 82 mm in height, C = 8 mm in relief.
After module identification, you can buy a carved decorative overlay NPU-190 made of polyurethane.




Why a new article should not repeat the general material on stucco restoration
STAVROS already has a detailed article about the restoration of polyurethane stucco molding and repair of chips.
The following are disassembled:
-
scratches;
-
chips;
-
cracks;
-
peeling;
-
tools;
-
filling defects;
-
gluing preserved fragments;
-
criteria for complete replacement of an element.
Repeating this in a new article of several thousand words would create cannibalization.
Here is a different intent.
The reader already knows the exact kit — CRPU-069 — and is trying to restore one specific part of it — NPU-190.
Therefore, the main value of the new page:
-
identify the NPU-190 among 64 parts;
-
verify it by size and repeating positions;
-
choose between repairing and replacing this specific module;
-
understand when you can avoid disassembling the entire socket;
-
return the new NPU-190 to the same coordinate;
-
align it with the seven remaining elements;
-
restore the overall finish.
The general article answers the question “how to repair polyurethane molding.”
This one answers the question “how to replace one NPU-190 inside CRPU-069.”
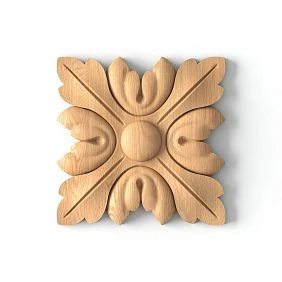
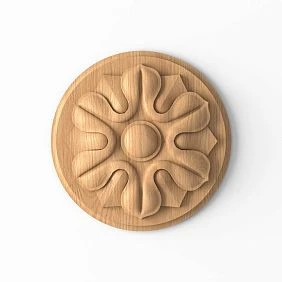
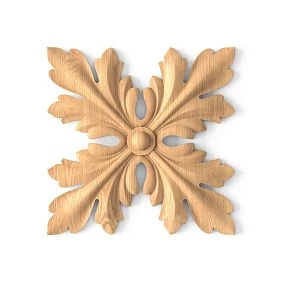
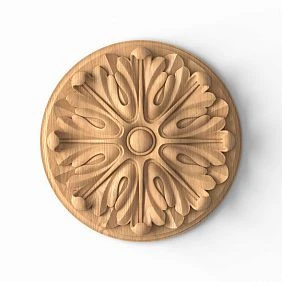
Our factory also produces:
How to identify NPU-190 among 64 elements of CRPU-069 and select the reference standard
Identifying a part only "by a similar leaf" or "by a small flower" is not enough.
CRPU-069 consists of 15 different types of modules. Some of them are close in scale, so a visual error is real.
For NPU-190, four features need to be checked at once.
Get Consultation
1. Item number in the kit composition
In the CRPU-069 specification, NPU-190 is present as a separate item.
This is the strongest fact.
2. Size
The new NPU-190 has:
50 × 82 × 8 mm.
The damaged part is measured based on the preserved geometry.
If part of the relief is chipped, it is better to check the width and height not only against the defective fragment, but also against one of the undamaged parts of the same type.
3. Repeatability
CRPU-069 uses 8 NPU-190 units.
So, if one is damaged, there are still seven reference units of the same model left in the already installed composition.
This is a huge advantage of local repair.
There is no need to restore the position "from memory" or from a small product image.
4. Pattern and orientation
Need to compare:
-
ornament direction;
-
top and bottom;
-
turn;
-
position relative to neighboring modules.
Only after all four criteria match can the damaged part be confidently identified as NPU-190.
Seven intact NPU-190 units inside CRPU-069 are the best reference for repair
Usually, when repairing old stucco molding, the main problem is the lack of an original sample.
Here, the situation is much more convenient.
If only one of the eight NPU-190 units is damaged, the remaining seven allow you to check:
-
the exact silhouette;
-
orientation;
-
relief;
-
distance to adjacent parts;
-
painting;
-
gloss level;
-
the texture of the finish;
-
the position relative to the center of the rosette.
Therefore, before dismantling, it is useful to select two reference NPU-190 units:
reference No. 1 — a symmetrical or opposite position;
reference No. 2 — the nearest adjacent position with a clearly visible mounting assembly.
Why two?
One shows the compositional coordinate.
The second is local adjacency and finish.
This reduces the risk of carrying over an old error or random offset.
First, determine the type of damage: repair the old NPU-190 or replace it entirely.
Not every damage requires a new part.
And not every damage is reasonable to restore manually.
For NPU-190, the decision is best made based on whether the relief geometry is preserved.
Surface scuffing or a local scratch
If the element's shape is fully preserved and only the finish is affected, replacement is usually excessive.
The task comes down to restoring the coating.
In this case, an article about stucco restoration is more useful than buying a new NPU-190.
A small chip without loss of the characteristic relief
If the damaged area can be carefully restored without modeling a complex ornament, repair may be rational.
The criterion here is not just millimeters.
You need to see how noticeable the defect is from below and in side light.
The original broken fragment has been preserved
This is a separate scenario.
If the piece is intact and fits perfectly, returning it can preserve the original pattern and existing finish better than a full replacement.
But the decision depends on the condition of the fragment itself and the base.
A noticeable section of the carved pattern is lost
Here, the advantages of the new NPU-190 become more obvious.
The product already has precise factory geometry.
Instead of manually recreating the relief, you can replace the entire small module.
The element cracked all the way through the body
You need to check not only the crack itself, but also the cause.
If the damage was caused by an impact, there is one scenario.
If the crack is related to base movement, tension, or an installation issue, a simple replacement may repeat the defect.
The NPU-190 has partially peeled off, but is not destroyed
Then a new overlay may not be needed at all.
The problem is in the mounting joint.
Before ordering, it is necessary to distinguish material damage from loss of adhesion to the ceiling.
Repair or replace matrix
| NPU-190 condition | First option | Why |
| Only coating abrasion | Repair | geometry preserved |
| Small chip on a smooth area | assess repair | a new part may be redundant |
| The chipped fragment has been preserved | try fitting the fragment back | The original pattern and finish are preserved |
| The complex relief is lost | more often replacement | The factory NPU-190 already has the exact shape |
| The part is split into several pieces | replacement is more promising | local repair is more complex and noticeable |
| The element is intact but has come unglued | restoration of mounting | the item itself is not damaged |
| There is a repeated crack after repair | first find the cause | the new NPU may suffer again |
| The adjacent element is damaged, not the NPU-190 | do not buy NPU-190 | first identify the correct SKU |
This table deliberately does not replace the restoration instruction.
Its task is to help decide whether the product is needed at all.
Economics of local replacement: you need to compare not just two prices
The new NPU-190 costs 690 ₽.
CRPU-069 — 62 560 ₽.
The difference between the price of one overlay and the price of a full set is:
62 560 − 690 = 61 870 ₽.
But this amount cannot be called "pure savings."
Why?
Local replacement may incur additional costs:
-
dismantling;
-
new mounting compound;
-
local base preparation;
-
puttying the border;
-
primer;
-
paint;
-
tinting;
-
master's work;
-
access to the ceiling;
-
protection of furniture and floor.
On the other hand, a full replacement of CRPU-069 would also involve dismantling, installation, finishing, and a much larger intervention.
Therefore, the correct commercial conclusion is:
the difference in the price of the goods themselves is 61,870 ₽, and the actual savings of the project are determined by the repair method and the cost of labor.
It is for this reason that local replacement of a single module deserves separate verification before purchasing a full set.
Before removing NPU-190: installation, coordinates, dimensions, and fit
CRPU-069 — modular composition.
This is an important advantage, but the word "modular" does not automatically mean:
any part can be removed in a minute regardless of the others.
The actual possibility of local disassembly depends on how this particular socket was installed.
Need to check:
-
Was NPU-190 glued separately or together with adjacent elements;
-
is there a visible seam between the modules;
-
does the paint overlap the borders;
-
is there putty along the contour;
-
are adjacent parts connected by a common finishing layer;
-
is it possible to approach the edge of the damaged NPU without pressing on adjacent elements.
If the NPU-190 is visible as an independent module and its perimeter is accessible, local replacement looks realistic.
If after multiple repaintings the entire composition has become almost monolithic on the surface, dismantling requires much more caution.
Before dismantling, it is necessary to record the coordinates of the part
The most common mistake in local repair is to remove the damaged element and then try to restore its position "approximately as it was."
For CRPU-069 this is especially unfortunate because the system is symmetrical and repetitive.
Before removal, it is useful to make an installation map of one NPU-190.
Minimally record:
-
a photo of the entire ceiling decor;
-
a close-up of the damaged part;
-
the distance from its center to the center of CRPU-069;
-
the distance to the nearest clear neighboring element;
-
grain orientation;
-
top/bottom;
-
the position of the symmetrical NPU-190 on the other side of the composition.
It is better to use two independent coordinates.
For example:
coordinate X — from the central axis of the rosette;
coordinate Y — from the adjacent repeating element.
So installing a new NPU does not depend on a single random mark.
Why you cannot rely only on the trace of old glue
After removal, a contour of the old mounting compound may remain on the ceiling.
It seems logical to simply place the new NPU-190 into this imprint.
But this is not always an accurate reference.
Causes:
-
old glue could have extended beyond the edge;
-
during initial installation, the part could have been slightly shifted;
-
part of the adhesive layer may remain on the removed NPU itself;
-
paint and putty change the appearance of the boundary.
Therefore, the glue trace is useful as an additional hint, but not as the sole marking.
Work harder:
-
recorded coordinates;
-
opposite whole NPU-190;
-
general pattern CRPU-069;
-
photos before dismantling.
Size 50 × 82 × 8 mm should be checked against the whole part, not the broken edge
If part of NPU-190 is chipped off, measuring the damaged item may give a false result.
For example, an edge several millimeters wide is lost.
Then the tape measure will show not 50 mm, but less.
This does not mean the product is different.
Need to use two sources:
official size of the new NPU-190 is 50 × 82 × 8 mm;
an undamaged NPU-190 inside the same CRPU-069.
If both match in silhouette and position, identification is stronger than measuring a single damaged fragment.
The 8 mm thickness affects the shadow and fit of the new part
Parameter C for NPU-190 is 8 mm.
This is important for two reasons.
1. Overall relief plane
The new overlay should visually match the other seven NPU-190s.
If too thick an old adhesive layer remains underneath, it may sit lower relative to the ceiling, i.e., protrude more.
If the base is excessively deepened during cleaning, the opposite problem may occur.
2. Side light
Even a few millimeters of difference in the seating of a small repeating module can show up as a shadow.
Especially if there is a chandelier or directional light nearby.
Therefore, after a dry fit, you need to check the NPU-190 not only from the front below, but also under side lighting.
Matching the article number does not eliminate the need to check the new part in place
The article number NPU-190 and the size 50 × 82 × 8 mm provide strong identification, but a physical check is still required before permanent installation.
The reason is simple: the old ceiling unit exists not in the catalog, but in a specific room.
The result is influenced by:
-
thickness of the old finishing layer;
-
residues of the mounting compound;
-
local puttying;
-
multiple repaintings;
-
manual marking during initial assembly;
-
condition of the ceiling base.
Therefore, the same SKU answers the question "is this the right product," but does not yet answer the question "does it currently fit correctly into the old unit."
Control is carried out in three stages.
Stage 1. Geometry
Compare the new NPU-190 with one of the whole ones:
-
width;
-
height;
-
contour;
-
direction of the relief.
Stage 2. Placement
Place the new part on the prepared spot without glue and check:
-
whether the back plane fits snugly;
-
whether there is any rocking;
-
whether the edge touches the old putty;
-
whether the visual depth matches the adjacent NPU.
Stage 3. Composition
Step back from the ceiling and look:
-
whether the part is rotated;
-
is it not offset relative to the repeating group;
-
is its shadow not different.
If there is a discrepancy at any stage, it cannot be corrected by forceful pressing.
The cause needs to be found.
This is especially important for the old CRPU-069: manual finishing could add its own visual thickness to the original 8 mm of relief.
How to choose the correct one out of seven whole NPU-190 for comparing color and relief
Not every one of the remaining seven NPU-190 is equally good as a finish reference.
On the ceiling, light is distributed unevenly. One part may be closer to the window, another under directed light, and a third in an area that more often fell under local touch-up painting.
Therefore, for color comparison, it is better to choose an NPU-190 that:
-
is in a similar light sector;
-
has no traces of repair;
-
is not contaminated;
-
was not repainted separately;
-
is located symmetrically to the damaged position.
For geometry, a different logic is more useful.
Here, the best reference is an element with the same orientation and similar surroundings.
Sometimes it turns out that the color reference and the position reference are two different NPU-190s.
This is normal.
For example, the opposite part perfectly shows the coordinate, but is in shadow. The neighboring one shows the shade better, but is rotated differently.
Instead of trying to find one "ideal" part, two control samples are used.
After painting the new NPU-190, it is useful to compare it with both:
with the first — by position and relief;
with the second — by color and gloss.
Such dual-standard control is especially useful for an old ceiling rosette, where different areas may have varied slightly visually over years of use.
It also helps avoid the reverse error: perfectly matching the color to one shaded NPU, then getting a noticeably darker part in a more lit sector.
How to accept the work after replacement: five independent checks
Local repair cannot be considered successful just because the new NPU-190 stays on the ceiling.
Its goal is to restore the integrity of the entire CRPU-069.
Therefore, after completion, it is useful to conduct five different checks.
1. Frontal view
Look at the rosette from a typical point in the room.
NPU-190 should not be the first thing that catches the eye as "new."
If the eye immediately finds the replaced module, the reason is usually:
-
color;
-
gloss;
-
offset;
-
different shadow.
2. Side light
Directional light best reveals the difference in fit.
With an NPU-190 thickness of 8 mm, it is especially visible if the new part:
-
protrudes more;
-
is recessed;
-
tilted.
3. Comparison with a symmetric NPU
Not with a neighboring part of a different type, but specifically with the same NPU-190.
Check:
-
orientation;
-
relative distance;
-
chiaroscuro;
-
finish.
4. Before/after photo from one point
The eye quickly gets used to the new part.
The photo allows comparing the overall composition without the habituation effect.
It is important to use the same angle that was taken before dismantling.
5. Check under several lighting scenarios
Daylight and a chandelier can reveal different defects.
A white part that matched perfectly during the day may stand out in the evening with a different degree of gloss.
If all five checks pass, the local replacement can be considered visually integrated.
If the new NPU-190 differs not in color, but in surface character
Sometimes the shade matches, but the new part still looks "fresher."
The reason may be in the surface.
The old CRPU-069 could have received over the years:
-
several layers of paint;
-
a more smoothed relief;
-
a slight texture from a roller or brush;
-
a matte coating;
-
patination.
The new NPU-190 has a clearer factory relief.
In such a situation, you cannot solve everything with a darker paint.
sharpness of edges;
-
nature of gloss;
-
texture of the coating.
-
Sometimes local matching is achieved not by selecting a different color, but by reproducing the same finishing technology.
Sometimes local matching is achieved not by selecting a different color, but by reproducing the same finishing technology.
For example, if the entire CRPU was painted with a brush, and the new NPU was covered with a perfectly smooth spray, the difference will be visible even with the same color.
This is another reason to keep data about the original finish.
After repair, it is useful to leave a "local replacement passport"
For one small module this seems excessive, but in modular CRPU-069 such a record is really useful.
It is enough to save in the repair folder:
-
article NPU-190;
-
size 50 × 82 × 8 mm;
-
quantity of NPU-190 in CRPU-069 — 8 pcs.;
-
photo of the location;
-
date of replacement;
-
paint code or tinting recipe, if known;
-
name of the mounting system used;
-
photo after repair.
Why?
If another NPU-190 is damaged in a few years, diagnostics will take minutes.
You won't have to re-identify the product, color, and installation method.
For commercial properties or complex private interiors, such a "renovation passport" is especially useful: it turns a one-time restoration into a maintainable system.
Work on the ceiling must stop if safe access is not ensured.
NPU-190 is small, but the work area is overhead.
The small size of the part does not automatically make working at height safe.
If access requires:
-
reaching sideways from a stepladder;
-
climbing onto furniture;
-
working with one hand without stable support;
-
removing a heavy light fixture without the necessary qualifications,
local replacement is better left to a specialist.
This does not change the commercial logic of the product.
You can buy one NPU-190 instead of the entire CRPU-069, but savings on the product should not turn into risk during installation.
What to check before placing an order: NPU-190 checklist for the old CRPU-069
Even at a price of 690 ₽, it is better to place an order not based on a "similar picture," but after a quick check. This reduces the risk of buying the right product for the wrong place.
| Check | What must be confirmed | If not confirmed |
| kit | CRPU-069 is specifically installed | first identify the ceiling system |
| Article number | the damaged position corresponds to NPU-190 | do not order based on external similarity alone |
| Size | the reference part measures 50 × 82 × 8 mm | double-check another SKU |
| Quantity | CRPU-069 contains 8 NPU-190 units | use repeatability as a control |
| Damage | loss of relief indeed requires replacement | For a surface defect, consider repair |
| Installation | The module can be separated locally | Assess the work by a master |
| Coordinates | Position recorded before removal | Do not dismantle yet |
| Finish | The color and nature of the coating are clear | Do a test patch |
| Base | It is clear what the part is glued to | Do not choose the mounting compound blindly |
| Access | The ceiling is safely accessible | organize professional access |
Such a list separates two different errors.
The first is an incorrect purchase.
The second is an incorrect repair with the right product.
For a commercial article, this is fundamental: the presence of NPU-190 in the CRPU-069 does not mean that you should click "buy" right now.
The order becomes logical only after going through the checklist.
What to do with the removed damaged NPU-190 after dismantling
Do not throw away the old part immediately.
Even if it is destroyed to the point that returning it to the ceiling is pointless, it remains a useful technical reference.
The saved NPU-190 helps to check:
-
old color;
-
number of paint layers;
-
shine;
-
surface texture;
-
residues of the mounting compound;
-
nature of contact with the ceiling;
-
actual orientation.
If there are several fragments, it is better to put them together and label them.
The back side is especially useful.
It may show how the old CRPU-069 was mounted and which area actually contacted the substrate.
But the old adhesive residue cannot automatically be considered an instruction for new installation. Its task is to provide information, and the choice of a new system is still made based on material compatibility.
The old NPU-190 can be discarded only after:
-
new part installed;
-
finish matched;
-
repair accepted under main lighting;
-
repair data saved.
This simple rule reduces the risk of losing the only sample of old finish prematurely.
The old CRPU-069 should be checked not only at the chip site
If one NPU-190 received an obvious mechanical impact, local diagnostics are sufficient.
But if the cause is unknown, it is useful to quickly inspect all eight identical elements.
Why exactly NPU-190?
Because identical modules provide a convenient control group.
Compare:
-
is there a similar crack on the other NPU-190;
-
do they fit equally against the ceiling;
-
is there any delamination in one direction;
-
does the finish character match;
-
is the defect not repeated in a symmetrical zone.
If the other seven are stable, the version of local random damage becomes more convincing.
If similar defects are found in several repeating modules, the problem should no longer be considered isolated.
Then the new part for 690 ₽ remains a needed item for the destroyed place, but the repair should include diagnosis of the cause.
This is an important distinction:
one damaged element ≠ necessarily one cause limited to that element.
How to limit the intervention area around the small NPU-190
The size of NPU-190 is only 50 × 82 mm.
It is logical to aim for the same local repair, but the actual work area may become wider due to old paint and putty.
It is useful to separate the three contours in advance.
Contour 1 — the module itself
50 × 82 mm.
The product is changed here.
Contour 2 — installation seam
A small area directly around the perimeter.
Here, the connection of the new NPU with the ceiling is restored.
Contour 3 — final blending
May be wider than the mounting seam if color or gloss needs to be evened out.
The main principle is not to widen the next contour before it becomes necessary.
For example, if after installation the seam is fully covered and the color matches, there is no reason to repaint a large sector of CRPU-069.
Conversely, if a local area is visible as a spot, a small intervention area is not an end in itself. The finish must be brought to visual integrity.
Thus, the repair remains local in structure but flexible enough in finishing.
When an order for one NPU-190 needs to be postponed, even if the article has already been confirmed
There are situations where the product is correctly identified, but buying it immediately is premature.
Postponing an order is useful if:
-
the damage turned out to be only superficial;
-
several elements detach from the ceiling at the same time;
-
the crack runs through the base;
-
it is unclear how to remove the old part without damaging the adjacent ones;
-
dismantling of the light fixture is required nearby;
-
the finish is unknown, and the new part may require complex decorative painting;
-
the repair is part of a larger ceiling renovation.
This does not cancel the NPU-190 article.
This changes the sequence of actions.
First, the uncertainty is resolved, then the purchase is processed.
This approach is especially useful in a finished interior: the cost of a mistake is determined not by the price of a small overlay, but by the risk of damaging the already assembled ceiling system.
Local dismantling and dry fitting: how to avoid damaging adjacent modules
After receiving a new overlay, it cannot be fixed immediately.
First, a dry fitting is performed.
Check:
-
whether the silhouette matches;
-
does the orientation match;
-
whether the width of 50 mm matches;
-
whether the height of 82 mm matches;
-
whether the new part protrudes more than adjacent ones;
-
whether an unexpected gap appears;
-
whether the distance to adjacent elements matches;
-
whether the composition looks symmetrical from below.
If the new NPU-190 does not fit into the expected place, the problem cannot be fixed with a thick layer of glue or forceful pressing.
You need to stop and find out the cause.
Possible causes:
-
the damaged element was not an NPU-190;
-
the old part was installed with a deviation;
-
old adhesive layer remained on the base;
-
the new part is rotated differently;
-
the contour is covered by old putty;
-
the adjacent module shifted earlier.
Dry fitting is the point where such errors have not yet turned into a new repair.
Local dismantling must preserve adjacent modules.
The goal of the repair is to replace one NPU-190.
If adjacent elements are damaged during removal, the original commercial logic is lost.
Therefore, the intervention zone must be minimal.
Before starting work, you need to understand:
-
where the real boundary of the NPU-190 lies;
-
whether there are thin protruding parts of other trims nearby;
-
whether the overall paint overlaps the seam;
-
how the ceiling around is protected.
Do not aggressively pry the element if it is unknown which mounting adhesive was used.
Different adhesives and different substrates behave differently.
If the part is held rigidly and there is complex relief nearby, it is wiser to involve a specialist than to turn a replacement for 690 ₽ into repair of several elements.
If the NPU-190 is near a chandelier or wiring, decorative repair must not affect the electrical system.
CRPU-069 is a ceiling composition, so a light fixture is often located nearby.
If the damaged NPU-190 is far from the electrical junction, that is one scenario.
If access requires:
-
removing the chandelier;
-
disconnecting the wiring;
-
opening the ceiling outlet;
-
working near exposed live parts,
decorative replacement ceases to be just stucco work.
In such a case, the electrical part must be serviced by a qualified specialist.
The NPU-190 itself is not used as a mounting for the light fixture, and wiring is not routed under it merely to hide a defect.
Ceiling decor and electrical systems must remain independent systems.
The old finish can make the new NPU-190 visually "foreign"
The new polyurethane overlay comes as a new product.
And the CRPU-069 could have been on the ceiling for several years.
The difference does not necessarily arise from the polyurethane itself.
The existing composition could have been:
-
painted;
-
repainted;
-
patinated;
-
coated with a matte or semi-matte layer;
-
locally tinted;
-
slightly altered by light and wear.
Therefore, the new NPU-190 may match geometrically perfectly, but visually appear brighter or "fresher."
The main goal of the finish is not to make the new part beautiful on its own, but to make it indistinguishable from the other seven NPU-190s in the overall composition.
The color should be matched to the existing CRPU-069, not to the white sample from the catalog.
The most dangerous mistake is to rely on the factory color of the new part.
If the old socket is painted in warm white and the new NPU remains cool white, the difference will be noticeable.
If the CRPU has a patina, plain white paint will not solve the problem either.
The correct reference is the existing ceiling.
It is better to choose an area:
-
near NPU-190;
-
without contamination;
-
without local repair;
-
in the same light mode.
If the paint code from the original repair is saved, that is useful.
But even the same code after several years of use may look different.
Therefore, a test spray-out is needed.
A monochrome white composition may require local touch-up around the new part
Sometimes a new NPU-190 is painted exactly to match, but the repair boundary is still visible.
The cause may be in:
-
new putty seam;
-
local primer;
-
difference in gloss;
-
old ceiling contamination;
-
trace from the removed part.
Then the technician may paint not only the NPU itself, but also a small area around it.
How wide this area will be is not universally predetermined in advance.
The main principle is a minimal intervention zone sufficient for visual leveling.
If repainting a significant part of CRPU-069 is required for a single NPU, that is already a separate restoration task.
Patined CRPU-069 cannot be restored with a single flat paint
Patina emphasizes the relief:
-
the recesses are darker;
-
the peaks are lighter;
-
the tone is distributed unevenly.
The new NPU-190 in a single solid color will differ.
In this case, you need to replicate not only the base shade, but also the finish logic.
The best reference is one of the seven intact NPU-190s.
It is useful to photograph it under side lighting and compare:
-
the peaks of the ornament;
-
recesses;
-
transitions;
-
degree of contrast.
If the finish is complex, it's better to entrust the work to a specialist in decorative painting.
How to restore coordinates and symmetry of NPU-190 after local replacement
CRPU-069 — large composition 910 × 910 mm.
Even a small NPU-190 can be noticeable if the repeating element is offset relative to the overall layout.
For a new part, it is better to check:
radial or central alignment;
local interval to the adjacent module.
For example, after a dry fit, measure:
-
distance from the center of NPU-190 to the central axis of CRPU;
-
distance to the nearest repeating
Why the slat wall remains context and does not change the repair scenario
This is an important semantic distinction.
NPU-190 is replaced in the ceiling socket CRPU-069.
It does not become a product "for a slat wall" just because the slats are in the same room.
Slat finishing is important in a different sense.
It shows that the interior is already finished and combines modern vertical panels with classic ceiling decor.
During renovation, there is no need to:
-
rework the slat wall;
-
add NPU-190 to the slats;
-
create a new decorative node;
-
change the overall concept.
It is necessary to restore the existing ceiling composition so that the interior looks whole again.
If the slat finishing is designed separately, it is possible buy wall slat panels or buy slatted panels, but this is not part of the repair operation itself with NPU-190.
Repair kit: one NPU-190, auxiliary materials, and the boundary of the complete set
If the decision to replace is confirmed, the main item is one new NPU-190.
Additionally, materials may be needed for:
-
installation;
-
surface preparation;
-
local leveling;
-
priming;
-
painting.
But a specific adhesive cannot be assigned by article without knowing the substrate and the old mounting system.
The ceiling can be:
-
painted plaster;
-
drywall;
-
puttied surface;
-
other finishes.
The mounting compound must be compatible with both polyurethane and the substrate.
Therefore, the article does not turn the basket into a mandatory set of "NPU + specific tube of glue + specific putty."
More correctly:
-
determine the base;
-
understand what was used before;
-
check STAVROS installation recommendations;
-
choose compatible materials.
If you need to compare other modules, you can open the section central polyurethane overlays or the entire catalog of decorative polyurethane overlays.
Do I need to buy a spare second NPU-190
For one damaged part, the main calculation is 1 piece.
The article should not automatically recommend buying a second one "just in case."
A spare may make sense if:
-
the interior is critical in terms of deadlines;
-
installation takes place far from the supplier;
-
there is a risk of repeated mechanical work near the ceiling;
-
the owner wants to keep one reference for the future.
But that is already an operational decision.
If the product is available separately and the SKU is known, mandatory stock is not required.
A commercially honest basket in the basic scenario:
1 × NPU-190 = 690 ₽.
It is worth buying the full CRPU-069 again only if the problem is on a different scale.
The full set may become rational if the problem is no longer local.
For example:
-
many different modules are damaged;
-
a significant part of the composition is lost;
-
there is no possibility to confidently restore the scheme;
-
the base requires complete dismantling;
-
the owner still plans to redo the ceiling.
But this is no longer the scenario of "one NPU-190 damaged."
For the original situation, repurchasing the ceiling socket CRPU-069 should be the last, not the first, solution.
Mistakes that turn a local replacement into a major repair
Mistake 1. Identifying NPU-190 only by external similarity
Why it happens: the damaged part is small, and the set contains many ornamental modules.
Consequence: the wrong SKU is purchased.
Check: size 50 × 82 × 8 mm + position in the layout + comparison with a whole NPU-190.
How to avoid: confirm at least three signs.
Mistake 2. Buying a new part for ordinary wear
Why it occurs: a new NPU-190 is inexpensive.
Consequence: unnecessary disassembly creates a greater risk than the original defect.
Check: whether the geometry is preserved.
How to avoid: first decide "repair or replacement".
Mistake 3. Removing the old NPU before taking photos and measurements
Why it occurs: the position seems obvious.
Consequence: exact coordinates and orientation are lost.
Check: is there an installation map.
How to avoid: fix the position before dismantling.
Error 4. Use only the trace of old glue as marking
Why it occurs: the imprint looks like a ready-made template.
Consequence: the new part repeats the old offset or sits higher due to glue residue.
Check: compare with the symmetrical NPU.
How to avoid: use two independent coordinates.
Error 5. Leave the new NPU in factory white color
Why it occurs: the old socket also seems white.
Consequence: shade or gloss differ.
Check: apply painted sample to existing CRPU.
How to avoid: match finish to old composition.
Error 6. Level part height with thick glue layer
Why it occurs: base is uneven after removal.
Consequence: NPU-190 protrudes more than neighbors and gives different shadow.
Check: dry fit.
How to avoid: prepare surface first.
Error 7. Damage adjacent modules when prying up
Why it occurs: old adhesive is unknown.
Consequence: instead of one part, several have to be repaired.
Check: understand the installation seam and access to the perimeter.
How to avoid: do not use forceful dismantling blindly.
Mistake 8. Ignoring the cause of the crack
Why it occurs: the desire to quickly cover up the defect.
Consequence: the new NPU cracks or peels off again.
Check: look at adjacent elements and the base.
How to avoid: eliminate the systemic cause before installation.
Practical algorithm for local replacement of NPU-190
-
Take a photo of the entire CRPU-069.
-
Take a close-up photo of the damaged part.
-
Find the remaining NPU-190 in the composition.
-
Select one symmetrical and one adjacent as references.
-
Verify the article number against the CRPU-069 composition.
-
Verify the size 50 × 82 × 8 mm.
-
Check the orientation of the pattern.
-
Determine the type of damage.
-
Decide: repair the old one or replace it.
-
If replacing, record the coordinates.
-
Mark the center and the distance to the adjacent element.
-
Check how the old NPU is connected by finishing to neighboring modules.
-
Do not start dismantling if there is a risk of touching electrical wiring.
-
Protect neighboring elements and the ceiling.
-
Remove only the damaged module as locally as the installation allows.
-
Clean the area of unstable remnants of the old mounting system.
-
Do not deepen the base unnecessarily.
-
Do a dry fit of the new NPU-190.
-
Compare its relief with the seven neighboring NPU-190 units.
-
Check the position along two coordinates.
-
Select a mounting compound suitable for polyurethane and the actual base.
-
Secure the new part according to the instructions of the selected system.
-
After the mounting assembly stabilizes, restore the local finish.
-
Compare the shade and gloss with the reference NPU.
-
Check the ceiling under side and main lighting.
-
Take a final photo from the same point as before the repair.
After identification and verification, you can order NPU-190 50 × 82 × 8 mm separately.
Decision matrix: repair, one NPU-190, or more extensive intervention
Situation Main decision Shopping cart Only the paint is worn Local finish 0 NPU Small repairable chip Restoration 0 NPU Significant relief of one part is lost Local replacement 1 NPU-190 One NPU completely lost Local replacement per scheme 1 NPU-190 Two confirmed NPU-190 damaged Two local replacements plus cause diagnostics 2 NPU-190 NPU intact but detached restoration of mounting 0 NPU Several module types are damaged extended diagnostics count by actual composition Most of CRPU-069 is damaged consider full repair/replacement of the system separate project Result: one damaged NPU-190 does not make CRPU-069 a disposable kit
The main practical value of the modular CRPU-069 is evident precisely in this situation.
The ceiling composition consists of 64 elements of 15 types.
NPU-190 is one of these individual types, and there are 8 of them in the kit.
The product itself is sold separately for 690 ₽.
This allows you to avoid starting the repair with a repeat purchase of CRPU-069 for 62,560 ₽.
Correct order:
identification → damage diagnostics → local replacement only when necessary → coordinate restoration → finish restoration.
It is especially useful that seven other NPU-190 remain on the ceiling as ready-made references.
They help to check:
-
shape;
-
orientation;
-
position;
-
relief of 8 mm;
-
color;
-
degree of gloss.
If the damage is minor and the relief is preserved, you may not need to buy a new NPU-190 at all.
If a significant part of the ornament is lost, one new overlay for 690 ₽ becomes a much more rational product purchase than the entire set.
If the defect recurs or affects multiple modules, you should first look for a common cause rather than reducing the repair to sequential replacement of parts.
For a wider selection available Polyurethane moldings, but in the original task the most accurate item is already known — NPU-190 50 × 82 × 8 mm.
A successful local replacement should ultimately be visually "invisible" as a separate repair event. The visitor or room owner should again perceive CRPU-069 as a whole, not notice the new NPU-190. This is a good final criterion: if after restoration the eye no longer catches on the defect site, the geometry, fit, and finish are correctly matched. If the new part stands out even without a hint, the repair is not yet complete — you need to determine what exactly differs: coordinate, relief, shade, gloss, or local finish boundary.
If, after comparing with a symmetrical part, side lighting, and a before/after photo, the replacement site no longer reads as separate, the task is solved exactly at the level for which it makes sense to buy NPU-190 as a standalone module. In such a situation, CRPU-069 retains its original composition, and the repair remains local and controlled in cost, scope of work, and intervention area.
FAQ
Can NPU-190 be identified if only a part of it remains?
Yes. Use the composition of CRPU-069, its place in the composition, and one of the seven intact NPU-190 units as a reference. The size of the new part is 50 × 82 × 8 mm.
Is it necessary to order NPU-190 of the same year of manufacture as the old CRPU-069?
The key factors are the article number, geometry, and finish compatibility. In the available STAVROS data, there is no separate requirement to look for a "batch of the same year." But before installation, the new part still needs to be compared with existing elements.
Can NPU-190 be replaced without removing the chandelier?
If access to the part is free and the work does not affect the mounting or wiring of the fixture, the decorative operation can be independent. If access requires interfering with the electrical part, a qualified specialist is needed.
What to do if the new NPU-190 matches in size but doesn't fit into the old place?
Don't press it in by force. Check the old adhesive layer, remnants of putty, orientation, and the accuracy of part identification.
If the old NPU-190 has been painted several times, will the new one look thinner?
The confirmed thickness of the new NPU itself is 8 mm. But the multi-layer finish on old elements can change the perception of the relief. Comparison should be done in person.
Can one of the seven intact NPU-190 units be used as a position template?
Yes, that's one of the most useful references. It's better to use a symmetrical position and additionally check the distance to neighboring modules.
Do I need to buy the entire CRPU-069 if the NPU-190 and one other element are damaged?
Not automatically. First, identify the second element according to the specification and check whether it is sold separately. A full set is only needed for a significantly larger problem.
What to do if the damaged NPU-190 didn't come off in one piece?
Save all fragments and do not blindly expand the removal area. They can help restore the original position, color, and nature of the mounting layer.
Can the new NPU-190 be painted in advance on the table?
Yes, if it matches the chosen finishing scheme, but after installation you still need to check the local transition and touch up the finish if necessary.
Where can I find other center rosettes if it turns out that a different SKU is damaged?
In the section STAVROS center polyurethane rosettes Other models can be compared, but the part is best finally identified by the composition of CRPU-069 specifically.
-