Article Contents:
- First screen: what to buy for the ceiling
- How ceiling decor differs from a chandelier rosette
- Which elements to use: breakdown by product groups
- Cornice: the main line of the ceiling
- Ceiling molding: lines and frames on the ceiling plane
- Decorative elements for the ceiling
- Ceiling rosettes: not just for chandeliers
- Decor for moldings: corners and accents
- Molding: delicate lines
- Six ceiling decor scenarios: from minimal to classic
- Scenario one: minimal set
- Scenario two: set for a chandelier
- Scenario three: neoclassical
- Scenario four: historical classic
- Scenario five: high ceiling and coffers
- Scenario six: ceiling without a chandelier
- How to choose element size: the logic of proportions
- Ceiling height as a starting point
- Room area
- Number of elements: less is not always worse
- Relief: profile depth
- Buying ceiling decor: what to check before placing an order
- Check the diameter of the rosette relative to the chandelier's mounting plate
- Check the compatibility of the cornice and molding
- Check the glue consumption
- Account for ventilation grilles and recessed lights
- Ceiling decor kit for different rooms
- For bedroom, ceiling 2.7 m
- For living room, ceiling 3.0 m
- For kitchen-living room, open plan
- For the hall of a country house, ceiling 3.5 m
- For a commercial interior, ceiling 4.0 m
- Installation of ceiling decor: key nuances
- Glue with good initial adhesion
- Installation sequence
- Marking is the foundation of the result
- Sealant is mandatory
- What to buy with ceiling decor: a comprehensive checklist
- Eight mistakes when buying ceiling decor
- Comparison table of kits by task
- Frequently Asked Questions
- About the Company STAVROS
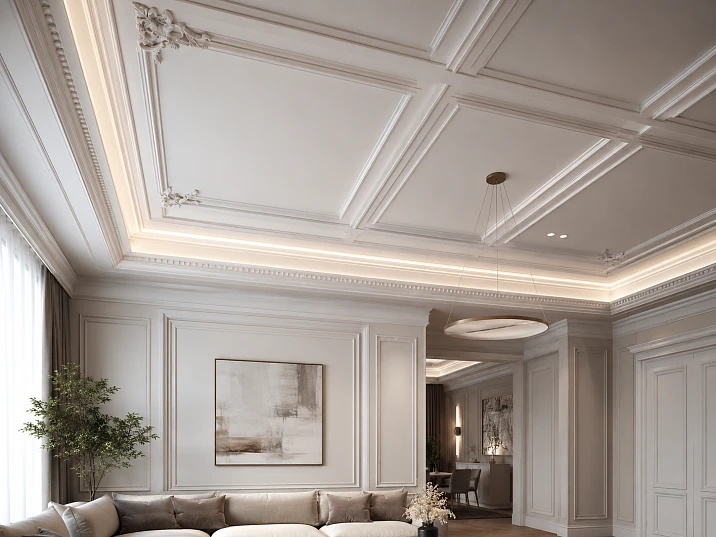
The ceiling is the fifth wall. That's what designers say when they want to explain why it deserves as much attention as walls, floors, and furniture facades. But in reality, most buyers limit themselves to one action: hang a rosette under the chandelier — and consider the ceiling decorated.
A rosette is a good start. But only a start.
Polyurethane ceiling decoration It's a system. A cornice around the perimeter, moldings for frames, decorative elements in the corners, caisson lines between lighting zones — all of this works together and creates an effect that a single rosette will never provide. A ceiling with a full set of stucco is a ceiling you look at. A ceiling with a single rosette is a ceiling you don't notice.
This article is for those who are ready to make the ceiling truly special. Not just "attach something," but thoughtfully assemble a set that turns an ordinary plane into an architectural element of the interior.

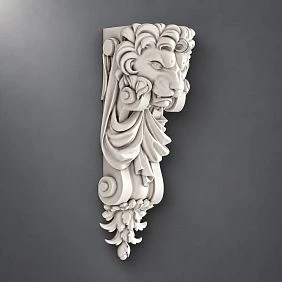

First screen: what to buy for the ceiling
If you're reading quickly — the commercial answer right away:
Complete set of polyurethane ceiling decor:
-
Cornice — for the perimeter, the junction of wall and ceiling.
-
Ceiling molding made of polyurethane — for decorative frames on the ceiling plane.
-
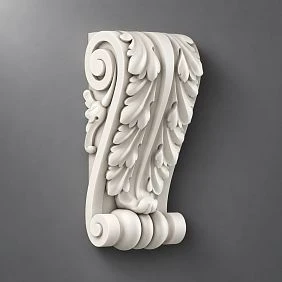
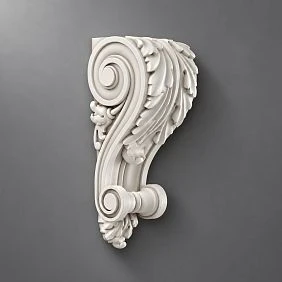
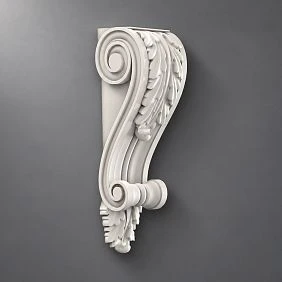
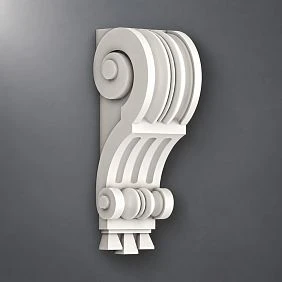
Polyurethane ceiling decor — decorative elements, medallions, caisson inserts.
-
Decor for Molding — corner inserts, accents at molding joints.
-
Ceiling rosette — with a chandelier or as an independent central accent.
-
Polyurethane adhesive — specialized, with good initial adhesion for the ceiling.
-
Acrylic sealant.
-
Acrylic primer.
-
Paint.
-
Spare decor 10–15%.
All of this is not "just in case," but for a proper result. A cornice without moldings is an unfinished perimeter. A rosette without a cornice is an accent without a frame. Moldings without glue are just profiles waiting their turn.




How ceiling decor differs from a chandelier rosette
A rosette solves one specific task: it decorates the chandelier attachment point, conceals the mounting plate, and creates an ornamental center for the ceiling composition. It is a point element.
Polyurethane ceiling decoration — it is a system that works across the entire ceiling plane:
-
Cornice — forms the boundary between the wall and ceiling, creating the room's top line.
-
Molding frames — structure the ceiling plane, creating a geometric rhythm.
-
Decorative elements — medallions, cartouches, coffered inserts — provide point accents within the system.
-
The rosette is a central element that works in conjunction with frames and a cornice.
Why is this fundamentally important? The human eye perceives the ceiling as a single plane. One rosette on an empty ceiling is like a painting without a frame: it exists, but without context it doesn't work. Cornice + frames + rosette is a complete architectural system that the ceiling "holds" as a single whole.
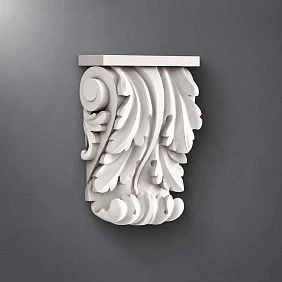
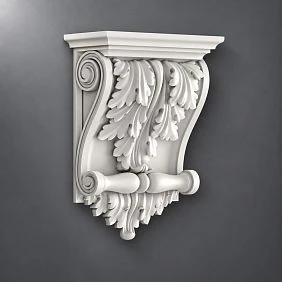
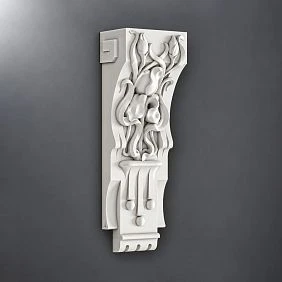
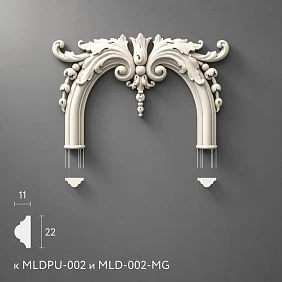
Our factory also produces:
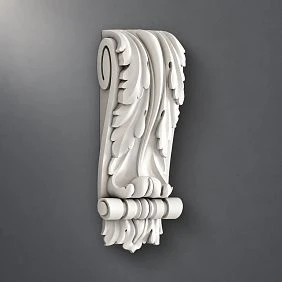
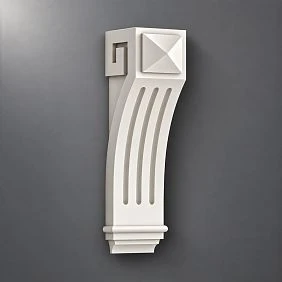
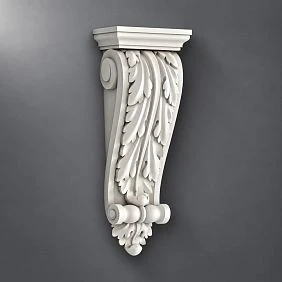
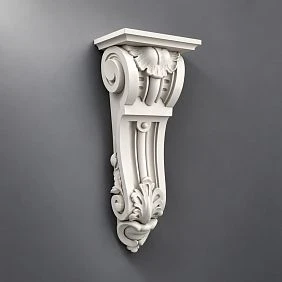
Which elements to use: breakdown by product groups
Let's break down each group separately — what it is, why it's needed, and when to use it.
Get Consultation
Cornice: the main line of the ceiling
The cornice is an angular profile that is mounted at the junction of the wall and ceiling along the entire perimeter of the room. This is the most noticeable element of the ceiling system: it is visible from any point in the room.
The cornice performs three functions simultaneously:
-
Architectural — sets the upper horizontal line of the space.
-
Visual — visually increases or decreases the ceiling height (depends on the profile proportion).
-
Masking — covers the joint between the wall and ceiling, which is rarely perfectly even.
Polyurethane moldings, cornices, and baseboards — this is a single category where cornice profiles are presented in a wide range: from delicate 60–70 mm for modern interiors to rich 180–200 mm for classic rooms with high ceilings.
How to choose the height of the cornice:
-
Ceiling 2.5–2.7 m — cornice 60–90 mm.
-
Ceiling 2.7–3.0 m — cornice 90–130 mm.
-
Ceiling 3.0–3.5 m — cornice 130–160 mm.
-
Ceiling above 3.5 m — cornice 160–200 mm and more.
Ceiling molding: lines and frames on the ceiling plane
Ceiling molding made of polyurethane — a flat or low-volume profile that is mounted directly onto the ceiling plane. Used for:
-
Rectangular frames around the perimeter inside the cornice.
-
Caisson grid — a grid of rectangular or square cells on the ceiling.
-
Zoning — allocating a dining area, sleeping area, or workspace in an open-plan layout.
-
Framing of recessed lights.
The width of the ceiling molding is from 20 to 70 mm. The higher the ceiling and the larger the room, the wider the profile can be.
Decorative elements for the ceiling
Polyurethane ceiling decor — these are three-dimensional accent elements: medallions, coffered inserts, corner accents, decorative rosettes at the intersection points of moldings. They do not carry any structural load — only visual.
As a rule, these elements are mounted:
-
In the center of each coffered cell.
-
At the intersection points of horizontal and vertical moldings.
-
At the corners of frames on the ceiling.
-
As an accent between the main rosette and the cornice.
Ceiling rosettes: not just for chandeliers
Polyurethane ceiling rosettes — traditionally used under a chandelier. But on a ceiling without a central chandelier, they can:
-
Act as an independent decorative accent in the center of a frame system.
-
Be placed above each of several lighting zones (above the dining table, above the sofa, above the workspace).
-
Create a visual "node" in the center of a coffer.
The diameter of the rosette is chosen proportionally to the room and the size of the frame around it.
Decor for moldings: corners and accents
Decor for polyurethane moldings — corner inserts, linear accents, "nodes" at junction points. They are especially important for the ceiling: a straight right angle of a frame without a corner insert looks strict but somewhat mechanical. A corner insert is that "lively" element that turns the corner of the frame from a mere connection point into a decorative accent.
Molding strips: delicate lines
Polyurethane trim — a thin linear profile from 15 to 40 mm — used for secondary belts inside the cornice, for light dividing lines between zones, for an additional contour inside frames. It does not replace the molding — it refines the system.
Six ceiling decor scenarios: from minimal to classic
Scenario one: minimal set
Goal: Don't overload the ceiling, but add completeness.
Contents:
-
Cornice 80–100 mm around the perimeter.
-
Acrylic sealant + primer + paint.
Result: Clean upper perimeter. The ceiling is "closed" from above and has a finished look. Works for modern interiors, Scandinavian style, minimalism.
Where appropriate: Bedroom, kitchen-studio, children's room.
Scenario two: chandelier set
Goal: Design the central area with a chandelier and the perimeter as a single system.
Contents:
-
Cornice 100–130 mm.
-
Ceiling rosette diameter 350–500 mm.
-
ceiling molding — one rectangular frame around the socket.
-
Primer + paint.
Result: The socket is inscribed in a frame, which is inscribed in the perimeter of the cornice. Three levels — three concentric elements, united on one plane.
Where appropriate: Living room, bedroom, dining room.
How to properly assemble such a set — in the article ceiling rosette, moldings and cornice made of polyurethane.
Scenario three: neoclassicism
Task: Concise architectural finishing without excessive ornamentation.
Contents:
-
Cornice 100–140 mm with a smooth or minimally profiled cross-section.
-
Ceiling moldings — 2–3 rectangular frames on the ceiling plane.
-
Decor for Molding — concise corner inserts.
-
Socket — if there is a chandelier.
-
Painting: matching the ceiling color.
Result: Architectural system without overload. The relief is only read by light — delicate and expensive.
Where appropriate: Modern apartment with historical touches, interior in the style of 'quiet luxury'.
Scenario four: historical classic
Task: A full stucco system for a classic interior.
Contents:
-
Cornice 150–180 mm with ornament.
-
ceiling molding — frames integrated into the cornice system.
-
Ceiling Decor — coffered inserts, medallions.
-
Corner elements with relief ornament.
-
Ceiling rosette 500–700 mm.
-
Paint: white.
Result: A rich stucco ceiling, comparable in decorative effect to the plaster moldings of historic interiors.
Where appropriate: Country house, historic interior, restaurant, hotel.
Scenario five: high ceiling and coffers
Task: Design a large ceiling plane with a height of 3.5 m and above.
Contents:
-
Cornice 180–200 mm.
-
Moldings made of polyurethane — grid of coffers across the entire plane.
-
Ceiling Decor — inserts in each coffer.
-
decorative polyurethane elements — accents at intersection points.
-
Socket in the center.
-
Paint: white, a contrasting tone inside the coffers is possible.
Result: A coffered ceiling is the architectural dominant of the space. Visually lowers the height, adds depth and rhythm.
Where appropriate: Hall of a country house, large living room, banquet hall, conference room.
Scenario six: ceiling without a chandelier
Task: Design a ceiling with spot lighting or without a central chandelier.
Contents:
-
Cornice around the perimeter.
-
Ceiling moldings — frames around groups of spotlights.
-
Polyurethane trim — additional dividing lines.
-
Decorative elements in the corners of the frames.
-
Painting: matching the ceiling color.
Result: The ceiling is structured without a central point. The frames "collect" groups of spotlights into unified light zones.
Where appropriate: Modern apartment with track or spot lighting, kitchen-living room, bedroom with niche lighting.
How to choose element size: the logic of proportions
The size mistake is the most noticeable. A too thin cornice on a high ceiling gets lost. A too large one on a low ceiling feels oppressive. Let's break it down by criteria.
Ceiling Height as a Starting Point
All decor sizes are based on ceiling height. This is the main parameter.
| Ceiling Height | Crown Molding | Ceiling molding | Rosette |
|---|---|---|---|
| up to 2.6 m | 60–80 mm | 20–30 mm | 250–350 mm |
| 2.6–2.8 m | 80–100 mm | 25–40 mm | 300–450 mm |
| 2.8–3.0 m | 100–130 mm | 35–50 mm | 400–550 mm |
| 3.0–3.5 m | 130–160 mm | 45–65 mm | 500–700 mm |
| Above 3.5 m | 160–200 mm | 60–80 mm | 650–900 mm |
Room area
Large room — larger decor. Small room — more delicate. In a 12 m² room, a coffered grid of wide moldings will create a cage-like feel. In a 40 m² living room, the same set will look organic.
Number of elements: less is not always worse
The "add everything" mistake is no less common than "buy only a rosette." A ceiling with a cornice, three levels of frames, coffers, and an abundance of decorative inserts in a small room becomes overloaded. Principle: each element should be justified by a purpose, not added "for richness."
Relief: profile depth
For a low ceiling, a shallow relief is preferable: the shadow from the profile will be minimal, and the decor will not visually "press down." For a high ceiling, a deep relief is acceptable and desirable: it creates an expressive shadow and is readable from a distance.
Buying ceiling decor: what to check before placing an order
Check the diameter of the rosette relative to the chandelier's mounting plate
This is the most common mistake when ordering online. The rosette is purchased, the chandelier is chosen — but the mounting plate overlaps the ornament. Or, conversely, the rosette opening is too small for the plate. Check: the inner diameter of the rosette opening should be 20–30 mm larger than the diameter of the mounting plate.
Check the compatibility of the cornice and molding
The cornice profile and molding profile should be from the same style line. Different manufacturers mean different scales and ornaments. The best way to ensure compatibility is to buy all elements of the set from one catalog.
Check the glue consumption
For ceiling installation, glue consumption is higher than for wall work: the profile needs to be pressed and held until it sets. One 300 ml tube covers about 5–7 linear meters of cornice. For a room of 20 m² with a perimeter of 18 m — at least 3 tubes. More details on selection in the article what to glue polyurethane molding with.
Account for ventilation grilles and recessed lights
Ceiling frames should be planned considering the actual placement of lighting fixtures and ventilation openings. A molding frame "cut" by a ventilation grille in the middle is a visual mishap that is difficult to fix after installation.
Ceiling decor set for different rooms
For a bedroom, ceiling 2.7 m
The bedroom is a room of rest. Here, decor should be moderate, without overload. You see the ceiling in the bedroom while lying down — in a horizontal position, with a maximally open viewing angle. That is why the bedroom is one of the best places for ceiling decor.
Recommended set:
-
Cornice 90–110 mm, smooth or with a delicate pattern.
-
ceiling molding — one central frame.
-
Rosette 350–450 mm.
-
Corner inserts.
-
Painting: white or matching the ceiling color.
For the living room, ceiling 3.0 m
Living room — a formal space, the main room of the house. Here, ceiling decor can be more expressive.
Recommended set:
-
Cornice 130–150 mm with moderate relief.
-
Moldings made of polyurethane — frames for the chandelier and side zones.
-
Ceiling Decor — medallions at the corner points of the frames.
-
Rosette 500–600 mm.
-
Decor for Molding — corner inserts.
-
Paint: white.
For kitchen-living room, open plan
In a kitchen-living room, ceiling molding can zone the space without physical partitions.
Recommended set:
-
Cornice along the entire perimeter.
-
ceiling molding — a zonal line between the kitchen and living room.
-
Small ceiling medallion above the dining table.
-
Painting: matching the ceiling color — different zones may have different tones.
For the hallway of a country house, ceiling height 3.5 m
Hallway — the first impression of the house. Maximum decor is appropriate here.
Recommended set:
-
Cornice 160–180 mm with ornament.
-
Moldings — coffered grid across the entire plane.
-
Ceiling Decor — inserts in each coffer.
-
Ceiling medallion 650–800 mm in the center.
-
Painting: white with possible contrasting tone inside the coffers.
For a commercial interior, ceiling height 4.0 m
Restaurant, hotel, meeting room — the scale is always larger than residential.
Recommended set:
-
Cornice 200–220 mm.
-
Wide Moldings — large coffers.
-
decorative polyurethane elements — high reliefs and medallions.
-
Rosettes above each light zone.
-
Painting: white + accent color inside coffers or antique patina.
Installation of ceiling decor: key nuances
installation of polyurethane molding on the ceiling has its own specifics — more difficult than on walls. A few important points.
Glue with good initial adhesion
On the ceiling, the element is held against gravity. The glue must set quickly so you don't have to endlessly support the profile with your hands. The cornice can be fixed with painter's tape — stretched from the wall to the ceiling until the glue sets.
Installation sequence
Correct sequence:
-
First, the cornice around the perimeter.
-
Then the frame moldings on the ceiling plane.
-
Then decorative inserts at the intersection points.
-
Lastly, the rosette in the center.
If you start with the rosette, then install the frame, and then find that the frame is not aligned with the rosette — rework.
Marking is the foundation of the result
Before installation — full marking with a pencil: ceiling center, frame axes, cornice perimeter. A level or laser level is mandatory. A ceiling that appears visually level is rarely mathematically level.
Sealant is mandatory
Along the entire contour of the cornice and moldings — acrylic sealant. A gap between the profile and the ceiling surface is inevitable on uneven planes. Without sealant, it will become visible after painting. With sealant, it will disappear.
What to buy together with ceiling decor: a consolidated checklist
Main decor:
-
ceiling molding — according to calculation + 12% reserve.
-
Cornice — room perimeter + 15%.
-
Ceiling Decor — medallions, inserts.
-
Decor for Molding — corner inserts.
-
Rosette — if there is a chandelier.
-
Trim — if a second tier is needed.
Installation:
-
Specialized adhesive.
-
Acrylic sealant — 2–3 tubes per room.
-
Acrylic primer.
-
Paint.
Tools:
-
Level (laser — preferred).
-
Miter box or angle saw.
-
Painter's tape for fixing while setting.
-
Glue and sealant gun.
-
Stepladder.
Eight mistakes when buying ceiling decor
Mistake one: buying only a rosette.
An empty ceiling with a rosette in the center is an incomplete system. A cornice is the minimum that gives completeness.
Mistake two: too large a cornice for a low ceiling.
A 160 mm cornice with a 2.6 m ceiling takes up a significant part of the visible wall height and visually "presses down" the space.
Mistake three: not linking the ceiling decor with the cornice and walls.
Ceiling frames should not "hang" in the air. They should be coordinated with the cornice at the top and with the wall decor in style.
Mistake four: not considering lighting.
Frames on the ceiling planned without considering the placement of lights are frames with "holes" from lights in inappropriate places.
Mistake five: choosing silicone sealant instead of acrylic.
Silicone cannot be painted. After painting, the seam remains visible. Only acrylic — it paints like plaster.
Mistake six: not taking a spare.
Cornice is a linear element. One wrong cut — loss of an entire strip. 15% reserve is mandatory.
Mistake seven: mixing different stylistic lines.
A classic cornice with a smooth ceiling molding in a geometric style — a conflict.
Mistake eight: buying elements without checking actual dimensions.
The photo in the catalog deceives the scale. Always check dimensions against the profile diagram before placing an order.
Comparative table of kits by tasks
| Task | Crown Molding | Ceiling molding | Rosette | Insert decor | Stock |
|---|---|---|---|---|---|
| Minimal | 80–100 mm | — | optional | — | 15% |
| For chandelier | 100–130 mm | 1 frame | Yes | Corner inserts | 12% |
| Neoclassical | 110–140 mm | 2–3 frames | Yes | Corner inserts | 12% |
| Classic | 150–180 mm | Frames + coffers | Yes | Medallions | 15% |
| High ceiling | 160–200 mm | Coffer grid | Yes | Coffer inserts | 15% |
| Without chandelier | 90–120 mm | Frames around points | — | Corner accents | 12% |
Frequently asked questions
What to buy for polyurethane ceiling decor?
Cornice around the perimeter, ceiling moldings for frames, decorative elements for accents, ceiling rosette if there is a chandelier, glue, acrylic sealant, primer, paint, and a 12–15% spare.
Can ceiling decor be done without a chandelier?
Yes. A cornice around the perimeter + frames made of moldings around spotlights or as an independent geometric system — a full-fledged Polyurethane ceiling decoration without a central chandelier.
How is ceiling molding different from a cornice?
A cornice is an angular profile covering the joint between the wall and ceiling. A ceiling molding is a flat profile mounted on the ceiling plane itself to create frames and lines.
Which decor to choose for a low ceiling?
A thin cornice 60–80 mm, a delicate molding 20–30 mm, a small rosette without excessive relief. Do not make coffered ceilings — they visually lower the height.
Can polyurethane ceiling decor be painted?
Yes — after priming with acrylic primer. Paint to match the ceiling color — the relief is read by light and shadow. Or in white — on any ceiling color. Painting before installation — in hard-to-reach areas, after — over the entire surface.
Is special glue needed for ceiling installation?
For the ceiling — glue with good initial adhesion so that the profile holds on its own a few minutes after pressing. More details in the material what to glue polyurethane molding with.
How to calculate the amount of cornice for a room?
Measure the perimeter of the room, subtract doorways (if the cornice does not go above the door). Add 15% margin for corner trimming. Divide by the length of one strip.
About the company STAVROS
STAVROS — manufacturer and supplier of a full range polyurethane products for decorating ceilings, walls, facades, and furniture. In the STAVROS catalog — Polyurethane ceiling decor, ceiling rosettes, Moldings and cornices, Decor for Molding, Decorative Inserts и Trim.
STAVROS helps customers assemble not individual elements, but complete sets: decor + consumables + spare. Professional advice on selection, quantity calculation, and installation is the standard for every order. For those who want not "just a ceiling," but a ceiling you look at — STAVROS offers a system that works.