Article Contents:
- What Is Ceiling Trim Molding?
- A useful definition for American interiors
- The five primary roles of ceiling trim
- Ceiling molding versus crown molding
- Polyurethane for applied ornament and fine lines
- Polystyrene crown profiles are a separate product family
- Wood, MDF, and plaster have their own strengths
- Practical material comparison
- Start with the room's apparent scale
- Eight-foot ceilings: protect visual breathing room
- Nine- and ten-foot ceilings: build a clear hierarchy
- Twelve-foot ceilings and larger rooms: use distance intentionally
- Living rooms: a perimeter and one focal frame
- Dining rooms: center the composition on the table, not just the ceiling
- Bedrooms: use restraint and comfort
- Entryways and hallways: preserve movement and proportions
- Home offices and libraries: geometry over excess ornament
- A tray ceiling is not one continuous flat surface
- Plan lighted ceiling molding without treating trim as wiring hardware
- A central rectangle can be more useful than a full grid
- Corners and concentric frames need visual discipline
- Thin polyurethane lines: MLDPU-001 and MLDPU-004
- Medium profiles: MLDPU-002 and MLDPU-003
- Decorative strips: KPU-125, KPU-016, KPU-118, and KPU-130
- Product dimensions and material table
- Record the real ceiling dimensions
- Calculate a ceiling rectangle independently
- Convert linear footage into stock pieces
- A more realistic cut-list example
- Sample estimating worksheet
- Pattern repeats and corner details change the order
- Step 1: Establish the substrate and the product's fixing instructions
- Step 2: Create a complete reflected-ceiling layout
- Step 3: Unpack, inspect, and dry-fit every profile
- Step 4: Cut clean miters and control dust
- Step 5: Bond and support the trim correctly
- Step 6: Finish joints without erasing the profile
- Step 7: Prime and paint for a unified ceiling
- Do not obstruct the operation of the room
- Test LED accent lighting as an independent system
- Connect the ceiling to wall panel molding
- Combine ceiling medallions and frames deliberately
- Let paint color reinforce the architecture
- Buying from a photograph without checking the section
- Designing the pattern before locating fixtures
- Ignoring stock length and motif repeat
- Assuming trim can fix structural or surface problems
- What is the difference between ceiling molding and ceiling trim?
- Can polyurethane molding be installed directly on drywall ceilings?
- How wide should ceiling molding be for an 8-foot ceiling?
- Should ceiling molding match the wall or the ceiling paint?
- How much extra molding should I order?
- Is molding with integrated lighting the same as a regular profile?
- Can I combine a ceiling medallion with a rectangular molding frame?
- Where can I compare STAVROS ceiling-related decorative profiles?
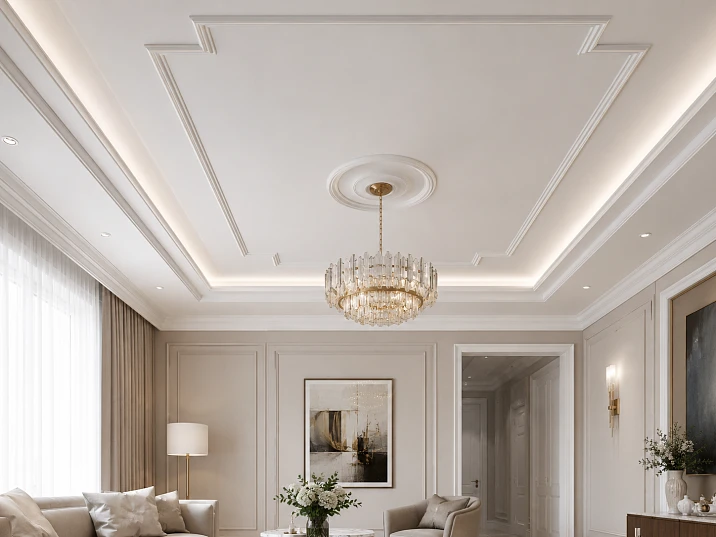
Ceiling trim molding does far more than conceal a seam where drywall meets a wall. In a carefully planned room, a modest line around the ceiling can organize the architecture, frame a light fixture, define a recessed tray, or create a more deliberate transition between painted surfaces. The challenge is not finding a decorative profile. It is deciding what that profile is supposed to do, how it relates to the room, and whether its dimensions and material suit the installation.
For a U.S. homeowner searching for ceiling trim molding, the term can refer to several different products. It might mean traditional crown molding mounted across the wall-ceiling junction, a slim flat molding adhered directly to the ceiling, a border surrounding a decorative panel, or an architectural strip defining the edge of a tray ceiling. These products do not have identical mounting surfaces, joint details, or visual effects. Treating them as interchangeable is one of the easiest ways to order the wrong trim.
This guide focuses on nonstructural architectural decoration, particularly polyurethane profiles and compatible decorative elements. It explains where a flat ceiling molding works, when crown molding makes more sense, how to prepare a layout, how to estimate lengths without confusing feet and pieces, and what to check before installing anything overhead. Along the way, we compare selected real products from the STAVROS architectural decor collection rather than inventing sizes or assuming that every catalog profile has the same cross-section.




What Is Ceiling Trim Molding?




A useful definition for American interiors
Ceiling molding is a decorative linear element attached to the ceiling, to an adjacent wall, or across the intersection of the two surfaces. The exact position matters. A profile installed flat on the ceiling typically acts like a graphic outline: it adds a shadow or visible border without projecting into the room very far. A crown profile bridges the corner with a more pronounced projection and a distinctive silhouette. A ceiling frieze is often a horizontal ornamental band rather than a simple connector. A tray-ceiling border defines an inside corner or change of plane.
The familiar phrase ceiling trim molding therefore describes the design problem, not a single universal item. Before shopping, decide whether the finished line will appear straight-on from below, be seen in profile from across the room, or act as a small architectural frame around another feature. A product that looks excellent on a vertical wall might appear visually weak when viewed from an eight-foot distance overhead. Conversely, an extremely deep profile can overwhelm a small ceiling recess.
Наша фабрика также производит:
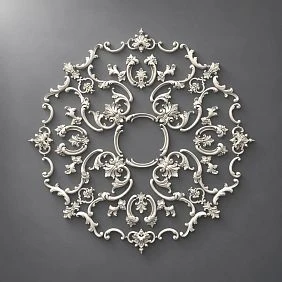
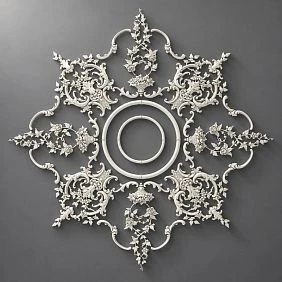
Смотреть весь Каталог продукции
The five primary roles of ceiling trim
First, perimeter trim can visually complete the upper boundary of a room. Second, ceiling-applied flat molding can outline a large center panel or create concentric rectangles. Third, a molding line can emphasize the step in a tray or other multi-level ceiling. Fourth, trim can coordinate the ceiling with a ceiling medallion around a chandelier. Fifth, small ornamental strips can add a repeated rhythm to a neoclassical or traditional ceiling composition. These roles can be combined, but combining them is not automatically better.
For a restrained interior, one well-proportioned perimeter detail may be sufficient. In a formal dining room, a perimeter frame plus a carefully scaled medallion might make sense. In a tall entryway, a cornice, a secondary molding band, and a simple central frame can create hierarchy. The guiding question is always the same: can the viewer immediately understand which line is primary and which lines are supporting it?
Получить консультацию
Ceiling molding versus crown molding
Traditional crown molding straddles the transition between wall and ceiling. It is installed at a designed spring angle or with the installation method specified by its manufacturer. Its visible size depends on both the profile's face and its horizontal and vertical projections. A flat molding, by contrast, may be applied to a single plane, often the ceiling itself. It is measured and laid out as a line on that plane. A decorative frieze can be wider and richer in pattern but still function as an applied band rather than a coved junction.
When comparing catalog entries, never rely on a photograph or a label alone. Examine the section drawing. Look for the surfaces intended to receive adhesive, the angle at which the molding sits, the length of each strip, and whether the product is decorative or structurally functional. The STAVROS molding selection includes narrow polyurethane profiles as well as other listed materials. A separate crown molding category currently features HIWOOD polystyrene products; those should not be described as polyurethane without specific product-level confirmation.
Polyurethane, Polystyrene, MDF, Wood, and Plaster
Polyurethane for applied ornament and fine lines
Polyurethane is useful for repeatable ornamental detail because manufactured profiles can reproduce a consistent cross-section and fine relief. Narrow pieces are practical for ceiling frames, perimeter accents, and decorative borders when the specific product is approved for overhead attachment. They are often intended for painting and can coordinate with other polyurethane elements. Their appearance varies enormously: one strip may have a simple rounded bead, while another may feature a classical motif or geometric pattern. The material category alone does not tell you how bold a line will appear.
Use the manufacturer's instructions for substrate preparation, adhesive selection, joint treatment, and finish compatibility. Polyurethane products are not automatically suitable for exterior use, high-temperature locations, or every lighting assembly. They are also not substitutes for the framing, wiring, or structural support of a ceiling. A decorative strip can make a recess look intentional; it cannot correct a loose ceiling panel or support an electrical fixture.
Polystyrene crown profiles are a separate product family
STAVROS also lists crown profiles made from polystyrene under the HIWOOD name. Polystyrene and polyurethane are not synonyms. Their density, surface behavior, installation instructions, and compatible finishing systems may differ. If a design calls for a conventional wall-to-ceiling cornice, a HIWOOD profile may be an option worth examining, but it should be selected and described according to its own product page. Do not transfer the specifications of MLDPU wall-molding strips to a different crown system simply because both appear near the ceiling.
This distinction also matters when preparing a bid. A quotation that says only "decorative ceiling molding" can conceal material changes that affect the installation. Include the manufacturer's code, exact dimensions, material, finish condition, number of strips, and approved fixing system. Ask for a sample or a full-scale section drawing when the visual difference matters. A small sample held where the trim will be installed often resolves more uncertainty than another set of online photographs.
Wood, MDF, and plaster have their own strengths
Wood gives a natural surface that can be stained, clear-finished, or painted. It is especially compelling when it repeats a timber detail elsewhere in the interior. However, wood moves with changes in moisture content, and long pieces need carefully planned joints and fastening. MDF offers a uniform paint-grade surface but must be protected from moisture and installed with methods suitable for its weight and substrate. Plaster can produce historically faithful profiles and restoration details, although it generally demands a different level of specialist handling and support.
The right choice depends on more than aesthetics. Consider substrate strength, room conditions, desired finish, accessible tools, expected movement, installation skill, and product availability. If your project is a modest flat ceiling frame, a purpose-selected polyurethane strip may be straightforward. If you are restoring a historic cornice, a traditional plaster or custom millwork solution may be more appropriate. Do not promise that one material is categorically superior for every room.
Practical material comparison
| Material | Best considered for | Main detail to verify | Common planning risk |
|---|---|---|---|
| Polyurethane | Applied ceiling frames and decorative bands | Product's approved overhead fixing and paint compatibility | Assuming every profile is a crown |
| Polystyrene | Selected lightweight crown and trim systems | Brand-specific substrate and adhesive requirements | Calling HIWOOD polyurethane |
| Solid wood | Coordinated stained or painted millwork | Movement, fastening and joint placement | Open joints from seasonal movement |
| MDF | Paint-grade trim in controlled environments | Edge protection and installation details | Moisture exposure and damaged edges |
| Plaster | Specialist period-style work | Weight, professional support and substrate | Treating heavy work as casual DIY |
Choosing a Profile for an 8-, 9-, 10-, or 12-Foot Ceiling
Start with the room's apparent scale
A ceiling profile has to work at the height from which people see it. An 8-foot ceiling often benefits from a restrained line that gives definition without creating a visually heavy band. At 9 feet, there may be more room for a modestly layered composition. Ten-foot and taller rooms can accommodate stronger architectural emphasis, but that does not mean every tall room requires large trim. Width, room footprint, natural light, and the amount of existing ornament change what feels balanced.
Think in terms of viewing distance rather than a rigid inch-based rule. The profile should remain visible from the principal entry point without dominating furniture or architectural openings. Tape a full-size sample to the ceiling and photograph it from the doorway, the sofa, and the main circulation route. If the molding appears almost invisible from the door, a broader face may help. If it appears to lower the ceiling, reduce projection or simplify the profile rather than merely choosing a different paint color.
Eight-foot ceilings: protect visual breathing room
At roughly 96 inches high, avoid filling the upper boundary with several deeply projecting bands unless the room is deliberately historical in character. A slim applied border can define a ceiling panel while preserving a light impression. A restrained crown profile may also work, but compare the actual wall drop and ceiling projection on the manufacturer's drawing. Large decorative shadows are not necessarily flattering in narrow halls or small bedrooms.
In an eight-foot room, consider a single ceiling rectangle set well inside the walls. This creates an organized center without multiplying corners. If the ceiling has recessed lights, smoke alarms, HVAC grilles, or a fan, mark them before selecting the rectangle size. Do not shift safety devices or obstruct air movement to preserve a perfectly symmetrical decorative pattern. Let the room's actual functions inform the geometry.
Nine- and ten-foot ceilings: build a clear hierarchy
More height allows a stronger junction treatment and sometimes a secondary inner frame. Keep one line dominant and one subordinate. For example, a moderately scaled cornice may mark the perimeter while a narrower flat molding outlines the center. Repeating equally bold frames at several distances from the wall makes the ceiling look busy rather than more refined. The hierarchy should remain readable after furniture, drapery, and fixtures are in place.
The ceiling should relate to the wall treatment. If you already have picture-frame molding below a chair rail, avoid copying every wall rectangle on the ceiling. Instead, align the central ceiling frame with the primary room axis and use the same color family to connect the architectural language. A restrained ceiling can make a complex wall treatment appear intentional; a second complex system may compete with it.
Twelve-foot ceilings and larger rooms: use distance intentionally
A 12-foot ceiling increases the distance between the viewer and the detail. Subtle profiles may disappear visually, while deeply modeled ornament becomes more legible from the floor. Consider longer uninterrupted runs, wider spacing between decorative lines, and fewer competing elements. Always check the actual profile dimensions: a nominally broad ornamental strip may still project only slightly, while a traditional crown can occupy a substantial volume at the junction.
Large rooms also magnify layout mistakes. A line that is a quarter inch out of alignment may be conspicuous when it follows a long corridor of daylight. Measure each wall rather than assuming it is parallel to the opposite wall. When the ceiling is substantially out of square, design a visually centered layout using consistent margins where they matter most, and resolve small discrepancies in less prominent areas. Do not force an ideal drawing onto an irregular room without a field survey.
Ceiling Molding Ideas for Different Room Types
Living rooms: a perimeter and one focal frame
In a living room, start with the view from the main seating area. A simple perimeter line can bring order to an open ceiling without turning the space into a period room. If a central chandelier or pendant is the main feature, a shallow applied frame can support that focal point, leaving adequate space between the frame and any medallion. A broad ceiling rectangle is often calmer than a grid of small squares.
Consider the relationship with the polyurethane decorative trim range. Its patterned borders may be visually interesting, but not every ornamental strip is appropriate for an overhead run or a tight ceiling corner. Compare the relief and the available length. For a simple contemporary ceiling, plain or lightly modeled molding usually integrates more easily than deeply floral profiles. For a historic-inspired living room, a repeated classical motif can be considered if it does not compete with existing door surrounds or a fireplace mantel.
Dining rooms: center the composition on the table, not just the ceiling
The dining table determines the principal viewing zone. It is tempting to center a ceiling frame on the geometric midpoint of the room, yet the table may sit closer to a window or an entry. If the table and chandelier are deliberately offset, the decorative ceiling composition should follow that functional axis rather than announcing a different center. Check that the pendant, ceiling medallion, and surrounding frame form a coherent group.
A formal dining room can accommodate a double outline: one larger frame and a smaller secondary line, with enough blank ceiling between them. Treat the space between profiles as part of the design. Paint it the same color for quiet depth or use a slightly varied tone for a controlled contrast. Avoid placing tiny ornate corner pieces in every intersection unless their visual scale is genuinely supported by the room. At normal dining distance, an uncomplicated frame is often more elegant than a crowded one.
Bedrooms: use restraint and comfort
Above a bed, a ceiling outline can make the sleeping zone feel considered without introducing a complex overhead feature. The best layout may be a single rectangle aligned to the bed or a room-wide perimeter. If an upholstered headboard, ceiling fan, or large light fixture already carries the visual weight, keep the trim secondary. Strongly contrasting dark ceiling frames are an option, but they will attract attention, particularly under bedside or directional lighting.
For bedrooms with sloped portions or dormers, do not carry a rigid molding pattern across every change of angle without checking how the intersections will read. A single flat portion may be the better place for ornament. Where the ceiling changes planes, use templates and verify whether the chosen profile is designed to follow that transition. A flat molding applied within one plane is usually more predictable than a cornice asked to change spring angle several times.
Entryways and hallways: preserve movement and proportions
A narrow hallway rarely needs a large ornamented ceiling. Slim trim can define a directional line toward the main room. If the hall contains recessed lights, a clean border can sit outside their footprint, but only after required fixture clearances are checked. When door heads are close to the ceiling, a deep crown may compete with the door casing. The simplest solution is often a flat or lightly projecting line, painted close to the ceiling color.
For a square entryway, one centered frame may be appropriate. For a long corridor, a repeated series of frames is possible, but equal spacing should be calculated from the actual length. Keep the first and last margins balanced. Avoid cutting an ornamental repeat abruptly at the final frame; mock up the repeat before cutting costly patterned pieces. Repetition should communicate rhythm, not make the corridor feel subdivided into a sequence of boxes.
Home offices and libraries: geometry over excess ornament
A home office may benefit from a ceiling composition that relates to built-in bookcases or wall paneling. Coordinate the main rectangle with the room's work zone rather than following only the desk footprint. Flat geometric trim can strengthen the sense of order. More elaborate classical moldings are possible in a library with substantial woodwork, but a clash between wood grain, wall ornament, and ceiling friezes can quickly become distracting.
If the office includes video-conference lighting, account for glare and moving shadows. Deeply textured ceiling trim under a directional LED strip can produce a striped or scalloped effect that looks more pronounced on camera than in person. Test lighting before installing an entire perimeter. Paint sheen also matters: a high-gloss molding can create highlights near monitors, while a matte or satin finish may produce a calmer field.
Tray Ceilings, Recessed Niches, and Decorative Frames
A tray ceiling is not one continuous flat surface
A tray ceiling introduces at least two horizontal levels and one vertical or angled transition. That geometry can create a natural location for trim, but it also raises installation questions that a conventional flat ceiling does not. The molding might sit around the outer perimeter, on the vertical rise of the tray, along the inner edge of the upper level, or inside the upper panel. Each position gives a different shadow and can require a different product. Do not buy a single profile for all four edges without checking the way it is meant to be mounted.
A popular approach is to keep the wall-to-ceiling junction simple and place one continuous molding line around the recessed inner area. This emphasizes the architectural recess without drawing excessive attention to the lower perimeter. Another approach uses a small border around the tray's vertical reveal and leaves the center unadorned. Whatever you choose, make the line continuous and resolve how the ends meet at inside corners. When the tray is irregular, a dimensioned sketch is indispensable.
Plan lighted ceiling molding without treating trim as wiring hardware
Some tray ceilings incorporate concealed lighting. The decorative trim may be part of the visual design, but it is not an electrical raceway by default. Use only lighting systems approved for the intended location, observe fixture and driver clearances, and keep components accessible as required by their instructions and applicable electrical rules. Do not embed a heat-producing or nonlisted LED assembly behind decorative polyurethane simply because the strip fits in the gap. An electrician may need to review the installation.
The lighting effect should be tested full-scale. A bright strip placed too close to deep relief can create repetitive shadows and expose small surface defects. A diffuser or a greater setback may make the illumination smoother, while warm versus cool color temperature changes how white molding appears. The desired effect is an even wash of light that reveals the ceiling's geometry, not a row of individually visible points. If the project calls for true indirect lighting, select a tested lighting channel and use the molding only as a compatible architectural finish.
A central rectangle can be more useful than a full grid
A decorative rectangle is easy to understand and comparatively easy to estimate. It creates a focal field without imposing a dense ceiling lattice. Begin by choosing margins from the walls that look balanced from the room's main vantage points. Measure the actual width and length of the ceiling, identify any asymmetry, then decide which center should govern the design: the room center, the chandelier axis, or the dining table. Draw the proposed outline with low-tack tape before cutting.
A grid makes sense in selected formal interiors, but it demands consistent cell sizes, aligned junctions, and careful coordination with lighting and sprinklers. A flat molding grid should not be confused with a structural or deeply recessed coffered ceiling. Applied strips create the appearance of panels; they do not create load-bearing beams. For a detailed grid, provide a scaled reflected-ceiling plan rather than improvising from a few perimeter dimensions. The number of intersections multiplies faster than the number of long runs.
Corners and concentric frames need visual discipline
Concentric frames look best when the space between them is intentional. If the two outlines have different widths, keep the inner profile slimmer unless there is a compelling historical reason to reverse the hierarchy. Check that the frames do not crowd a ceiling medallion or light fixture. On a rectangular ceiling, the side margins should feel consistent even if absolute distances differ slightly because the room is not square.
The more complicated the trim's motif, the more care is required at the corners. A simple rounded profile can be mitered in familiar ways; a repeated egg-and-dart or floral band may require matching the pattern on both sides of the joint. Test the corner with a short sacrificial piece. A theoretically perfect 45-degree miter may still look awkward if it cuts through a prominent flower or bead. Plan the ornament as carefully as the geometry.
STAVROS Profiles to Compare for Ceiling Decoration
Thin polyurethane lines: MLDPU-001 and MLDPU-004
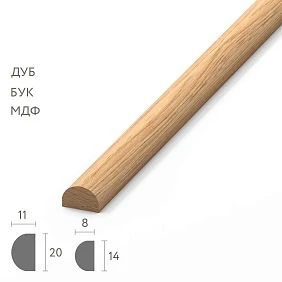
The MLDPU-001 polyurethane molding has a published 10 × 6 mm cross-section and a 2,600 mm strip length. That is approximately 0.39 × 0.24 inches and 102.36 inches long. It is a narrow, bead-like profile suited to consideration for fine decorative outlines. The MLDPU-004 molding is wider, with a 15 × 8 mm cross-section, also in a 2,600 mm length. The modest difference in face width can be meaningful when the profiles are repeated in several rectangles.
These are decorative profiles rather than interchangeable crown cornices. Their small size can make them attractive candidates for a flat ceiling frame, but overhead suitability and attachment must be approved for the specific installation. Hold a full-length sample against the intended surface and inspect it from below. A narrow molding can appear as a delicate pencil line against a pale ceiling; painted in contrast, the same profile may become a prominent geometric outline. The surface and finish are just as important as the millimeter size.
Medium profiles: MLDPU-002 and MLDPU-003
The MLDPU-002 polyurethane molding measures 22 × 11 × 2,600 mm. The 0.87-inch face width produces a more visible line than a 10 mm bead. For larger ceiling rectangles, this can provide a clear border without reaching the visual weight of a full crown. Its multilevel profile casts additional shadow under directional light. Assess whether that shadow supports the room's style or makes the ceiling look overdecorated.
The MLDPU-003 product is listed at 35 × 12 × 2,600 mm, or about 1.38 × 0.47 × 102.36 inches. A broader face becomes useful when the ceiling plane is large and a narrow line would disappear. It also leaves less visual space inside a small frame. On a compact 8-foot ceiling, compare the broad profile with the proposed frame margins before ordering. Product drawings should govern the installation detail, especially where the line crosses a ceiling joint or meets another ornamental element.
Decorative strips: KPU-125, KPU-016, KPU-118, and KPU-130
The ornamental KPU-125 rope molding measures 9 × 5 × 1,000 mm. It is a small decorative braid intended for fine borders, but its shorter stock length produces more joints than a 2,600 mm strip. The KPU-016 egg-and-dart trim uses a 23 × 17 mm cross-section and presents a much stronger classical rhythm. If a continuous ceiling border uses ornamental trim, align its pattern across joints rather than joining pieces solely according to their physical length.
For a graphic treatment, the KPU-118 geometric molding has a 40 × 5 mm profile with a linked hexagon pattern. For a richly modeled ornamental band, the KPU-130 floral molding measures 120 × 17 × 930 mm. These pieces are very different in visual weight, length, and joint behavior. They should be selected for a specific composition, not substituted into a generic ceiling-molding estimate. Verify mounting orientation and manufacturer approval before using any trim in an overhead location.
Product dimensions and material table
| STAVROS profile | Published cross-section | Published strip length | Approximate U.S. dimensions | Design role to evaluate |
|---|---|---|---|---|
| MLDPU-001, polyurethane | 10 × 6 mm | 2,600 mm | 0.39 × 0.24 × 102.36 in | Fine applied outline |
| MLDPU-004, polyurethane | 15 × 8 mm | 2,600 mm | 0.59 × 0.31 × 102.36 in | Compact shaped border |
| MLDPU-002, polyurethane | 22 × 11 mm | 2,600 mm | 0.87 × 0.43 × 102.36 in | More pronounced ceiling frame |
| MLDPU-003, polyurethane | 35 × 12 mm | 2,600 mm | 1.38 × 0.47 × 102.36 in | Larger architectural outline |
| KPU-125, polyurethane | 9 × 5 mm | 1,000 mm | 0.35 × 0.20 × 39.37 in | Fine ornamental braid |
| KPU-016, polyurethane | 23 × 17 mm | 2,000 mm | 0.91 × 0.67 × 78.74 in | Egg-and-dart detail |
| KPU-118, polyurethane | 40 × 5 mm | 2,000 mm | 1.57 × 0.20 × 78.74 in | Geometric patterned trim |
| KPU-130, polyurethane | 120 × 17 mm | 930 mm | 4.72 × 0.67 × 36.61 in | Statement floral frieze |
Dimensions describe the listed products, not a universal recommendation to install every product on a ceiling. Check the current drawing, material, and application restrictions before ordering. Inch values are rounded conversions of the metric measurements. A profile's face width is not its effective ceiling projection when installed at an angle; for any crown, obtain its actual installed section.
How to Measure Ceiling Trim and Calculate Linear Feet
Record the real ceiling dimensions
Measure length and width at the ceiling plane, not just at floor level. In older houses, the walls may lean or the corners may be noticeably out of square. Measure each of the four perimeter sides separately, then record the longest and shortest differences. If there are recesses, soffits, returns, or projecting beams, draw them as independent segments. A simple rectangle on graph paper with dimensions at every change of direction will prevent many ordering mistakes.
Use feet and inches consistently. For quick estimating, convert inches to decimal feet by dividing by 12, but keep a drawing with actual inch measurements for the cut list. For a 14-foot by 18-foot room, the theoretical rectangular perimeter is 2 × (14 + 18) = 64 linear feet. This assumes four straight walls and does not include a tray-ceiling border, decorative frame, or window-bay return. Treat the estimate as a starting point rather than the final cut plan.
Calculate a ceiling rectangle independently
Suppose the same room contains one rectangular ceiling frame measuring 10 feet by 14 feet. The frame adds 2 × (10 + 14) = 48 linear feet. The combined theoretical trim length becomes 64 + 48 = 112 linear feet if both perimeter and frame use the same profile. If they use different products, calculate them separately. A crown perimeter and a flat inner border may require different materials, fasteners, tools, and quantities.
Do not turn this combined figure directly into a purchase order. A product is sold in stock lengths, not in an infinitely divisible line. A 2,600 mm strip is approximately 8.53 feet, while a 1,000 mm KPU ornamental strip is only 3.28 feet. Both might be called molding, but their joint counts and waste patterns differ dramatically. Stock length, pattern repeat, and whether seams are permitted on a visible run determine the actual purchase quantity.
Convert linear footage into stock pieces
For MLDPU profiles 2,600 mm long, 112 linear feet divided by 8.53 feet per strip gives approximately 13.13 strips before cutting waste. The mathematical ceiling would be 14 strips. Yet that is not a safe order quantity because several 14-foot and 18-foot runs must be assembled from shorter pieces, and cut ends are not always reusable. Long pieces may need staggered or strategically positioned seams, and the intended appearance may require excluding short offcuts from prominent areas.
As a preliminary allowance, some straightforward projects use roughly 10–15% extra measured length, while complex rooms or patterned profiles may require more. For 112 linear feet, a 15% allowance produces 128.8 feet, which divided by 8.53 feet is about 15.1 strips, rounded up to 16. This remains an estimate only. Prepare a piece-by-piece cut list and arrange the cuts against the actual stock lengths before placing the order; that exercise can increase or decrease the number of required pieces.
A more realistic cut-list example
Consider a 12-foot ceiling frame with two 8-foot sides. With 8.53-foot strips, each 8-foot side can come from one piece, leaving approximately 0.53 foot before saw kerf. Each 12-foot side needs a long section plus a shorter continuation. The number of pieces depends on where the seams fall and whether offcuts can be used for the short sections. If the profile has a directional ornamental pattern, offcuts from one side may not match the direction on another.
Lay out the intended pieces on paper using the real stock length and a small cutting allowance. Label every piece by position: north perimeter, east perimeter, inner frame top, and so forth. Mark the miter direction and any special returns. When the supplier offers multiple sizes under the same model, include the size with the SKU. A cutting list should be unambiguous to someone who has not seen the room.
Sample estimating worksheet
| Project element | Example measurements | Theoretical linear feet | Quantity note |
|---|---|---|---|
| Room perimeter | 14 ft × 18 ft | 64 | Check all four walls |
| Inner rectangle | 10 ft × 14 ft | 48 | Separate profile if desired |
| Total straight runs | Perimeter + rectangle | 112 | Before waste and joints |
| Planning allowance, 15% | 112 × 0.15 | 16.8 | Preliminary, not a cut plan |
| Length with allowance | 112 + 16.8 | 128.8 | Divide by exact stock length |
| 2,600 mm stock estimate | 128.8 ÷ 8.53 | 16 pieces rounded up | Verify detailed cut layout |
Pattern repeats and corner details change the order
A geometric strip might have an easily continued pattern, but floral motifs and egg-and-dart sequences may be difficult to reconcile at a corner. Some installers will need to discard a portion of the strip so the visible repeat starts and ends in an intentional place. Add any matching loss to the cut list rather than pretending it is included in a generic 10% waste factor. A shorter ornamental strip can also multiply the number of visible joints and the effort required to finish them cleanly.
Decorative corner elements are not universal substitutes for mitered ends. If a specific corner piece exists, verify the compatible profile and size. Do not assume an ornamental corner from another collection will cover the joint. For a central ceiling frame, it may be simpler to select a clean continuous molding that can be mitered conventionally. Save a highly repetitive decorative frieze for a long straight band where its pattern remains legible.
How to Install Decorative Ceiling Molding
Step 1: Establish the substrate and the product's fixing instructions
Identify what will carry the molding: gypsum drywall, sound plaster, timber, a finished ceiling panel, or another material. Check whether paint is firmly bonded, whether the ceiling is dry, and whether repairs are needed. Decorative trim should not be attached over peeling paint, loose joint compound, water damage, or cracked material that has not been assessed. A perfectly straight molding cannot make an unstable substrate sound. Repair the ceiling first and let repairs cure according to the products used.
Before drilling or fastening, determine whether hidden wiring, pipes, or other services may be present. Confirm that the selected molding is approved for the particular surface and installation orientation. For overhead installation, follow the manufacturer's fixing and temporary support instructions; do not assume a generic construction adhesive alone provides sufficient restraint during cure. Heavier profiles or unusual substrates may require a reviewed fastening design. If the ceiling has unresolved movement, moisture, or structural concerns, consult the relevant professional before adding decoration.
Step 2: Create a complete reflected-ceiling layout
Mark a clear datum rather than measuring each strip from a potentially uneven wall. Establish the principal axis of the room and the position of the light fixture or fan. Use a laser or a suitable chalk-and-measurement method to transfer the planned frame lines to the actual ceiling. Mark the outer edge or centerline consistently; mixing the two creates a cumulative layout error equal to the width of the profile. A 35 mm molding can noticeably change the apparent field size when two sides are considered.
Place low-tack tape along the proposed lines and view the outline from several locations. Verify that it avoids smoke and carbon monoxide alarms, HVAC openings, electrical boxes, access panels, sprinklers, and other building components. Such devices must remain accessible and unobstructed, with clearances determined by the relevant manufacturer's instructions and code requirements. Adjust the decorative design rather than relocating life-safety devices for symmetry alone. A scaled sketch and one on-site photo with measurements are useful references during installation.
Step 3: Unpack, inspect, and dry-fit every profile
Compare the delivered code and size against the order. Examine the face, edges, relief, and overall straightness. Sorting pieces before cutting prevents mixing two visually similar profiles with slightly different widths. Keep short scrap sections for test joints. With patterned molding, determine which end of the ornament should face a given direction and whether a left-right product pair is required. Record the orientation on each cut-list entry.
Dry-fit the first frame completely before bonding. Mark every miter and any planned splice. If the walls are not square, do not automatically cut four 45-degree corners and assume the result will fit. Measure the actual included angles or create an accurate template. Many decorative ceiling lines are most successful when small discrepancies are resolved deliberately at the layout stage rather than hidden with heavy filler afterward.
Step 4: Cut clean miters and control dust
Use an appropriate fine-tooth saw, miter box, or saw setup recommended for the material. Support the length of the piece so it does not sag or twist during cutting. For a flat ceiling frame, the joint may be a conventional flat miter; for a true crown profile, the cutting orientation can be fundamentally different. Use the manufacturer's spring-angle information and a tested crown-cutting method. Never transfer a crown cutting diagram to a flat molding without checking the actual geometry.
A sharp test cut is more valuable than guessing. After cutting, hold both adjoining pieces in position to check the face alignment and pattern continuation. If the profile contains a large floral motif, consider adjusting the cut locations to preserve complete motifs on the most visible spans. Wear appropriate eye and respiratory protection for cutting and sanding. Follow the product's safety information and control airborne dust, especially when cutting old painted surfaces nearby.
Step 5: Bond and support the trim correctly
Choose only a compatible mounting system specified or approved for the chosen trim and substrate. Apply it in the recommended pattern, observe open time, and avoid excessive adhesive that could squeeze into detailed ornament. Press the strip into the marked position while maintaining alignment. Use temporary supports or the specified mechanical restraint where required; do not rely on the product remaining overhead merely because it adheres for the first few minutes.
Overhead work is physically demanding. Use a stable platform suitable for the ceiling height and obtain assistance for longer lengths. Maintain a consistent gap or butt-joint method at adjoining strips according to the product instructions. Remove excess material promptly using an approved technique that will not damage the finish. Complete one representative corner before continuing around the room. This reveals whether the attachment, profile orientation, and finishing method need adjustment.
Step 6: Finish joints without erasing the profile
Allow the adhesive to cure fully before sanding or applying finishing products. Use a compatible filler or joint compound only where permitted by the molding manufacturer. A thick smear over a shallow decorative strip can blur its relief and make the joint more conspicuous after painting. Work locally, preserve sharp edges and repeating motifs, and sand only enough to level the repair. Inspect under raking light because this reveals seams that diffuse daylight may conceal.
A small amount of movement between building surfaces is normal in many houses. Where a joint is intended to accommodate movement, use the specified flexible material and detail rather than rigidly filling everything. Do not bridge a structural expansion joint with decorative molding in a way that prevents it from functioning. The finish should look uninterrupted from a normal viewing distance, while still respecting the way the building behaves.
Step 7: Prime and paint for a unified ceiling
Determine whether the selected item arrives primed, unprimed, or with another surface finish. Clean it and apply a compatible primer if needed. Then use the appropriate architectural paint for the surface. For understated rooms, painting the molding the same color as the ceiling produces a relief effect primarily through shadow. A slightly different sheen can make the border perceptible without a strong color break. A contrast color should be tested over a meaningful sample length rather than judged from a tiny swatch.
Where profiles meet walls, tape carefully to maintain a clean paint line without leaving a ridge. Avoid excessive paint buildup in egg-and-dart, rope, or floral detail. A light brush or suitable spray approach can help preserve the ornament, subject to the finish manufacturer's directions. Check the result with daytime light and the final artificial lighting switched on. Overhead defects are often easiest to see when the room is fully lit from its normal fixture locations.
Lighting, Ventilation, and Safety Details
Do not obstruct the operation of the room
Ceiling trim must coexist with existing building systems. Maintain required access to electrical junction boxes, fan hardware, recessed luminaires, detectors, sprinkler heads, air registers, and any ceiling-mounted access panels. A decorative frame that seems perfectly proportioned on paper can conflict with these functions in the field. The installer should verify the clearances and relocate the decorative line if necessary. Building safety and serviceability take priority over visual symmetry.
For a recessed lighting layout, measure fixture positions from a reliable datum and mark their diameter or trim ring as well as their centers. This prevents a frame from being placed too close to a can light even when the center point appears clear. If a light fixture will be added or moved, coordinate with a qualified electrician before finalizing the molding. The decorative profile should not carry the light fixture, fan, or chandelier; those loads require their own suitable support.
Test LED accent lighting as an independent system
A ceiling frame can work near indirect lighting if the lighting and trim are designed together. The light source should have the appropriate listing and mounting instructions for its location. Account for electrical connections, service access, thermal management, and the location of any power supply or controller. The purpose of the trim is visual. It is not a substitute for an approved lighting channel, protective enclosure, or proper wiring method.
Build a short mockup with the intended color temperature, diffuser, setback, and paint. Photograph it in a darkened room and under daytime conditions. Repeating ornament may create a broken light line; a plain profile may produce a smoother visual transition. If the result is too intense, adjust the lighting design rather than adding improvised material around the strip. A successful hidden-light detail looks deliberate even when the LEDs are switched off.
Coordinating Ceiling Trim With the Rest of the Interior
Connect the ceiling to wall panel molding
A ceiling border should not feel like an unrelated accessory. If the walls already have picture-frame molding, compare the scale of the upper and lower lines. The ceiling profile can be slimmer, the same family, or intentionally broader depending on which zone is dominant. Repeating the identical ornament everywhere can make the room heavy. A better strategy is to repeat one characteristic—rounded beading, a stepped silhouette, or a paint color—while allowing each surface a different amount of detail.
When the room has a prominent chair rail, baseboard, and door casing, the upper ceiling outline should complete a hierarchy. The STAVROS polyurethane molding catalog provides narrow and medium sections that can be compared in full scale. Examine how their relief reads at ceiling height; a profile that looks rich on a sample board near eye level can appear much quieter overhead. A photograph from the entrance at normal eye height is the most revealing test.
Combine ceiling medallions and frames deliberately
A ceiling medallion can emphasize a chandelier or pendant, while an outer frame defines the surrounding field. Both details should share an axis unless the composition is intentionally asymmetric. Compare the medallion's overall diameter with the inner clear space of the rectangular frame. Too little space around the medallion creates a cramped look; too much makes the two elements feel unrelated. Tape an outline of the medallion and frame to the ceiling before finalizing the purchase.
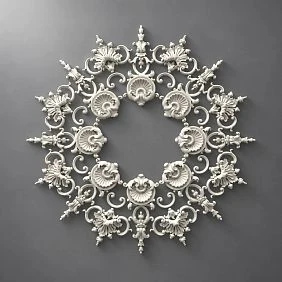
The STAVROS ceiling medallion collection contains a separate class of decorative products, not interchangeable linear molding. A medallion must not replace the proper electrical box or fixture support. Check the canopy size and any intended central opening, and ensure the selected decor can be installed without disturbing the fixture's required clearances. The most coherent ceiling compositions let the medallion be the focal point and the linear frame play a supporting role.
Let paint color reinforce the architecture
White-on-white molding is not necessarily invisible. Relief becomes legible through changing daylight, gentle shadow, and variations in sheen. For a contemporary ceiling, a single color can create an elegant, quiet finish. A contrasting line may be appropriate in a graphic Art Deco or other high-contrast design, but it makes any alignment error more visible. Test contrast under the exact room lighting, including the evening illumination that occupants will use most frequently.
Warm off-white ceilings with matching trim often coordinate better with natural wood than a cold white border. In rooms with strong painted millwork, choose whether ceiling trim should repeat the trim color or recede into the ceiling. Do not automatically use a different color on every plane. Two coordinated colors usually provide enough hierarchy for a simple system, while three or more can make a small room feel fragmented. The goal is a unified architecture rather than the maximum number of decorative effects.
Common Ceiling Molding Mistakes
Buying from a photograph without checking the section
Photographs hide scale and often fail to show a profile's mounting face. Check width, projection, length, material, and drawing. A slim flat molding and a coved crown cannot be installed identically. The STAVROS crown molding section should be evaluated by its specific polystyrene product specifications rather than described generically as polyurethane. Use the exact model and material on the purchasing schedule.
Designing the pattern before locating fixtures
Ceiling fans, recessed lights, sprinklers, smoke alarms, air registers, and access panels are not optional interruptions to be discovered after installation. Map them first, then choose a pattern that fits. If a perfect rectangle would interfere with a detector or light fixture, change the rectangle. Do not conceal or relocate a life-safety device casually. Any change to electrical or fire-protection components must be performed in accordance with the relevant requirements.
Ignoring stock length and motif repeat
A measured requirement of 100 linear feet does not mean that exactly 100 linear feet can be purchased with no waste. Several 8.53-foot pieces may be required to assemble long runs, while shorter ornamental strips introduce more joints. Repeated patterns may need extra material to match at miters or splices. A detailed cut list is a better purchasing document than a single summed length. Confirm stock lengths on each product page because even related STAVROS profiles are not necessarily supplied at the same length.
Assuming trim can fix structural or surface problems
Decorative molding can conceal a small irregular seam in some designs, but it should not be used to hide water damage, active cracking, failing plaster, or an unstable ceiling. Repair the underlying problem first. Likewise, the presence of a decorative border does not make a ceiling beam structurally stronger or transform a shallow applied frame into a real coffer. Design language should be accurate both for appearance and construction.
Buying Checklist and Project Handoff
Before ordering, prepare a one-page schedule containing the room name, ceiling measurements, elevation of any changes of plane, profile code, exact size, material, stock length, finish, calculated number of pieces, and intended joint locations. Add a note describing the approved attachment method and whether the product is confirmed for overhead installation. This information helps the designer, homeowner, installer, and supplier discuss the same items without relying on a verbal description such as "some white ceiling trim."
For decorative lines, review the polyurethane ornamental trim selection together with the more restrained MLDPU profiles. For a true wall-to-ceiling junction, compare the relevant crown category separately. Keep the finished ceiling composition consistent with doors, windows, wall molding, and lighting. If availability, shipment to a U.S. destination, lead time, or project-specific suitability matters, obtain written confirmation from STAVROS before making commitments to a customer. An English-language storefront alone does not establish a domestic shipping promise.
A professional purchasing schedule also records alternatives. If the primary SKU becomes unavailable, the substitute should match more than its nominal width. Check relief depth, material, finish, length, curvature, and visual pattern. A visually similar piece may have a different mounting method or corner behavior. Approve substitutions from samples or section drawings, not just from a catalog thumbnail. Keep the final drawings and cutting layout with the order for future repairs.
Frequently Asked Questions
What is the difference between ceiling molding and ceiling trim?
In common U.S. usage, the expressions overlap. Ceiling molding often emphasizes a formed decorative profile; ceiling trim may be used for any finishing strip around the ceiling. Neither phrase guarantees a particular material or mounting orientation. Specify whether you need a true crown at the wall-ceiling junction, a flat applied ceiling border, or an ornamental frieze. The product's section drawing is more reliable than the general label.
Can polyurethane molding be installed directly on drywall ceilings?
Potentially, if the specific product, substrate condition, and fixing system are suitable for overhead work. Drywall must be sound, dry, and adequately supported. Use manufacturer-approved attachment instructions, including any temporary support or mechanical fastening. Do not assume that a wall installation method automatically applies to a ceiling. For large or heavy assemblies, ask a qualified installer or designer to review the details.
How wide should ceiling molding be for an 8-foot ceiling?
There is no universal dimension that suits every 8-foot room. Begin with a restrained full-size sample and compare its visual weight with door heads, light fixtures, and available ceiling area. A slim flat line can often add definition without creating a heavy upper border. If considering crown molding, compare its actual installed projection and wall drop, not just its catalog face width.
Should ceiling molding match the wall or the ceiling paint?
Either can work. Matching the ceiling creates a subtle shadow effect and keeps the ceiling visually calm. Matching wall trim can unify a more formal architectural scheme. Contrasting molding makes the geometry more explicit and requires particularly accurate layout and finishing. Test a long enough sample to assess the effect under the room's actual lighting, rather than relying on a digital rendering.
How much extra molding should I order?
Measure all runs, calculate the relevant stock lengths, and build a cut list. A preliminary 10–15% allowance can help with straightforward work, but patterned molding, numerous corners, long joints, and complicated ceiling geometry may require more. Never apply one universal percentage without checking how the pieces can actually be cut. A small room with many short decorative frames can waste more material than a large room with simple straight lines.
Is molding with integrated lighting the same as a regular profile?
No. A lighting assembly requires an approved electrical installation, attention to heat and access, and a compatible mounting method. A decorative molding strip should not be treated as a certified LED channel or electrical enclosure without documentation. Plan lighting and architecture together, but keep their distinct technical requirements clear. Engage the relevant licensed professional when the work involves wiring or changes to fixtures.
Can I combine a ceiling medallion with a rectangular molding frame?
Yes, when the scale and axis are coordinated. Begin with the chandelier or pendant location, verify the medallion's diameter, then choose a frame large enough to provide comfortable negative space around it. Ensure that the decor does not interfere with the fixture canopy, box, or access. A medallion and a rectangular frame should form one composition instead of appearing like unrelated additions.
Where can I compare STAVROS ceiling-related decorative profiles?
Start with the architectural decor catalog, then review the molding, ornamental trim, ceiling medallion, and crown categories according to your installation. Check the exact product material and published dimensions. The supplier should confirm project-specific mounting requirements, overseas delivery options if relevant, and any substitute codes before purchase.
Conclusion: Make the Ceiling an Intentional Part of the Room
The most successful ceiling trim molding rarely depends on the most elaborate profile. It depends on accurate geometry, clear hierarchy, the right material, a realistic cut list, and careful coordination with fixtures and building systems. Begin with the room's height and principal axis. Decide whether you need a crown, a flat molding frame, or an ornamental border. Compare the actual section drawings and stock lengths, test the profile at full scale, and resolve corners and lighting before installation.
STAVROS offers polyurethane molding and ornamental trim with a range of face widths, profiles, and decorative characters. Those products can support many architectural ideas when selected for the correct application. The practical objective is a ceiling that looks balanced from the floor, integrates with the rest of the interior, and remains serviceable long after the decorative work has been completed.