Article Contents:
- Why a rosette for a chandelier solves more than it seems
- When a ceiling rosette is really needed
- Scenarios where a rosette is mandatory
- When a rosette is optional
- How to choose the diameter of a rosette for a chandelier
- Algorithm for choosing diameter
- Typical mistakes in choosing diameter
- Polyurethane, foam or plaster: what to choose for a chandelier
- Why polyurethane is the best choice for most tasks
- Styrofoam: an honest assessment
- Plaster: when it's justified
- Shape and relief: smooth, ornamental, classic
- Smooth rosette
- Ornamental rosette with a floral motif
- Geometric rosette
- Large relief vs. fine
- How to choose a rosette for the chandelier type
- The principle of matching visual weight
- Is a hole in the rosette for the chandelier needed
- When a hole is necessary
- When a hole is not needed
- How to make a hole in a polyurethane rosette
- Rosette for a chandelier and ceiling cornice: how to assemble a complete composition
- How a ceiling system is built
- Visual result of a systematic approach
- Rosette for a chandelier in different rooms
- Living Room
- Bedroom
- Hall and Foyer
- Office
- Dining Room
- How to calculate the budget for purchasing a ceiling rosette
- Installation of a ceiling rosette for a chandelier: step by step
- Step 1: Marking
- Step 2: fitting
- Step 3: Surface preparation
- Step 4: Adhesive application
- Step 5: pressing and fixing
- Step 6: sealing joints
- Step 7: painting
- Mistakes when buying a ceiling rosette for a chandelier
- Choosing a rosette only by a photo in the catalog
- Not considering the chandelier diameter
- Taking a rosette that is too large for a small room
- Taking a too ornate relief for a low ceiling
- Forgetting about the hole for the wire
- Buying foam when a clear relief is needed
- Not considering the ceiling cornice
- Painting the rosette before installation
- Not buying glue and sealant at the same time
- What to buy together with a ceiling rosette
- Ceiling decor
- Installation materials
- All stucco decor
- Why STAVROS
- FAQ
- Which ceiling rosette to buy for a chandelier?
- What is better for a chandelier: polyurethane or foam?
- What diameter of rosette to choose for a large chandelier?
- Can you install a rosette under a chandelier in a small room?
- Is a hole needed in the ceiling rosette for a chandelier?
- How to glue a ceiling rosette?
- What to buy together with a rosette for a chandelier?
- How to choose a socket for a ceiling cornice?

A ceiling without a socket for a chandelier is like a portrait without a frame. The chandelier hangs by itself, the ceiling exists by itself, and there is no dialogue between them. Technically, everything works. Aesthetically, it's a failure. It is the ceiling socket for the chandelier that creates that connecting element: it gathers the center of the ceiling, gives the chandelier a "pedestal," and forms an architectural accent where the eye most often falls — in the center of the room, right above your head.
Buying a ceiling socket for a chandelier seems like a simple solution. You go to the catalog, choose a round one of the right diameter — done. But this is where a series of mistakes begins that turn a good interior into a collection of mismatched details. The socket turns out to be too small for a large crystal chandelier. Or too ornate for a minimalist room. Or made of foam that crumbles during installation. Or without a hole that needed to be planned in advance.
This article is not about "what a ceiling socket is." It is a commercial guide: how to choose, calculate, buy, and install correctly. With tables, checklists, specific scenarios, and direct links to STAVROS products.


Why a socket for a chandelier solves more than it seems
Let's start with an honest conversation about function. Many people think that a ceiling socket is purely a decorative element. A pretty circle around the chandelier. This is only partly true.
In fact, a socket for a chandelier performs several tasks simultaneously — and understanding this changes the approach to selection.
It covers the technical mounting area. The place where the chandelier is attached to the ceiling — a hole, a hook, a wire, possibly uneven plaster. The socket neatly and professionally covers all of this.
It creates a visual "pedestal" for the chandelier. Without a socket, the chandelier "hangs in the air" — separate from the ceiling. With a socket, it becomes part of the ceiling plane, architecturally connected to the space.
It holds the scale of the room's center. A large living room with high ceilings requires a visual accent in the center. A ceiling socket for a chandelier is precisely that accent. It prevents the center of the ceiling from seeming empty and poorly thought out.
Sets the stylistic key for the entire ceiling area. A socket with a floral ornament signals: this is classic. A smooth geometric one is neoclassical. A richly carved one, with acanthus leaves, is a grand hall.
Supports the system with cornices and moldings. If along the perimeter of the ceiling there is Ceiling cornice, the socket in the center completes the ceiling composition. Without it — there is a cornice, but the center is empty. This feels like incompleteness.
Buying a ceiling socket for a chandelier means making a conscious design decision, not just "covering a hole."


When a ceiling socket is really needed
Not every interior requires a socket for a chandelier. But in a number of scenarios it is necessary — and its absence will be noticeable.
Our factory also produces:


Scenarios where a socket is mandatory
Classic and neoclassical interior. Here the ceiling is a full-fledged "fifth wall" with a decorative program. The socket is a mandatory element of this program. A chandelier without a socket in a classic interior is like a gentleman at a ball without a tie: technically present, but something is off.
Formal rooms: living room, hall, dining room, study. It is in these rooms that the ceiling works for status. A socket of expressive diameter with an ornament is an investment in the impression the space makes.
Large, crystal, bronze chandeliers. The heavier and richer the chandelier visually, the more important it is to give it a proportionate "pedestal." Without a socket, a large chandelier looks like a random object glued to the ceiling.
Ceilings with a cornice along the perimeter. If there is Polyurethane cornice The perimeter — the center of the ceiling requires completion. Otherwise, the perimeter is decorated, but the center is empty. This is a visual imbalance.
Ceilings with noticeable mounting points. If the light fixture mount leaves unevenness, stains, or protrudes from the ceiling plane — the rosette covers all this more reliably than any putty.
Get Consultation
When a rosette is optional
In minimalist interiors where the ceiling is intentionally left clean. In technical spaces. In rooms with spot lighting without a central chandelier. There, a ceiling rosette would look like a foreign body.
How to choose the diameter of a rosette for a chandelier
This is where most people make mistakes. The diameter is not "roughly like the chandelier" or "whatever you like." It is a calculation that determines whether the rosette will work or look out of place.
Algorithm for choosing the diameter
Step 1. Measure the diameter of the chandelier.
The diameter of the light fixture is the starting point. The rosette should be larger than the mounting cup, but not necessarily larger than the chandelier itself. For fixtures up to 40 cm in diameter — a rosette of 30–50 cm. For large chandeliers 60–80 cm — a rosette from 50 to 80 cm.
Step 2. Assess the ceiling height.
A ceiling of 2.5 meters and a ceiling of 3.5 meters are different spaces with different scale logic. On a low ceiling, a large rosette visually "lowers" the ceiling even further. On a high one, a small rosette gets lost. For ceilings up to 2.7 meters — rosettes up to 50 cm. For ceilings of 3 meters and above — you can safely consider from 60 to 80 cm and larger.
Step 3. Consider the room area.
In a small bedroom of 12–14 sq. m — a rosette of 30–40 cm. In a living room of 25–35 sq. m — 50–70 cm. In a grand hall or large dining room — from 70 to 100 cm.
Step 4. Check the width of the cornice.
If there is a cornice along the perimeter, the rosette should not visually "meet" it. The distance from the edge of the rosette to the cornice should be comfortable — at least 30–40 cm.
Step 5. Compare the visual weight.
A heavy, richly ornamented rosette requires a corresponding chandelier. A calm, smooth one — for a modern light fixture. The visual weight should be balanced.
More details on the principles of choosing large models — in the article "Large polyurethane ceiling rosettes" on the STAVROS website.
Typical mistakes in choosing the diameter
A socket that is too small for a large chandelier is like a small frame for a large portrait. The center doesn't hold, the socket gets lost.
A socket that is too large in a small room is a visual burden. The ceiling lowers, the room shrinks.
A socket whose diameter matches the chandelier's diameter is a merger without hierarchy. It's unclear what is dominant: the chandelier or the socket.
Rule: The socket should be noticeably larger than the mounting area, but not become the dominant element. It is a frame, not a picture.
Polyurethane, foam, or plaster: what to choose for under a chandelier
The question of material is not just a question of aesthetics. It's a question of durability, ease of installation, and the final result under paint.
| Material | When choosing | Pros | Limitations |
|---|---|---|---|
| Polyurethane | Interior socket for a chandelier on a permanent basis | Lightweight, durable, clear relief, resistant to humidity, paints well | Requires careful installation and the right adhesive |
| Polystyrene foam | Temporary or budget solution | Cheap, easy | Less distinct relief, fragile during installation, paint adheres worse |
| Plaster | Historical interiors, restoration | Naturalness, substantial relief, professional result | Heavy, difficult installation, requires reinforced fastening |
| Wood | Special decorative tasks, wooden interiors | Naturalness, tactility, carving | Rarely used under a ceiling chandelier, requires special mounting |
Why polyurethane is the best choice for most tasks
Polyurethane ceiling rosettes — This is the standard of modern interior decor. Here's why:
— Clear relief. Polyurethane reproduces the smallest details of the ornament during casting. Petals, leaves, woven motifs — everything comes out with the same clarity as the master model.
— Lightweight. A 60 cm diameter polyurethane rosette weighs 300–500 grams. This is important: ceiling mounting does not require anchors or reinforced dowels.
— Moisture resistance. Unlike gypsum, polyurethane is not afraid of humidity fluctuations. For kitchens and bathrooms, this is an important parameter.
— Ready for painting. The surface of a polyurethane rosette is already prepared for priming and painting. The paint lays evenly, without craters or uneven absorption.
— Wide range. In the section polyurethane rosettes STAVROS presents models of various diameters, reliefs, and styles — from strict geometry to rich floral ornament.
Polystyrene foam: an honest assessment
Polystyrene foam ceiling rosettes are a budget solution with compromises. The relief is less clear. During installation, it crumbles easily. When painting, it requires a special primer to avoid chemical reactions with solvents. For a permanent interior solution with a good chandelier, polystyrene foam is not the best choice.
Plaster: when it is justified
Gypsum rosettes are used in the restoration of historical interiors and in projects where "real" stucco is fundamentally important. Gypsum is heavy — a 60 cm diameter rosette can weigh 3–5 kg. Installation requires additional fastening and a professional approach. For most modern apartments, it is excessive.
Shape and relief: smooth, ornamental, classic
Shape defines the character of the rosette. The same diameter in different reliefs creates completely different perceptions.
Smooth rosette
Without ornament. Only the shape — a circle with a neat profiled edge. This is a choice for:
— modern classics with minimal decor;
— neoclassical interiors with clean lines;
— bedrooms where silence and calm are important;
— light minimalist living rooms.
A smooth rosette under a chandelier works discreetly — it doesn't overload the ceiling but gives the chandelier the necessary "pedestal."
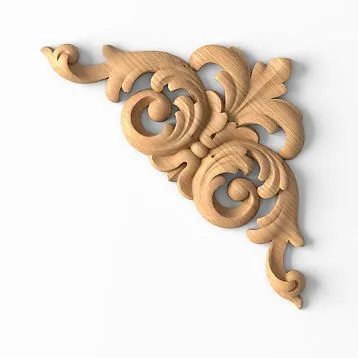
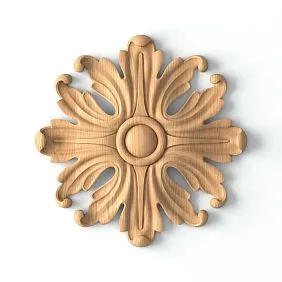
Ornamental rosette with a floral motif
Acanthus leaves, flower garlands, winding stems — this is the classic language of ceiling decor, originating from Renaissance architecture. An ornamental rosette is appropriate in:
— classic living rooms with crystal or bronze chandeliers;
— formal dining rooms and halls;
— bedrooms with classic furniture;
— interiors in Provence style with soft floral accents.
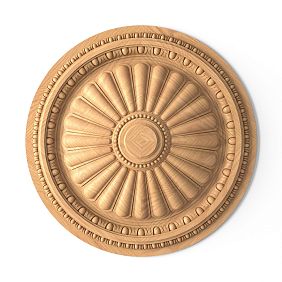
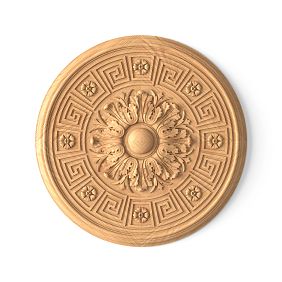
Geometric rosette
Clear geometric elements without floral ornamentation. With rays, diamonds, triangles. This is Art Deco, strict neoclassicism, modern classicism. A geometric ceiling rosette looks both strict and expressive.
Large relief vs. thin
Large, high relief is for formal rooms with high ceilings. There it is readable, there it works with the scale. In small rooms with low ceilings, large relief creates a feeling of heaviness and overload.
Thin, delicate relief is the choice for medium-sized living rooms. It creates texture without dominating.
The entire range of rosettes — from minimalist to richly ornamented — in the section moldings from polyurethane STAVROS.
How to choose a socket for the chandelier type
This is the most practical question — and the most often ignored. The socket should support the chandelier, not compete with it.
| Chandelier type | Which socket is suitable |
|---|---|
| Crystal multi-tiered | Ornamental, medium or large diameter, floral motif |
| Classic bronze | Relief socket with floral ornament, warm tone for painting |
| Modern minimalist | Smooth or moderately relief, pure white color |
| Small decorative light fixture | Compact socket, without excessive relief |
| Large designer chandelier | Large ceiling plate that holds the scale and doesn't get lost |
| Pendant light on a long cord | Subtle ceiling plate that covers the mounting area |
| Modern minimalist lampshade | Smooth small ceiling plate, strict shape |
Principle of matching visual weight
A heavy, ornate chandelier needs a matching ceiling plate. A light fixture needs a light one. This is not just an aesthetic principle — it's a law of visual balance. When the ceiling plate and chandelier are disproportionate, the eye 'stumbles': something is clearly off, though it's not always clear what.
Practical test: imagine removing the ceiling plate. If the chandelier still looks organic — the plate is optional. If something is lost without it — that's exactly the plate you need.
Does the ceiling plate need a hole for the chandelier
A technical question that determines everything. And it needs to be resolved before purchase, not after installation.
When a hole is necessary
If the chandelier is attached to the ceiling through a socket, the wire must pass through it. This means a hole with a diameter sufficient for the wire and the mounting nut of the fixture base is needed in the center of the socket.
The standard hole diameter for the wire is 10–20 mm. For a mounting bolt or hook, it depends on the chandelier's design.
When a hole is not needed
If the chandelier is attached to the ceiling independently of the socket, and the socket is glued around the base after the fixture is installed. This is the most convenient scenario: the socket does not require precise alignment with the mounting area.
How to make a hole in a polyurethane socket
Polyurethane is easy to work with: a drill, hole saw, or sharp knife—any tool handles it effortlessly. Important:
— Make the hole before installation, not after.
— Mark the center of the socket.
— Select a diameter with a margin of 2–3 mm relative to the wire or fastener diameter.
— Sand the edges with sandpaper.
More details about installing sockets on stretch ceilings — in a special article «Polyurethane ceiling rosette for stretch ceilings» STAVROS. It covers all the nuances of technical installation and compatibility with the stretch fabric.
Socket for a chandelier and ceiling cornice: how to create a complete composition
One rosette is good. A rosette in a system with cornices and moldings is a complete ceiling architecture.
How a ceiling system is built
Center — rosette. The main accent. The diameter is matched to the chandelier and room area. The relief is coordinated with the style.
Perimeter — cornice or molding. Polyurethane cornices A transition from the wall to the ceiling is formed around the perimeter of the room. They set a "frame" within which the rosette operates.
Additional lines — moldings. If the ceiling is large enough, a circular one can be added between the cornice and the rosette. Polyurethane molding in the form of a circular border around the rosette. This creates a concentric ceiling system — a classic solution for formal rooms.
Accents — decor for moldings. At transition points, corners, intersections, you can use Decor for Molding — small figured inserts that enrich the system.
Visual result of a systematic approach
A room where the ceiling is designed systematically — rosette + cornice + moldings — is perceived as a complete architectural space. This is not an "apartment with renovation." This is an "interior with character."
The difference between "buying one rosette" and "assembling a ceiling system" is the difference between a detail and a solution.
On the principles of choosing the size of a rosette for a chandelier — in the material "Stucco on the ceiling under the chandelier" STAVROS.
Ceiling rosette for a chandelier in different rooms
Living Room
Living room — the main space of an apartment or house. Here, the rosette operates at full capacity. Diameter — medium or large (50–80 cm). Relief — expressive, ornamental, or geometric. Color — matching the ceiling. Chandelier — crystal, bronze, or designer classic.
Bedroom
Bedroom requires delicacy. The rosette here is smaller — 30–50 cm. Relief — thin, without excessive ornament. The goal is to create a sense of completeness without visual strain. For a Provence-style bedroom — a floral motif. For a neoclassical bedroom — smooth or with a moderate botanical element.
Hall and Entrance
Hall — the first impression. If it is a large formal hall — the rosette should be impressive. Diameter — from 60 cm and above. Relief — rich, classic. If the hall is small — a compact rosette with a neat ornament.
Office
A rosette in a study creates a sense of solidity and respectability. A strict geometric shape or a classic ornament of moderate size works well. Color — white or cream.
Dining Room
Dining room with a large dining table — this is a ceremonial space. A large chandelier above the table requires a proportionate rosette. Diameter — 60–80 cm. Relief — expressive.
How to calculate the budget for purchasing a ceiling rosette
Often, a person sees the price of a rosette and thinks that is the entire budget. No. The full budget for a ceiling decorative task consists of several items.
| Article | What's included |
|---|---|
| The rosette itself | The price depends on the diameter, complexity of the relief, and material |
| Construction adhesive | Professional mounting adhesive |
| Sealant | Acrylic sealant for joints and edges |
| Primer | For surface preparation before painting |
| Paint | Usually 1–2 coats in ceiling color |
| Painting consumables | Brushes, roller, painter's tape |
| Delivery | Depends on distance and service |
| Cornice (if needed) | Additional linear molding along the perimeter |
Why are sockets different prices? Because relief complexity, diameter, and polyurethane mixture quality are different parameters. A cheap socket with unclear relief is a compromise that will be visible after painting. A professional socket with clear ornament is an investment that will work for the interior for decades.
Installing a ceiling rosette for a chandelier: step by step
Installing a polyurethane rosette is a task that one person can handle without special tools. The main thing is consistency.
Step 1: Marking
Find the center of the ceiling or the chandelier mounting point. Mark the point with a pencil. Check if the center of the rosette matches the chandelier mounting center.
Step 2: fitting
Hold the rosette against the ceiling without glue. Make sure the size, position, and hole (if needed) are correct. This saves you from mistakes that cannot be fixed after installation.
Step 3: Surface Preparation
The ceiling surface must be clean, dry, free of dust and grease stains. Old paint — make sure it is firmly attached. Peeling coating — remove it.
Step 4: Applying adhesive
Mounting adhesive is applied along the perimeter of the back side of the rosette in a snake pattern. Pause according to the glue instructions — usually 3–5 minutes for surfaces to bond.
Step 5: pressing and fixing
Press the rosette against the ceiling according to the markings. Hold for 1–2 minutes. Remove excess glue immediately with a dry cloth — it is harder after drying.
Step 6: sealing joints
After the glue dries, apply acrylic sealant to the joint between the rosette and the ceiling. Smooth it with a wet finger. This will hide gaps and create a smooth line for painting.
Step 7: painting
Prime the surface of the rosette with a special primer. After drying, paint it to match the ceiling color. Usually two coats with a brush or small roller are enough.
Mistakes when buying a ceiling rosette for a chandelier
We've gathered the most common and painful ones.
Choosing a rosette only by a photo in the catalog
A photo in the catalog is a two-dimensional image. A real rosette is a three-dimensional object with relief. Request dimensions: diameter, relief height, hole diameter.
Not considering the diameter of the chandelier
A rosette smaller than the chandelier's mounting cup is a disaster. A rosette barely larger than the chandelier defeats the purpose. Measure first, buy later.
Choosing a rosette that is too large for a small room
In a 12 sq. m bedroom, a 80 cm diameter rosette creates the feeling that the ceiling is pressing down. Match the diameter to the area.
Choosing too lush a relief for a low ceiling
A high, complex relief on a 2.4 meter ceiling is overload. For low ceilings — smooth or with a thin relief.
Forgetting about the hole for the wire
Buy, glue — and discover that the chandelier wire does not fit through the rosette. This is a real story. Solve the hole issue before installation.
Buying foam when a clear relief is needed
A foam rosette looks "soapy" after painting — the relief is lost. Polyurethane holds the relief clearly even under several layers of paint.
Not considering the ceiling cornice
If a cornice already exists or is planned, the size and style of the rosette must be coordinated with it. An uncoordinated system looks chaotic.
Painting the rosette before installation
Mounting adhesive bonds better with unpainted polyurethane. Paint after installation.
Do not buy adhesive and sealant at the same time
"I'll find something at home" is not the best strategy. The right mounting adhesive is critical for a secure hold.
What to buy with a ceiling rosette
A systematic approach yields systematic results.
Ceiling decor
-
ceiling cornices and moldings made of polyurethane — for perimeter design
-
Polyurethane Rosettes — for additional accent points in the interior
-
Decor for Molding — to enrich the cornice system
Installation materials
-
Mounting adhesive, sealant, primer — without this, installation is impossible
All stucco decor
-
Polyurethane moldings — full catalog: rosettes, cornices, overlays, medallions
Why STAVROS
You can buy a ceiling rosette for a chandelier in dozens of online stores. But get the right result only where there is expertise, a full range, and a real product base.
STAVROS has specialized in interior decor since 2002. The catalog includes — Polyurethane ceiling rosettes... of different diameters, reliefs, and styles: from smooth, minimalist to richly ornamented classic ones. Alongside — cornices, moldings, molding decor, installation materials. Everything needed for a complete ceiling system — in one catalog.
The quality of STAVROS rosettes — clear relief, smooth paintable surface, stable geometry. Not foam with a fuzzy outline, but professional injection-molded polyurethane that holds its shape under multiple coats of paint.
Among STAVROS's completed projects are the Hermitage, Konstantinovsky Palace, and Alexander Palace. Rating 5.0 — over 260 verified reviews. Delivery across Russia: CDEK and DPD. Showrooms in St. Petersburg and Moscow.
FAQ
Which ceiling rosette should you buy for a chandelier?
Choose based on three parameters: the chandelier's diameter and room size determine the rosette size; the interior style and light fixture type — the shape and relief; the material — polyurethane for a permanent solution, foam as a budget option.
What is better for a chandelier: polyurethane or foam?
Polyurethane — clear relief, strength, durability, good paint adhesion. Foam — cheaper, but relief is less expressive, fragile during installation. For a permanent interior — polyurethane.
What diameter of rosette to choose for a large chandelier?
For a large chandelier (60–80 cm) — a rosette from 60 to 90 cm depending on ceiling height and room area. The main rule: the rosette should be noticeably larger than the mounting area, but not become the main element of the ceiling.
Can you install a rosette under a chandelier in a small room?
Yes. Choose a compact model 25–40 cm with a thin relief. A too large rosette will visually lower the ceiling.
Is a hole needed in the ceiling rosette for a chandelier?
Depends on the chandelier installation method. If the wire and mount pass through the rosette — yes. If the chandelier is mounted independently and the rosette is glued around — not necessary.
How to glue a ceiling rosette?
With mounting glue along the perimeter of the back side of the rosette. After drying — acrylic sealant along the joint, primer and painting in the ceiling color. Details — in the section mounting materials STAVROS.
What to buy together with a ceiling rosette for a chandelier?
Minimum: mounting adhesive, sealant, primer, paint. For a complete system: a ceiling cornice and moldings in the same style.
How to choose a rosette for a ceiling cornice?
The style of the rosette relief and the cornice should match: both classic, or both geometric, or both smooth. Mixing an ornamental rosette with a geometric cornice is a style conflict that will be noticeable.