Article Contents:
- The main question: is it even possible
- How a stretch ceiling works: what to know before choosing a rosette
- What to check before buying a rosette: a complete checklist
- 1. Is there a mounting plate and what is its diameter?
- 2. What is the diameter of the technological ring?
- 3. How does the wire come out and how is the chandelier attached?
- 4. What weight does the structure allow?
- 5. Is the rosette needed before or after ceiling installation?
- 6. Who is responsible for installing the socket?
- 7. What type of fabric?
- Three installation scenarios: how a socket ends up on a stretch ceiling
- Scenario one: socket before the fabric is stretched
- Scenario two: socket over the fabric with a rigid base underneath
- Scenario three: socket attached to the chandelier mounting platform
- Which socket to choose for a stretch ceiling: specific criteria
- Weight: the lighter, the more reliable
- Diameter: proportionate to the embedded part
- Profile: moderate or low
- Central hole: check compatibility
- Shape: round — the most convenient
- Important point: glossy stretch ceiling
- Matte fabric panel
- Ceiling rosette and chandelier: how it all works together
- Chandelier with decorative "cup"
- Chandelier without decorative "cup"
- Multiple lights and one rosette
- When it's better to choose a small rosette
- When you can choose a large rosette
- Painting a rosette on a stretch ceiling: how to do it correctly
- What to buy together with a rosette for a stretch ceiling
- Essential minimum
- Additional elements
- Ceiling stucco on a stretch ceiling: what else is possible
- Typical mistakes when choosing a rosette for a stretch ceiling
- Five scenarios: a rosette on a stretch ceiling in real interiors
- Installation on a stretch ceiling: step-by-step algorithm
- Frequently Asked Questions
- About the Company STAVROS
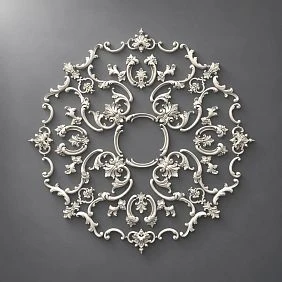
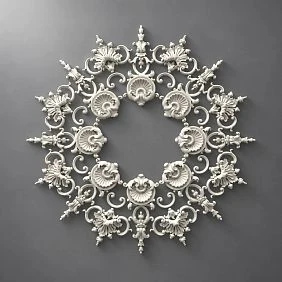
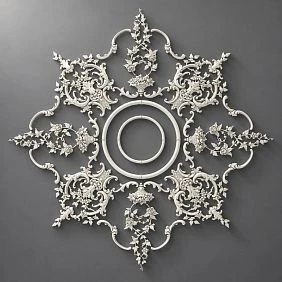
The main question: is it even possible
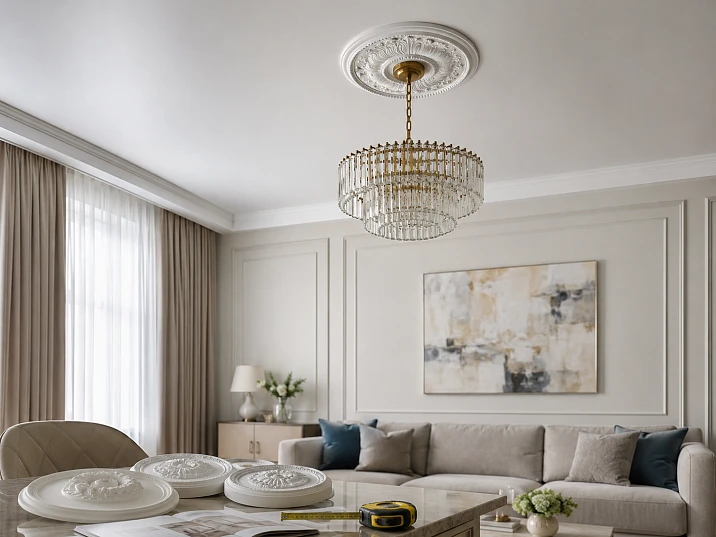
Let's answer right away, honestly and without evasion: yes, it is possible. A polyurethane ceiling rosette is compatible with a stretch ceiling — provided a number of conditions are met, which need to be checked before purchase, not after.
What exactly changes in the case of a stretch ceiling? The base changes. On a regular ceiling, the rosette is glued directly to a hard surface — concrete, drywall, plaster. The stretch fabric is not a load-bearing surface. It is stretched with a certain tension, has its own elasticity, and is not designed for point loads from a decorative item.
Therefore, the key principle is this: the rosette must not rely on the tension fabric as a load-bearing base. It is either mounted together with an embedded element before the fabric is tensioned, or attached to a rigid base through a special technological hole, or installed in a manner agreed upon with the stretch ceiling team.
If this principle is followed — a polyurethane ceiling rosette for a stretch ceiling works perfectly. It looks the same as on any other ceiling, performs the same decorative function, and lasts just as long.




How a stretch ceiling works: what you need to know before choosing a rosette
To make the right decision, you need to understand the construction of a stretch ceiling — at least in its basic form.
A stretch ceiling is a sheet of PVC or fabric fixed around the perimeter of the room in a profile system. A gap remains between the sheet and the ceiling slab — typically 5–15 cm. Electrical cables, ventilation elements, and mounting inserts run through this gap.
The insert for a chandelier is a metal or wooden plate (platform) attached to the ceiling slab before the fabric is tensioned. The chandelier hook or light fixture mounting unit is attached to it. The insert distributes the load from the chandelier onto the rigid slab, not onto the fabric.
A technological hole is made in the fabric — usually round — through which the cable exits and the chandelier hook is installed. This hole is framed with a special ring that secures the edge of the fabric and prevents it from tearing.
What does this mean for the rosette? That the size and placement of the decorative rosette must take into account:
-
diameter of the technological ring;
-
location of the mounting zone on the fabric;
-
cable exit method;
-
ability to support or secure the socket without load on the fabric.
Our factory also produces:

What to check before buying a socket: full checklist
This is the most important section for those who haven't ordered a socket yet. Seven questions that need answers before clicking the "Buy" button.
Get Consultation
1. Is there a mounting plate and what is its diameter?
The first and main question. If there is a mounting plate, installation is possible. If there is no mounting plate, the stretch ceiling is already installed, and the issue becomes more complicated.
You need to know the diameter of the mounting plate to understand within what radius the mounting zone is rigid. The socket must rest on this zone — or be independent of the fabric.
2. What is the diameter of the technological ring?
The technological ring — metal or plastic — secures the opening in the fabric. Its diameter is the minimum "open" area. The cable exits through it, as does the hook or mounting tube. The central hole of the rosette must be either equal to or slightly larger than this ring, so that the rosette can conceal the mounting area.
3. How does the wire come out and how is the chandelier attached?
The chandelier can be mounted on a hook, a tube, or a mounting plate. The mounting method determines how the exit area will look: whether there will be a hook, tube, mounting element — and how the rosette will "sit" around it. Ensure that the central hole of the rosette is compatible with the chosen mounting element.
4. What weight does the structure allow?
The stretched ceiling fabric is not designed to bear loads from decorative items. If the rosette will rest on the fabric, its weight must be minimal. A polyurethane rosette with a diameter of 400–500 mm weighs 400–700 g — this is acceptable. However, it is better to plan a scheme where the rosette rests on a rigid base rather than on the fabric.
5. Is the rosette needed before or after ceiling installation?
This is a fundamental question. If the stretched ceiling has not yet been installed, the rosette can be included in the installation scheme in advance. If the ceiling is already installed, the choice of installation schemes is limited.
6. Who is responsible for installing the rosette?
Installing a ceiling rosette on a stretched ceiling is a task best coordinated with the team that installed the ceiling or with an experienced finisher familiar with stretched ceiling systems. Self-installation with glue on the fabric without a rigid base can damage the fabric.
7. What type of fabric?
Matte fabric canvas allows adhesive mounting of delicate elements better than glossy PVC. Glossy canvas reflects everything — any installation error or unevenness is immediately visible. With glossy canvas, it is especially important to achieve a smooth, precise result.
Three installation scenarios: how a socket meets a stretch ceiling
Let's examine real schemes used in practice.
Scenario one: socket before stretching the canvas
This is the ideal option — if you are reading this article before the final ceiling installation. In this case:
-
A mounting plate for the chandelier is attached to the concrete ceiling.
-
A decorative polyurethane socket is glued or screwed to the ceiling or the mounting plate structure.
-
The canvas is stretched — around the socket, with a technological hole at the cable exit point.
-
The socket ends up 'behind' the canvas — or in the canvas area, if structurally planned that way.
But another approach is more often used: the socket is installed on top of the already mounted canvas — in an area where there is a rigid base (mounting plate) under the canvas. In this case, the socket rests on the canvas above the mounting plate, and the load from the socket is transferred through the canvas to the rigid plate — without deforming the canvas.
Scenario two: rosette over the fabric with a rigid base underneath
The most common option for an already installed stretch ceiling. The mounting plate for the chandelier is of a sufficiently large diameter (300–400 mm) — and the rosette rests on the fabric in the area where there is a rigid plate behind it. Glue is applied to the back surface of the rosette — along the perimeter, not in the center.
Important condition: the diameter of the rosette must be equal to or smaller than the diameter of the mounting plate. If the rosette extends beyond the mounting plate, its edges will only rest on the fabric — which is unacceptable for products with noticeable weight.
Scenario three: rosette attached to the chandelier's mounting platform
Some chandeliers have a decorative "cup" or mounting plate that covers the attachment area. In this case, the decorative rosette is attached not to the ceiling, but to this platform — through it or together with it. This completely relieves the fabric of load.
Which rosette to choose for a stretch ceiling: specific criteria
Once the installation scheme is clear, you can proceed to choosing the product. Here are the parameters that are important specifically for stretch ceilings.
Weight: the lighter, the more reliable
Polyurethane is inherently lightweight — and this is one of its main advantages specifically for stretch ceilings. A plaster rosette of the same diameter weighs 3–5 times more and creates a load that is undesirable for stretch ceilings. polyurethane rosettes weighing 400–700 g — the optimal choice.
Diameter: proportional to the mounting plate
The diameter of the rosette must not exceed the diameter of the mounting plate if the rosette rests on the fabric. If installation is intended on a rigid base without support on the fabric, there are no restrictions on a smaller diameter.
For a stretch ceiling, the recommended diameter is 250–450 mm. Large rosettes with a diameter of 500 mm and above are allowed if a corresponding mounting plate and an approved installation scheme are available.
Relief: moderate or low
A high-relief rosette means a greater distance from the ceiling plane to the top point of the ornament. On a stretch ceiling, a rosette with high relief is more difficult to install and harder to seat evenly. For a stretch ceiling, it is better to choose rosettes with moderate relief (up to 20–25 mm) or a low profile.
A smooth rosette with a profiled rim is an ideal choice for a stretch ceiling: minimal height, maximum installation precision.
Central hole: check compatibility
The central hole of the rosette — for the wire and mounting element — must match the size of the technological ring and the chandelier's mounting assembly. If the standard hole does not fit, polyurethane can be easily trimmed with a sharp knife to the required diameter — this is another advantage of the material.
Shape: round — the most convenient
A round rosette is the most convenient for a stretch ceiling: it does not require orientation along axes, evenly distributes the load around the circumference, and is easiest to match with a round technological ring.
Oval or square socket — possible, but require more precise marking and a coordinated installation scheme.
Important point: glossy stretch ceiling
Glossy PVC fabric — a special case. It turns the ceiling into a mirror: reflects furniture, walls, lights. And, of course, reflects the ceiling socket.
On a glossy ceiling, the socket is "doubled": the real one — and its reflection below. This can create a beautiful effect — but only if the installation is flawless. Any gap, any misalignment, any uneven fit on a glossy ceiling is doubly visible.
Recommendations for a glossy ceiling:
-
Choose a socket with a flat, impeccably smooth back surface.
-
Installation — only with a rigid base.
-
Glue — in a thin, even layer, without excess.
-
Sealant around the perimeter — with a neat continuous seam, smoothed in one motion.
-
After installation — painting the socket in the ceiling color, delicately, in a thin layer.
Matte fabric canvas
Installing a decorative rosette on a matte fabric canvas is easier: the surface does not reflect, imperfections are less noticeable, and the adhesive holds securely on the fabric. However, the requirements for the installation scheme remain the same.
Ceiling rosette and chandelier: how it all works together
A decorative rosette on a stretch ceiling does not exist in isolation from the chandelier. This is a system of three elements: chandelier — rosette — ceiling. And all three must be coordinated.
Chandelier with a decorative "cup"
Most modern chandeliers come with a decorative cap ("cup") that covers the attachment point to the ceiling. If this cup is large enough in diameter, the rosette can be small, simply as an additional decorative ring around the cup. If the cup is small, the rosette takes on all the decorative load, covering both the cup and the mounting plate area.
Chandelier without a decorative "cup"
Some designer lighting fixtures intentionally leave the mounting unit exposed — this is part of their concept. In this case, the rosette becomes the main decorative framing of the suspension point. It should be expressive enough to independently "hold" this focus.
Multiple lights and one rosette
If, for example, a row of pendant lights is installed above a table area, they usually come from one mounting zone. One technical unit — one rosette around it. In this case, an oval shape works well ceiling rose made of polyurethane — it frames not a point, but a zone.
When it's better to choose a small ceiling rosette
There are situations where a smaller size is the right solution, not a compromise.
The ceiling is low. With a ceiling height of 2.5–2.6 m (considering the stretch ceiling, which takes up another 5–10 cm), a large rosette visually brings the ceiling closer. A small rosette with a diameter of 220–300 mm is the right choice.
The surface is glossy. On a glossy surface, everything looks larger — including the rosette. A moderate diameter creates the right effect.
The mounting area is small. If the mounting plate has a diameter of 200–250 mm, the rosette should be proportionate to it.
The chandelier is compact. If the light fixture is small, the rosette should not exceed it in diameter.
The room is small. In a small bedroom or children's room, a large rosette creates disproportion.
The interior is minimalist. In a minimalist interior, a small smooth rosette with a profiled rim is a precise, unobtrusive accent.
When you can choose a large ceiling rosette
A large rosette is a statement. It must be appropriate.
The room is spacious. A living room of 25–35 m² with a high ceiling is a space that "holds" a large rosette with a diameter of 500–600 mm.
The chandelier is large. A large crystal chandelier or a monumental pendant requires a proportionate frame.
Large-diameter mounting plate. If the design includes a mounting plate with a diameter of 400–500 mm, a large rosette is installed correctly.
Installation is coordinated in advance. If the installation scheme is planned with a large rosette in mind, there are no restrictions.
The interior is classic or neoclassical. For classic style, a large relief rosette is a historical norm, not an excess.
Hall or formal space. First impressions are formed in the hall. A large rosette with expressive relief in the hall is an architectural gesture that is remembered.
Painting a rosette on a stretch ceiling: how to do it correctly
Painting a ceiling rosette on a stretch ceiling requires special care. The fabric is not a wall or plaster: paint or primer that gets on the fabric can leave indelible marks or deform the surface.
How to proceed:
Before painting, cover the fabric around the socket with painter's tape — tightly, without gaps. The tape should adhere to the perimeter of the socket and cover a few centimeters of the fabric around it.
Paint delicately: a thin layer, minimal pressure on the brush, strokes from the socket outward — to avoid getting under the painter's tape.
After the first layer dries — remove the tape and, if necessary, apply a second layer, again covering the fabric.
For white painting to match the ceiling — water-based or acrylic paint. Not oil-based, not alkyd — they do not combine well with polyurethane and can damage the fabric if accidentally applied.
What to buy together with a socket for a stretch ceiling
For a stretch ceiling, the set of installation materials differs somewhat from the standard one.
Mandatory minimum
-
Specialized glue for polyurethane stucco. It should work well with the ceiling fabric surface — check compatibility with the type of stretch ceiling (PVC or fabric).
-
Acrylic sealant. For sealing the perimeter joint between the socket and the fabric. White, solvent-free.
-
Painter's tape. For protecting the fabric during painting.
-
Primer for polyurethane. Acrylic, without aggressive solvents.
-
Paint. Water-based or acrylic in the color of the ceiling.
Additional elements
If a wider ceiling system is planned along with the socket, consider:
-
Ceiling moldings. Moldings made of polyurethane for creating decorative frames around the socket or along the walls. Important: moldings on a stretch ceiling are installed differently — they are attached to the walls or to the edge profiles, not to the fabric.
-
Cornice. Decorative perimeter cornice — Ceiling molding along the walls — mounted on the wall above the level of the stretch fabric. This is fully feasible and creates architectural completeness.
-
Decorative overlays. Decorative stucco for corner accents — mounted similarly to the cornice, on the walls.
| Task | What to buy |
|---|---|
| Design a chandelier on a stretch ceiling | A polyurethane ceiling rosette of the required diameter |
| Do not overload the low ceiling | A small rosette with low relief, diameter up to 320 mm |
| Cover the chandelier mounting area | Socket with a diameter matching the embedded part |
| Add classic decor | Socket + cornice on walls + moldings |
| Assemble the installation kit | Socket, glue, sealant, painter's tape, primer, paint |
| Buy without mistakes | After checking the embedded part, ring diameter, and installation diagram |
Ceiling stucco on a stretch ceiling: what else is possible
The topic is not limited to one socket. If you want to add ceiling molding to the interior with a stretch ceiling — there are significantly more possibilities than it seems.
Cornice around the perimeter. A polyurethane ceiling cornice is mounted on the wall — directly under the joint of the wall and the stretch fabric, or a few centimeters lower. This is standard practice: the cornice covers the edge profile of the stretch system and creates a decorative frame for the entire ceiling.
Moldings along the walls. Straight Moldings made of polyurethane are mounted on the walls below the level of the stretch ceiling — to create decorative panels, frames, and architectural belts.
A rosette as the only element on the ceiling. In a minimalist interior with a stretch ceiling, one central rosette above the chandelier is a sufficient and expressive decorative accent. Everything else — the cornice, moldings — is on the walls.
Combined system. A rosette on the ceiling + a cornice on the walls + molding frames on the walls — this is a complete architectural system that covers all surfaces of the room and creates a cohesive classic look.
Typical mistakes when choosing a rosette for a stretch ceiling
Mistake one: buying a rosette without knowing the diameter of the mounting plate.
The rosette arrives and turns out to be larger than the mounting plate — there is nothing to support it, installation is at risk. Always check the size of the mounting plate before ordering.
Mistake two: gluing a heavy plaster rosette onto the fabric.
A plaster rosette weighs 2–4 kg. This is a load that the stretch ceiling fabric is not designed to bear. After a few months, the fabric may deform or the rosette may fall off. Only polyurethane.
Mistake three: mounting a rosette on a glossy fabric without painter's tape.
Glue or sealant gets on the glossy fabric and leaves a permanent mark. Always protect the fabric before installation.
Mistake four: choosing a socket with a central hole that is incompatible with the chandelier's mounting assembly.
A narrow hole means the chandelier cannot be installed. Too wide, and the mounting assembly is not concealed. Check the socket hole diameter and the size of the chandelier's mounting plate.
Mistake five: buying a socket after the final ceiling installation without coordinating the layout.
After ceiling installation, the choice of mounting schemes for the socket narrows. If the ceiling is not yet ready, include the socket in the installation plan in advance.
Mistake six: ignoring the type of fabric.
PVC and fabric are different materials with different properties. An adhesive that holds on fabric may hold less effectively on PVC. Check the adhesive's compatibility with the fabric type.
Five scenarios: a socket on a stretch ceiling in real interiors
Scenario one: living room 24 m², stretch ceiling 2.7 m, crystal chandelier, embedded platform 350 mm.
Round socket with a diameter of 320 mm, moderate acanthus relief. Installation over the fabric in the area of the embedded platform. Cornice made of ceiling moldings On the walls under the edge profile. White paint. Result: a classic living room with a decorative ceiling system — despite the stretch ceiling.
Scenario two: bedroom 16 m², stretch ceiling 2.6 m, compact fabric lampshade, mounting plate 250 mm.
Round smooth rosette with a diameter of 230 mm with a profiled rim. Installation in the mounting plate area. White. No additional elements. Result: a delicate accent above the light fixture — unobtrusive and precise.
Scenario three: hall 3 × 4 m, matte stretch ceiling 2.9 m, suspended metal light fixture, mounting plate 380 mm.
Round rosette with a diameter of 360 mm, moderate geometric relief. Installation in the mounting plate area. Cornice on the walls. White. Result: a grand hall with an architectural ceiling accent.
Scenario four: kitchen-living room, stretch ceiling, three pendants in a row above the island, mounting plate 300 × 100 mm (rectangular).
Oval rosette with a long axis of 420 mm. Installation in the mounting plate area along the axis of the pendants. White. Result: decorative framing of the light group above the kitchen island.
Scenario five: children's room 12 m², glossy stretch ceiling 2.5 m, ceiling lampshade, mounting plate 200 mm.
Round smooth rosette with a diameter of 190 mm — exactly matching the mounting plate size. Installation with painter's tape, thin layer of glue, thorough sealing. White. Result: a neat, safe accent on the glossy ceiling — without deformations or marks.
Installation on a stretch ceiling: step-by-step algorithm
For those planning to install it themselves or wanting to clearly understand what the master will do. A complete professional algorithm for installing any polyurethane molding — in the guide on installing polyurethane molding. Below is the specification for a stretch ceiling.
Step one: determine the mounting area. Find the center of the installation zone — the cable exit point. Ensure there is a rigid base behind the fabric.
Step two: check the diameter. Make sure the socket does not extend beyond the mounting plate. If it does, installation requires a different scheme.
Step three: prepare the fabric. Degrease the fabric surface in the installation area. For PVC — isopropyl alcohol, without aggressive solvents.
Step four: protect the fabric. Trace the perimeter of the socket on the fabric with a pencil. Apply masking tape around this outline — to protect the fabric when applying glue and sealant.
Step five: apply glue. Apply glue to the back surface of the socket — in an even layer around the perimeter. For products resting on the mounting plate through the fabric — additional glue points in the center.
Step six: installation. Press the socket against the fabric in the desired position. Hold for 3–5 minutes.
Step seven: sealant. Apply acrylic sealant around the perimeter of the socket, with a smooth motion around. Remove the masking tape before the sealant dries.
Step eight: painting. After complete drying — protect the fabric again with masking tape, prime and paint the socket in the ceiling color.
Frequently asked questions
Can I glue a ceiling rosette directly onto a stretch ceiling?
Directly onto the fabric — only if there is a rigid base (embedded part) behind the fabric and the weight of the rosette is small. Gluing onto an unsecured fabric without a base is not allowed: the fabric will deform under the weight of the product.
Which rosette is best suited for a stretch ceiling?
A lightweight round polyurethane rosette with moderate or low relief, with a diameter matching the size of the embedded part. Buy a polyurethane ceiling rosette with the required parameters in the STAVROS catalog.
When is it better to buy a rosette: before or after ceiling installation?
Better before — this allows you to include the rosette in the installation scheme, correctly calculate the embedded part and the diameter of the technological ring. If the ceiling is already installed, you need to check the embedded part and choose a rosette to match its size.
How to properly paint a rosette on a stretch ceiling?
With masking tape around it, using delicate brush strokes, a thin layer of acrylic paint. Avoid getting paint on the fabric.
Can a cornice be installed together with a socket on a stretch ceiling?
Yes. The cornice is mounted on the wall — under the edge of the stretch fabric. The socket is on the ceiling in the area of the embedded part. This is a feasible and beautiful system.
What do I need to buy to install a socket on a stretch ceiling?
Specialized glue, acrylic sealant, painter's tape, primer, and paint. Full range polyurethane products of installation materials — in the STAVROS catalog.
Can I remove a socket from a stretch ceiling if I don't like it?
Yes — carefully, using a utility knife. Polyurethane cuts easily, the glue is cut off with a layer. The fabric may require delicate cleaning.
About the company STAVROS
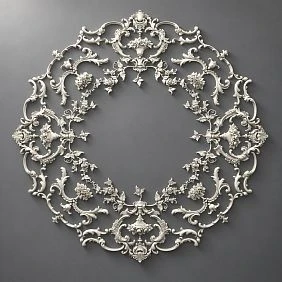
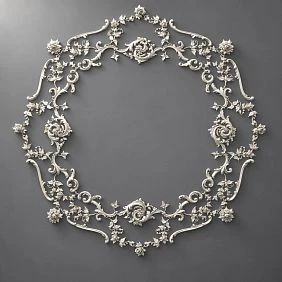
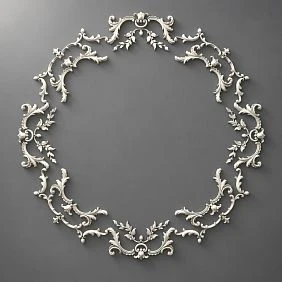
STAVROS — professional supplier polyurethane products for residential and commercial interiors. In the company's catalog — ceiling rosettes of various shapes, diameters, and reliefs, Moldings and cornices for walls and ceilings, Decorative Inserts и Ceiling molding of all types. All STAVROS products are made of high-quality polyurethane with high relief precision, resistant to moisture and mechanical stress, ready for installation and painting. The company works with private customers and professional finishing teams across Russia — with delivery and consultations on selection and installation.