Article Contents:
- Why the shelf starts with the bracket, not the board
- What is the wooden bracket KR-041
- The main mistake is choosing the size by photo
- One shape, four scales
- How to read KR-041 dimensions correctly
- Why the reach is no less important than the height
- Full-size template: the most useful step before ordering
- How to prepare the template
- Choosing only by a large photo
- Considering the largest option the most reliable
- Ignoring the shelf depth
- Not accounting for the adjacent trim or switch
- Ordering a pair at different times
- Mixing beech and oak under a clear finish
- Not passing the load and wall material to the craftsman
- Marking the series by eye
- Ordering first, then coming up with the shelf
- Confusing decorative function with structural
- Which query is best to use if I have already chosen a model?
- Which size of KR-041 is suitable for a narrow shelf?
- Can I immediately take the largest size?
- How many brackets are needed for one shelf?
- What distance should be left between the brackets?
- Is the permissible load of KR-041 confirmed?
- Can KR-041 be used only as decor?
- How to make a full-size template?
- Do I need to make templates for all four sizes?
- Is beech or oak better for white enamel?
- When is it better to choose oak?
- Do I need to order a pair at the same time?
- What do "Standard" and "Prestige" mean?
- Can KR-041 be painted together with the shelf?
- Will KR-041 fit a stone countertop?
- Can KR-041 be installed on drywall?
- How to avoid hitting hidden wiring?
- What matters more: bracket height or depth?
- Can different sizes of KR-041 be used in the same room?
- How to calculate the reserve?
- What should I send to the STAVROS manager?
- Where can I see other models?
- Where can I read general material on selection?
- How does the article about KR-041 differ from the general bracket overview?
- Can I order one bracket to check the scale?
- Do I need to account for the thickness of the finish coating?
- Can KR-041 be trimmed if the size doesn't fit?
- How can I check that the bracket won't interfere with the door?
- Do I need to account for the baseboard and trim?
- Can KR-041 be used for several identical shelves?
- How to fix the size selection for the installer?

A beautiful wooden bracket is easy to choose from a photo, and just as easy to make a mistake with its scale. In a close-up shot, a small model looks expressive, but next to a real shelf, a tall cabinet, or a furniture cornice, it can get lost. The opposite situation is no less common: a large carved element is placed under a narrow detail, and the whole composition seems heavy. Therefore, the decision to buy a wooden bracket for a shelf should start not with the color of the wood or the decorative pattern, but with a precise fitting of dimensions to the specific location.
The KR-041 bracket is convenient because the same shape is available in four scales. This allows you to maintain a consistent pattern and choose a size for a small furniture detail, a compact shelf, a noticeable cornice, or a large interior accent. But the choice cannot be made on the principle of "the biggest looks more solid." You need to consider the width and thickness of the shelf, the height of the furniture, the distance to neighboring moldings, handles, switches, and door trim, as well as the role of the element: decorative, structural, or mixed.
Separately, you need to distinguish between visual support and the load-bearing system. The KR-041 card does not specify a confirmed allowable load. This means you cannot promise in advance that one or two wooden brackets will independently hold heavy books, a stone countertop, household appliances, or a wide shelf with a large load. The wall material, fasteners, shelf depth, placement of fixation points, and the expected weight must be calculated by a specialist. The KR-041 itself can be chosen as a carved wooden element, and its structural role must be confirmed by a separate project.
Below is a practical route: how to choose one of the four sizes, make a full-size template, determine the quantity, coordinate beech or oak, prepare a technical specification for the craftsman, and place an order in one batch. You can go to the product configurations via the link buy wooden bracket KR-041, but before placing an order, it is useful to go through all the fitting stages.
Why a shelf starts with a bracket, not a board
In everyday perception, you first choose a shelf, and then look for supports for it. For a decorative project, this order often leads to compromises. The shelf is already bought, its depth and thickness are set, and the suitable carved element is either too small, protrudes, or conflicts with neighboring details. As a result, the craftsman tries to adapt the finished composition on site, reduces distances, changes the height, or places the brackets too close to the edges.
A more precise approach begins with the simultaneous selection of three things: the size of KR-041, the dimensions of the shelf itself, and the installation location. They need to be considered as one unit. The bracket defines the lower silhouette, the shelf defines the upper horizontal line, and the wall or furniture facade sets the background. When these three elements are checked together, the composition looks designed, not assembled from random parts.
This is especially important for custom-made furniture. If a carved support must be repeated across several sections, the size affects not just one shelf but the entire rhythm of a cabinet, bookcase, display case, or wall panel. An error made on one sample is then repeated many times over. Therefore, it is better to spend time on a paper template before ordering than to adjust several finished elements after delivery.




What is the wooden bracket KR-041?
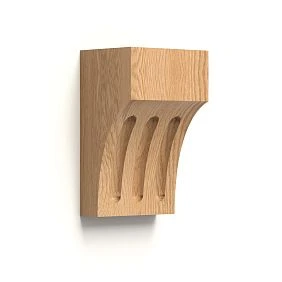
KR-041 is a carved wooden bracket designed for interior and furniture compositions. Its value is not limited to its support function. It forms a transition between a vertical plane and a horizontal element, fills the empty area under a shelf or cornice, supports the classic design of furniture, and helps connect several parts into a single ensemble.
The model is available in four confirmed sizes: 65 × 40 × 31 mm, 81 × 50 × 39 mm, 114 × 70 × 54 mm, and 146 × 90 × 70 mm. The product page offers options in beech and oak, with a "Standard" or "Prestige" sanding finish, as well as preparation for enamel or tinting depending on the selected configuration. The current combination of material, treatment, and finish should be checked directly before ordering.
One shape in several sizes provides an important advantage: the same ornament can be used in projects of different scales. For example, a compact KR-041 can be placed on a small furniture module, a medium one under a shelf or cornice, and a large one used as a noticeable architectural accent. At the same time, the visual connection between rooms or furniture elements is maintained.
| Parameter | Confirmed data | What to check before ordering |
|---|---|---|
| Article number | KR-041 | Specify the article number in the specification and in the message to the manager |
| Product type | Carved wooden bracket | Determine whether it will be decorative or part of a calculated load-bearing system |
| Dimensions | 65 × 40 × 31; 81 × 50 × 39; 114 × 70 × 54; 146 × 90 × 70 mm | Verify the side designations against the product page and drawing |
| Material | Beech or oak | Coordinate with the material of the shelf, furniture, and future finish |
| Sanding | "Standard" or "Prestige" | Select the level of preparation for a specific finishing method |
| Finishing | For enamel or tinting — according to the selected configuration | Check which preparation is available for the required material and size |
| Permissible load | Not confirmed in the provided data | Calculate the wall, fasteners, shelf, and load-bearing scheme separately |
| Main link | KR-041 card | Check current parameters before placing an order |
Our factory also produces:
The main mistake is choosing the size based on a photo
A product photo almost always shows the shape larger than it appears in an interior. The part is shot separately, the background is neutral, and there are no familiar reference points nearby: a door handle, a light switch, shelf thickness, or cabinet height. Therefore, even a size of 65 × 40 × 31 mm may seem like a noticeable support, although in a real composition it will be a small decorative element.
A reverse error occurs when a buyer focuses only on the height figure. They see 146 mm and consider the size moderate, but forget about the width and depth. In a three-dimensional composition, the entire volume matters. The large KR-041 occupies a noticeable area on the vertical plane, casts a shadow, and requires enough free space around it.
The most reliable way is to translate the dimensions from the product card into a physical template. Even a simple paper silhouette immediately shows how close the part is to a handle, molding, furniture edge, or electrical point. This is cheaper and more accurate than evaluating on a screen.
Get Consultation
One shape — four scales
| Size KR-041 | Project role | Where to start fitting | What should not be promised without calculation |
|---|---|---|---|
| 65 × 40 × 31 mm | Small decorative unit | Narrow furniture part, small cornice, compact shelf | That the element is suitable as an independent load-bearing support for a heavy object |
| 81 × 50 × 39 mm | Compact furniture support | Cabinet, display case, small wardrobe, repeating decor | That the chosen distance between elements is universal |
| 114 × 70 × 54 mm | Noticeable medium-sized support | Open shelf, furniture cornice, niche, wall composition | That two pieces are enough for any length and load |
| 146 × 90 × 70 mm | Large interior accent | Tall furniture, wide horizontal line, expressive architectural node | That large size automatically means a higher permissible load |
This table sets a starting point, not a norm. The same size can look different on a light wall, on a dark facade, under a thin shelf, or under a heavy cornice. Therefore, the final choice is made only after fitting to the actual scale.
How to read KR-041 dimensions correctly
A record of three numbers cannot be perceived as a simple designation of height, width, and thickness without checking against the card. For a carved product, the shape is more complex than a rectangular block: one side may describe the overall height, another the projection, and a third the width or depth of the seating area. Before creating a template, you need to open the card and drawing, understand the model's orientation, and only then transfer the dimensions to paper.
If a designer prepares the project, it is useful to specify not only three numbers in the specification but also attach an image with marked sides. This reduces the risk of the craftsman confusing the projection and width, especially when different brackets are used in the project.
When ordering several sizes of one model, it is worth labeling each option separately. The phrase "KR-041 medium" is not precise enough. The documents must include the full article number and the full set of dimensions.
Why the projection is no less important than the height
The buyer often evaluates the bracket frontally and pays attention to the height. But for a shelf, the side silhouette is important. It determines how deeply the support goes under the horizontal part, how the free edge looks, and whether the shelf seems detached from the base.
The bracket does not have to reach the front edge of the shelf. In decorative projects, it can be noticeably shorter. But the difference should look intentional. If the overhang is too small relative to the shelf depth, the support visually gets lost. If it is almost equal to the depth of a thin piece, the composition can become heavy.
This observation cannot be turned into a universal structural formula. The allowable overhang depends on the shelf material, its thickness, length, wall mounting, and load. KR-041 helps select the proportion, but the engineering part is determined by the craftsman.
Full-size template: the most useful stage before ordering
The template is not for presentation aesthetics. It helps check the real volume of the piece in space. For each size under consideration, it is better to make a separate silhouette. You can use paper, cardboard, or thin sheet material that holds its shape.
How to prepare a template
- Open the KR-041 card and write down the full size.
- Check the orientation of the sides against the image or drawing.
- Draw the side silhouette at a 1:1 scale.
- Cut out the outline without reducing or enlarging.
- Label the article number, size, and intended material.
- Attach the template to the wall or furniture at the installation point.
- Add a paper mockup of the shelf with the required thickness and depth.
- Take photos from a normal viewing angle, not just close-ups.
If choosing between two adjacent sizes, it is useful to apply the templates one after another in the same spot. Then the difference is immediately visible. Comparing "by eye" across two browser tabs is significantly less accurate.
What to check around the template
The size may fit on its own, but conflict with the surroundings. On the wall, there may be a switch, outlet, door trim, vertical molding, or panel edge nearby. On furniture, there may be a handle, hinge, facade frame, carved overlay, or adjacent drawer. All these elements need to be considered before ordering.
- Check that KR-041 does not cover a switch or outlet.
- Leave visual breathing room between the bracket and the door trim.
- Verify the bottom point against the height of the furniture and baseboard.
- Check that the bracket does not collide with the door when it is opened.
- Estimate the distance to the furniture handle.
- Match drawing KR-041 with adjacent moldings and rosettes.
- Check the shadow of the element under daylight and artificial lighting.
This control is especially important for the large size of 146 × 90 × 70 mm. It has a more noticeable impact on adjacent areas and requires more free space.
How to photograph a fitting for approval
The photo should show not only the template itself but also the context. One shot is taken directly in front of the composition, the second from the usual entry point of the room, and the third from the side to see the projection. It is useful to include the nearest door, handle, molding, or furniture edge in the frame.
If the client approves the solution, it is better to show two sizes against the same background and from the same distance. Then the choice is based on scale rather than on differences in angles.
The photo also helps the manager or designer understand the task. Together with dimensions and a diagram, it turns an abstract request like "need a beautiful bracket" into a concrete project.
One KR-041, a symmetrical pair, or a series
The quantity depends not only on the shelf length. First, the compositional scenario is determined. One element can be used as a single decorative accent. A pair creates symmetry. A series suits a long horizontal line or repeating furniture sections. But each solution requires its own layout.
| Scenario | What it provides | What to Check | Main risk |
|---|---|---|---|
| One bracket | Central decorative accent | Alignment with shelf or furniture part axis | Accept decorative element as calculated load-bearing support |
| Symmetrical pair | Balanced composition | Equal indents from edges and uniform height | Subtly shift one axis during marking |
| Three or more elements | Support for long horizontal and repeatable rhythm | Equal intervals and connection with furniture sections | Choose distance only by aesthetics without structural calculation |
| Repetition on facades | Unified pattern of the furniture set | Same orientation, size, material, and finish | Ordering parts at different times and getting batch differences |
Why a universal distance between brackets cannot be given
The query "how many brackets are needed for a shelf" sounds simple, but without initial data the answer will be unreliable. You need to know the length, depth, and material of the shelf, its mounting method, expected load, wall type, and the role of KR-041. If the element is decorative, the spacing is chosen based on composition. If it is part of a load-bearing system, the step is determined by a specialist.
Therefore, the article should not offer universal 400, 500, or 600 mm. Such figures without calculation create a false sense of safety. It is better to prepare several visual diagrams and pass them to the craftsman along with the load and base characteristics.
For a long shelf, you can start with compositional division by furniture sections, but the final quantity is approved after a technical check. If a separate metal or wooden load-bearing system is hidden under the shelf, KR-041 can be placed in a decorative rhythm. If there is no separate system, the approach will be different.
How to mark a symmetrical pair
First, determine the central axis of the shelf or furniture module. Then mark equal offsets to the axes of the two brackets. You need to measure not only from the edge of the wall, but also from the horizontal part itself. Unevenness of the wall or furniture body can cause visual misalignment.
After initial marking, apply two identical templates and step back a few meters. At close range, a small error is unnoticeable, but at a glance it is immediately visible if one side seems heavier.
It is useful to check the height with a laser level or other precise marking. A carved contour can distract the eye, so you should rely on base planes and axes.
How to mark a series under a long horizontal line
The series should be tied to the furniture's architecture. If the cabinet is divided into three sections, it is often logical to align the brackets with the boundaries of these sections or their centers. If the shelf is in a niche, consider the side margins and the central axis.
First, create a diagram on paper or in the project, then transfer the axes to the wall. Do not start by attaching the outermost element and "spacing the rest by eye." A small error in the first interval on a long composition leads to a noticeable shift of the last element.
When repeating KR-041 on several identical facades, a unified marking template is needed. It reduces the risk that each piece ends up at a slightly different height.
What affects the overall height of the composition
The bracket cannot be evaluated in isolation. Its own size, shelf thickness, distance from the floor, furniture height, adjacent trim, and decorative frames all affect the overall height. Even a small KR-041 can look expressive if placed under a thin shelf at eye level. A large element can get lost under a very tall, wide structure.
When fitting, it is useful to mark not only the bracket's outline on the wall but also the top line of the shelf. This shows how much space the entire assembly takes up. If the project includes a molding frame, it should also be applied to the template or painter's tape.
The bottom point is checked relative to furniture, baseboard, and walkway. A large element placed too low can interfere with cleaning or visually "press down" on the lower part of the wall. This is not a universal prohibition, but a reason to evaluate the specific interior.
KR-041 for a small open shelf
For a compact shelf, fitting often starts with sizes 65 × 40 × 31 or 81 × 50 × 39 mm. But you cannot automatically choose the smaller option. If the shelf is thick, has a pronounced cornice, or is located on a large empty wall, a small bracket may get lost.
The shape of items on the shelf also matters. A light decorative object requires one visual scale, a row of books another, although the load-bearing part is still calculated separately. The template helps to understand proportions specifically.
Before ordering, you need to decide whether the shelf will have hidden mounting. If yes, KR-041 can play a decorative role. If not, the craftsman must determine how much load each node takes.
KR-041 for a furniture cornice
On a cabinet or library, the bracket often works as a transition between the vertical post and the protruding cornice. Here, the connection with the post width is important. A too narrow element looks like a random overlay, a too wide one goes beyond the logic of the body.
For an average furniture module, you can start fitting with 81 × 50 × 39 or 114 × 70 × 54 mm. The large option 146 × 90 × 70 mm is appropriate when the furniture itself has sufficient height, wide posts, and a noticeable top belt.
For a serial order, it is better to receive all elements in one batch, with the same material and level of sanding. This is especially important for tinting, where the shade and wood grain remain visible.
KR-041 for a niche and wall composition
In a niche, the bracket can finish the shelf, support the cornice, or connect the side plane with the top horizontal. Here, you need to check not only the size but also the distance to the corners. The carved contour should not look squeezed between two walls.
If the niche is illuminated, the shadow becomes part of the composition. A large relief creates a more noticeable pattern. Therefore, it is useful to check the template with the lighting turned on.
In the wall composition KR-041 can be combined with moldings, but the patterns should support each other. If the frame is very thin and modern, a large carved bracket may become too active. In this case, it is worth selecting brackets by size and shape and comparing several solutions.
KR-041 for a dresser, nightstand, and display cabinet
On small furniture, the bracket can be placed under the tabletop, cornice, or protruding decorative strip. Its scale needs to be coordinated with the legs, handles, and height of the facades. If all details are active, the composition becomes overloaded.
The compact dimensions of KR-041 allow using one shape on several pieces of the furniture set. For example, the same ornament can be repeated on nightstands and a display cabinet, changing the scale only after careful fitting.
It is necessary to check the opening of doors and drawers. Even if the bracket does not touch them when closed, a protruding handle or facade may catch the element during movement.
KR-041 in a commercial interior
In a cafe, salon, hotel, or showroom, carved brackets can be repeated on the counter, display case, shelves, and portals. Seriality enhances the recognizability of the interior but requires precise specification. An error in size will be repeated in many areas and become expensive to fix.
For a commercial project, it is important to separate the sample from the main batch. You can first order or approve one configuration, test it in real lighting, and only after approval launch the set. The terms of this approach should be clarified with the manager.
In addition to the visual part, the craftsman must calculate the operational load. A shelf in a restaurant or store may be used more intensively than a home decorative composition.
Beech or oak for KR-041
The choice of wood species is primarily related to the finish and neighboring parts. Beech is often considered for a project under enamel, when the texture should be hidden by color. Oak is chosen when you want to preserve a noticeable wood grain under tinting or a transparent coating. But the final configuration depends on the card of the selected size.
| Criterion | Beech | Oak |
|---|---|---|
| Typical project | Enamel painting or colored finish | Tinting with preservation of the wood grain |
| Combination with furniture | Appropriate when neighboring parts are also designed for painting | Appropriate next to oak or textured wooden elements |
| Paired order | Order in one batch and prepare uniformly for finishing | It is especially important to match the grain and shade for visible pairs |
| What to check | Availability of the required preparation for enamel | Matching the tint to the shelf and adjacent parts |
One cannot claim that one species is "better" without relation to the project. What matters more is that the bracket, shelf, molding, and furniture carcass accept the chosen finish equally. With a transparent coating, mixing species is more noticeable.
From the material block, you can return to the product card and choose KR-041 in beech or oak with the current configuration.
'Standard' or 'Prestige'
The sanding level should be linked to the future finish and project requirements. For painting and complex final preparation, one configuration may be important; for visible tinting, another. One cannot automatically assume that a higher processing option eliminates all the craftsman's work.
Before ordering, you need to clarify what exactly is included in the selected level and coordinate this with the painter or carpenter. Especially if the brackets will be close to eye level or under directed light that emphasizes the relief.
The specification should state not just "well polished," but the exact name of the option from the card: "Standard" or "Prestige."
For enamel or for tinting
Preparation for enamel involves a project where the color unites the bracket with the shelf, furniture, or wall decor. Here, it is important to choose the shade and coating system in advance so that the relief does not lose its expressiveness under a too-thick layer.
Tinting preserves the wood grain and makes differences between parts more noticeable. Therefore, paired brackets are best ordered simultaneously and finished in one cycle. If one element is purchased later, a match in shade is not guaranteed.
Current availability of preparation for a specific size and material should be checked in the product card or with a STAVROS manager.
Why paired elements are best ordered in one batch
Natural wood has differences in grain and shade. Under enamel, they are less noticeable; under tinting, they are more so. If two brackets are symmetrically placed and close together, even a small difference is perceived more strongly.
Ordering simultaneously helps fix identical parameters: size, wood species, sanding, and preparation. In the message to the manager, it should be clearly stated that the elements form one visible pair or series.
For a project with a reserve, a spare element is also better purchased together with the main batch. It will be useful in case of damage, furniture changes, or expansion of the composition.
How to calculate the quantity of KR-041
First, count not the meters of shelf, but the installation points. For each section, determine the scenario: a single element, a pair, or a series. Then sum the quantity across all sections and decide whether a reserve is needed.
| Project | Original scheme | Base quantity | What to clarify |
|---|---|---|---|
| One decorative shelf | Symmetrical pair | 2 KR-041 | A separate support system and permissible load |
| Two identical shelves | A pair under each | 4 KR-041 | Unified axes and the same height |
| Cabinet with three sections | One element at each vertical | Quantity according to the approved scheme | Connection with facade division and cornice |
| Four identical furniture modules | Same pair on each | 8 KR-041 | Order in one batch and common marking template |
| Commercial project | Series across multiple areas | Sum per specification plus agreed reserve | Sample, marking, and distribution by zones |
Reserve has no universal percentage. For a pair in a home interior, the base quantity may be sufficient, while for a large project a spare element reduces the risk of a complex reorder. The decision depends on budget, project timeline, and the possibility of reordering.
How to create a room-by-room list
For an apartment, house, or commercial property, it is useful to keep a separate table. It specifies the room, area, KR-041 size, quantity, material, finish, and notes. This prevents mixing similar configurations.
| Room | Section | Size | Quantity | Material | Finish | Note |
|---|---|---|---|---|---|---|
| Living room | Shelf in a niche | Specify full size | According to the approved scheme | Beech or oak | Enamel or tinting | Check the backlight and adjacent molding |
| Office | Library cornice | Specify full size | By number of sections | Beech or oak | Coordinate with furniture | All parts from one batch |
| Hallway | Small console | Specify full size | One or a pair | Beech or oak | As per project | Check the passage and door trim |
Such a list is useful not only for the customer but also for the installer. It links the product specification to the actual installation location.
How to calculate the quantity for multiple rooms
First, a separate diagram is made for each room. In the living room, there may be one pair under a shelf, in the study — a series on the bookcase, in the hallway — two elements under a console. After that, quantities are summed only within the same configuration. Different sizes or materials cannot be combined into one line.
For example, if the living room needs two KR-041 units measuring 114 × 70 × 54 mm in oak, and the study needs six KR-041 units measuring 81 × 50 × 39 mm in beech, these are two separate items. Even if the article number is the same, the configurations are different.
For a large order, it is convenient to assign a code to each zone: G-1, K-1, P-1. This code can be used on packaging and in the installation sheet. It speeds up the distribution of parts on site and reduces the risk of accidentally installing the wrong size.
How to determine if a reserve is needed
A reserve is especially useful in a series project where several identical brackets are located nearby. If one part is damaged during installation or finishing, a late reorder may differ in wood grain or production time. A spare element received with the main batch reduces this risk.
For a single home pair, a reserve may be unnecessary. The decision depends on budget, timelines, and the complexity of reordering. In a commercial interior, where a halt in installation affects the opening of the facility, a reserve usually has greater practical value.
You cannot assign a universal five or ten percent. For a small batch, the percentage approach gives a strange result, so it is better to calculate specific spare items.
What to pass to the installer before installation
The installer should not receive only a box with parts and a photo from the catalog. They need a diagram showing axes, height, distances, base material, and the role of KR-041. The more accurate the technical specification, the fewer decisions will have to be made on site.
- Article number KR-041.
- Full size of each configuration.
- Quantity for each section.
- Beech or oak.
- "Standard" or "Prestige".
- Future finishing.
- Installation height.
- Distance between axes.
- Material of wall or furniture.
- Dimensions and material of the shelf.
- Expected load.
- Presence of a separate support system.
- Diagram of adjacent moldings, handles, and electrical points.
If the load diagram has not yet been calculated, this must be clearly noted. An engineering solution cannot be replaced by an assumption that a carved wooden element "should hold."
How to check the base
The type of wall or furniture determines the fasteners and installation method. Concrete, brick, drywall, framed partition, solid wood, and MDF require different solutions. These solutions should be chosen by a specialist considering the load and structure.
Before ordering, it is useful to find out whether there are embedded elements, where hidden utilities run, and whether it is possible to secure in the calculated point. Sometimes a visually convenient location cannot be used without relocation or reinforcement.
For furniture, it is necessary to check the panel thickness, the location of internal partitions, and the possibility of access to the fasteners. The decorative diagram must correspond to the actual structure of the cabinet.
How to coordinate the installation height
The height cannot be chosen only based on marking convenience. It depends on the overall height of the shelf, furniture, and room. The same KR-041 at eye level is perceived more actively than under a high cornice.
On the wall, it is useful to mark not only the bracket axis but also the lower and upper points. Then check the composition from several places: sitting, standing, from the entrance, and from the side. In the hallway, it is necessary to consider human movement and door opening, in the living room — the main viewing points.
If several shelves are located one above another, their brackets must form a clear vertical system. Random displacement of one pair destroys the overall order.
How to align the distance between axes
The distance between axes is a design parameter, not a product characteristic. For a decorative pair, it is chosen based on the shelf width and composition. For a structural system, the pitch is determined after calculating the load and the base.
In the technical specification, it is better to specify the distance between axes rather than between the edges of the carved contour. The axis is easier to transfer to the wall and check with a tool. For a series, the coordinate of each point is recorded, or the initial offset and repeating pitch, if it is indeed uniform.
After marking, the templates are applied simultaneously. This allows you to see whether the pair is too compressed and whether the outer elements extend to the edges of the shelf.
How not to confuse a decorative bracket with a universal load-bearing support
KR-041 may look like a full-fledged support, but the appearance does not confirm the permissible load. The card does not have a verified value that could be used as an engineering characteristic. Therefore, the shelf cannot be calculated based only on the size of the wooden element.
In the project, different scenarios are possible: KR-041 works together with a calculated fastening; the hidden system takes the main load, and the bracket decorates the joint; the master separately confirms the structural role of the product. All three options are acceptable only after verification.
If you need general advice on product types, it is useful to read the material how a furniture bracket differs from a decorative one.
KR-041 and the metal hidden system
In some projects, the main load is taken by a hidden metal structure, while wooden elements form the visible decor. This allows placing KR-041 along compositional axes without tying every detail to a load calculation.
But the presence of a hidden system cannot be assumed. It must be designed, selected for the wall and shelf, and then coordinated with the placement of wooden parts. The fasteners must not conflict in depth or installation points.
In the technical specification, it is necessary to clearly separate: what carries the load and what forms the composition.
How to prepare a project for a drywall wall
Drywall itself does not mean that a shelf cannot be installed, but the solution depends on the frame, embedded elements, and load. Before finishing, reinforcement can be provided at the necessary points. If the wall is already finished, a specialist must determine available mounting points and the permissible scheme.
The KR-041 template helps to link decorative axes with embedded elements in advance. Sometimes it is necessary to slightly change the distance between elements so that the fastening hits the calculated points. Such a change is better made at the design stage, not after purchase.
The article does not provide universal dowels or screws: fasteners are selected for the specific base and load.
How to prepare a project for a furniture cabinet
On furniture, the bracket can be attached to a post, side panel, cornice, or an additional mounting part. You need to know the material thickness, the presence of internal partitions, and access to the back side. The decorative placement must coincide with a structurally suitable zone.
If the cabinet is made of MDF or another panel material, the craftsman evaluates the fixing method separately. It cannot be assumed that any screw is suitable just because the part is small.
For serial furniture, it is useful to make a jig or a single marking template. It ensures the same position of all KR-041.
How to choose KR-041 for repairing existing furniture
When updating a finished cabinet or display case, first inspect the body. You need to check whether the bracket will cover old holes, whether it will collide with the door, and whether there is a sufficiently strong area for mounting.
Then make a template and check it together with existing handles, moldings, and legs. The new carved element should support the furniture, not look like a late random addition.
If the old finish is preserved, it is better to compare the color sample with beech and oak in person. The screen does not convey the exact shade and wood grain.
How to choose KR-041 for new custom furniture
In a new project, there are more possibilities. The bracket size can be coordinated with the width of the post, the depth of the cornice, and the size of the facades before the body is manufactured. This allows avoiding compromises.
It is useful for the designer to include KR-041 in the drawing as a separate item, specify the full size, and create a scaled visualization. But even after visualization, a paper template remains useful: the real room may be perceived differently.
All paired and repeating elements are ordered in one batch and distributed among modules before finishing.
What to buy together with KR-041
The bracket itself rarely exists separately from the project. A shelf or furniture cornice, suitable finishing, calculated fasteners, and sometimes other decorative elements are needed. But links in the article are placed only on confirmed pages from the scheme.
| What to add to the project | Why | What to Check | Useful transition |
|---|---|---|---|
| Shelf or furniture cornice | Forms the upper horizontal | Depth, thickness, material, and load | Selected per project |
| Fastening calculation | Determines the safety of the node | Wall, embedded parts, fasteners, and weight | Performed by a specialist |
| Other brackets | Allow comparing shape and scale | Size, material, and style | View all wooden brackets |
| General selection material | Helps assess the role of the support in the interior | Do not replace precise fitting of KR-041 with general advice | How to choose a wooden shelf bracket |
How to choose between KR-041 and another shape
KR-041 is suitable when its carved pattern supports the furniture or architecture of the room. If the interior is very minimalist, the shape may be too active. In this case, it is better to compare other options without changing the selection criteria: size, projection, material, finish, and role in the structure.
You should also choose a different model when none of the four sizes provides the correct proportion. Do not try to compensate for an unsuitable scale with distance or random trimming.
For an extended selection, you can selecting brackets by size and shape, while maintaining the same logic of the full-size template.
How to distinguish KR-041 from a random wooden blank
A finished carved bracket has a specific shape, size range, and material options. A random blank may be similar in overall silhouette but not match in proportions, surface quality, and repeatability. For a single experiment, this is sometimes not critical, but for a pair or a series, the differences become noticeable.
KR-041 is convenient because you can order several identical elements of the same model. This is important for furniture, where symmetry and repeatability are perceived more strongly than on a single wall.
Before ordering, you still need to check the card of the selected configuration: the finished product does not cancel the design of the node.
Mistakes when choosing KR-041
Choosing only based on a large photo
The photo does not show the scale next to real furniture. A 1:1 template and a shot from a normal viewing point are mandatory.
Considering the largest option the most reliable
Size does not replace the confirmed permissible load. The structure is calculated separately, regardless of the visual massiveness of the part.
Ignoring the shelf depth
The side silhouette affects perception no less than the frontal one. Too short an overhang looks random, too large can weigh down the node.
Not considering the adjacent trim or switch
The bracket may physically fit, but the composition may end up cramped or inconvenient for installation.
Ordering a pair at different times
Material and shade may differ. It's better to order at the same time, especially if tinting is planned.
Mixing beech and oak under a clear finish
The difference in texture will be noticeable, especially on symmetrical elements placed nearby.
Not passing the load and wall material to the master
Without this data, it's impossible to correctly select fasteners and the load-bearing scheme.
Marking the series "by eye"
The error accumulates and becomes noticeable on a long horizontal line or repeating facades.
First order, then come up with the shelf
The bracket, shelf, and installation location need to be designed together, not sequentially adjusted to each other.
Confusing decorative function with structural
A beautiful carved element does not automatically gain engineering characteristics. Without calculation, safety of a heavy shelf cannot be promised.
Ordering mistakes
Even the correct size can be ordered incorrectly if the full set of parameters is not specified. Phrases like "two medium oak ones" or "need the same as in the photo" are insufficient. They do not specify size, sanding, future finish, or the purpose of the pair.
- Full size not specified.
- Material not specified.
- Sanding level not selected.
- Preparation for finish not agreed upon.
- Not noted that the elements form a visible pair.
- Quantity not calculated for all rooms.
- No reserve is provided for a large project.
- No fitting diagram or photo is attached.
- The expected load is not specified.
- The material of the wall or furniture is not reported.
An accurate order reduces the risk of rework and helps the manager check the configuration. Before sending the specification, it is useful to open the card again and verify each line.
How to accept a batch after delivery
First, check the article number, dimensions, quantity, and material. Paired elements are laid out side by side in the same orientation. Assess the overall pattern, surface, and compliance with the selected preparation. If the order includes multiple sizes, they must not be mixed in one group without marking.
If parts are to be tinted, it is useful to view them under daylight and artificial lighting. Natural differences in wood do not disappear, but for a visible pair it is important to understand in advance how they are perceived together. Under enamel, primarily check the shape, surface, and absence of accidental damage.
Before finishing and installation, each part must be checked against the room schedule. Marking helps avoid confusing sizes and installation zones. For a large project, it is useful to photograph the distribution before sending it to the painting workshop.
How to store KR-041 before installation
Wooden elements should be stored in conditions suitable for interior products, protecting them from moisture, sudden changes, and mechanical damage. Specific requirements are best clarified with the manufacturer and craftsman, especially if installation is delayed.
Paired parts should not be placed in different boxes without marking. It is better to keep them together to avoid confusion during finishing. Between carved surfaces, a safe padding that leaves no marks can be provided.
It is not recommended to use the finished bracket as a template for dirty construction work. A paper mock-up has already been created for marking. This protects the surface from dust, paint, and accidental impacts.
How to prepare KR-041 for finishing
Before applying the coating, the craftsman checks the surface, the selected sanding level, and compatibility with the finishing system. It cannot be automatically assumed that the product is ready for any varnish, enamel, or tinting without preparation.
Paired elements are finished in one cycle, with the same materials and the same number of layers. This is especially important for tinting. A shade test is best done on a suitable sample or in an inconspicuous area in agreement with the craftsman.
If the bracket must match the color of finished furniture, the name of the shade alone is not enough. A physical sample or an approved coating system is required.
How to check the finished finish before installation
After painting or tinting, the elements are laid out in pairs again. The uniformity of color, readability of the relief, and the absence of noticeable differences between parts that will be placed next to each other are checked.
Directional light can reveal what is not visible under normal lighting: too thick a layer in recesses, differences in gloss, or traces of processing. Therefore, the check is carried out under conditions close to the future interior.
Mounting zones should not be accidentally covered with material if it interferes with the selected mounting system. This issue is coordinated by the foreman.
Who KR-041 is suitable for
The model suits a buyer who needs a carved wooden element with one shape in several scales. It is convenient for custom furniture, open shelves, cornices, niches, and repeating interior patterns.
KR-041 is especially useful when the project can be measured in advance and shown on a template. Then four sizes become a clear selection tool rather than a random assortment.
The model is also suitable for projects where the choice of beech or oak and subsequent uniform finishing with furniture matters. For a symmetrical pair or series, all parameters can be fixed in advance and a coordinated set can be obtained.
When it's better to choose another solution
Another bracket is needed if the KR-041 pattern does not support the interior style, no size matches the proportions, or a confirmed load-bearing system with a specific load that is not in the card data is required.
KR-041 should not be used just because it was liked separately from the furniture. First, the entire composition needs to be checked. Sometimes a calmer shape better connects the shelf with a modern interior.
If the shelf must hold heavy equipment or a stone element, the main focus is on engineering calculation. The decorative shape is chosen after confirming a safe structure.
How to buy KR-041 on STAVROS
First, select the two most likely sizes and make templates. After fitting, fix one option, material, sanding level, finish, and quantity. Then open the card and buy wooden bracket KR-041 in the agreed configuration.
For a pair or series, specify that the elements are installed next to each other and belong to the same project. Attach a fitting photo and a list if the order is large. The more accurate the initial data, the easier it is to check the configuration before launch.
The current price, availability, timelines, and availability of a specific combination must be checked before placing an order. They are intentionally not fixed in the article to avoid misleading the buyer.
Ready order specification
| Field | What to specify |
|---|---|
| Article number | KR-041 |
| Size | 65 × 40 × 31; 81 × 50 × 39; 114 × 70 × 54 or 146 × 90 × 70 mm |
| Quantity | According to the list of areas |
| Material | Beech or oak |
| Sanding | "Standard" or "Prestige" |
| Finishing | For enamel or tinting — according to available configuration |
| Scenario | Single element, pair, series, or repetition on furniture |
| Installation | Height, axes, base material, shelf dimensions |
| Load | Indicate the estimated weight and submit for a separate calculation |
| Note | All elements of one visible pair or series |
Pre-payment checklist for the order
- Size confirmed with a full-size template.
- Orientation of three sizes checked against the card or drawing.
- Quantity counted for all rooms.
- Paired and serial items combined into one batch.
- Material coordinated with the shelf and furniture.
- Sanding recorded with the exact name.
- Future finish coordinated with the craftsman.
- Base and load transferred to a separate calculation.
- Installation axes marked on the diagram.
- Handles, doors, switches, and trim have been checked.
- The decision on the reserve was made deliberately.
- The current configuration has been verified in the card.
FAQ: questions about choosing and ordering KR-041
Which query is better to use if I have already chosen a model?
Search by article number KR-041 and full size. This reduces the risk of opening a different model or configuration.
Which size of KR-041 is suitable for a narrow shelf?
Start with trying 65 × 40 × 31 or 81 × 50 × 39 mm, but do not place an order without a template. Thickness, shelf depth, and wall scale may require a different option.
Can I immediately take the largest size?
Only after trying. The size 146 × 90 × 70 mm creates a large accent and requires free space.
How many brackets are needed for one shelf?
The quantity depends on the composition and the load-bearing calculation. For symmetry, a pair is often considered, but this is not a universal structural standard.
What distance should be left between the brackets?
There is no universal value. It is determined by the length and material of the shelf, the wall, the load, and the chosen mounting system.
Is the permissible load for KR-041 confirmed?
In the provided card data, there is no confirmed value. The base, fasteners, and load-bearing scheme must be calculated separately.
Can KR-041 be used only as decoration?
Yes, if the main load is taken by another calculated system. Such a separation must be fixed in the project in advance.
How to make a full-size template?
Check the orientation of the dimensions on the card, draw a side silhouette at 1:1 scale, cut it out, and attach it together with the shelf mockup.
Do I need to make templates for all four sizes?
Not necessarily. Usually, two adjacent options between which you are choosing are sufficient.
Beech or oak better under white enamel?
Beech is often considered for enamel, but the final choice depends on the available configuration and furniture project.
When is it better to choose oak?
When it is important to preserve a pronounced wood grain under tinting or transparent finish.
Should I order a pair at the same time?
Yes, especially for tinting. This makes it easier to coordinate material, processing, and overall appearance.
What does "Standard" and "Prestige" mean?
These are sanding options from the card. Exact content and availability need to be checked before ordering and coordinated with the finishing craftsman.
Can KR-041 be painted together with the shelf?
A unified finish can be planned if materials and preparation are compatible. The coating technology is determined by the craftsman.
Will KR-041 suit a stone countertop?
This cannot be stated without a separate calculation. A stone part requires a confirmed support system.
Can KR-041 be installed on drywall?
It depends on the frame, embedded elements, fasteners, and load. A specialist makes the decision after inspecting the base.
How to avoid hitting hidden wiring?
Before drilling, check utilities and choose safe mounting points.
Which is more important: height or bracket depth?
Both parameters. Height determines the frontal scale, depth determines the side profile and connection to the shelf.
Can different sizes of KR-041 be used in the same room?
Yes, if it is justified by different furniture scales and maintains a consistent pattern. It's better to verify the solution with templates.
How to calculate the reserve?
There is no universal percentage. For a large or commercial project, a spare element is more useful than for a single home pair.
What to send to the STAVROS manager?
Article number, full size, quantity, material, sanding, future finish, a photo of the template, and an indication that the parts form a pair or a series.
Where can I see other models?
You can View all wooden brackets and compare the shape, size, and material.
Where can I read general material on selection?
For extended context, open the article How to choose a wooden shelf bracket.
How does the article about KR-041 differ from the general overview of brackets?
Here, four sizes of one model are considered, a full-size template, quantity calculation, and preparation of the specification for a specific order.
Can I order one bracket to check the scale?
The possibility and conditions need to be clarified with the manager. For a large project, a sample can help, but the main visible batch is better to agree on together.
Do I need to account for the thickness of the finish coating?
Yes, if it affects installation, joints, or readability of the relief. The technology is determined by the finishing master.
Can KR-041 be trimmed if the size doesn't fit?
Unauthorized trimming may compromise the shape and fit. It's better to choose a suitable size or another model before ordering.
How can I check that the bracket won't interfere with the door?
Attach the template, fully open the door, and check the trajectory of the facade and handle.
Do I need to account for the baseboard and trim?
Yes. They form adjacent verticals and lower boundaries of the composition, especially in the hallway and near the door.
Can KR-041 be used for multiple identical shelves?
Yes, if proportions and construction are confirmed for each shelf. Use a single marking template for repetition.
How to record the size selection for the installer?
Specify the full size in the statement, attach a printed template and a diagram with axes.
Test assembly without permanent fastening
Before final installation, it is useful to assemble the composition in a provisional form once more. The shelf is supported temporarily in a safe manner, and KR-041 templates are secured with removable tape or another method that does not damage the finish. The purpose of this stage is to check not strength, but the position, scale, and connection of all parts. The temporary assembly must not be used for load testing.
The test fitting is carried out after the actual thickness of the shelf is known and the main finishing work is completed. Sometimes the real wall color, enamel gloss, or cornice thickness change perception compared to an early sketch. If the template seems too large or too small, the size can still be adjusted before placing the order.
At this stage, three lines are checked: the upper horizontal of the shelf, the lower points of the brackets, and their vertical axes. For a pair, mirror symmetry is important; for a series, equal intervals or an exact connection with furniture sections. Measurements are recorded in the installation diagram, not left only on the wall.
How to check the project after the final finishing of the room
The color and texture of the background significantly affect the carved decor. On a contrasting wall, a small KR-041 reads more actively than on a surface of a similar shade. Glossy enamel and directed light enhance the relief, while matte finish makes it calmer. Therefore, the final fitting is best done under conditions close to future use.
If switches, trims, or molding frames were installed later, the free zones need to be checked again. Even a few centimeters of change can disrupt the composition. Special attention is paid to the opening of doors and furniture fronts: a finished handle sometimes protrudes more than a temporary one.
For a commercial project, it is useful to approve one fully completed section. It is used to check the size, color, height, distance between axes, and the nature of the shadow. Only after written or recorded approval is the scheme repeated on the remaining sections.
How to transfer a project from a designer to an installer without losing information
Beautiful visualization is not enough. The installer needs a sheet with dimensions, axes, and references to real surfaces. It marks the article KR-041, full size, quantity, height from finished floor, distance from shelf edge, and base material. A separate line indicates that the product's allowable load is not confirmed by the card and the load-bearing part is calculated independently.
If the designer used multiple scales of KR-041, each is marked with its own code. For example, KR41-65 and KR41-114. These codes are repeated in the list, on packaging, and in the diagram. This approach eliminates the situation where a craftsman relies on visual similarity and installs a compact part in place of a large one.
After transferring documents, it is useful to conduct a short verification on site. The designer shows the central axes, the craftsman confirms the possibility of mounting, and the client approves the appearance. Decisions affecting load and safety are recorded by the responsible specialist.
Result: from photo to precise configuration
KR-041 should be chosen not as a beautiful carved detail separate from the interior, but as part of a specific assembly. Four sizes allow you to select a scale for small furniture, an open shelf, a cornice, or a large composition. But the right choice appears only after a full-size template, checking adjacent elements, and coordination with the craftsman.
Before ordering, you need to record the full size, quantity, material, sanding, finish, and the role of the bracket. The wall, fasteners, shelf, and load are calculated separately, since there is no confirmed allowable load in the card.
This approach turns the customer's journey into a clear sequence: see KR-041, choose the scale, try the template, compile a specification, and order one agreed batch from STAVROS. As a result, the decorative bracket does not look like a random addition, but becomes part of a pre-planned piece of furniture or interior composition.