Article Contents:
- Polyurethane as a material: technology and advantages
- Moldings: architectural lines of space
- Ceiling cornices: transition between planes
- Baseboards: foundation of composition
- Pilasters and Half Columns: Vertical Architecture
- Rosettes, brackets, and consoles: focal accents
- Panels and 3D decor: volumetric wall finishing
- Systemic approach: creating a cohesive composition
- Installation: professional mounting technology
- Stylistic solutions: From classic to modern
- Care and longevity: investment in the future

Modern interior finishing requires materials that combine the beauty of classical moldings with the practicality of modern technologies.polyurethane decorative elementsThey perfectly solve this task — they replicate the elegance of plaster moldings but lack their drawbacks: weight, fragility, installation complexity, and high cost. Polyurethane has revolutionized decorative finishing, making solutions previously reserved for palaces and mansions accessible. Today, any interior can achieve architectural expressiveness, volume, and classic elegance through a systemic approach to decorating with polyurethane elements.
Why is a systemic approach so important? Because true interior beauty is created not by individual elements, but by their interaction, harmony of forms, repetition of motifs. Wheninterior molding systemdesigned as a unified system — cornices harmonize with moldings, rosettes repeat the ornament on pilasters, baseboards visually connect with door frames — the very completeness emerges that distinguishes professional design.Polyurethane finishing systemallows creating this unity by using elements from a single collection with a consistent stylistic language, uniform quality of execution, and coordinated dimensions. Moreover, the polyurethane system solves not only aesthetic but also practical problems: conceals utilities, masks defects of base surfaces, visually corrects room proportions, and creates a basis for concealed lighting.


Polyurethane as a material: technology and advantages
Polyurethane is a synthetic polymer obtained by reacting polyols with isocyanates. For producing decorative elements, a special high-density polyurethane composition is used, which, after curing, acquires hardness, strength, and shape stability. Production is carried out by casting into silicone or metal molds, enabling elements with exceptional relief detail and precision in replicating the finest ornament details.
The density of decorative polyurethane is 300-500 kilograms per cubic meter, which is 3-4 times less than plaster. This is critical for installation: lightweight elements do not create load on walls and ceilings, do not require heavy fasteners, and can be installed even on gypsum board structures without risk of collapse. A 2-meter-long plaster cornice weighs 15-20 kilograms, while a polyurethane one weighs only 3-5 kilograms, making installation physically easy and accessible even for one person.
Water resistance is one of the key advantages of polyurethane over plaster. Polyurethane absolutely does not absorb water, does not swell, does not deform, and does not lose strength upon prolonged contact with moisture. This allows usingpolyurethane moldingin bathrooms, kitchens, pools, saunas — anywhere where plaster is unacceptable due to the risk of damage. Moreover, polyurethane is successfully used for facade decoration, where elements are exposed year-round to rain, snow, and temperature fluctuations.
Polyurethane's temperature stability ensures preservation of shape and properties within a range from minus 60 to plus 80 degrees Celsius. Summer heat or winter frost do not cause deformations, cracks, or changes in linear dimensions. This is especially important for facades and spaces with significant temperature fluctuations.
Polyurethane's impact resistance is significantly higher than plaster's. Plaster molding is brittle — upon impact, pieces chip off, and relief details are damaged. Polyurethane is elastic and can absorb impacts without breaking. Accidentally hitting a polyurethane cornice while rearranging furniture, in the worst case, you'll get a small dent, but not a chip or crack, as with plaster.
The longevity of quality polyurethane decoration is measured in decades. The material does not age, does not fade, does not yellow, and does not lose properties over time. The only thing that may require attention after years — repainting, if the elements were painted. The polyurethane itself remains unchanged.
Ease of processing — polyurethane elements are easily cut with a fine-toothed hacksaw, a circular saw, or an electric jigsaw. No special tools are needed, unlike for cutting plaster or stone. Cuts are clean and smooth, do not crumble. Elements can be trimmed to fit the space, cut to the required length, and form joints at any angle.
Economic efficiency — at comparable visual quality, polyurethane elements cost 2-3 times less than handcrafted plaster analogs. Mass production by casting allows obtaining identical elements at an affordable price. Cost savings are also achieved during installation — the ease of installation reduces labor costs, thus lowering the cost of work.


Moldings: architectural lines of space
Moldings made of polyurethaneare decorative strips with relief profiles that create architectural divisions on walls, ceilings, and furniture. Moldings are a universal decorating tool, allowing to structure flat surfaces, create visual frames, frame functional zones, and hide joints between different materials.
The profile of molding determines its character and application. Simple moldings with rectangular or rounded cross-sections — for minimalist modern interiors where delicate structuring without excessive decoration is needed. Classical moldings with order elements — egg-shaped ornament, rosette, acanthus — for classical and neoclassical interiors requiring historical authenticity. Baroque moldings with lavish floral ornament, scrolls, and flowers — for luxurious, decorative palace-style interiors. Art Deco moldings with geometric stepped profiles — for interiors from the 1920s–30s and their modern interpretations.
Molding sizes vary from miniature 20–30 mm high for furniture decoration to large 150–200 mm for spacious rooms with high ceilings. Choosing the right size is critical: too small a molding in a large room will be lost, too large in a small room — it will overwhelm the space.
Applying moldings on walls transforms a flat painted or wallpapered surface into an architectural composition. Horizontal moldings at 70–100 cm from the floor visually divide the wall into base and main sections, creating a classic finish scheme. Vertical moldings imitate pilasters, creating rhythmic vertical accents. Rectangular frames from moldings on walls form panels, lattices, visually structuring the space. Moldings around door and window openings create portals, enhancing the significance of openings.
Application on ceilings — moldings divide the ceiling into zones, create coffers, frame the central part with a chandelier. This visually reduces overly high ceilings or adds interest to standard ones. Ceiling molding around the room perimeter creates a visual frame, a sense of completion.
Application in furniture — moldings decorate cabinet and commode facades, transforming flat doors into decorative panels. Molding around the countertop creates an elegant frame. Moldings on furniture base add solidity.
Moldings as masking — behind a horizontal molding, you can hide electrical wiring, LED strip for concealed lighting, or boundaries between different finishing materials. Molding turns a technical necessity into a decorative solution.
Flexible polyurethane moldings allow decorating curved surfaces — arches, rounded walls, bay windows. They bend without heating, taking the required shape, which is impossible with rigid plaster or wooden analogs.
Our factory also produces:


Ceiling cornices: transition between planes
Polyurethane ceiling cornices— decorative strips installed at the junction of wall and ceiling. A cornice performs several functions simultaneously: aesthetic — creates a visual transition between vertical and horizontal surfaces, masking — hides irregularities at the junction, functional — can serve as a base for concealed lighting.
Cornice profiles vary in complexity and height. Simple cornices 50–80 mm high with a minimalist profile suit rooms with 2.5–2.7 m ceilings and modern aesthetics. Medium cornices 100–150 mm with classical decorative elements — for standard interiors with ceilings around 3 m. Tall cornices 200–300 mm with rich ornament — for spacious rooms with ceilings from 3.5 m, where monumentality and palace luxury are needed.
Cornices with lighting — special profiles with a ledge or niche for placing LED strips. Light is directed upward toward the ceiling or downward toward the wall, creating soft, atmospheric perimeter lighting. This is a modern technique visually increasing ceiling height, creating a floating ceiling effect, adding modern technological sophistication to the interior while preserving the classic elegance of the cornice.
Corner elements of cornices — pre-made corner sections installed at interior and exterior corners of the room. They eliminate the need for precise 45-degree cutting of cornices, which is especially important for cornices with complex ornamentation, where cutting errors result in pattern misalignment. Corner elements guarantee perfect joints, saving installation time.
Cornices of different widths are used for visual correction of room proportions. A wide cornice visually lowers the ceiling — a technique for overly high rooms where a more intimate, cozy atmosphere is needed. A narrow cornice delicately marks the boundary without significantly affecting the perception of height — suitable for standard and low ceilings.
Multi-level cornices create complex decorative compositions. The first level — a large-section main cornice, the second level — a smaller cornice or molding below the first. This adds visual complexity and richness, characteristic of Baroque, Empire, and luxurious classical interiors.
Painting cornices determines their perception. A white cornice on a white ceiling and light walls — a classic option creating a delicate transition. A cornice in ceiling color visually increases ceiling height, as the boundary shifts downward. A cornice in wall color visually lowers the ceiling. A contrasting cornice (gold, silver, dark on light background) turns it into a standalone decorative element, drawing attention.
Get Consultation
Baseboards: foundation of composition
Polyurethane baseboards— perform the same functions as wooden or MDF baseboards — cover the compensatory gap between wall and floor, protect the lower part of the wall from damage, serve as cable channels for wiring. But polyurethane baseboards have an additional advantage — they can be tall, decorative, with a classic profile, transforming from a utilitarian element into an architectural detail.
The height of polyurethane baseboards reaches 150–200 mm, typical for classical interiors. Such a baseboard creates a visual foundation for the wall, adding solidity and respectability to the room. The profile of tall baseboards often mirrors the profile of ceiling cornices, creating a visual rhyme that frames the wall from top to bottom.
Flexible polyurethane baseboards allow wrapping around curved walls, columns, bay windows without the need to cut and join multiple short fragments. The baseboard bends along the radius, fitting tightly to curved surfaces.
Moisture resistance of polyurethane baseboards makes them ideal for bathrooms, kitchens, and other humid areas. Unlike MDF, which swells and deforms when wet, polyurethane remains stable. This is critical in areas where water splashes regularly onto the baseboard.
Ease of painting — polyurethane baseboards are easily painted with acrylic, latex, or alkyd paints of any color. You can paint them to match wall color, making them blend in and appear as an extension of the wall. You can paint them contrastingly — white baseboard on dark walls or vice versa. You can paint them gold or silver, creating a luxurious accent. You can use special paints to imitate wood or stone texture.
Corner and joint elements — pre-made angles, plugs, connectors that simplify installation and ensure perfect joints. This is especially valuable for baseboards with complex profiles, where self-cutting may result in imprecise outcomes.
Combination with flooring — polyurethane baseboards combine with any floor type: parquet, laminate, tile, poured, carpet. Unlike wooden baseboards, which require matching wood species with parquet, polyurethane baseboards are universal — paint them the desired color, and you get a perfect match.
Pilasters and half-columns: vertical architecture
Polyurethane pilasters— vertical decorative elements imitating flat columns protruding from the wall plane. A pilaster consists of three parts: base (foundation), shaft (central part), and capital (top). This is a classic architectural element that in interiors creates vertical accents, divides walls into sections, and adds monumentality.
The order system determines the character of pilasters. Doric pilasters — simple, minimalist, with minimal decoration, creating a masculine, strict atmosphere. Ionic — with characteristic volutes on the capitals, more elegant and feminine. Corinthian — with lavish capitals of acanthus leaves, the most decorative and luxurious. Composite — a combination of Ionic and Corinthian, the most richly decorated.
Pilaster sizes are determined by room height. In a standard apartment with 2.7 m ceilings, a pilaster 2.5 m high. In rooms with 3–4 m ceilings — full-size pilasters from floor to ceiling. The shaft width of a pilaster is usually 100–200 mm, protrusion from the wall 20–50 mm.
Application of pilasters in interiors is diverse. Framing door openings — pilasters on either side of a door create a portal, a grand entrance. Zoning walls — pilasters divide long walls into sections, creating rhythm. Framing fireplaces — pilasters on either side of the fireplace portal add architectural significance. Framing built-in cabinets — pilasters mask utilitarian cabinets, transforming them into architectural elements. Decorating corners — pilasters in room corners create architectural solidity.
Half-columns — round-section elements protruding from the wall by half their diameter. They are more voluminous and sculptural than flat pilasters. Half-columns are used in spacious rooms where there is room for volumetric decoration. They create play of light and shadow, adding three-dimensionality to flat walls.
Combining with other elements — pilasters visually connect with cornices, creating a unified architectural composition. The capital of the pilaster logically transitions into the horizontal cornice, creating the impression of a load-bearing structure supporting the ceiling. This is classical architectural logic that works in interiors as well.
Pilaster painting can be monochromatic (in wall color for subtle relief) or contrasting (white pilasters on colored walls, gilded capitals on white shafts). Contrasting painting emphasizes the architectural logic of the element, making the composition more readable.
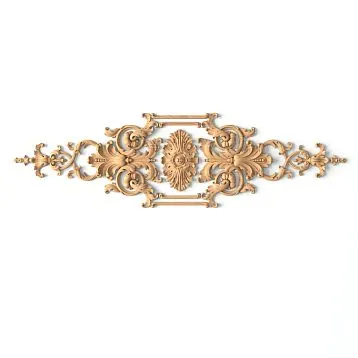
Rosettes, brackets, and consoles: point accents
Decorative polyurethane rosettes— are round or oval surface-mounted elements with relief ornamentation, used as accents on walls, ceilings, furniture. A ceiling rosette at the point of chandelier attachment — a classic application, creating a decorative frame for the light fixture and visually gathering the ceiling composition around a central point.
Ceiling rosette sizes are selected based on the chandelier and room size. For a small room of 10–15 square meters with a small chandelier, a rosette with a diameter of 300–400 millimeters is suitable. For a living room of 25–30 square meters with a large chandelier — a rosette of 600–800 millimeters. For grand halls with huge chandeliers — rosettes up to 1200 millimeters in diameter.
Wall rosettes are smaller than ceiling ones, used as standalone decorative accents or as framing for wall-mounted lights and mirrors. A rosette above a wall sconce turns a simple light fixture into a compositional center. Rosettes in the panels of wall panels create an additional decorative layer.
Brackets and consoles — are protruding support elements, real or decorative. In classical architecture, a console supports a cornice, balcony, or shelf. In interiors, polyurethane consoles are mostly decorative — they create an illusion of support, adding architectural logic. Consoles under cornices imitate load-bearing elements. Consoles under shelves can be real supports — polyurethane is strong enough to support a bookshelf's weight.
Decorative brackets at wall-ceiling junctions create additional accents, enhancing the sense of structural integrity. This is especially characteristic of Gothic and Baroque styles, where visible structure is part of the aesthetics.
Panels and 3D decor: volumetric wall finishing
3D panels made of polyurethane— a modern decorative finishing direction, creating volumetric relief surfaces. Panels are square or rectangular elements, usually 500x500 or 600x600 millimeters, with a three-dimensional pattern on the front surface. The pattern may be geometric (squares, rhombuses, waves, honeycombs), botanical (stylized leaves, bamboo), or abstract (arbitrary volumetric forms).
Installation of 3D panels is done with adhesive directly on the base wall or on a lath for uneven walls. Panels are joined edge-to-edge, forming a continuous relief surface. Clear geometry of elements ensures precise fitting, seamless composition.
Application of 3D panels transforms accent walls. One wall in the living room, clad with volumetric panels, becomes a visual center attracting attention. A wall behind the bed headboard, finished with relief panels, turns the bedroom into a luxurious space. A wall in a hall or corridor with 3D decor creates a memorable first impression.
Play of light on the relief — key advantage of 3D panels. Depending on lighting, the relief appears differently: under side lighting, shadows are deep and contrasting, relief is maximally pronounced; under frontal lighting, relief is softer and more delicate. By changing lighting, one can control the perception of the wall.
Painting of 3D panels defines the character of the wall. Monochromatic painting in one color allows the relief to speak through play of light and shadow. Gradient painting — different shades on protruding and recessed parts — enhances volume. Contrasting painting — for example, protrusions dark, recesses light — creates a graphic, dramatic effect. Metallic painting — silver, gold, copper — adds luxury and glamour.
Combination with other elements — 3D panels on walls are framed by moldings around the perimeter, creating a complete composition. This visually separates the relief zone from surrounding smooth walls, highlighting its special status.
Systemic approach: creating a unified composition
True power ofpolyurethane finishing system— unfolds when approached systematically, when all elements are designed as a single whole. This means using elements from one collection, with a unified stylistic language, coordinated profiles, and repeating ornamentation.
Principle of vertical rhythm — ceiling cornice and floor skirting have similar or identical profiles, creating a visual framing of the wall from top and bottom. This is a classic technique that makes the composition complete and cohesive. The eye perceives repetition of forms and interprets it as order and harmony.
Principle of horizontal rhythm — moldings on different walls are placed at the same height, creating a single horizontal line encircling the room. This line structures the space, making it readable and architectural.
Principle of ornament repetition — the ornament on the cornice repeats on rosettes, pilaster capitals, and moldings. This creates thematic unity, visual echoes that link different elements into a system.
Principle of scale correspondence — the size of decorative elements corresponds to the scale of the room. In a small room — delicate, narrow cornices and moldings. In a spacious living room — large, monumental elements. Mismatch of scale destroys harmony: large decor in a small space overwhelms, small decor in a large space disappears.
Principle of stylistic unity — all elements belong to one style. It is not possible to mix classical cornices with Baroque pilasters and modernist 3D panels. Each style has its own language of forms, and mixing languages creates visual cacophony. Within a style, variations are possible, but the stylistic foundation must remain unified.
System design begins with selecting the style and collection of elements. Polyurethane decor manufacturers form collections — sets of cornices, moldings, skirting, pilasters, rosettes — executed in a unified style, with coordinated sizes and ornamentation. Choosing a collection gives you a ready-made solution for creating a cohesive interior.
Installation: professional installation technology
Quality installation is critical for the result. Even the most beautiful elements, installed incorrectly, will look cheap. Professional installation ensures tight fitting, perfect joints, and durability.
Surface preparation — base walls or ceilings must be clean, dry, and strong. Remove peeling paint, wallpaper, or plaster. Dust and dirt reduce adhesive bond. Grease stains (especially on kitchens) are cleaned with solvent or cleaning agent.
Marking — critical stage. For cornices, a horizontal line around the room perimeter is marked using a laser level or hydrolevel. Even a slight tilt of the cornice will be noticeable and create an impression of room curvature. For wall moldings, their position is marked considering symmetry, proportions, furniture placement, and functional zones.
Cutting elements — polyurethane is cut with a fine-toothed saw, a circular saw, or a jigsaw. For corner joints, elements are cut at 45 degrees using a mitre block or a circular saw with a rotating table. Cutting accuracy is critical — even a 1-2 degree deviation will result in a noticeable gap at the joint. For complex angles (non-right angles), special marking methods or pre-made corner elements are used.
Choosing adhesive — for polyurethane, use special polyurethane adhesives like "liquid nails" or acrylic construction adhesives. Silicone sealants are unsuitable — they do not provide sufficient adhesion. Adhesive is applied in zigzag or strip patterns to the back of the element, ensuring full surface contact.
Installation — the element is pressed against the surface along the marked line and held for 1-2 minutes to allow the adhesive to set. Heavy elements (large cornices, pilasters) are additionally secured with temporary supports or self-tapping screws until the adhesive fully dries. Screws are driven into areas that will later be covered by other elements or filled with putty.
Joint sealing — gaps between elements are filled with white acrylic sealant or sealant suitable for painting. The sealant is smoothed with a wet finger or rubber spatula to form a seamless transition. Excess is immediately wiped away with a damp cloth. After drying, joint areas are sanded with fine-grit sandpaper for a perfect smooth finish.
Final finishing — polyurethane elements are typically supplied white or primed. They must be painted for protection and aesthetics. Water-based acrylic or latex paints are used. Paint is applied with a roller or brush in 2-3 thin coats, each after the previous one has fully dried. For gold imitation, special metallic paints or leaf gold are used.
Stylistic Solutions: From Classic to Modern
Classic style requires a full set of ornamental decoration. High cornices with rich ornamentation, wide skirting boards, pilasters with classical capitals, ceiling rosettes for chandeliers, mouldings creating wall panels. Ornamentation is antique — acanthus, meander, palmettes. Color palette is light — white, cream, with possible gilding of details. This is palace aesthetics, requiring large spaces and appropriate furniture.
Neoclassicism — a simplified version of classicism, more restrained. Medium-height cornices with moderate decoration. Skirting boards 100-120 millimeters. Mouldings creating wall frames, but without excess. Pilasters in simplified forms or just their suggestion — vertical mouldings. Colors are light, pastel shades are possible. Gilding is delicate or absent. This is modern elegance with classical references.
Baroque and Rococo — maximum decorative richness. Ornate cornices with floral ornamentation and scrolls. Numerous mouldings creating complex compositions. Rosettes on walls and ceilings. Consoles and brackets creating a sense of structural complexity. Colors are white with gold, or pastels (blue, pink, lavender) with gold. This is theatrical, luxurious aesthetics.
Empire — monumental, imperial style. Large cornices with a simple yet expressive profile. Pilasters with Egyptian or Roman motifs. Ornamentation with military symbolism — laurel wreaths, swords, torches, lions. Colors are solemn — white with gold, or rich (burgundy, emerald, sapphire) with gold accents. This is imperial power, solemnity.
Art Deco — geometric, graphic. Cornices and mouldings with stepped, zigzag profiles. Rosettes with radial, sun-like compositions. 3D panels with geometric relief. Colors are contrasting — black with gold, white with silver, graphite with copper. This is 1920s-30s glamour, jazz era, luxury and geometry.
Provence and country — rustic elegance. Ornamental decoration is present but delicate. Small cornices with floral motifs. Mouldings framing wall panels. Rosettes with floral ornamentation. Colors are white, cream, pastels. Patination — artificial aging — is possible. This is cozy simplicity, provincial charm.
Modern style uses stucco minimally, as architectural lines rather than decoration. Simple cornices without ornamentation, creating a clear boundary between wall and ceiling. Mouldings structuring walls geometrically. 3D panels with abstract relief. Colors are any, often monochromatic or contrasting. This is modern architectural aesthetics, where stucco is a tool, not decoration.
Maintenance and longevity: an investment in the future
Polyurethane elements require no complex maintenance. They do not absorb dust, are easy to clean, and are not afraid of moisture. Regular cleaning with a damp cloth keeps them clean. For removing dirt, use mild, non-abrasive, non-solvent cleaning agents that will not damage the painted surface.
Painted elements may require repainting after years, especially in areas of intensive contact or exposure to sunlight. Repainting is simple — light sanding to improve adhesion, priming (if surface was oily or dirty), 1-2 coats of new paint. The element looks brand new.
Mechanical damage — dents from impacts — can be repaired. The dent is filled with acrylic putty, sanded after drying, and painted. For deep damage, use two-component polyester putty, which is stronger.
Detached elements can be easily re-adhered. Remove old adhesive residue, degrease surfaces, apply fresh adhesive, press firmly. The problem is solved without replacing the element.
The longevity of quality polyurethane elements is measured in decades. They do not crack, yellow, or deform over time. The only thing that changes — the paint — but this is easily updated. The polyurethane itself remains unchanged, preserving the clarity of relief, strength, and appearance.
Economic efficiency is evident in the long term. The initial investment in qualitycomprehensive stucco for interiorsis paid off over decades of flawless service without repairs or replacements. This is an investment in beauty, quality, and longevity — values that never become outdated.
Creating an interior with a polyurethane finishing system — this is the path from flat, featureless walls to architecturally expressive, structured, elegant spaces. Start with basic elements — cornice along the ceiling perimeter, skirting boards. Feel how even these simple details transform the room. Then add mouldings, creating wall panels. Add pilasters, rosettes, creating compositions. With each element, the space becomes richer, more interesting, more valuable.polyurethane decorative elementsThey offer creative freedom with guaranteed quality results. They allow you to create the dream interior, where classical beauty combines with modern practicality, where palace luxury is accessible without astronomical budgets, where every detail contributes to overall harmony.