Article Contents:
- Why brackets are needed in the interior — and where they are truly appropriate
- Bracket as an architectural statement
- Three functions of a decorative bracket
- Where brackets are appropriate in a modern interior
- How slatted rhythm interacts with decorative support elements
- The 'fabric and accent' principle
- Point of contact: where exactly the bracket meets the slatted wall
- Unity of tone as a way to preserve integrity
- Where in the apartment and house do brackets work in tandem with slat panels
- Living room: cornice, shelves, fireplace portal
- Hallway: functional shelves with decorative support
- Bedroom: headboard and niches
- Study: bookshelves and architectural accents
- Kitchen: decorative beams and functional shelves
- Cornices, shelves, niches and portals: detailed breakdown of applications
- Brackets under the cornice: a classic technique
- Brackets under shelves: function plus image
- Portals and openings: bracket as a keystone
- Niche with slatted walls: interior accent
- Decorative bracket in interior: selection parameters
- Size: how to determine the correct scale
- Relief: simple or complex profile
- Quantity: how many brackets are enough
- When a bracket enhances the interior, and when it becomes superfluous
- When a bracket is justified
- When a bracket is superfluous
- Mistakes in choosing size, relief and quantity
- First mistake: bracket larger than the supported element
- Second mistake: overly rich relief on a slatted background
- Third mistake: brackets without a rhythmic system
- Fourth mistake: different brackets in one space
- Fifth mistake: bracket without thoughtful lighting
- Sixth mistake: bracket in an interior of the 'wrong style'
- Bracket color: white, wood, gold, or neutral
- Installation: how to properly attach a polyurethane bracket to a slatted wall
- Preparation
- Fastening
- Finishing
- FAQ: Answers to Frequently Asked Questions
- About the Company STAVROS

There are details in an interior that are almost unnoticed—yet they hold the entire architectural logic of the space. The bracket is one such element. Modest in size, it carries the idea of support: visual, structural, semantic. Where a shelf floats in the air without explanation, the bracket gives it a foundation. Where a cornice is simply attached to the wall, the bracket turns it into an architectural element. Where a portal or niche looks unfinished, the bracket puts the finishing touches.
Rafter panelsandPolyurethane brackets—this is a combination where the linear geometry of a modern material meets a classic architectural element that carries the idea of support and reinforcement. And if the slat creates rhythm and surface, the bracket creates a point—a point of focus, a point of completion, a point of origin.
How does this pairing work? Where is it appropriate? And when does a bracket transform from an architectural detail into an unnecessary element imposed on the space without need? Let's break it down sequentially and honestly.


Why brackets are needed in interior design — and where they are truly appropriate
The question sounds provocative only at first glance. In an era of hidden fasteners, minimalist shelves on invisible brackets, and walls without extra detail — why add visible decorative support elements to an interior at all?


The bracket as an architectural statement
Architecture has always been the art of expressing structural logic through form. A column that carries an entablature. A bracket supporting a cornice. Ceiling coffers marking a load-bearing beam. All of this is a visualization of the idea of support, a translation of the structural into the artistic.
Exactly thereforedecorative polyurethane brackets— this is not just decoration. It is an architectural detail that gives a space logic, order, and internal conviction. An interior with correctly placed decorative supports is perceived as designed — not just furnished and finished.
Our factory also produces:


Three functions of a decorative bracket
First function: visual support for protruding elements. A shelf, cornice, portal entablature — anything that protrudes horizontally from a wall plane needs a visible or implied support. Without it, the protruding element 'hangs' — creating a sense of visual discomfort that many cannot articulate but feel. The bracket relieves this tension: it explains why the shelf is here, how it is held, where it gets its strength.
Second function: surface articulation. Brackets, placed at equal intervals, divide a horizontal element — a cornice, beam, shelf — into modular sections. This is a rhythmic function, analogous to the function of battens in a panel: a repeating element creates order and scale.
Third function: accenting a transition. A corner bracket at the point where a horizontal plane meets a vertical one — this is an element that fixes an architectural point: a beginning, an end, a turn. Such brackets are especially appropriate in portals, niches, by a fireplace, in the framing of openings.
Get Consultation
Where brackets are appropriate in modern interiors
List of specific zones:
-
Under decorative shelves on a slatted wall
-
Under ceiling cornices in accent areas (in corners, above doorways)
-
On the sides of a fireplace portal
-
In the design of arched and rectangular openings between rooms
-
Under ceiling beams (real or decorative)
-
In niches for books, decor, or TV — as an element framing the upper part of the niche
-
On the facades of built-in furniture in classic or transitional style
How slatted rhythm interacts with decorative support elements
The slatted panel creates a vertical, uniform, continuous surface. The bracket is a point-based, volumetric, asymmetrical silhouette element. These are opposites—and that's precisely why they work together.
The 'fabric and accent' principle
slatted panels for walls—is the fabric of space: homogeneous, rhythmic, creating a background.Polyurethane bracket—is the accent: singular, volumetric, drawing the eye to a specific point. Fabric without accents is boring. Accents without fabric are chaotic. Together they create a space with hierarchy.
The comparison is apt: a slatted wall is a musical staff with identical vertical lines. The bracket is a note that sounds at a specific point. Without the staff, the note is lost. Without the note, the staff is silent.
Point of contact: where exactly the bracket meets the slatted wall
The most organic contact scenarios:
First scenario: the bracket is mounted on the slatted surface. A wooden or stone shelf is attached to the slatted wall, with the bracket positioned between the lower plane of the shelf and the slatted surface. The bracket 'stands' on the slats, its vertical back aligns with the rhythm of the panel. When the bracket and panel share the same tone, they are perceived as a single material object.
Second scenario: the bracket is mounted at the boundary between the slatted and smooth surface. A horizontal shelf or cornice is placed along the transition line from the slatted panel to the smooth wall. The bracket at this point serves a dual function: it supports the horizontal element and visually 'closes' the transition between the two different surfaces.
Scenario three: brackets at the edges of the slatted panel. The slatted field is bounded by vertical moldings or pilasters; corner brackets are placed in the upper corners of the slatted field under a horizontal cornice. This transforms the slatted panel into a semblance of a portal—an architectural volume with supports.
Unity of tone as a way to preserve integrity
polyurethane decorThe bracket form allows complete freedom in painting. When mounted on a slatted surface, the most organic solution is one where the bracket is painted in the same tone as the panel: it becomes an architectural detail of the surface, not an added object. A contrasting bracket—white on a dark slatted wall, gold on a neutral background—stands out, becomes an accent. This is permissible but requires greater restraint in quantity.
Where in the apartment and house brackets work in tandem with slatted panels
Let's talk specifically—room by room, zone by zone.
Living room: cornice, shelves, fireplace portal
In the living roomSlatted panels in interior designMost often occupy an accent wall—behind the sofa or in the TV area. Several scenarios for using polyurethane brackets are possible here.
Decorative shelves on a slatted wall. A wooden shelf 30–40 mm thick, fixed to a slatted accent wall, is supported by two or three brackets. Brackets in the tone of the panel make the shelf an organic part of the slatted surface. The shelf carries decor—several books, a small sculpture, a vase. This is a living element that does not disrupt the rhythm of the slatted wall but gives it volume and function.
Decorative cornice on a slatted accent wall. A wide ceiling cornice above the slatted panel is supported by a pair of massive brackets—at the corners of the slatted field. The brackets create the feeling that the cornice is 'carried' by architectural supports, not simply attached to the wall. This solution transforms the slatted panel into something resembling a classic portal.
Fireplace portal. If there is a fireplace in the living room—real or decorative—slatted panels on the sides of the fireplace portal and brackets supporting the mantelpiece create a complete architectural composition.molded decoration made of polyurethaneIn the form of bracket-console corbels on the sides of the mantel shelf — this is a classic solution that, paired with slatted walls, acquires a modern interpretation.
Hallway: functional shelves with decorative support
In the hallway, function and decor are most closely intertwined.Slatted panels in the hallwayOn the wall by the entrance — a common solution. Above the slatted surface, a small shelf is installed for keys, small items, a decorative mirror, or a small lamp.
The polyurethane brackets under this shelf serve both as real support (the shelf is load-bearing) and as a decorative element creating an architectural accent in a small space. In a narrow corridor where every detail is visible, the right bracket elevates the project's level several steps at once.
The height of the shelf with brackets in the hallway is about 1.8–1.9 m from the floor: above head level, below the ceiling. This level provides convenient storage and a decorative accent without obstructing passage.
Bedroom: headboard and niches
In the bedroomslatted panels at the headboard— one of the most popular design solutions in recent years. Here, polyurethane brackets can serve as supports for a decorative cornice above the headboard — a horizontal beam or shelf forming a 'sky' over the bed.
Two brackets on the sides of the slatted panel at the headboard, with a horizontal shelf or cornice between them — this is an architectural 'niche' for the bed, creating a sense of protection and completeness without building partitions or constructing a canopy.
Important condition: in the bedroom, brackets should be small and have a simple profile. A massive ornamental bracket at the headboard creates excessive excitement in a space intended for rest.
Study: bookshelves and architectural accents
Slatted panels for the studyin a dark tone with wooden shelves on polyurethane brackets is an image that appeals to the tradition of a classic library. Bookshelves supported by paired brackets create a sense of historical depth: this is how studies in European universities of the 18th–19th centuries looked.
In a modern study, this image works as a reference, not a copy: a dark slatted wall, several dark wood shelves on polyurethane brackets matching the wall color, books — and the space immediately acquires an intellectual dimension.
Kitchen: decorative beams and functional shelves
In the kitchenRafter panelsare often used in the backsplash area or as island finishing. In the dining area, an open kitchen with slatted walls and decorative ceiling beams creates the atmosphere of a country house or bistro. Brackets supporting decorative beams or open shelves above kitchen surfaces are an organic element of this environment.
A polyurethane bracket under an open kitchen shelf on a slatted wall: this is a light and elegant solution that does not create a sense of heaviness, characteristic of polyurethane combined with stone surfaces.
Cornices, shelves, niches, and portals: a detailed breakdown of applications
Brackets under a cornice: a classic technique
A decorative cornice supported by brackets is a technique with a centuries-old history. In classical architecture, a bracket-corbel or modillion under a cornice performed a real structural function. In a modern interiordecorative elementsmade of polyurethane imitate this constructive logic decoratively.
How it works paired with slatted panels: the slatted wall runs up to the cornice level. The cornice is wide — 120–180 mm — and is mounted at the top of the slatted surface or above it. Brackets are placed at equal intervals (60–90 cm) under the cornice. Brackets matching the wall color are part of the surface. Brackets in contrast serve as architectural accents.
Interval rule: the distance between brackets under the cornice should be a multiple of the slat spacing. This creates a rhythmic correspondence between the two systems — the fine (slats) and the large (brackets).
Brackets under shelves: function plus image
Open shelves on decorative brackets are a solution where aesthetics and function are inseparable. The load on a polyurethane decorative bracket is limited — it is not designed for serious static loads. The actual support of the shelf is provided by hidden metal fasteners (a wall pin, an invisible steel bracket), while the decorative polyurethane bracket conceals this fastener and creates the architectural image.
This is a fundamental technical point:Polyurethane bracket— a decorative element, non-load-bearing. For a shelf with a real load (books, heavy decor), a hidden metal fastener is always installed; the polyurethane bracket is placed over it or mounted alongside as a decorative shell.
Portals and openings: the bracket as a keystone
Finishing door and arched openings with slatted panels on the sides is a common scenario for open-plan layouts. An opening between the living room and dining room, finished with slatted panels on the reveals, is completed with a horizontal lintel. Brackets on both sides of the lintel — where the horizontal transitions into the vertical — create the architectural logic of a portal.
A corner bracket in such a portal functions as a 'keystone' element: it fixes the intersection point of two planes and makes it architecturally meaningful. Without the bracket — the lintel simply rests on the walls. With the bracket — it is supported by them.
Niches with slatted walls: an interior accent
Wall niches are one of the most attractive objects for applying slatted panels and brackets. A slatted back wall of the niche, a decorative horizontal element (shelf or cornice) inside, a pair of brackets on the sides — and the niche transforms from a simple recess into an architectural scene.
molded decoration made of polyurethaneInside a niche with a slatted back wall: white brackets on a dark slatted surface — a contrasting accent that makes the niche the center of visual attention on the wall. Or brackets matching the color of the slats — a delicate detail that works only through volume and shadow.
Decorative bracket in interior: selection parameters
Before moving on to mistakes, let's establish the parameters for correctly selecting a polyurethane bracket for a specific task.
Size: how to determine the correct scale
The size of the bracket is determined by three factors:
-
Ceiling height. The higher the ceiling, the larger the bracket can be. Guideline: the height of the bracket should be no more than 8–10% of the wall height. With a ceiling of 2.6 m, the maximum bracket is about 200–260 mm in height. With a ceiling of 3.2 m — up to 320 mm.
-
Length of the supported element. A bracket under a long cornice (3–4 m) should be larger than under a short shelf (0.8–1.0 m). Visual ratio: the height of the bracket is approximately 15–20% of the length of the supported element.
-
Depth of projection. The horizontal part of the bracket should correspond to the depth of the shelf or cornice. If the shelf projects 200 mm, the horizontal part of the bracket should be 160–180 mm.
| Task | Bracket height | Width | Depth |
|---|---|---|---|
| Under the shelf in the hallway | 120–160 mm | 80–100 mm | 150–180 mm |
| Under the cornice in the living room | 150–220 mm | 90–120 mm | 80–120 mm |
| In the fireplace portal | 200–300 mm | 100–140 mm | 120–180 mm |
| In a niche (small format) | 80–120 mm | 60–80 mm | 80–120 mm |
| Under the beam | 200–350 mm | 100–150 mm | 150–200 mm |
Relief: simple or complex profile
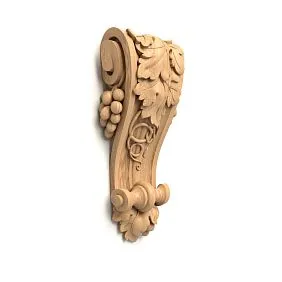
Facade decoration made of polyurethaneoffers a wide range of bracket reliefs: from extremely simple geometric forms to richly ornamented ones with acanthus leaves, volutes, and complex profiles.
Selection rule: the complexity of the bracket relief is inversely proportional to the complexity of the background. On a slatted wall—a simplified bracket. On a smooth wall—it can be more complex. An ornamented bracket on an ornamented slatted surface is a competition between two complex systems, the result of which is always overload.
For a modern interior with slatted panels, brackets with a simple S-shaped or straight-line profile without ornament are optimal. For a classic interior—brackets with moderate relief: volute, bead, simple frieze.
Quantity: how many brackets are enough
Brackets work in rhythm. A single bracket—an unstable, random impression. Two brackets—a minimal pair creating symmetry. Three—rhythm. More than three—only with a truly long supported element (from 2.5–3 m).
Interval between brackets: 60–90 cm for medium formats. With very large brackets (from 250 mm)—90–120 cm. Too frequent brackets create a sense of excessive support—the space looks technically overloaded.
When a bracket enhances the interior, and when it becomes superfluous
This is a matter of professional integrity. A decorative bracket is not a universal tool that improves any space. There are situations where its presence is justified and strong. And there are situations where it is imposed on the space—and this is immediately visible.
When a bracket is justified
-
There is a real horizontal protruding element (shelf, cornice, lintel) that requires visual support.
-
The interior appeals to a classic or transitional tradition, where a bracket is historically organic.
-
The space is sufficiently large for additional architectural detail (ceilings from 2.6 m, room area from 15 m²).
-
The bracket creates a completion for an unfinished architectural gesture (a niche without a cornice, a shelf without support).
When a bracket is unnecessary
-
A small room with a low ceiling (2.3–2.4 m): every volumetric element reduces the sense of space.
-
A minimalist interior, where any decorative detail disrupts the purity of the concept.
-
There is no horizontal protruding element—the bracket 'holds' the wall, meaning it exists without a supporting object. This is strange and looks like decorative kitsch.
-
Brackets are already present elsewhere in the space, and adding new ones creates oversaturation.
The question to ask before installing a bracket: 'What exactly does this bracket support?' If the answer is clear—install it. If the answer is vague or nonexistent—do not install it.
Mistakes in choosing size, relief, and quantity
Let's move on to specific mistakes, because they are the most valuable learning material.
First mistake: bracket larger than the supported element
A bracket 280 mm high under a shelf 150 mm deep and 60 mm wide is an architectural absurdity. The support is disproportionately large relative to what it supports. It's like placing a massive stand under a fragile cup—the mismatch in scale destroys the logic.
Rule: the height of the bracket should be less than or equal to the width of the shelf. If the shelf is 200 mm wide—the bracket should not exceed 200 mm in height.
Second mistake: overly rich relief on a slatted background
Decorative polyurethane bracketwith acanthus leaves and volutes against a slatted panel background—these are two competing ornaments. The slats create a subtle vertical rhythm, while the ornate bracket creates a large plastic relief. Both demand attention. As a result, neither receives it fully.
Solution: on a slatted background—use a simple bracket profile. Ornament is appropriate only where the background is completely neutral (smooth wall, flat surface without its own texture).
Third mistake: brackets without a rhythmic system
Three brackets under a shelf at distances of 40 cm, 80 cm, and 55 cm from each other—a random interval that destroys the sense of order. Brackets should be spaced strictly evenly. If the shelf is 2.0 m—three brackets at 0 m, 1.0 m, and 2.0 m (at the edges and in the center), or 0.5 m, 1.0 m, and 1.5 m (evenly with an offset).
Mistake four: different brackets in one space
One bracket under the shelf in the living room is an S-shaped profile. Another bracket by the mantel shelf is linear geometric. The third in the niche is ornamental. Three different brackets in one room speak of three different design decisions made independently. This is a collection, not a system.
Rule: in one room, use one type of bracket. The scale can vary (large by the fireplace, small in the niche), but the profile should be uniform.
Mistake five: bracket without thoughtful lighting
A volumetric bracket lives in shadow—its relief gains expressiveness precisely through the play of light and shadow. Under uniform overhead lighting, the bracket's relief 'flattens out,' it loses its plasticity and looks like a flat white object of unclear shape.
A directional light fixture, positioned so that light falls at an angle to the bracket's surface, is a necessary condition. This is especially important for brackets with rich relief: in proper light they look sculptural; without it, they are inexpressive.
Mistake six: bracket in an interior of the 'wrong style'
Polyurethane brackets— is an element with historical connotation. In interiors of strict minimalism, high-tech, or Scandinavian style, they look alien—like an object from the past accidentally brought into a modern environment. A bracket requires an interior that has at least elements of classical or transitional tradition: profile baseboards, moldings, classic furniture, natural materials.
Bracket color: white, wood, gold, or neutral
Painting a decorative bracket is the final touch that determines its role in the space.
White bracket on a white wall. A bracket as an architectural detail in the wall tone is a maximally delicate solution. The form is read through shadow, not through color. This is a solution for those who want to add volume without decorative loudness.
White bracket on a dark slatted wall. The contrast makes the bracket an accent. This is a strong technique that requires a single application in the space: one contrasting bracket is a point accent. Several create a motley effect.
Bracket in the tone of the slatted panel. When painted to match the oak slats (warm beige, tobacco, dark walnut), the polyurethane bracket merges with the wooden surface into a unified material image. This solution is maximally organic and requires the least design courage—it almost always works.
Bracket with imitation of gold or bronze. Thin gilding on a bracket is a point of luxury that works well in a dark space (dark slatted wall, dark furniture). A golden bracket on a dark background sparkles as a point and creates a sense of quality without excessive theatricality.
Installation: how to properly secure a polyurethane bracket to a slatted wall
Preparation
Before installing the bracket on a slatted wall, it is necessary to:
-
Determine the exact location of the bracket, taking into account the rhythm of the slats—it is better to place the bracket along the axis of a slat, not in the gap.
-
Ensure the presence of a built-in element in the wall behind the slats (for a loaded shelf)—or install the built-in before mounting the slatted panels.
-
Align all brackets horizontally with a spirit level or laser level—the slightest misalignment is immediately noticeable.
Fastening
DecorativePolyurethane bracketIt is attached using polyurethane adhesive or low-expansion mounting foam (to avoid deforming the product). For additional fixation — use thin finishing nails through the vertical back of the bracket into the slat or into the wall through the slats.
For a loaded shelf: the metal bracket is mounted into a wall embedment, and a polyurethane decorative bracket is placed over it (or mounted next to it) to conceal the metal and create an architectural look.
Final finishing
After installation, the joints between the bracket and the slatted surface are filled with acrylic sealant or putty. In a monochrome version (bracket matching the wall color), the final paint covers the entire surface with a single layer — the joints disappear into a uniform tone.
FAQ: Answers to Frequently Asked Questions
Will a polyurethane bracket withstand real load — books, heavy decor?
No — it is a decorative element, not a load-bearing one. For real load, a concealed metal fastener in the wall is required. The polyurethane bracket is mounted as a decorative shell that creates an architectural look but does not bear the load. The decorative bracket itself can only support light decor weighing up to 1–2 kg with reliable fixation using adhesive and nails.
Can polyurethane brackets be painted with water-based paint?
Yes, after preliminary priming with a special adhesion primer. Without primer, the paint does not adhere firmly enough to the polyurethane surface and begins to peel in areas of mechanical contact. After priming — any water-based, alkyd, or acrylic paint.
How to determine the correct bracket size for a shelf on a slatted wall?
Guideline: bracket height — 70–100% of the shelf width, horizontal part — 80–90% of the shelf depth. The bracket should 'go under' the shelf, not protrude beyond its sides. Visual test: close one eye, look at the planned configuration — the bracket should logically 'support' the shelf, not appear randomly attached to the side.
Slatted panels made of oak or MDF — which is better paired with brackets?
Both options work. Oak slats with tinting create a rich material context in which the polyurethane bracket in a wood tone looks especially organic. Paintable MDF allows for a monochromatic system (slats, bracket, cornice - all in one tone), which is maximally modern and architecturally pure.
Are brackets needed in small apartments?
In small apartments, brackets are used selectively: one or two in the hallway under a shelf, or a pair in the bedroom by the headboard. Mass use of brackets in small spaces creates overload. An exception is small-sized brackets (up to 100 mm) in the tone of the wall: they add volume without visual heaviness.
How to combine brackets with other elements of stucco decor in one space?
Brackets, moldings, and cornices in one space should be from the same system: a unified profile language, a unified tone (or unified color logic), and corresponding scales. Chaotic mixing of elements from different series creates an impression of a non-systematic solution. The optimal approach is to choose allPolyurethane Itemsfrom one collection — then the cornice, bracket, and molding will share a common profile DNA.
About the company STAVROS
An architectural detail is not a decoration applied on top of a finished interior. It is part of the concept, planned together with the finishing, materials, and lighting. And in this concept, the quality of each element determines the quality of the whole.
STAVROS produces both key materials for this concept.slatted panels made of MDF and solid oak— with precise geometric parameters that ensure perfect installation results and a predictable visual outcome.Brackets, moldings, cornices, and all stucco decor made of polyurethane— with detailed relief work, stable dimensions, and a surface ready for professional finishing.
STAVROS is a manufacturer that understands: a bracket is not an 'addition' to a slatted panel; it is its architectural partner. And both should be made with the same level of demand for the result. This is precisely what distinguishes a professional solution from a set of separate products.