Article Contents:
- Why use polyurethane wall molding — lightweight and moisture-resistant
- Material physics: what is NPU
- Four key advantages
- Where polyurethane molded decor works best
- Decorative panels — decorating the lower third of the wall
- What is a polyurethane decorative wall panel
- Wall decoration framing system
- Panel tier height: proportion rule
- Wall moldings — frame decor of English paneling
- What is wall decoration with frame molding
- Decorative wall molding: profile types
- How to calculate the amount of molding for frame decor
- Corner elements in the molding system
- Framing door and window openings with pilasters
- Why frame an opening with a pilaster
- Polyurethane column decor: from base to capital
- Pilaster and opening ratio
- Pilasters in the wall molding system
- Polyurethane molding imitation — how to achieve a plaster effect
- What creates the plaster effect
- Technology: how to make 'plaster' from polyurethane
- Wall finishing for molding: surface preparation
- Wall decor installation: adhesive, dowels, joints
- Marking — the foundation of proper installation
- Adhesive for polyurethane decor
- Dowels for large elements
- Joints and seams: how to avoid visible gaps
- Installation time and limitations
- Painting and Finishing of Polyurethane Molding
- Surface Preparation for Painting
- Painting: Tools and Techniques
- Color Solutions: Four Working Schemes
- Care for Painted Polyurethane Decor
- FAQ - answers to popular questions
- About the Company STAVROS

A wall is not just a boundary between interior and exterior. It is the surface that first catches the eye, holds light and shadow, and sets the tone for the entire room. And that is precisely why how you decorate it defines the character of the space—its scale, style, and mood.Wall moldingsPolyurethane molding is not a retro whim or a tribute to the 'antique' fashion. It is a modern tool for creating an architecturally expressive interior: easy to install, durable in operation, and infinitely versatile in application.
This article is a detailed practical guide to wall-mounted polyurethane molding decor. We will analyze each type of element, the logic of their composition, installation technology, and finishing. And we will answer the main question that always underlies the choice of decor: how to make a wall look architectural, not just decorated?


Why Use Polyurethane Molding for Walls—Lightness and Moisture Resistance
Let's start with an honest conversation about the material. Why polyurethane, not plaster, not wood, not stone?


Material Physics: What is NPPU
Neutral Polyurethane Foam (NPPU) is a closed-cell foam of high density. The closed cells do not let water through: polyurethane wall molding is completely moisture-resistant, does not swell, and does not crack from humidity fluctuations. This makes it applicable where wood or plaster would require special treatment: kitchens, hallways, bathrooms, basement floors.
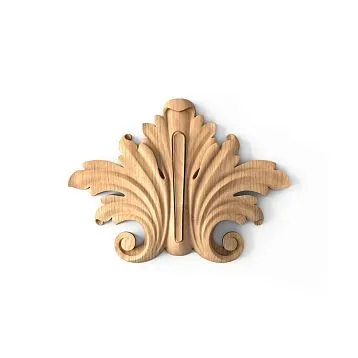
The density of decorative polyurethane is 100–120 kg/m³. For comparison: plaster is 1,100–1,200 kg/m³, meaning polyurethane is ten times lighter. This means that even a large decorative panel like CPU.VRS-056 weighs several times less than a similar plaster element and can be mounted with ordinary mounting adhesive without anchors or dowels.
Our factory also produces:


Four Key Advantages
First—ease of installation.Polyurethane DecorIt is glued with polyurethane mounting adhesive onto a prepared surface. This takes from a few minutes to half an hour per element—without complex markings, without reinforced fastening, without special tools.
Second—moisture resistance. Complete insensitivity to moisture opens up possibilities for application where any other decor would require additional protection.
Third—elasticity. Unlike plaster, polyurethane does not crumble upon accidental impact. It deforms elastically and returns to shape. This is especially important for framing corners, protruding moldings, decorative pilasters—anything that might receive a household impact.
Fourth—paintability. The polyurethane surface accepts any acrylic or alkyd paint without primer (provided it is not oil-based). Changing the color after five years is simple: light sanding with P320 and a new coat. No chemical stripping, no puttying.
Get Consultation
WhereRelief DecorationPolyurethane molding works best
On living room and dining room walls—for creating English panels, frame decor, accent friezes. In hallways—for decorating doorways and the lower wall zone. In kitchens—for the backsplash area above the countertop. In studies—for creating a library wall with pilasters and moldings. In bedrooms—for a bed headboard framed with decorative molding.
Decorative Panels—Decorating the Lower Third of the Wall
The lower third of the wall is the most vulnerable and functionally loaded zone. This is where cleaning marks, furniture impacts, and wear from passing people accumulate. Historically, this zone was protected with wooden panels—dado or English paneling.Polyurethane wall overlaysin the form of decorative panels solve this task in a modern interpretation.
What is a Polyurethane Decorative Wall Panel
A decorative molding panel for a wall is a flat or relief element of large format, mounted on the lower part of the wall as a continuous covering or forming a system of separate frames. It creates a zone perceived as the 'plinth' of the wall: visually dense, architecturally complete.
Panels CPU.VRS-057 (from 12,720 rub.), CPU.VRS-058 (from 20,550 rub.), CPU.VRS-060 (from 34,820 rub.) from the STAVROS catalog are large decorative elements with developed relief: ornamental fields, cartouches, floral friezes. They are mounted as independent accent panels or combined into a rhythmic system along the wall.
Frame System for Wall Decoration
The most common way to decorate the lower wall zone is a system of rectangular frames made of moldings. Several frames of different widths are arranged along the wall at a height of 80–120 cm (up to a separating horizontal molding). Inside the frames, the wall can be painted in a different shade, wallpapered, or left neutral.
This technique is a direct reproduction of the English panel in a simplified and accessible version. It uses moldings from the NPU series: NPU.VRS-012 (from 1,190 rub.) – a simple profile for minimalist frames; NPU.VRS-004 (from 5,910 rub.) and NPU.VRS-005 (from 4,060 rub.) – more complex, with an elaborate cross-section for rich classical decor.
Panel tier height: the rule of proportion
The height of the lower panel tier should be 1/3 to 2/5 of the wall height. With a 2.7 m ceiling – a panel tier of 90–108 cm. With 3.0 m – 100–120 cm. Higher – and the panel begins to 'capture' too much of the wall, disrupting the balance. Lower – it looks like a wide baseboard, not an architectural tier.
The upper boundary of the panel tier is fixed by a horizontal dividing molding – a wide profile strip that runs along the entire perimeter at the desired height. Above it – the 'field' of the wall with wallpaper or paint. Below – the panel tier. Between them – the molding as an architectural dividing line.
Wall moldings – the frame decor of the English panel
Molding is a word that hides an entire system. Not just a 'strip on the wall,' but an architectural line that structures the surface, creates frames, and sets the rhythm.
What is wall decoration with frame molding
Frame molding is a system of rectangular or square frames applied to the wall surface in a rhythmic order. Each frame creates a 'field' within itself – a visually distinct zone. Several frames in a row form a vertical rhythm; several rows one above the other – a grid.
This solution is known as wainscoting (an American term) or panel decor in the English style. In modern interiors, it works both in the classic white version and in bolder color combinations – dark frames on a light wall, gold moldings on a dark blue background.
Decorative wall molding: profile types
Flat molding (stick) – the simplest type. A flat strip without a complex profile, with minimal bevels. Creates a clear geometric frame without shadow effects. Suitable for minimalist and Scandinavian interiors. Represented by models NPU.VRS-012 (from 1,190 rub.) and NPU-116 (from 650 rub.).
Profile molding with a single ogee – the classic type. The upper edge has a rounded or stepped profile, creating a shadow line. This molding is most often used for the frame decor of English panels. Models NPU.VRS-002-3 (from 2,570 rub.) and NPU.VRS-003.1 (from 7,750 rub.).
Complex composite molding – the monumental type. Consists of several levels of profile: a main flat shelf, a profiled edge, and an additional overlay. Creates an expressive play of shadows, characteristic of rich classical interiors. Models CPU.VRS-064.1 (from 14,130 rub.) and CPU.VRS-055.1 (from 38,000 rub.) – for interiors of a grand scale.
How to calculate the amount of molding for frame decor
Measure the perimeter of each planned frame. Add up all perimeters – this is the total linear footage of molding. Add 15% for cutting (frame corners are cut at 45°, and each corner requires a small allowance). Divide by the length of the molding strip (standard – 2 m) – you get the number of strips.
For a room with a system of ten frames 60×80 cm: perimeter of one frame = (0.6 + 0.8) × 2 = 2.8 m. Ten frames = 28 linear m + 15% allowance = 32.2 linear m. With a 2 m strip: 17 strips.
Corner elements in the molding system
At the intersection point of the horizontal and vertical moldings of the frame – a corner block. This is a square decorative element that is installed in each corner of the frame and to which straight segments of molding adjoin from four sides. The corner block eliminates the need for precise 45° miter cuts and simultaneously adds a decorative accent – a rosette, ornament, or geometric motif.
NPU-470L (590 rub.) and NPU-470R (590 rub.) – 'left/right' corner elements for medium-sized moldings. NPU-472L (980 rub.) and NPU-472R (980 rub.) – more monumental corner blocks with elaborate relief.
Framing door and window openings with pilasters
If molding works horizontally and creates frames, then a pilaster works vertically – it forms a tectonic accent, a 'vertical' in the architectural system of the wall. And the most organic place for a pilaster is framing a door or window opening.
Why frame an opening with a pilaster
A door opening without framing is just a hole in the wall. An opening framed by pilasters with a capital and a horizontal architrave on top – is an architectural portal. The space around the door acquires solemnity and completeness. The gaze, passing through this portal, perceives the transition from one space to another as an architectural event, not just movement.
Polyurethane column decor: from base to capital
The complete system for framing an opening includes:baseboardas the lower horizontal tier, the pilaster base on the upper edge of the baseboard, the pilaster shaft – the vertical element running along the side jamb of the opening,Capitalat the top point of the shaft, a horizontal architrave (lintel) above the opening, connecting the two vertical elements.
For polyurethane framing of openings, elements NPU.VRS-001 (from 8,290 rub.) and NPU.VRS-002 (from 8,370 rub.) are used – large decorative pilasters with rich ornamentation on the shaft. NPU.VRS-013 (from 9,490 rub.) – an element for decorating corner zones. NPU.VRS-006 (from 29,320 rub.) – monumental decor for grand-scale formal openings.
Ratio of pilaster to opening
The width of the pilaster shaft should be 8–12% of the opening width. For a 900 mm opening – a pilaster 72–108 mm wide. For a 1,200 mm opening – 96–144 mm. A too-narrow pilaster gets lost. A too-wide one – consumes space and 'squeezes' the opening.
The height of the capital is 15–20% of the height of the pilaster shaft (from the top of the base to the bottom of the capital). This rule creates the correct proportion: the capital is large enough to be read as a termination, but not so large as to 'overpower' the shaft.
Pilasters in a wall molding system
Pilasters and frame molding decor work together on the principle of complementarity: moldings create a horizontal grid of frames, pilasters create vertical accents against their background. The classic scheme: two pilasters frame a doorway, with a horizontal architrave above them, a plinth below them, and frame moldings across the wall field. All together — a full-fledged architectural system of an 'order facade' on the wall.
Imitating stucco from polyurethane — how to achieve a plaster effect
Polyurethane decor, with proper painting and finishing, is practically indistinguishable from traditional plaster. Not 'almost the same,' but truly indistinguishable — provided the surface work is done skillfully.
What creates the plaster effect
Plaster is perceived as a 'real' material due to several visual properties. First — matte finish: plaster does not shine; its surface scatters light evenly. Second — texture: a slightly porous surface with a subtle 'liveliness,' not perfectly smooth plastic. Third — shadow weight: the deep relief of plaster ornamentation creates expressive shadows. It is precisely these three characteristics that need to be reproduced when working with polyurethane.
Technology: how to turn polyurethane into 'plaster'
Step one — base priming. Coat the polyurethane element with acrylic primer for plastic. This is necessary for reliable paint adhesion to the surface and to eliminate the 'plastic' sheen of the base.
Step two — first coat of paint. Apply matte white acrylic paint (or the desired tone) with a brush or a small roller tool. Important: a brush gives a slight texture characteristic of plaster. A smooth roller gives smoothness — not what is needed.
Step three — P320 sanding. After the first coat dries — light sanding to smooth out the paint nap.
Step four — finishing coat. A second coat of the same paint with a brush. After complete drying — a finishing matte varnish with a sheen no higher than 5% (deep matte). This varnish will seal the surface and add a 'quiet,' non-glossy texture.
Step five (optional) — patination. For elements imitating antique plaster — lightly apply warm gray or cream wax to the protruding parts of the relief. The wax collects on the protrusions, creating a slight darkening — an effect of aged surface.
Wall finishing for stucco: base preparation
The surface for mounting polyurethane decor must be level, primed, and painted. If the wall has deep irregularities (more than 5 mm per meter) — the decor will not press tightly, and voids will appear underneath. Permissible irregularities — 2–3 mm per meter, which are compensated by the adhesive layer.
Check the surface with a 2 m straightedge: gaps over 3 mm should be eliminated with filler. After drying — primer. This is a mandatory step: primer strengthens the surface and increases adhesive adhesion by 2–3 times.
Mounting wall decor: adhesive, dowels, joints
Mounting is the stage where even perfectly chosen decor can be 'ruined' by incorrect technique. Let's examine it in all details.
Layout — the foundation of correct mounting
Before applying adhesive, all decor is dry-fitted. Horizontal and vertical axes are marked on the wall with a laser level. For a frame molding system — layout of all frames with a pencil, checking symmetry.
Special attention: vertical symmetry. If the frame system on the wall does not start from the center but from a random offset — the asymmetry will be glaring under any lighting. Always start layout from the center of the wall, arranging frames symmetrically in both directions.
Adhesive for polyurethane decor
Specialized polyurethane mounting adhesive (or adhesive foam for stucco decor) — the only correct choice. Silicone sealants — no: they are too elastic and do not hold static load. Epoxy compounds — no: they do not compensate for thermal expansion. PVA glue — absolutely not: it does not work on smooth surfaces.
Polyurethane adhesive is applied in a 'snake' pattern on the back surface of the element. A notched trowel for large flat elements — an even combed layer. Initial contact — 3–5 minutes (while the adhesive has 'set' but not yet hardened): at this moment, the element can be slightly shifted for precise positioning. Working strength — 24 hours.
Dowels for large elements
Elements weighing over 500 g (CPU.VRS-058, CPU.VRS-060, CPU.VRS-061) require additional mechanical fastening. 6×60 mm nail-in dowels — two to four fasteners per element depending on area. Heads are masked with plastic filler, after drying — P320 sanding.
For elements mounted on drywall: 5×52 mm 'molly' (expanding) dowels — each holds 8 kg. Sufficient for any polyurethane decor element.
Joints and seams: how to avoid visible gaps
End joints of moldings in frames are cut at 45° on a miter saw. The angle is cut precisely — a 0.5° deviation creates a visible gap. After mounting, all joints are coated with acrylic sealant matching the finish paint color. Smooth with a spatula, let dry for 2 hours, sand with P320. Sealant fills micro-gaps, creating the appearance of a monolithic element.
Mounting time and limitations
Optimal installation temperature: +15°C to +30°C. At temperatures below +10°C, polyurethane adhesive gains strength 3–4 times slower. At temperatures above +35°C — the adhesive's open time is reduced to 1–2 minutes, making it impossible to properly position the element.
Painting and finishing of polyurethane molding
The finish coating determines whether polyurethane decor will look like an architectural element or a sticker. Let's examine the complete technology.
Surface preparation for painting
Before painting, the element, already mounted on the wall with sealed joints, must be:
-
Dust off with a dry brush or by blowing.
-
Wipe with a slightly damp cloth (not wet — avoid wetting the joints with sealant until it is fully cured).
-
Apply acrylic sealer-primer in a thin layer with a brush — in one direction along the profile.
-
Let dry for 1 hour.
Sealer-primer is a mandatory step that many skip and are later surprised by stains. Polyurethane contains traces of processing oils that can 'bleed through' a thin layer of white paint, causing dark or yellow stains. The sealer-primer blocks this migration.
Painting: tools and technique
Brush with soft bristles (nylon or synthetic) — for decorative elements with relief. The brush reaches into the profile's recesses, covering all surfaces evenly. A paint roller is only suitable for flat moldings without relief.
Paint — acrylic water-dispersion. For a white finish — matte enamel with 0–7% gloss. For tinted options — the same enamel with added pigment. Two coats with intermediate sanding using P400 grit is the standard for achieving an even finish color.
Color solutions: four working schemes
Scheme 1: Monochrome. Decor, walls, and ceiling — in one white tone. The molding is perceived through its relief and shadows. A classic that works in any style.
Scheme 2: White decor — colored wall. White moldings on a wall of any saturated color — from deep blue to terracotta. The frames become clear graphic lines, contrasting with the background. Striking, modern.
Scheme 3: Decor matching the wall color — white ceiling. Moldings and frames are painted the same tone as the wall. The decor 'dissolves' in the color and is perceived only as a relief pattern. A subtle, sophisticated solution.
Scheme 4: Patination or gilding. On a dark base coat — light application of metallic wax patina on the raised parts of the relief. The effect of aged gold or silver. Suitable for monumental decorative CPU.VRS series panels in formal spaces.
Care for painted polyurethane decor
Cleaning: damp cloth without abrasives — for flat areas. Soft brush or fitch brush — for relief areas (dust gets trapped in the relief recesses). Avoid: aggressive cleaning agents with chlorine or solvents — they damage the varnish coating.
Refreshing: if visible fading occurs — light sanding with P320 grit (only on flat areas) and one refreshing coat of the same paint. Relief areas — only with a brush, no sanding.
FAQ — answers to popular questions
Can polyurethane decor be mounted on wallpaper?
Not recommended: the adhesive can soften the wallpaper paste underneath over time, and the decor may peel off along with the wallpaper. The correct method is to mount it on a painted or plastered wall.
How to cut polyurethane molding at a 45° angle?
Miter saw with a fine-toothed blade (80–100 teeth). Cutting speed — medium. Too fast — melts the material. Too slow — tears the surface. After cutting — lightly sand the cut with P220 grit sandpaper.
How does polyurethane decor differ from MDF?
MDF — a dense board based on wood fiber, can be painted and milled precisely. Polyurethane — closed-cell foam, moisture-resistant and lightweight. MDF is heavier, not moisture-resistant without coating, requires mechanical fastening. Polyurethane — can be glued, not afraid of moisture, weighs 5–7 times less.
Can polyurethane decor be combined with wooden elements?
Yes, but with one condition — a unified finish color. When painted white, polyurethane moldings andWooden cornicesare visually indistinguishable. When tinted to resemble wood — the difference in materials will show in the texture. Choose a monochrome solution for successful combination.
How many square meters of wall can be decorated with CPU.VRS decorative panels in one day?
One installer with an assistant — 15–25 sq. m per working day, provided the base is ready and elements are pre-cut.
How to remove an incorrectly installed element?
Carefully pry with a wide-blade spatula (80–120 mm) along the edges, gradually peeling it off the adhesive. Polyurethane is elastic — with careful removal, the element remains intact and can be reinstalled with new adhesive.
Is it necessary to decorate all walls or is one enough?
An accent wall with frame decor and pilasters is a full-fledged design solution that does not need to be repeated on other walls. Three neutral walls + one decorated wall — a classic scheme that works without overload.
About the company STAVROS
Polyurethane decor only realizes its potential when backed by a manufacturer who understands architecture and is not limited to the 'boxed' market assortment.
STAVROS is a Russian manufacturer of polyurethane stucco decor and solid wood architectural decor. The NPU.VRS wall stucco decor series includes decorative elements from 530 to 29,320 rubles, the CPU.VRS series — monumental panels and decorative elements of a grand scale from 12,720 to 51,490 rubles. The STAVROS catalog includes —Wooden pilasters, Ceiling Molding, Wooden moldings, solid wood trim pieces— everything needed to create a complete interior architectural system.
STAVROS consults on element selection, calculates kits for the project, manufactures products from a single batch of material to guarantee uniform tone and geometry. Delivery across all of Russia. Because true decor is not about buying individual elements, but about creating a system. And STAVROS knows how to build it.