Article Contents:
- The open edge of PAN-005 is part of the design, not a leftover after installation
- Where the open border most often appears
- Why one millimeter matters
- A cross-section sketch is more useful than a pretty visualization
- Scenario 1. The 1 mm difference remains as a thin step
- Scenario 2. The profile position is adjusted by the installation diagram
- Scenario 3. The difference turns into a conscious shadow line
- Solid color painting emphasizes the geometry
- Do not try to "draw" oak just from a website photo
- A sample helps to evaluate not only the color
- Scheme A. The molding is included in the total width of the accent zone
- Scheme B. The molding is added outside the panels
- Why the last module matters more than the first
- First, lay out the rhythm on the plan
- Example without a made-up margin
- Before furniture
- Behind furniture
- From floor to ceiling
- Mistake 1. Ordering MLD-063 only from a photo
- Mistake 2. Assuming the MDF pair is the same thickness
- Mistake 3. Promising beech or oak "perfectly flush"
- Mistake 4. Forgetting about the width of MLD-063
- Mistake 5. Ordering the molding after panel installation
- Mistake 6. Calculating molding by panel area
- Mistake 7. Using a universal percentage for extra allowance
- Error 8. Not making an MDF binding layout
- Error 9. Buying mounting compound without checking the base
- Error 10. Trying to fix poor cutting with molding
- Error 11. Not drawing the bottom junction
- Error 12. Not drawing the top
- Error 13. Mixing beech and oak just because they are both 9 mm
- Error 14. Painting the panel and molding separately without a test sample
- Error 15. Refusing a sample on a large project
- Error 16. Considering the open edge only a decorative trifle
- Will MLD-063 fit PAN-005?
- What is the depth of PAN-005?
- What is the depth of MLD-063?
- Does the 1 mm difference mean that MDF MLD-063 cannot be used with PAN-005?
- Will the PAN-005 beech and MLD-063 beech be exactly in the same plane?
- What about the oak set?
- What is the width of MLD-063?
- Do I just need to add 14 mm to the width of PAN-005?
- Can PAN-005 made of MDF and MLD-063 made of MDF be painted in the same color?
- Is OPAN-005 needed before ordering?
- What is the size of OPAN-005?
- What materials are available for OPAN-005?
- How to calculate the quantity of MLD-063?
- Should I take a 10% margin of MLD-063?
- How to calculate the quantity of PAN-005?
- Can I simply trim the last PAN-005 on the molding?
- Is MLD-063 needed on both sides of the accent zone?
- Can MLD-063 be used next to a door casing?
- How can I tell if a 1 mm difference will be noticeable?
- Can the difference be compensated with the adhesive layer?
- Do I need to account for the baseboard?
- Do I need to account for the ceiling?
- Can I install an MDF molding against an oak panel?
- Where can I see other slat panels?
- Where to see other moldings?
- What is the most important thing to check before payment?
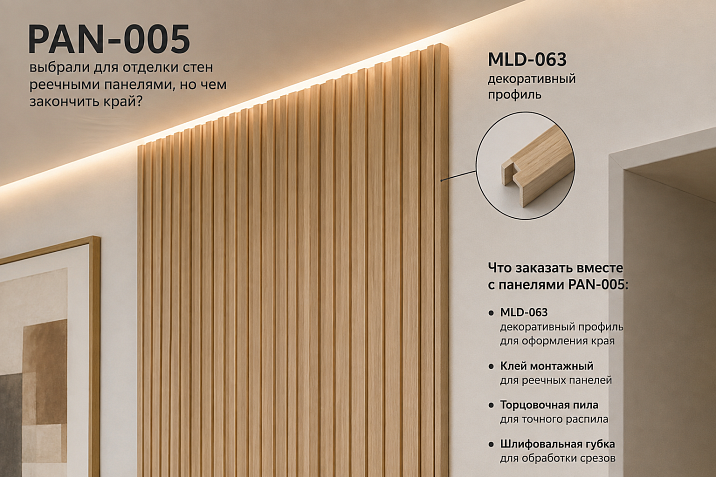
The panel is already chosen, the layout is almost ready, the color and material are liked — and only on the final drawing a question appears that can ruin the entire wall edge. PAN-005 ends not in a corner, but on an open plane: next to it remains a painted wall, a doorway, a niche, furniture, or another finish. The slatted relief cannot simply be cut off and hope that the end will look finished. A neat transition is needed. It is at this moment that MLD-063 appears.
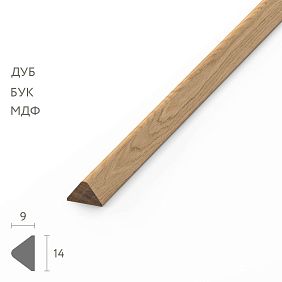
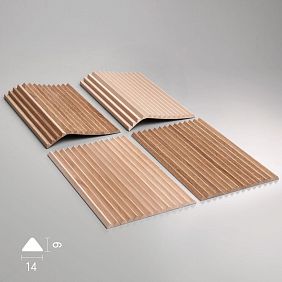
For wall finishing with slatted panels, the PAN-005 + MLD-063 combination is interesting not only visually. It has a specific dimensional feature. The depth of PAN-005 in all considered materials is 9 mm. For MLD-063 made of beech and oak, the nominal depth is also 9 mm, while for the MDF version it is 8 mm. Therefore, the phrase "we take MDF to MDF and get everything flush" is incorrect here. There is 1 mm between the catalog values, and this millimeter needs to be seen on the diagram before purchase and installation.
For beech and oak, the situation is simpler: the nominal depth of 9 mm for the panel and 9 mm for the molding match. But even such a match should not be turned into a promise of an automatic perfect joint. The actual front plane is affected by the base, glue, fabric backing of the panel, profile geometry, finish, and method of abutment. The right question is not "does MLD-063 fit at all," but how exactly it will be installed next to a specific PAN-005 and what edge line you want to get.
If the decision with the slatted surface has already been made, you can buy slatted panel PAN-005 after checking the material, length, and layout. But the wall edge needs to be designed simultaneously with the panels, not after their installation: then the molding, sample, and installation materials go into one order, rather than turning into an urgent additional purchase on site.
The open edge of PAN-005 is part of the project, not a leftover after installation
When slatted panels cover a wall from corner to corner, the end issue is almost unnoticeable: one surface meets another, and the boundary is determined by the room's architecture. Quite different is an accent area two or three meters wide on a large wall. The slatted pattern ends in the middle of the plane, and the viewer sees not only the front part of the panels, but also the transition to the smooth wall itself.
This transition must be intentional.
You can finish the panel with a straight line. You can emphasize the border with a narrow wooden profile. You can create a contrast between the relief and a smooth painted surface. But you cannot first install PAN-005 and then use a random leftover piece of trim to "cover up what you've got." The slat wall has too expressive geometry: a sloppy edge immediately reveals improvisation.
In this scheme, MLD-063 is considered a finishing profile for the paneling border, not a decorative strip added for aesthetics. Its width is 14 mm, and the depth depends on the material. These two figures need to be included in the wall layout before ordering.




Where an open border most often appears
There are many practical scenarios:
-
PAN-005 ends before the doorway;
-
The slat TV zone occupies only the central part of the wall;
-
The panel covers the wall behind the bed but does not reach the corners;
-
The finish runs along a reception desk or furniture;
-
The slat surface adjoins a painted wall;
-
The panel wraps around a column or curved section and ends on a visible plane;
-
you need to separate the wood from another material;
-
the decorative zone has an intentional vertical frame.
In all these cases, the edge is visible. Therefore, it must be as precise as the center of the composition.
Our factory also produces:




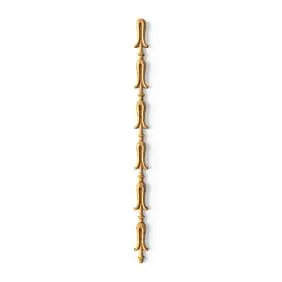
PAN-005 and MLD-063: first compare the sizes, then discuss the color
These two products have a convenient common point — material options. PAN-005 is available in MDF, beech, and oak. MLD-063 is also available in MDF, beech, and oak. But the same material name does not mean the same thickness.
| Set | PAN-005 | MLD-063 | What this means before ordering |
|---|---|---|---|
| MDF + MDF | C = 9 mm | C = 8 mm | Nominal difference is 1 mm; a flush joint cannot be promised without a diagram and fitting |
| Beech + beech | C = 9 mm | C = 9 mm | The depth matches the catalog; the actual abutment is still checked |
| Oak + oak | C = 9 mm | C = 9 mm | The depth matches the catalog; the finish and profile position are agreed upon in advance |
This table is the main technical filter of the article. It does not say that the MDF kit is "not suitable." It says something else: it cannot be designed as if 8 and 9 mm are the same value.
If you need exactly this finishing profile, you can buy a wooden molding MLD-063 and use it as part of the overall edge scheme. But before placing an order, it is useful to draw a cross-section of the wall: the base, the layer of mounting compound, PAN-005, MLD-063, and the adjacent finish.
Get Consultation
Why one millimeter matters
On a wall plan, 1 mm looks almost funny. On the end of a long vertical boundary, this millimeter stretches from floor to ceiling.
If the front surface of the molding turns out to be recessed relative to the protruding part of the panel, a thin step will appear along the edge. If the designer expected a single plane, the step will be perceived as a mistake. If such a transition is intentionally planned, it can become a neat shadow line.
The point is not to eliminate the difference at any cost. The point is to see it before installation.
The step is especially noticeable under side lighting. Light from a window, track light, or wall-mounted accent lighting will emphasize even a small difference. Therefore, the MDF kit should be evaluated not only with a ruler, but also with a sample under the actual lighting of the room.
MLD-063 is not a reason to promise a universal "cap" for any end.
The phrase "cover the edge" sometimes creates wrong expectations. The buyer imagines a special U-shaped or L-shaped profile that fits over the end and physically hides it from all sides.
MLD-063 should be evaluated according to its own drawing and installation method. It is a molding 14 mm wide that can be used to define the boundary of paneling and external edges. But you cannot automatically claim that it works as a ready-made end cap for any PAN-005 layout.
Before ordering, answer three questions:
-
What part of the edge do you want to hide?
-
Should the molding be in the same front plane as the relief?
-
Should it sit next to the panel, overlap part of the border, or create a separate decorative line?
The answers determine the mounting diagram.
A cross-section sketch is more useful than a pretty visualization.
For this task, a simple hand-drawn sketch is sufficient.
Show the wall in section. Mark the thickness of PAN-005 — 9 mm. Next to it, apply MLD-063 — 8 or 9 mm depending on the material. Draw the layer of mounting material with a conditional line, without specifying the thickness, until the specific composition and substrate are selected.
After such a sketch, it immediately becomes clear where the face edge of each element will be.
If the project is done by a designer, this joint must be included in the working documentation. If the installation is done independently, a paper sketch is still useful: it prevents forgetting the difference in depths during procurement.
MDF PAN-005 + MDF MLD-063: not a mistake, but a joint that requires a solution.
The most interesting combination is MDF with MDF. By material, it seems obvious: one base, one color, one finishing principle. But the depths differ.
PAN-005 — 9 mm.
MLD-063 made of MDF — 8 mm.
From this, several possible design scenarios arise.
Scenario 1. The 1 mm difference remains as a thin step
If the mockup shows a neat result, it is not necessary to try to technically bring the two parts into one plane. A narrow vertical step can look intentional, especially if the molding forms a calm boundary between the relief and smooth surfaces.
But the solution needs to be tested on a sample. On a white matte finish it reads one way, on a dark one another, and under side lighting a third.
Scenario 2. The profile position is adjusted by the installation scheme
Sometimes the difference can be compensated by the position of the parts relative to the base. But you cannot promise a specific compensation method in advance without knowing the wall, adhesive, and installation technology.
If the project requires strictly one face plane, the task should be handed over to the installer or technologist before purchase: how to bring MLD-063 8 mm to PAN-005 9 mm without an accidental step.
Scenario 3. The difference turns into a deliberate shadow line
In modern finishing, a slight difference can work as a material separator. Then 1 mm ceases to be a problem and becomes part of the geometry.
However, such an effect cannot be assessed only by the number. A real fitting of a fragment of PAN-005 and MLD-063 is needed.
Can MDF panels and MDF moldings be painted in one color?
As a design task — yes, they can be designed as a single color surface. But the same color in the specification does not guarantee the same visual perception.
PAN-005 is embossed. Light constantly alternates with shadow between the slats. MLD-063 is a narrow linear element of a different geometry. Even with the same finish shade, they will reflect light differently.
In addition, the final color depends on the substrate preparation, primer, application method, and number of coats.
Therefore, for a monochrome solution, it is better to make a test paint on both elements. Not on a separate conditional MDF plate, but specifically on a fragment of the profile and panel.
Monochrome painting emphasizes the geometry
When the panel and molding have the same color, the difference between them is built not on the shade, but on the relief.
This is especially useful in a minimalist interior: MLD-063 completes the edge but does not create a new color strip.
In such a composition, an error in thickness, on the contrary, becomes more noticeable through the shadow. Therefore, the MDF set especially needs a trial assembly.
Beech PAN-005 + beech MLD-063: 9 mm match simplifies the project, but does not cancel fitting
For beech, the catalog depths match: 9 mm for the panel and 9 mm for the molding.
This is a good start for a neat edge. But the two "9 mm" values do not guarantee that the finished face surfaces will be perfectly flush after gluing.
The panel has its own construction and fabric backing. The molding has its own profile. There may be local unevenness on the wall. The adhesive adds real thickness, which depends on the application method.
Therefore, the correct wording for the customer is:
the nominal depth of beech PAN-005 and beech MLD-063 matches; the actual joint needs to be checked on the assembled unit.
This is exactly how a technical fact turns into a useful recommendation without a false promise.
Oak PAN-005 + oak MLD-063: not only the scale matches, but also the logic of natural finishing
For the oak option, a nominal depth of 9 mm is also confirmed for both products.
When natural texture matters in an interior, the same wood species is especially convenient: the edge can be designed as a continuation of the overall material story of the wall.
But natural wood does not have a mechanically repeating pattern. Panels and moldings may differ in tone and grain character. This is not necessarily a defect — it is a property of natural material.
If the customer needs a maximally controlled visual transition, it makes sense to agree on samples and future finishing in advance.
Do not try to "draw" oak just from a website photo
A screen and real wood look different. Room lighting, lamp temperature, and adjacent materials change perception.
Therefore, with expensive finishing, a sample is not a formality, but part of the choice.
OPAN-005: a small order that helps test the big one
For PAN-005, there is a separate sample OPAN-005 measuring 197 × 9 × 310 mm. It is available in MDF, beech, and oak and allows you to evaluate the profile and material before purchasing the main batch.
If the customer hasn't seen the slat texture in person yet, it's reasonable Order sample OPAN-005 before the final decision.
The sample is especially useful in four situations:
-
choosing between MDF, beech, and oak;
-
you doubt the depth of the 9 mm relief;
-
want to match a finish in one color with MLD-063;
-
need to show the material to a client, designer, or craftsman before the main order.
The sample helps evaluate not only the color
Place OPAN-005 next to the intended molding. Look not only at the shade.
Check:
-
the actual protrusion of the panel from the base;
-
the edge shape;
-
the nature of the shadow;
-
the slat spacing;
-
how noticeable the molding should be;
-
how the combination looks from the side.
Even if the sample is small in size, it is sufficient for the end node: here we are interested not in the entire wall, but in the cross-section and texture.
14 mm MLD-063 needs to be taken into account in the width of the accent zone
The second important dimension of MLD-063 is 14 mm.
The buyer often counts only the panels. For example, they decide to cover a certain wall width and lay out PAN-005 modules. After that, a molding is added to the edge, and the final boundary shifts.
To prevent this, it is necessary to determine in advance whether the 14-millimeter profile is included in the specified decorative dimension or added to it.
These are fundamentally different schemes.
Scheme A. The molding is included in the total width of the accent zone
Then the total width of the panels should be calculated taking into account the space for MLD-063.
Scheme B. The molding is added outside the panels
Then the finished zone becomes wider by the actual visible part of the profile according to the installation scheme.
You can't just write a formula "+14 mm" without understanding the profile orientation. But in the working drawing, these 14 mm must appear.
PAN-005 with a width of 1010 mm: why the edge is better calculated up to the last panel
The width of PAN-005 is 1010 mm. This is a convenient module for large surfaces, but a real wall rarely divides evenly by 1010.
When laying out, there are three tasks:
-
determine the number of full panels;
-
understand where the trimming will be;
-
decide how exactly the last relief will finish before MLD-063.
A rough calculation by width can be done as the ratio of the width of the finished area to 1010 mm. But the purchase quantity cannot be determined only by rounding the calculator. You need to consider the cutting direction and whether the remainder can be used on an adjacent section.
Why the last module is more important than the first
The first panel is usually aligned to the baseline. The last one meets the edge.
If it has to be trimmed significantly, the rhythm of the slats near the molding may change. This is the area that will constantly be in view next to the smooth wall.
Therefore, good cutting is based not only on material savings, but also on the aesthetics of the last strip.
First, lay out the rhythm on the plan
Draw the wall to scale and apply 1010 mm modules.
See what remainder comes to MLD-063.
If the remainder is inconvenient, you can change the starting point or distribute the trimming more symmetrically. The specific solution depends on the entire wall.
"Three PAN-005 per three meters" and the edge with MLD-063 are two different tasks
For a wall about three meters long, the buyer may notice that three panels of 1010 mm give a total nominal module of 3030 mm. But the article about the edge should not turn into a repetition of calculating the extra 30 mm.
Here we are interested in something else: after the chosen cutting, where will the real boundary of the paneling be, and how will MLD-063 join it.
You can trim panels, redistribute the edge, work from the center — that's already a layout task. The molding is connected after the boundary is defined.
Therefore, in the order PAN-005 and MLD-063 are related, but each solves its own part of the project.
How to count the quantity of MLD-063
Molding is a linear element, so it should be calculated by the length of all boundaries it actually trims.
Start not with packaging or the number of panels, but with a drawing.
Mark each MLD-063 line:
-
left vertical edge;
-
right vertical edge;
-
top boundary, if provided;
-
bottom boundary, if provided;
-
edges of niches;
-
borders around furniture;
-
individual transitions between materials.
Add up the lengths of these lines.
The resulting value is the net design length.
Then it is compared with the lengths of a specific MLD-063 in the chosen material, which need to be checked in the current product card before ordering. Do not automatically add a universal 10 or 15 percent: the actual allowance depends on the number of cuts, joints, and the possibility of using offcuts.
Example without a made-up allowance
Suppose the slat zone has one open vertical border with a height of 2700 mm.
The net requirement for the molding is 2700 mm.
Then you need to check what lengths the selected MLD-063 material is available in and how many joints there will be. If one plank is not enough, the designer decides in advance where the connection will be and whether it is visually acceptable.
If there are two open vertical borders, the net requirement is already 5400 mm.
Such a calculation is more honest than an abstract "buy three pieces."
Where to place the molding joint if one length is not enough
The best joint is the one that is planned.
On a long vertical boundary, a random connection at eye level will be more noticeable than a joint in a less active area. If the profile is painted, the seam may be perceived differently than on a transparent wood finish.
Therefore, the length of MLD-063 should be chosen together with the wall height.
For solid wood, the material's pattern is especially important: two planks may differ in tone and texture. With a transparent finish, this is taken into account in the layout.
MDF, beech, or oak: the molding does not have to match the panel material at any cost
The safest logic is to first consider matching pairs: MDF + MDF, beech + beech, oak + oak. This makes it easier to manage style and finish.
But the interior may imply contrast.
For example, an MDF panel is painted to match the wall color, and the edge is deliberately made wooden. Or an oak panel gets a contrasting painted profile.
Such solutions are possible as design, but they cannot be presented as automatic technical compatibility.
If materials are mixed, the following are checked separately:
-
depth;
-
visual transition;
-
finish;
-
reaction to light;
-
actual abutment;
-
installation method.
MDF slat panels for walls for interior finishing: when MLD-063 is especially noticeable
MDF is often chosen for controlled color. When the panel is painted to match the wall, the slat relief becomes the main visual effect.
In this case, the edge must be especially clean. The contrast of the material does not distract the eye, and any step in thickness is read through light.
Therefore, for the PAN-005 MDF + MLD-063 MDF combination, you need to decide in advance: whether to hide the 1 mm technologically or leave it as part of the boundary.
This decision cannot be made after painting and installation of the panels.
Wooden slat wall panels for interior finishing: the edge works as a frame of natural material
Beech and oak give a different scenario. Here, MLD-063 can not just close the transition, but visually frame the natural wood surface.
Since for beech and oak the nominal depths of PAN-005 and MLD-063 match at 9 mm, it is easier to start the project with a flush joint. Then the mockup shows whether an additional visual divider is needed.
With a clear finish, watch the grain direction and tone of the molding. A narrow profile can appear darker or lighter than the panel simply due to wood orientation and lighting.
What to put in the cart before starting installation
A good purchase for this wall is not "panels now, everything else later." The kit is assembled before the craftsman arrives at the site.
| What to order | Why | What to check |
| PAN-005 | Main slat surface | Material, quantity, length, layout |
| MLD-063 | Open edge finishing | Material, depth 8/9 mm, boundary length, junction scheme |
| OPAN-005 | Texture and material check | Needed especially before a large order or finish selection |
| Installation materials | Fastening and preparation | Compatibility with base, panel, molding, and finish |
| Finishing materials | If painting/finishing is provided | Unified technology for adjacent parts |
To prepare the kit, you can Buy materials for installation and finishing After the wall base, material PAN-005, and selected MLD-063 are known. The specific composition cannot be selected based only on the word "panel": the adhesive and preparation depend on the entire system.
Why mounting materials cannot be chosen at the last moment
When the material arrives at the site, you want to start working immediately. That is why the mounting composition is often bought as the nearest available one.
For slat finishing, this is a bad sequence.
First, you need to understand:
-
what the base is made of;
-
how level it is;
-
which PAN-005 material is selected;
-
which MLD-063 is used;
-
whether the elements will be painted;
-
Is disassembly required?
-
What recommendations apply for the selected installation composition?
Only after this is the basket assembled.
If panels and molding are painted, the installation technology must be coordinated with the finishing. It is not allowed for the adhesive, primer, or finish to conflict with each other.
What to check on the wall before delivery PAN-005
The most expensive panel will not fix a crooked baseline.
Before ordering and especially before installation, check:
-
the actual width and height of the area;
-
the verticality of the wall;
-
angles;
-
position of sockets and switches;
-
door slopes;
-
furniture abutment;
-
baseboard;
-
ceiling node;
-
future MLD-063 line;
-
access to the edge for installation.
It is not necessary to bring the entire wall to perfect geometry according to an abstract standard. You need to know the actual deviations and understand how they affect the chosen system.
PAN-005 on a radius: the edge becomes a three-dimensional task
PAN-005 has a flexible fabric base and can be used not only on a flat wall. If the panel follows a curved surface and ends at a visible edge, MLD-063 cannot be automatically transferred from a straight layout.
A rigid linear profile and a flexible panel work differently.
Before ordering, you need to check:
-
where exactly the radius ends;
-
is the area under the molding flat;
-
what angle do the surfaces form;
-
can the profile be installed without tension;
-
what will the transition look like from the side.
If the edge is on a curved section, it is better to coordinate the solution with the drawing and sample.
PAN-005 on a furniture facade: 14 mm of molding can change the gaps
The slat panel can also be used in furniture applications. Here the scale is smaller, so the 14 mm width of MLD-063 becomes even more noticeable.
If the profile is added along the edge of a door or furniture panel, you need to check:
-
opening;
-
distance to the adjacent door;
-
handle;
-
hinges;
-
gap to the cabinet;
-
thickness of the overall package;
-
Edge position.
Do not use wall layout on furniture without recalculation. What fits easily on a three-meter wall may be too large on a 450 mm wide facade.
TV zone: where best to end the slat surface
One of the most common scenarios is PAN-005 behind the TV.
There are three edge logics.
Up to the furniture
The panel ends vertically above the cabinet or next to it. MLD-063 emphasizes a separate accent plane.
Behind the furniture
The edge is partially hidden by the cabinet or wardrobe. Then it is important to decide whether a profile is needed on the invisible section at all.
From floor to ceiling
The open vertical edge becomes a long architectural line. Here, both the 14 mm width and the possible depth step are especially noticeable.
In each variant, the number of MLD-063 differs, although the area of PAN-005 can be almost the same.
Bed headboard: the edge must account for nightstands and lamps
If the slat zone forms the headboard, its boundaries often run near bedside tables, sconces, or outlets.
Do not place MLD-063 just based on a beautiful symmetrical width in the visualization. Check the actual position of the furniture.
If the molding ends up half behind the nightstand, the vertical line will visually break. Sometimes it is better to widen or narrow the panel zone so that the edge remains readable.
Wall finishing with slat panels in the bedroom especially depends on light: side sconces highlight the relief and simultaneously enhance the shadow from the edge profile.
Hallway: the edge of PAN-005 often falls near the door trim
In the hallway, there is less free space and more doorways. Therefore, MLD-063 may end up next to an existing trim.
You need to check not only the thickness but also the visual width of the two vertical lines.
If the trim is large, an additional 14-millimeter profile next to it may look like a random strip. Sometimes it is better to end PAN-005 directly at the architectural boundary. In another situation, MLD-063 helps neatly separate the slat pattern from the door framing.
The decision is made on the facade view of the wall.
Commercial interior: a sample helps approve the solution before production.
In an office, salon, restaurant, or showroom, the area of slat cladding can be large. A mistake on one home partition is unpleasant; a mistake on dozens of square meters turns into a serious rework.
For such projects, OPAN-005 is especially useful.
You can approve:
-
material;
-
relief;
-
color;
-
combination with MLD-063;
-
edge character;
-
lighting.
After that, the craftsman makes the control unit, and only then the main volume is launched.
Other slat panels: when you shouldn't force PAN-005 to solve someone else's task
PAN-005 was not chosen by chance: it has a specific profile, width 1010 mm and depth 9 mm. But sometimes after fitting it turns out that it's not the edge itself that's bad — the scale of the entire panel doesn't fit.
Then it's more useful to buy slat panels for walls for interior finishing after comparing other models, than to complicate the edge with additional details.
In the category, you can evaluate alternative profiles and samples.
The phrase buy slat panels for walls for interior finishing in this case means not "take anything from the section," but compare the rhythm, width, material, and method of application before the final purchase.
When MLD-063 is really appropriate
This profile should be considered if:
-
the open edge PAN-005 remains visible;
-
a narrow, controlled edge is needed;
-
the molding material fits the overall concept;
-
dimensions 14 × 8 or 14 × 9 mm are accounted for in the drawing;
-
the junction has been checked on a sample;
-
the molding does not conflict with the trim, baseboard, or furniture;
-
the profile length is calculated along all open edges.
In such a situation, MLD-063 does not look like a random addition. It completes the system.
When it is better to look for another profile
MLD-063 does not have to fit every wall.
Another option should be considered if:
-
14 mm is too wide or too narrow for the composition;
-
the 8/9 mm difference in the MDF assembly does not suit the project;
-
a profile of a different shape is needed;
-
a different edge function is required;
-
the selected wood species does not match the finish;
-
the mounting joint cannot be executed neatly;
-
the edge must solve several technical tasks simultaneously.
In that case, you can buy wooden moldings after comparing profiles by drawings, not just by photograph.
How not to confuse MLD-063 with any narrow molding
The catalog has many linear products. A narrow face width does not make them identical.
For the PAN-005 edge, at least five parameters are compared:
-
article number;
-
width;
-
depth;
-
material;
-
the profile shape according to the drawing.
If only the width matches, that is not enough.
It is especially dangerous to replace MLD-063 with a similar item right on site, because "it is also 14 mm." Another profile may have a different depth and type of joint.
How not to confuse the material within a single article
For MLD-063, the same model has different C values.
MDF — 8 mm.
Beech and oak — 9 mm.
Therefore, it is not enough to write in the specification:
MLD-063 — 3 pcs.
The material must be specified.
The same logic applies to the panel. PAN-005 must be recorded with material, length, and quantity.
What to write in the specification
A good specification does not leave the installer to guess.
Example for MDF:
PAN-005, MDF, C = 9 mm, selected length — ___ pcs.
MLD-063, MDF, 14 × 8 mm, selected length — ___ pcs.
Note: the junction of PAN-005 / MLD-063 is to be executed according to the agreed section; nominal depth difference is 1 mm.
For beech or oak:
PAN-005, beech/oak, C = 9 mm — ___ pcs.
MLD-063, beech/oak, 14 × 9 mm — ___ pcs.
Note: nominal depth matches; actual surface to be checked on test assembly.
Such a record is much more useful than the phrase "molding in panel color."
Calculation PAN-005: why wall area is only the beginning
Slat panels are sold in modules, so area in square meters does not give a complete answer.
Need to know:
-
width of the area to be finished;
-
height;
-
panel orientation;
-
selected length;
-
number of full modules;
-
trimming;
-
ability to use leftovers;
-
number of open edges.
For example, two walls of the same area may require different amounts of PAN-005 due to different proportions.
Therefore order PAN-005 for wall finishing better after laying out at a width of 1010 mm, not just after calculating square meters.
Do I need to add a panel allowance
There is no universal percentage.
The allowance depends on:
-
number of cuts;
-
complex corners;
-
of radius sections;
-
reuse of offcuts;
-
pattern requirements;
-
risk of damage during fitting.
For a simple rectangular wall, one approach; for a column and several niches, another.
Therefore, the article should not promise "always add +10%". Better to create a cutting map and determine the actual reserve.
Do you need to add a margin MLD-063
The same logic applies to molding.
If there is one vertical boundary and the profile length conveniently covers the wall height, an extra percentage may not be needed.
If there are many corners, short sections, and joints, the allowance becomes more useful.
The correct way is to lay out all segments according to the available profile lengths and see which remnants can be reused.
Joints PAN-005 and MLD-063 are better coordinated before final finishing.
If elements will be painted, the temptation is great: first glue everything, then 'paint will hide it.'
Paint does not fix geometry.
It can unify color, but a step, uneven line, or incorrect joint will remain.
Therefore, a dry fit or control assembly is done first. Then the position is approved. After that, installation and finishing are done according to the accepted technology.
Dry fit: what exactly to look at
Place a panel fragment and molding next to each other without final fixation.
Look at the joint:
-
strictly from the front;
-
at a 45° angle;
-
from the side;
-
in daylight;
-
under working artificial light.
Run your hand over the transition.
On the MDF connector, feel the 1 mm difference and decide whether compensation is needed.
On beech/oak, check whether the actual surface matches what was expected from the nominal 9 mm.
Do PAN-005 and MLD-063 need to be strictly flush?
There is no universal requirement.
Flush is one of the options.
The second option is a slight intentional offset.
The third is molding as a separate frame.
The fourth is a shadow transition.
The main thing is that the chosen result is specified by the project, not appearing randomly due to mismatched dimensions.
The PAN-005 relief and the smooth molding line serve different roles.
The panel creates a frequent repeating vertical pattern. MLD-063, in contrast, gathers this rhythm into a single boundary line.
This is why an overly complex edge profile can conflict with the panel. A narrow molding is interesting because it does not try to replicate the entire relief but separates it from the next surface.
This is a practical selection criterion: the edge should complete the pattern, not create a new competing motif.
Light along the edge: a small test before installation.
If there is a light fixture or window near the panel, do a test.
Place the sample and molding on a temporary base.
Turn on the light during the time of day when the room is used most often.
Check:
-
where the shadow from MLD-063 appears;
-
how noticeable the MDF step of 8/9 mm is;
-
does the profile not look too contrasting;
-
is the edge readable as a straight line.
Such a test is especially useful for dark finishes and natural oak.
The baseboard, ceiling, and MLD-063 should meet without an accidental joint.
A vertical molding does not exist on its own. At the bottom, it meets the baseboard or floor; at the top, it meets the ceiling, cornice, or other trim.
These points need to be drawn out.
If MLD-063 with a width of 14 mm ends directly on a large baseboard, you need to decide which one adjoins which.
If the panel goes up to the ceiling, the profile should also have a clear finish.
A common mistake is to perfectly finish the middle of the vertical edge and leave the last 50 mm at the top and bottom unprocessed.
Door slope next to PAN-005
If the accent zone ends at the door, check the distance between MLD-063 and the trim.
A too-small gap creates two almost merged vertical lines.
What to do if MLD-063 is already purchased, but panels are still being selected
First, do not adjust the entire concept to a randomly purchased molding.
Check whether PAN-005 is really needed in terms of profile, material, and width.
If yes, compare the depths.
If MLD-063 made of MDF is chosen, design the 1 mm difference in advance.
If made of beech/oak, a 9 mm match will be a convenient starting condition.
What to buy first: OPAN-005 or the full panel
If you haven't seen the material and profile in person yet, a sample makes more sense.
OPAN-005 is small, convenient to hold against a wall, furniture, floor, and molding.
If PAN-005 has already been used in another room and the material is familiar, a sample may not be needed.
So OPAN-005 is not a mandatory item in every cart. It's a risk-reduction tool where the decision hasn't been physically confirmed yet.
Commercial route without unnecessary catalog transitions
When the scheme is already clear, the order can be assembled sequentially.
First, PAN-005 is fixed.
Then — MLD-063 material.
Then the linear length of the edge is calculated.
If there are doubts about the texture, OPAN-005 is added.
Lastly, mounting and finishing materials are selected for the specific substrate and finish.
This way, the buyer doesn't wander through the catalog but assembles one wall as a system.
Mistakes that make the edge of a slat wall look random
Mistake 1. Ordering MLD-063 only from a photo
A photo shows the appearance but doesn't replace the cross-section detail. For PAN-005, the depth, profile width, and position relative to the base are critical. If the project is calculated only from a picture, the difference between 8 and 9 mm surfaces on site.
Mistake 2: Assuming the MDF pair has the same thickness
PAN-005 has a depth of 9 mm, MLD-063 made of MDF is 8 mm. The difference is only 1 mm, but along a long vertical edge, it can become a noticeable shadow line.
Mistake 3: Promising beech or oak "perfectly flush"
By nominal dimensions, the depth matches — 9 mm. But after installation, the final plane is affected by the base, the mounting compound, the panel construction, and the actual position of the profile.
Mistake 4. Forgetting about the width of MLD-063
14 mm must be present in the layout. If the profile is added after the width of the accent zone is approved, the edge may shift relative to furniture, an outlet, a doorway, or wall symmetry.
Mistake 5. Ordering the molding after panel installation
This way, the buyer deprives themselves of the ability to calmly design the joint. It is much easier to choose the edge simultaneously with PAN-005 and check it before final fixation.
Mistake 6. Calculating the molding by panel area
MLD-063 is calculated by the length of open edges. Two walls of the same area may require different amounts of profile if one has one open edge and the other has four.
Error 7. Using a universal percentage of allowance
The allowance depends on the cutting layout. If one strip covers the entire section, the extra percentage may remain unused. With many joints and short sections, on the contrary, the reserve becomes more useful.
Error 8. Not making an MDF tie-in mockup
One millimeter is difficult to discuss in words. It is much easier to assemble a small fragment and see the real difference under daylight and artificial lighting.
Mistake 9. Buying an installation compound without checking the substrate
The wall may be painted, plastered, wooden, or have another substrate. The compound is selected for a specific system, not just for the panel name.
Mistake 10. Trying to fix poor cutting with a molding
MLD-063 finishes the edge but does not fix a random leftover of the last panel. The rhythm of PAN-005 should be coordinated earlier.
Mistake 11. Not drawing the bottom junction
The vertical molding meets the baseboard, floor, or furniture. If this joint is not resolved, a neat line in the middle of the wall will end with a sloppy transition at the bottom.
Mistake 12. Not drawing the top
The same applies to the ceiling, cornice, and other upper elements. The top point of the profile should look finished.
Error 13. Mixing beech and oak just because they are both 9 mm
Matching depth does not mean matching texture. If species are mixed in one zone, it should be a deliberate design decision.
Error 14. Painting a panel and molding separately without a test sample
Even with a single chosen shade, relief and smooth profile can be perceived differently. A test fragment helps to see the result in advance.
Error 15. Refusing a sample on a large-scale project
For a large wall or commercial project, the cost of a mistake is usually higher than the cost of preliminary testing. OPAN-005 is useful precisely as a tool for approval before purchasing the main volume.
Mistake 16. Considering the open edge only a decorative trifle
In fact, it is a geometric junction of two surfaces. It affects the width of the zone, the amount of material, light and shadow, and the installation sequence.
Who the PAN-005 + MLD-063 combination suits
It is especially interesting for those who have already chosen PAN-005 and want a neat visible boundary of the slatted surface.
The combination suits accent walls, TV zones, headboards, commercial panels, transitions to painted walls, individual piers, and furniture compositions where MLD-063 dimensions fit the project.
The main condition is that the molding material must be determined before purchase, because the depth of 8 or 9 mm depends on the material.
For MDF, the designer immediately works with a difference of 1 mm.
For beech and oak, with a nominal match of 9 mm.
In both cases, the control node remains useful.
When it is better not to fix MLD-063 without additional search
It is not worth finally binding the project to this profile if:
-
a strictly single front plane for MDF is needed, and the way to resolve the difference has not yet been found;
-
the width of 14 mm does not fit into the composition;
-
a different edge shape is needed;
-
the profile must perform a function that a regular molding does not have;
-
the border runs along a complex radius;
-
there is a trim, switch, or furniture too close nearby;
-
the project requires a different material or a different thickness.
In such situations, it is better to compare other items than to force MLD-063 to work in an unsuitable scheme.
How to order a kit for STAVROS
Before placing an order, it is useful to prepare one sheet with project data. Not a beautiful presentation, but a working page.
It should contain:
-
the exact width and height of the area being finished;
-
the PAN-005 layout;
-
the panel material;
-
number of modules;
-
trim locations;
-
all open boundaries;
-
selected material MLD-063;
-
design length of molding;
-
connection diagram;
-
need for OPAN-005;
-
Base type;
-
future finish;
-
selected installation logic.
After this, you can proceed to the products.
The main rack surface is convenient order PAN-005 for wall finishing already after laying out to a width of 1010 mm and the selected length.
For the visible edge — order MLD-063 for the panel edge in a specific material, not just by article number.
If the material has not yet been confirmed in person, OPAN-005 is added to the order.
Mounting materials are selected after checking the base and finish.
What should be recorded in the invoice or internal specification
Bad entry:
PAN-005 — 3 pcs.
MLD-063 — 2 pcs.
It does not specify the material and does not record the critical difference in depths.
For MDF, it is better to write in more detail:
PAN-005, MDF, C = 9 mm, selected length — ___ pcs.
MLD-063, MDF, 14 × 8 mm, selected length — ___ pcs.
For solid wood:
PAN-005, beech or oak, C = 9 mm — ___ pcs.
MLD-063, matching material, 14 × 9 mm — ___ pcs.
If a flush joint is important at the site, it is also better to specify this in a separate note: installation is performed according to the agreed section, not "on site."
Transition of PAN-005 to a painted wall: the smooth surface must be prepared together with the edge
One of the cleanest scenarios is when the slatted surface ends on a smooth painted wall. In the visualization, such a transition looks simple: on the left is the relief, on the right is the flat color, and between them is a narrow MLD-063 line. At the site, another question arises — the quality of the adjacent plane itself.
If the smooth wall has a wave, a local putty buildup, or an uneven paint line, even a precisely installed molding will emphasize the defect. Therefore, before installing the profile, it is useful to check not only PAN-005, but also the strip of the base next to the future edge.
This is especially important when the molding and the wall are painted in the same color. The contrast of shades disappears, but the geometry remains. Any vertical deviation or uneven gap becomes more noticeable.
In practice, it is necessary to determine in advance:
-
exact edge line using a laser or another accepted marking method;
-
the condition of the wall to the right and left of MLD-063;
-
the order of painting the smooth surface and the profile;
-
protection of the finished finish during installation;
-
the place where the fabric base PAN-005 ends.
Thus, MLD-063 works as a neat boundary, not as an attempt to hide a poorly prepared wall.
Control unit before the main batch: what the client or master must approve
For an expensive project, it is useful to assemble a small full-scale demonstration fragment. A part of PAN-005, MLD-063, and the same type of substrate that will be on site is sufficient.
On such a fragment, several things are checked at once: the actual plane, depth differences, profile shadow, color, joint character, and appearance from a distance.
If MDF is used, the control unit responds whether the customer is satisfied with the difference between 9 and 8 mm. If beech or oak, it shows how much the actual match of two nominal 9 mm corresponds to the expectation.
After approval, it is better to photograph the fragment from the front and side. For a series or a large object, it can be saved as a reference. Then installers receive not a verbal "make it beautiful," but a specific sample of the agreed result.
This approach is especially useful when slat wall panels for interior wall finishing pass through several rooms: the same boundary repeats many times, and a random error in one unit can multiply across the entire object.
FAQ: PAN-005, MLD-063, and open edge finishing
Will MLD-063 fit PAN-005?
MLD-063 can be considered as a profile for finishing the open edge of PAN-005, but the final decision depends on the material and installation scheme. For MDF, there is a nominal difference in depth, so an automatic flush joint cannot be guaranteed.
What is the depth of PAN-005?
9 mm for the considered options in MDF, beech, and oak.
What is the depth of MLD-063?
8 mm for the MDF option and 9 mm for beech and oak.
Does the 1 mm difference mean that MDF MLD-063 cannot be used with PAN-005?
No. It means that the designer must decide in advance how the transition will look. The difference can remain as a step or be accounted for in the installation scheme.
Will the beech PAN-005 and beech MLD-063 be exactly in the same plane?
The nominal depth matches — 9 mm. The actual position after installation needs to be checked on the real base or a control joint.
What about the oak set?
Same logic: according to the catalog, the depth of both elements is 9 mm, but the actual abutment depends on the installation.
What is the width of MLD-063?
14 mm. This dimension needs to be included in the facade layout of the wall before cutting the last panel.
Do we just need to add 14 mm to the width of PAN-005?
Not always. It all depends on whether the molding is included in the specified dimension of the accent zone or is located outside its limits. This is determined on the drawing.
Can PAN-005 made of MDF and MLD-063 made of MDF be painted in the same color?
As a design solution, yes. For an identical result, you need to coordinate the preparation and finish, and ideally do a test paint on the actual profiles.
Is OPAN-005 needed before ordering?
Not in every project. It is especially useful if you haven't seen the material and relief in person yet, are choosing between MDF, beech, and oak, or are approving a large volume.
What is the size of OPAN-005?
197 × 9 × 310 mm.
What materials is OPAN-005 available in?
From MDF, beech, and oak.
How to calculate the quantity of MLD-063?
Add up the lengths of all lines where the molding is actually intended: vertical edges, niche boundaries, upper or lower sections. Then distribute the result across the available lengths of the selected profile.
Do I need to add a 10% margin for MLD-063?
A universal percentage is not needed. The margin depends on joints, cutting, and the possibility of using leftovers.
How to calculate the quantity of PAN-005?
You need to make a layout based on a width of 1010 mm, the height of the zone, and the selected panel length. A simple area calculation is not enough.
Can I simply trim the last PAN-005 near the molding?
The trimming must match the construction and the project. It is especially important to maintain a neat rhythm for the last strip next to MLD-063.
Is MLD-063 needed on both sides of the accent zone?
Only if both edges are open and require molding per the project. If one side ends at a corner, door, or furniture, the scheme may be different.
Can MLD-063 be used next to a door casing?
Such a joint can be considered, but you need to check the distance, thicknesses, and the visual interaction of the two vertical profiles.
How can I tell if a 1 mm difference will be noticeable?
Assemble a small fragment of MDF PAN-005 + MDF MLD-063 and look at it under side lighting. This is more reliable than any verbal description.
Can the difference be compensated with the adhesive layer?
You cannot pre-designate the installation compound as a universal compensator. The thickness and application method depend on the specific product and substrate.
Do I need to account for the baseboard?
Yes. The bottom point of MLD-063 must have a clear connection to the baseboard or floor.
Do I need to consider the ceiling?
Yes. The top joint is designed with the same care as the vertical part of the edge.
Can an MDF molding be installed on an oak panel?
As a designer combination, this can be considered, but you cannot automatically promise a match in appearance or geometry. You need to check the depth, finish, and the joint itself.
Where can I see other slat panels?
If PAN-005 does not fit in profile or format, you can to buy slat panels for walls for interior finishing after comparing other models and samples.
Where can I see other moldings?
If MLD-063 does not suit you in width, depth, or shape, compare other profiles in the wooden molding section.
What is the most important thing to check before payment?
Material PAN-005, material MLD-063, the actual cross-section of the junction, and the length of all open edges. For MDF, separately note the difference between 9 and 8 mm.
Before the cart: seven questions instead of one guess
Before payment, go through a quick check.
Where does PAN-005 end?
Not "approximately near the door," but along the exact line on the plan.
What is the panel material?
MDF, beech, or oak.
Which MLD-063 is selected?
The material determines the depth.
How should the edge look?
Flush, with a small step, like a frame or as a separate line.
How many linear meters of the border?
Count the actual lines, not the wall area.
Is OPAN-005 needed?
If you haven't seen the material in person yet, a sample can resolve several questions before a large purchase.
Are the mounting materials matched to the base?
If not, the cart is not complete yet.
The PAN-005 edge should be purchased together with the wall, not after it.
The main practical conclusion here cannot be reduced to the word "fits".
For MDF there is a confirmed nominal difference: 9 mm for PAN-005 and 8 mm for MLD-063. This means the edge needs to be designed and checked. For beech and oak, the depth matches according to the catalog — 9 mm, which creates a more convenient starting condition, but still does not replace a test assembly.
The width of MLD-063, 14 mm, should appear in the layout before the craftsman cuts the last panel. The amount of molding is calculated based on the length of open borders. OPAN-005 helps to see the texture and real profile depth before the main order. Mounting materials are chosen after the base, material, and finish are determined.
It is this order that turns several catalog items into a complete interior unit.
STAVROS company allows you to assemble a solution within one product line: PAN-005, MLD-063, OPAN-005 sample, other slat panels, wooden moldings, and mounting materials. But even within one system, the precise result begins not with an assumption about compatibility, but with dimensions and a design cross-section.
If the edge of the wall remains open, do not leave it "for later." First check the 9/8/9 mm, determine how the visible 14 mm line works, calculate the layout, and only then assemble the order. Then the slat surface will end where and how the project intended, not where the last PAN-005 accidentally ended.