


Article Contents:
- Profile typology: from simple to complex
- Preparation for installation: basis of quality adhesion
- Installation technology: from adhesive to final finish
- Durability: factors and guarantees
- Conclusion

Choosing a decorative profile is not just buying a pretty strip from a store. It is choosing a material that will serve for decades, retaining its original shape, color, and relief detail. Gypsum moldings are fragile, heavy, and fear moisture. Wooden ones are noble but expensive, prone to deformation from humidity and temperature. Foam ones are cheap but soft, easily damaged, and lose their shape. Polyurethane combines the advantages of all materials, eliminating their drawbacks.
Polyurethane moldings — a technological solution that has become a standard in modern interior decoration. The material combines lightness (8-10 times lighter than gypsum), strength (does not break under impact), water resistance (does not absorb water), geometric stability (does not deform with temperature fluctuations), and ease of processing (cuts with a regular saw). This is not a compromise, but a synthesis of the best qualities.
Polyurethane molding profiles are diverse — from simple smooth strips 10 mm wide to ornate ones 120 mm wide. Each profile is designed for specific tasks, has its own purpose and character. Understanding profile typology is the foundation of correct selection, guaranteeing that the molding will be appropriate for the interior, proportionate to the room, and fulfill its framing or dividing function.
Installing polyurethane moldings is accessible to a DIY enthusiast, but requires understanding the technology. Adhesion of adhesive to the substrate, proper surface preparation with primer, adhesive application technique, spackling joints for invisible seams, painting with enamel for final protection — each stage is critical. Skipping any of these creates problems: molding elements peeling off after months, visible seams, uneven color after painting.
The durability of polyurethane moldings is 30-40 years under normal operating conditions. However, the actual service life depends on the quality of installation. A correctly installed molding serves for decades without repair. A poorly installed one peels off within a year and requires redoing.
In this article, we will systematically examine three pillars of successful application of polyurethane moldings: selecting the right profile for the task, installation technology with emphasis on critical stages (adhesion, spackling, priming), and factors determining durability. You will gain practical knowledge for independent work or competent oversight of contractors.


Profile typology: from simple to complex
The profile of a molding is the shape of its cross-section, visible on the end of the strip. The profile determines visual perception, functionality, and installation complexity. Profile classification is multidimensional; let’s consider the main criteria.
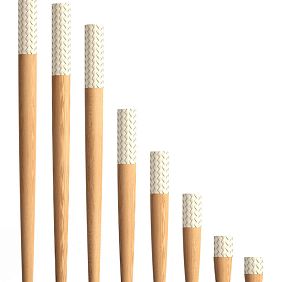
By width, moldings are divided into narrow (10-30 mm), medium (35-70 mm), wide (80-120 mm), and very wide (over 120 mm). Narrow profiles create delicate lines, suitable for small rooms and modern minimalist interiors. Medium profiles are universal and applicable in most situations. Wide profiles create monumentality and require spacious rooms with high ceilings. Very wide profiles are for palace interiors, halls, and public spaces.
By cross-section shape, they are classified as flat (rectangular section, one plane), profiled (stepped section with protrusions and recesses creating light and shadow play), and ornamental (relief ornament on the front surface — plant motifs, geometric patterns, classical meanders).
Flat profiles — the foundation of modern style. Smooth, even surface without ornament, clear geometric lines. Width from 10 to 80 mm, thickness 5-15 mm. Mounted on walls to create frames, panels, horizontal divisions. Can be painted any color, compatible with minimalism, Scandinavian style, loft.
Profiled moldings have a complex cross-section — concave curves (concave arcs), convex curves (convex arcs), and flat steps (flat steps). Such a profile creates light and shadow play, visually richer than flat profiles of the same width. Classical profiles (Ionic, Corinthian) are used in neoclassical and classical interiors. Width 40-100 mm, thickness 15-30 mm.
Ornamental profiles carry relief ornamentation on their front surface. Plant motifs (acanthus leaves, vines, flowers) are characteristic of Baroque and Empire styles. Geometric ornaments (meanders, beads, diamonds) — for Classicism and Art Deco. Relief depth 3-10 mm determines expressiveness. Width of ornamental profiles 50-120 mm.
By purpose, moldings are classified as wall (for wall decoration — creating panels, framing doors, windows, mirrors), ceiling (for wall-ceiling junction, visually replacing cornices but wider), corner (special L-shaped elements for internal and external corners), and flexible (with increased elasticity for curved surfaces — arches, round columns).
Flexible moldings contain plasticizers, allowing the profile to be bent with a radius of 30-50 cm without damage. Mounted on curved surfaces — arched openings, bay windows, round niches. Cost 50-100% more than rigid ones, but indispensable for non-standard tasks.
Standard length of polyurethane moldings — 2.0 or 2.4 meters. Some manufacturers (Orac Decor, Europlast) produce 2.0 m strips for easier transportation. Others (Decomaster) — 2.4 m to reduce the number of joints during installation. When calculating quantities, consider standard length to minimize waste.
Polyurethane density varies from 150 to 350 kg/m³ depending on the manufacturer. Budget series (Decomaster) — 180 kg/m³, optimal price-quality balance. Premium (Orac Decor Duropolymer) — 350-420 kg/m³, maximum strength and relief detail. For interior moldings, density of 180-250 kg/m³ is sufficient.
Cut edge color — indicator of material quality. White cut edge is characteristic of high-quality polyurethane without additives (Europlast, Orac Decor). Beige cut edge — material contains additives, possible quality fluctuations (Decomaster — stable manufacturer with beige cut edge, quality verified). Grey cut edge with specks — possible recycled raw material, quality questionable.
Surface treatment affects adhesive and paint adhesion. The back surface of the molding (adhering to the wall) may be smooth or milled. A milled surface with small grooves provides better adhesive adhesion — contact area increases, adhesive fills grooves, creating mechanical bonding. The front surface is primed by the manufacturer to improve paint adhesion.


Preparation for installation: basis of quality adhesion
Adhesion — the bonding of adhesive to molding surfaces and walls/ceilings. Quality adhesion ensures secure attachment for decades. Poor adhesion leads to element peeling off within months or years. Factors affecting adhesion: surface cleanliness, substrate strength, humidity, temperature, adhesive type, application technique.
Surface diagnosis of the wall or ceiling — first stage. Tapping reveals loose plaster areas — a dull sound indicates voids beneath the layer. Such areas are sanded down to a solid substrate and filled with plaster or spackling compound. Installing on loose plaster guarantees the molding will peel off along with it.
Substrate strength is checked by scratching with a hard object (key, coin). A strong surface does not scratch or leaves minimal marks. Loose surface (old paint, flaking whitewash) scratches easily and crumbles. Such surfaces are mechanically (putty knife, brush) or chemically (stripping agent for old paint) cleaned, then primed with a strengthening primer.
De-greasing is critical for kitchens and areas where grease contamination is possible. Grease prevents adhesion — adhesive does not stick to greasy surfaces. De-greasing is performed with isopropyl alcohol, acetone, or special degreaser. Applied to a cloth, the surface is wiped in the area of molding installation (strip 10-15 cm wide along the installation line).
Priming the base is a mandatory step often ignored by amateurs. Primer performs three functions: strengthens the surface (penetrates pores, bonds particles), equalizes absorbency (creates uniform absorbency), improves adhesion (creates a rough surface for glue).
The type of primer is selected based on the base. For concrete and gypsum plaster — acrylic deep-penetration primer (penetrates 5-10 mm, strengthens). For gypsum board — primer for low-absorbent bases (reduces absorbency, glue does not penetrate into gypsum board). For old paint — adhesive primer (creates a rough surface on smooth paint).
Primer is applied with a brush or roller in one layer. A strip 10-15 cm wide along the molding installation line. Primer consumption: 100-150 ml per linear meter. Drying time: 2-4 hours, better to wait 6-8 hours or overnight. Priming the entire wall is not necessary — only the area in contact with the molding is sufficient.
Acclimatization of moldings before installation is mandatory. Polyurethane brought from a cold warehouse in winter has a temperature of -10 to -20°C, and its dimensions correspond to this temperature. When installed in a warm room at +20-25°C, polyurethane expands by 0.3-0.5 mm per linear meter. If cold elements are installed and then expand, stresses arise, and delamination may occur. Acclimatization: leave moldings in the installation room for 24-48 hours.
Installation line marking is done with a laser or bubble level. For horizontal moldings (wall-ceiling junctions, horizontal wall divisions), horizontal alignment is critical — a deviation of 5-10 mm over 3 meters is visually noticeable and creates an impression of curvature. A laser level projects a horizontal line across the entire wall, along which the bottom edge of the molding is marked. For vertical moldings (door frames, vertical panels), vertical alignment is checked with a plumb bob.
Temperature and humidity during installation affect the polymerization of the glue. Optimal temperature: +15-25°C, humidity: 40-70%. At temperatures below +10°C, the glue does not set properly and polymerization slows down. At temperatures above +30°C, the glue sets too quickly, leaving insufficient time to adjust the element's position. Humidity above 80% slows polymerization, below 30% accelerates it, and the glue may crack upon setting.
Our factory also produces:


Installation technology: from glue to final finishing
Glue for polyurethane moldings — a specialized composition ensuring strong adhesion to various bases and to polyurethane itself. Universal construction glues (liquid nails, mounting foam) are less suitable — they set more slowly, hold less strongly, and may cause polyurethane deformation.
Types of glue: mounting polyurethane glue (Orac Decofix FDP500, Decomaster DM-0801) — thick paste in a 310 ml tube for mounting gun, setting time 10-20 minutes, full strength after 24 hours. Joint polyurethane glue (Orac FX200, Decomaster DM-0802) — liquid paste in an 80 ml tube with a narrow nozzle, for gluing ends of elements at joints, setting time 2-4 hours.
Mounting glue is applied to the back side of the molding (the side facing the wall) in a zigzag pattern or dots. For narrow moldings (width up to 50 mm) — one central strip. For medium (50-80 mm) — two strips along the edges. For wide (over 80 mm) — continuous application with a 4-6 mm notched trowel. Glue layer thickness: 2-3 mm.
Technique for pressing the molding against the wall: the element is placed against the marking line, pressed evenly along its entire length with a force of 3-5 kg (noticeable but not excessive). Pressed for 10-15 seconds, then secured with painter’s tape (scotch) every 40-60 cm. Tape strips 4-5 cm wide are attached with one end to the molding and the other to the wall, holding the element until the glue sets. Tape fixation time: 4-6 hours, after which the tape is removed.
Excess glue squeezed out from under the molding is immediately wiped away with a damp cloth or sponge. If the glue has already set (after 30-40 minutes), removal is more difficult — it will require cutting with a sharp knife, leaving marks. Remove immediately while the glue is still plastic.
Trimming moldings at corners — a critical moment in installation. Internal corners (standard room corners) — both moldings are cut at 45°, forming a 90° right angle when joined. External corners (projections, columns) — also at 45°, but in the opposite direction. Tools: a miter saw with angle setting (professional option, accuracy ±0.5°) or a miter box with hacksaw (budget option, accuracy ±1-2°).
Cutting technique in a miter box: the molding is placed in the miter box in the position it will have on the wall (for wall moldings — vertically, with the back side against the side wall of the miter box). The slot is set at 45° to the right or left. A fine-tooth hacksaw (for metal) cuts smoothly without pressure. The cut should be clean, without chips. Check: two cut pieces are joined dry — the joint should be tight, with a gap no more than 0.5 mm.
Joint glue is applied to both joining ends in a thin layer of 1 mm before installation. The elements are pressed together during the gluing process to the wall. Joint glue creates a monolithic connection — the joint becomes stronger than the material itself and is practically invisible after spackling and painting.
Spackling the joint — the final installation operation, making the joint invisible. Even perfectly cut and joined elements have a micro-gap of 0.3-0.5 mm. Under side lighting, this gap casts a shadow, making the joint visible. Spackling fills the gap, and after painting, the joint becomes completely invisible.
Type of spackle: acrylic finishing spackle for interior use (Knauf, Ceresit). Do not use gypsum spackles — they shrink upon drying and crack. Acrylic spackles are elastic, do not shrink, and sand well.
Spackling technique: take a small amount of spackle with a narrow rubber trowel (40-60 mm), fill the joint gap by moving across the joint. Smooth along the joint, removing excess. The spackle should be level with the molding surface, without protrusions or depressions. Immediately wipe away excess around the joint with a damp sponge. Drying time: 2-4 hours.
Joint sanding after spackle drying is done with fine sandpaper P220-P320. Sand carefully, without damaging the molding’s relief (if there is ornament). Goal — a perfectly smooth joint, imperceptible to the touch. Remove sanding dust with a vacuum cleaner or damp cloth.
Priming moldings before painting is mandatory for even color. Polyurethane has a dense surface, poorly absorbing paint. Spackle at joints is porous and absorbs actively. Without primer, paint will lay unevenly — one color saturation on polyurethane, another (darker) on spackle. Primer equalizes absorbency.
Type of primer: acrylic primer for interior use, universal or for low-absorbent bases. Application: brush 40-50 mm, thin layer along the molding, carefully painting ornament recesses (if any). Consumption: 50-80 ml per linear meter. Drying time: 3-4 hours.
Painting under enamel — final coating protecting molding from dirt, mechanical damage, and UV radiation. Enamel — paint forming a hard, smooth film with glossy or semi-gloss finish. For moldings, use acrylic or alkyd enamels for interior use.
Acrylic enamels (water-based) — eco-friendly, odorless, dry quickly (3-4 hours between coats), tools easily cleaned with water. Shortcoming — less durable film compared to alkyd enamels. Alkyd enamels (solvent-based) — more durable, hard film, deep gloss. Shortcomings — strong odor, long drying time (8-12 hours), toxic until dry.
For polyurethane moldings, acrylic enamels are preferred — absence of solvents eliminates risk of polyurethane deformation (although quality polyurethane resists alkyd enamels, cheap polyurethane may soften).
Painting technique: first coat — primer, thin, brush 40-50 mm along the molding. Paint all ornament recesses, joints, corners. Dries in 3-4 hours. Second coat — covering, masks gaps, creates uniform saturated color. Applied in the same direction as the first. Dries in 3-4 hours. Do not sand between coats unless there are drips or runs.
Molding colors: white — classic solution, universal, suitable for any interior. Contrasting (black, dark gray on light walls) — graphic, modern solution. In wall tone — molding creates relief visible only by shadow, subtle solution. Gold, silver, bronze — for luxurious classic interiors, requires patina or special metallic paints.
Get Consultation
Durability: factors and warranties
Durability of polyurethane moldings — 30-40 years as claimed by manufacturers under normal operating conditions. Actual service life depends on material quality, correct installation, operating conditions, and maintenance.
Material quality is determined by polyurethane density, absence of pores and inclusions, geometric accuracy. Premium manufacturers (Orac Decor, NMC) guarantee density 215-350 kg/m³, white uniform cut, size accuracy ±1 mm. Russian manufacturers (Evroplast, Decomaster) — density 180-250 kg/m³, white or beige cut, accuracy ±2 mm. Quality is stable, service life 30-40 years.
Chinese unnamed manufacturers — density 120-180 kg/m³, gray cut with inclusions, accuracy ±5 mm. Possible internal pores, uneven density. Service life unpredictable — from 5 to 20 years. Saving 30-50% on price entails risk of premature replacement.
The quality of installation is critical. Proper installation (preparation of the base with primer, specialized adhesive, careful filling of joints, priming and painting) ensures a service life of 30-40 years. Incorrect installation (omitting base priming, using unsuitable adhesive, absence of joint filling, painting without priming) leads to problems: element detachment within 1-3 years, joint cracking, uneven color change.
Signs of proper installation: molding firmly adheres to the wall (does not detach or bend under light pressure), joints are invisible (gaps are absent, ornament matches), paint is uniform (no stains, patches, tone differences between molding and joints), 90° angles (checked with a square).
Operating conditions affect durability. Favorable conditions: temperature +15-25°C, humidity 40-70%, absence of direct sunlight (UV degrades polymer), minimal mechanical impacts. Under such conditions, polyurethane lasts 40+ years without changes.
Unfavorable conditions: temperature above +40°C (near radiators, saunas — polyurethane softens and deforms), humidity above 90% constantly (in pools, hammams — possible swelling of low-quality polyurethane), direct sunlight (south-facing windows — UV yellows the surface, making it brittle within 5-10 years), frequent mechanical impacts (in children’s rooms, gyms — possible damage from impacts).
For unfavorable conditions, choose premium brands (Orac Decor with UV stabilizers, density 350+ kg/m³), paint with UV-filter paints, provide mechanical protection in risk zones.
Maintenance of polyurethane moldings is minimal. Dry cleaning with a soft brush or vacuum cleaner 1-2 times per year removes dust. Wet cleaning with a cloth and detergent 1-2 times per year for kitchens (removes grease buildup). Do not use abrasive cleaners (scratch the surface), solvents (may damage polyurethane or paint), stiff brushes (leave scratches).
Repairability is high. Minor damage (scratches, chips) is filled with acrylic putty, sanded, and repainted. Major damage (cracks, broken pieces) requires replacement of the element. Removal: cut the adhesive joint with a sharp knife, carefully remove the element. Installation of a new one: by standard technology.
Manufacturer warranties: premium brands (Orac Decor) offer a 10-15 year warranty for maintaining geometry and absence of deformation. Russian brands (Evroplast, Decomaster) — 5-10 years. Warranty covers manufacturing defects (material inhomogeneity, geometric inaccuracies), but not installation or operational defects.
Signs of end of service life: surface yellowing (UV exposure, polymer aging), brittleness (polymer loses elasticity, cracks under pressure), delamination (loss of adhesive bond over time), deformation (polymer softening due to temperature). When these signs appear on 30-50% of molding surface area, replacement is recommended.
Ecological safety of polyurethane: modern compositions are safe, certified for residential use, do not emit harmful substances at normal temperatures. At heating above +100°C, emissions may occur — do not use polyurethane moldings in saunas (steam rooms +80-100°C), near stoves or fireplaces with localized heating.
Conclusion
Moldings made of polyurethaneA technologically advanced solution for interior decoration, combining the aesthetics of classical molding with the practicality of modern materials. Variety of profiles from narrow 10 mm to wide 120 mm, from flat smooth to ornately decorated, opens possibilities for any style and task.
Installation is accessible to a DIY enthusiast with understanding of the technology. Adhesion of adhesive to the base is ensured by surface preparation — priming to strengthen and equalize absorption. Specialized polyurethane adhesive creates a strong bond, lasting decades. Filling the joint with acrylic compound makes joints invisible. Priming moldings before painting equalizes absorption of polyurethane and putty. Painting with enamel creates a final protective coating.
Durability of 30-40 years is achieved by combining high-quality material (density 180-250 kg/m³, uniform cut), proper installation (all stages performed according to technology), favorable operating conditions (temperature +15-25°C, humidity 40-70%, minimal UV exposure), minimal maintenance (cleaning 1-2 times per year).
The company STAVROS offersPolyurethane moldingsProfiles from proven manufacturers — Evroplast, Decomaster, Orac Decor. Material density 180-350 kg/m³ depending on series. Wide range of profiles: smooth from 10 to 120 mm, classic and modern ornate, flexible for curved surfaces.
Professional consultants from STAVROS will help select a profile for your interior, calculate the quantity considering trimming in corners, recommend adhesive, primer, putty, and paint for quality installation. Full project kit — from moldings to consumables — in one place.
Material quality is guaranteed — all manufacturers are certified, products undergo incoming inspection. Clear geometry, uniform density, white or beige uniform cut. Material warranty 5-10 years from the manufacturer.
Create an interior where classical molding decor aesthetics combine with the practicality of modern technologies. An interior that will delight for decades without repairs or replacements.Polyurethane moldingsPolyurethane moldings from STAVROS — a smart choice for long-lasting decor.
From profile selection to final painting. From base preparation with primer to joint filling. From proper adhesive to quality enamel. Each stage of technology is critical for the longevity of the result. Follow the technology, use quality materials, and get a result lasting 30-40 years.
STAVROS — your reliable partner in creating long-lasting interiors. Quality materials, professional consultations, full technical support. Thousands of completed projects across Russia. Your project can become the next success.
Profiles to any taste. Installation by technology. Durability for decades.Moldings made of polyurethanePolyurethane moldings from STAVROS — start transforming your interior today.


