Article Contents:
- Anatomy of a door portal — from simple to complex
- Level one: basic framing with architraves
- Level two: overlay decor on the door leaf
- Level three: architectural portal with columns and cornice
- Materials for door decor — wood vs. polyurethane
- Wooden moldings — classic and noble
- Polyurethane moldings — technological and versatile
- Combined approach — the best of both worlds
- Designing the composition — proportions and harmony
- Golden ratio in door decor
- Margins and frames — the rule of air
- Symmetry and Rhythm
- Tools and materials — what you need for the job
- Measuring Tools
- Cutting Tools
- Fastening materials and adhesives
- Finishing materials
- Step-by-step technology for installing moldings on a door
- Stage 1: Dismantling and preparation
- Stage 2: Composition layout
- Stage 3: Preparing the moldings
- Stage 4: Gluing the moldings
- Stage 5: Sealing the joints
- Stage 6: Finishing
- Stage 7: Door installation
- Creating an architectural portal — the next level
- Portal design
- Pilaster Installation
- Installing the pediment
- Finishing the portal
- Common Mistakes and How to Avoid Them
- Error 1: Inaccurate miter cutting
- Error 2: Excess adhesive
- Error 3: Ignoring proportions
- Error 4: Style Mismatch
- Error 5: Insufficient surface preparation
- Decor options for different interior styles
- Classic style
- Neoclassicism
- Modern style
- Scandinavian Style
- STAVROS — master of architectural details that create the interior
- Answers to popular questions about door decoration with moldings
- How much does it cost to decorate one door with moldings?
- Can laminated doors be decorated?
- How long does it take to decorate one door?
- Is it necessary to remove the door for decoration?
- How to match door decor with architraves?
- Can glass inserts in doors be decorated?
- Do moldings need to be treated with protective compounds?
- What to do if the molding comes off after a year?
- Can a portal with pilasters be made on a narrow door opening?

Have you ever wondered why some doors look like faceless rectangles, while others resemble architectural portals that catch the eye? The secret isn't in the cost of the door leaf or exotic wood species. The secret is in the framing. Moldings for interior doors transform the most ordinary smooth door into an object of admiration, adding relief, volume, and classic elegance. This technique has been known for centuries, but today it's accessible to anyone willing to dedicate a few hours to creative work.
The problem with typical apartments and houses is standardization. The doors installed by developers are functional but extremely faceless. A smooth leaf without expressive details, simple trims, and a lack of decoration. Replacing such doors with classic paneled ones costs tens of thousands of rubles per leaf. But there is an alternative: decorating interior doors with overlay elements, which costs several times less, can be done in a day, and radically changes the perception of the interior.
This article is a step-by-step guide to creating a door portal that looks expensive but doesn't require huge investments. We'll break down which moldings and decorative elements are suitable for doors, how to properly design the composition, calculate the amount of materials, and perform the installation yourself. You'll learn how to turn a simple leaf into a paneled door with classic proportions, how to build a full-fledged portal with pilasters and a pediment, what mistakes beginners make and how to avoid them. We'll talk about materials — wood and polyurethane, their features and combinations. In the end — practical recommendations, answers to typical questions, and examples of completed projects.


Anatomy of a door portal — from simple to complex
Before picking up tools, you need to understand the structure of what we're creating. A door portal is not a random set of planks, but a thoughtful architectural system where each element serves a function.


Level one: basic trim with casings
The minimal door decoration is casings.door frameCasings cover the joint between the door frame and the wall, mask the mounting foam, and give the opening a finished look. Casings are installed on three sides of the opening: two vertical planks and one horizontal one at the top. The bottom part is usually not framed — it's covered by the baseboard.
Casings vary in width (from 50 to 120 mm), profile (flat, rounded, profiled with relief), and material (MDF with film, solid wood, polyurethane). To create an 'expensive' portal, simple flat casings are not enough — you need profiled ones with relief elements that create a play of light and shadow.
Casing joints are made at a 45° angle in the upper corners of the opening. This requires precise cutting — even a millimeter error creates a noticeable gap. Quality jointing is a sign of professionalism.
Our factory also produces:


Level two: overlay decoration on the leaf
The next step is decorating the door leaf itself. Here, moldings come into play — narrow planks with a shaped profile that are glued onto the door surface, creating relief frames. These frames imitate the panels of classic doors, turning a smooth leaf into a three-dimensional structure.
Standard scheme: the door is divided into 2–4 rectangular sections, each framed with molding. For a door 2000 mm high, suitable options are: two horizontal sections (upper 800 mm, lower 1200 mm) or four sections (two at the top and two at the bottom, each 500–600 mm high). Proportions are important — overly elongated or squat sections disrupt harmony.
Molding width for door decoration is 20–40 mm. Narrower ones look insufficiently expressive, wider ones overload the composition. The profile relief can be simple (one convexity) or complex (multiple steps, ornamental motifs). For classic interiors, complex profiles are suitable; for modern ones — laconic ones.
Get Consultation
Level three: architectural portal with columns and cornice
The highest level is a full-fledged architectural portal, where the door opening is framed not just by casings, but by pilasters (flat columns), and crowned at the top with a pediment (decorative cornice). Such framing turns the door into a ceremonial entrance, emphasizes its status, and creates a sense of monumentality.
pilasters and columnsPilasters are installed on the sides of the door. They consist of three parts: base (lower expansion), shaft (main body), and capital (upper decorative finish). Pilaster width is 80–150 mm, which is significantly wider than a regular casing. Height — from floor to top of door opening plus capital height.
The pediment is placed above the door, resting on the capitals of the pilasters. It can be straight (a simple profiled cornice), triangular (classical pediment), or semicircular (segmental pediment). The pediment's projection from the wall plane is 50–120 mm, creating an expressive shadow and emphasizing volume.
Creating a full-fledged portal is an ambitious project requiring precise calculations, quality materials, and confident tool handling. But the result is impressive: an ordinary interior door transforms into an architectural object worthy of palace interiors.
Materials for door decoration — wood vs. polyurethane
The choice of material determines not only the appearance but also the installation technology, durability, and project cost. ForDoor DecorTwo main materials are used: natural wood and polyurethane. Each has its own strengths and weaknesses.
Wooden moldings — classic and noble.
Wood is the traditional material for architectural decor.Decorative solid wood overlaysThey possess a unique texture, tactile warmth, and the ability to age beautifully. The main wood species for moldings are oak, beech, ash, and pine.
Oak is the elite among species. Density 700 kg/m³, high hardness, expressive texture with characteristic radial rays. Color ranges from light beige to dark brown. Oak is stable — it does not warp from humidity, does not crack, and lasts for decades. But it is expensive — oak wooden moldings cost 2–3 times more than beech and 4–5 times more than pine.
Beech is the workhorse of carpentry. Density 650 kg/m³, high hardness, fine-pored, uniform texture. Color is pinkish-beige; when stained, it can take on almost any shade, making beech versatile. Cost is moderate, quality is stable. The only downside is that beech is more sensitive to humidity than oak and requires a protective coating.
Pine is the budget option. Density 500 kg/m³, soft, easy to work with, but also easy to scratch. Texture is pronounced with dark annual rings and light wood between them. Color is yellowish-white. Pine moldings are cheap, accessible, but require careful handling and mandatory finishing (varnish, paint).
Wooden moldings are mounted with adhesive (carpenter's PVA, acrylic mounting adhesive) and additionally secured with headless finishing nails or micro-screws, which are countersunk below the surface, and the holes are filled with wood filler. After installation, the wood is sanded, stained (if a color change is required), and coated with varnish or oil.
Polyurethane moldings — technological and versatile.
Polyurethane is a synthetic polymer that, through casting, reproduces any forms with an accuracy of up to tenths of a millimeter.Moldings made of polyurethaneThey are lightweight (density 350–450 kg/m³), durable, moisture-resistant, and dimensionally stable.
The advantages of polyurethane for door decor are numerous. First, weight — a polyurethane molding is 2–3 times lighter than a wooden one, simplifying installation and reducing the load on the door leaf. Second, stability — polyurethane does not warp from humidity, does not dry out, and does not crack. Third, detail — casting allows reproduction of the finest ornament details, unattainable with woodworking.
Polyurethane moldings are mounted with specialized adhesive (polyurethane or acrylic mounting adhesive). Mechanical fasteners are not required — the adhesive provides sufficient strength. After installation, joints are filled with acrylic sealant, and elements are painted with water-based or acrylic paint.
The aesthetics of polyurethane are debated. Proponents claim that after quality painting, polyurethane is visually indistinguishable from wood. Opponents believe it lacks the 'soul' and warmth of natural material. The truth lies in the middle: for modern interiors where painting in white or light colors is planned, polyurethane is ideal. For classic interiors with natural wood texture, wood is preferable.
A combined approach — the best of both worlds.
A sensible solution is to combine materials. The main framing (casing, large portal elements) is made of wood, preserving the nobility of the material. Small applied decor on the door leaf is made of polyurethane, utilizing its technological advantages. After uniform painting or staining, the difference in materials is leveled, and the advantages of each contribute to the overall result.
Designing the composition — proportions and harmony.
The beauty of a door portal lies not in the quantity of decor, but in the correctness of proportions. There are time-tested rules that guarantee a harmonious result.
The Golden Ratio in door decor.
The Golden Ratio is a proportion where the smaller part relates to the larger part as the larger part relates to the whole. Numerically, this ratio is approximately 1:1.618. Applied to a door: if you divide the height of the leaf into two parts according to the Golden Ratio, you get a point where it is logical to place a horizontal molding.
For a standard door height of 2000 mm, the Golden Ratio gives a division into 1236 mm and 764 mm. A horizontal molding placed at a height of 1236 mm from the bottom of the door creates a visually balanced composition. The upper section is smaller, the lower section is larger — a proportion pleasing to the eye.
When creating panel decor with four sections, the Golden Ratio is applied twice: first vertically (determining the position of the horizontal divider), then horizontally within each section (determining the width of the vertical frames from the edge of the door).
Margins and frames — the rule of air.
Molding frames on a door should not fit flush to the edges of the leaf. A margin — 'air' — is necessary, creating visual breathing for the composition. The minimum margin from the edge of the door to the outer boundary of the molding frame is 50–70 mm for doors of standard width (700–900 mm). For narrow doors (600 mm), the margin is reduced to 40 mm; for wide double doors, it is increased to 80–100 mm.
The top and bottom margins are usually 10–20% larger than the side margins. This visually stabilizes the composition — the door looks stable, not 'upside down'. For a door 800 mm wide and 2000 mm high, optimal margins are: sides 60 mm, top and bottom 70 mm.
The width of the molding itself forming the frame is 25–35 mm for doors of standard size. A narrower molding (15–20 mm) looks insufficiently expressive; a wider one (40–50 mm) overloads the small area of the door leaf.
Symmetry and Rhythm
A door is a symmetrical object, and the decor should support this symmetry. If creating a composition of several sections, they should be either identical (all sections of the same size) or symmetrically distributed (two small ones on top, two large ones on the bottom, but the left and right sides are mirror identical).
Rhythm is created by repeating elements. If there are four sections on the door, and in the corners of each section are placedDecorative Inserts, the overlays should be identical or vary according to a specific pattern (e.g., upper ones smaller, lower ones larger). Chaotic mixing of different overlays destroys the composition.
Tools and materials — what is needed for the work
Creating a door portal does not require a professional carpentry workshop, but a certain set of tools is necessary.
Measuring Tools
Tape measure (at least 3 meters) for measuring the door and opening. Carpenter's square for checking right angles. Level (laser or bubble, 60–80 cm long) for controlling verticality and horizontality of elements. Chalk line for applying long straight lines on the door.
Cutting tools
For cutting moldings at an angle, a miter saw (electric miter box) or a manual miter box with a fine-toothed saw is needed. A miter saw provides a perfect cut at the desired angle effortlessly. A manual miter box requires skill and care but handles the task well with proper patience.
For length trimming, an electric jigsaw or a hand saw is suitable. For wood, use a blade with fine teeth (for a clean cut without chips); for polyurethane, any blade will do.
Fastening materials and adhesives
For wooden moldings: PVA wood glue (for gluing wooden surfaces), 25–35 mm headless finish nails or micro-screws with a countersunk head, wood filler (for filling fastener holes).
For polyurethane moldings: polyurethane mounting adhesive (provides maximum strength for bonding polyurethane to wood and other materials) or acrylic mounting adhesive (less strong but sufficient for lightweight elements), white acrylic sealant (for filling joints between elements).
Finishing materials
For wood: sandpaper with grit 150, 220, 320 (for surface preparation before finishing), stain or pigmented oil (if changing the wood color is required), acrylic varnish or wood oil (final protective coating).
For polyurethane: acrylic primer (improves paint adhesion to polyurethane), water-based or acrylic paint (final coating).
Step-by-step technology for installing moldings on a door
Theory without practice is useless. Let's consider a specific sequence of actions for creating classic paneled decor on a smooth door.
Stage 1: Dismantling and preparation
Remove the door from its hinges. Working with the door lying horizontally on sawhorses or a table is significantly more convenient and accurate than with a vertical one. Remove handles, lock hardware—they will interfere with installation.
Clean the door surface from dirt, grease, and dust. If the door is painted with glossy paint or laminated, lightly sand the surface with 150-grit sandpaper—this will improve adhesive adhesion. Wipe with a damp cloth and let dry.
Step 2: Marking the composition
Mark the layout of molding frames on the door. Use a pencil and a long ruler or a chalk line. Mark the indents from the door edges (60–70 mm), draw vertical and horizontal lines defining the sections.
Check the markings: all rectangles should have right angles, opposite sides equal, symmetry maintained. Measure the diagonals of each rectangle—if they are equal, the rectangle is precise.
Stage 3: Preparing the moldings
Calculate the length of each molding segment. For a rectangular frame, four segments are needed: two vertical (equal to the frame height) and two horizontal (equal to the frame width). Ends are cut at a 45° angle for corner joints.
Measure the segment length along the outer side of the molding (this is important—length is measured not along the inner side of the frame but the outer). Cut one end at 45°, measure the required length, cut the second end at 45° in the opposite direction.
Check the fit 'dry': lay out the four segments on the door according to the markings, check if the corners meet without gaps. If there are gaps—adjust the cut. It's better to spend time on fitting now than to struggle with filling gaps after gluing.
Stage 4: Gluing the moldings
Apply adhesive to the back of the molding in a thin zigzag or dots spaced 5–10 cm apart. Don't overdo it—excess will squeeze out when pressed. Place the molding on the door exactly according to the markings, press. Immediately wipe away any squeezed-out adhesive with a damp cloth.
For wooden moldings, additionally secure with finish nails or micro-screws. Fasteners are placed 20–30 cm apart, countersunk 1–2 mm below the surface. Holes are filled with wood filler matching the molding color.
For polyurethane moldings, mechanical fasteners are usually not needed—the adhesive is strong enough. But for assurance, you can secure the molding with painter's tape while the adhesive sets (2–4 hours).
Glue all four sides of the first frame, then move on to the next sections. Work sequentially, don't rush—quality is more important than speed.
Stage 5: Sealing the joints
After the adhesive has completely dried (24 hours), fill the joints between moldings with acrylic sealant. Use a thin nozzle on the tube, apply the sealant carefully, filling the gap but not smearing it on the surface. Immediately after application, smooth the sealant with a wet finger or rubber spatula—resulting in a smooth line without drips.
Stage 6: Finishing
For wooden moldings: lightly sand the surface with fine sandpaper (grit 220–320), remove dust. Apply stain if you want to change the color (stain is applied with a brush or pad, absorbs for 15–20 minutes, excess is wiped off with a cloth). After the stain dries (2–4 hours), apply varnish or oil in 2–3 thin coats with intermediate drying.
For polyurethane moldings: prime with acrylic primer (if the moldings were not factory-primed). After 2–4 hours, apply paint in 2–3 coats. The first coat is a base, may apply unevenly. The second and third create an opaque, even coating.
Stage 7: Door installation
After the finishing materials have completely dried (12–24 hours), reinstall the hardware (handles, lock), and hang the door on its hinges. Admire the result — a smooth, plain door has transformed into an elegant paneled surface.
Creating an architectural portal — the next level
If decorating a door panel with moldings is a task for a 'confident amateur,' then creating a full-fledged portal with pilasters and a pediment is an 'advanced' level. But with proper preparation and patience, it is quite achievable.
Portal design
A portal begins with a drawing. Measure the door opening: width, height, depth of the reveals. Determine what type of portal you want: classical (with pilasters and a triangular pediment), simplified (with pilasters and a straight cornice), minimalist (wide architraves with a small cornice at the top).
Select the elements.pilastersPilasters consist of a base, a shaft, and a capital. The height of the shaft should correspond to the height of the door opening minus the height of the base. Pilaster width is 80–120 mm. The pediment is chosen to match the style of the pilasters.
Calculate how far the portal will protrude from the wall. Pilasters typically have a thickness of 15–25 mm (protruding from the wall). The pediment protrudes further — 50–100 mm from the edge of the pilaster. Ensure the protrusion does not interfere with door opening and people's movement.
Installing Pilasters
Pilasters are installed on the sides of the door opening. First, the base — the lower part — is mounted at floor level or on a small plinth (10–20 mm). The base is secured with adhesive and dowels (if the wall is concrete or brick) or screws (if the wall is drywall or wood).
The pilaster shaft is installed on the base. Long shafts (over 1.5 meters) require additional fixation at mid-height — a hidden bracket, a dowel screwed into the wall through the shaft in an inconspicuous location (in a relief recess). Adhesive is applied to the back of the shaft, the element is pressed against the wall, aligned vertically with a level, and secured with temporary supports until the adhesive sets.
The capital is installed on the top of the shaft. It can be secured with adhesive (if lightweight, polyurethane) or additionally with hidden fasteners (if heavy, wooden). The capital serves as a support for the pediment, so its attachment must be reliable.
Pediment installation
Sundial above the doorThe pediment rests on the capitals of the pilasters and is attached to the wall above the opening. If the pediment is lightweight (polyurethane, short length), adhesive and a few dowels screwed into the wall through the pediment at the top (fasteners hidden by decorative elements) are sufficient.
If the pediment is heavy (wood, large projection from the wall), hidden brackets are required — metal angles screwed to the wall, on which the pediment rests. The brackets are concealed by the pediment itself and decorative overlays.
The horizontality of the pediment is critical. Even a slight misalignment (1–2 mm per meter of length) is noticeable to the eye and ruins the impression. Use a long level, check carefully.
Portal finishing
After installing all portal elements, fill the joints between them with acrylic sealant. The joint between the pilaster and the wall, the joint between the capital and the shaft, the joint between the pediment and the capital — all these lines should be smooth, without gaps. Apply the sealant carefully, smooth it out, creating a seamless transition.
If the portal is made of wood, the finishing is stain and varnish (or oil) using the technique described above. If made of polyurethane or a combination, everything is painted a uniform color with acrylic paint. Painting hides material differences, creating the impression of a solid architectural element.
Typical mistakes and how to avoid them
Even with a detailed guide, beginners make mistakes. Knowing about them in advance can help avoid disappointment.
Mistake 1: Inaccurate miter cutting
Joining moldings at a 45° angle requires jeweler-like precision. A deviation of even 1–2° creates a gap in the corner. Causes: dull saw blade, incorrect angle setting on the miter saw, workpiece shifting during cutting.
Solution: use a sharp blade with fine teeth, carefully set the angle on the saw (check with a test piece), securely fix the workpiece when cutting. If a gap still forms, do not try to hide it with a thick layer of sealant — it's better to recut the element to achieve a tight joint.
Mistake 2: Excess adhesive
When there is too much adhesive, it squeezes out when pressing the molding, smearing on the surface of the door and the molding itself. Dried adhesive creates unsightly stains that are difficult to remove.
Solution: apply adhesive moderately, in a thin line or dots. Immediately after pressing the element, remove any squeezed-out adhesive with a damp cloth. If the adhesive has dried, carefully scrape it off with a knife without damaging the surface.
Mistake 3: Ignoring proportions
The desire to maximally fill the door with decor leads to overload. Too many frames, overly wide moldings, too small margins from the edges — the door looks garish and tasteless.
Solution: follow the rule 'less is more.' Two or three harmonious sections are better than six cramped ones. Margins from the edges of at least 50 mm are mandatory. If in doubt, create a mock-up of the composition on paper, view it from a distance, and assess the proportions before starting work.
Mistake 4: Style mismatch
Mixing elements from different styles creates visual dissonance. Classical pilasters with Ionic capitals and modern minimalist moldings on the door do not go together. Baroque overlays with scrolls and strict geometric frames conflict.
Solution: choose elements of the same style or stylistically compatible ones. If the portal is classical, the door decor should also be classical (symmetrical frames, possibly with plant appliqués in the corners). If the style is modern, use laconic forms without excessive ornamentation.
Mistake 5: Insufficient surface preparation
Installing moldings on a dirty, greasy, or glossy surface leads to peeling. The adhesive cannot provide a reliable bond if there is a layer of dust or grease between it and the surface.
Solution: thoroughly clean the surface before installation. Degrease it (using white spirit, alcohol), and if necessary, lightly sand it to create roughness. This takes 10–15 minutes but guarantees the durability of the decor.
Decor options for different interior styles
The door portal should match the interior style. Let's consider characteristic solutions for popular directions.
Classic style
Symmetrical paneled frames on the door: two to three sections, framed by profiled moldings 30–40 mm wide. In the corners of the frames —carved appliqués— with plant motifs (acanthus leaves, laurel branches). A portal with pilasters, the capitals of which are executed in the Corinthian or Ionic order. A triangular or semicircular pediment with a profiled cornice.
Material — wood (oak, beech), varnished or tinted in noble shades (walnut, mahogany). Color — natural wood or painted in white, cream, light gray with visible texture preserved (patinated enamel).
Neoclassicism
A more restrained version of classic. Moldings are thinner (20–30 mm), the profile is simplified, without excessive ornamentation. Frames on the door are strictly geometric, without appliqués or with minimalist corner elements. Portal with narrow pilasters (60–80 mm), capitals simplified. Pediment straight, profiled cornice without a gable.
Material — wood or polyurethane, painted in solid colors (white, pearl gray, light beige). Contrast: dark door (graphite, dark brown) with white decor or vice versa.
Modern style
Laconic horizontal or vertical slats on the door, creating a minimalist rhythm. Moldings are flat or with the simplest profile (one step), width 15–25 mm. Color — monochrome (door and decor of the same color) or contrasting (black slats on a white door).
The portal is simplified to wide architraves (100–150 mm) without pilasters and capitals. The pediment is absent or replaced by a thin horizontal slat, slightly protruding from the wall.
Scandinavian style
Light wood (birch, ash, bleached oak) or white paint. Decor is minimalist: one or two simple frames on the door, thin moldings without ornamentation. The portal is absent, replaced by architraves made of the same light wood, 70–90 mm wide.
Emphasis on wood texture, naturalness, absence of excessive decor. Sometimes the door is not decorated with moldings at all but is painted with graphic patterns — horizontal or vertical stripes, geometric shapes.
STAVROS — a master of architectural details that create the interior
When you think about where to find quality moldings, appliqués, pilasters, and other elements for creating a door portal, there is a name spoken with respect by professional carpenters, designers, and demanding clients. STAVROS is a company for which architectural decor is not just a product, but a mission aimed at reviving the culture of detailing in modern interiors.
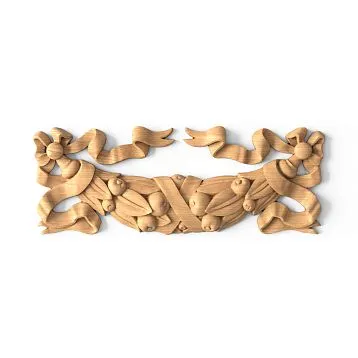
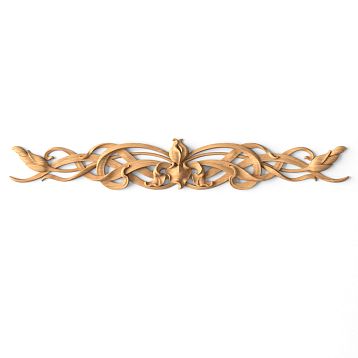
Decorative elements for doors from STAVROS— are hundreds of SKUs of wooden and polyurethane products, each of which has been selected based on criteria of quality, aesthetics, and manufacturability. Moldings made of solid oak and beech — from simple flat slats 15 mm wide to complex profiled elements 60 mm wide with multi-step relief. Carved appliqués — plant ornaments, geometric rosettes, classic cartouches, executed with jewelry-like detailing. Pilasters and columns — from compact decorative elements 1 meter high to full-fledged architectural structures 3 meters high with bases and capitals of all classical orders.
Polyurethane moldings from STAVROS are made from high-quality raw materials of European production. Density of 380–420 kg/m³ provides an optimal combination of lightness and strength. Geometric accuracy — deviations of no more than 0.3 mm per linear meter — guarantees perfect joining of elements without gaps. The detailing of the relief reproduces the finest nuances of the ornament, creating the impression of handcrafted work.
But STAVROS is not just a wide catalog. It is a comprehensive approach to solving the task. The company's consultants will help select elements for your interior style, offer ready-made compositional solutions, and calculate the required amount of materials with millimeter precision. You will receive a specification: which moldings, which appliqués, how many linear meters, what additional materials (adhesive, fasteners, sealant) will be required.
STAVROS designers (if necessary) will develop an individual door portal project with 3D visualization. You will see the result before work begins, can make adjustments, and try alternative options. This is especially valuable for complex portals, where a mistake in proportions or choice of elements can be costly.
Delivery of STAVROS products is organized to any region of Russia and CIS countries. Wooden elements are packaged in protective film and corrugated cardboard, preventing damage during transportation. For Moscow, St. Petersburg, and adjacent regions, delivery by the company's own transport is possible — this guarantees preservation and precise deadlines.
Warranty on STAVROS products — 5 years. Wooden elements do not deform, do not crack, retain geometry and surface quality. Polyurethane ones do not yellow, do not lose relief, remain strong and stable. These are not marketing promises, but real characteristics confirmed by thousands of completed projects.
STAVROS pricing policy combines premium quality and reasonable prices. Own production of wooden elements, direct contracts with European polyurethane suppliers, optimized logistics allow offering competitive prices without compromising quality. Wholesale buyers — construction companies, designers, foremen — are provided with special conditions and volume discounts.
STAVROS showrooms in Moscow and St. Petersburg are spaces where you can see, touch, and evaluate products in person. The exposition includes samples of all main molding profiles, collections of appliqués and rosettes, fragments of door portals in different styles. You can compare wood and polyurethane, evaluate the detailing of carving, and select combinations of elements.
The online catalog on the STAVROS website contains detailed information about each product: high-resolution photographs from multiple angles, exact dimensions, technical characteristics, application recommendations. A convenient filter system allows selecting elements by material, size, style. The shopping cart and online payment make the ordering process fast and comfortable.
STAVROS's educational mission is expressed in the publication of detailed articles, video instructions, and master classes on working with decorative elements. The company understands: beautiful interiors are created not only by professionals but also by enthusiastic amateurs who need knowledge and quality materials. STAVROS provides both.
By choosing STAVROS, you choose a company that respects the traditions of carpentry craftsmanship and simultaneously uses modern technologies. A company for which every detail is important — from the accuracy of the molding profile to the quality of packaging. A company that understands: a door is not just an opening, it is an architectural element that defines the character of the interior. And with quality STAVROS elements, every door can become a portal to a world of beauty and harmony.
Answers to popular questions about door decor with moldings
How much does it cost to decorate one door with moldings?
The cost depends on the complexity of the composition and materials. The minimal solution (4 simple frames made of polyurethane molding per door) — from 1,500 to 3,000 rubles for materials. The average option (4 frames made of wooden molding with corner overlays) — 4,000–7,000 rubles. Premium (complex composition of carved wooden elements) — 10,000–20,000 rubles. The master's work (if you don't do it yourself) — 3,000–8,000 rubles per door depending on complexity.
Can laminated doors be decorated?
Yes, but with a caveat. The laminated surface is smooth, and adhesive adheres worse than on wood. Before installing the moldings, lightly treat the door surface with sandpaper of 120–150 grit — create a slight roughness to improve adhesion. Use high-quality adhesive (polyurethane mounting or MS-polymer). For assurance, additionally secure the moldings with finishing nails (if the door has a wooden frame inside).
How long does it take to decorate one door?
For an experienced master: preparation and marking — 30 minutes, preparation and trimming of moldings — 1 hour, gluing — 1 hour, sealing joints and finishing — 1–2 hours. Total: 4–5 hours of pure time plus time for adhesive and finishing coating to dry. For a beginner, the process will take 1.5–2 times longer — don't rush, it's better to spend an extra hour on careful fitting than to redo it later.
Is it necessary to remove the door for decoration?
Not necessarily, but highly desirable. Working with the door lying horizontally is much more convenient: adhesive doesn't drip, elements don't shift under their own weight, it's easier to control the quality of joints. Removing the door from its hinges is not difficult (requires a screwdriver or drill), and the gain in work quality is significant. If you still work with the installed door, use painter's tape to fix the elements while the adhesive sets.
How to combine door decor with trim?
The style and width of moldings on the door should match the door casings. If the casings are simple and flat, keep the moldings simple too. If the casings are profiled, choose moldings with a similar profile. Color — identical or contrasting (white moldings on a dark door, dark casings). Avoid situations where the casings are richly decorated while the moldings on the door are primitive, or vice versa — this creates imbalance.
Can glass inserts in doors be decorated?
Moldings cannot be glued onto glass — adhesive won't provide a reliable connection. But you can decorate the frame around the glass insert. If the door has a glass section, frame it with molding around the perimeter, gluing it onto the wooden part of the door right up against the glass. This will highlight the glass insert and integrate it into the overall composition. On the glass itself, you can apply sandblasted patterns, film decor, or stained glass painting — these are other decorating techniques.
Do moldings need to be treated with protective compounds?
Wooden moldings definitely require a finishing coating — varnish, oil, or paint. This protects the wood from moisture, dirt, and mechanical damage. Polyurethane moldings can be left unpainted (they are stable even without coating), but painting is recommended — it protects against yellowing from UV exposure, allows you to create the desired color, and unifies all elements into a single composition.
What to do if a molding comes off after a year?
The cause is either poor-quality adhesive, poor surface preparation, or mechanical impact (impact, pressure). Remove the detached element, clean the back side and the door from remnants of old adhesive, apply fresh adhesive again (use a proven, high-quality product), press it, and secure it while it sets. For assurance, add mechanical fasteners — finishing nails or micro-screws.
Can a portal with pilasters be made on a narrow door opening?
Yes, but the pilasters should be narrow (60–80 mm) to avoid overloading the space. For narrow openings (700–800 mm wide), a full-fledged portal with massive pilasters may look bulky. It's better to use profiled door casings 90–110 mm wide — they add volume without overloading. The pediment above a narrow opening should also be modest — a straight cornice 60–80 mm high, not a massive pediment.