Article Contents:
- When replacing, first examine the old handle rather than choosing a new one
- One hole or two: this is where the search begins
- If only one hole remains
- If two holes remain
- When the holes have become oval
- When the new handle is smaller than the old one
- When the new handle is larger than the old one
- Knob handle: one point, but many nuances
- Bar handle: the distance between mountings is crucial
- Profile handle: the overall dimensions do not reveal the entire installation scheme
- Shell handle and other surface-mounted shapes
- Why an unfinished handle is often more convenient for restoration
- When it makes more sense to choose a pre-finished option
- Can hole misalignment be fixed without drilling new holes
- How to compare the price of one handle with replacing the entire set
- The paper template that actually helps
- Wardrobe: visibility of one new handle
- Dresser: handle mark and differences between drawers
- Kitchen: humidity, frequent cleaning, and adjacent fronts
- Cabinet and small furniture: risk of disrupting proportions
- Case one: holes align, but the previous mark is visible
- Case two: the old handle is lost, but there is a neighboring one
- Case three: in the kitchen, the holes are worn out and the drawer sticks
- Can I order a single wooden handle instead of a set?
- Can I find a matching new handle using only a photo of the old one?
- What should I do if the center-to-center distance falls between two common sizes?
- Can I install a knob handle instead of a two-point pull?
- Can I replace an old knob with a pull?
- Why does a new handle of the same SKU differ in color from the others?
- Which wood species should I choose if the old handle was painted with opaque enamel?
- How can I tell if the screw is too long?
- Should both handles be replaced on paired cabinet doors?
- What should I do if scratches are found under the removed handle?
- Is it worth buying one handle before ordering a batch for the workshop?
- How can I avoid losing information about a suitable handle after renovation?
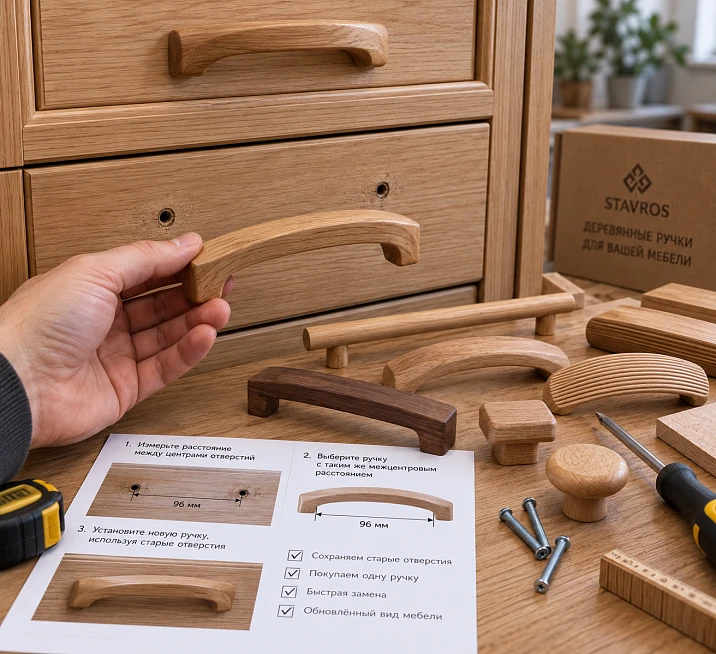
One handle broke on a dresser. The other five are intact, the fronts are in good condition, and I don't want to replace all the hardware. It seems enough to find a similar wooden handle and order one piece. But after removing the damaged part, it turns out that the new handle's mountings are positioned differently, and a light rectangle remains on the darkened lacquer under the previous one. The purchase has been made, but installing it neatly is no longer possible.
The most reliable way to replace a single piece of furniture hardware is to first measure the existing holes and the trace of the old hardware, then select a compatible model, and only after that make the purchase. If the handle was attached at two points, the starting measurement is the center-to-center distance, that is, the distance between the centers of the holes. If there is only one hole, you need to check the mounting base, the fasteners, and whether the previous trace can be covered. In both cases, the handle projection, the thickness of the front, and its condition are also taken into account.
Wooden furniture handles can be purchased individually. The STAVROS catalog includes models made of beech and oak, including unfinished options that are convenient for matching to an old finish. However, the ability to order a single piece does not yet mean that any new handle will fit in place of the old one. Sometimes it is possible to preserve all the holes and perform the replacement almost invisibly; sometimes it is more honest to admit in advance that the front will need restoration or the set will need to be updated.
A simple rule helps avoid most mistakes: a visual match does not prove compatibility, and matching mounting holes do not yet guarantee that the trace of the old handle will disappear. These two checks are performed separately.
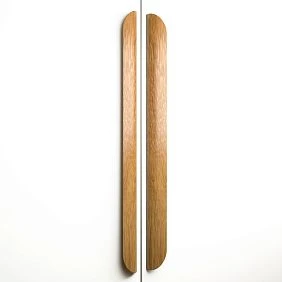
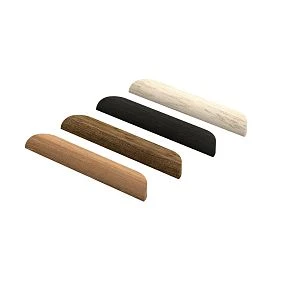
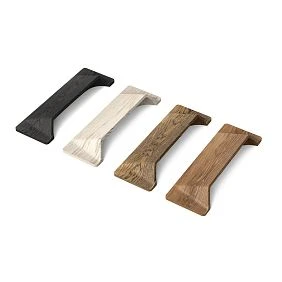
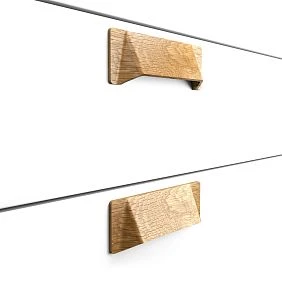
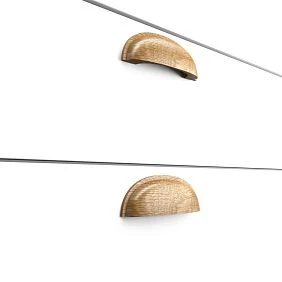
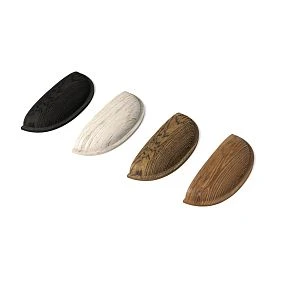
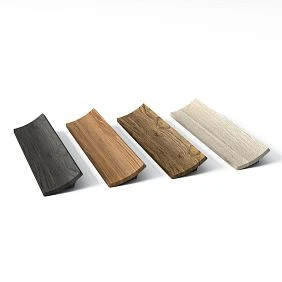
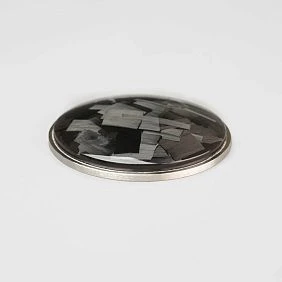
When replacing, first study the old handle rather than choosing a new one
While the old part is still in place, it provides far more information than it seems. Its shape shows where the grip was located, how far the handle protruded from the surface, whether it covered the mounting holes, and how much area it occupied on the front. On the back side of the door or drawer, you can determine the number of attachment points and assess the condition of the holes.
Start with a simple inspection. Open the door or pull out the drawer. Look at where the screw heads are located: one in the center, two in a line, or the mounting is arranged differently. On some designs, part of the fasteners is hidden under a cover; do not try to pull off such a handle until you have figured out how it is secured. If the front is old, removal can easily damage the finish more than the breakage itself.
Before removal, it is useful to take several photos: an overall view of the furniture piece, a close-up of the handle from the front, a side view with a ruler, and the back side of the front. The shot with a ruler is needed for preliminary selection, not for precise measurement: perspective distorts distances. Take the final dimensions directly from the part or the holes.
If the handle is broken, keep the fragments, screws, and washers. Even a small remnant of the base sometimes allows you to determine the diameter of the mounting area, the shade of the finish, or the shape of the attachment. Do not throw away the old fasteners until fitting is complete: they help you understand the length of the screw and how the threaded part was positioned.
The owner of a chest of drawers and the furniture maker have the same task here, although the scale of work is different. The former wants to restore a neat appearance to the piece without additional holes. The latter wants to select a replacement so that the workshop does not get repeat work for repainting or reworking the front. Both benefit from first making a short record of dimensions.
|
What we record |
What exactly needs to be determined |
Why this matters when replacing |
|
Mounting points |
One hole, two holes, or a special fitting |
Immediately exclude incompatible models |
|
Center-to-center distance |
Distance between the centers of two holes |
Keep the existing drilling pattern |
|
Total length |
From the outermost to the outermost point of the handle |
Compare it with the previous silhouette |
|
Width and height |
Maximum overall dimensions of the part |
Check adjacent facade elements |
|
Protrusion |
How far the handle protrudes forward |
Assess grip comfort and possible collisions |
|
Base |
Size and shape of the contact area with the facade |
Determine whether marks will be covered |
|
Facade thickness |
Actual size in the screw area |
Choose the correct fasteners |
|
Wood and finish |
Material, color, sheen, coating transparency |
Coordinate the replacement with the other handles |
|
Model or SKU |
Marking, order, drawing, tag |
Find an exactly identical part |
Such a set of measurements is better than a single description like “a handle about 15 centimeters.” Two outwardly similar models may have the same length but a different mounting pattern. The opposite situation also occurs: the mounting points match, while the base width and overall outline differ noticeably.




One hole or two: this is where the search begins
For a single replacement, knob handles and models that are fastened at two points are fundamentally different. A knob usually has one main mounting point. A pull handle has two. But the word “usually” matters here: there are non-standard designs, additional anti-rotation pins, concealed fastenings, and overlay elements with a different pattern. Therefore, the final decision is made based on the specific part or drawing.
Our factory also produces:
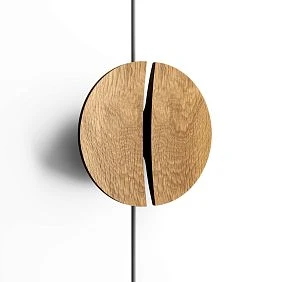
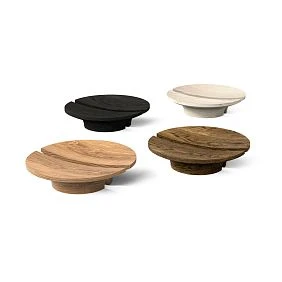
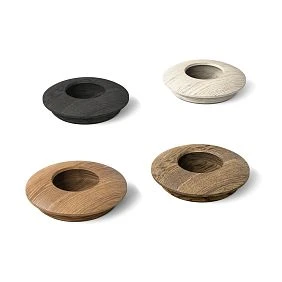
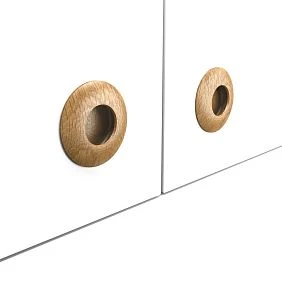
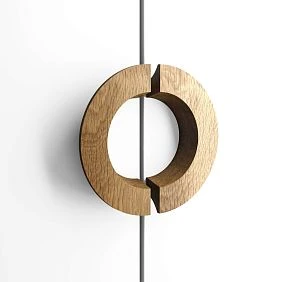
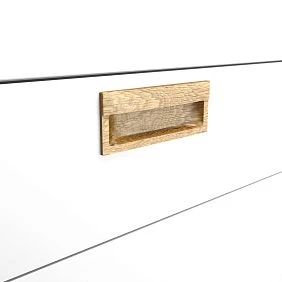
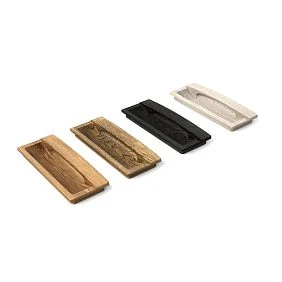
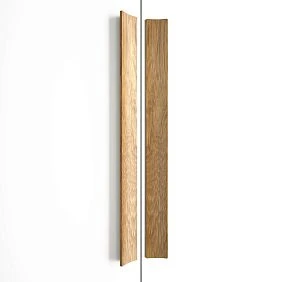
If one hole remains
The simplest option is to choose a new knob handle with compatible mounting. Measurements should be taken not only from the hole. The old knob may have had a wide round base that, over years of use, left a distinct mark on the finish. If the new knob is noticeably smaller, a light or dark ring will remain visible even with perfect installation.
Measure the diameter of the base of the old knob. If it is not round, note the maximum width and height, or better yet, make a paper template of the outline. Check whether the mounting hole is actually centered on the base: on asymmetrical handles it is sometimes offset relative to the visible shape.
There is another nuance: the old knob may have rotated, leaving arc-shaped scratches around the hole. A wider new handle sometimes hides the marks, but only after checking its actual seating surface. The edge of the product that overhangs the front and does not touch it does not necessarily cover the damage the way the top-down photo suggests.
For a preliminary selection, the section will be useful — of premium quality. We use solid oak, walnut, ash, beech — species that are beautiful, strong, and pleasant to the touch. Each button is hand-turned or carved by our artisans, processed with attention to texture, shape, and finish.. Check not only the name of the shape, but also the drawing of the product you like.
Get Consultation
If two holes remain
The main constraint is the existing distance between the mountings. Drilling a third hole just to fit a handle you like is almost always a bad first strategy, especially if the front is veneered, painted with enamel, or has a historic finish.
Imagine a drawer with two remaining holes spaced 128 mm between centers. A handle with 160 mm mounting will not fit into them by itself, even if its overall length looks suitable. Here, you first look for a model with a center-to-center distance of 128 mm. If there is no suitable one, other repair options are evaluated, but you do not start with a drill.
Pay attention to mountings that are not on the same horizontal line. This may be a handle of an unusual design or the result of an old repair. Measure not only the gap between the points, but also the height offset of each one. A new handle with a straight mounting pattern will not necessarily replace a product installed diagonally.
How to measure center-to-center distance correctly
Center-to-center distance is the distance from the center of one mounting hole to the center of another. It is not equal to the overall length of the handle, the gap between its outer edges, or the width of the visible part of the base.
The most convenient way is to remove the handle, gain access to the mounting holes, and measure the distance between their centers on the back side of the front. If the holes are round and have the same diameter, it is acceptable to measure the distance between their corresponding edges: for example, from the left edge of the first hole to the left edge of the second. This will give the same center-to-center distance. But this technique only works with identical, undamaged holes oriented the same way; with oval, worn, or unequal holes, it produces an error.
A caliper is suitable for precise work. A ruler with a millimeter scale will also do if the centers are easily distinguishable. It is more difficult with holes blocked by leftover fasteners, or with old drilling that has already been filed. In that case, the measurements should be checked again and compared with an intact handle from another drawer.
The step-by-step check looks like this:
1. Remove the old handle while holding it from the front side.
2. Clean the holes of dust and loose debris without enlarging them.
3. Make sure you are measuring exactly the two mounting points of the required handle.
4. Measure the distance between the centers in millimeters.
5. Compare the result with the drawing or installation dimensions of the new model.
6. If the measurement is close to a common value but does not match exactly, check the tool and the condition of the holes; do not round the value by eye.
For example, a measurement of 127.5–128 mm on an old front may be explained by measurement error or slight wear. But a size of 128 mm cannot be declared suitable for any holes “about 13 centimeters.” For ordering, it is necessary to verify against the geometry of the specific model and the permissible deviations, if the manufacturer specifies them.
If the old handle has survived intact, it is useful to measure the distance between the centers of its mounting elements separately. Then compare this dimension with the distance between the holes in the front. The difference will show how much the holes may have been enlarged or how much the fastening is installed at an angle.
When the holes have become oval
On a frequently opened drawer, a screw could loosen over the years and stretch the hole in the wood-based panel. When measuring, a range appears instead of one clear value. You cannot choose a handle based only on the largest distance that the play allows. After installation, it will shift, and the connection will lose rigidity.
Here, the condition of the material around the hole needs to be checked. If the edges are crumbling, the hole is torn, or the back surface is pressed in by the screw head, replacing the handle alone will not solve the problem. The repair method is selected based on the construction of the front, its material, and the type of fastening; for serious damage, it is better to entrust the work to a furniture specialist.
Center-to-center distance and overall length: why you cannot look at just one number
A handle has dimensions that serve different purposes. The distance between the mountings determines compatibility with the existing drilling pattern. The overall length determines how the handle looks on the front, how close it comes to neighboring decor, and which areas of the previous finish remain exposed. The projection determines the finger clearance and how far it protrudes beyond the plane of the door.
A hypothetical example: the old handle has an overall length of 180 mm and a center-to-center distance of 128 mm. The new one also has 128 mm mounting, but a length of only 160 mm. If both models are symmetrical about the mounting points, the overhang beyond the outer holes for the old one is (180 − 128) / 2 = 26 mm, and for the new one — (160 − 128) / 2 = 16 mm. Up to 10 mm of the previous area on each side may become exposed. This does not mean that visible spots will necessarily appear: the result depends on the shape of the old handle and the actual mark. But it is exactly this calculation that shows where you need to look before ordering.
At the same time, two items 180 mm long with the same center-to-center distance are still not complete equivalents. One has a narrow bridge and wide mounting legs; the other has a solid wooden bar. The first option will leave almost the entire area between the mountings exposed, while the second may cover it. The length matches, but the coverage area does not.
|
Parameter |
Is a match mandatory? |
What happens if they differ |
|
Number of mounting points |
As a rule, yes, if the holes remain |
Incompatibility is possible without modifying the front |
|
Center-to-center distance |
Yes, for rigid two-point drilling |
The screws will not align with the holes |
|
Total length |
Not always |
The scale and visibility of the old mark will change |
|
Base width |
Depends on the condition of the front |
Scratches or stains may become visible |
|
Overhang from the front |
Depends on adjacent parts and grip |
The handle may interfere or become inconvenient |
|
Wood species |
Not always |
The pattern and shade may differ |
|
Coating |
Important for a visible single replacement |
The new part will stand out among the old ones |
|
Fastener type |
Yes, based on assembly compatibility |
The handle will not be secured reliably |
Compare the drawing with the actual front. Photos in the catalog help you choose the silhouette, but they do not replace installation dimensions. Some STAVROS model pages include links to product drawings; they are convenient for checking dimensions before purchase.
Old handle broken or lost: how to restore the parameters
If fragments have survived, start with them. A broken wooden bridge may tell you nothing about the mounting, but the surviving bases show the distance between the installation points. Photograph the shape of the break and the surface finish separately. If the old model was painted, the fresh break may reveal the color of the original wood, but you shouldn't judge the species from a single cut.
The second source is the other handles on the same piece of furniture. An intact handle from a neighboring drawer often provides an almost complete set of dimensions. Remove it, place it against a ruler, and if necessary make a paper outline. If the design allows, try temporarily moving it to the damaged position. This will show whether the same holes were used on all fronts.
However, symmetrical furniture was not always assembled with identical handles. Wide drawers might have a long pull, narrow ones a short pull, and hinged doors might have knobs. In some series, the shape of the left and right pieces also differs. You shouldn't order a replacement "based on the sample from the neighboring door" until you have checked the exact position you need.
If there isn't a single intact handle, the holes and the mark on the finish are all you have left. First, measure the drilling pattern. Then make a tracing paper or thin paper template that follows the boundaries of the faded area or the spot left by the old base. Such a template can be laid over a full-size printed drawing of the new handle. When printing to scale, be sure to check the reference dimension with a ruler: automatic fitting to the sheet can distort the drawing.
Sometimes the old handle can be identified from the furniture instructions, the invoice, a product photo, or the workshop's custom specification. Look not only for the trade name, but also for the article number, size, and finish. A single article number in a family may have several sizes and material options; a matching name does not yet guarantee matching holes.
Why the mark from the previous handle can turn out to be the main problem
After removal, a rectangle of a different shade, a narrow strip around the base, or two darker spots near the holes are often revealed. The cause can vary. The exposed part of the front faded in the light, while the finish under the handle kept its original color. During cleaning, water and cleaning agents affected the exposed surface, while the area protected by the handle changed differently. Sometimes the previous hardware slightly pressed into the lacquer or left small scratches from movement.
On a painted front without visible texture, the color mismatch may be noticeable only at a certain angle. On a tinted solid wood surface, the mark may stand out more because of the change in wood color and differences in the depth of the finish. If there is a polished area around the old handle from frequent touching, the new piece will not automatically remove it either.
To understand whether the finish needs repair, carry out three checks.
The first is geometric. Measure the actual footprint area and compare it with the outline of the new handle. Do not assume that the total length of the product necessarily covers the front: the surface between the bases of the bow handle remains exposed.
The second is color-related. Inspect the area in diffused daylight and under ordinary evening lighting. Directed side light better reveals scratches, variations in gloss, and pressed-in edges. Do not evaluate only from a phone photo: automatic image processing smooths out small differences.
The third is tactile. Run your finger over the area around the old handle after first cleaning it of dirt. If you feel grooves or depressions, the new hardware may visually conceal them, but without restoring the finish the damage will not disappear. Do not try to sand the area locally before choosing the new part: you will end up with a spot from the repair itself.
When the new handle is smaller than the old one
This is a particularly risky replacement on an old lacquered dresser. A narrow knob instead of a wide round one, a short bow handle instead of a long one, a thin bar instead of a massive base — each option may expose part of a previously covered area. At the same time, technically the handle is sometimes installed without a single new hole. The result is a paradox: the fastening fits perfectly, but the appearance has worsened.
Before ordering, it is useful to place a paper cutout of the new part's outline on the front. Even better, place the actual sample if it is available. Inspect not only the overall silhouette but also four zones: both holes, the edge of the old footprint, the line of possible contact with the handle, and the place where fingers will touch the surface when opening.
When the new handle is larger than the old one
A larger handle often helps cover fading or scratches. But it may land on a panel, decorative frame, neighboring drawer, front edge, or prevent full opening. This mistake occurs especially often in the kitchen: next to the door there may be a wall, another front, or a countertop protrusion.
A length difference of 20–30 mm looks insignificant in a photo. On a narrow drawer, it can almost eliminate the free margins on the sides. If the new handle takes up a significant part of the front's width, check its position in the closed and open states, as well as whether it is possible to grasp it without touching the neighboring surface.
Finish and geometry are checked independently. Even a larger handle will not fix a pressed-in hole edge if the area remains visible. And even a completely covered footprint does not make a handle convenient if it catches on the neighboring door.
Projection, grip and placement: why a handle that fits the holes may still be uncomfortable
Projection is the distance the handle extends from the face of the cabinet front. For a pull, it is useful to measure two values: the maximum outer projection and the free space for fingers under the grip. They are not equal to each other. A bulky handle may protrude noticeably forward but leave a tight gap for the hand because of the shape of the bridge.
When replacing a single handle on a cabinet, check whether it can be grasped with a familiar motion. For a heavy drawer, the grip area and the rigidity of the mounting are significant; for a small cabinet, the absence of protruding sharp edges in the passageway matters. A decorative shape suitable for a nightstand in the bedroom will not necessarily be comfortable on a frequently used lower kitchen drawer.
A separate question is the position of the new handle relative to the edge. The old holes may have been drilled quite close to the side edge. If the new model is wider, its end will extend beyond the edge of the cabinet front or end up too close to the neighboring handle. For hinged doors that open toward each other, you need to check the gap between the handles when closed and their path during movement.
Long profile handles can have another effect: the piece visually becomes an independent horizontal line that must be coordinated with the other lines of the furniture. Replacing one short pull with an extended bar on a single drawer can make the piece asymmetrical. This is not a mechanical defect, but during restoration it is a noticeable result.
To check, it is enough to temporarily place a paper mockup on the cabinet front, open and close the door, pull out the drawer, and compare the distances. If the sample is three-dimensional, a trial fitting will show what is not visible from a two-dimensional outline: how convenient it is to grasp the handle from below or from the side and whether your fingers press against the cabinet front.
Cabinet front thickness and screw length
Even with a complete match of holes and dimensions, an unpleasant issue can arise: the standard screw of the new handle does not fit the old cabinet front. An MDF front, a wooden door, a thick panel and the thin wall of a metal drawer may require different fastening solutions. The screw length depends on the actual thickness of the material at the installation point, the depth of the threaded hole in the handle and the design of the connection.
First, measure the thickness of the cabinet front. It is better to do this at the mounting hole, not on the decorative edge or protruding frame. If a reinforcing plate, washer or additional spacer is attached to the inner side, take their thickness into account as well. Then find out which screw is intended for the selected model: its thread, diameter and available working length.
It is useful to imagine the calculation with a simple example. The cabinet front thickness is 18 mm, and the screw length from the bearing surface of the head to the end is 25 mm. If the head sits directly against the back of the cabinet front and there are no additional parts, approximately 7 mm of the threaded portion will protrude beyond the front surface. But this calculation does not prove that the screw fits. For a reliable fastening, you need to know the required thread engagement depth, and also whether the screw will hit the bottom of the handle's blind hole before the base is pressed against the cabinet front.
A screw that is too short may engage too few threads and strip out during use. One that is too long sometimes creates a false sense of tightness, because it bottoms out inside the handle while the item itself still wobbles. Trying to tighten such a screw with force can damage the threads, split the wooden part, or crush the finish on the front.
Do not automatically transfer old screws to a new model. Their diameter, thread pitch, head, and method of mating with the insert may differ. Even a common screw type is not universal for all wooden handles. If the product page lists a mounting kit, compare it with your front thickness; the presence of a kit does not remove the need to check compatibility.
In the STAVROS catalog, some models are sold with mounting hardware. For example, on the product page Button HL-036 it states that the mounting kit is included in the price. At the same time, the length and installation pattern for a specific piece of furniture should be chosen based on the dimensions of the selected version and the actual front.
How to choose the type of wooden handle without modifying the front
On new furniture, the choice of shape usually starts with the design. When repairing an existing piece, the order is reversed: first the old drilling pattern, then the handle construction, and only then decorative preferences. This is especially noticeable when comparing a knob, a pull, and a long profile. Each shape interacts with the front in its own way and covers different areas of the previous finish.
Knob handle: one point, but many nuances
A knob looks like the simplest solution. If the front has one hole, there really is a wide choice of round, cylindrical, and shaped options. But for old furniture, the shape of the base is critical. A wide mushroom-shaped knob can cover a large area of lacquer, while a compact cylindrical one covers only a small area around the screw.
On a chest of drawers with six identical knobs, it is better to evaluate a replacement not on its own, but next to its neighbors. A new knob of larger diameter changes the rhythm of the fronts; a smaller one stands out noticeably when viewed at an angle. The shade of beech or oak and the sheen of the finish can also give away a new part, even when its shape almost matches.
If the knob is used on a heavy drawer, check how easy it is to grip: whether there is enough room for your fingers, whether the surface is too smooth, whether you have to pull with just your fingertips. Sometimes the cause of breakage was not a weak handle as such, but a constantly loosening fastening or an awkward motion when opening. A new handle of the same shape may repeat the problem.
Pull handle: the distance between the mountings is crucial
A pull is a common option for two holes. The shape of the crossbar can be arched, straight, turned, or geometric. Comparing Wooden handle brackets, start with the installation diagram: is the center-to-center distance the same, which way are the support pads oriented, and which part of the wood touches the front.
With a pull that has two narrow bases, almost the entire area between the mounting points may remain visible. If a solid plate used to be in that spot, you cannot simply choose a pull by center-to-center distance without assessing the mark. It is often technically possible to replace it, but the shade of the finish on the exposed strip will need to be evened out.
Also compare the grip height. A deep pull lets you slide your fingers farther in, but it protrudes more into the walkway. A low pull is less noticeable from the side, but it may be inconvenient for someone with a large hand. For a frequently used drawer, this nuance matters more than the decorative complexity of the profile.
Profile handle: the overall dimensions do not tell you the whole installation scheme
Wooden profile handles can look like elongated strips, bars, or elements with a geometric cross-section. They can visually stretch a narrow front or emphasize the horizontal of a wide drawer. But their mounting points are not necessarily positioned the same way as those of a regular pull of similar length.
A telling example is the catalog handle Plane HL-011. The model is available in several size versions. The product page lists the length and other dimensional specifications separately; this clearly shows why you should not buy a handle based only on the phrase “length 180 mm” or on a photo. You need to choose a specific version and check the drawing of its mounting.
For comparison, you can look at Tetras HL-033: this model also has a size range. Matching lengths of two profiles does not yet mean matching cross-sections, contact zones, and other installation characteristics. When replacing a single handle, this matters more than when making furniture from scratch.
Particularly careful attention should be paid to very long profiles. In photos they appear to be simply an enlarged version of a short part, but on a finished cabinet they may cross the frame of the panel, shift relative to neighboring fronts, or interfere with opening.
Shell handle and other overlay shapes
A shell handle can cover part of the front with a wide decorative surface. During renovation this is sometimes useful: a new overlay shape can conceal darkening or wear around the old grip area. However, its fastening assembly and base must match the existing furniture. The name "shell" indicates neither the number of screws nor the location of installation points.
In the section wooden shell handles options should be checked against the dimensions of the specific item. If the old overlay covered two holes, and the new shape is designed for a different installation, the presence of a wide base alone does not solve the fastening issue.
It makes sense to purchase a new handle of a different design only when it can be installed stably and visually coordinated with the front without questionable modifications. For restoring a single part, a model close in geometry is often more useful than a more striking product with an incompatible assembly.
The original article number is the shortest path to a successful replacement
If the exact model of the old handle is known, the task becomes significantly easier. Look for the article number in the furniture documents, on the packaging of the preserved hardware, in correspondence with the manufacturer, the delivery note, or an old order. For custom furniture, information may remain in the workshop's components list. Such a document is especially valuable: it contains not only the name, but also the material, size, and finish.
The collection name alone is sometimes not enough. Imagine a family of handles where a single shape is produced in several lengths and with different center-to-center distances. A customer finds the original name and orders the first similar item, but receives an incompatible part. That is why the verification sequence must be complete: product code → specific size → wood species → finish option → mounting → quantity.
Even when all designations match, it is advisable to check the dimensional card. Manufacturers may update coatings, delivery methods, or included components. Do not assume that a screw that came with the product many years ago fully matches today's set. Compare the old part with the current drawing and product description.
If the model is no longer produced, the product code is still useful: it makes it easier to recover the image and specifications. Then alternatives are selected based on functional parameters. In this scenario, it is better to separate mandatory conditions from desirable ones right away. A compatible mounting and no new holes are mandatory. Maximum similarity of wood grain and outer profile are desirable, but sometimes unattainable without ordering a custom part.
Do not count on the production of a single custom handle from a photo always being available and economically justified. The possibility of custom manufacturing, minimum order limitations, and the price of such an order must be clarified separately. Sometimes restoring a surviving original part turns out to be more reasonable than searching for a new item.
Beech, oak, and finish: how to bring a new handle closer to the old ones
When replacing a single handle, the wood species affects primarily the appearance of the surface and the finishing options. Beech usually has a calmer, finer grain pattern. Oak often shows larger pores and more pronounced texture. But neither material can be chosen solely by a general rule: the specific model, the quality of the blank, the coating, and the neighboring parts all matter.
Under opaque enamel, the differences in wood grain become less noticeable because the color creates a non-transparent layer. If the goal is to get a solid-color handle to match an existing painted facade, a beech blank can be a convenient option. But first check that the manufacturer allows the required finish and that the selected product is prepared specifically for it.
With clear lacquer, oil, or tinting, the wood structure remains visible. If the other handles are oak, replacing one of them with a beech one, even in a similar shade, may stand out in texture. On the other hand, oak itself does not guarantee a match: two blanks of the same species can have different grain patterns, and the color of the coating changes how it is perceived.
On an old dresser, it is especially difficult to reproduce the shade of the coating, which has changed over several years. A handle made now with the same product code may look lighter, darker, or brighter than the others. This is not necessarily a manufacturing error. Old parts have been exposed to sunlight, regular touching, and cleaning; over time, the sheen and tone of the finish change.
Do not try to "age" a new item with overly rough sanding or random chemicals. Damage and uneven spots poorly mask the difference in age. For a difficult match, it is more useful to choose an unfinished blank and perform a test tinting on a suitable sample of the same wood species. Suitable compounds and auxiliary products can be found in the section materials for installation and finishing, after first checking compatibility with the chosen technology.
Why an unfinished handle is often more convenient for restoration
unpainted wooden handles they leave you the option to choose the enamel, stain, lacquer, or oil yourself, if these materials are compatible with the product and the desired finishing technology. This option is especially useful when the old front is already painted in a non-standard color or has a clear finish that has darkened over time.
However, "unfinished" does not mean "ready for any painting method without preparation." The final color is affected by surface sanding, the wood species, the primer, the thickness of the applied layers, and the characteristics of the composition itself. The color on a fan deck or by paint name does not guarantee a match with existing furniture. Even when using the same shade, the result may differ because of old yellowed lacquer or a different sheen.
If the handles are painted with enamel, it is useful to compare not only the color number but also the surface matte-ness. A new glossy piece against five old matte ones is noticeable in side light. Sometimes it is precisely the difference in sheen that makes the replacement obvious, even though the shades look close.
For a semi-transparent finish, the direction of the grain and the combination of wood sections must be taken into account. At STAVROS, preparation options for enamel and for tinting are indicated for a number of blanks; these are different requirements for selecting the color and pattern of the material. Check the availability of the required version in the product page for the specific handle. General information on product requirements is provided in the section quality of STAVROS products.
When it is wiser to choose a ready-made finish
If the existing furniture is new or recently made and its finish matches an available manufacturer option, you can consider Wooden handles with coating. This reduces the number of operations: there is no need to select the primer yourself, or to paint and dry a single piece.
But choosing from a screen should be considered preliminary. A photograph depends on the lighting, the camera's white balance, and the display settings. On old furniture, the actual condition of the coating also differs. If the handle is in a prominent place next to the others, it is better to see a sample in real light or check whether it can be compared with a physical finish sample.
Buying individually is especially useful here: a single handle lets you check the color and shape before deciding to replace the entire set. For a restorer, this isn't an unnecessary expense but a way to avoid making a mistake on a much larger order.
What to do about damaged holes and old hardware
A loose handle doesn't always require a new handle. If the wood is intact and the screw gradually works its way out, the hardware itself may be the cause. In this situation, first check whether the threads are damaged, whether the screw is bottoming out in the hole, and whether it actually presses the base against the cabinet front.
If the screw's threads are stripped or it's bent, you may need a compatible replacement fastener. If the threaded insert in the handle itself is damaged, the issue is more complicated: new hardware may prove more reliable than repairing the old assembly. If the cabinet front material around the hole is damaged, even a perfectly matched new handle will wobble until the support area is restored.
Extra caution is needed with old furniture, where there may be thin veneer, cracked lacquer, or weakened wood around the hole. Using an oversized washer doesn't always help: it can press into the inner surface, and over-tightening can create a crack. The reinforcement method is chosen after inspecting the structure. For valuable antique furniture, it's wise to agree on the repair with a restorer in advance.
There are situations where the problem isn't the hardware but the geometry of the drawer. If the slides run stiffly, the front is skewed, or a heavy door keeps jamming, the handle is subjected to extra force. A new part can break again. Before buying a replacement handle, check whether the piece of furniture itself opens properly.
Can hole misalignment be fixed without drilling new holes?
Sometimes adapter decorative plates or special repair bases are used to cover the old holes and create a new mounting surface. But this method isn't universal: it changes the thickness of the assembly, the appearance, the position of the fasteners, and the load distribution. The plate must suit the specific cabinet front and handle, and its attachment must remain mechanically reliable.
On a veneered or painted cabinet front, trying to install a long new handle "covering the old holes" without secure fastening can give a worse result. The old holes will be hidden, but the new handle will start to move and damage the finish around them. Don't use double-sided tape or glue as an automatic substitute for a mechanical assembly on a loaded drawer: the suitability of such a solution depends on the design and the manufacturer's recommendations.
If the new center-to-center distance doesn't match the old one, first look at other models. You can also browse hardware for legs and handles, but do not assume that any screw from the range is suitable: compatibility is checked against the specific handle model. If it is impossible to find a neat solution, it is worth evaluating the restoration of the front and only then — a new drilling pattern.
Buying by the piece: when one handle is better than a full set
Buying a single handle is justified if you have managed to find the same model or a sufficiently close analogue, the old holes fit, the mark from the previous base does not spoil the appearance, and the color of the new part is acceptable. This is the most economical scenario in terms of the number of replaced items. If we are talking about a single broken element at the bottom of a chest of drawers, visual differences are sometimes less critical than on a cabinet door at eye level. But you need to evaluate the specific item and the lighting.
Furniture handles are bought by the piece not only by owners of old furniture. For a workshop, it is often useful to first get one model for testing before ordering a set for a kitchen or a series of chests of drawers. In the drawing, a handle looks convenient, but after installation it may turn out that with a real grip the fingers catch on the front, the fastener hits a reinforcement, or the profile looks too massive.
A single test piece allows you to check the item not speculatively, but on a real door. For production, this is especially significant: a mistake noticed before launching twenty fronts costs less than redoing already drilled parts.
The conditions for piece ordering are confirmed by the STAVROS catalog: you can choose a single handle, not only factory packaging. But when placing an order, you should separately check the availability of the specific article, material, size and finish, as well as the current price and delivery cost. The wording “from one piece” does not mean that any individually modified version can be manufactured without a minimum batch.
How to compare the price of one handle and replacing the entire set
The price of the item is only part of the repair costs. For one handle, the amount consists of the cost of the part itself, delivery and, if necessary, matching the finish or installation work. For a full set, the remaining handles, removal, possible preparation of holes and finishing of the exposed areas are added.
Let one suitable handle cost P rubles, delivery — D, and additional finishing — O. Then the approximate cost of replacing one part is P + D + O. If a chest of drawers requires six identical handles, the cost of the new hardware will be 6 × P at the same unit price, but the total costs will be higher after taking into account work, delivery and possible repair of the fronts.
It's not just about the arithmetic. Replacing a single handle may require complex hand tinting, while replacing six with the same new model can sometimes avoid that step. The opposite also happens: six new handles may require re-drilling holes, and the savings on finishing one old piece become meaningless. Compare the full estimate, not just the product prices.
|
Situation |
A sensible first step |
Possible solution |
|
One handle is broken, the exact model is available for purchase |
Check the size and color |
Buy one piece |
|
The model is discontinued, the holes are standard for an available equivalent |
Verify the dimensions, footprint, and fasteners |
Take one equivalent for a test fit |
|
All the old handles have darkened significantly, and the equivalent looks noticeably different |
Compare the cost of coating selection versus full replacement |
Decide based on the fitting result |
|
Old holes are positioned non-standardly |
Explore the possibility of repairing the old part |
Do not drill the facade before calculation |
|
The facade is damaged around the mounting point |
First assess the repair of the base |
Restoration plus a compatible handle |
|
The workshop is developing a new series |
Test one handle on a finished facade sample |
Confirm the model and order the set |
If a piece of furniture has no particular decorative value and all the handles have long been worn out, buying the whole set may be simpler. But there is no point in automatically replacing six working handles because of one breakage. First check whether a compatible replacement is available and how noticeable the difference will be. When a complete hardware refresh is needed, a separate a breakdown of choosing wooden handles for a wardrobe, chest of drawers, and kitchen.
How to check a new handle before installation: a trial fit without extra holes
Do not start installation by tightening the screws. First place the new handle next to the old one, if it has been kept, and compare them by the measured parameters. Then place it against the front without pressure to check the scale, its position relative to frames, edges, and neighboring parts.
If two old holes match, try passing the provided mounting screws through them and carefully aligning them with the holes or threaded inserts of the handle. This is a trial operation, not tightening. The screw should go in along the axis without skewing, and the base should sit flush against the surface. If you have to force the screw at an angle, pull the handle to the side, or enlarge the hole, stop: the geometry is not aligned.
Before final installation, it is useful to check several positions of the furniture. On a pull-out drawer, the handle may not catch on neighboring fronts when closed, but when pulled out it may catch on the protrusion of the adjacent cabinet. On a door next to a wall, insufficient side clearance becomes noticeable only when fully opened. This is not a reason to reject the chosen shape in advance, but it is a reason to test it on the actual piece.
The condition of the decorative finish is also assessed before tightening. Place a thin paper template that follows the contour of the base underneath and make sure the new handle covers the required area. When an old mark is noticeable, look at the front from a normal distance — approximately from the point where the furniture is seen in the room. A small difference noticeable at ten centimeters sometimes disappears in overall perception; a large spot will be visible from the other end of the room as well.
A paper template that actually helps
For checking without a ready-made sample, you can make a simple full-size template. It will not replace a three-dimensional trial fit, but it will show whether free margins will remain and whether the handle will cover the decorative frame.
1. Take the dimensions from the product card or the drawing of the selected version.
2. On thick paper, draw the overall outline of the handle at a 1:1 scale. For a complex shape, the outer dimensions and individual outlines of the mounting bases are sufficient.
3. Mark the centers of the mountings. Pierce small holes in the paper for orientation only, not on the furniture front.
4. Place the template over the old drilling pattern, aligning the marks with the holes.
5. Check for free space near the edges, raised frames, and adjacent handles.
6. Separately mark the outline of the previous trace on the paper and determine which parts of it will remain exposed.
If you print the drawing, check the scale setting. The standard "fit to page" function can change the dimensions, and with them, the position of the mounting points. It is enough to measure one known dimension on the printout. If 128 mm is specified but the sheet shows 123 mm, such a printout must not be used for marking.
Do not transfer the holes from the paper template to the front until you have made sure that the new handle will indeed be installed with a change in the drilling pattern. For the task of replacing a single part, the goal is the opposite: to preserve the existing holes and not create new ones.
Replacing a handle on a wardrobe, chest of drawers, and kitchen: different constraints
The same mounting does not make the usage conditions the same. Furniture has different loads on the handle, different visibility of the front, and different risks of damaging the finish.
Cabinet: visibility of one new handle
On a tall cabinet door, the eye often stops at the handle area: handles form a repeating vertical line or a symmetrical pair. If one wooden handle differs from its neighbor in length, angle, or color, the mismatch is noticeable even from a distance. When replacing handles on two hinged doors, it makes sense to compare both handles side by side in the closed position, rather than evaluating each one separately.
For a built-in cabinet, check the gaps to the wall and adjacent sections. A large new handle can reduce the space for opening the door. If the furniture stands in a narrow passage, its projection also matters. Sometimes a model that is as similar as possible in shape should be rejected precisely because of its protruding base.
On a door with a mirror, decorative frame, or tall panel, it is especially important where the edge of the new handle will end up. Even a small shift in the visible dimensions can disrupt strict symmetry. Therefore, for a cabinet it is often preferable to precisely replicate the old shape or replace both handles as a pair, rather than use a randomly chosen single equivalent.
Dresser: handle mark and differences between drawers
A dresser has a convenient reserve of information — the neighboring drawers. If the handle on one of them is preserved, you can take a sample, check the drilling pattern, and compare the condition of the finish. But drawers differ in height and width: the lower ones sometimes have larger handles than the upper ones. Therefore, when searching for an equivalent, compare first of all fronts of the same size.
On old dressers, there are often wear areas around the handles from fingers and nails. A new narrow handle can expose them completely. After replacement, this looks like an untidy stain, even though the part itself is installed straight. If refinishing is planned, first assess the possibility of matching the tone, and only then choose a shape with a smaller base.
For heavy drawers, the condition of the slides is critical. Increased resistance often leads to a person pulling the handle with lateral force. Such a load loosens the fasteners. Replacement without eliminating the cause may prove temporary.
Kitchen: moisture, frequent cleaning, and neighboring fronts
In the kitchen, a handle is constantly exposed to wet hands, dirt, and cleaning agents. For a wooden part, the quality of the finish and acceptable care are especially important here. An unpainted handle can be matched by shape and color for subsequent finishing, but installing it in a working kitchen area without a suitable protective layer is not always reasonable.
Kitchen cabinet fronts are often positioned very close together: there are small gaps between the handles of adjacent drawers, and a dishwasher, side panel, or pull-out mechanism may be nearby. That is why any increase in projection or length must be checked for opening clearance and possible collision. If the kitchen has built-in appliances, assess the trajectory of their doors, not just that of neighboring cabinets.
If the old handle broke due to constant moisture, inspect the surface around the holes. Swelling of the facing, compromised sealing of the edges, or swelling of the material cannot be fixed by replacing the hardware. This is already a separate repair of the cabinet front.
Base cabinet and small furniture: risk of disrupting proportions
For a narrow base cabinet, an extra few centimeters of total length can significantly change the appearance. Imagine a front 300 mm wide. A handle 180 mm long occupies 60% of its width; a handle 240 mm long already occupies 80%. When centered, there will be 60 mm or 30 mm of free space to the side edges, respectively. The calculation is hypothetical, but it clearly shows that on small furniture even a handle compatible in hole spacing may turn out to be too large.
Measure not only the free space on the flat surface of the front, but also the distance to the rounded edge. On a furniture front with a noticeable curve, a wide base may partially fall on the curved section and not sit securely.
Three typical scenarios for replacing a single handle
Case one: the holes match, but the previous mark is visible
Imagine a chest of drawers with two holes remaining at a center-to-center distance of 128 mm. The old pull has wide wooden supports that covered an area of approximately 25 × 25 mm around each hole. The buyer found a new pull with the same center-to-center distance, but with bases of approximately 15 × 15 mm.
From the standpoint of screw placement, it may fit if the other mounting parameters match. However, the new base will leave open strips of approximately 5 mm in each direction along the edges of the previous contact area, assuming central alignment. If there is a trace of varnish or scratches there, it will become noticeable. Therefore, before ordering, you need to check the surface, and if necessary choose a model with wider bases.
This example explains why identical drilling is not the same as a mark-free replacement. Restoring the finish may cost more than the handle itself.
Case two: the old handle is lost, but there is a neighboring one
Of the six handles on the cabinet, one is lost. On two identical doors, a complete pair has been preserved, while the other fronts have parts of a different size. At first glance, it is easier to take any similar one from the catalog. It is much more accurate to temporarily remove a handle from a door of the same width and measure the center-to-center distance, overall size, projection, and base. Separately check the shade of the finish on several handles: even within the same piece of furniture, parts could have aged differently due to lighting.
After measuring, it becomes clear that what is needed is not just a “wooden handle for a cabinet,” but a specific version of a certain size. If an exact analogue is sold individually, you can order one part. If a model that fits in size differs significantly in color, it makes sense to compare the cost of one paintable blank with replacing the handles as a pair on symmetrical doors.
This approach preserves the existing holes and at the same time takes into account how a person sees the furniture as a whole.
Case three: in the kitchen, the holes are worn out, and the drawer sticks
The handle on the lower kitchen drawer has become loose, one screw no longer holds, and the hole in the front has elongated. Buying a new handle with the same center-to-center distance will not solve the problem: the mounting geometry is already compromised. If the drawer runners operate with resistance, the new assembly will continue to bear the load.
In such a case, the repair sequence changes. First, check the runners and make sure there is no skewing. Then assess the condition of the front and the possibility of restoring the hole while maintaining strength. After repairing the base, choose a compatible handle and check its fasteners. If the hole cannot be reliably restored, the furniture maker determines a different repair scheme, possibly with reworking the front.
Here, refraining from immediately buying a handle saves money: the cause of the breakdown is in the furniture, not only in the hardware.
Installing a new wooden handle without damaging the front
The test fitting gave a positive result, the drawing matches the old holes, and the fastener fits by thread and length. You can proceed to installation. For painted and lacquered furniture, it is especially useful to act without haste: an accidental scratch from a screwdriver or a skewed screw can negate a careful match.
1. Prepare the surface. Remove loose dust around the holes with a soft dry cloth. To clean stubborn dirt, use a product whose compatibility with the finish has been confirmed. Do not use solvent on an unfamiliar lacquer.
2. Inspect the mounting points. Check for cracks, chips, and swelling. If the base is damaged, fix that problem first.
3. Check the screws separately. Verify the thread, length, and ability to engage with the mounting part of the handle. Do not force the thread.
4. Align the base with the holes. Hold the handle on the front side so it does not fall or scratch the front panel.
5. Start the fasteners. For a two-point handle, first thread both screws a few turns, keeping the ability to make small position adjustments.
6. Tighten the connection gradually. The bases should sit flush. Do not use excessive force: the wooden part, the insert, or the front panel finish may be damaged.
7. Check operation. Open and close the door or pull out the drawer several times, holding the handle as you normally would. It should not shift, creak from misalignment, or catch on neighboring parts.
8. Inspect the result under normal lighting. Look at the front panel straight on and at an angle, and compare the replacement with the other handles.
If a gap appears between the base and the front panel during a trial tightening, do not try to eliminate it by increasing force. The cause may be an uneven mounting surface, a warped front panel, the wrong screw length, or the fastener bottoming out inside the handle. Professional installation begins with eliminating the cause, not with tightening harder.
Do not use the automatic recommendation to "tighten a quarter turn" for any wooden product. The allowable force depends on the specific connection. If the manufacturer specifies the installation sequence or recommended tool, follow that information.
When it's better not to buy a single handle
There are several situations in which buying a single replacement won't give the desired result.
Reliable fastening cannot be ensured. The old handle had two mounting points, while the new one has a different layout; the holes are damaged; the hardware doesn't match the thickness of the front. In these cases, the structural problem must be solved first.
The visible mark from the old handle cannot be hidden, and refinishing the surface is undesirable. Even an exact center-to-center match doesn't guarantee a neat appearance if the new shape exposes a large faded area.
There is no visually similar counterpart for a symmetrical piece. On paired doors, a single handle with a sharply different silhouette may look out of place. Sometimes it's wiser to replace both handles of one pair while keeping the other groups intact.
The cause of the breakage hasn't been fixed. The drawer jams, the door is warped, the fastening is tearing out of damaged material. As long as the defect remains, the new handle risks sharing the fate of the old one.
The old original handle can be carefully restored. For historical furniture, preserving the authentic hardware may be more valuable than buying a modern replacement. Especially if the new piece would change the character of the front or require re-drilling.
Finally, it doesn't always make sense to buy an expensive custom piece for a minor scratch on a working handle. If the fastening is secure and the damage is only superficial, local refinishing may be sufficient — provided it's compatible with the existing finish.
How to order a single handle without mixing up the finish
Once the desired shape is determined, put the parameters in writing. In furniture orders, the most common confusion arises at the stage of choosing a size within one model family. The buyer remembers the name but doesn't specify the length, wood species, or finish option. As a result, they receive a product that looks correct but doesn't fit the old holes.
For a single handle, a simple record is enough: model name — SKU — overall size — center-to-center distance or mounting pattern — wood species — finish — quantity 1 piece. If the fasteners are required separately, add their parameters. For restoration, it is useful to keep a photo of the old front before and after installation.
There is another nuance for an order from a furniture workshop. A single handle purchased as a sample must have the same finish as the subsequent batch. Otherwise, the test loses its meaning: you checked a beech blank of one size, but ordered a different profile of oak handle for the series. After the sample is approved, a bill of materials is drawn up with the exact SKU, material, size, finishing method, and quantity.
If the project uses two types of handles, account for them separately. For example, five chests of drawers need two short handles for the top drawers and four long ones for the bottom drawers. Then the total requirement will be ten short and twenty long, not “thirty furniture handles.” This separation prevents accidentally ordering thirty identical pieces that do not fit some of the fronts.
After a successful replacement, leave the information in an accessible place — in the furniture documents or in an electronic folder with photos. Include not only the name and SKU, but also the dimensions, finish shade, actual length of the installed screw, and the repair date. If the handle is needed again in a few years, this will save you from taking new measurements.
Where to buy furniture handles individually for replacement
You can start your selection with catalog of STAVROS wooden furniture handles. It presents various types of wooden products, including options for self-finishing and handles with a ready-made finish. To replace a single piece, it is best to immediately determine which design is required: a knob with a single mounting point, a pull, a profile, or another shape.
For those who want to buy wooden furniture handles and already have the old holes, it is useful to follow a specific checklist. First, look for a suitable center-to-center distance or mounting pattern. Then choose the overall length and base, compare the projection, and only after that — the wood species, shade, and price. This order reduces the number of unsuitable options, even if the catalog contains dozens of models.
If you need to buy a single wooden handle for a chest of drawers or a wardrobe, check the product page of the selected model for the required size, material, finish options, and whether fasteners are included. STAVROS offers supply from one piece. The delivery cost may be significant relative to the price of the smallest piece, so before placing an order it is useful to look payment and delivery terms.
When working on custom furniture, the following information is also useful for furniture manufacturers. If you need to evaluate the finish or check whether the profile is compatible with a front sample, you can browse the available Product samples and clarify in advance how to obtain a suitable item.
Buying a single piece makes sense when the chosen handle solves exactly your problem. For replacing a broken handle, this means preserving the existing drilling pattern and the neat appearance of the front. For a furniture workshop, it is the opportunity to check the shape and mounting before ordering a batch. Both cases share one thing: the decision to buy is made after measurements, not before them.
Frequently asked questions about buying and replacing a wooden furniture handle
Can I order a single wooden handle instead of a set?
Yes, STAVROS allows ordering furniture handles from one piece. For a specific item, check the availability of the required size, wood species, and finish. If custom manufacturing to a sample is required, the terms may differ from a regular per-piece purchase.
Can I choose a new handle based only on a photo of the old one?
A photo helps find a similar shape, but it does not replace measurements. You need to know the number of mounting points, the center-to-center distance for two holes, the overall length, the base, and the projection. Without this data, it is easy to order a beautiful but incompatible piece.
What should I do if the center-to-center distance falls between two common sizes?
First, repeat the measurement from the other edge or with another tool. Check whether there is any damage or ovality of the holes. Do not round the result just to match the nearest product: an accurate choice requires a drawing and an assessment of the actual drilling pattern.
Can a knob handle be installed instead of a two-point pull?
Technically, such a change is sometimes possible as part of reworking the front, but it does not align with the goal of preserving both old holes. One of them will remain unused and will require careful restoration. If the front cannot be repaired, it is better to look for a compatible two-point handle.
Can an old button be replaced with a bow handle?
A standard two-point bow handle will require an additional hole if there was originally only one. If you want to preserve the old drilling pattern, choose a handle with a compatible single-point layout, or separately plan a restoration and front rework project.
Why does a new handle of the same article number differ in color from the others?
The old finish could have changed in shade and gloss over years of use. Light, touching, and cleaning all have an effect. Matching the article number helps reproduce the geometry, but it does not guarantee the same degree of finish aging. Compare the item with the furniture under real lighting.
Which wood species should be chosen if the old handle was painted with opaque enamel?
With opaque paint, the wood grain is usually less visible. But the species should be chosen based on the specific model, surface preparation option, and operating conditions. A beech handle for enamel paint may be a suitable solution if the dimensions and mounting match.
How can you tell that a screw is too long?
A sign is that the screw rests inside the handle before its base is pressed tightly against the front, or tightening does not eliminate the play. Check the actual screw length, the front thickness, and the depth of the threaded connection. Do not try to solve the problem with excessive force.
Do both handles need to be replaced on paired cabinet doors?
Not necessarily. If an exact match has been found and the difference is imperceptible, one is enough. A paired replacement is considered when the new handle differs significantly in size, pattern, or color and disrupts the symmetry of the doors.
What should I do if scratches are found under the removed handle?
First, determine which areas the new handle will cover. If the damage will remain visible, assess whether the coating can be repaired with suitable products. Do not sand or repaint the front at random: a localized intervention can make the spot even more noticeable.
Is it worth buying one handle before ordering a batch for the workshop?
Yes, if the model has not yet been tested on a real front. One trial handle allows you to evaluate the installation, grip, projection, scale, and finish. After a successful test fit, save the exact SKU and finish so that the subsequent order matches the sample.
How can I avoid losing information about a suitable handle after a repair?
Save a photo of the installed part and a record with the SKU, size, number of holes, center-to-center distance, material, finish, and fasteners. This information will help you buy a compatible handle again without searching by appearance.