Article Contents:
- A question asked by every second person: can stucco be combined with a stretch ceiling?
- Why a stretch ceiling needs decoration
- Visual emptiness as an architectural problem
- Zoning and structuring space
- A chandelier without a frame is the most common aesthetic problem
- The technical side of the issue: how stucco is attached to a stretch ceiling
- Three main installation methods
- Why a lightweight material is specifically needed for a stretch ceiling
- What needs to be done before installing the stretch fabric
- Which decorative molding elements are suitable for stretch ceilings
- Ceiling Cornices
- Chandelier moldings
- Moldings for creating frames
- Decorative inserts and medallions
- What is definitely not suitable for stretch ceilings
- Types of stretch ceilings and compatibility with molding
- PVC fabric (film)
- Fabric material
- Combined and structural systems
- Molding on stretch ceilings in different interior styles
- Classic and neoclassic
- Modern style
- Art Deco
- Eclecticism and mixed solutions
- Loft and Industrial Style
- Decorative solutions for stretch ceilings with molding: specific schemes
- Scheme 1: Cornice plus rosette
- Scheme 2: Molding frames
- Scheme 3: Rosette with molding frame
- Scheme 4: Cornice with lighting niche
- Scheme 5: Multi-level system
- Choosing material for molding on a stretch ceiling
- Polyurethane: optimal choice
- Polystyrene: cheaper, but with limitations
- Wood: in special cases
- Plaster: very rarely, only on walls
- How to choose molding for a stretch ceiling: step-by-step logic
- Step 1: Determine the stretch ceiling system
- Step 2: Decide which elements are needed
- Step 3: Select the scale to suit the space
- Step 4: Determine the ornament style
- Step 5: Consider the color of the fabric and molding
- Installing molding on a stretch ceiling: detailed instructions
- Stage 1: Preparation
- Stage 2: Marking
- Stage 3: Installing cornices on the wall
- Stage 4: Socket Installation
- Stage 5: Molding Installation on the Canvas
- Stage 6: Joint Sealing and Painting
- Common Mistakes When Installing Molding on a Stretch Ceiling
- Using Aggressive Adhesive
- Pressure on the Canvas During Installation
- Installation Without a Mounting Plate
- Heavy Elements Without Additional Fastening
- Mismatch Between Decoration Scale and Space
- Violation of Symmetry
- Where Molding on a Stretch Ceiling Looks Especially Organic
- Living Room
- Bedroom
- Kitchen-Dining Room
- Hall and Foyer
- Office
- Frequently Asked Questions About Molding on Stretch Ceilings
- Can Molding Be Glued Directly onto a Stretch Ceiling?
- Is It Necessary to Install a Backing Plate for an Outlet in Advance?
- Does the Cornice Cover the Mounting Profile of the Stretch Ceiling?
- What Glue Should Be Used for Installing Molding on a Stretch Ceiling?
- Will the Stretch Ceiling Support the Decor?
- Can Molding Be Installed If the Stretch Ceiling Is Already Mounted?
- What Size Outlet to Choose for a Standard Room with a Stretch Ceiling?
- Which Cornice Is Best for Covering the Stretch Ceiling Profile?
- Conclusion


The question every second person asks: can you combine molding with a stretch ceiling?
Stretch ceilings have long become one of the most common solutions in apartment and house finishing. A smooth surface, hidden utilities, quick installation—this system has many practical advantages. But it has one obvious problem: the stretch fabric itself is decoratively neutral. It's smooth, clean, and... empty. No architectural expressiveness, no depth, no character.
This is exactly where the question arises that thousands of people ask daily: is molding on a stretch ceiling compatible with the system's structure itself? Will the decor damage the fabric? How to attach elements if the surface is non-load-bearing? How will it look—and will it look good at all?
The answer is yes, it is compatible. Moreover, today the stretch ceiling is one of the most common bases for ceiling molding decor. And in this article, we will analyze everything thoroughly: technology, materials, installation methods, style solutions, typical mistakes, and what ultimately results for those who approach the task wisely.


Why a stretch ceiling needs decor
Our factory also produces:


Visual emptiness as an architectural problem
Stretch fabric is a technically flawless surface that architecturally says nothing. White gloss, matte white, satin—all these options solve the functional task of a flat ceiling but do not create a spatial statement. As a result, even an expensive, well-thought-out interior with quality furniture and proper lighting often gives a sense of incompleteness precisely because of the empty ceiling.
A cornice around the perimeter, a rosette for the chandelier, molding frames—each of these elements literally includes the ceiling in an architectural dialogue with the rest of the space. This is exactly why molding on a stretch ceiling is needed: not for decoration's sake, but to create a holistic, finished interior.
Get Consultation
Zoning and structuring space
In modern apartments with open floor plans, the stretch ceiling often unites several functional zones. Molding frames applied to its surface or mounted near it allow visual separation of the kitchen area from the dining area, the living room from the hallway—without walls or partitions. This is one of the most unobtrusive and architecturally competent zoning tools.
A chandelier without framing is the most common aesthetic problem
On a stretch ceiling, the chandelier hook always passes through a special mounting ring. Around it is an empty plane. Without a rosette, this looks technical and unfinished. A ceiling rosette for a chandelier solves the problem in one move: a decorative disc covers the mounting assembly, creates a 'frame' for the light fixture, and turns the center of the ceiling into an architectural accent.
The technical side of the issue: how molding is attached to a stretch ceiling
This is the most important section for those who look at the task practically. The stretch fabric is not a load-bearing surface—it only holds its own tension. Any decor intended to be fixed to a stretch ceiling requires a special mounting approach.
Three main mounting methods
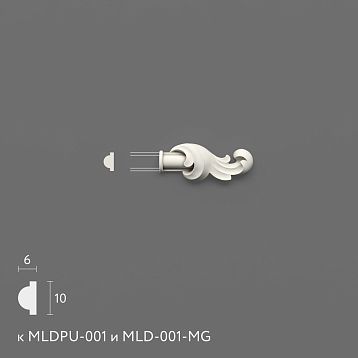
The first method is wall mounting. Cornices and moldings along the perimeter of the room are attached not to the stretch fabric itself, but to the walls—along the line where the fabric meets the ceiling surface. This is the most reliable and common method. In this case, the cornice covers the gap between the stretch fabric and the wall (the so-called 'bag'), serving as a decorative plug. PreciselyPolyurethane moldingsis most often used here—the lightweight material holds perfectly on the wall without loading the fabric.
The second method is mounting to the rough ceiling through the fabric. At pre-marked points, a hole is cut in the fabric, a mounting ring is installed (for a rosette—a special support plate), and the decorative element is attached to the rough ceiling. This method is used for rosettes and individual local elements. Mounting rings are installed even before the stretch fabric is mounted—this is fundamentally important.
The third method is adhesive mounting on the fabric. Lightweight polyurethane elements of small size and weight (up to 200–300 grams) can be glued directly onto the stretch fabric with a special acrylic adhesive that does not damage the fabric structure. This method is used for decorative moldings that form frames and geometric patterns directly on the surface.
Why a lightweight material is specifically needed for a stretch ceiling
This is where the answer lies to why plaster molding is used extremely rarely on stretch ceilings, while polyurethane is ubiquitous. Plaster is heavy: even a small cornice weighs several kilograms per linear meter. Mounting plaster on walls near the stretch fabric is technically feasible but requires careful fastening, and any mistake risks deforming the structure. Polyurethane is 10–15 times lighter—this is precisely whyPolyurethane ceiling decorationis the standard solution for stretch ceilings today.
What needs to be done before installing the stretch fabric
If the decor is planned in advance, the professional approach looks as follows:
-
Determine the location of the chandelier and install the mounting plate in the rough ceiling before installing the stretch fabric
-
If necessary, mark the walls for cornices
-
Select decorative elements before starting installation work to accurately account for all dimensions and gaps
-
Consider the thickness of the cornice when choosing the type of mounting profile for the stretch ceiling
If the stretch ceiling is already installed — it's not a problem. Cornices are mounted to the walls afterward, and the socket is installed through a mounting ring, which is cut into the fabric. The main condition is to work carefully, without jerks or pressure on the fabric.
Which decorative molding elements are suitable for a stretch ceiling
Let's examine each type — taking into account the specifics of the stretch system.
Ceiling Cornices
Cornice is the most popular and versatile decorative element for stretch ceilings. It is mounted on the wall along the perimeter of the room along the fabric line, covering the joining profile and the gap between the fabric and the wall. This is both a decorative and technical solution: the cornice makes the stretch ceiling complete, removing the visible line of the mounting profile.
For stretch ceilings, cornices with a width of 5 to 12 cm are well suited — sufficient to cover the technical gap, and not so large as to put a load on the wall. Decorative ceiling cornices made of polyurethane are attached with acrylic glue and, if necessary, with additional mounting brackets.
Rosettes for chandeliers
Rosette is a mandatory decorative element for a stretch ceiling with a chandelier. It is mounted on a special embedded plate, which is pre-installed in the rough ceiling. A hole corresponding to the diameter of the rosette is cut into the finished fabric — and the decorative disc is glued onto the plate.
Ceiling rosettes for chandeliers for stretch ceilings are produced with a hole in the center and without it (in the latter case, the hole is neatly cut to the required diameter). For stretch ceilings, polyurethane rosettes are the optimal choice: lightweight, durable, not deforming under temperature changes.
Moldings for creating frames
Moldings on the surface of a stretch fabric are one of the most effective and technically simple ways to decorate a ceiling. Lightweight polyurethane moldings are glued directly onto the fabric surface, forming geometric frames, symmetrical rectangles, and coffered patterns.
Key condition: moldings must be lightweight (polyurethane), and the adhesive must be neutral to the PVC film or fabric of the canvas. Acrylic adhesives, specifically designed for working with stretch ceilings, do not damage the surface and hold the decor securely.
Decorative inserts and medallions
Small decorative inserts, corner elements, and medallions can be mounted on stretch fabric using the adhesive method, provided they are lightweight. They are used to decorate molding frames at intersection points and to create additional decorative accents.
What is definitely not suitable for a stretch ceiling
Heavy plaster elements intended to be attached directly to the fabric — no. Elements with sharp lower edges that could deform the fabric upon accidental contact — use with caution. Adhesives based on organic solvents (acetone, toluene) — absolutely not allowed, they dissolve PVC film.
Types of stretch ceilings and compatibility with molding
Not all stretch ceilings are the same. The type of fabric affects the method of mounting decor.
PVC fabric (film)
The most common type. Glossy, matte, satin, with photo printing — all these options are made from PVC film. Decor mounting: cornices on walls, rosettes on embedded plates, moldings with PVC-compatible adhesive. The fabric is sensitive to mechanical damage and sharp edges.
Fabric ceiling
More durable than PVC. Not afraid of accidental contact. Allows slightly greater load when mounting decor with adhesive. Less sensitive to sharp edges. Fabric ceilings are a good base for molding systems with moderate frame density.
Combined and structural systems
Two-level stretch ceilings, structures with lighting, ceilings with drywall elements — here decorative molding is mounted on accessible load-bearing elements: drywall fascias, boxes, ledges. This is the most free situation in terms of mounting.
Stucco on stretch ceilings in different interior styles
Classicism and neoclassicism
Classical interior with a stretch ceiling is a paradoxical but very common combination. The stretch fabric provides a perfectly smooth surface, while stucco creates the necessary architectural context. An ornamental cornice around the perimeter, a chandelier rosette, molding frames—all of this creates an interior where the stretch ceiling doesn't look like a cheap compromise.
For neoclassical style, a white matte stretch ceiling with white stucco works especially well: the decor is perceived through relief and shadows, not color, and creates a noble monochrome surface with architectural content.
Modern style
In a contemporary interior, stucco on a stretch ceiling is used as an intentional architectural accent. A thin geometric cornice, a minimalist rosette without ornament, one or two molding frames made of straight profiles—this is not 'classical,' it's a modern architectural detail. Molding frames on a glossy stretch ceiling look especially effective, as it provides reflection and enhances the effect.
Art Deco
Art Deco style with geometry and decorative richness pairs excellently with stretch ceilings, especially lacquered surfaces. Molding frames with geometric corner inserts, a radial rosette, stepped cornice profiles—all of these fit organically onto a mirror-like or richly matte ceiling surface. Gilded stucco against a dark lacquered fabric is one of the most striking Art Deco techniques.
Eclecticism and mixed solutions
Here, the possibilities are practically unlimited. The only important thing is that the chosen decor has internal stylistic logic and doesn't look random. Molding frames on a white stretch ceiling with antique furniture and modern lighting fixtures—this is deliberate eclecticism that works.
Loft and industrial style
In loft style, stucco is used with irony: decorative molding on a concrete-gray stretch surface creates a contrast between 'rough' and 'refined,' which is the essence of this style. Nothing extra is needed here—just one element, placed intentionally and precisely.
Decorative solutions for stretch ceilings with stucco: specific schemes
Scheme 1: Cornice plus rosette
The basic and most common composition. The cornice around the perimeter conceals the mounting profile of the stretch ceiling and creates a frame for the space. The central rosette frames the chandelier. Together, they create a 'contour + center' system that transforms even the simplest stretch ceiling.
This scheme works in any room and any style. For a modern interior — thin profile cornices and a laconic rosette. For classic — ornamental cornices and a rich, multi-layered rosette.
Scheme 2: Molding Frames
One or several rectangular frames made of polyurethane moldings are applied to the surface of the stretch fabric. This creates the effect of a coffered ceiling — architecturally expressive, structured, and expensive-looking. The moldings are glued directly onto the fabric with a special adhesive.
The frames can be placed across the entire plane or only in the central zone. A central molding frame above the dining table or relaxation area is a way to highlight a functional zone without walls.
Scheme 3: Rosette with a Molding Frame
A rectangular or square molding frame is built around the central rosette. The chandelier ends up not just framed by the rosette, but at the center of a full-fledged architectural system. This is one of the most spectacular solutions for living rooms and dining rooms.
Scheme 4: Cornice with a Lighting Niche
The cornice is mounted on the wall with a gap, in which an LED strip is placed. Soft contour lighting illuminates the lower edge of the cornice and reflects off the surface of the stretch fabric, creating an accent lighting scenario. This technique is especially effective on glossy and mirror fabrics.
Scheme 5: Multi-level System
Two levels of molding frames, cornice, rosette—a complete architectural ceiling system. Implemented in spacious living rooms with ceilings from 2.8 m. Requires precise marking and careful installation, but the result is a professional interior object.
Choosing material for stucco on a stretch ceiling
Polyurethane: the optimal choice
This is not an opinion—it's practice.polyurethane moldingsis today the standard for working with stretch ceilings. Its characteristics:
-
Weight: 0.2–1.5 kg per element—the fabric is not loaded
-
Flexibility: light elasticity allows fitting the element to the surface without cracks
-
Moisture resistance: does not react to condensation, humidity fluctuations
-
Relief precision: high, ideal repeatability
-
Painting: any water-based paints
-
Installation: adhesive + staples if necessary
Decorative elements made of polyurethane are used in projects ranging from economy to premium — the difference lies only in the complexity of the ornament and size.
Polystyrene: cheaper, but with limitations
Polystyrene ceiling tiles are a budget solution with very limited relief. They are lightweight, inexpensive, and installed with adhesive. However, the visual quality is significantly lower: the relief is unclear, detailing is weak, and the surface is porous. As a temporary or budget solution — applicable, but there is no talk of any 'designer' result.
Wood: in special cases
Wooden moldings are used on stretch ceilings in chalet, rustic, and Scandinavian classic interiors. Wood is heavier than polyurethane and is installed exclusively to load-bearing structures — walls, boxes, fascias. Wooden elements are not glued directly onto the fabric.
Plaster: very rarely, only on walls
Plaster stucco near a stretch ceiling — only on walls, only with reliable fastening, only in professional installation. Plaster is never installed directly onto the fabric. In most practical situations with a stretch ceiling, plaster is inferior to polyurethane in all parameters.
How to choose stucco for a stretch ceiling: step-by-step logic
Step 1: Determine the stretch ceiling system
Before choosing decor, it's important to know the type of fabric (PVC or textile), the mounting profile construction (clip, baguette), and the presence of embedded plates for sockets. If the ceiling is not yet installed, it's better to plan for embedded elements in advance.
Step 2: Decide which elements are needed
Cornice around the perimeter — almost always, it hides the mounting profile. Socket for a chandelier — if there is a pendant light. Molding frames — for additional decor or zoning if desired. Additional inserts — as desired.
Step 3: Choose the scale to fit the space
Standard apartment with ceilings 2.5–2.7 m: cornice width 5–8 cm, socket diameter 30–45 cm. Room with ceilings 2.8–3 m: cornice 8–12 cm, socket 40–60 cm. High ceilings from 3 m: complete freedom.
Step 4: Determine the style of the ornament
Modern interior — smooth profiles, geometric shapes without floral ornament. Neoclassicism — moderate ornament, clean profiles. Classic — rich relief, acanthus leaf, curls. Art Deco — geometry, symmetry, stepped profiles.
Step 5: Consider the color of the fabric and molding
White molding on white fabric — classic, works everywhere. Molding matching the ceiling color — decor is perceived only through relief, creates a refined monochrome effect. Contrasting molding — a bold design statement. Metallic painting (gold, bronze) — for Art Deco and rich interiors.
Installing molding on a stretch ceiling: detailed instructions
Stage 1: Preparation
Determine cornice mounting points (walls), socket location (center or along chandelier axis), molding frame layout (on canvas). Prepare tools: mounting acrylic adhesive, miter box for angled cuts, painter's tape, tape measure, pencil.
Stage 2: Marking
Mark cornice lines along walls. Determine ceiling center or chandelier axis — all socket and frame markings are built from this point. Check symmetry of markings on all four sides. Trace molding frame outlines directly onto canvas with soft pencil or fabric marker.
Stage 3: Mounting cornices to wall
Apply adhesive to back of cornice (zigzag or dots). Press cornice to wall along marked line. Hold for 30–60 seconds. Secure with painter's tape until dry. Cut corner joints of cornices at 45° — use miter box for this.
Stage 4: Mounting socket
If mounting plate is already embedded in rough ceiling — carefully cut hole in canvas along plate perimeter. Apply adhesive to back of socket, align center hole with hook or ring, press to plate. Hold until set.
Stage 5: Mounting moldings to canvas
Apply adhesive to back of molding in thin strip. Place molding on canvas strictly according to markings. Press without pressure — do not push into canvas, simply hold. Secure with painter's tape. Let dry for 24 hours.
Stage 6: Sealing joints and painting
Fill cornice joints and gaps between the rosette and the canvas with acrylic sealant, smooth with a wet finger. After complete drying (24 hours) – paint the molding. Use a brush for relief elements, a small roller for smooth ones. Apply two thin coats.
Common mistakes when installing molding on a stretch ceiling
Using aggressive adhesive
Adhesives based on organic solvents (acetone, toluene, gasoline) dissolve PVC stretch ceiling film instantly and irreversibly. Only acrylic and PVA-based adhesives are allowed. This is not a recommendation – it is a mandatory requirement.
Pressure on the canvas during installation
When installing a rosette or moldings, do not apply pressure to the canvas with force. This is especially critical when working with glossy PVC films – any pressure leaves a deformation or imprint that does not disappear.
Installation without a mounting plate
Installing a rosette on a stretch ceiling without a pre-mounted mounting plate will result in either loss of the decoration or tearing of the canvas. If the mounting plate was not installed before the canvas was mounted, the system will need to be dismantled and reinstalled.
Heavy elements without additional fastening
Any decorative element weighing more than 300–400 grams, which is mounted on a wall next to a stretch canvas, must have mechanical fastening (brackets, dowels) in addition to adhesive. Using only adhesive for heavy cornices is a risk.
Mismatch between the scale of decor and space
A large ornamental rosette and wide cornices with a 2.4 m ceiling is a mistake that visually 'eats up' the height of an already low space.
Violation of symmetry
An asymmetrically placed rosette or molding frames shifted off-center are immediately noticeable and cannot be fixed without dismantling. Marking is the first and most important step.
Where stucco on a stretch ceiling looks especially organic
Living Room
The main room where ceiling decor unfolds to its full potential. The cornice conceals the mounting profile, creating a frame for the space. Molding frames structure the large surface. The rosette frames the chandelier. Together, it forms an architecturally complete interior.
Bedroom
Delicate decor: a thin cornice without large ornamentation, a small rosette. Matte white fabric plus white stucco create a quiet, calm surface with barely perceptible relief.
Kitchen-dining room
A molding frame above the dining area + a rosette above the table = a designated formal space for dining. The cornice conceals the profile and adds a neat finishing touch.
Hall and Entrance
The first space a guest sees. The cornice in the hallway sets the standard for the entire interior. Even a thin profile cornice without ornamentation speaks to the thoughtfulness of the space.
Office
A strict geometric cornice and a laconic rosette on a matte ceiling — this is the right environment for work. No opulence, only architectural logic.
Frequently Asked Questions About Molding on Stretch Ceilings
Can molding be glued directly onto a stretch ceiling?
Yes, lightweight polyurethane moldings and small rosettes weighing up to 300 g can be glued directly onto the fabric using acrylic adhesive compatible with PVC. It is important to avoid putting pressure on the fabric and not to use aggressive solvents.
Is it necessary to install a mounting plate for the rosette in advance?
Yes, and it is better to do this before installing the stretch fabric. The mounting plate is attached to the rough ceiling at the desired point. After the fabric is installed, a hole is cut through it, and the rosette is fixed onto the plate.
Does the cornice cover the mounting profile of the stretch ceiling?
That is exactly how it works. The cornice is mounted on the wall along the lower edge of the mounting profile and completely covers it, turning a technical detail into a decorative element.
What adhesive should be used for installing molding on a stretch ceiling?
Only acrylic adhesives and PVA-based compounds. Adhesives with organic solvents (liquid nails with solvents, contact adhesives) destroy PVC fabric.
Will the stretch ceiling support the decor?
Decoration is attached not to the fabric, but to the walls and embedded structures. The fabric holds only lightweight elements (moldings, small rosettes) that do not create a significant load. Heavy elements are always mounted to load-bearing structures.
Can molding be installed if the stretch ceiling is already mounted?
Yes. Cornices are attached to the walls after the ceiling installation. Moldings are glued onto the fabric. A rosette is mounted through a cut hole in the fabric onto an embedded plate. If there is no embedded plate, a section of the fabric will need to be removed for its installation.
What size rosette should be chosen for a standard room with a stretch ceiling?
For a room of 15–20 sq. m with a height of 2.5–2.7 m — a rosette with a diameter of 30–45 cm. The size of the rosette should match the diameter of the chandelier or be 20–30% larger.
Which cornice is best for concealing the stretch ceiling profile?
A cornice 5–8 cm wide with a straight lower cut is a universal solution. It is important that the lower edge of the cornice is even and fits tightly against the wall surface.
Conclusion
Molding on a stretch ceiling is not a compromise or a complex technical task. It is a thoughtful approach to decorating a modern interior that combines the best of two systems: the technological precision and neatness of the stretch ceiling and the architectural expressiveness of molded decor.
With the right choice of material (polyurethane is the only sensible choice for a stretch system), proper installation, and a well-considered composition, the result is exactly what it should be: the ceiling ceases to be an empty neutral plane and becomes a full-fledged architectural element of the space.
If you are seriously engaged in ceiling design — pay attention to the assortment of the company STAVROS. Full catalog of cornices, moldings, rosettes, and decorative elements made of polyurethane —Polyurethane Items— available with selection by shape, size, and style.
STAVROS is architectural decor for those who create space consciously. European material quality, impeccable relief, a full range for any interior solution—from minimalism to classic. Here, every element is created so that your ceiling looks as it should: complete, expressive, and professional.