Article Contents:
- Why you need a ceiling rosette: breaking down the effect
- Function one: hide the mounting area
- Function two: create a visual center of the ceiling
- Function three: make the chandelier part of the interior
- How to choose the size of a ceiling rosette for a chandelier
- Guide by chandelier
- Guide by room
- Guide by ceiling height
- Distance guide to walls
- Smooth or embossed ceiling rosette: which to choose for your interior
- Smooth rosette: minimalism that works
- Embossed rosette: expressiveness and classic character
- Intermediate option: moderate relief
- Ceiling decor under the chandelier: when one rosette is not enough
- Ceiling cornice: perimeter framing
- How the rosette and cornice work together
- Additional ceiling decor
- Polyurethane moldings: how to connect the ceiling with the walls
- How wall moldings relate to the ceiling rosette
- How to choose moldings that match the socket
- Socket for different rooms: specifics of choice
- Ceiling socket for the bedroom
- Ceiling socket for the living room
- Ceiling socket for the study
- Ceiling socket for the children's room
- Ceiling socket for the hall and hallway
- Ceiling socket and interior style: detailed analysis
- Classic
- Neoclassicism
- Modern style
- Art Deco
- Scandinavian Style
- Material matters: why polyurethane is better than plaster
- Lightness
- Moisture resistance
- Relief accuracy
- Ease of installation
- Installing a ceiling rosette: step-by-step logic
- Step one: marking the center
- Step two: surface preparation
- Step three: applying adhesive
- Step four: installation
- Step five: sealing the edge
- Step six: painting
- What to buy with a ceiling rosette: complete set
- Basic set for any rosette
- Extended set for the living room
- Set for a classic interior
- Minimum bedroom set
- How to avoid common mistakes when choosing a socket
- Ceiling rosette as an independent decorative element
- FAQ: popular questions about choosing a ceiling rosette
- About the Company STAVROS
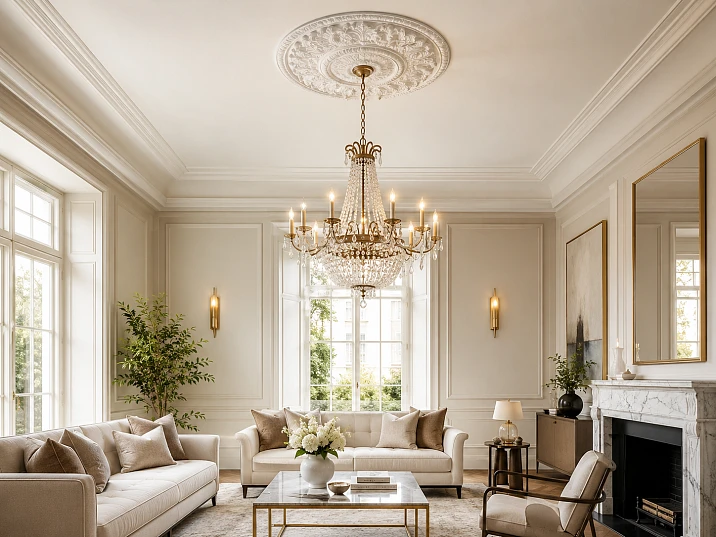
The chandelier is chosen, the wire is routed, the ceiling is ready for painting — and at that moment a person looks up and realizes: something is wrong. The light fixture hangs alone in an empty space, like an accidental guest. Around the mounting point — a bare ceiling, no framing, no transition. There is a chandelier, but no image. It is at this moment that most people first ask themselves: is a ceiling rosette needed here?
It is needed. And not just needed — it changes the entire picture. Ceiling rosette — this is a decorative round element made of polyurethane that is attached to the ceiling around the chandelier's suspension point. It transforms the light fixture from a utilitarian object into the center of the ceiling composition. A chandelier with a rosette is the architectural axis of the room. A chandelier without a rosette is just a light source.
How to choose the right rosette for a chandelier? What diameter to take? Should it be smooth or textured? And what to buy along with it so the ceiling looks complete? Detailed and honest answers to all these questions.
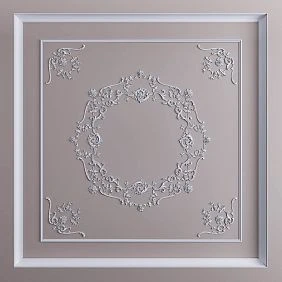
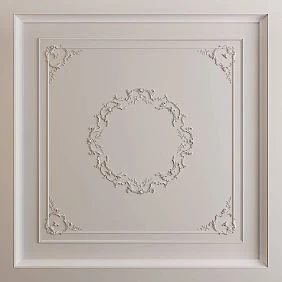
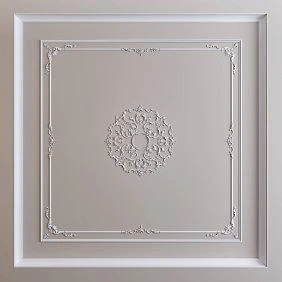
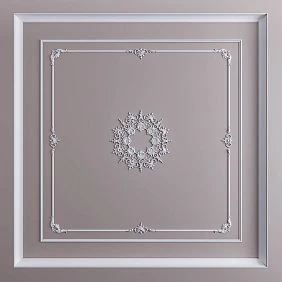
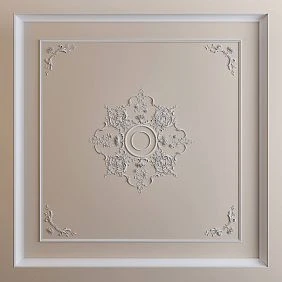
Why you need a ceiling rosette: analyzing the effect
Before choosing a specific product, it's worth understanding what exactly it does. A ceiling rosette performs several functions simultaneously, and each of them is important.




Function one: hide the mounting area
At the chandelier's attachment point on the ceiling, there are almost always traces of work: small chips in the plaster, a stain from the previous mount, a dowel, the edges of a neatly made hole for the wire. All this is barely noticeable from afar, but if the gaze lingers, the imperfection catches the eye. The rosette completely covers this area, and the installation traces disappear under the relief ornament.
Our factory also produces:

Function two: create a visual center of the ceiling
The ceiling is a large plane, and the human eye instinctively looks for an organizing point on it. If the ceiling is empty, the gaze wanders chaotically. The rosette under the chandelier creates this point, focuses attention, and makes the ceiling "readable." This is important not only aesthetically but also psychologically: a room with an organized ceiling is perceived as cozier and more complete.
Get Consultation
Function three: make the chandelier part of the interior
Any light fixture hung without context looks like an object that was simply hung. The rosette creates this context: it frames the chandelier's base, sets its scale, and integrates it into the ceiling plane. After installing the rosette, the chandelier ceases to be a separate object — it becomes part of the architectural axis: floor, room axis, ceiling with central decor.
Buy a ceiling rosette — this is not a whim or an excess. It is a targeted solution that, for little money and a few hours of work, changes the perception of the entire room. That is why it is part of the basic set of finishing decor along with moldings and ceiling cornices.
How to choose the size of a ceiling rosette for a chandelier
The question of size is the first and most important when choosing a rosette. A rosette that is too small under a large chandelier looks disproportionate and gets lost. One that is too large under a small light fixture overwhelms and disrupts the ceiling's proportions. The correct diameter is a balance between the size of the chandelier, the room area, and the ceiling height.
Chandelier guide
The simplest rule: the diameter of the rosette should be comparable to the diameter of the upper part of the chandelier or slightly larger. If the chandelier has a wide base or basket, the rosette should be noticeably larger to create a clear frame. If the chandelier has a thin base, you can take a smaller rosette: it will act as an accent medallion on the ceiling.
Practical ratio: the diameter of the rosette is 1.5–2 times larger than the diameter of the upper part of the chandelier — this is the zone of most harmonious perception. For very large chandeliers (from 80 cm in diameter), you can take a rosette of the same diameter or even slightly smaller — it works as a "neck" at the base of the fixture.
Room guide
Room area is the second key parameter. The larger the room, the larger the rosette should be. This is not only about aesthetics but also visual logic: a small element on a large ceiling gets lost, does not organize the space, and does not create the necessary accent.
Approximate table:
| Room area | Recommended rosette diameter |
|---|---|
| Up to 12 sq. m (bedroom, study) | 30–45 cm |
| 12–20 sq. m (medium bedroom, children's room) | 45–60 cm |
| 20–30 sq. m (living room, dining room) | 55–75 cm |
| From 30 sq. m (large living room, hall) | from 70 cm |
This table is a guideline, not a strict rule. The final decision is made considering several factors simultaneously.
Ceiling height guideline
Ceiling height affects not only the permissible size of the rosette but also the expressiveness of its relief. The higher the ceiling, the richer the ornament you can use — from a distance of 3–4 meters, the details of the relief are better visible, and a large rosette looks organic.
For ceilings up to 2.6 m, it is better to choose rosettes with a diameter of up to 55–60 cm with moderate relief. For ceilings from 3 m, you can work with a diameter of 70–90 cm and rich ornament. For ceilings above 3.5 m, rosettes from 80 cm and larger, with a pronounced multi-level pattern.
Distance to walls guideline
The rosette should not visually 'push' against the walls or be overlapped by the ceiling cornice. The distance from the edge of the rosette to the nearest wall or cornice should be at least 25–30 cm. If the distance is smaller, it is better to choose a slightly smaller diameter rosette.
This is especially relevant in rectangular rooms: the center of the chandelier often does not coincide with the geometric center of the ceiling, and the rosette may end up closer to one wall. This is normal — just choose the diameter considering the smallest distance to the wall.
Smooth or embossed ceiling rosette: which to choose for your interior
After deciding on the size, the second question arises: which rosette pattern suits your interior? This is a matter of style, and there is no single correct answer — there is a logic of choice that is worth mastering.
Smooth ceiling rosette: minimalism that works
A smooth rosette is a profile with a clear geometric outline, without ornamental relief. Typically, it consists of several concentric circles, a stepped profile, or a smoothly rounded shape without a pattern.
Such ceiling rose made of polyurethane It suits modern interiors without historical style references. It adds volume and a focal point without decorative 'noise', blends organically into a minimalist space, and works well both under a laconic Scandinavian-style lamp and a modern metal and glass chandelier.
A smooth rosette is chosen when:
-
the interior is modern or minimalist
-
the chandelier has a simple shape without ornaments
-
the ceiling is unadorned, and the rosette is the only decorative element
-
a neat result is needed without the risk of 'overload'
-
the painting will match the ceiling color — the smooth profile creates a subtle relief accent with this technique
Relief rosette: expressiveness and classic character
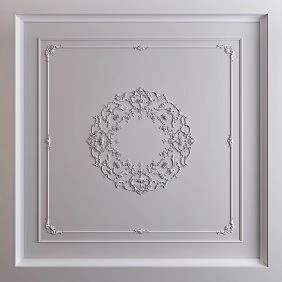
A relief rosette is a product with an ornamental pattern: petals, leaves, curls, radiant elements, pearl threads, geometric repeats. The relief creates depth, and even when painted in the same tone as the ceiling, the pattern is perfectly readable through the play of shadows.
Relief socket for chandelier enhances the architectural character of the ceiling. It requires an appropriate setting: at minimum, a chandelier with classic details; at maximum, a full ceiling design with cornices and walls with moldings.
A relief rosette is chosen when:
-
the interior is classic, neoclassical, or art deco style
-
the chandelier has ornamental elements, crystal, gilding
-
there is already decorative Moldings on the walls or ceiling
-
the ceiling is high, and the relief is clearly visible from a distance
-
you want an expressive result with a rich decorative effect
Intermediate option: moderate relief
Between the two extremes — a completely smooth rosette and a richly ornamented one — there is a golden mean: products with a light geometric pattern, without complex floral ornamentation, but not entirely smooth either. A stepped profile with a slight repeat, rays from the center, rhythmic stripes — these are rosettes that work in the widest range of interiors.
It is these rosettes that are most often bought for modern apartments that do not want to be completely without decor, but also do not strive for historical classicism. This is a compromise that looks organic in any context.
Ceiling decor under a chandelier: when one rosette is not enough
The rosette has done its job — the chandelier no longer hangs in a void. But in a large room or with high ceilings, this may not be enough. The ceiling still seems unfinished, especially if the walls are already decorated with moldings or decorative elements.
This is where Ceiling molding — decor along the perimeter of the ceiling and additional elements that turn the ceiling plane from a neutral background into a full-fledged part of the interior system.
Ceiling Cornice: Perimeter Framing
A ceiling cornice is a molding that is installed at the junction of the wall and ceiling along the entire perimeter of the room. It creates a clear boundary between the two planes, adds volume, and "closes" the transition, which in most apartments is imperfect.
Buy ceiling molding in the form of a cornice is one of the most effective decorative steps you can take in a room. With a consistent style with the rosette and moldings on the walls, the cornice creates a feeling of a complete, architecturally thought-out space.
How the rosette and cornice work together
Imagine: along the perimeter of the ceiling runs a smooth or moderately textured cornice 8–10 cm wide. In the center of the ceiling is a rosette with a matching profile, and under it — a chandelier. The ceiling ceases to be just a flat surface. It gains structure: a framed perimeter and an organized center. All the space between them works as a clean field, emphasizing both elements.
This technique is the foundation of classic ceiling decor. It has been used in interiors since the 18th century and never goes out of style because it is based on simple geometric logic: a frame and a center.
Additional decor on the ceiling
In more elaborate interiors, a concentric ring of thin molding can be added between the rosette and the cornice — it visually expands the rosette area and creates a more complex ceiling composition. This is a technique characteristic of classic and neoclassical interiors.
Ceiling Molding Purchase in the form of a cornice, border, and rosette from the same series — means getting a stylistically unified set of ceiling decor, where all elements are designed in the same key.
Polyurethane moldings: how to connect the ceiling with the walls
There is a common miscalculation: a person beautifully decorates the ceiling with a rosette and cornice, but the walls remain bare. Or, conversely, the walls are adorned with molding frames, while the ceiling lives separately. The result in both cases is a good solution, implemented only halfway.
When the ceiling and walls are decorated in a unified style, the room is perceived as a cohesive space, not as a collection of random surfaces. It is for this "stitching together" that Moldings made of polyurethane.
How moldings on the walls are connected to the ceiling rosette
Imagine a living room. On the walls — frames made of moldings 35 mm wide with a smooth profile. On the ceiling — a cornice of the same profile. In the center — a rosette with a light geometric ornament. Under the rosette — a chandelier. All this forms a single vertical axis: the wall with frames, the transitional cornice, the ceiling with the rosette and chandelier. The eye moves from bottom to top and finds harmony at every level.
buy polyurethane moldings together with the rosette and cornice means creating a system, not a set of individual elements.
How to choose moldings that match the rosette
The basic principle: moldings and the rosette should speak the same stylistic language. A smooth rosette with a geometric pattern calls for smooth or moderately profiled moldings. A relief rosette with a floral ornament calls for moldings with a matching relief or at least a pronounced profile. Mixing styles — a smooth minimalist rosette with richly ornamented classic moldings — creates a visual contradiction that prevents the interior from being perceived as a cohesive whole.
Buy polyurethane moldings a wide range of profiles — from strict narrow to richly relief wide — can be found in the catalog, and there is always an opportunity to choose an option that matches the already selected rosette.
Rosette for different rooms: specifics of choice
Ceiling rosette for the bedroom
The bedroom is a room of rest, and the decor here should be restrained. The rosette for the bedroom is small, 30–50 cm in diameter, with a moderate relief or completely smooth. For a modern bedroom — a geometric profile, for a classic one — a light ornament.
In the bedroom, the connection of the rosette with other decorative elements is especially important. If the headboard is framed with molding, the rosette above the bed creates a vertical axis that organizes the entire sleeping area space.
Ceiling rosette for the living room
The living room is the main room of the apartment, and here the rosette can be more expressive. Diameter 55–75 cm, relief from moderate to rich depending on the style. If the living room is large, the rosette is complemented by ceiling moldings along the perimeter and with moldings on the walls.
In the living room, a reception with a concentric ring of molding around the rosette is also possible — it expands the decorative zone of the ceiling center and creates a "medallion" effect.
Ceiling rosette for the study
The study is a space of concentration and status. A medium-diameter rosette with a clear geometric or moderately classic pattern works well here. A smooth rosette in the study is appropriate in an interior with dark tones and strict furniture, while a relief rosette suits a study with wood and bookshelves.
Ceiling rosette for the children's room
In the children's room — only a small smooth rosette. The children's space is already saturated with color and shapes, and an additional ornamental element on the ceiling would be excessive. The task of the rosette in the children's room is to hide the installation area and neatly design the light fixture attachment point, nothing more.
Ceiling rosette for the hall and entryway
The entryway is the first impression. If it is a spacious hall, the rosette here can be expressive — large, relief, with rich ornamentation. In a narrow apartment entryway — neat, not too large, consistent with the overall style.
Ceiling rosette and interior style: detailed analysis
Classic
For a classic interior — a relief rosette with floral ornamentation: acanthus leaves, petals, curls. Diameter — large, from 60 to 90 cm depending on the room. Color — white or with gold patina. Mandatory accompaniment: a cornice with a matching pattern, moldings on the walls, Decorative stucco as accents.
Neoclassicism
For neoclassicism — a rosette with a moderate pattern: radiant elements, rhythmic rims, a light meander or restrained petal pattern. Diameter — medium or large. Color — white or cream. Wall moldings — in a consistent style.
Modern style
A smooth rosette or one with minimal geometric pattern. Small or medium diameter. Color — exactly matching the ceiling. Moldings — thin and smooth. Buy molding For a modern style, you need to aim for minimalism: one precise element is better than several inappropriate ones.
Art Deco
A rosette with a geometric ornament: rays, concentric circles, rhythmic teeth. Diameter — medium. Contrasting color or gilding is possible. Moldings — with a geometric profile.
Scandinavian style
Only a smooth rosette of minimal size. White color matching the ceiling. No ornament. The goal is to indicate the presence of a rosette without disturbing the tranquility of the space.
Material matters: why polyurethane is better than plaster
On the market, you can find ceiling rosettes made from different materials. Polyurethane is the optimal choice for residential interiors, and here's why.
Lightness
A polyurethane rosette weighs several times less than its plaster counterpart. This is important for safety: with proper installation, it holds securely on the ceiling without additional fasteners. Large-diameter plaster rosettes require additional mechanical fixation, which complicates installation.
Moisture resistance
Polyurethane does not absorb water, does not deform with humidity changes, and does not crack. Plaster loses strength with prolonged contact with moisture. For rooms with imperfect ventilation, polyurethane is a significantly more reliable choice.
Precision of relief
Modern polyurethane rosettes are produced using precise molds and provide a clear, detailed relief. The ornament is reproduced without loss of detail — this is how products that are visually indistinguishable from plaster ones look.
Ease of Installation
Polyurethane ceiling rose made of polyurethane It is glued with acrylic mounting adhesive without special tools. Installation is accessible to anyone who knows how to work with glue and a level. The entire process takes 2–4 hours, including preparation.
Installing a rosette on the ceiling: step-by-step logic
Before picking up the glue, it is important to understand the sequence of actions. Mistakes during rosette installation are very noticeable — especially if it is not centered or has visible gaps along the edge.
Step one: marking the center
The center of the rosette must align with the chandelier mounting point. Find this point and mark it with a pencil. Take a string equal to the radius of the rosette (half the diameter) and use it to draw a circle around the center. This is the rosette outline on the ceiling.
Make sure the rosette is not too close to the cornice or wall. If the distance is insufficient, choose a rosette of a smaller diameter.
Step two: surface preparation
The ceiling in the installation area must be dry, clean, and free of peeling coatings. If the ceiling has just been puttied, allow at least 2–3 weeks for complete drying. If necessary, prime the surface with acrylic primer and let it dry.
Step three: applying adhesive
Apply glue to the back of the rosette in dots or a snake pattern over the entire area, staying 5–7 mm from the edges. For a small rosette — 5–7 dots around the perimeter and one in the center. For a large one — a zigzag over the entire area.
After applying the glue, observe the open time (according to the glue instructions — usually 1–3 minutes).
Step four: installation
Align the central hole of the rosette with the chandelier mounting point. Press evenly over the entire area. Hold for 3–5 minutes, then secure with masking tape at 4–6 points and leave for 30–60 minutes for initial setting.
Step five: sealing the edge
After setting, apply a thin strip of acrylic sealant along the edge of the rosette, smooth it with a wet finger, and let it dry. Sand with fine sandpaper. Now the rosette is ready for painting.
Step six: painting
Paint the entire ceiling together with the rosette in one go. Paint the relief with a thin brush — the roller does not reach into the recesses. Two coats of paint with intermediate drying will give a smooth, matte finish.
Mount the chandelier only after the paint has fully dried — no earlier than 24 hours after the last coat.
What to buy together with the ceiling rosette: complete set
This is the most practical section. To avoid going back to the store halfway through, here is what you need to order in one go.
Basic set for any rosette
-
Ceiling rosette of the required diameter and style
-
Acrylic mounting adhesive (1 tube 300 ml per socket up to 60 cm)
-
Acrylic sealant for edge sealing
-
Painter's tape for fixing during installation
-
White acrylic paint
-
Thin brush for painting the relief
Extended kit for living room
-
Ceiling rosette medium or large diameter
-
Ceiling molding (cornice around the ceiling perimeter)
-
Moldings made of polyurethane for wall frame decor
-
Mounting adhesive with reserve
-
Acrylic sealant
-
Paint, brush, painter's tape
Classic interior kit
-
Large diameter relief ceiling rosette
-
Ceiling cornice with matching ornament
-
Moldings made of polyurethane relief wall profile
-
Decorative stucco for accent wall zones
-
Relief Decoration as a complement to frames
-
Glue, sealant, putty, paint, brushes
Minimum bedroom kit
-
Small smooth rosette (30–45 cm)
-
Mounting adhesive
-
Edge sealant
-
Paint
How to avoid common mistakes when choosing a ceiling rosette
Mistake: choosing a rosette based on a pretty picture without measuring the ceiling. A rosette that looks great in a photo of a spacious living room may be disproportionate in a small bedroom. Always measure the distance from the mounting point to the nearest walls and cornice — this determines the maximum allowable diameter.
Mistake: choosing a textured rosette for a modern interior. A rich classical ornament on the ceiling of a modern apartment looks like a random guest from another era. If the interior has no classical elements — choose a smooth one or one with minimal geometric pattern.
Mistake: installing a rosette without marking. A shift of the rosette relative to the chandelier center by 3–5 cm is immediately noticeable. Marking the center takes 10 minutes and guarantees perfect symmetry.
Mistake: not sealing the edge of the rosette with sealant. A gap along the contour is the most noticeable flaw that negates all the neatness of installation. Acrylic sealant solves this problem in 20 minutes.
Mistake: installing the chandelier before painting. In this case, you won't be able to properly paint the rosette, and the fixture will be visible against an unpainted background or under an uneven coating.
Ceiling rosette as an independent decorative element
An interesting use case: a rosette without a chandelier. This sounds unexpected, but it works. The rosette is installed on the ceiling as a purely decorative element — a central medallion without a light fixture underneath. It is especially effective in combination with hidden perimeter lighting: a lighted cornice frames the plane, the rosette decorates the center — and no chandelier, only the architecture of light and relief.
This technique is popular in modern minimalist interiors where a classic chandelier would be superfluous. A smooth rosette with a diameter of 40–50 cm as the ceiling center is expressive, stylish, and unconventional.
FAQ: popular questions about choosing a ceiling rosette
What diameter of ceiling rosette should I choose for a chandelier?
Focus on the room area: up to 12 sq m — 30–45 cm, up to 20 sq m — 45–60 cm, up to 30 sq m — 55–75 cm, over 30 sq m — from 70 cm. Clarify based on the distance from the chandelier center to the nearest wall: the rosette should not 'bump into' the cornice.
Is a ceiling rosette needed in a modern apartment?
Yes, if you want to make the chandelier part of the interior, not just a light source. For a modern apartment, choose a smooth one or with minimal geometric pattern.
Smooth or embossed rosette — which is better?
Smooth — for modern interiors, minimalism, Scandinavian style. Embossed — for classic, neoclassical, living rooms with rich decor. An intermediate option with light geometry suits most interiors.
What is the best material for a ceiling rosette?
Polyurethane is the optimal material: lightweight, moisture-resistant, with precise relief, easy to glue and paint. It surpasses plaster in weight and moisture resistance.
Can a rosette be combined with cornices and wall moldings?
Yes, and it is recommended. A unified style system: rosette — cornice — wall moldings — creates a complete, architecturally thought-out space.
When needed Ceiling molding in addition to the ceiling rose?
When the room is large (from 20 sq. m), ceilings are high, or walls are already decorated with moldings. A ceiling rose + a perimeter cornice is the minimum for a finished ceiling in a spacious room.
What to buy together with a ceiling rose?
At minimum: mounting adhesive, acrylic sealant, painter's tape, paint. If necessary — Ceiling molding, Moldings made of polyurethane, Decorative stucco for walls.
How long does a polyurethane ceiling rose last?
With proper installation using acrylic adhesive — for decades. Polyurethane does not deform, does not yellow under acrylic paint, and does not crack from vibration or temperature changes.
Is a specialist needed for installing the ceiling rose?
No. Installing a ceiling rose is DIY-friendly: you need adhesive, sealant, painter's tape, and the ability to work with a level. The only difficulty is marking the center, which is solved with a string and a pencil.
Can I Buy a ceiling rosette together with a cornice from the same series?
Yes. Most manufacturers produce coordinated decor lines where the rosette and cornices are designed in a unified style. This simplifies selection and ensures stylistic unity of the ceiling decor.
About the company STAVROS
If you are considering ceiling decor — a rosette for a chandelier, a cornice around the perimeter, wall moldings — the right place to buy is STAVROS. STAVROS is a Russian company with a wide range of decorative polyurethane products for residential and commercial interiors.
in the STAVROS catalog ceiling rosettes of various diameters and styles — from minimalist smooth to richly ornamented classic, Ceiling molding for cornice design, Moldings made of polyurethane for walls and Decorative stucco for accent solutions. All STAVROS products are made of high-quality polyurethane with clear relief and precise dimensions, ready for installation and painting.
STAVROS operates with delivery across all of Russia. The company's specialists will help you choose the right decor set for your room — from a single rosette to a complete ceiling and wall design. When a chandelier should look like part of the interior, not just hanging in emptiness — start with the right rosette, and STAVROS will help you find it.