Article Contents:
- Why hidden lighting is first a task of choosing a profile, and only then a strip
- Three tools for hidden lighting: cornice, molding and ceiling stucco
- Ceiling cornice for lighting
- Molding for hidden lighting
- Ceiling stucco as a system
- Light gap: what it is, how to calculate it and why it is more important than the profile pattern
- How to choose the size of the cornice for ceiling height: practical table
- Which profile will not ruin the light: five mistakes when choosing
- First mistake: profile without a groove for the tape
- Second mistake: too shallow profile
- Third mistake: excessively embossed cornice ornament
- Fourth mistake: joints without miter cutting
- Fifth mistake: different profiles on different walls
- Polyurethane moldings for hidden lighting: when it works
- Ceiling stucco in a lighting system: two operating modes
- LED strip for ceiling stucco: technical parameters
- CPU-P series kits: stucco for lighting in a ready-made solution
- Cornice A130V1 as a light perimeter
- CPU-P1: minimal system with backlight
- CPU-P4 and CPU-P6: ceiling with light architecture
- What to buy with backlit stucco: kit assembly
- Minimum kit
- Medium kit (light perimeter + decorative ceiling)
- Extended kit (full ceiling system)
- Installation of backlit stucco: sequence and critical points
- Marking — precision determines everything
- Fastening: glue + dowels for A130V1
- Corners: 45° cutting and fitting
- Wiring for LED strip
- Painting After Installation
- What to buy for different tasks: summary table
- Frequently Asked Questions
- STAVROS: architectural decor for ceilings with hidden lighting
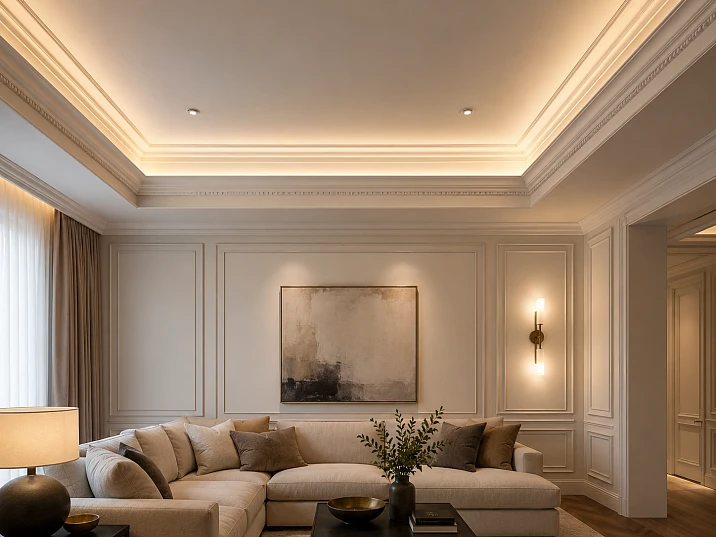
You've finished the renovation. You placed the LED strip behind the ceiling cornice. You turned on the light in the evening — and felt something was wrong. Instead of an even glowing strip along the ceiling perimeter — spots. In some places, the strip is visible through. In some places, the cornice creates a shadow in an unexpected spot. Somewhere at the joint, the gap turned out to be too small, and the light hits the profile instead of spreading across the ceiling.
This is not a problem with the LED strip. This is a problem with choosing the profile. Molding for hidden lighting is chosen not only by style: Ceiling cornice must provide the correct light gap, molding for lighting — an even line, and the ceiling molding should neatly connect the light, walls, and top of the room into one cohesive interior.



Why hidden lighting is first a task of choosing a profile, and only then the strip
Most people start with the LED strip. They study brightness, color temperature, diode density. This is important — but secondary. The primary thing is the profile behind which the strip is hidden. Because it is the cornice or molding that determines:
-
What light gap will result. The gap is the distance between the back wall of the profile, where the strip is mounted, and the ceiling. It is into this gap that the light 'flies' upward and diffuses. Too small a gap — the light will be visible as a strip right at the edge of the profile. The correct gap — a soft halo around the entire perimeter.
-
Will the strip be visible. If the profile does not overlap the strip in height, the glowing diodes are readable through the shadow in the evening twilight. This is what people call "the garland is visible" — and it looks cheap.
-
How even the light line will be. Profile joints and corners — each can create a slight glow or, conversely, a dark gap. This depends on the precision of the profile manufacturing and how well it is designed specifically for lighting applications.
-
What the ceiling looks like during the day. Hidden lighting is not just an evening tool. The cornice or molding behind which it is hidden is visible all day. And if this profile has no independent decorative value, the ceiling looks "like in a retail hall" during the day.
The conclusion is simple: choosing moldings for lighting is simultaneously a technical and aesthetic solution. You cannot separate "how the light works" from "how the profile looks."




Three tools for hidden lighting: cornice, molding, and ceiling molding
Before discussing specific parameters, let's clarify the terminology. Three different products — three different tasks.
Our factory also produces:

Ceiling cornice for lighting
A cornice is a large cross-section profile installed in the transition zone from wall to ceiling. It creates a volumetric transition — an architectural cornice protruding 5–15 cm from the wall with a height of 60–150 mm. Behind the rear edge of the cornice, there is a groove or open space where the LED strip is placed.
A ceiling cornice for backlighting is a classic architectural solution. It provides the deepest light gap and maximum concealment of the tape. The cornice is visible as an independent decorative element even without lighting, and when the tape is turned on, the backlight emphasizes its profile from below, creating a sculptural lighting effect.
The best example in the STAVROS range is the A130V1 cornice (100 × 83 mm, HIWOOD polystyrene, length 2000 mm), which is a mandatory perimeter element of all six ceiling decor kits of the CPU-P series. It is specially designed with a profile depth sufficient to accommodate an LED strip in the groove behind the rear edge.
Get Consultation
Molding for hidden backlighting
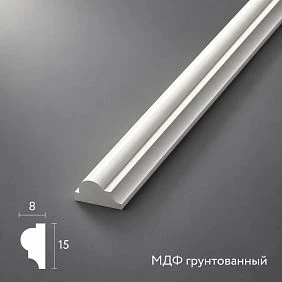
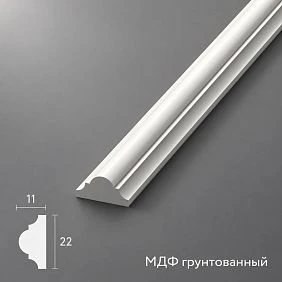
A molding is a smaller cross-section profile. It creates a relief transition or line on the ceiling but does not have the volume of a full cornice. For hidden backlighting, moldings with a special profile are used — "for backlighting": with a recess of the rear edge from the wall or a special lower groove for mounting the tape.
In the STAVROS range, there is a specialized profile — the LB32 molding (HIWOOD polystyrene, 32.5 × 24.0 mm × 2000 mm, 650 rubles). It is directly positioned as a molding for backlighting — with geometry designed for a hidden LED strip. This is a lighter and more delicate solution than a cornice. Suitable for modern interiors where contour lighting is needed without heavy classical architecture.
Ceiling stucco as a system
Ceiling molding — this is not one strip around the perimeter, but a system: cornice + molding contours + ornamental overlays + central element. In this system, the cornice performs the function of a light perimeter, the remaining elements — of the decorative ceiling architecture.
If the backlighting should be part of a full-fledged decorative ceiling, a system is needed, not just one profile. The ready-made STAVROS ceiling decor kits of the CPU-P series (CPU-P1 — CPU-P6) include the A130V1 cornice with a groove for the tape as a mandatory first level — the perimeter light contour is built into the system from the start.
Light gap: what it is, how to calculate it, and why it is more important than the profile design
The light gap is the vertical distance between the top edge of the LED strip and the ceiling plane. It is this gap that determines how the light scatters on the ceiling: as a wide soft halo or a narrow bright strip near the cornice.
The minimum working light gap is 30 mm. With a gap of less than 30 mm, the light does not have time to scatter to the point where it becomes visible and creates a bright strip at the edge of the cornice. With a gap of 40–60 mm, there is a soft halo 15–25 cm wide. With a gap of 60–90 mm, there is a wide, smoothly fading halo.
How does this relate to choosing a cornice? Directly. The light gap is determined by:
-
The profile height (vertical size of the cornice): the higher the profile, the deeper the strip is hidden from the bottom edge.
-
The position of the strip in the profile groove: the strip is directed upward (toward the ceiling) — diffused soft light; the strip is directed at an angle — more directional.
-
The distance from the back edge of the profile to the ceiling during installation: this parameter depends on the method of installing the cornice.
The A130V1 cornice (83 mm vertically) provides, with proper installation, a light gap of 45–55 mm — this is a comfortable range where the light scatters smoothly. The LB32 molding (24 mm vertically) provides a gap of 20–25 mm — minimal, on the edge of acceptable for standard brightness 2835 or 5050 strips.
Conclusion: for full hidden perimeter lighting of a room, choose a cornice with a height of 60 mm or more. The LB32 molding is optimal for accent lighting in niches, under shelves, near built-in elements — but not as the main light perimeter of a large room.
How to choose the cornice size based on ceiling height: a practical table
One of the most common questions when choosing a cornice for hidden lighting — what profile size is suitable for my ceiling height? We answer systematically.
| Ceiling Height | Recommended profile | Light gap | Solution character |
|---|---|---|---|
| 2.4–2.5 m | Molding LB32 or molding D40 | 20–30 mm | Delicate accent line |
| 2.5–2.7 m | Cornice 60–80 mm | 35–45 mm | Calm light perimeter |
| 2.7–2.9 m | Cornice A130V1 (83–100 mm) | 45–55 mm | Full classic cornice with lighting |
| 3.0 m and above | A130V1 + internal molding contours | 50–70 mm | Multi-level ceiling system |
| High hall from 3.5 m | CPU-P system with A130V1 | 55–80 mm | Monumental ceiling architecture |
Please note: with low ceilings (2.4–2.5 m), a heavy 100 mm cornice visually "lowers" the ceiling. This is the opposite effect — the cornice creates a horizontal line that is perceived as "the ceiling ends here." For low rooms, a delicate LB32 molding or a small 40–60 mm cornice in the wall color works better.
Which profile won't ruin the light: five mistakes when choosing
Let's analyze typical mistakes. They are made not only by inexperienced buyers but also by professional builders who know tile laying well but have a superficial understanding of decorative profiles.
Mistake one: profile without a groove for the tape
Any ceiling cornice can be used "for backlighting" in a broad sense — simply lay the tape behind it. But cornices without a special groove do not fix the tape in the desired position. The tape "wanders," the direction changes from corner to corner, and the light line becomes uneven.
Choose profiles where the groove for the tape is structurally provided: A130V1 cornice with a groove behind the back edge or LB32 molding with a bottom groove.
Mistake two: too shallow profile
Molding D22 or D32 (22–32 mm vertically) are wall and ceiling moldings for decoration, but not for hidden lighting. They do not provide the necessary light gap and do not cover the strip from direct view. Result: LED points are visible to the naked eye, like a garland.
Mistake three: excessively relief cornice ornament
A cornice with a deep floral ornament looks great in daylight. But in lighting mode, the ornament creates many shadows — and the lower edge of the cornice turns into a "lace" glowing contour instead of an even line. This may be a desired effect in a classic interior — but not for those who want a clean light line.
For an even contour light — choose cornices with a smooth lower edge profile: A130V1 has a profiled front face, but its lower edge is clean and even.
Mistake four: joints without angle cutting
In room corners, the cornice is joined. If the joint is not cut precisely, a gap forms at the corner point — and the light source is visible through the gap. This is especially critical for a profile with a small light gap. HIWOOD polystyrene (material of cornice A130V1) cuts precisely at any angle — it is important to use a miter saw or a precise miter box, rather than cutting by hand.
Mistake five: different profiles on different walls
Sometimes one profile runs out, and a similar but different one is available. Installed: externally almost identical, but the profile height differs by 5–8 mm. The light gap on this wall is different — and a "step" of the light halo is visible at the transition corner. This is a mistake that cannot be fixed without dismantling. Order the cornice with a reserve — at least 10% of the perimeter.
Polyurethane moldings for hidden lighting: when it works
buy polyurethane moldings for hidden lighting — the right step in specific scenarios. Let's break down where molding works better than a cornice.
A niche in a drywall structure. If the project already includes a drywall niche around the perimeter of the ceiling, the molding is mounted on the lower edge of the niche and hides the LED strip inside. In this case, the molding is not the only lighting tool — it works together with the structural niche.
Accent lighting in a shelf niche. The LB32 molding under each shelf of a rack creates several horizontal light strips — the effect of lighting a library or display cabinet. Here, the light gap is less critical because the lighting works directionally, not diffusely.
Modern interior without classical architecture. In Scandinavian, minimalist, or Nordic styles, a heavy cornice looks alien. The LB32 molding (32.5 × 24 mm) is a delicate profile that adds an even light line without architectural heaviness.
Highlighting a zone on the ceiling. A rectangular light "frame" on the ceiling, marking the dining area or sofa zone, is mounted from molding at a distance of 30–50 cm from the walls. Enclosing the zone with molding and an internal LED strip is a light, modern technique.
In the STAVROS catalog, polyurethane moldings MLDPU-001 (1,740 RUB/piece) and MLDPU-004 (3,190 RUB/piece) are profiles with relief, intended primarily for decoration. For hidden lighting from polyurethane profiles, it is better to use smooth sections or the special LB32.
Ceiling stucco in a system with lighting: two operating modes
When Ceiling molding becomes part of the system with hidden lighting, the ceiling gets two completely different "faces" — daytime and evening. And this is one of the main arguments in favor of the complete approach.
Daytime mode — relief. In daylight (natural or from a chandelier), the ceiling system works through relief. Ornamental overlays, corner accents, molding contours — all this creates a play of light and shadow that makes the ceiling rich and multi-level. The richer the system (CPU-P4, CPU-P6), the more expressive the daytime relief.
Evening mode — light. When the LED strip behind the A130V1 cornice is turned on, the ceiling system switches to a different register. Warm contour light (2700K) fills the perimeter gap, from which it softly "flows" onto the ceiling. The ornamental overlays are in the zone of this contour light — and their relief begins to work through the shadow from side lighting, rather than through the shadow from overhead lighting.
This effect cannot be reproduced by other means. It is the combination of relief ornamental overlays and side contour lighting that creates what is called "stucco by candlelight" — a soft, warm, architecturally rich ceiling that, in an evening interior, makes a completely different impression than during the day.
LED strip for ceiling stucco: technical parameters
Not every strip works equally well with stucco cornices. A few practical recommendations.
Color temperature. For warm classics — 2700K (warm white). For neoclassicism and modern interiors — 3000K. Cold temperatures (4000K, 6000K) create a sharp clinical light that conflicts with warm wood and cream stucco.
Diode density. Minimum 60 diodes/meter. A strip with a density of 30 diodes/meter produces uneven light — with sufficient light gap, this manifests as periodic brighter spots. Density of 120 diodes/meter — a smooth line without "graininess."
Voltage. 24V is preferable to 12V for long spans: at 12V, spans over 3–4 meters may experience brightness drop at the end of the line. For a room perimeter of 12–20 meters — 24V is mandatory.
Direction. The strip is directed upward (toward the ceiling) — for the softest diffused halo. The strip is directed horizontally, at a slight angle — for a more pronounced contour effect with shadow under the cornice. Both options are appropriate: the first for a bedroom, the second for a living room with desired "sculptural" stucco in evening light.
CPU-P series kits: stucco with backlighting in a ready-made solution
The most practical path for those who want a ceiling with hidden lighting and decorative stucco — ready-made STAVROS CPU-P series kits. Let's break down how they solve the lighting issue systematically.
Cornice A130V1 as a light perimeter
All six sets in the series include the A130V1 cornice (100 × 83 mm) as a mandatory external perimeter. This is a large cornice that:
-
Creates a light gap of 45–55 mm — sufficient for comfortable diffusion.
-
Has a groove behind the rear edge — the strip mounts clearly and evenly.
-
Looks like an independent decorative element even without lighting — not a "technical strip," but an architectural cornice.
-
Designed for a room perimeter of 3200 × 3200 mm according to the CPU zone standard.
CPU-P1: minimal system with lighting
Basic set. Cornice A130V1 + one molding inner contour + central element. Perimeter lighting creates a warm halo that emphasizes the first inner molding contour. Minimalistic yet architecturally complete.
CPU-P4 and CPU-P6: ceiling with light architecture
In the CPU-P4 (21 product types) and CPU-P6 (15 product types with the original central system MLDPU-027) sets, perimeter lighting works as the lower light tier of the entire ceiling system. From the perimeter gap, light spreads onto the ceiling, meets ornamental overlays — and through the play of shadows creates the effect of a "living" relief ceiling in the evening.
This is what professional designers call "light architecture" — when the light source and decorative object work together as a single system.
What to buy together with backlit stucco molding: kit assembly
Buying a cornice or molding is just the beginning. A complete solution requires a kit.
Minimum kit
-
Cornice A130V1 or molding LB32 (depending on the task)
-
Acrylic-based mounting adhesive
-
Acrylic putty for joints
-
Primer + acrylic paint
-
Profile reserve 10–15% of the perimeter
Medium kit (light perimeter + decorative ceiling)
-
Cornice A130V1 (along the perimeter of the CPU-P zone)
-
One of the ready-made kits CPU-P1, CPU-P2, or CPU-P3
-
ceiling rosettes — for decorative finishing of the chandelier mounting point
-
Glue, putty, primer, paint
Extended kit (full ceiling system)
-
CPU-P4 or CPU-P6 kit — for the formal living room
-
Additional cornice around the entire room — lighter profile outside the CPU zone
-
Moldings made of polyurethane for wall frames — connects the ceiling to the walls
-
Decorative stucco for framing doorways and wall accents
-
Ceiling rosettes + Relief Decoration for ceiling accents
-
Glue, putty, primer, paint, spare profile
Installation of stucco molding with backlighting: sequence and critical points
Marking — precision determines everything
Before installing the cornice — laser level along the entire perimeter. The horizontal line of the cornice installation must be perfectly level. Any deviation of 2–3 mm over a ten-meter perimeter accumulates into a visible "hump" or "dip" in the light line. In a dark room with the LED strip turned on, this discrepancy is instantly noticeable.
Fastening: glue + dowels for A130V1
The A130V1 cornice (100 × 83 mm, weight 1.2–1.5 kg/meter) is installed using mounting glue + mechanical fastening. Glue alone does not ensure reliable long-term fixation of a profile of this size — especially at the "wall + ceiling" junction, where the surface is two-plane. Dowels 5 × 50 mm with a pitch of 50–60 cm through the profile body are a mandatory element of installation.
HIWOOD polystyrene with a density of 680 kg/m³ holds a self-tapping screw well — when pre-drilling with a 3 mm drill bit, the hole is clean, without chipping.
Corners: cutting at 45° and fitting
In room corners, the cornice is joined at a 45° angle. A miter saw with an accuracy of ± 0.5° is the optimal tool. A miter box will give an acceptable result only if the room corner is perfectly straight — in practice, most corners are not 90°, and slight fitting is inevitable. The gap in the joint is filled with acrylic putty and sanded after drying.
Wiring for LED strip
The LED strip is laid before installing the cornice or directly during the process. The wire is brought out at one or several points to the power driver. If the room perimeter is more than 8–10 meters, it is recommended to have several connection points for the strip — to avoid brightness drop on long sections.
Painting after installation
The cornice, puttying of joints and adjacent areas of the wall and ceiling are painted after complete installation of the system. One coat of primer + two coats of acrylic paint. The lower edge of the cornice requires special attention: it is visible when viewed from below, and any uneven painting is noticeable.
What to buy for different tasks: summary table
| Task | What to purchase |
|---|---|
| Light perimeter in a modern interior | Molding LB32 + LED strip 24V 2700K |
| Classic cornice with backlight | A130V1 + LED strip + glue + fasteners |
| Ceiling with light and decor in the living room | Kit CPU-P3 or CPU-P4 + LED strip |
| Formal ceiling with maximum decor | CPU-P6 Kit + LED Strip + ceiling rosettes |
| Delicate accent lighting in the bedroom | CPU-P1 or CPU-P5 Kit + warm LED 2700K |
| Connect the ceiling and walls into one system | Cornice A130V1 + Moldings for walls + Decorative stucco |
Frequently asked questions
Which molding to choose for hidden lighting?
The best choice for full perimeter lighting is the A130V1 cornice (100 × 83 mm) or a similar profile with a height of 60 mm or more and a slot for an LED strip. It provides a light gap of 45–55 mm, ensures a smooth soft halo, and looks like an independent decorative element. For modern interiors without heavy architecture — the LB32 molding (32.5 × 24 mm) for lighting.
Can a regular ceiling molding be used for hidden lighting?
Technically, yes, if there is sufficient clearance behind the molding. However, most decorative moldings (D22, D32, LD32, and others) have a height of 10–32 mm — this is not enough for a full light gap. They do not hide the strip from direct view and produce an uneven light line. buy polyurethane moldings for lighting, it only makes sense with a profile specifically designed for this scenario — for example, LB32.
What to buy for a ceiling with hidden lighting?
Basic kit: cornice or molding for lighting, mounting adhesive, fasteners, joint putty, primer, paint, 10–15% extra profile. For a decorative ceiling additionally: ready-made CPU-P ceiling decor kit from the series ceiling moldings, ceiling rosettes for a chandelier. Buy moldings for the entire system — in one store, with a coordinated assortment.
Is stucco molding for lighting suitable for a low ceiling?
Yes, but with caveats. With a ceiling of 2.5 m, the A130V1 cornice (83 mm) can visually "lower" the space — its height is almost 3.5% of the ceiling height, which is noticeable. For ceilings up to 2.6 m, choose LB32 molding or a cornice up to 60 mm. Install it in the color of the wall or ceiling — this makes the profile less noticeable and reduces the feeling of a low ceiling.
What light gap is optimal for a soft halo?
The optimal light gap for a soft diffused halo is 40–60 mm. With such a gap, light from a tape with a density of 60 diodes/meter gives a smooth halo 15–20 cm wide without visible "graininess" of the source. The A130V1 cornice, when properly installed, provides exactly this range.
Is special paint needed for stucco molding with lighting?
No. Regular acrylic matte paint is the optimal choice. A matte surface scatters reflected light evenly, without glare. Glossy or satin paint on stucco molding creates glare from the LED strip, which is undesirable.
STAVROS: architectural decor for ceilings with hidden lighting
When the task is to make a ceiling with hidden lighting seamless, architecturally complete, and beautiful — it is important to have a manufacturer whose entire range is designed as a system.
STAVROS offers ready-made kits ceiling decoration CPU-P series — six architectural solutions for different types of spaces, from an intimate bedroom (CPU-P1, CPU-P5) to a monumental grand hall (CPU-P6). Each kit includes a A130V1 cornice with a slot for LED strip as a mandatory light perimeter, internal molding contours, and ornamental polyurethane overlays in a consistent style.
Additionally: a full line of polyurethane and HIWOOD polystyrene moldings — from the delicate LB32 for backlighting to large ornamental MLDPU; Decorative stucco for walls and openings; ceiling rosettes for decorating the central point. All materials are produced on our own CNC equipment and sold with Contact us to confirm shipping to your destination.
Because a ceiling with properly chosen stucco and properly hidden lighting is not a technical object. It is a space where light and architecture work together, creating in the evening something that cannot be described in words — and cannot be forgotten after you have seen it.