Article Contents:
- What is a wall composition made of stucco decor: not decorations, but architecture
- Basic scheme: central kit + side kits + moldings
- Central wide kit: where to place and how to choose
- Side narrow kits: role, placement, proportions
- Moldings: how to tie everything into a single system
- For which walls does a modular composition work
- Wide accent wall in the living room
- Wall at the head of the bed in the bedroom
- TV area: decor around the screen
- Hall and staircase area
- Dining room, study, library
- Symmetry or asymmetry: how to choose the right scheme
- Symmetrical scheme: when and why
- Asymmetry: when it is justified
- How to choose the main element: the center that holds everything
- How to select side sets to match the central one
- How to connect several sets with moldings: architectural wall grid
- Method 1: Horizontal molding as a unifying line
- Method 2: Perimeter frames
- Method 3: Common outer frame
- Method 4: Moldings as vertical dividers
- How to calculate the width of the entire wall composition
- How to calculate height: vertical axis and indents
- Wall marking algorithm before purchasing multiple sets
- How not to overload a wall with multiple sets: the balance rule
- Examples of ready-made schemes for different rooms
- Scheme 1: Wide living room, wall behind the sofa
- Scheme 2: Bedroom, wall at the head of the bed
- Scheme 3: TV area
- Scheme 4: Hall and staircase area
- Errors when assembling a wall composition from multiple sets
- Ready-made sets or assembly from scratch: what to choose
- Collections for wall composition: which ones to combine
- Assemble a wall composition from ready-made STAVROS sets
- About the company
- FAQ: Answers to Popular Questions
There is one point where many stop before buying: oneReady-made set of stucco decorhas already been chosen, but the wall still seems unfinished. There is decor — but no scale. There is an accent — but it gets lost on a wide surface. Sound familiar?
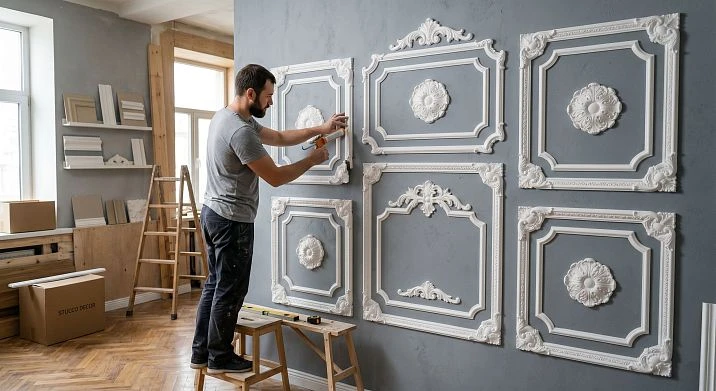
This is not a problem of choice. It is a matter of principle: a single set works on a pier or a medium wall, but for a large living room, spacious bedroom, hall, or long wall, you need awall composition of stucco molding — a well-thought-out system of several elements. And you can assemble it without a design project, without complex calculations, and without custom production — fromready-made wall decor setswhich are already grouped by collections and proportions.
This article provides a complete practical breakdown: how modular logic works, what a central element and side sets are, how to connect everything with moldings without overloading the wall. Includes diagrams, examples, and a marking algorithm.
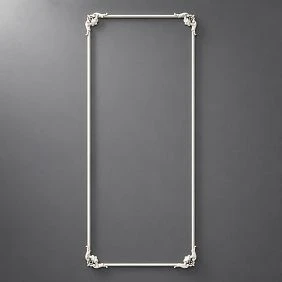
What is a wall composition of stucco decor: not decoration, but architecture
Let's start with the main thing.Composition of stucco decoris not just a few beautiful elements placed on a wall. It is a well-thought-out layout where each module plays its role: sets the rhythm, holds the axis, supports the center, creates depth.
The difference between "decor on the wall" and "wall composition" is clearly visible in interiors. In the first case, there are several separate elements without logic that do not form a whole. In the second, there is a unified architectural grid of the wall where moldings, frames, overlays, and central accents form a system.
What is included in a full wall composition:
-
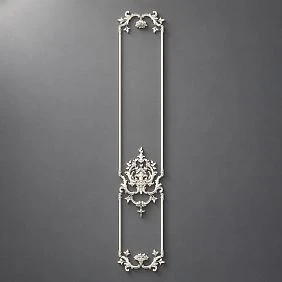
The main decorative module is the central set that first catches the eye. This could be a wide frame with an ornamental overlay, a formal set with a central medallion, or an accent panel above the main focal point (sofa, bed, fireplace).
-
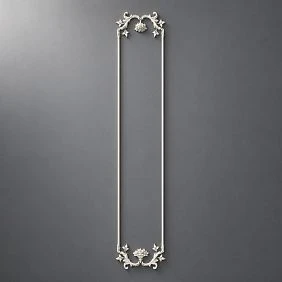
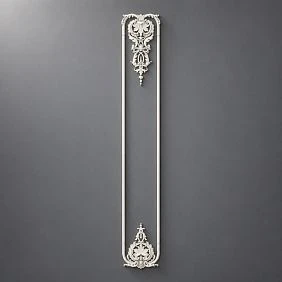
Side vertical elements are narrow sets or frames made of moldings on the sides of the center. They do not compete with the main module but support it and expand the decor area.
-
Connecting moldings are horizontal and vertical lines that unite several sets into a single grid. Without them, even properly selected elements remain disjointed.
-
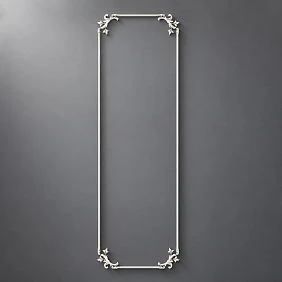
Decorative overlays and corner elements are details that complete frames, place accents, and add ornamental complexity at the intersection points of moldings.
-
Indents and "air" are empty wall areas between elements that are no less important than the elements themselves. It is the proportion of "decoration to emptiness" that makes a wall expressive rather than cluttered.
-
A unified collection means when all elements belong to the same stylistic line, the wall reads as a cohesive solution rather than a motley set of random purchases.
Main idea:several sets of stucco on a wallwork only when they are united by a common logic. And this logic does not need to be invented—it is set by the correct scheme.




Basic scheme: central set + side sets + moldings
This is a universal principle for most wide walls. Simple, scalable, predictable in result. Let's break down each part.
Our factory also produces:
Central wide set: where to place and how to choose
Central stucco decor set — is the main decorative module, the dominant element of the entire composition. It should be wide enough to match the scale of the wall, and expressive enough to hold attention.
Where the central set is placed:
-
Above the sofa — along the central axis of the seating area
-
At the head of the bed — centered on the bed
-
In the TV area — above the console or around the screen
-
Above the console in the hall or entryway
-
In the center of a wide formal wall
-
Above the fireplace
How to choose the width: the central set should roughly match the width of the main piece of furniture. For a 220 cm sofa — a set of 200–240 cm. For a 180 cm bed — a set of 160–200 cm. A slight mismatch (±15%) is acceptable, but significant disproportions ruin the composition.
More details on width selection — in the article How to choose a set of stucco decor according to wall width.
Get Consultation
Narrow side sets: role, placement, proportions
Side sets of stucco decorare vertical or narrower elements that extend the decor area to the left and right of the center. Their task is not to compete with the central set, but to support it, creating a horizontal rhythm on the wall.
Side sets:
-
Placed on the piers on the sides of the central zone
-
Can be vertical (height 1800–2300 mm, width 300–500 mm)
-
Can be horizontal frames made of moldings — with decorative inserts
-
Should be visually "quieter" than the central set
Principle: if the central set is wide and richly decorated, the side sets should be narrow and concise. If the central set is calm, the side sets can have a bit more decorative detail.
About how to combine narrow and wide formats — in the articlea narrow or wide set of stucco decor.
Moldings: how to tie everything into a single system
Moldings for wall composition — is the skeleton onto which all other elements are strung. Without moldings, even well-chosen sets remain separate decorative details. With moldings, they turn into an architectural system.
What moldings do in a wall composition:
-
Build the overall grid of the wall — horizontal and vertical axes
-
Connect the central set with the side ones
-
Design the space between sets — turn it into a neutral architectural field
-
Expand the composition without buying new large sets
-
Create frames around piers, zones, functional areas
Examples of molding layouts:
-
One horizontal molding at a height of 100–120 cm from the floor divides the wall into an upper decorative zone and a lower functional zone. Side vertical frames are placed in the lower zone.
-
Molding frames on the sides of the central set create symmetrical side sections with an internal "field" for a painting, mirror, or just a blank wall.
-
The molding as a horizontal connection between the top of the central set and the top of the side frames unifies everything at the same height.
Molding frames on the wallPolyurethane moldings are mounted with glue, easily cut to the desired size, require no special skills, and hold up well under paint. They are the best tool for expanding and connecting a wall composition.
Completing the frames is aided byMolding corner piecesandDecor for Moldingornamental inserts at intersection points, which give the frame corners a finished look and architectural weight.
Which walls work with the modular composition
Not every wall requires a multi-component approach. But there are several scenarios where the "center + sides + moldings" scheme works particularly convincingly.
Wide accent wall in the living room
A wall behind the sofa with a width of 3.5 m or more is a classic subject forstucco decor for a large wall. One set here will look like a small spot. A full wall layout is needed.
Working scheme: a wide central set along the axis of the sofa + two narrow vertical sets on the piers to the left and right + a horizontal molding that unites all three sections at a single height. A possible addition is a horizontal frame in the lower zone of the wall (above the baseboard), which creates a single architectural belt.
About wall decor behind the sofa — in the articlepolyurethane wall decor behind the sofa.
Wall at the head of the bed in the bedroom
The bedside area is a special decorative context. Symmetry is important here: the bed is centered, the sconces are paired, the nightstands are identical. The central set is placed along the axis of the bed, the side narrow elements are next to the sconce or nightstand areas.
Important: the sconces should be part of the scheme, not random points. Their outlets need to be planned before installing the decor — as part of the overall wall scheme. More details in the articleStucco molding set for the bedroom.
For the bedside wall, it works wellPavlovsk collection — soft, intimate, with an expressive center without excessive formality.
TV zone: decor around the screen
stucco decor for the TV zone from several sets is a delicate task. The TV zone is already the main visual center of the wall. The decor here should support the TV, not compete with it.
Working approach: a concise frame made ofof polyurethane moldingsaround the screen area + calm vertical side sets along the edges of the wall. No large ornamental overlays behind the screen — the TV itself is an "overlay" with high visual weight.
All cables and sockets are strictly behind the screen, in a hidden area. Moldings should not pass through the bracket zone. More details in the articlePolyurethane TV zone decor.
Hall and staircase area
On high walls of a hall or staircase, severalready-made stucco decor setscreate a rhythmic system. This is no longer an accent, but an architectural solution for the entire surface.
For large formal walls, a rhythmic series works well: three or five identical vertical sets with equal intervals. Moldings unite all sets horizontally — at the same height at the top and bottom. The result is a paneled wall with architectural logic.
About principles for high walls — in the articlestucco decor for high walls and stairwell halls.
Dining room, study, library
In these spaces,wall layout of stuccoworks as an architectural background. The wall behind the desk or behind the sofa area in the office gains depth and character. The central element can be placed behind an accent chair, while the side frames can decorate shelves or neutral surfaces.
Symmetry or asymmetry: how to choose the right scheme
Symmetrical scheme: when and why
Symmetry is the safest and most predictable approach fora wall composition made of stucco. It works in 90% of cases and gives a result that looks professional even without a designer.
A symmetrical scheme is appropriate:
-
When the wall is wide and uniform — without doors or niches in the working area
-
When the main object (sofa, bed, TV) is centered on the wall
-
When a classic or neoclassical result is needed
-
When all elements are selected from one collection
-
When the result should be predictable — without creative risks
Example of a symmetrical scheme for a wide living room:
-
Central wide set along the sofa axis (width 180–240 cm)
-
Two identical narrow vertical sets on the left and right
-
Gaps between the center and sides are equal (40–60 cm)
-
Indentations from the wall edges are equal (30–50 cm)
-
Molding as a horizontal connection at the height of the top of the side sets
Asymmetry: when it is justified
The asymmetrical approach is no worse than the symmetrical one — but requires a clear concept. Otherwise, instead of deliberate asymmetry, you get chaos.
Asymmetry is justified if:
-
There is a door, window, niche, or TV on the wall that shifts the center of gravity
-
Furniture is arranged asymmetrically
-
Only one part of the wall needs to be decorated — for example, the area behind a console
-
The interior is modern or minimalist, where strict symmetry would look artificial
The main rule of asymmetry: there must be rhythm. Even if elements are placed unevenly, logic should be felt between them — repetition of scale, a unified style, a common installation height.
How to choose the main element: the center that holds everything
The most common question when assemblinga ready-made composition of stucco on the wall: where to start? Always — from the center.
The main element is the point that a person sees first when entering a room or sitting on a sofa. Everything else is built around it.
How to determine the main element:
-
If there is a TV on the wall, it is already the main visual center. The decor should frame it, not compete with it.
-
If the wall is "clean" and the furniture is centered, the central set is chosen along the furniture axis.
-
If the wall is long and there is no obvious center, one needs to be created. A wide set in the center or a large frame system becomes this anchor.
-
If there is a fireplace in the room, the fireplace is almost always the main center. The decor is built around it.
Which set to choose for the central place:
For a wide living room — Wide set of stucco decor with an expressive central accent. The "Tsarskoye Selo" or "Peterhof" collection — for a formal interior, "Petersburg" collection — for a calm urban space.
For the bedroom at the headboard — a set with a soft ornamental center, without excessive relief.Pavlovsk collection — an ideal choice.
For the hallway — the "Peterhof" collection with pronounced architectural weight and a formal shape.
How to choose side sets to match the central one
Side sets of stucco decor — these are not reduced copies of the central one. They are independent modules with a different function. They should not duplicate the center, but support it.
Selection principle:
If the central set is large, wide, with an ornamental overlay and an expressive center — the side ones should be narrow and calm. A vertical frame of moldings for a wall composition without overlays or with a minimal insert.
If the central set is laconic, the side ones can have a bit more detail: corner elements, small ornamental inserts in the center of the side frames.
What to consider when choosing side elements:
-
Pier width. The side set should not be wider than the free pier between the central zone and walls, doors, or corners.
-
Height. It is advisable to install side sets at the same height as the central one — this ensures horizontal unity.
-
Sockets and switches. Switches are often located on piers. They need to be considered when choosing the width and placement of the side set. More details in the articlemolded decor for a wall with sockets and switches.
-
Same collection. It is better to take side sets from the same collection as the central one. If that is not possible — from a stylistically similar line.
Collection «Ekaterinhof» — an excellent source for side elements: neat vertical formats, classic profile, working well as support for larger central sets.
How to connect several sets with moldings: architectural grid of the wall
This is perhaps the most important practical block. It ismoldings to expand the composition that turn a set of kits into a unified wall system.
Method 1: Horizontal Molding as a Unifying Line
One horizontal molding line running across the entire wall at a fixed height — say, 200 cm from the floor — unifies all elements below it. The central set, side frames, and piers all fall within a single "architectural band" of the wall.
Above this line is a neutral zone. Below is decorative architecture.
Method 2: Perimeter Frames
A frame is built around each set from of polyurethane moldings. Moreover, the frames of the central and side sets are aligned along horizontal lines — the top moldings of all frames are at the same height, and the bottom ones are as well. As a result, the wall is divided into architectural cells with a clear grid.
Method 3: Common Outer Frame
The entire wall area — from one pier to another — is enclosed by a single large molding frame. Sets are placed inside it. This works especially well for formal walls and halls where a "pictorial" organization of space is needed.
Method 4: Moldings as Vertical Dividers
Vertical moldings divide the wall into sections. Each section has its own frame with a set or overlay. This principle resembles wooden panels or fabric inserts in a classic interior.
Complete the framesdecorative elements for frames made of moldings— ornamental inserts in the corners, rosettes in the centers, frieze elements along horizontal sections.
How to calculate the width of the entire wall composition
Width calculation is not math for the sake of math. It's understanding how much real space your intended scheme occupies.
What is measured:
-
Total wall width (from corner to corner or from corner to door opening).
-
Working width — minus doors, trims, cabinets, pipes, and other obstacles.
-
Width of the central set.
-
Width of each side set.
-
Gaps between elements (optimally 40–80 mm between sets).
-
Indents from the edges of the working area (optimally 30–60 mm on each side).
Simple formula:
Working wall width = width of central set + 2 × width of side set + 2 × gap between elements + 2 × edge indent
Example: working wall width — 380 cm. Central set — 170 cm. Two side sets of 60 cm each. Gaps of 50 cm. Edge indents of 25 cm. Total: 170 + 120 + 100 + 50 = 440 cm — does not fit. Solution: reduce gaps to 30 cm or choose side sets of 40 cm width. Total: 170 + 80 + 60 + 50 = 360 cm — fits with margin.
More details about calculations — in the articlehow to calculate moldings and stucco decor for a wall.
How to calculate height: vertical axis and indents
The height of the wall composition is determined by the working area of the wall — the space between the baseboard, cornice, and furniture. All nuances of height calculation — in the articlesets of stucco decor 2300 mm.
For a wall composition of several sets, it is especially important:
-
Single installation height. All sets — central and side — must be at the same height. The centers or top moldings of the frames must align horizontally. Variation in height makes the composition chaotic.
-
Eye level. The central accent — ornament, medallion, overlay — should be approximately at the eye level of a seated person: 120–150 cm from the floor.
-
Furniture. The lower part of the set, overlapped by the sofa back or bed headboard — this is normal if the central accent is visible above the furniture.
-
Baseboard and cornice. The lower molding of the frame starts 20–40 mm above the baseboard. The upper molding starts 80–120 mm below the cornice or ceiling.
Algorithm for marking the wall before purchasing multiple sets
This is a mandatory step. When purchasing one set, the cost of a mistake is lower. When purchasing three or four sets, the cost of a mistake is significantly higher. Marking with painter's tape protects against costly miscalculations.
Drill a hole in the step to a depth of 40-50 mm
1. Measure the working width and height of the wall. Write them down.
2. Find the central axis of the wall or the furniture axis — draw a vertical line with painter's tape.
3. Set aside the width of the central set from the axis — half the width to the left and half to the right. Apply vertical strips.
4. Mark the gaps between the central and side elements.
5. Apply the outlines of the side sets on the left and right.
6. Add horizontal strips of moldings — where they will connect the elements.
7. Mark the sockets, switches, outputs for sconces and the TV zone. Make sure they do not cross the molding lines.
8. Step back 2–3 meters — to the main viewing point. Evaluate proportions, symmetry, and the space between elements.
9. Adjust the layout if something looks wrong.
10. Only after this — place the order.
More about layout principles in the article Ready-made molding frames for the wall.
How not to overload a wall with multiple sets: the balance rule
This is the most common mistake when assembling a ready-made composition of stucco on the wall. The desire to get more leads to too much decor — and the wall ceases to read as architecture, turning into visual noise.
Balance rule: decor occupies no more than 60–70% of the visible wall area. The remaining 30–40% is "air," a neutral surface that allows perception to breathe.
Specific mistakes that create overload:
-
Several large decorative overlays next to each other — they compete for attention
-
Too small gaps between elements — less than 30 mm
-
Moldings with too wide a profile for small frames
-
Side sets are as expressive as the central one — no hierarchy
-
Decor is evenly distributed across the entire wall without a main center
Key rule of hierarchy:
One central element — the most expressive. Side elements — support but do not overpower. Moldings — connect but do not compete with overlays. If this hierarchy is maintained, the wall always looks professional, regardless of the number of elements.
Examples of ready-made schemes for different rooms
Scheme 1: Wide living room, wall behind the sofa
-
Central wideset of stucco decor for an accent wallalong the sofa axis — width 180–220 cm
-
Two narrow vertical sets on the sides — width 50–70 cm each
-
Horizontal molding at a height of 200 cm, uniting all three sections
-
Gaps between the central and side sections — 50 mm
-
All from the «Petersburg» collectionor«Tsarskoye Selo» collection
Result: an architectural accent wall that reads as a solid panel solution.
Scheme 2: Bedroom, wall at the head of the bed
-
Central set along the central axis of the bed — width matches bed width ± 20 cm
-
Side elements — frames made ofmoldings for a wall compositionwith corner inserts near the sconce areas
-
Outputs for paired sconces — inside side frames or along the central axis of the frame
-
Uniform height: top of all elements on the same horizontal line
-
All from the Pavlovsk collection
Result: a calm, soft bedside wall with sconces as part of the decorative scheme.
Scheme 3: TV zone
-
Laconic frame around the TV zone and cabinet — made ofof polyurethane moldings
-
Narrow vertical side frames along the edges of the wall — on partitions without electrical wiring
-
No large decorative overlays in the screen and bracket area
-
All outlets are behind the TV, in a hidden area
-
"Petersburg" collection — without competing with the screen
Result: a clean TV zone with architectural context around the screen, without visual competition.
Scheme 4: Hall and staircase area
-
Three or five identical vertical sets — a rhythmic series
-
Step between sets is equal (wall width ÷ (quantity + 1))
-
Horizontal molding at the top and bottom unites all elements
-
the "Peterhof" collection — for a grand, weighty result
Result: a rhythmic panel wall with architectural logic that transforms the hall into a full-fledged architectural space.
Errors when assembling a wall composition from multiple sets
These errors occur in every second DIY renovation. Let's list them so you can avoid them.
-
Buying sets without a preliminary layout. Three beautiful sets bought separately do not automatically form a system.
-
Mixing different collections without a unifying idea. 'Pavlovsk' in the center and 'Peterhof' on the sides is not necessarily a mistake, but without a thoughtful combination, it's chaos.
-
Not measuring the working width of the wall. One of the most costly miscalculations: the sets are bought, but there isn't enough space.
-
Forgetting about the baseboard and cornice. A 150 mm baseboard means minus 15 cm of working height for each element. A large cornice means even more minus.
-
Not accounting for furniture. A cabinet covers the side set — it's not visible. Finding out about this after installation is too late.
-
Setting all elements to the same visual volume. Without hierarchy, the wall looks like a collection, not a composition.
-
Not defining a main focal point. Without an anchor, the gaze wanders across the wall without focus.
-
Not marking with painter's tape. Only at real scale can you see what works and what doesn't.
-
Do not ignore the color of the paint. If the stucco is painted the same color as the wall, small-scale details get lost. If it's contrasting, even a small molding reads very actively. Color changes the perception of scale.
-
Do not choose a molding profile that is too wide for small frames. An 80 mm molding in a 40×60 cm frame looks rough. Rule: the width of the molding should be no more than 8% of the shorter side of the frame.
-
Do not forget to check outlets, switches, and sconces. When assembling multiple sets, engineering points inevitably fall into the decorative area. This must be planned before, not after.
Ready-made sets or custom assembly: what to choose
Ready-made wall decor setsversus custom assembly from individual moldings and overlays — both strategies work. The difference lies in the task.
Ready-made sets are convenient:
-
When you need a quick and predictable composition
-
When you don't want to spend a long time calculating dimensions
-
When the collection has already created a system of elements for you
-
When the wall is standard and has no complex obstacles
Individual assembly from moldings is better:
-
When the wall is non-standard — with niches, protrusions, multiple windows, doors
-
When there are many engineering points requiring bypass
-
When precise non-standard frame sizes are needed
-
When several walls in different spaces are designed in one system
Detailed comparative analysis — in the articlea ready-made set of stucco decor or individual moldings.
Collections for wall composition: which to combine
When assemblingwall composition of stucco moldingfrom several sets, choosing a collection is not an aesthetic detail, but a constructive solution. All elements must belong either to the same collection or to stylistically close ones.
"Petersburg" collection— calm architectural classic. Works well as a base for any multi-component scheme. Central and side sets from this collection always fit into a system without visual conflict.
Pavlovsk collection— soft chamber classic. For living spaces, bedroom, living room with a cozy character. Several sets from this line create a wall with warmth and lived-in feel.
Collection «Ekaterinhof»— strict classical symmetry. Works great as a source of side elements for a more formal central set from "Peterhof" or "Tsarskoye Selo".
Collection «Tsarskoye Selo»— for accent walls with an expressive center. One set from "Tsarskoye Selo" in the center and two calm side ones from "St. Petersburg" — a strong working combination.
the "Peterhof" collection— formal format. For halls, wide living rooms, country houses. Several sets from "Peterhof" in a rhythmic pattern create a wall that is impossible to look away from.
About how to choose a collection — in the articleHow to choose the STAVROS stucco decor collection for walls.
Assemble a wall composition from ready-made STAVROS sets
In the STAVROS catalog you can selectReady-made wall decor setsfor the central part of the accent zone andnarrow sets of stucco decorfor side piers. The composition can be supplemented withpolyurethane moldingsfor frames and binding,decorative polyurethane overlaysfor corner accents anddecor for moldingsfor corner inserts and ornamental details. All elements are made ofpolyurethane wall moldings, which is glued without special tools, cut, painted, and does not require complex installation.
Useful articles:
About the Company
STAVROS is a manufacturerpolyurethane interior decorfor residential and commercial spaces. STAVROS offers ready-made kits, moldings, cornices, baseboards, decorative overlays, corner elements, and ornamental inserts — everything needed to assemble a full wall composition of any complexity and scale. Delivery across all of Russia.
FAQ: Answers to popular questions
Can I use several sets of stucco decor on one wall?
Yes. The main thing is to determine the central element, side zones, and connect everything with moldings in advance. Without an overall scheme, several sets look like a random collection.
How to assemble a wall composition from several sets of stucco?
The simplest option: a wide set in the center along the furniture axis, narrow vertical sets on the sides, moldings as connectors between elements and along the perimeters of the frames. Marking with painter's tape before purchase is mandatory.
What to choose for a large wall: one wide set or several?
For a wall wider than 3 m, several elements are almost always better. One wide set gets lost on a large surface. A system of central and side elements fills the wall architecturally.
Can I combine sets from different collections?
It is possible, but safer — from one collection or stylistically similar ones. The main rule: the central one is more expressive, the side ones are calmer, the moldings are neutral.
How not to overload the wall with stucco decor when using several sets?
Define a hierarchy: one center, calm side elements, neutral moldings. Leave at least 30–40% of the surface as 'air'. Maintain gaps between elements — at least 30–50 mm.
Are moldings needed if ready-made sets have already been purchased?
Yes. Moldings turn individual sets into a unified wall system. Without them, each set remains a standalone element — they do not form an architecture.
How to check the layout before purchasing?
Mark the wall with painter's tape: mark the central set, side sets, moldings. Step back and evaluate proportions, gaps, symmetry. Check that electrical elements are not obstructed. Only then — order.