Article Contents:
- Bay window: an architectural gift that is easy to ruin
- Why a bay window is more complex than a regular wall: analyzing the geometry
- Types of bay windows and their features
- How many angles need to be considered
- Systematic approach: three layers of bay window design
- Ceiling cornice in a bay window: the main technical challenge
- How to choose a cornice profile for a bay window
- How to run a cornice along broken geometry
- Connection of the bay window cornice with the main room cornice
- Cornice and curtains in the bay window
- Moldings for bay window walls: how to design piers and side planes
- Piers between windows: vertical moldings
- Lower zone under windows: window sill plane
- Side planes of the bay window: frames and connection with the room
- Connection with baseboard
- Decorative stucco in the bay window: where to place the accent
- Central plane: main decorative point
- Pier with sconce: architectural frame for the light fixture
- Upper part of the pier: ornamental insert
- Side walls: when the center is occupied by windows
- Three bay window design scenarios: from minimal to formal
- Scenario one: "Clean minimum"
- Scenario two: "Classic living room"
- Scenario three: "Formal bay window"
- Technical details: cutting, installation, joints
- Tools for working with corner cutting
- Installation Sequence
- Glue for polyurethane elements
- Sealing all joints
- Typical mistakes when designing a bay window
- What to buy for bay window design: final table
- Frequently Asked Questions
- STAVROS: system for complex geometry
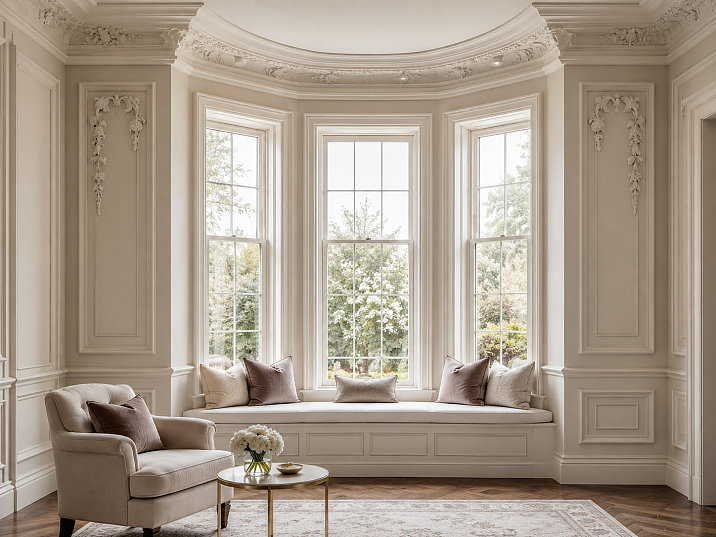


Bay window: an architectural gift that is easy to ruin
A bay window is an architectural privilege. A protruding volume, extra light, a special 'lantern' atmosphere over the city or garden. Not every home has one, and those who do know: you want to make the bay window special.
But the same story often happens with bay windows. The owner realizes this area needs decoration. They take moldings, start gluing — and at some point face the fact that the geometry doesn't obey. The angle is wrong. The cornice refuses to follow the broken line. The joints come apart. The molding that looked perfect on a straight wall looks out of place here.
Why? Because a bay window is not a straight wall. It is a system of planes, angles, and windows that requires a systematic approach to stucco, not a set of individual solutions.
A bay window looks expensive when its complex geometry does not conflict with the interior: Ceiling molding gathers the top line, Moldings made of polyurethane decorate the piers, Decorative stucco provides an accent, and neat joints make the protruding area part of the room, not a random architectural problem.
This article is about how to do it correctly. Consistently, technically competently, and beautifully.


Why a bay window is more complex than a regular wall: breaking down the geometry
Before discussing specific solutions, you need to understand what exactly we are working with. A bay window is not just a "protrusion." It is an architectural volume with its own rules.
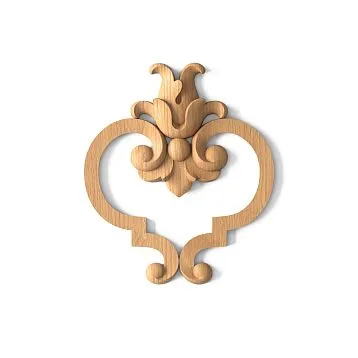
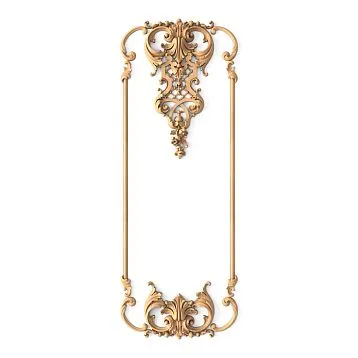
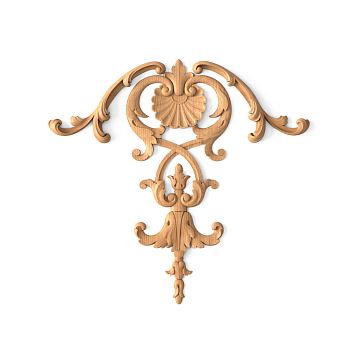
Our factory also produces:


Types of bay windows and their features
A triangular bay window is a classic. Three planes: central (frontal) and two side ones at an angle of 45° or 60°. Three corners: two "entry" ones (where the bay window adjoins the main room) and two internal ones (between the bay window planes). That's a minimum of four corner joints just in the wall plane.
A rectangular bay window has two side walls at right angles to the main room and one frontal wall. Four corners, all right angles. Simpler in terms of joints, but requires careful work with 90-degree internal corners.
A semicircular bay window is the most complex. A smooth curved wall line, windows along the arc. Moldings here must either be flexible or installed as separate short sections with precise end cuts.
A bay window with panoramic windows has the entire frontal and part of the side planes occupied by glazing. The piers between windows are minimal — 15–30 cm. Decoration here is limited: only a cornice at the top and a thin molding along the piers.
Get Consultation
How many corners need to be considered
This is a key question when buying a cornice and moldings. Each corner is either internal (walls converge towards you) or external (the corner protrudes). And each requires its own cutting.
A standard three-sided bay window without additional niches contains:
-
4 internal corners in the plane of the walls.
-
2–4 corners in the ceiling plane (where the cornice changes direction).
-
Additional joints when transitioning from the bay window to the main room.
This means: a reserve for cutting is mandatory. Minimum 20% above the calculated cornice length. For moldings — 15%. For complex bay windows with non-standard angles — 25%.
Systematic approach: three layers of bay window design
The most common mistake when designing a bay window is starting with decor. With a trim that you liked. Or with a molding you wanted to try.
The correct sequence is different:
First layer: the top line. Ceiling cornice. It sets the scale of the entire system and is the most complex in terms of geometry.
Second layer: vertical lines. Moldings on piers, side planes, frames on the lower part of the walls. They create rhythm and structure.
Third layer: accents. Decorative stucco и Relief Decoration — pointwise, in one or two positions.
Only in this sequence. Not the other way around.
Ceiling cornice in the bay window: main technical task
The cornice is the first thing to be installed and the last thing that forgives mistakes. An uneven cornice on the complex geometry of the bay window will be immediately and constantly visible. A neat one creates a feeling of an expensive, well-thought-out space.
How to choose a cornice profile for a bay window
Principle: the more complex the geometry of the bay window, the calmer the cornice profile should be. This is counterintuitive — it seems that a rich decorative profile will make everything more beautiful. In reality, a rich profile with ornament on broken geometry will read as chaos.
Recommendations for the bay window profile:
-
For a three-sided and rectangular bay window: medium complexity profile, 60–90 mm. Several clear horizontal levels without fine ornament. Corners are cut at 45° (for straight ones) or at an arbitrary angle (for non-standard bay windows).
-
For a semicircular bay window: simple profile 50–70 mm. Smooth or with minimal relief. Cutting into short sections 15–25 cm with precise ends.
-
For a bay window with panoramic windows: a delicate profile of 40–60 mm. Here, the cornice is only a "border," not an architectural accent.
How to run a cornice along broken geometry
This is the main technical question. Three methods:
Method one: cutting at an angle. For each corner, a precise angular cut is made. For standard 45° — a miter saw. For non-standard angles (30°, 60°, 120°) — an angle finder, marking, cutting along the line.
Rule: measure the actual angle of the wall, not the design angle. In real construction, angles often differ from the stated ones by 2–5 degrees. This error creates a noticeable gap at the joint.
Method two: corner inserts. For complex internal corners, corner inserts are used — special elements from the same series as the cornice. They cover the joint and do not require perfect cutting. For ceiling moldings polyurethane, this is the most reliable solution.
Method three: "live" joints. The cornice joints at the corners are not cut to a perfect angle but are filled with acrylic sealant. This is only acceptable if painted in a single color — then the filled and painted joint is nearly invisible.
Connection of the bay window cornice with the main room cornice
This is a key decision: whether to continue the cornice from the main room into the bay window or to design the bay window with a separate profile.
The continuation of a single cornice is architecturally stronger. The bay window becomes part of the room, rather than a separate "inserted" space. Requires careful corner joints at transition points.
A separate cornice in the bay window is acceptable if the bay window is visually distinguished by a different color, material, or decor. But with a uniform finish, it looks incomplete.
Recommendation: a single profile, a single cornice. buy polyurethane moldings And the cornice needs to be with a margin — first install it in the main room, then continue into the bay window.
Cornice and curtains in the bay window
If curtains or blinds are planned in the bay window, the cornice is installed considering the curtain rod or curtain system. Two options:
Cornice above the curtain rod — a decorative ceiling cornice is installed above the curtain system. The curtain rod is hidden behind the cornice. This is the ideal solution: Moldings works as a masking element and simultaneously as a decorative one.
Cornice below the curtain rod — a less successful option where the rod is visible above the decorative cornice. Avoid.
Moldings for bay window walls: how to design the piers and side planes
After the top line is solved, we move on to the walls. Here the task is to create rhythm and structure without overloading the already complex geometry.
Piers between windows: vertical moldings
A pier is a narrow vertical strip of wall between adjacent windows. In a triangular bay window, there are usually two to four such piers. Their width ranges from 10–12 cm in narrow bay windows to 40–60 cm in wide ones.
For narrow piers (up to 20 cm) — a single vertical molding in the center. Profile width: 15–25 mm, no more. A wide molding on a narrow pier looks overloaded.
For medium piers (20–40 cm) — two vertical moldings or one wide one. Distance from the molding to the edge of the pier: at least 3–4 cm.
For wide piers (40–60 cm and more) — a molding frame: vertical molding on the left, vertical on the right, horizontal at the top and bottom. The frame "inserts" the pier into the architectural context like a picture in a frame.
Lower zone under windows: windowsill plane
The area under the windowsill in a bay window is often underestimated. If the bay window has a wide windowsill with a depth of 30–50 cm, it is a full-fledged architectural "bench". A molding belt along the front of this area, at the level of the windowsill, creates a horizontal line that "holds" the lower part of the bay window.
Horizontal Polyurethane molding At the windowsill level, it is both a decorative and functional element: it hides the joint between the windowsill and the wall.
Side planes of the bay window: frames and connection with the room
The side planes of the bay window are transitional walls between the main room and the front part of the bay window. It is here that it is most important to ensure a visual "connection."
Molding frames on the side planes should continue or rhyme with the molding frames of the main room. If the living room has molding frames 60 cm high at a level of 90 cm from the floor, the frames in the bay window should be at the same height and of the same size. Then the gaze "flows" from the room into the bay window without discomfort.
Connection with the baseboard
Buy molding for the bay window means thinking of the baseboard as the bottom horizontal line of the system. The baseboard should run continuously along the entire perimeter of the bay window — across all planes and through all corners.
For polyurethane baseboards, corner transitions are done the same way as for cornices: cutting at an angle or using corner inserts.
Decorative stucco in the bay window: where to place the accent
The third layer is the accent layer. And here restraint is important. The bay window is already a complex, rich architectural zone. You need to add a little decor.
Central plane: the main point of decor
The central (front) plane of the bay window is the best place for one decorative accent. If there is no window here (or the window only occupies part of the plane), a medallion, cartouche, or decorative overlay in the upper zone of the wall creates a "header" for the bay window.
Size of the decorative element for the central plane: 150–250 mm. Placement: along the central axis, at a height of 2/3 from floor to ceiling.
buy decorative moldings for this position means choosing from the category of medallions, rosettes, and cartouches. For a classic bay window — a floral medallion or cartouche. For modern neoclassicism — a geometric overlay with a clean relief.
Pier with sconce: architectural frame for a light fixture
If a wall sconce is planned on the bay window pier, a molding frame around it becomes an architectural solution. The frame "mounts" the sconce like an exhibit: a rectangular frame made of molding 25–30 mm, height 40–60 cm, width — along the pier with a 4–5 cm offset.
Inside the frame — a sconce in the center plus a small decorative overlay above the light fixture.
Upper part of the pier: ornamental insert
If the pier is wide enough — 35–60 cm — in its upper part, above the molding frame, a small Decorative stucco in the form of a floral ornament or geometric overlay. Size: 80–120 mm.
Important: this is a point accent. One element per pier — maximum. If there are several piers, the decorative element is placed only on one — the central or widest one.
Side walls: when the center is occupied by windows
Often the entire front part of the bay window is glass. Windows from floor to ceiling or almost. In this case, the central plane is unavailable for decor. The stucco accent is moved to the side walls — where there is still a wall plane above the windowsill.
On the side wall of the bay window, if it is wide enough — a molding frame in the upper zone plus a small Buy Moldings inside the frame.
Three bay window design scenarios: from minimal to grand
Scenario one: "Pure Minimum"
For a small bay window, modern interior, minimalist neoclassicism.
Set:
-
Ceiling molding — cornice 50–60 mm, smooth profile. Continuation of the cornice from the main room.
-
Baseboard around the entire perimeter — the same profile as in the room.
-
Moldings on the piers — vertical lines 15–20 mm, without frames.
Color: monochrome. All decor in the color of the walls.
Effect: the bay window looks like an organic part of the room. Calm, neat, modern.
Scenario two: "Classic Living Room"
For a country house, an apartment with high ceilings, a classic interior.
Set:
-
Cornice 80–100 mm with a classic profile. 25% allowance.
-
Molding frames on the side planes — 25–30 mm.
-
Horizontal belt at the windowsill level.
-
Vertical moldings on the piers.
-
Decorative stucco — medallion in the central plane.
Color: cornice and moldings — in the color of the ceiling (white). Walls — warmer cream. Medallion — in the color of the moldings.
Effect: a full-fledged classic bay window with architectural character.
Scenario three: “Grand bay window”
For a large house, study, grand living room.
Set:
-
Large cornice 110–140 mm. Continues along the entire perimeter of the living room and bay window.
-
Full molding frames on all bay window planes — 35–45 mm.
-
Horizontal belt at the windowsill level.
-
Decorative overlays on the piers.
-
Large medallion or cartouche in the central area.
-
Buy Moldings — symmetrical side overlays at the cornice at the transition points of the planes.
Color: two-tone scheme — walls in a warm color, all decor white.
Effect: monumental architectural bay window. Memorable at first glance.
Technical details: cutting, installation, joints
Tools for working with angle cutting
Miter saw with a rotating table — a must. Rotation angle: adjustable from 0° to 90°. For standard 45° angles — basic position. For non-standard bay window angles — precise angle gauge before cutting each element.
Digital angle finder (bevel gauge) — measures the actual wall angle. Indispensable for bay windows where design angles differ from real ones.
Installation order
-
Marking the horizontal line of the cornice — laser level. Strictly horizontal across all planes of the bay window.
-
Cutting the cornice with allowance — first cut all corner elements, dry fit.
-
Installation of the cornice — from one of the "entry" corners, sequentially along the entire perimeter.
-
Sealing joints — immediately after installation, before painting.
-
Moldings on walls — vertical, then horizontal belts.
-
Frames on planes — last among structural elements.
-
Decorative overlays — very last.
-
Sanding, primer, painting.
Glue for polyurethane elements
Acrylic assembly adhesive. For the ceiling cornice in the bay window — additional fixation: construction stapler or temporary tape until dry. In high-load areas (above a steam radiator, near heated floors) — reinforced assembly adhesive.
Sealing all joints
White acrylic sealant. All joints — corner and linear. Apply with a thin spatula, immediately smooth with a finger moistened with water. Allow to dry for 4–6 hours. Sand with fine sandpaper (180–220 grit).
Typical mistakes when designing a bay window
Mistake one: starting with decor, not the cornice. A decorative overlay without a system around it is just an ornament on an empty wall. First the cornice, then moldings, then accents.
Mistake two: not making a reserve. On a bay window, an average of 25–40% more material is lost than on a straight wall of the same length. Cutting corner joints requires long pieces that are later trimmed. You'll regret every centimeter you're short.
Mistake three: overloading the piers. A narrow pier of 15–20 cm with two or three moldings looks disastrous. One thin molding in the center is the maximum for a narrow pier.
Mistake four: different profiles in the bay window and the room. If the room's cornice is 80 mm with a classic profile, and suddenly a 50 mm smooth one appears in the bay window, that's a disconnect. A single profile around the entire perimeter.
Mistake five: cutting without dry fitting. Always dry fit before applying glue. Especially corner cuts — on a bay window, they rarely match on the first try.
What to buy for designing a bay window: final table
| Task | What to purchase |
|---|---|
| Assemble the top line of the bay window | Ceiling molding — cornice 60–120 mm, 25% reserve |
| Design the walls between windows | Moldings made of polyurethane 15–35 mm |
| Create frames on the side planes | buy polyurethane moldings 25–40 mm |
| Add a decorative accent | Buy decorative stucco — medallion 150–200 mm |
| Connect the bay window to the room | Single cornice + Polyurethane Items of the same profile |
| Do not spoil the complex geometry | Simple profiles + 25% reserve + corner inserts |
| Assemble a complete set | Cornice + moldings + Buy Moldings + glue + sealant + paint + spare |
Frequently asked questions
How to design a bay window in the interior?
A bay window is designed systematically: first Ceiling molding — a cornice along the entire perimeter, then Moldings on the piers and side planes, then accent Relief Decoration lighting at one or two focal points.
Which moldings are suitable for a bay window?
Optimal: Moldings made of polyurethane with a medium-complexity profile, 20–35 mm for walls. Cornice 60–100 mm — depending on room height. For narrow piers — no wider than 20–25 mm. A 20–25% allowance for cutting corner joints is mandatory.
Is decorative stucco needed in a bay window?
Yes, but not everywhere. One focal accent — a medallion or cartouche — on the central plane or a wide pier. Decorative stucco on every pier and every corner will overload an already saturated geometry.
What to buy for decorating a bay window?
Cornice (Ceiling molding) + Moldings made of polyurethane for piers and frames + Buy decorative stucco for accent + mounting adhesive + acrylic sealant + acrylic primer paint + finish paint + 20–25% spare.
How to run a cornice along the broken geometry of a bay window?
Cutting with a miter saw at a precise angle — be sure to measure the actual wall angle with a digital protractor. Dry fit before applying glue. Joints — acrylic sealant. For semicircular bay windows — short sections 15–25 cm with precise end cuts.
Should the bay window be highlighted with a separate color?
Not necessarily. If the decor skillfully connects the bay window with the room — a single paint job works better. A separate color is appropriate if the bay window is functionally distinct (reading area, dining area) or if the owner wants to emphasize its architectural volume.
STAVROS: system for complex geometry
A bay window is not a task for a single molding, but for a set. A cornice along a complex perimeter, moldings on the piers, decorative accents at the right points, glue with the required characteristics — all of this must be selected as a single system.
STAVROS manufactures Polyurethane Items for interior use: cornices of all profiles and sizes, Moldings made of polyurethane from delicate 15 mm to large 120 mm, decorative molding for accent points. A wide range of profiles allows you to choose a single scale for all elements — cornice, moldings, and decor.
Buy molding for a bay window, calculate the quantity with a margin, select coordinated profiles — in the STAVROS catalog. Delivery across all of Russia. Pickup in Moscow and St. Petersburg.
Your bay window deserves proper design. Make it part of the interior — not an architectural problem without a solution.