Article Contents:
- The single word "cornice" hides two completely different purchases
- M1702 up close: what the product card confirms
- M1702 specification table
- What the buyer receives when ordering one item
- Seventy millimeters define the visible strip
- Eighteen millimeters limit the protrusion
- Two thousand millimeters determine the cut
- White profile on white surfaces
- Cornice in wall color
- Cornice in ceiling color
- Contrast line
- Combination with a ceiling rosette
- Small bedroom
- Hallway and entrance hall
- Modern kitchen
- Office
- Children's room
- Living Room
- Commercial space
- Option 1. Rail on the ceiling, M1702 around the room perimeter
- Option 2. Rail hidden in a construction niche
- Option 3. Wall-mounted curtain rod plus decorative profile
- Option 4. Decorative box covers the curtain system
- Comparison of M1702 and L1902M
- Make a paper mockup
- Compare three scales
- Consider the lower line of the interior
- Example: room 4 × 3 m
- Example: bedroom 4.2 × 3.6 m
- Example: corridor of complex shape
- Layout map
- Check the geometry of the junction
- The base must be strong
- Dry fitting is mandatory
- Do not place a short extension piece in the center of the wall
- Align joints with lighting
- Do not skimp on the control piece
- The corner of the room is not always 90 degrees
- External corner is vulnerable
- Corners are painted after preparing the joint
- Only cornice
- Cornice plus rosette
- Cornice plus molding frame
- Cornice plus lighting
- Mistake 1. Ordering M1702 for hanging curtains
- Error 2. Considering 70 mm as the width of the curtain rod shelf
- Error 3. Taking 18 mm as a ready-made niche for the LED strip
- Error 4. Choosing a product only by a large photo
- Error 5. Not comparing M1702 with neighboring models
- Error 6. Dividing the perimeter by two without a layout map
- Error 7. Not buying a spare
- Error 8. Considering all corners to be right angles
- Error 9. Glue onto peeling paint
- Error 10. Not checking the order of work with the stretch ceiling
- Error 11. Placing the seam in the center of the main wall
- Error 12. Using random glue
- Error 13. Not providing materials for joining
- Error 14. Leaving the profile without finishing if the project requires painting
- Error 15. Painting without a test patch
- Error 16. Not accounting for the top of a built-in wardrobe
- Error 17. Confusing a decorative profile with a box
- Error 18. Hiding a cable behind it without a project
- Error 19. Not checking external corners
- Error 20. Mixing different cornices on the same perimeter without a transition joint
- Error 21. Using M1702 in a grand hall just because it is called a cornice
- Error 22. Installing short remnants consecutively
- Error 23. Not signing off on details after fitting
- Error 24. Ordering exactly along the perimeter without accounting for doorways and niches
- Error 25. Buying before approving the curtain and lighting scheme
- For the owner of a modern interior
- For a buyer who needs a small projection
- For a designer creating a monochrome ceiling
- For a renovation crew with a precise layout map
- For a project where curtains are mounted with a separate system
- For a buyer of a curtain rod
- For a project with hidden lighting
- For a very large room
- For a classic interior with rich stucco molding
- For an uneven base without preparation
- Looking for a cornice above the window for tulle
- Need a neat line in the bedroom
- Want to hide the LED strip
- There is little space in the hallway
- Need to cover an uneven joint between the wall and ceiling
- Room perimeter is 14 m
- Compare not the name, but three numbers
- Distinguish a ceiling cornice from a molding
- Do not confuse a decorative cornice with a ceiling plinth by its common name
- A curtain system is recognized by functional details
- The profile for lighting is checked from the reverse side
- Example of a general list
- Separate batches by finish
- First the main walls, then the short sections
- Count control samples separately
- Curtain rail not included
- Lighting not included
- Glue and joint compound are not considered part of the plank
- Paint and surface preparation remain separate steps
- Installation should not be considered included
- The line must be continuous
- Joints should not create a step
- Corners should preserve the profile
- Paint should have uniform gloss
- The curtain system must operate independently
- The backlight should not show the light source
- The remaining material needs to be saved
- Can M1702 be used as a curtain rod?
- Why is the product called a curtain rod?
- Does M1702 have runners and hooks?
- What is included in one M1702 item?
- What do the dimensions 70 × 18 × 2000 mm mean?
- Is seventy millimeters the width for a curtain?
- Can M1702 be installed above a window?
- Is M1702 suitable for a minimalist interior?
- What does the profile look like in a small room?
- Will M1702 work for a high ceiling?
- Can an LED strip be hidden behind M1702?
- Which curtain rod should be chosen for lighting?
- Can M1702 be glued to a stretch ceiling?
- What glue is needed?
- Does M1702 need to be painted?
- How to calculate the number of planks?
- How many slats are needed for a room 4 × 3 m?
- Can leftovers be used on another wall?
- Where is the best place to place joints?
- Are all corners cut at 45 degrees?
- Is M1702 suitable for a kitchen?
- Can it be placed in a bathroom?
- Will M1702 fit for a hallway?
- Can M1702 be connected to another cornice?
- Is a ceiling rosette needed?
- Can one slat be ordered for a sample?
- How to tell if the cornice is too narrow?
- Is M1702 suitable for hiding wires?
- Can a garland or decor be attached to M1702?
- How to distinguish M1702 from L1902M?
- Where can I see other sizes?
- What should I write to the manager before ordering?
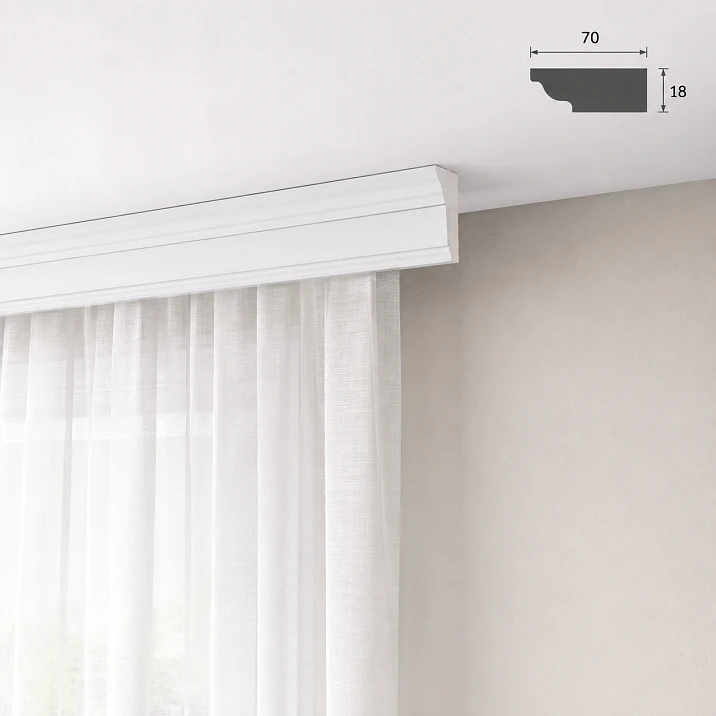
A person types the word "cornice" into the search, opens the M1702 product page, and sees a long two-meter strip. At that moment, it's easy to draw the wrong conclusion: since the product is called a cornice, it must be possible to hang tulle, heavy drapes, or a roller blind from it. In reality, the word is the same, but the structures are completely different.
M1702 should be purchased as a narrow ceiling cornice for decorative purposes, not as a confirmed system for hanging curtains. The profile decorates the transition between the wall and ceiling, creates a smooth architectural line, and helps complete the interior. The M1702 product page does not list tracks, gliders, hooks, rings, rods, brackets, or load-bearing capacity calculations for fabric. Therefore, attaching curtains to it without a separate engineering system is not possible.
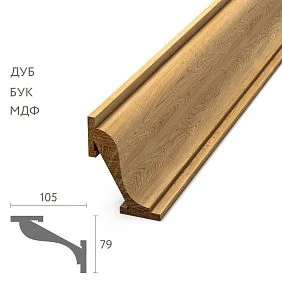
The model's dimensions are 70 × 18 × 2000 mm. The first number describes the noticeable vertical part of the profile, the second describes its small projection from the wall or ceiling area according to the drawing, and the third is the length of one strip. It is the combination of a 70 mm height and an 18 mm depth that makes M1702 visually tall but physically flat. It can emphasize the ceiling boundary without taking up much space in the room.
For those who need a minimalist decorative transition, you can buy the narrow ceiling cornice M1702 after measuring the perimeter and checking the base. If the task involves curtains, first choose a separate rail, profile, string, or rod rated for the weight of the fabric. A decorative cornice and a hanging system can coexist in the same room, but each element must perform its function.
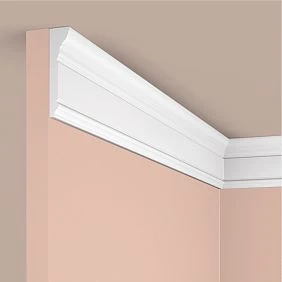
The single word "cornice" hides two completely different purchases
The confusion arises not from the buyer's inattention, but from the language. In construction and interior design, a cornice refers both to a decorative strip under the ceiling and to the structure on which curtains hang. Externally, both parts are located high up, often run along the wall, and can be white. That's where the similarity ends.
A curtain rod is a load-bearing system. It takes the weight of the fabric, withstands tugs when opening and closing, holds gliders or rings, attaches to the wall or ceiling, and is calculated considering the span length. The set or project includes a rail, guide, brackets, end caps, connectors, fasteners, and fabric control elements.
A decorative ceiling cornice is a profiled strip. It covers or finishes the junction of the wall and ceiling, creates shadow, changes the perception of room height, and ties together the finishes of two surfaces. It is glued to a prepared base, joined, puttied, and painted. The load from drapes is not transferred to it.
| Buyer's question | Curtain rod | Decorative ceiling cornice M1702 |
|---|---|---|
| What it's for | Hangs and moves the fabric | Forms the transition between wall and ceiling |
| What holds | Tulle, curtains, drapes | Own weight after installation |
| What parts are expected | Rail, rings, runners, hooks, brackets | Profile 2000 mm long |
| How they choose | By fabric weight, length, number of rows, type of attachment | By cross-section dimensions, style, room height, and perimeter |
| How they install | Mechanical fastening as per calculation | On compatible mounting compound over prepared substrate |
| What does "row" mean | Separate track for fabric | The concept of rows does not apply to M1702 |
| Is load-bearing capacity needed | Yes | Not stated for curtains |
| Can it be hidden in a niche | Yes, if the project includes a niche | M1702 itself is not a niche for curtains |
| What is bought together | Hooks, runners, end caps, fasteners | Adhesive, materials for joints and painting |
If the product card does not mention curtains, tracks, or allowable load, you cannot assume their presence based on the name alone. Before paying, it is useful to formulate the task in one sentence: "I need to hang fabric" or "I need to finish the wall-to-ceiling transition." For the first case, M1702 is not confirmed. For the second, this exact type of product was created.




M1702 close-up: what is confirmed by the product card
M1702 belongs to the HI WOOD line of decorative cornices. It is a high-density polystyrene profile with smooth, minimalist geometry. It does not imitate heavy stucco molding or create a deep classical relief. Its purpose is to run a clean line under the ceiling that is noticeable in height but barely protrudes into the room.
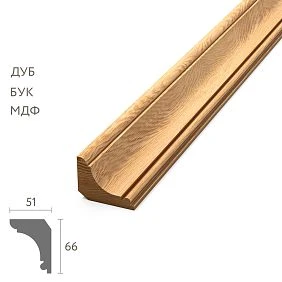
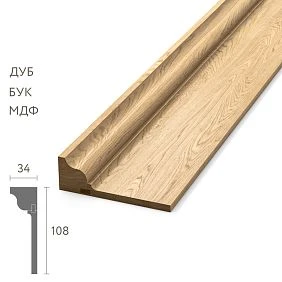
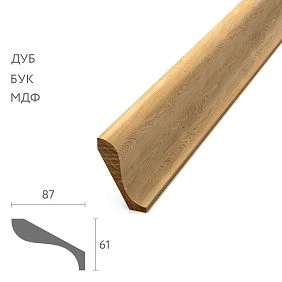
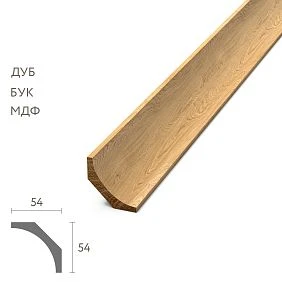
Our factory also produces:
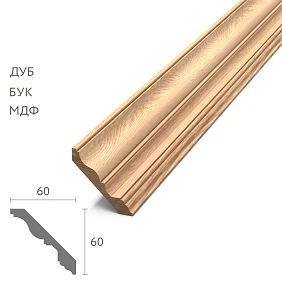
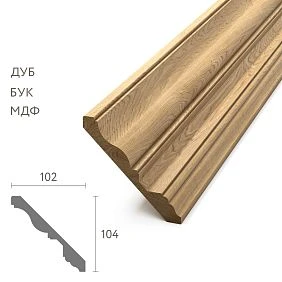
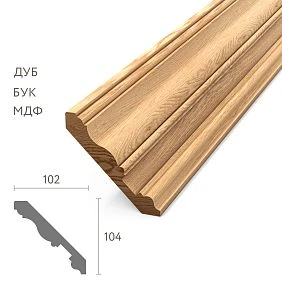
M1702 specification table
| Parameter | Confirmed value | What this gives the buyer |
| Model | M1702 | Allows not to confuse the profile with adjacent cornices |
| Manufacturer | HI WOOD | Defines the product line |
| Product type | Decorative ceiling cornice | Shows that this is an interior profile, not a curtain system |
| Material | High-density polystyrene | Requires compatible adhesive, careful trimming, and finishing |
| Size A × C × L | 70 × 18 × 2000 mm | Provides data for scale, installation, and quantity calculation |
| Profile height | 70 мм | Forms a noticeable vertical strip under the ceiling |
| Profile projection | 18 мм | Makes the cornice relatively flat |
| Length of one plank | 2000 мм | Determines the number of products and the location of joints |
| Purpose | Design of the wall and ceiling transition | Helps separate the decorative task from hanging curtains |
| Stylistic character | Concise smooth line | Suitable for modern and calm interiors |
| Backlighting | A special niche in the M1702 card is not declared | Cannot automatically embed LED strip |
| Curtain kit | Not declared | Cannot expect runners, hooks, or a rod |
| Installation materials | Selected separately | They need to be included in the estimate before placing the order |
These characteristics provide a sufficient basis for choosing a decorative profile. But the card does not replace the project. Before installation, you need to open the drawing, check the actual orientation of dimensions A and C, the condition of the wall and ceiling, internal and external corners, as well as the areas adjoining cabinets, curtains, ventilation ducts, and other elements.
Get Consultation
What the buyer receives when ordering one item
One M1702 product item is one 2000 mm long plank of the selected model. Do not assume that mounting adhesive, joint compound, primer, paint, corner pieces, or tools are automatically included in the price. Always verify the configuration in the product card and order.
The two-meter length is convenient for transport and layout, but it creates seams on walls longer than 2 m. These joints need to be planned in advance. A random short filler piece above a door or in the center of a long wall can remain noticeable even after painting.
Size 70 × 18 mm: why a tall profile can look almost flat
The size of the ceiling cornice is not read as the area of the shelf or as a place for the curtain. For M1702, two dimensions determine the external contour of the profile: 70 mm and 18 mm. The exact position of each side is checked against the drawing, but the general logic is clear: the profile has a noticeable vertical dimension and a small depth.
Seventy millimeters define the visible strip
The height of 70 mm is 7 cm. On the wall, such a strip does not disappear. It draws a straight line under the ceiling, can visually correct an uneven junction, and creates a calm finish. On a white wall and white ceiling, the cornice may look like a soft architectural shadow. With contrasting painting, it becomes a graphic boundary.
The height cannot be assessed separately from the room. In a small bedroom, 70 mm may be perceived as quite expressive. In a spacious hall with a very high ceiling, the profile risks getting lost. Therefore, a mock-up is made on the actual wall: a paper strip 70 mm high or a short sample is applied, and you step back to the usual viewing point.
Eighteen millimeters limit the projection
A depth of 18 mm makes M1702 narrow in projection. This is an important advantage in corridors, small rooms, niches, and near built-in furniture. The profile does not form a massive shelf and does not overhang the wall.
But the small projection imposes limitations:
-
a voluminous curtain track cannot be automatically hidden behind the profile;
-
a full light niche cannot be promised;
-
complex wall irregularities will be noticeable;
-
the mounting surface must be prepared;
-
the wall-ceiling joint must match the drawing.
A narrow ceiling cornice is not a reduced version of any other structure. Its compactness works only where the task is truly decorative.
Two thousand millimeters determine the cutting
A length of 2000 mm equals 2 m. A room with a perimeter of 14 m requires at least seven full strips without accounting for waste. However, a real order cannot be completed by dividing the perimeter by two. Corners, doorways, protrusions, bay windows, and short walls change the layout. A 450 mm leftover from one wall may not always fit a 500 mm section after cutting.
What a narrow ceiling cornice looks like in an interior
M1702 does not build a decorative effect through ornament. Its expressiveness comes from proportion. The tall face and small projection create a subtle shadow under the ceiling, while the smooth surface supports the room's clean geometry.
White profile on white surfaces
This is the calmest scenario. The wall, ceiling, and cornice are painted in a similar color. The transition becomes architectural but not contrasting. Light highlights the subtle shadow, making the ceiling look neater and the joint not seem accidental.
This solution suits spaces where furniture, textiles, and lighting already exist, but a clean finish at the top is missing. M1702 does not argue with the interior and does not require repeating complex ornament on doors or baseboards.
Cornice in the color of the wall
If the ceiling is lighter, the profile continues the wall and visually raises it. This technique is especially interesting in rooms with saturated wall colors. A 70 mm high line carries the color upward but does not form a heavy shelf.
Before painting, a sample should be made: a deep dark shade emphasizes any joints and base waves more strongly.
Cornice in the color of the ceiling
The profile is perceived as a continuation of the upper plane. It can visually lower the ceiling line slightly onto the wall and hide the hard transition. In a narrow corridor, this technique helps make the upper part of the room cohesive.
Contrast line
Contrast is acceptable but requires precise geometry. A black, gray, or colored cornice on a light background becomes a graphic element. Any uneven joint will become more noticeable, so the layout and preparation must be especially careful.
Combination with ceiling rosette
A laconic perimeter can be complemented with a central element. The catalog offers Polyurethane ceiling rosettes, but their scale and relief need to be coordinated with the smooth M1702. A small, calm rosette will support a minimalist composition. A large, rich ornament will require additional connecting details, otherwise the ceiling will look assembled from different styles.
For which rooms M1702 is suitable by proportions
You cannot assign a profile to a room just by its name. A bedroom can be 9 m² or 40 m², a corridor can be straight or complex, a kitchen can be separate or combined with a living room. Therefore, the choice is based on scale, ceiling height, wall length, and interior saturation.
Small bedroom
The narrow projection of 18 mm does not eat up space. The height of 70 mm creates a sufficient line to make the ceiling look finished. In a calm bedroom, M1702 can be painted to match the walls or ceiling and achieve a soft transition without classic relief.
Corridor and hallway
In a passage area, a deep cornice often looks heavy. A flat profile preserves the width of the room and does not conflict with tall cabinets. Before ordering, check the top of door trims, built-in mezzanines, access hatches, and lighting fixtures.
Modern kitchen
M1702 is suitable for a minimalist kitchen where facades have straight geometry. The cornice can be run along the entire perimeter or only along free walls. Above upper cabinets, you need to decide in advance whether the ceiling profile connects with the furniture, passes in front of it, or is interrupted. An accidental break above a cabinet looks worse than a pre-designed transition.
Cabinet
A straight line helps bring together a space with bookcases, a desk, and calm finishes. The profile does not distract from the furniture but adds architectural discipline.
Children's room
A smooth cornice is easier to incorporate into a color scheme than a relief ornament. It can be painted to match the ceiling color or made into a soft colored stripe. All materials and finishes are chosen with the room's purpose in mind.
Living room
In a compact modern living room, M1702 may be sufficient. In a large formal space, a profile with an 18 mm projection can look too thin. Then you need to compare HI WOOD cornices of different sizes and choose a more substantial cross-section, rather than convincing yourself that one article fits any scale.
Commercial space
In an office, salon, showroom, or small cafe, a minimalist profile forms a clean perimeter and does not compete with signage, furniture, or lighting. For long walls, a joint map and a reserve for repeatability of the result are especially important.
M1702 is not a curtain rod: how to build the correct window unit
The most common mistake is to buy M1702 and then look for a way to screw hooks to it. The correct window unit is assembled differently.
First, choose a system for the curtains:
-
ceiling rail;
-
profile cornice;
-
string construction;
-
rod on brackets;
-
electric cornice;
-
hidden system in a prepared niche.
The choice depends on the weight of the fabric, the number of rows, the width of the window, the opening method, and the base. Only after this do they decide whether a decorative M1702 is needed nearby.
Option 1. Ceiling rail, M1702 around the perimeter of the room
The decorative cornice runs along the walls. The curtain rail is attached separately to the ceiling at a calculated distance from the window. A visible section of the ceiling remains between them. The structures are independent of each other.
Option 2. The rail is hidden in a construction niche
The niche is formed in advance. M1702 can finish the rest of the perimeter, but it does not become a load-bearing part of the niche. Its endpoint and the transition to the window are designed before installation.
Option 3. Wall-mounted curtain rod plus decorative profile
The rod is attached to the wall with brackets. M1702 runs higher, near the ceiling. It is necessary to check whether the brackets intersect with the profile and whether there is enough space to remove the curtains.
Option 4. A decorative box covers the curtain system
Such a box is a separate structure. M1702 can become part of it only by design, but one flat profile 70 × 18 mm does not replace the box and does not hold the fabric.
Can an LED strip be hidden behind M1702
The M1702 card does not declare a special niche for LED backlighting. Therefore, a ready-made lighting effect cannot be promised. The 18 mm size by itself does not prove the presence of a sufficient platform, the correct emission angle, space for the strip profile, and maintenance of the power supply.
For backlighting, check:
-
the shape of the back side of the cornice;
-
gluing area;
-
distance from the light source to the ceiling;
-
ability to hide the LED strip from direct view;
-
direction of the light flux;
-
heat dissipation;
-
access to the power supply;
-
electrical circuit;
-
fire safety;
-
quality of the reflective surface.
If you need a profile specifically designed for hidden lighting, you should buy the L1902M cornice for hidden lighting after checking its drawing and installation diagram. The L1902M has dimensions of 100 × 33 × 2000 mm and is positioned in the card as a model with lighting. It is noticeably taller and deeper than the M1702.
Comparison of M1702 and L1902M
| Parameter | M1702 | L1902M |
| Size | 70 × 18 × 2000 mm | 100 × 33 × 2000 mm |
| Visual scale | Thin tall line | Larger profile |
| Overhang | 18 мм | 33 мм |
| Backlighting | No special function declared | The card links the model with lighting |
| Where it is appropriate | Laconic transition between wall and ceiling | Project with a more pronounced cornice and lighting scenario |
| What to check | Proportions, base, joints | Recess for the tape, light direction, electrical work, and installation |
| Can it be used for curtains | No confirmed function | Also should not be considered a curtain system |
Even a special lighting cornice does not become a curtain structure. The word 'cornice' here still refers to an architectural ceiling profile.
How to choose a ceiling cornice by scale, not by photo
A product photo shows the shape but does not convey the actual size in a room. A profile 70 mm high may seem massive in a close-up. On a 5 m wall, it will look much calmer.
Make a paper mockup
Cut out a strip 70 mm high and a thickness visually indicating the 18 mm projection. Attach it near the ceiling with safe tape over a 1–2 m section. Look:
-
from the entrance;
-
from the sofa or bed;
-
near the window;
-
near the upper cabinets;
-
in daylight;
-
under evening lighting.
The mockup immediately shows whether the profile is sufficient or if it gets lost.
Compare three scales
Don't limit yourself to M1702. Take the sizes of a more compact and a larger cornice from the category. Paper templates allow you to see the difference without buying multiple strips.
Consider the bottom line of the interior
The ceiling cornice interacts with the baseboard, door trims, furniture cornices, and wall moldings. If the lower part of the room is decorated with massive elements, a too-thin top line may look random. If the interior is almost devoid of decor, M1702 will support it better than a large relief profile.
Calculating the quantity of M1702: a formula that does not replace the layout map
The length of one strip is 2 m. First, measure the entire cornice route, then divide it into sections.
For a rectangular room:
P = 2 × (A + B)
Where:
-
P — perimeter;
-
A — room length;
-
B — room width.
Base quantity without reserve:
Q₀ = P / 2
The final quantity is rounded up and adjusted according to the layout.
Example: room 4 × 3 m
Perimeter:
P = 2 × (4 + 3) = 14 m
Base quantity:
14 / 2 = 7 planks
Seven planks give exactly 14 m of material. But this is a calculation without losses. In the four corners, cuts will be needed, and there is no way to compensate for cutting errors. For a real order, a reserve is needed.
Example: bedroom 4.2 × 3.6 m
Perimeter:
P = 2 × (4.2 + 3.6) = 15.6 m
Basic division:
15,6 / 2 = 7,8
Minimum — 8 planks. Total length will be 16 m, remainder only 400 mm. This may not be enough for corners and re-cutting. The layout map will show whether a ninth plank is needed.
Example: corridor of complex shape
Simple perimeter is of little use here. You need to record the length of each section:
-
1850 mm;
-
920 mm;
-
2160 mm;
-
740 mm;
-
1380 mm;
-
2640 mm.
Then distribute the parts across two-meter planks. Sections of 2160 and 2640 mm will require joints. It is better to place them not in the center of the main wall, but closer to a less noticeable area, while maintaining sufficient length for each part.
Layout map
| Section | Wall length | Number of full pieces | Joint needed | Preferred joint location |
| Wall with window | 4200 мм | 2 + extension | Yes | Above the less visible part of the wall |
| Wall by the bed | 3600 мм | 1 + 1 part | Yes | Not centered on the headboard |
| Short wall | 1800 мм | 1 | No | Solid piece |
| Section above the door | 900 мм | From the remainder | No | Solid segment |
| Niche | 1200 мм | From the remainder | No | Solid segment |
This approach saves material and improves appearance. The "perimeter plus ten percent" order is simpler, but the map gives a more accurate result.
Allowance for corners, trimming, and possible defects
There is no single universal allowance standard. A simple square room with even corners requires less reserve than a space with a bay window, columns, and niches.
The allowance is increased if:
-
many internal and external corners;
-
walls longer than 2 m with joints;
-
installation is done for the first time;
-
the profile is painted in a contrasting color;
-
the base is uneven;
-
matching the pattern of adjacent parts is required;
-
delivery of a single additional plank would be inconvenient;
-
part of the material is needed for test cuts.
For an experienced crew and a simple room, the reserve can be moderate. For self-installation, it is wiser to have one extra strip than to try to salvage a mistakenly cut short piece.
What to order together with M1702
The profile itself does not finish the ceiling without installation and finishing. A full estimate is prepared before payment.
| What to add | What it is for | When it matters most | What to check | Internal link |
| M1702 | Create a minimalist line under the ceiling | Modern interior without deep relief | Size 70 × 18 × 2000 mm and quantity | Order cornice HI WOOD 70 × 18 mm |
| Another HI WOOD cornice | Compare scale and projection | M1702 seems too thin | Cross-section, length, purpose | Buy polystyrene ceiling cornice |
| Construction adhesive | Attach profile to base | Any installation | Compatibility with polystyrene and surface | Buy mounting adhesive for cornice |
| Materials for joints | Hide connections and minor defects | Walls longer than 2 m, many corners | Compatibility with profile and finish | Category of materials for installation and finishing |
| Paint | Merge the cornice with the wall or ceiling | After preparing the joints | Suitable composition and test coat | Selected per project |
| L1902M | Create a cornice lighting scenario | A confirmed model with backlighting is needed | Drawing, niche, electrical | Card L1902M |
| Ceiling rosette | Decorate the center of the ceiling | There is a chandelier or decorative composition | Diameter, style, relief | Buy a polyurethane ceiling rosette |
| ceiling decor | Assemble a more developed composition | One perimeter is not enough | Compatibility in style and scale | Order polyurethane ceiling decor |
The table does not mean that all items are needed at once. A minimalist room may only require M1702, adhesive, joint materials, and paint. The rosette and additional decor are added only when the ceiling is designed as a composition.
Base preparation: where product selection ends and result quality begins
Even an accurate profile looks bad on an unprepared wall. The small projection of M1702 will not hide a strong wave in the base. If wide gaps remain between the cornice and the wall, they will need to be eliminated, not masked with a thick layer of compound.
Check the geometry of the junction
Assessed using a long rule or laser:
-
straightness of the wall;
-
ceiling horizon;
-
differences in corners;
-
plaster protrusions;
-
old paint;
-
cracks;
-
voids;
-
areas with poor adhesion.
If the ceiling noticeably drops in height, you need to decide whether to align the cornice to the ceiling or to the visual horizontal. This is a design decision, not a random choice by the installer.
The base must be strong
The adhesive holds the profile only together with the top layer of the surface. Peeling paint, chalky putty, or loose plaster may come off along with the cornice.
Dry fitting is mandatory
Before applying the adhesive, the strips are laid out along the walls, joints and corners are marked, and each piece is labeled. This procedure reduces the risk that a well-fitted element ends up on the wrong wall.
Joints of two-meter strips: why they cannot be distributed randomly
The M1702 joint runs across a smooth surface. The ornament does not distract from the connection, so the line must be neat.
Do not place a short extension piece in the center of the wall
A 2 m strip on a 4.2 m wall leaves a 200 mm extension piece if two full strips are used. A short piece in the center or near a prominent corner creates two close joint lines. It is better to redistribute the segments, for example, use three parts of a more balanced length or move the joints to less noticeable areas.
Align the joints with the lighting
Side light emphasizes unevenness. If a linear light fixture runs along the wall or a window provides grazing light, the joint preparation must be especially thorough.
Don't skimp on the test piece
One short trial shows how the material cuts, how the adhesive behaves, and how the seam looks after painting. This is cheaper than fixing the room's perimeter.
Internal and external corners
An inside corner is found in almost every room. An outside one—on columns, protrusions, and niches. Corners require precise profile transfer, because the 70 mm height makes any mismatch noticeable.
The room's corner is not always 90 degrees
Even in a new apartment, walls can deviate. Cutting all pieces at a template 45 degrees without measuring is risky. First, take the actual angle, make a test joint, and only then trim the final pieces.
The external corner is vulnerable
The protruding section receives mechanical impacts. Although the M1702 projection is small, the external corner must be executed precisely and protected with finishing. In a high-traffic area, it's useful to check whether a door, furniture, or long items might hit it.
Corners are painted after seam preparation
If the strips are painted separately and then joined, the joint may remain visible. The finishing sequence depends on the technology, but the final surface should look continuous.
M1702 under a stretch ceiling: first the structure, then the decorative profile
A stretch ceiling fabric cannot be used as a regular solid base. The cornice must be attached to the wall or a prepared structure according to the project. Before ceiling installation, it's advisable to determine the profile height, the junction line, and the position of embedded elements, if they are needed for other components.
Check:
-
distance between the top of M1702 and the fabric;
-
possibility of painting without contaminating the ceiling;
-
installation sequence;
-
location of the curtain niche;
-
access to the LED backlighting;
-
the junction with ventilation grilles;
-
temperature and installation limitations of the selected materials.
You should not try to hide a stretch ceiling error with a single decorative trim without consulting the installers. A cornice can frame the transition, but it cannot fix a weak mounting or incorrect geometry of the fabric.
Ceiling composition: when one M1702 is enough, and when it is not
M1702 can be the only decorative line. In a modern interior, this is often enough: smooth walls, a level ceiling, simple doors, and minimalist furniture do not require additional ornaments.
But in some projects, the ceiling needs further development.
Cornice only
Suitable for a small room, a calm color scheme, and an interior without classical details. The perimeter remains clean.
Cornice plus rosette
The center of the ceiling gets an accent, while M1702 holds the composition at the edges. The rosette is chosen according to the size of the light fixture and the room, without aiming to make it as large as possible.
Cornice plus molding frame
An inner contour is created on the ceiling. For M1702, this scheme requires a careful ratio between the width of the frame and the perimeter. Too rich inner decor may conflict with the minimalist cornice.
Cornice plus light
If you need reflected light, it's better to choose a special profile or a separate light box. M1702 cannot be turned into an LED cornice just because it is thin.
Twenty-five mistakes when buying a narrow ceiling cornice
Mistake 1. Ordering M1702 for hanging curtains
The card does not include a load-bearing rail, runners, or load calculation. A separate system is chosen for fabric.
Mistake 2. Considering 70 mm as the shelf width for curtains
This is the size of the decorative profile. It does not describe space for hooks or guides.
Mistake 3. Taking 18 mm as a ready-made niche for an LED strip
A small projection does not confirm the lighting scenario. A drawing of a special LED profile is needed.
Mistake 4. Choosing a product only by a large photo
Without scale, the profile seems more massive. A paper mockup on the wall gives a more honest representation.
Mistake 5. Not comparing M1702 with neighboring models
In a large room, the profile can get lost. The cornice category allows choosing a different cross-section.
Mistake 6. Dividing the perimeter by two without a layout map
Mathematically, there is enough material, but joints can end up in unfortunate places.
Mistake 7. Not buying extra stock
One incorrect cut can stop the installation of the entire room.
Mistake 8. Counting all corners as right angles
Actual geometry differs from the ideal 90 degrees.
Mistake 9. Gluing onto peeling paint
The profile will come off along with the weak layer.
Error 10. Not checking the order of work with a stretch ceiling
You can damage the fabric or lose access to the adjoining area.
Error 11. Placing the seam in the center of the main wall
A smooth profile emphasizes the joint.
Error 12. Using random glue
The composition must be compatible with both polystyrene and the base.
Error 13. Not providing materials for joints
Glue alone is not enough for a clean continuous line.
Error 14. Leaving the profile without finishing if the project requires painting
Installation seams and cut areas will remain visible.
Error 15. Painting without a test patch
Color and gloss can emphasize imperfections.
Error 16. Not accounting for the top of a built-in wardrobe
The cornice may hit furniture or end with a random cut.
Error 17. Confusing a decorative profile with a box
M1702 does not create a volumetric structure for utilities.
Error 18. Hiding a cable behind it without a project
Electrical and low-current lines must be laid safely and maintained.
Mistake 19. Not checking external corners
On a protrusion, the profile receives impacts and requires precise fitting.
Mistake 20. Mixing different cornices on one perimeter without a transition node
The difference in height and overhang will create a step.
Mistake 21. Using M1702 in a formal hall just because it is called a cornice
The scale of the room may require a larger profile.
Error 22. Installing short remnants in a row
A large number of joints worsens the appearance and increases the amount of finishing work.
Error 23. Not labeling the parts after fitting
The pieces look similar, but they are designed for specific walls and corners.
Error 24. Ordering exactly by perimeter without accounting for doorways and niches
The cornice route may be longer or shorter than the total perimeter of the room.
Error 25. Buying before approving the curtain and lighting scheme
Later it may turn out that the profile conflicts with a niche, track, or backlighting.
Who M1702 is suitable for
For the owner of a modern interior
The smooth profile supports straight lines, calm facades, and minimal decor.
For a buyer who needs a small projection
A depth of 18 mm is convenient in a narrow room, hallway, or next to built-in furniture.
For a designer creating a monochrome ceiling
The cornice can be included in the wall or ceiling paint color to create a soft architectural boundary.
For a renovation crew with a precise layout map
Two-meter slats are easy to distribute if the angles and joints are known in advance.
For a project where curtains are mounted with a separate system
M1702 does not have to hold the fabric and can work only as decor, which matches its purpose.
It's better for someone to choose a different option
For the curtain rod buyer
A load-bearing rail, rod, or profile system is needed.
For a project with hidden lighting
You should consider L1902M or another model with a confirmed lighting function.
For a very large room
A height of 70 mm and a projection of 18 mm may be insufficient. A mock-up and comparison with large profiles are needed.
For a classic interior with rich molding
The smooth M1702 may look too neutral. The curtain rod category contains more voluminous options.
For an uneven base without preparation
A narrow profile will not cover large unevenness. First, level the wall and ceiling.
Practical Selection Scenarios
Looking for a curtain rod above the window for tulle
M1702 is not suitable as a support system. Choose a curtain construction, and consider the decorative profile separately.
Need a neat line in the bedroom
Make a 70 mm template, hold it against the wall, and assess the scale. If the line reads well, calculate the perimeter and choose M1702.
Want to hide the LED strip
Do not buy M1702 without a diagram. Compare it with L1902M and check the special niche.
There is little space in the hallway
The 18 mm offset may be convenient. Check doors, cabinets, and external corners.
Need to cover an uneven joint between the wall and ceiling
M1702 can shape the line, but it will not fix strong waves. The base needs to be prepared.
Room perimeter is 14 m
Seven planks give exactly 14 m, but without
Acceptance M1702: what must match the order
| Check | What to check | Why this is important |
| Article number | M1702 | Adjacent models have different sizes |
| Size | 70 × 18 × 2000 mm | An error will change the scale and joints |
| Quantity | According to the layout map and reserve | Shortage will stop installation |
| Surface | Without deep dents and contamination | Defects will appear after painting |
| Straightness | Along the entire length | Wave will complicate installation |
| Edges | Without severe chips | Edges participate in joints |
| Batch | Same model and geometry | Simplifies assembly of a single line |
| Installation materials | Separately per specification | They should not be considered automatically included |
After acceptance, the strips are stored in conditions that do not cause deformation or damage. Do not lean long elements against a wall in a passageway or place heavy objects on them.
How to avoid confusing M1702 with similar products before adding to cart
The catalog of decorative profiles is organized by size, shape, and purpose. Several white two-meter cornices in photos may look almost identical, especially if the images are taken without furniture and human scale. The error is discovered on site: one profile is too deep, another too low, a third is designed for backlighting, and a fourth does not match the chosen ceiling line.
Compare not the name, but three numbers
For M1702, the key entry is 70 × 18 × 2000 mm. When comparing with a neighboring model, write down its height, projection, and length side by side. A difference of a few millimeters in depth can noticeably change the shadow, and an additional 20–30 mm in height changes the scale of the entire perimeter.
Do not transfer properties of a similar card to M1702. If a neighboring cornice is called a model for backlighting, this does not mean that all HI WOOD profiles have the same function. If one profile is shown in a classic interior, M1702 does not thereby gain relief or increased projection.
Distinguish a ceiling cornice from a molding
Molding more often works on the plane of a wall or ceiling: it creates frames, divides the surface, and forms internal contours. A ceiling cornice decorates the junction of two planes itself. Some profiles look visually similar but differ in seating. You cannot turn a random molding and assume you got M1702: the glue area, angle, and face side must match the drawing.
Do not confuse a decorative cornice with a ceiling plinth by their common household name.
In colloquial speech, ceiling plinth and cornice are often called the same. For a buyer, it is more important not to argue about the term but to check the cross-section. M1702 has a specific geometry of 70 × 18 mm. If you need a nearly invisible seam a few centimeters wide, this profile may turn out to be taller than expected. If you need a large architectural shelf, its projection, on the contrary, will be too small.
A curtain system is recognized by its functional details.
For a curtain rod, the number of rows, method of fabric movement, type of mounting, and allowable load must be clear. The M1702 lacks these features. Therefore, even a photo of the profile above the window does not make it a curtain system. Possibly, the guide is installed separately and simply did not make it into the frame.
A profile for lighting is checked from the back side.
The main difference is not in the front photo but in the seating geometry. An LED strip needs space, light direction, and the ability to hide the source from direct view. For M1702, such a function cannot be inferred from its small projection. For a lighting project, compare the drawing with L1902M and only then choose the product.
Calculation of M1702 for multiple rooms: one apartment is not one common perimeter.
When ordering a cornice for a bedroom, hallway, kitchen, and living room at once, there is a temptation to add up all the meters and divide the sum by two. Such a calculation shows the total volume but may give an incorrect number of planks. Leftovers from one room do not always transfer to another: wall lengths, joint locations, installation order, and even finish color differ.
Example of a general summary sheet
Let's say the apartment has four zones:
| Room | Cornice route | Basic division by 2 m | What to check |
| Bedroom | 15.6 m | 7.8 strips | Four internal corners and a wall of 4.2 m |
| Corridor | 9.4 m | 4.7 strips | Many short sections and two external corners |
| Kitchen | 11.8 m | 5.9 strips | Break above cabinets and area by the window |
| Living room | 18.2 m | 9.1 planks | Long walls and visible joints |
Simple summation gives 55 m and 27.5 planks, i.e., at least 28 pieces without reserve. However, rounding each room separately already gives 8 + 5 + 6 + 10 = 29 planks. After the layout map, the quantity may increase further, because the 300 mm remainder from the bedroom will not replace the 850 mm segment in the hallway.
Separate batches by finish
If the bedroom is painted in the wall color and the living room in the ceiling color, leftovers after painting cannot be considered universal spare parts. It is better to label planks by room in advance and keep an uncut reserve until installation is complete.
First the main walls, then short sections
When cutting, long visible parts are made from the most whole planks. Short sections above doors and in niches are made from leftovers. The reverse order leads to a situation where there is enough material by meters, but for a 3.8 m wall only pieces of 600–900 mm remain.
Count control samples separately
A test corner, a test joint, and a paint sample also consume material. If they are cut from a plank already allocated for finishing parts, the map will no longer add up. In a large apartment, control material should be included as a separate line item.
What is not included in the M1702 purchase automatically
The buyer sees a finished photo of the ceiling and may perceive it as a kit. In a real order, the profile is just one element. Before payment, it is useful to separate the product, consumables, work, and third-party systems.
Curtain rail is not included
M1702 is not equipped with a guide for tulle or curtains. The curtain system is calculated separately. If it is hidden in a niche, the niche dimensions must be known before installing the decorative cornice.
Lighting is not included
LED strip, aluminum profile, diffuser, wiring, power supply, and control belong to a separate lighting design project. They cannot be added to M1702 by default.
Adhesive and joint compound are not considered part of the plank
Even if the card shows accompanying installation compound, it must be added to the cart as a separate item and its consumption calculated. Adhesive for bonding and material for joints may serve different purposes.
Paint and surface preparation remain separate stages
A photo of a white product does not mean that finishing will not be needed after installation. Joints, corners, and cut areas must become a single whole with the profile. The preparation method is chosen according to the material instructions and the condition of the site.
Installation should not be considered included
Cutting, marking, bonding, joint treatment, and painting are works. Their cost and composition are specified separately. This is especially important when comparing two offers: a lower price for planks does not mean a lower cost of the finished ceiling perimeter.
Estimate of the finished perimeter: you need to count not only the strips
It is convenient to divide the commercial calculation into five groups.
| Group | What to include | Why you cannot skip |
| Main product | M1702 strips and reserve | Without a reserve, one mistake will stop the work |
| Installation | Glue, materials for connections, temporary fixation | The profile must hold and form a straight line |
| Preparation | Leveling, cleaning, priming if necessary | A weak base reduces reliability |
| Finishing | Materials for seams, painting, tools | A smooth surface makes defects noticeable |
| Logistics | Delivery, lifting, storage of two-meter parts | Long planks are easy to damage before installation |
This calculation helps to honestly compare M1702 with another profile. For example, a larger cornice may cost more per plank but require the same number of joints. And a profile for lighting adds an electrical part, even if the perimeter length does not change.
Control of finished installation: what to accept before final payment for work
The ceiling cornice is inspected not only from a ladder. The main impression is formed from the floor, under normal lighting, and from the places where a person is most often located.
The line must be continuous
Scan the perimeter with your eyes. The cornice should not unexpectedly rise, fall, or change its projection. If the ceiling is uneven, the adopted line should look deliberate and consistent throughout the room.
Joints should not create a step
At the connection of two planks, check the front surface, the upper and lower edges. Even a well-puttied seam gives itself away if one part protrudes by a fraction of a millimeter.
Corners must preserve the profile
The inner corner should not turn into a shapeless mass of finishing compound. The outer one should not become a sharp random protrusion. The geometry of M1702 continues through the connection.
The paint should have a uniform sheen
Local seam repairs sometimes differ in the degree of matteness. Check the surface under raking light. A difference in sheen can be more noticeable than a difference in color.
The curtain system must operate independently
Open and close the curtains after all work is completed. The fabric, runners, and brackets should not touch M1702. If the decorative profile restricts movement, the window unit is designed incorrectly.
The lighting must not reveal the light source
If the room has a separate light cornice or niche, check it in the evening. M1702 must not accidentally block the light flow, create a sharp shadow, or hinder access to the equipment.
The remaining material must be kept
The signed segment M1702 is useful as a sample of color, profile, and repair. It is stored in a way that does not damage the geometry. For an apartment with multiple finishing colors, a sample of each system is kept.
Ready-made request to the manager before ordering
To avoid discussing the product in general terms, you can send a short specification:
We need a decorative ceiling cornice M1702 HI WOOD measuring 70 × 18 × 2000 mm for finishing the transition between wall and ceiling. The curtain rod is installed separately. The total route is ___ m, internal corners — ___, external corners — ___, long walls over 2 m — ___. Please confirm the number of planks according to our layout, select compatible mounting adhesive and materials for joints, and calculate delivery of two-meter products. Lighting is not planned / planned separately, so please compare M1702 with L1902M if necessary.
Such a request shows the seller the real task. It reduces the risk that the word "cornice" will be understood as a curtain structure, and also helps to immediately compile a full estimate.
FAQ: answers before purchasing M1702
Can M1702 be used as a curtain rod?
No, the product card does not state the function of hanging curtains. This is a decorative ceiling profile for the transition between wall and ceiling.
Why is the product called a cornice?
In architecture, a cornice refers not only to a curtain structure, but also to a decorative protruding profile under the ceiling.
Does the M1702 have runners and hooks?
Such a configuration is not specified. Do not expect curtain hardware to be included in the product item.
What is included in one M1702 item?
One M1702 rail model, 2000 mm long. The rest of the configuration needs to be checked separately.
What do the dimensions 70 × 18 × 2000 mm mean?
These are the profile dimensions A × C × L. The exact orientation of the sides needs to be verified against the drawing.
Is seventy millimeters the width for the curtain?
No. This is the size of the decorative section, not a shelf or fabric guide.
Can the M1702 be installed above a window?
Yes, as a decorative profile under the ceiling. The curtain should be attached to a separate calculated system.
Is the M1702 suitable for a minimalist interior?
Yes, its smooth geometry and small projection align well with laconic finishes.
What does the profile look like in a small room?
It creates a noticeable strip 70 mm high and a slight shadow due to the 18 mm projection. The exact scale is best checked with a paper mockup.
Will the M1702 suit a high ceiling?
In a very large space, it may look too thin. Compare it with larger models in the category.
Can an LED strip be hidden behind the M1702?
It is impossible to promise such a result without a drawing and installation diagram. A special niche in the M1702 card is not stated.
Which cornice should I choose for lighting?
Consider L1902M or another profile whose card explicitly states its purpose for lighting.
Can M1702 be glued to a stretch ceiling?
The stretch fabric should not be used as a regular base. Installation is designed on the wall or a prepared structure together with ceiling installers.
What glue is needed?
A compound compatible with polystyrene and the specific base is needed. The choice is confirmed according to the product instructions and installation conditions.
Does M1702 need to be painted?
The finish depends on the project and the product card. Joints and cut areas usually require a uniform finish.
How to calculate the number of planks?
Divide the route length by 2 m, round up, and adjust the result according to the layout map and corners.
How many slats are needed for a room 4 × 3 m?
The perimeter is 14 m, so seven planks are needed without reserve. For actual installation, a margin is provided.
Can leftovers be used on another wall?
Yes, if the length fits and the joint is positioned well. The remnants are distributed on the layout plan.
Where is the best place to place joints?
In less visible areas, away from the center of the main wall and the sliding side light.
Are all corners cut at 45 degrees?
No. First, the actual angle of the room is measured and a test joint is made.
Is M1702 suitable for the kitchen?
Yes, if the profile matches the style and a compatible installation and finishing system is used. The junction with cabinets needs to be designed in advance.
Can it be installed in the bathroom?
Wet room conditions require separate verification of the substrate, adhesive, joints, and coating. The material name alone is not enough.
Will M1702 work for the hallway?
The small overhang of 18 mm is convenient for narrow spaces. Check doors, cabinets, and external corners.
Can M1702 be connected to another cornice?
Only through a well-thought-out transition. Different heights and projections will create a step.
Is a ceiling rosette needed?
No, it is additional decor. It is only needed based on the ceiling and light fixture composition.
Can I order a single strip for a sample?
The card shows a product item of one length. The actual ordering availability is checked during checkout.
How can I tell if the cornice is too narrow?
Make a template 70 mm high on the real wall and compare it with a larger profile.
Is M1702 suitable for hiding wires?
It cannot be used as a cable channel without a special project. Electrical lines must be laid safely and maintained.
Can a garland or decor be attached to M1702?
Additional loads are not declared. Do not puncture or load the profile without confirmation.
How to distinguish M1702 from L1902M?
M1702 has dimensions 70 × 18 × 2000 mm. L1902M has 100 × 33 × 2000 mm and a lighting scenario is declared.
Where can I see other sizes?
Open the category of decorative cornices made of HI WOOD polystyrene and compare the product cards.
What should I write to the manager before ordering?
Specify the article number M1702, wall lengths, calculated quantity, base type, need for glue, and installation questions.
Final check before payment
The purchase is ready to be finalized if you can answer nine questions:
-
Do you need a decorative profile, not a curtain system?
-
Has the 70 × 18 mm size been checked on the mockup?
-
Are the two-meter slats distributed across the walls?
-
Have the joint locations been chosen in advance?
-
Have the internal and external corners been measured?
-
Is the base solid and level?
-
Are the adhesive and joint materials compatible with polystyrene?
-
Are the lighting and curtain system designed separately?
-
Is the delivery of long strips calculated?
An unknown answer does not mean that M1702 is not suitable. It shows which part of the project needs to be clarified before purchase.
M1702 is bought for the architectural line, while curtains are entrusted to a separate system.
The main mistake is born from one word. The buyer sees "cornice" and expects a guide for curtains, although M1702 belongs to decorative ceiling profiles. Its purpose is not to hold fabric, but to complete the transition from wall to ceiling.
The size 70 × 18 × 2000 mm reveals the character of the model. The height creates a noticeable strip, the small projection maintains lightness, and the two-meter length allows calculating the perimeter and distributing joints. The profile is especially appropriate in minimalist bedrooms, hallways, kitchens, studies, and modern living rooms, where a massive relief would look heavy.
Before ordering, three projects need to be separated: decorative perimeter, curtain system, and lighting. For the first, M1702 is suitable. For the second, a load-bearing structure is chosen. For the third, a special profile, such as L1902M, is checked. Then the strips are calculated, mounting materials are added, and delivery is coordinated.
STAVROS company allows you to go through this path sequentially: open the M1702 card, compare HI WOOD cornices, select a model for lighting, add a rosette or other decor to the ceiling, and compile a mounting estimate. Such a choice protects against the most expensive mistake — buying a beautiful two-meter strip and only after receiving it discovering that curtains cannot be attached to it.