Article Contents:
- The project starts with a common axis and the purpose of the post
- Each part is assigned a function in the assembly
- The overall height is calculated taking joints into account
- Compare the diameters at both ends
- The end surface is checked separately from the silhouette
- Centering and joint strength are checked separately
- A composite profile should have a clear rhythm
- Mini balusters are selected taking shelf levels into account
- A turned leg is used as the lower element only after the joint has been checked
- A trial assembly is carried out before final finishing
- Marking preserves the order and the selected orientation
- The material is selected for the entire composite element
- Finishing before or after assembly is chosen based on the joint design
- Before a production run, one fully completed assembly is required
- The schedule must show the composition of each post
- Repeatability is checked on finished posts
- When a ready-made support is simpler than a composite one
- Where to buy ready-made turned wooden parts for assembly

Two elements with the same maximum diameter may not align at the joint: one ends with a wide face, the other with a narrow neck. That is why finished turned wooden parts for a composite post are compared by their mating surfaces and common axis. A beautiful profile on each individual part does not yet guarantee a neat connection.
For the workshop, the task is to determine the composition of the assembly in advance, check its height, assemble a trial set and approve the finish. Then the base, middle sections and top are perceived as one designed post, and their position can be repeated on subsequent pieces.
The project begins with the common axis and the purpose of the post
First, determine where the composite element is located in the furniture and what function it performs. A decorative column on the facade, a post between shelves and a support under the cabinet may look similar, but they work under different conditions. For a load-bearing assembly, the entire structure and its joints are checked; the appearance of the turned parts does not confirm the permissible load.
On the drawing, mark the common axis, the upper and lower boundaries, the position of the fasteners and the maximum permissible diameter. For an etagere post, additionally show the shelf levels and the adjoining areas. These lines set the constraints within which ready-made elements are selected.
It is useful to determine right away which dimensions cannot be changed. If the cabinet height is approved, adding a decorative ring must be accounted for within the existing assembly. If a door opens nearby, the maximum profile protrusion is checked relative to its movement, not only on a stationary facade.
The common axis must have a clear reference to the furniture: for example, to the center of the mounting plate or to a specified distance from the shelf edge. Without such a reference, you can assemble a straight post that ends up offset relative to the adjacent one. The coaxiality of the parts and the correct position of the entire assembly are two separate checks.




Each part is assigned a function in the assembly
The future post is divided into parts according to their purpose. This approach helps remove unnecessary elements and understand where a profile transition is really needed and where a single ready-made product is sufficient.
| Assembly part | Its purpose | What to check when selecting |
|---|---|---|
| Base | Form the lower transition and the junction point | The platform, the lower fastening and the diameter of the next part |
| Main turned part | Set the character and proportions of the post | Height, profile and both ends |
| Intermediate part | Separate the sections or align the transition | Its own height, fit and position in the sequence |
| Top finish | Complete the composition or connect it to the furniture | The top surface, the protrusion and access to the fastening |
В STAVROS furniture configurator ready-made elements can be selected for such tasks. However, belonging to the same section does not replace checking the specific dimensions and the method of connection.
It is important to distinguish between parts connected sequentially end-to-end, decorative elements on a common rod, and posts separated by shelves. These schemes add up heights and transmit forces differently. A hole in the center of a part also does not mean that it is intended for any rod or fastener. The construction is determined from the drawing of the selected version, then transferred to your own assembly.
Our factory also produces:
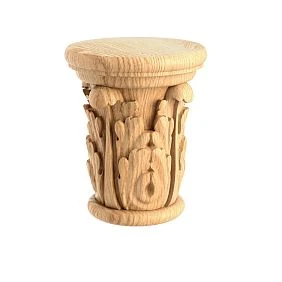
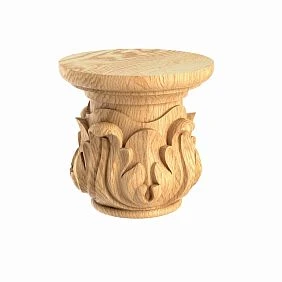
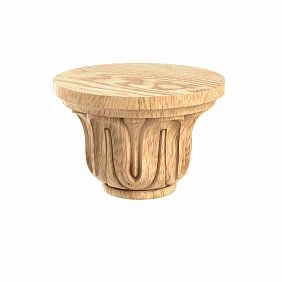
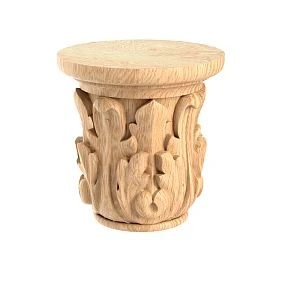
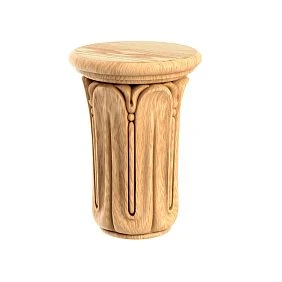
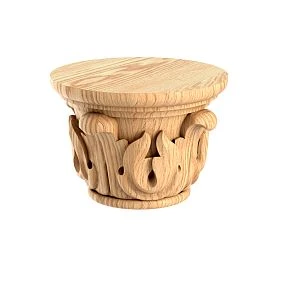
The overall height is calculated taking connections into account
Catalog lengths can be summed only after determining which surfaces they are measured from. If the dimension includes a tenon that sinks into the adjacent part during assembly, its protrusion must not be counted again as the visible height of the post.
For sequential assembly, a clear rule is used: the overall height equals the sum of the full lengths of the parts minus mutual overlaps and plus individual elements that actually increase the size of the assembly. If the documentation already gives the installed height of each part, subtracting again would be an error.
A conditional example: the lower part has a full length of 100 mm, the two middle parts are 80 mm each, and the upper part is 60 mm. The sum is 320 mm. If each of the three connections provides a 10 mm overlap and it is already included in these full lengths, the assembled result will be 290 mm: 320 minus 30. This is a calculation example, not a description of the fastening for a specific item.
The thickness of a shelf, washer or base pad is taken into account according to its actual position. A part recessed into an adjacent surface does not necessarily add its full thickness. No arbitrary "connection allowance" is introduced: each term must correspond to an actual section of the drawing.
Get Consultation
Diameters at both ends are compared
A composite post requires at least the part height, the largest diameter, and the dimensions of the upper and lower joints. If an axial hole is provided, its diameter, depth, and position relative to the outer profile are additionally checked. These parameters may differ between versions of the same product.
Two elements with the same maximum diameter can have completely different ends. In an assembly, this will produce an unexpected ring, step, or too narrow a contact. Therefore, looking only at the widest collar is not enough.
| Joint | Possible result | Condition for a clean transition |
|---|---|---|
| Diameters match | Continuous outer contour | Axes and the intended edge shape match |
| Upper part is narrower than the lower one | Pronounced step | The ledge is specified by the design and is uniform around the circumference |
| The upper part is wider than the lower part | Widening toward the end | The bearing, proportions, and method of connection are coordinated |
Even equal diameters do not guarantee a smooth profile. One surface may meet the joint almost vertically, while the other meets it at a noticeable angle. This produces a break in the line. It is either accepted as a decorative boundary or a different pair is chosen. The purpose of the joint must be clear before the parts are processed, rather than explained after an accidental ledge appears.
The end surface is checked separately from the silhouette
At the end, the mating plane, contact area, condition of the edge, and presence of a designed seat are assessed. A decorative finish is not necessarily a prepared mounting surface. It cannot be assumed that any sphere, disc, or turned element can be joined end-to-end with a neighboring one without additional design work.
For a flush joint, the perpendicularity of the bearing surface to the specified axis is important. If the end is tilted, the part may deviate when tightened, even though its center is marked correctly. A gap on one side of the connection is first regarded as a sign of a possible seating error, not as a reason to tighten the fastener harder.
It is also checked that the connection closes along the required surfaces. A tenon or fastener that is too long may bottom out inside before the ends come together. Externally this looks like a loose joint, but sanding the face edge does not eliminate the cause.
If rework is needed, its admissibility, the method of securing the part, and the effect on overall height are determined in advance. Material removed from the end changes the size of the assembly. Fitting a single unit cannot be silently transferred to a series: the corresponding operation must appear in the work record and be verified on the remaining components.
Centering and joint strength are checked separately
The assembly axis can be set by a fit, a tenon, a dowel, a rod, or another joint provided by the design. Its choice depends on the purpose of the unit and the geometry of the parts. The mere presence of a central fastener does not guarantee that the outer profiles will align: the hole may be offset or angled.
If the holes are made by a workshop, the marking is tied to the selected datum surfaces, and the drilling direction is controlled with a suitable fixture. A shaped part cannot be reliably set up using only a conveniently placed bead. The fixture must hold it in the specified position and preserve the surface.
An overly tight fit is not corrected by forcibly tightening the entire assembly. An overly loose fit, by contrast, may allow the parts to shift before final fixing. The permissible joint dimensions are specified in the documentation; a universal clearance for all species, diameters, and fasteners is not suitable here.
Gluing two end faces is also not considered sufficient justification for the strength of a post. The joint design, operating conditions, and requirements of the selected adhesive are evaluated. Mounting and finishing materials are selected after this decision. A neat seam confirms the quality of the external joint, but by itself says nothing about the permissible load on the furniture.
A composite profile must have a clear rhythm
After checking the joints, the overall silhouette is evaluated. Several expressive details placed in a row may compete with one another: a large sphere, a wide bead, and another strong thickening will end up next to each other. Each part is interesting on its own, but the post loses its clear form.
A practical technique is to choose the main turned part and use the neighboring elements as calm transitions. This is not a mandatory rule for every style. It helps to check whether the composition has a main accent and whether the other details support its scale.
Look at the distances between the thickenings, the length of the necks, and the position of the joints. Two close beads may be perceived as an accidental doubling of the profile. Sometimes it is enough to remove the intermediate ring, but the height must then be recalculated and the mating diameters rechecked.
The silhouette is assessed as part of the furniture, from a normal viewing distance. A profile that reads well in a large photograph may almost disappear under a shelf or appear overly active next to a carved facade. For a preliminary comparison, a flat layout at a single scale is useful. The final decision is made after a three-dimensional trial fitting, since shadows and protrusions change the perception of the transitions.
Mini balusters are selected taking into account shelf levels
Wooden mini balusters for shelves and shelving units can serve as repeating sections between horizontal components. In such a project, it is important to preserve not only the overall appearance of the posts but also identical shelf support levels at all corners of the furniture.
First, determine what is included in the height of each section: the visible part of the baluster, its seating depth, and the thickness of the horizontal element. If the shelf is located between two parts, it is included in the overall dimension chain. If the post passes through a hole in the shelf, the dimension is calculated differently. Mixing these schemes produces an error even with identical parts.
In the category round turned balusters specific dimensions and the intended purpose of the version must be checked. Belonging to the baluster category does not automatically make a product suitable for a small furniture section.
The repeating profile is coordinated with the usable shelf space. A wide thickening may interfere with placing items, even though the external dimensions of the shelving unit remain unchanged. In addition, a decorative row by itself does not provide rigidity to the furniture. The method of attaching the shelves, stability, and resistance to rocking are considered within the structure as a whole, rather than derived from the number of balusters.
A turned leg is used as a lower element only after checking the joint
Ready-made Turned furniture leg sometimes becomes the lower part of a composite support. In that case, its top platform must fit not only the cabinet body, as in its original application, but also the new element being connected.
Check the size of the platform, the location of the holes, and the sufficiency of material in the area of the future fastening. The external transition also changes: the top of the leg, which was previously hidden under the cabinet body, may now be exposed. An untreated or structurally complex area is not always suitable for a visible joint.
Adding a section increases the height and changes the operating conditions of the support. The suitability of an individual leg for one structure cannot be transferred to any extended assembly. It is especially important to check the connection under lateral forces and the overall stability of the furniture.
If the task can be solved by choosing a different ready-made height, this option is compared with the composite one. An additional part is justified when it has a clear function or a necessary compositional role. Increasing the height with a random insert simply because its diameter approximately matched means leaving the joint design to the assembly stage. Before purchasing the remaining parts, such uncertainty is best resolved using the drawing and a sample.
The test assembly is carried out before final finishing
The first set is assembled without final fixing, in the order specified by the project. Such a trial fitting allows checking the fits, height, access to fasteners and the external transition before applying the coating. An unstable tall assembly is held with a suitable device rather than left standing freely on a small end.
First the joints are checked individually, then the whole unit. The parts must occupy the specified position without correcting skew by excessive tightening. If, after joining the next part, the axis changes direction, its fit, end and fastening are investigated.
The deviation is checked in two mutually perpendicular directions along the datums selected in the drawing. A single side view can hide a displacement in another plane. Different decorative diameters are not used as identical measuring surfaces: a ruler applied to them will predictably show a different distance.
After that, the overall height and the position of characteristic transitions are measured. The post is trial-fitted to the upper and lower units of the furniture. During disassembly, the sequence of parts is preserved and any modifications found are recorded. The test assembly ends not with the impression of "seems straight", but with a clear result: which dimensions are confirmed, which surfaces require processing, and what must be repeated before the final joint.
Marking preserves the order and the selected orientation
After the trial fitting, each set is assigned a number, and the parts are assigned positions in assembly order. Additionally, the top, bottom and mutual rotation are marked if it is important for the wood grain pattern or the location of the fastening. All markings must be unambiguously legible after disassembly.
For example, the entry "Post 2, part 3, top" refers to the workshop's internal records. The supplier's item code is kept alongside in the list so as not to confuse the position number with the name of the purchased product. Elements that look identical may have different hole sizes or prepared ends.
The marking is placed on a permissible hidden surface or a separate tag is used. The trace must not contaminate the area under a transparent finish, interfere with gluing, or require removal together with a layer of wood. A sticker on a seating surface can also create an extra operation before joining.
Matched sets are stored separately. This is especially useful for tinting: during test fitting, a combination of shades and grain directions has already been found that is easy to lose by putting all identical parts into one box. If an element is replaced after treatment, the new instance is checked again in its specific rack. The same article number preserves the part type, but does not eliminate the need to check actual fit and appearance.
The material is selected for the entire composite element
Beech or oak is determined with consideration for how the finished assembly will look. Under a clear finish, the transition between species usually reads as an independent change in the pattern. If such a contrast is not intended, the overall species and selection requirements are best established before purchasing the parts.
Even several elements of the same species do not automatically form a continuous grain pattern. They may differ in shade, texture direction, and blank composition. In this case, the integrity of the composition is achieved through coordinated proportions and selection, not by promising to turn a composite rack into a visually seamless piece of wood.
When choosing the finish, consider the quality of wooden products for finishingRequirements for enamel and for tinting differ; the degree of surface preparation is also specified separately. The most visible areas of all parts are compared together, in the intended working position.
Under opaque enamel, the difference in base color may become irrelevant, but the texture and quality of preparation remain. Therefore, the material and finish are specified for each item, rather than with a single vague entry of “wood.” If a unit contains a metal rod or another base, its structural role is described separately from the material of the outer decorative parts.
Finishing before or after assembly is chosen based on the design of the joints
There is no single correct order for all composite racks. The decision depends on access to surfaces, the type of fastening, the need for subsequent disassembly, and the finishing system used. A control test fitting is performed in advance in any of the options.
| Work sequence | When it is considered | Points to watch |
|---|---|---|
| Finishing individual parts | After assembly, part of the relief will become hard to reach | Protection of joints and glue areas, color matching |
| Finishing the assembled unit | The design allows final assembly before painting | Access to recesses and no moving joints under the overall coating |
| Partial assembly and finishing | The unit consists of independent assembly parts | A clear boundary of operations and protection of finished surfaces |
If parts are painted separately, the coating must not accidentally reduce the fitting clearance or get into the threads. Gluing surfaces are prepared according to the adhesive requirements: finished enamel does not replace clean wood where the joint is designed for gluing.
When finishing after assembly, the causes of gaps and misalignments are eliminated beforehand. Paint does not correct geometry and does not turn a movable joint into a fixed one. A single sample of the result is approved for all parts, and the processing sequence is recorded. The timing of final assembly and packaging is determined by the readiness of the coating, not only by the absence of tackiness on the surface.
Before the series, one fully completed assembly is needed
Testing a single part does not show how the entire post will look. For verification, a complete composite element is assembled with the intended transitions, fastening and finishing. On it, the height, axis, joints, position of the main thickened areas and combination with the furniture are evaluated.
The check is carried out in stages. Before final fixing, the fits and geometry are confirmed. After finishing, the color and gloss of different parts are compared, and the recesses and transition areas are inspected. If the preparation or assembly order had to be changed during the process, the working record is corrected before the remaining sets are manufactured.
The finished sample is kept together with the project designation and documentation version. Photographs are useful for recording the general appearance, but the exact dimensions and composition of the assembly remain in the specification. A single photograph is not enough to reproduce it without understanding what is inside the joints.
If necessary, availability is clarified in advance product samples and individual parts. A material sample helps to choose the finish, but does not replace a full trial post. Its further purpose is also determined: whether it will be included in the order or remain a workshop reference. This determines the number of components that need to be purchased for the series.
The specification must show the composition of each post
The entry “wooden post — four pieces” is suitable for designating a finished assembly, but it does not describe its procurement. For kitting, all included parts and the quantity of each item per post are listed.
Let us continue with the conditional scheme with a base, two identical middle parts, and a top. For four posts, the calculation will be as follows:
| Position from bottom to top | Per post | Number of posts | Total parts |
|---|---|---|---|
| Bottom element | 1 | 4 | 4 |
| Middle repeating element | 2 | 4 | 8 |
| Top finish | 1 | 4 | 4 |
| TOTAL | 4 | 4 | 16 |
In the working document, next to each line, enter the actual item code, size version, material, surface preparation, and finish designation. Fasteners and other joint components are accounted for separately so that they do not disappear from the order between the lines of wooden parts.
A diagram with parts spaced along the axis is added to the list: it shows the order, direction, and location of repeats. It marks the top and bottom, seating points, and reference dimensions. Such a drawing is especially useful when another craftsman assembles it. They should see the joining sequence rather than reconstruct it from the list of names.
Repeatability is checked on finished posts
After manufacturing a series, not only individual components but also assembled units are compared. Overall height, the position of transitions, alignment of axes, and the condition of the upper and lower platforms are checked. Permissible deviations are specified in the project taking into account the purpose of the furniture; an arbitrary single norm for all posts is not suitable.
Small differences in several parts and fits can accumulate in the overall dimension. At the same time, two posts of the same height may have different levels of decorative rings. If they stand next to each other or support shelves in intermediate sections, such a difference becomes noticeable and may affect assembly.
For comparison, use identical base surfaces and a single measurement sequence. Orient the posts the same way so that differences in profile or light direction are not mistaken for a defect. Compare color and gloss separately within a group, since differences between parts are often clearer next to an adjacent set.
After installation, check that the furniture works as a whole. Matching post height does not guarantee the absence of wobbling, and a level shelf does not confirm that every joint is correct. If one assembly has to be corrected, record the change in the documentation and check whether the same operation is needed for the others.
When a ready-made support is simpler than a composite one
A composite construction is useful when a special sequence of profiles, intermediate levels, or a combination of functions is needed that a single part cannot provide. If a ready-made model already meets all requirements, additional joints may only increase the amount of work.
Compare the entire path to the installed product: selection, purchasing, end preparation, fastening, trial assembly, finishing, and verification of the result. Saving on individual elements does not always mean a lower cost for the finished post. For a one-off project, the time spent designing the joint and making a suitable fixture is especially noticeable.
In the wooden legs for furniture you can check whether a suitable single-piece support is available. This means a ready-made product of the required shape; the blank material and the presence of glued joints are clarified separately. A single item code is not a promise of manufacture from a solid piece of wood.
If no suitable option exists, evaluate the composite assembly on its own merits: the required height, proportions, and the ability to connect furniture elements. The possibility of subsequent disassembly must also be provided for by the design. The presence of several parts does not by itself make an assembly repairable if, after gluing, it cannot be disassembled without damage.
Where to buy ready-made turned wooden parts for assembly
Select ready-made turned wooden parts in STAVROS, it is more convenient to follow the diagram of the future assembly. For each item, you need the function, overall length, joint dimensions, material, and surface condition. In the request, separately note which fits must be ready and which operations the workshop plans to perform itself.
Before purchasing, check the available drawings and product models. If the required end-face size or hole is not specified, it is clarified for the specific version. The seating depth and internal structure of the part cannot be reliably determined from the image.
For repeat orders, it is useful to review conditions for manufacturers, and coordinate availability, lead times and the method of receipt taking into account payment and delivery. The order for the entire batch is formed after approval of the trial assembly, separately accounting for the retained sample and the required reserve.
An approved assembly begins with a common axis and verified joints. When the position, seating dimensions and finish of each element are known, the finished turned parts can be confidently assembled for the project. The result is reproduced according to the drawing, the bill of materials and the actual sample — with the transitions and proportions that were approved before the furniture was launched.