Article Contents:
- The Magic of Gypsum: Material of Living History
- Gypsum Moldings: From Antiquity to Modernity
- Crown moldings and trim: framing space
- Rosettes and Coffered Ceilings: Ceiling Decoration
- Pilasters and Half-columns: Vertical Accents
- Murals and Reliefs: Sculpture on the Wall
- Gypsum Wall Panels: Modern Classic
- 3D Panels: Play of Volume
- Boiserie: Panel Classic
- Imitation of Brick and Stone: Textured Panels
- Decorative Gypsum Plaster: Art of Texture
- Venetian Plaster: Depth and Sheen
- Textured Plaster: Relief and Character
- Sgraffito: Multi-Layered Graphics
- Installation Technology of Gypsum Moldings: From Preparation to Finishing
- Base Preparation: Cleanliness and Strength
- Marking and Fitting: Precision Above All
- Adhesion: Reliable Connection
- Final Finishing: From Primer to Patina
- Installation of Gypsum Panels: Creating a Unified Surface
- Requirements for the Base: Flatness in Millimeters
- Marking and Layout: Planning Composition
- Adhesion and Fixation: Strength and Precision
- Joint Filling and Final Finishing: Invisible Joints
- Application of Decorative Plaster: Craftsmanship and Inspiration
- Base Preparation: Foundation for a Masterpiece
- Mix Preparation: Ratios and Consistency
- Application and Texture Formation: The Master’s Hand
- Tinting and Polishing: Final Touches
- Gypsum and Polyurethane: What’s the Difference and What to Choose?
- Advantages of gypsum: naturalness and prestige
- Advantages of polyurethane: lightness and practicality
- When to choose gypsum, and when polyurethane?
- Care for gypsum finish: preserving beauty
- Regular cleaning: delicacy and caution
- Updating the finish: freshness of color
- Answers to frequently asked questions about gypsum finish
- Can gypsum be used on the facade?
- How much does gypsum weigh?

Gypsum is the oldest material that has reached us from the depths of ancient times, when masters of antiquity built temples and palaces adorned with luxurious stucco. TodayPlaster wall finishingit is experiencing a true rebirth: architects and designers are once again turning to this noble material capable of transforming an ordinary dwelling into a work of art. Gypsum wall panels, gypsum stucco, and decorative gypsum on walls open up boundless possibilities for creating unique interiors — from strict classicism to bold avant-garde. This is not just surface cladding, but a philosophy of space, where every ornament swirl carries meaning, every relief plays with light, and every detail creates an irreplaceable atmosphere of home.


The magic of gypsum: a material of living history
What makes gypsum so special among numerous modern finishing materials? Primarily — its unique nature. Gypsum is a sedimentary mineral that, after firing and grinding, becomes a fine powder capable of forming a plastic mass when mixed with water. This mass hardens without shrinkage, preserving the finest details of relief, whether imparted by the craftsman or the mold.
The ecological purity of gypsum is unquestionable: it is simply natural stone and water. The material is completely safe for health, does not emit toxins, and contains no volatile organic compounds. Moreover, gypsum has a unique property of regulating humidity in a room: it absorbs excess moisture during high humidity and releases it back when the air becomes dry. Walls finished with gypsum, like breathing with the inhabitants of the house, create an ideal microclimate.
Fire resistance is another quality of gypsum that is difficult to overestimate. The material is completely non-combustible, and moreover — when heated, it releases bound water, which cools the surface and prevents the spread of fire.Gypsum stuccoon walls and ceilings increases the fire safety of the room, which is especially important for wooden houses, children's rooms, and fireplace rooms.
The plasticity of gypsum allows creating elements of any complexity: from the simplest baseboards to multi-figure reliefs with deep relief and fine detailing. In the hands of an experienced craftsman, gypsum comes alive, transforming into floral garlands, ancient gods, geometric ornaments, abstract compositions. At the same time, the resulting items are relatively lightweight — gypsum stucco does not create a critical load on load-bearing structures, allowing its use even on old buildings with weakened foundations.


Gypsum stucco: from antiquity to modernity
When it comes to gypsum, the first thing that comes to mind is luxurious stucco decorating palaces and mansions. This type of decoration has never gone out of fashion, only styles and motifs have changed. TodaySculptural decorationsit is experiencing a new flowering: it is used not only in classical interiors, but also in modern spaces, where stucco becomes a bold contrasting accent.
Our factory also produces:
Crown Molds and Moldings: Framing Space
Ceiling cornices are the most common element of gypsum stucco. They hide the junction between wall and ceiling, visually raise the height of the room, and create a sense of completeness in the composition. Cornices can be smooth and minimalist or richly decorated — with plant ornaments, geometric patterns, rows of Ionic and Ogee profiles. The width of the cornice is chosen proportionally to the ceiling height: the higher the ceiling, the more substantial the cornice can be.
Wall moldings are used for dividing wall surfaces, creating panel compositions, framing door and window openings.Wall finishing with moldingsThey give the interior architectural rigor and rhythm. Moldings highlight zones, create an illusion of depth, and form frames for paintings and mirrors directly on the wall. Moldings painted in a contrasting color to the wall — white on dark blue, gold on burgundy, black on beige — look especially striking.
Baseboards are not only a functional element covering the gap between wall and floor, but also an important part of decorative finishing. Gypsum baseboards can be tall (up to 20-30 centimeters), with rich profiles and ornamentation. They visually emphasize the lower part of the wall, creating a sense of solidity and monumentality. In classical interiors, baseboards often duplicate the profile of the ceiling cornice, creating a harmonious symmetry between top and bottom.
Get Consultation
Rosettes and coffered ceilings: ceiling decoration
Ceiling rosettes — round or polygonal medallions with relief ornament — are traditionally used to frame chandeliers. The rosette becomes the compositional center of the ceiling, drawing the eye and adding grandeur. The diameter of the rosette is chosen depending on the size of the chandelier and the room's area: a small rosette will be lost on a large ceiling, while a too large one will overwhelm the space in a small room.
Coffered ceilings — rectangular, square, or polygonal recesses in the ceiling framed by profiled beams — create volume and depth. A coffered ceiling visually appears higher, more spacious, and more interesting. Each coffer can be decorated with painting, gilding, or internal lighting. Gypsum beams framing the coffers are manufactured with various profiles — from simple rectangular to complex multi-step profiles with carving.
Wall and ceiling decorative moldingIt can include not only rosettes and coffers, but also corner elements, borders, friezes, and domes. Gypsum domed structures create an impression of a temple space, height, and lightness. They are used in large halls, lobbies, and staircases — places where solemnity and grandeur are important.
Pilasters and half-columns: vertical accents
Pilasters — flat vertical protrusions on a wall, imitating columns — are used to decorate doorways, fireplaces, arches, or simply to divide long walls. A pilaster consists of a base (foundation), shaft (body), and capital (upper part). Each element can be smooth or decorated according to the chosen order: Doric, Ionic, Corinthian, or Composite.
Half-columns — more voluminous than pilasters, they protrude from the wall by half or a third of their diameter. Half-columns add plasticity to the wall, create play of light and shadow, and establish rhythm. They are installed symmetrically — on both sides of windows, doors, fireplaces, or mirrors. The base and capital of half-columns are made separately, and the shaft can be smooth or fluted (with vertical grooves).
Sculptural wall decorationPilasters and half-columns are especially appropriate in rooms with high ceilings, where vertical elements emphasize height and create monumentality. In modern interiors, simplified, minimalist pilaster forms without capitals and bases — simply vertical relief strips dividing the wall into sections — are often used.
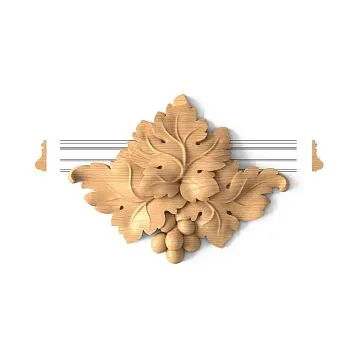
Panels and reliefs: sculpture on the wall
Gypsum panels — full-fledged works of art that transform a wall into a gallery. Themes can be anything: from classical mythological scenes to modern abstract compositions. Panels are made by casting into molds or hand modeling — the latter is more expensive but allows creating a unique, one-of-a-kind piece.
Reliefs — sculptural images protruding from the wall surface by less than half the volume of the figure — are used to decorate fireplaces, bedheads, and wall sections between windows. A relief can depict a portrait, landscape, still life, or ornament. Relief depth varies from several millimeters to 5–7 centimeters, allowing for impressive chiaroscuro effects.
decorative wall finishingGypsum panels and reliefs require thoughtful lighting. Side-directed light enhances volume, making the relief more expressive. Diffused overhead light softens contrasts, making the image appear softer and more airy. Underlighting creates a dramatic, almost mystical effect.
Gypsum wall panels: modern classicism
If stucco is decoration, then gypsum wall panels are full-fledged cladding that covers the entire wall surface or a significant portion of it. Panels are flat pieces of various sizes (typically from 30x30 to 100x50 centimeters) with relief surfaces. They are installed butt-to-butt or with a small gap, forming a single decorative plane.
Three-dimensional panels: play of volume
3D gypsum panels — a trend of recent years that remains popular. The relief surface creates impressive visual effects, especially with proper lighting. Geometric patterns — waves, honeycombs, squares, triangles — form a dynamic composition that changes depending on viewing angle and light direction.
3D wall finishingGypsum panels allow creating an accent wall that becomes the main decoration of the room. Such a wall is typically placed behind a bedhead, sofa, TV, or fireplace. Other walls are left smooth and painted in neutral colors to avoid overloading the space.
The advantage of gypsum 3D panels over analogs made from other materials is the possibility of subsequent finishing. Panels can be painted in any color, covered with decorative coatings, patinated, or gilded. The relief remains sharp and does not blur with paint, as often happens with polystyrene panels. Gypsum retains its shape and preserves relief depth even after multiple coatings.
Boiserie: panel classicism
Boiserie — panel cladding of the lower part of the wall, 80 to 180 centimeters high. Classical boiserie consists of frames (moldings) and panels (central panels). Frames form rectangular sections, within which smooth or relief panels are placed. The upper edge of boiserie is finished with a wide cornice or shelf.
Internal decorative wall claddingBoiserie in style imparts nobility, solidity, and respectability to a room. This type of finish is traditional for offices, libraries, dining rooms, and living rooms in classical style. Gypsum boiserie is stronger and more durable than wooden, does not fear moisture (with protective coating), and does not deform over time.
Color solutions for boiserie can vary. The classic option — white or cream panels on a light wall background. The contrasting option — dark panels (gray, blue, green) on a white wall or vice versa. Modern interpretation — monochromatic solution, where panels and walls are painted the same color, and relief is emphasized only through play of light and shadow.
Imitation of brick and stone: textured panels
Gypsum panels can imitate almost any material: brickwork, natural stone, wood, leather, fabric. Especially popular is imitation of old brick with deliberately rough texture, uneven joints, chipped edges. Such panels are used in interiors of loft, industrial, and Provence styles.
Stone imitation — travertine, sandstone, slate — creates a sense of natural power and eternity. Gypsum panels are dozens of times lighter than natural stone, easier to install, and cheaper, but with quality execution, they are practically indistinguishable from the original. They are painted in natural tones, patinated, and artificially aged.
Wall finishing photoGypsum textured panels demonstrate incredible variety of solutions: from brutal brick walls in men’s offices to elegant stone cladding in living rooms, from warm wooden relief in bedrooms to cold concrete in minimalist studios. Gypsum allows realizing any fantasy without limitations.
Decorative gypsum plaster: art of texture
If stucco and panels are ready-made elements mounted on walls, then decorative gypsum plaster is a material applied directly to the surface and shaped by the artisan during the process. Every wall finished with decorative plaster is unique — it is impossible to exactly replicate the pattern and texture.
Venetian plaster: depth and sheen
Venetian plaster on a gypsum base — one of the most refined techniques of decorative finishing. It creates an effect of polished marble with deep internal glow. The material is applied in extremely thin layers (from 3 to 7 layers), each layer carefully smoothed and polished. The result is a smooth glossy surface with subtle color transitions, veins, and tonal variations.
Venetian plaster requires an ideally flat surface and high skill from the artisan. Any irregularity, bump, or depression will be visible on the glossy surface. Yet the result exceeds all expectations: walls appear to be clad in precious stone, and the space is filled with light reflected from the polished surface.
Wall cladding optionsVenetian plaster includes various color solutions: from classic white and cream to rich emerald, sapphire, and ruby tones. Modern Venetian plaster may contain metallic pigments — gold, silver, bronze, pearl — creating additional light effects.
Textured plaster: relief and character
Textured gypsum plaster allows creating various textures: from fine-grained satin to large relief in the form of waves, grooves, craters. Texture is formed using special tools: trowels, spatulas, patterned rollers, stencils, brushes, even hands. Each artisan develops their own style, signature, recognizable manner.
Popular textures: worm-eaten (imitation of wood damaged by insects), fine grain (even small uniform grain), orange peel (large bumpy texture), travertine (imitation of natural stone with pores and caverns), fur (dense furry relief). Each texture creates its own mood and atmosphere.
wall finishing materialsBased on plaster, they allow combining smooth and textured areas, creating contrasting compositions. For example, cover the center of the wall with Venetian plaster, and the perimeter with textured plaster. Or make smooth panels within raised frames. Possibilities are limited only by the designer's imagination.
Sgraffito: multi-layered graphics
Sgraffito is an ancient technique in which several layers of plaster of different colors are applied, and then the upper layers are scratched to reveal the lower ones. This creates a graphic image with clear outlines. This technique was used to decorate the facades of Italian palazzi, and today it is returning to interiors.
Sgraffito using plaster requires precision and a steady hand. The design is applied using a stencil or freehand, then carefully scratched with special tools while the plaster is still fresh and pliable. After drying, the image becomes durable and can be coated with protective wax or varnish.
Decorative wall finishingIn sgraffito technique, the wall becomes a piece of graphic art. This can be a geometric ornament, plant pattern, landscape, abstraction, calligraphy. Sgraffito is especially effective in large spaces — halls, staircases, living rooms with second light.
Installation technology of plaster moldings: from preparation to finish
Installing plaster moldings requires care, precision, and adherence to technology. Plaster is a brittle material, so it must be handled carefully and securely fastened. Proper installation guarantees the longevity of the decoration and safe operation.
Base preparation: cleanliness and strength
Walls or ceilings to which moldings will be attached must be strong, dry, clean from dust, grease, and old coatings. Remove peeling paint and crumbling plaster, fill cracks and holes with repair compound. Prime the surface with a deep-penetration primer — this improves adhesive bond and strengthens the base.
If the wall is uneven, it must be leveled with plaster or spackling. Plaster molding replicates the base's shape, so any bumps or hollows will be visible. Especially important is flatness when installing long elements — cornices, moldings, baseboards. They must fit the surface along the entire length, without gaps or misalignment.
The moisture content of the base must not exceed 8-10%. On a damp base, the adhesive won't set, and the molding may detach under its own weight. Before starting installation, ensure that walls are completely dry after plastering, the primer has dried, and there is no moisture in the room.
Marking and fitting: precision above all
Before gluing, elements are laid out on the floor, pressed against the wall, checked for symmetry and size match. This is especially important when installing complex compositions made of many parts. On the wall, mark with pencil or chalk — indicate symmetry axes, positions of elements, lines for cornices and moldings.
Long elements — cornices, moldings — often need to be cut to length and joined at corners. Corners are cut at 45 degrees using a miter box or a circular saw. It is important that the cut is clean, without chips, otherwise the joint will look unsightly. Professionals recommend first fitting the elements on the floor, adjusting them to each other, and only then gluing them.
Plaster ornament for walls and ceilingsSymmetrical forms (rosettes, panels, bas-reliefs) are installed strictly at the center of the surface or at pre-selected points in the composition. For precise marking, use plumb bobs, levels, laser levels, and tape measures. Any millimeter error will be noticeable and spoil the impression.
Gluing: secure connection
To install plaster moldings, use special plaster-based adhesives, polymer compounds, sometimes — plaster paste (alabaster, mixed with water and PVA glue). Apply adhesive to the back of the element using a notched trowel, evenly distributing it over the surface. Large heavy elements are additionally secured mechanically — with anchors or self-tapping screws.
Press the element against the wall, align it with the marking, hold it for several minutes until the adhesive sets. Immediately wipe away any excess adhesive with a damp sponge. If the element is heavy, place temporary supports — wooden beams or stands — under it, removing them after the adhesive has fully dried.
Fill joints between elements with the same adhesive or plaster spackle. Carefully fill, smooth, let dry, then sand with fine-grit sandpaper until completely invisible. Ideally, the wall should appear monolithic, with no visible joints or seams.
Final finishing: from primer to patina
After the adhesive has fully dried (usually after one day), prime and paint the molding. Primer creates a protective layer, improves paint adhesion, and equalizes surface absorption. Without primer, plaster intensely absorbs paint, increasing consumption and resulting in uneven color.
Paint moldings with water-emulsion, acrylic, or latex paints. Apply at least two coats with intermediate drying. For relief elements, use brushes of different sizes, sponges, or spray guns. Paint recesses with a fine brush, raised parts with a wide brush or roller.
Decorative wall and ceiling finishingPlaster can be additionally decorated with patina, gilding, or silvering. Patina is artificial aging — dark paint is applied into recesses of the relief, while raised parts remain light. This creates an antique effect, as if the object has passed through centuries.
Gilding is performed with 24-karat gold (ultra-thin sheets of real gold) or imitation — gold leaf, gold paint. Gilded moldings look luxurious, grand, festive. They are used in palace-style, baroque, rococo, and neoclassical interiors. Modern interpretation — selective gilding of individual elements against a matte white or colored background.
Installation of plaster panels: creating a single plane
Installation of plaster wall panels differs technologically from molding installation. Here, not only secure fastening but also perfect panel alignment and creation of a flat surface without unevenness are important.
Requirements for the base: flatness in millimeters
Plaster panels are installed on a perfectly flat base — plastered walls or gypsum board cladding. Deviations should not exceed 1-2 millimeters over 1.5 meters. More significant unevenness will cause panel misalignment, visible joints, and cracks.
Walls are checked with a long straightedge or laser level, unevenness is identified and corrected with plaster or spackling. After leveling, the surface is sanded and primed in two coats. The primer must be fully dry before starting installation — this takes several hours to a full day depending on temperature and humidity.
If the wall was previously covered with another material (wallpaper, paint, tiles), remove the old coating completely. Scrape off residual adhesive, paint, or grout with a trowel, sander, and special solutions. The base must be clean, strong, and monolithic.
Layout and arrangement: planning composition
Before installing the panels, they are laid out on the floor, the pattern is selected, and the installation order is determined. If the panels have a directional pattern (waves, stripes, floral ornament), it is important to maintain direction and symmetry. On the wall, marking is done — horizontal and vertical lines are marked, along which the panels will be aligned.
The first row of panels is especially important — it determines the correctness of the entire composition. For the first row, a guide profile — a metal or wooden strip — is installed, which sets the horizontal line. The profile is mounted with anchors to the wall, carefully leveled.
Gypsum wall panelsPanels with pronounced relief require special attention to joints. The pattern must smoothly transition from one panel to another, forming a continuous pattern. For this, panels are numbered, marked with installation direction, and fitted together before gluing.
Adhesion and fixation: strength and precision
Gypsum panel adhesive is selected depending on the weight of the panels and the type of base. For lightweight panels on drywall, gypsum adhesive or putty is sufficient. For heavy panels on concrete, high-strength cement-polymer compositions are used. Adhesive is applied to the wall and the back of the panel using a notched trowel.
The panel is pressed against the wall, aligned with the marking, pressed, and slightly moved to better distribute the adhesive. Vertical and horizontal alignment is checked with a level, and position is adjusted if necessary. The end parts of the panels must be coated with adhesive to ensure immediate bonding between panels.
Joint filling and final finishing: invisible joints
Seam sealing and final finishing: invisible joints
After the adhesive has fully dried (after 24-48 hours), joints are filled. Joints are filled with gypsum putty, carefully smoothed to level with the panel surface. On wide joints, reinforcing tape — serpentine or paper tape — is applied to prevent cracking.
Putty is applied in two to three layers with intermediate drying and sanding. Each layer should be thinner than the previous one. The final layer is applied as a very thin layer, stretching the putty almost to transparency. After drying, joints are sanded with fine-grit sandpaper until completely smooth.
Relief wall finishingGypsum panels are finished with priming and painting. Primer is applied with a roller or spray gun, evenly covering the entire surface. Paint is selected depending on the desired effect: matte for calm interiors, semi-gloss for versatile solutions, glossy for dramatic accents.
Applying decorative plaster: craftsmanship and inspiration
Working with decorative gypsum plaster is not just a craft, but an art. Here, there is no strict algorithm — every movement of the craftsman is unique, and each wall becomes special. However, there are general principles that must be followed to achieve a quality result.
Preparation of the base: foundation for a masterpiece
Decorative plaster requires a strong, flat, dry base. Walls are plastered with regular gypsum or cement plaster, leveled, and sanded. The degree of flatness depends on the type of decorative plaster: for Venetian plaster, an ideally smooth surface is required; for textured plaster, general flatness without large defects is sufficient.
The surface is primed in two layers. The first layer — a deep-penetration primer — strengthens the base and reduces absorbency. The second layer — an adhesive primer or concrete contact — creates a rough bonding layer. On smooth concrete without concrete contact, plaster may not adhere.
Primer can be tinted to match the decorative plaster — this makes application easier, reduces material consumption, and prevents the base from showing through thin plaster layers. This is especially important when working with Venetian plaster, which is applied in semi-transparent layers.
Preparation of the mixture: proportions and consistency
Ready-made decorative plasters are sold in buckets, ready for use — only mixing is required. Dry mixes are diluted with water according to the manufacturer's instructions. It is important to strictly follow the proportions: too liquid plaster will sag, too thick plaster will not smooth out properly and will develop shrinkage cracks.
Water is poured into a clean container, then dry mix is gradually added while continuously mixing. Mix with a drill and a mixing attachment on low speed to avoid air entrainment. Allow the mixture to stand for 5-10 minutes for full hydration of components, then mix again.
Ready plaster has the consistency of thick sour cream. It should hold on the trowel without dripping, but still be easily smoothed over the surface. The working life of gypsum plaster is limited — usually 30-60 minutes — so small batches are mixed, which can be finished within this time.
Application and texture formation: the craftsman's hand
The application technique depends on the type of plaster. Venetian plaster is applied in thin layers (1-2 mm) with a flexible trowel, smoothed with chaotic short strokes. Each layer must dry before applying the next. After 3-5 layers, the surface is sanded with fine sandpaper, then a finishing layer is applied and polished with a trowel to a glossy finish.
Textured plaster is applied in a thick layer (5-10 mm) with a hawk, trowel, or by hand. While the material is fresh, texture is formed: it is brushed with a sponge, roller with pattern, notched trowel, sponge, brush. Impressions of various objects can be made to create unique patterns.
DIY decorative wall finishingTextured plaster requires practice. It is recommended to first practice on a piece of drywall or plywood, try different tools and movements, and find the pattern you like. Only after this should you proceed to wall finishing.
Tinting and glossing: final touches
Ten to fifteen minutes after applying textured plaster, when it begins to set, the surface is tinted. A plastic sponge is moistened with water and gently smoothed over the plaster with light circular motions without pressure. A gypsum milk — liquid gypsum solution — appears on the surface, filling small pores and irregularities.
Gypsum milk is left to stand for 10-15 minutes to slightly thicken, then glossing is performed. A wide, stiff trowel is used with pressure to smooth the surface, filling remaining defects and compacting the structure. During glossing, the plaster acquires a light silk-like sheen, becomes smoother and stronger.
Venetian plaster is polished with great force to achieve a mirror-like sheen. A clean metal trowel is used, moving across the surface in short crosswise strokes. The trowel heats up from friction, slightly melting the plaster to form a smooth, glossy layer. After polishing, the Venetian plaster is coated with a protective wax that enhances the sheen and protects against moisture.
Gypsum and polyurethane: what's the difference and which to choose?
Many wonder: how does gypsum molding differ from polyurethane, which is better, more expensive, longer-lasting? There is no single answer — each material has its own advantages and disadvantages, its own area of application.
Advantages of gypsum: naturalness and prestige
Gypsum is a natural material with a multi-century history. Palaces, museums, historical buildings are adorned precisely with gypsum molding. This creates an aura of prestige, authenticity, and aristocracy.Plaster wall finishingIt is perceived as a sign of good taste and respectability.
Gypsum is eco-friendly, emits no substances, regulates humidity, and has high fire resistance. It is suitable for people with allergies, asthma, or chemical sensitivity. In a gypsum interior, it is comfortable to breathe — there is no feeling of synthetic materials.
Gypsum molding can be restored, repaired, or modified. Chips and cracks are easily filled with gypsum putty, and the surface can be repainted countless times. Gypsum does not fear high temperatures, does not deform under sunlight, and does not change dimensions.
Advantages of polyurethane: lightness and practicality
Polyurethane molding is several times lighter than gypsum, simplifying transportation, storage, and installation. One person can install it without helpers or special tools. Polyurethane does not break when dropped, does not crumble, does not crack — this is especially important during transportation and installation.
Polyurethane is moisture-resistant and can be used in bathrooms, kitchens, and pools without additional protection. It does not absorb water, does not swell, and does not develop mold.Polyurethane wall cladding— optimal choice for rooms with high humidity.
Polyurethane elements are cheaper than gypsum, especially in large volumes. The assortment is vast — almost any profile and ornament can be found. Installation is faster and simpler, requiring no special skills. For private homes where budget is limited and deadlines are tight, polyurethane is a sensible solution.
When to choose gypsum, and when polyurethane?
Gypsum is chosen for prestigious objects where authenticity matters: historical buildings, respectable residences, classic-style salons. Gypsum is indispensable for unique elements made to order — reliefs, panels, complex capitals. Gypsum is better suited for restoring historical interiors, where matching the original is crucial.
Polyurethane is chosen for modern projects where speed, practicality, and budget are important. Polyurethane is optimal for apartments in new constructions, country houses, commercial spaces. Polyurethane is preferable in humid rooms, unheated cottages, and seismically active regions.
The ideal solution is a combination of materials. The main decorative elements — cornices, moldings, rosettes — are made of polyurethane, while unique accent elements — reliefs, panels, capitals — are made of gypsum. This allows optimizing the budget while still creating a high-quality interior.
Care for gypsum finishes: preserving beauty
Gypsum elements are low-maintenance if properly treated and used under normal conditions. Basic care involves regular dust cleaning and periodic refreshment of the coating.
Regular cleaning: delicacy and caution
Dust from gypsum molding is removed with a soft dry brush, feather duster, or vacuum cleaner with a soft attachment. It is important not to press on the relief or scratch the surface with stiff bristles. Deep recesses that a cloth cannot reach are cleaned with a fine brush — artistic or makeup brush.
For wet cleaning, use a slightly damp soft cloth, squeezed almost dry. Excess moisture may soften the gypsum, especially if the protective coating is damaged. Abrasive cleaners, solvents, acids, or alkalis must not be used — they destroy gypsum and paint.
Grease stains, kitchen soot, and fly marks are removed with a soapy solution or specialized gypsum cleaners. Dirt is gently moistened, blotted with a cloth, rinsed with clean water, and dried. Stubborn stains may need to be painted over — this is simpler and safer than trying to scrub them off.
Refreshing the coating: fresh color
Painted gypsum molding can be repainted as needed — typically every 5-7 years. The surface is cleaned of dust, degreased, primed, and new paint is applied. This allows completely changing the color and creating a new interior mood.
Patina and gilded elements require a more delicate approach. Patina is refreshed by applying a dark tone into recesses and rubbing off excess. Gilding is restored by touching up damaged areas or by full re-gilding. Electroplated gold is reapplied after removing the old coating.
— usually the answer is 'rosette' or 'cornice'. These elements have become so iconic that they have even entered word games.Well-maintained moldings and walls in good condition can serve for decades without intervention. The key is to maintain a normal microclimate: humidity 40-60%, temperature 18-25 degrees, avoiding direct water exposure and mechanical damage.
Answers to frequently asked questions about gypsum finishes
Can gypsum be used on facades?
Yes, but with limitations. Gypsum fears direct water exposure, so facade molding is installed under eaves, in niches, or on protected areas. Multi-layer hydrophobic treatment is mandatory, increasing moisture resistance by 2-3 times. Modern compositions allow gypsum to serve on facades for 5-10 years.