Article Contents:
- First screen: what to buy for staircase finishing
- Why steps and decor should be chosen as a single system
- The staircase is visible in motion: five planes at once
- Three points of material contact
- Wooden staircase elements: load and texture
- Wooden steps: wood species selection and parameters
- Risers: vertical plane with multiple scenarios
- End elements: a detail often forgotten
- Solid wood moldings: connecting profiles
- Polyurethane stair decor: junctions, wall, baseboard
- Baseboard along the stair flight: bottom line of the system
- Wall moldings along the flight: rhythm of movement
- Decorative frames on risers
- Cornice on the stair landing
- Decorative elements on the piers
- Ready-made stair flight trim kits
- Minimum kit: steps and baseboard line
- Classic staircase: wood and molding frame
- Neoclassic: Reserved Elegance
- Staircase in the hall: connection with space
- Grand staircase: decor as a statement
- How to design risers: five scenarios
- Scenario one: riser matching the tread
- Scenario two: white riser against dark wood
- Scenario three: decorative frame on the riser
- Scenario four: painted or tiled riser
- Scenario five: open riser (without riser)
- Proportions and scale: what defines the system
- Riser height and tread width: safety standards
- Scale of moldings on the stair wall
- Baseboard: height and profile
- Mistakes when finishing a wooden staircase
- Buying steps without a riser diagram
- Forgetting about ends and junctions
- Not installing baseboard along the flight
- Choosing too large a relief for a narrow staircase
- Placing molding in the kick zone
- Not connecting the staircase with the hall
- Not buying extra for cutting waste
- Forgetting sealant for joints
- Buying wood and polyurethane without a common painting scheme
- Checklist: complete order for finishing a flight of stairs
- STAVROS: complete arsenal for finishing a staircase
- Frequently Asked Questions

Every time a person climbs a staircase, they cover a route of five to fifteen steps. During this time, their gaze takes in: the surface of the step underfoot, the front edge of the tread, the vertical riser, the baseboard along the wall, the wall itself next to the flight, and the side end of the step. These are five different planes and five decision points when designing the finish.
Most people think of a staircase as 'steps and railings.' In practice, it is a whole system of junctions: wood to concrete, wood to wall, end to air, baseboard to step. And it is in these junctions that half the work of finishing a flight of stairs is hidden.
This article is a practical guide for those who have already decided to buy wooden steps but have not yet realized that they need a complete set: risers, end elements, Polyurethane baseboard, wall moldings, decorative overlays. Wood handles the load. Polyurethane handles everything else.




First screen: what to buy for finishing a staircase
Before diving into details — a shopping list. A complete one. The one you need to make once and never come back to.
Wooden elements:
-
Wooden steps and components for staircases — treads made of oak, beech, ash, pine;
-
Wooden risers — vertical panels between steps;
-
End elements — side overlays covering the step cut;
-
Pogonazh iz massiva — wooden profiles for framing, friezes, transitions;
-
Wooden decor and overlays — decorative elements on the wooden part of the flight.
Polyurethane elements:
-
Moldings made of polyurethane — wall profiles along the flight, frames on risers;
-
Polyurethane baseboard — lower decorative line along the stair wall;
-
Polyurethane moldings — cornice on the landing, decorative overlays on the spandrels;
-
Decorative stucco / overlays — accent elements on the wall and side planes;
-
Polyurethane wall decor — frames, decorative panels on the wall along the flight;
-
Decor for Molding — corner inserts and frame locking elements.
Mounting materials:
-
Fasteners for wooden steps — screws, dowels, mounting foam;
-
Glue for polyurethane profiles — selection and application technology;
-
Acrylic sealant — joints, baseboard corners, step ends;
-
Primer — for polyurethane profiles before painting;
-
Paint — a single tone for moldings, baseboards, cornices, risers to be painted;
-
Varnish or oil — final protection for wooden steps and exposed wooden elements;
-
Material reserve of 5–10% — for trimming, corners, unforeseen damage.
Main idea: wooden steps bear mechanical load every day. That is why they must be made of solid wood. Polyurethane profiles cover everything that is not loaded: the wall part, junctions, the baseboard line, decorative frames. This division of roles is not a compromise, but sound engineering.




Why steps and decor should be chosen as a single system
Our factory also produces:
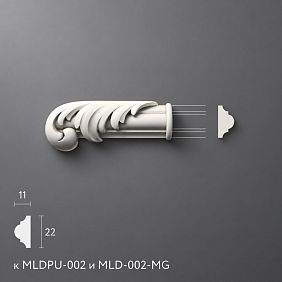
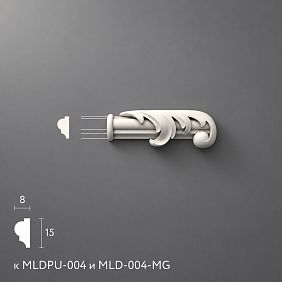
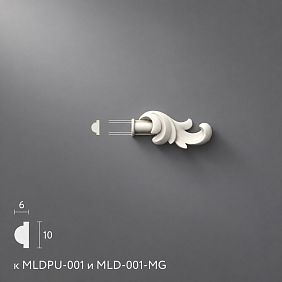



The staircase is visible in motion: five planes at once
Standing in front of a finished staircase, a person perceives it differently than while walking. During movement, the gaze continuously glides across several planes: the tread (horizontal surface of the step), the riser (vertical surface between steps), the step end (side surface), the wall junction (joint of the step and side wall), and the baseboard line on the wall.
If these five elements are not connected by color, scale, and material, the staircase looks like an unfinished structure. Beautiful wooden steps against unfinished risers and a bare wall are not "minimalism" — it's a construction site.
The task of finishing is to create a unified visual system. Wood speaks of load and warmth. Polyurethane speaks of decorative completeness. Each element knows its role.
Get Consultation
Three points of material contact
On a flight of stairs, there are three key points where different materials meet and require careful joining.
The first is the junction of the step and the side wall. This is where the wooden tread meets a plastered or tiled wall. Without proper joining, there will be a gap here that accumulates dust and looks untidy. Solution: Polyurethane baseboard or a wooden cove molding that covers the joint and creates a neat line along the entire length of the flight.
The second is the junction of the riser and the wall. The vertical plane of the riser also meets the wall. The same principle applies here: a profile or baseboard covers the joint and creates a unified bottom line.
The third is the step end. The open cut of the wooden tread on the side of the flight is either a decorative element (if the end is beautifully finished and varnished) or an incompleteness (if the end is simply cut). An end cap or profile solid wood trim covers the end and creates a finished look.
Wooden elements of a flight of stairs: load and texture
Wooden steps: choosing the species and parameters
Wooden steps and components for staircases — is the central element of the flight's finish. People walk on them. They judge the quality of the staircase by them — tactilely, visually, audibly (a wooden flight should not creak or "give way").
Choosing the wood species for the steps is not an aesthetic, but an engineering decision. Let's consider the main options:
| Species | Hardness (Brinell) | Character | Recommendation |
|---|---|---|---|
| Oak | 3,7–3,9 | Hard, expressive texture, warm | For heavily used staircases |
| Beech | 3,8 | Hard, uniform, light | For painting or thin stain |
| Ash | 4,0 | Very hard, elastic, light | For maximum wear resistance |
| Larch | 2,5–3,0 | Moderately hard, resinous | For cottages and country houses |
| Spruce | 1,8–2,2 | Soft, budget-friendly | Not recommended for steps |
For residential houses with constant use, the optimal choice is oak or ash. Beech, with proper treatment (oil or varnish in several layers), also holds up well under load.
The standard thickness of a solid wood step is 40 mm. This is sufficient for spans up to 1.2 meters without intermediate supports. For tread widths up to 900 mm — 30 mm. For larger spans — reinforced steps of 50–60 mm or steps with a metal frame.
Step overhang (tread projection over the riser) — standardly 15–25 mm. This creates a shadow under the overhanging edge, which visually makes the step appear 'lighter'.
Risers: vertical plane with several scenarios
A riser — the vertical panel between two treads — comes in three types: solid wood, wood with decorative elements, and painted (non-wood). Each creates a completely different character for the staircase.
A wooden riser matching the step tone is the most monolithic option. The entire staircase looks like a single wooden element. This is an option for natural Scandinavian, modern classic, and minimalist interiors.
A white painted riser against a wooden step is a classic technique used in British, French, and Russian classicist interiors. Dark wood step + white riser is a contrasting pair with high decorative impact. Here, the riser can be either wooden, painted white, or MDF for painting.
A decorative riser with molding or a frame is a more complex option. A thin Polyurethane molding is glued onto the riser surface, creating a decorative frame. This adds depth to the vertical plane and ties the staircase to wall moldings.
Important rule: protruding decor on the riser is only acceptable if it does not fall into the area hit by the toe of a shoe when climbing. The lower part of the riser (15–20 cm from the tread of the lower step) is a danger zone. Decor here is either not placed, or only a flat applied ornament without a relief protrusion is used.
End elements: a detail often forgotten
The end of a wooden step is an open cut of solid wood. If the staircase has no side wall (open flight), the end is fully visible: wood texture, layers, end grain. When properly treated, this looks beautiful. Without treatment, it looks unfinished and quickly accumulates dirt.
An end cap made of solid wood trim — a U-shaped or L-shaped profile that covers the end and front edge of the tread. This simultaneously solves an aesthetic problem (the end looks clean) and a protective one (the edge is protected from chipping).
For staircases adjacent to a wall on one side, an end element is only needed on the opposite open edge. For fully open flights, on both sides.
Solid wood moldings: connecting profiles
Pogonazh iz massiva on the staircase performs several functions. The first is decorative fillets and transition profiles at the junctions of steps to the wall. The second is edge profiles to protect the front edge of the tread (nosing). The third is dividing horizontal strips that create a visual rhythm on the surface of the risers.
A fillet — a small quarter-round or box profile — is installed in the corner between the tread and the riser (at the bottom, where they connect). It closes the joint gap and simultaneously adds an elegant horizontal accent.
Polyurethane decor for stairs: junctions, wall, baseboard
Baseboard along the staircase: the lower line of the system
This is the most underestimated element of staircase finishing. The baseboard along the staircase is not the same baseboard that goes around the perimeter of the room. The staircase baseboard runs at an angle, parallel to the flight, from the bottom step to the landing. Its task is to close the joint of the lower ends of the steps and the wall, create a unified lower line, and visually "ground" the staircase in the space.
Polyurethane baseboard for the staircase is cut at an angle corresponding to the angle of the staircase's rise. This requires precise measurements and the right tool — a miter saw or a miter box with an adjustable angle. With proper cutting, the baseboard lays cleanly and neatly along the entire length of the flight.
On the horizontal landing, the baseboard transitions to a standard horizontal position and joins with the room's baseboard. This transition is one of the most complex nodes when installing staircase decor, and it must be planned in advance: how the two pieces of baseboard at different angles will connect.
Moldings on the wall along the flight: rhythm of movement
Moldings made of polyurethane on the wall along the staircase — this is wall architecture seen in motion. They can run parallel to the flight (at the angle of the rise) or form rectangular frames, sectionally dividing the wall along the length of the spans.
Horizontal moldings parallel to the flight — a simpler and stricter option. One or two profiles parallel to the line of steps create a horizontal rhythm that accelerates the perception of movement. This is suitable for modern classic and neoclassical styles.
Rectangular molding frames on the stair wall are a more complex and expressive option. Each section of the wall between steps or groups of steps gets a rectangular frame made of molding. Inside the frames — a clean surface of a different shade, a mirror, a painting, or just paint. This is a classic option for grand staircases and halls.
Installing moldings at an angle on a stair wall is a precise task. Detailed technology is described in the article about installing polyurethane moldings. Key nuances: marking by level (horizontal moldings must be perfectly horizontal, slanted ones parallel to the flight), joining at platform corners, sealant on all joints.
Decorative frames on risers
A riser is an ideal surface for accent decor. If the riser is painted white or a light tone, a thin molding frame around the perimeter of the riser creates an 'inlaid panel' effect. This is a simple solution that instantly elevates the finish level.
Important parameter: the molding on the riser should be thin (10–20 mm) with a small projection. A too thick or protruding profile will be bumped during walking, leading to damage. For risers, choose the most delicate profiles from the range.
Decor for Molding — corner inserts in the riser frame — add a detail that looks like handcraft. Four corner rosettes in the riser frame turn a simple rectangular frame into a classic decorative element.
Cornice on the stair landing
A landing is a space where the flight ends and a horizontal zone begins. Here the ceiling becomes horizontal, and this is where a full cornice is appropriate. Polyurethane moldings in the form of a cornice around the perimeter of the landing creates a sense of architectural "arrival": the staircase lifts you up — and you find yourself in a designed space.
The scale of the cornice on the landing is determined by the ceiling height and the area of the landing itself. A narrow intermediate landing — a light cornice. A spacious landing in front of the entrance to the second-floor hall — a medium-height cornice with a profile matching the main interior style.
Decorative elements on piers
On the stair wall between sections of molding frames, on turning landings, in the double-height space area, piers appear — sections of wall without frames that require accent decor. Decorative stucco — applied medallions, cartouches, corner elements — are installed on these piers as accent details.
Rule: decorative stucco is placed above the constant touch zone (above 130 cm from the step). On the lower level of the wall, where the hand reaches for the wall when climbing, stucco is impractical — it will be damaged.
Ready-made staircase finishing kits
Minimum kit: steps and baseboard line
The most affordable option — and yet quite complete. Wooden steps with risers, end elements made of solid wood trim, Polyurethane baseboard along the wall. Three positions — a complete finish of the flight.
This set works well in modern, Scandinavian, and minimalist interiors. Clean lines, natural wood, neat baseboard — nothing extra.
Set: oak/beech steps + risers + end caps + polyurethane baseboard + fasteners + glue + sealant + wood varnish + primer + paint for baseboard.
Classic staircase: wood and molding frame
Add to the minimal set Moldings made of polyurethane on the wall along the flight and decorative frames on the risers. Oak steps with oil or stain, white risers, white wall moldings, white baseboard. Dark wood + white polyurethane — a classic with high decorative impact.
Set: oak steps + white risers (wood or MDF for painting) + ends + wall moldings + riser frames + Decor for Molding + baseboard + fasteners + glue + sealant + primer + white paint + oil for steps.
Neoclassicism: Reserved Elegance
Wooden steps made of beech or ash in a light tone (oil without pigment or bleaching), white risers, thin wall moldings, light cornice on the landing. No decorative stucco — only profiles and clean surfaces. Neoclassicism loves geometry and avoids excess.
Set: ash steps + white risers + ends + thin moldings + baseboard + cornice on the landing + glue + sealant + primer + white paint + oil for steps.
Staircase in the hall: connection with the space
A staircase leading into a spacious hall should be connected to that space. The moldings on the stair wall continue into the hall moldings — a unified rhythm of frames. The stair baseboard joins the hall baseboard. The landing cornice echoes the hall cornice.
Polyurethane wall decor On the accent piers of the flight — frames for mirrors, decorative panels — continues the hall's logic. The staircase and hall should be perceived as a single architectural space, not as two separate rooms.
Set: oak steps + risers + moldings on the stair wall + baseboard + cornice on the landing + Wall Decor on the piers + Decorative stucco as an accent + glue + fasteners + sealant + primer + paint + varnish.
Grand staircase: decor as a statement
A grand staircase in a mansion, country house, or spacious apartment is a place where decor should work to the maximum. Wooden steps made of oak with a pronounced texture. Risers with molding frames and corner inserts. The wall along the flight — with rectangular molding frames along the entire height. Decorative stucco on the piers between the frames. Cornice on the landing with a rich profile.
This is not excess. This is proportionality: a large space requires large and detailed decor.
Set: oak treads + risers with frames + ends + wall frame moldings + Decorative stucco on the piers + cornice + baseboard + glue + fasteners + sealant + primer + paint + oil or varnish.
How to design risers: five scenarios
The riser — the vertical plane of the staircase — is the most "designer" element of the flight. It creates the character of the staircase when viewed from bottom to top. Let's consider five working scenarios.
Scenario one: riser matching the tread
Riser made of the same solid wood as the tread, coated with the same oil or varnish. The staircase looks like a monolithic wooden object. The most strict and modern option.
Technical feature: the riser is attached to the tread from below (via a groove or with glue and fasteners), not nailed through. This eliminates visible fasteners.
Scenario two: white riser against dark wood
Classic. Tread made of dark oak, riser — white. This is a color contrast that separates the horizontal plane from the vertical and creates a rhythm of "stripes" when viewing the flight as a whole.
The white riser can be wooden for painting or MDF for painting. For damp rooms — moisture-resistant MDF with two layers of primer and enamel.
Scenario three: decorative frame on the riser
Thin Polyurethane molding is glued to the surface of the riser, forming a rectangular frame. Inside the frame — paint of a slightly different shade or simply a contrasting background. Decor for Molding adds a classic accent in the corners of the frame.
Important: the height of the frame should be 20–30 mm less than the height of the riser on each side. The frame should not reach the edge of the tread, otherwise it will be scuffed when walking.
Scenario four: painted or tiled riser
In Mediterranean, Mexican, or Eastern styles, risers are tiled with decorative tiles or hand-painted. Each riser is a separate "canvas." The step itself remains wooden or stone.
This is the most labor-intensive and expensive option, but it creates a unique character for the staircase that cannot be confused with any other.
Scenario five: open riser (without a riser)
In modern and loft interiors, risers are removed entirely — the staircase becomes "transparent" and airy. The steps are supported by side stringers or a central beam. A gap is visible from below.
This is an architectural solution that requires proper calculation of the load-bearing structure and is only permissible with a corresponding base of the flight.
Proportions and scale: what defines the system
Riser height and tread width: safety standards
A comfortable staircase is built according to the rule "2h + b = 600–640 mm", where h is the riser height, b is the tread width. With a riser height of 170 mm, the tread width should be 260–300 mm. With a height of 180 mm — 240–280 mm.
This is not aesthetics — it's biomechanics. A staircase built according to this rule is perceived as comfortable and intuitively "right". Violation of the proportion — the staircase is either too steep (fatigue when climbing) or too shallow (uncomfortable step).
Scale of moldings on the stair wall
Moldings on the stair wall should be proportionate to the wall height and the length of the flight. A narrow dark flight in a corridor — thin profiles 20–30 mm, no more than two horizontal lines. A wide open staircase in a hall — moldings 50–70 mm with a clear relief.
Frames on the stair wall make sense only with a flight length of 5–6 steps and a wall height of 2 meters. With a shorter flight, the frames will look like an unfinished set of elements.
Baseboard: height and profile
For a staircase flight, the optimal baseboard is 60–80 mm high. A higher one (100+ mm) creates visual heaviness at the base of the stairs. A lower one (40 mm) gets lost against the staircase structure itself.
The baseboard profile should echo the profile of the moldings on the wall: the same style of relief — classical, geometric, baroque — creates unity of the system.
Mistakes in finishing a wooden staircase
Buying steps without a riser diagram
The steps are ordered. Wooden, beautiful. They arrived — but the risers are not provided, or are provided but from a different wood species. As a result, the staircase is assembled from parts from different sources, and something always doesn't match: shade, texture, thickness. Solution: order steps and components for staircases simultaneously, as a single package.
Forgetting about ends and junctions
The steps are installed. They look nice — from above. But from the side, the ends are exposed, the joint of the step with the wall is bare. This is a classic mistake: when ordering materials, end elements and junction profiles are not included in the list. The result is an extra trip for material in the middle of installation.
Not including a skirting board along the flight
"The staircase looks fine as is," says the customer, looking at the freshly installed steps. It looks fine. Until you see the joint of the lower ends of the steps with the wall — a gap 5–10 mm wide, filled with construction dust. A skirting board is not a luxury. It is an architectural necessity.
Choosing too large a relief for a narrow staircase
A narrow staircase in a house with a width of 80–90 cm is not a place for expressive relief moldings. A large profile of 80–100 mm on a narrow wall will create a feeling of crampedness. For narrow flights — only thin, laconic profiles. Let decorative relief remain for the landing and hall.
Place molding in the foot strike zone
Surface-mounted decorative elements On the riser in the lower third — 15–20 cm from the horizontal surface of the lower step — this is the constant strike zone of the shoe toe when climbing. Any protruding decor here will be knocked off within a few months. Rule: protruding molding only above 20 cm from the lower step on the riser.
Not connecting the staircase with the hall
The staircase is decorated on its own. The hall has a different style of moldings, a different baseboard, a different cornice. At the junction of the landing and the hall, there is a visible break in the systems. This is a design error: the finishing of the staircase and the finishing of adjacent rooms should be designed together.
Not taking a reserve for trimming
Especially critical for the baseboard on the stair flight: it needs to be cut at a non-standard angle. Each cutting error means a loss of a piece of the profile. Without a 15% reserve, there is a high risk of stopping installation at the most inopportune moment.
Forgetting sealant for joints
Joints of moldings, baseboard-to-step junctions, corner connections — all require sealing. Without sealant, dust accumulates in these places, and gaps form that are difficult to clean. Acrylic sealant is applied before final painting and is painted together with the profile.
Buying wood and polyurethane without a common painting scheme
Steps under oil — warm brown tone. Moldings and baseboard — white. Risers — painted with gray paint (because 'it was that way'). Three different color stories on one staircase is chaos. The painting scheme is drawn up before purchasing materials: what will be wood under oil, what will be painted white, what will be in the neutral tone of the wall.
Checklist: complete order for finishing a stair flight
Wooden elements:
-
steps and components for staircases — by number of steps + 1 spare;
-
Risers — by number of risers + 1 spare;
-
End caps — by number of open ends;
-
Pogonazh iz massiva — fillets, edge profiles, divider strips;
-
Wooden decor and overlays — if necessary.
Polyurethane profiles:
-
Polyurethane baseboard — along the length of the flight + 15%;
-
Moldings made of polyurethane — along the length of the wall + 15%;
-
Polyurethane moldings — cornice on the landing + 10%;
-
Decorative stucco — by number of accent positions;
-
Polyurethane wall decor — frames on the piers;
-
Decor for Molding — 4 corner inserts for each frame.
Mounting materials:
-
Fasteners for wooden steps;
-
Polyurethane mounting adhesive — more about selection;
-
Acrylic sealant white;
-
Primer for painting polyurethane;
-
Paint — for risers, baseboard, moldings;
-
Oil or varnish — for wooden steps and exposed wooden elements.
STAVROS: a full arsenal for staircase finishing
STAVROS is a Russian manufacturing company with a history since 2002. It produces solid wood products and polyurethane decor for interiors. Everything from steps and staircase components to molding, crown moldings и decorative molding — is manufactured and supplied in a unified system.
This is what matters for staircase finishing: the customer receives not scattered parts, but a set coordinated in scale and relief. Wooden steps, moldings, trims, and baseboards were designed with the understanding that they would be used together.
STAVROS started with restoration work for historical sites — the Konstantinovsky Palace, the Hermitage, the Alexander Palace. This experience with architectural proportions and historical profiles sets the standard of quality and precision present in every product.
Production in Saint Petersburg. Showrooms in Saint Petersburg and Moscow. Delivery across all of Russia. Order from one piece. Stock — from 3 working days. Custom order — 5–10 working days.
Frequently asked questions
Can wooden steps and polyurethane moldings be combined?
Yes, and this is the optimal solution. Wood is used where there is load: steps, risers, ends, edge elements. polyurethane decor — for baseboards, wall moldings, frames on risers, cornices on the landing. Each material in its place.
What to buy for finishing a staircase in a classic style?
Wooden steps, risers, end elements, Polyurethane baseboard, Moldings on the wall, decorative molding on the partitions, glue, fasteners, sealant, primer, paint, and varnish. Reserve — 10–15%.
Can moldings be installed on risers?
Yes, provided the profile does not fall into the kick zone (lower 15–20 cm of the riser). For risers, choose thin profiles with a small projection. Decor for Molding with corner inserts adds a classic accent.
How to cover the junction of the stairs to the wall?
With a polyurethane baseboard — to close the joint of the lower ends of the steps with the wall. Acrylic sealant — for joints between the step and the wall in the contact area. With a cove solid wood trim — in the corner between the step and the riser.
How not to overload the stairs with decor?
Make wooden steps the main material — they set the character of the stairs. Moldings and the baseboard is the background and frame. Decorative stucco — only pointwise, on the piers and landing. Three levels of decor — maximum.
What is the angle for cutting baseboard for a staircase?
The cutting angle equals the angle of the staircase flight. Standard staircases in residential buildings have an angle of 30–37°. The baseboard is cut at this angle using a miter saw with an adjustable cutting angle. The joint between the staircase baseboard and the horizontal hall baseboard is a separate corner element that needs to be calculated in advance.
What type of wood should be chosen for steps in a private house?
Oak is the optimal choice for a residential house with constant load. Hardness, expressive texture, responds well to oil and varnish treatment. Ash is slightly harder, lighter, suitable for interiors in a light color scheme. All species are available in the range of staircase components STAVROS.
Is a cornice needed on the staircase landing?
It is advisable. A cornice on the landing creates an architectural completion of the flight — a sense of 'arrival' in a designed space. Without a cornice, the transition from the flight to the landing looks unfinished. The scale of the cornice should correspond to the ceiling height and the area of the landing.