Article Contents:
- One wardrobe is several different tasks for handles
- A tall door requires a handle that supports the scale of the facade
- Handle length and door height: it is useful to compare the proportion, but not turn it into a standard
- A tall handle changes the architecture of the wardrobe
- A small facade is especially sensitive to projection
- HL-036 as an example of one design in three scales
- Pull handle for doors and frequently used drawers
- Drawer pull
- Profile handle as part of the cabinet's geometry
- HL-011 as a real example of a size range
- Facade thickness affects fastener length
- The central gap visually amplifies the error
- A simple check before drilling
- Top cabinet and user of different heights
- For a large series, a control set is useful, not just one handle
- The sample must be linked to a specific SKU and finish
- Uncoated handles and coated handles
- Push-to-open front
- Integrated or recessed grip area
- HL-036 — push button in three sizes
- HL-049 — compact button handle
- Allow for reordering
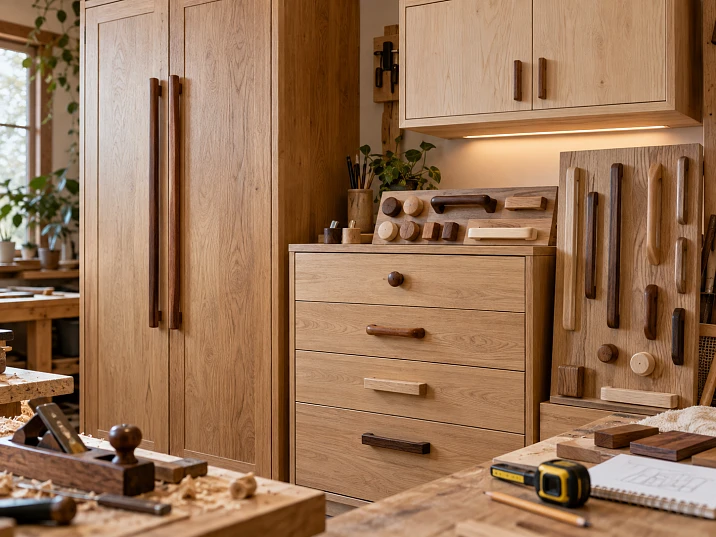
A large wardrobe rarely has only one type of front. Two tall hinged doors sit next to a top cabinet, drawers appear at the bottom, and a narrow section on the side. If you put the same handle on everything just for the sake of a "unified design," some fronts will be convenient and some will not. A long handle that works well on a 2200 mm tall door can take up half of a small drawer. A compact knob that works well on a drawer can be inconvenient on a tall, heavy door.
Therefore, it is better to choose wooden handles for a wardrobe not on the principle of "one model for everything," but as a system.
Work sequence:
wardrobe → front groups → grip zone → handle type → size → mounting points → opening check → material and finish → sample → drilling template → specification → order.
The main task is to achieve three things at once:
- large doors open conveniently;
- small fronts are not overloaded;
- the entire wardrobe is perceived as a single piece of furniture, even if the handles have different sizes or types.
One wardrobe is several different tasks for handles
Let's imagine a typical wardrobe.
It contains:
- two doors 2200 mm high;
- three top-box doors 450 mm high;
- four drawers 180–250 mm high;
- narrow side door;
- internal pull-out drawer.
All fronts belong to one piece of furniture, but they work differently.
A person pulls a tall door toward themselves with the whole hand.
And the top-box door is opened above shoulder level.
The drawer is pulled horizontally.
There is little space on a narrow door for large hardware.
Therefore, an identical handle does not automatically become the right one just because the fronts are in the same cabinet.
First, divide the fronts into groups
For a production project, simple Russian designations are sufficient:
- VD-01 — tall door;
- MD-01 — small door;
- YaShch-01 — drawer;
- ANT-01 — top cabinet;
- UZK-01 — narrow front.
After that, the handle is selected not “for the cabinet in general,” but for each group.
For example:
VD-01 → long profile handle
BOX-01 → push-button handle
ANT-01 → short pull
This approach is much clearer for both the designer and the assembler.
When one group is enough
If a wardrobe consists of only two identical tall doors, the system is simple: one SKU, one size, mirrored installation.
But as soon as fronts of a different scale appear, the question needs to be revisited.
A narrow side section requires separate verification
A narrow front often turns out to be the most inconvenient for a universal handle. If a door 250–300 mm wide gets the same long pull as a 600 mm wide leaf, the handle starts to occupy too much of the surface. If you place a push-button too close to the edge, the grip becomes uncomfortable, and the attachment point itself ends up visually pressed against the side panel.
For a narrow front, you need to check:
- how much clear space remains after installing the handle;
- whether the handle overlaps with the frame or molding;
- whether it is comfortable to grip with your hand;
- whether the hand touches the adjacent section;
- whether the handle conflicts with the side wall of the wardrobe when fully opened.
Pay especially close attention to a built-in wardrobe that stands close to the wall. A handle on the outermost door may look great from the front and hit the wall when opening.
Internal drawers can be placed in a separate group
If there are internal drawers behind the hinged doors, their handles do not have to match the external ones one-to-one.
When closed, they do not participate in the external composition of the wardrobe at all. This means you can put more emphasis on:
- convenience;
- compactness;
- the absence of a protrusion that interferes with closing the doors;
- easy installation.
For example, exterior doors get long wooden profiles, while interior drawers get small knobs or short pulls of the same wood species.
This does not disrupt the wardrobe design, because the two groups are visible at different moments of use.
A facade matrix helps keep track of exceptions
For a complex wardrobe, it is useful to create a short table before choosing the SKUs:
| Group of fronts | Quantity | Size | How it opens | What matters for the handle |
|---|---|---|---|---|
| Tall doors | 2 | 2200 × 550 | hinged | full grip, scale |
| Top shelf/mezzanine | 3 | 450 × 550 | hinged | bottom access, compactness |
| Drawers | 4 | 220 × 700 | sliding | horizontal grip, rhythm |
| Narrow section | 1 | 2200 × 280 | hinged | compact size, side wall |
| Internal drawers | 3 | 160 × 500 | sliding | minimal projection |
After such a table, it becomes obvious that "one handle for everything" is just one of the possible options, not the default rule.
A conditional example of a unified system for a complex wardrobe
Let's take a wardrobe about three meters wide. It has two tall doors of 2200 mm each, four drawers 700 mm wide, and three top cabinet doors 450 mm high.
The task is to keep modern wooden hardware but not force all fronts to use a single physical length.
For tall doors, the craftsman considers the long HL-033 profile, 900 mm long with a 768 mm center-to-center distance. On a 2200 mm door, such a handle occupies about 41% of the height:
900 / 2200 ≈ 0,41.
It already reads as a noticeable vertical, but does not cover almost the entire front.
On drawers, the same 900-millimeter option is impossible: the front is 700 mm wide. Here the craftsman switches to the compact HL-036 button, 53 mm in size. Four buttons line up on a single vertical axis.
On the top cabinets, one can consider a short version of the profile handle or a small pull, for example around 180 mm, if the actual grip and opening are confirmed by a sample.
The result is not one handle, but three groups:
- 2 long handles on the doors;
- 4 buttons on the drawers;
- 3 short handles on the top cabinets.
Total — 9 pieces.
So that the wardrobe does not look assembled from random hardware, the craftsman unifies them:
- a single wood species;
- a single finish;
- the same degree of gloss;
- coordinated installation coordinates.
Next, three drilling templates are created instead of nine individual markings.
This example illustrates the main principle of the article: the unity of a cabinet is achieved not by making every handle the same size, but through a coordinated system of sizes, materials, and coordinates.




A tall door requires a handle that supports the scale of the front
On a tall front, a small handle may work physically, but visually and ergonomically it can look random.
Here, what matters is:
- overall handle length;
- center distance;
- projection from the facade;
- grip zone;
- installation height;
- position relative to the central gap;
- the weight and rigidity of the door itself.
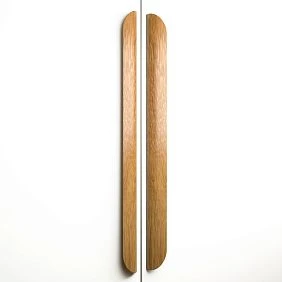
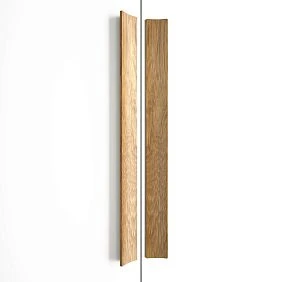
For tall fronts, STAVROS offers separate long versions of wooden handles, and this specific narrow question is covered in more detail in the article about long handles for a hinged wardrobe.
A more important question here is how to coordinate such a long handle with the other handles of the wardrobe.
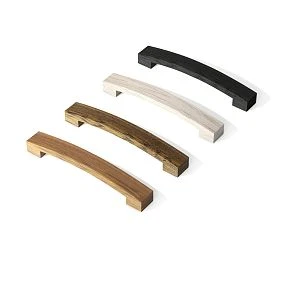
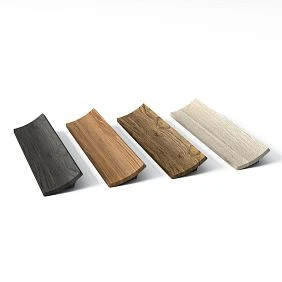
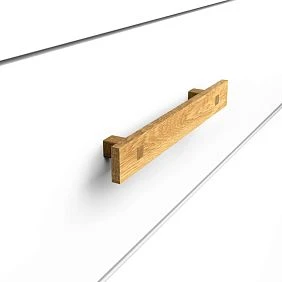
Our factory also produces:
Handle length and door height: it is useful to compare the ratio, but not turn it into a standard
For comparison, a simple indicator can be used:
handle ratio = handle length / front height.
Let's imagine a door with a height of 2200 mm.
A 400 mm handle occupies:
400 / 2200 ≈ 18% of the height.
Handle 900 mm:
900 / 2200 ≈ 41%.
Handle 1800 mm:
1800 / 2200 ≈ 82%.
This does not mean that 18%, 41%, or 82% are right or wrong.
The formula is only needed to visually compare the scale.
A 400 mm handle will be perceived as a separate element.
At 1800 mm — almost like a vertical facade profile.
There is a huge visual difference between these solutions.
Get Consultation
A tall handle changes the architecture of the wardrobe
The longer the handle, the more it becomes part of the vertical pattern of the furniture.
On two adjacent doors, long handles can form:
- two parallel verticals;
- one central pair;
- a visual frame;
- an accent that almost replaces a decorative molding.
Therefore, on tall fronts, the size cannot be chosen based only on grip convenience.
You need to look at the entire cabinet.
The installation height of a long handle should be based on the grip zone
A long handle has a specific feature: a person can grab it at different points. Therefore, the length itself does not solve the issue of convenience if the entire part is installed too high or too low.
For design purposes, it is useful to note separately:
- the lower point of the handle;
- the top point;
- the working zone that will be used most often;
- the height of this zone from the floor.
Let's imagine a handle 900 mm long. If its lower end starts at a height of 1100 mm, the top will be at 2000 mm. For an adult user, it may be convenient because the lower half falls within the natural reach of the hand.
If the same handle is raised so that the bottom is at 1500 mm, the actually convenient zone is greatly reduced, even though the length itself remains the same.
Therefore, in the drawing it is better to record not only the "900 mm handle" but also its installation coordinate.
The vertical alignment of the handle must be coordinated with the facade grid
On a wardrobe with several tall doors, the handles form their own rhythm. If one door leaf is narrower or wider than another, mechanically placing all handles at the same distance from the outer edge sometimes creates a visual skew.
It is useful to compare two options:
- tying each handle to the nearest edge of its own door;
- aligning the entire handle system to the cabinet's common central grid.
For two identical doors, the first method is usually simple.
For an asymmetrical cabinet, the second can give a more cohesive look.
There is no universal answer: it is important to see the entire facade row, not just one door separately.
A small drawer should not copy the handle of a tall door
On a drawer, the same long handle may not physically fit or may take up almost the entire width.
Let's imagine a drawer 500 mm wide.
A handle 400 mm long takes up:
400 / 500 = 80% of the width.
On a tall door, 400 mm could look moderate.
On a drawer, this is almost a full horizontal profile.
Such a solution can be intentional, but it is completely different in character.
What is more often suitable for small drawers
For compact fronts, it makes sense to consider:
- a button knob;
- a short pull;
- a small profile handle;
- a compact surface-mounted handle.
The handle should provide a comfortable grip but not become the main mass of the front.
A small front is especially sensitive to projection
On a small drawer, length is not the only thing that matters.
If the handle protrudes strongly forward, it may look bulkier than it appears on the product card.
Check:
- the depth;
- finger clearance;
- neighboring drawer;
- the possibility of clothing catching on it accidentally.
An upper cabinet is a separate zone, not a scaled-down copy of the lower door
The upper cabinet is located above the usual grip zone.
Therefore, the handle position cannot be automatically copied from the lower door.
The user reaches upward.
It is important for them to grip the handle confidently with one hand.
What to check
- the installation height from the bottom edge of the upper cabinet door;
- height of the intended user;
- the direction of opening;
- handle size;
- overhang;
- ability to reach it from below;
- proximity to the ceiling or cornice.
If the door opens to the side, it usually makes sense to place the handle closer to the lower and unobstructed area.
If a lift mechanism is used, the scenario is different: the handle should be convenient specifically for the first opening motion.
Why a long vertical handle is often unnecessary here
An overhead cabinet door is not tall by itself.
A long handle can take up almost its entire surface without providing any additional convenience.
Often better:
- a short pull;
- button;
- compact profile.
But the final decision depends on the size of the facade and the mechanism.
Button, bracket, and profile: how to distribute handle types across the cabinet
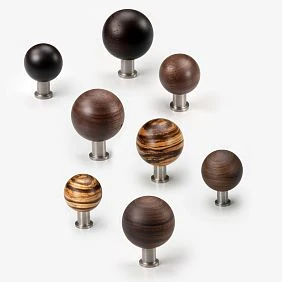
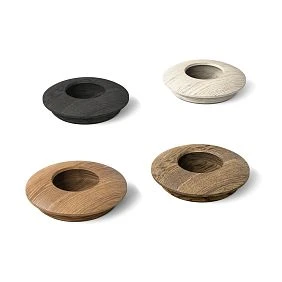
The STAVROS catalog has a separate category — of premium quality. We use solid oak, walnut, ash, beech — species that are beautiful, strong, and pleasant to the touch. Each button is hand-turned or carved by our artisans, processed with attention to texture, shape, and finish..
A button is convenient where a compact, precise grip is needed.
For example:
- small drawer;
- small door;
- internal section;
- top cabinet;
- a facade where the handle should not dominate.
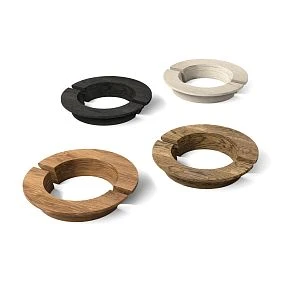
HL-036 as an example of one design in three scales
The HL-036 model is currently available in three size versions:
- 37 × 22 × 15 mm;
- 53 × 27 × 18 mm;
- 74 × 29 × 25 mm.
This is a useful example for a cabinet.
One character of form can be scaled for different facades without forcing all furniture to use one physical length.
Knob handle HL-036 is available in beech and oak and is supplied unfinished.
When the button is inconvenient
On a large, heavy door, it may be easier for a person to grab the pull with their whole hand.
A button provides a more localized grip.
Therefore, a tall door and a small drawer can quite rightly receive different types of handles.
Pull handle for doors and frequently used drawers
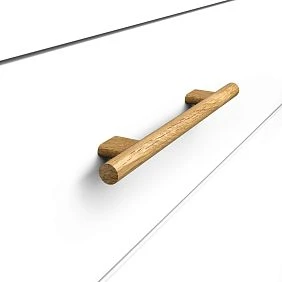
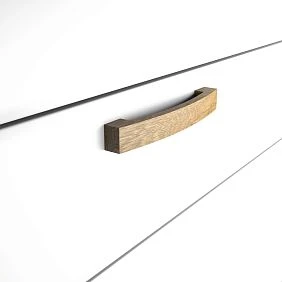
Wooden handle brackets provide a clear grip and usually have two mounting points.
For a cabinet, this is convenient if:
- the door is opened frequently;
- a confident grip is needed;
- the handle should be noticeable but not take up almost the entire front;
- the average size is used.
Check three parameters separately:
- total length;
- center distance;
- overhang.
These values answer different questions.
Overall length — for scale.
Center-to-center — for drilling.
Overhang — for grip comfort and possible collisions.
Handle on the drawer
For a medium or wide drawer, a handle is often more convenient than a knob.
But you shouldn't automatically transfer a vertical handle from a door to a drawer in the same position.
On a drawer, it more often works horizontally.
If the same model allows for such use, the system can look very cohesive.
But the specific orientation needs to be checked on the selected product page and on the actual front.
Profile handle as part of the wardrobe's geometry
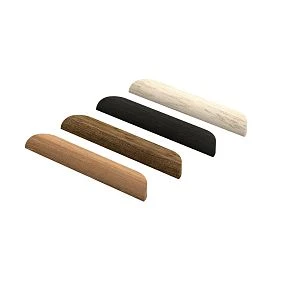
In the category wooden profile handles there are long versions that are no longer perceived as a separate small piece of hardware, but as a vertical or horizontal line.
This is convenient for tall wardrobes.
But such a handle has a stronger effect on the composition.
When the profile is especially appropriate
If the front is:
- tall;
- smooth;
- laconic;
- without large carved decor;
- requires a pronounced vertical.
A long wooden handle can become the main element.
When the profile becomes too strong
On a facade with:
- moldings;
- pilasters;
- carved overlays;
- an active panel
a long profile may begin to compete with the decor.
Therefore, the handle is chosen together with the entire facade system.
One model in different sizes — the simplest way to maintain consistency
For a cabinet with different fronts, it is not necessary to use completely different handles.
It is often better to choose one geometric family.
Large size — for a tall door.
Medium — for a standard door.
Small — for a drawer or top cabinet.
This preserves:
- shape;
- the material;
- finishing;
- the character of the grip;
- the common language of the furniture.
Only the scale changes.
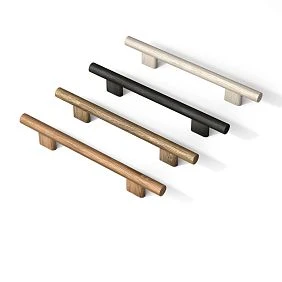
HL-011 as a real example of a size range
The HL-011 model is available in a wide range of sizes.
Currently, the product page lists, in particular:
- 180 × 40 × 25 mm, center-to-center 128 mm;
- 260 × 40 × 25 mm, center-to-center 192 mm;
- 400 × 40 × 25 mm, center-to-center 320 mm;
- 500 × 40 × 25 mm, center-to-center 384 mm;
- 600 × 40 × 25 mm, center-to-center 512 mm;
- 700 × 40 × 25 mm, center-to-center 576 mm;
- 900 × 40 × 25 mm, center-to-center 768 mm;
- longer versions up to 1800 mm.
Such a range allows you to select a single design line for facades of different scales.
Handle HL-011 is available in beech and oak and is supplied unfinished.
What not to do
There is no need to take the 1800-millimeter version for a tall door and then try to put the same physical handle on a drawer just for the sake of unity.
Unity is created by form.
Size must be subordinate to the facade.
The size system must be limited in advance
Even if one model is available in ten lengths, you do not need to use all ten in a single cabinet.
The more options, the more complex:
- purchasing;
- drilling;
- inspection;
- repeat order;
- storage of spare parts.
For most cabinets, two or three sizes within one line are sufficient.
For example:
- large — for tall doors;
- medium — for standard doors and top cabinets;
- small — for drawers.
This way the system remains flexible but does not turn into a set of random variations.
Example of matching one line with three fronts
Let's take three fronts as an example:
- door 2200 mm;
- top cabinet 500 mm;
- drawer 700 mm in width.
For the door, the long version of 900 mm can be considered.
For the top cabinet — 180 or 260 mm, if the handle type and opening method are suitable.
For the drawer — 260 or 400 mm in horizontal orientation, if the specific model allows such a solution.
This does not say that these exact dimensions are mandatory. The point is the method: one design is preserved, and the length changes according to the scale of the front.
Not all sizes within the series are equally convenient for mounting
For the long line, the center-to-center distance changes along with the overall length. Therefore, reducing the handle does not mean that the holes will remain the same.
If the project moves from 900 to 700 mm, you need to take the center-to-center distance from the card again and update the drilling template.
You cannot keep one universal jig “for the entire series” if the mounting points differ between sizes.
When one model family is not enough
Sometimes even a large size range does not cover the entire wardrobe.
For example:
- tall doors require a long profile;
- a button is more convenient on drawers;
- on the top cabinet — a small bracket.
In this case, it is better to deliberately use two or three coordinated groups.
This is not a mistake.
The mistake is mixing random handles without a common logic.
How to tie together different types
Unity can be maintained through:
- one wood species;
- the same finish;
- the same color;
- similar geometry;
- repeating radius;
- uniform thickness;
- overall rhythm of arrangement.
For example:
long oak profile handle on doors + compact oak knobs on drawers + uniform clear finish.
The shape varies.
Material and surface character unify the system.
When two groups are better than one SKU
If functionally:
- the door requires a full grip;
- the drawer — a compact one;
- mezzanine — for convenient grip from below,
convenience should not be sacrificed for formal uniformity.
Overall length and center-to-center distance are different parameters
For a two-point handle, you cannot select holes by overall length.
For HL-011, for example, the 400 mm version has a center-to-center distance of 320 mm.
For HL-033, the 400 mm length also has a center-to-center distance of 320 mm, but for other sizes the values vary according to their own series.
Therefore, the drawing must specify separately:
- overall dimensions;
- center-to-center;
- thickness;
- overhang.
You should not assign universal letter designations without checking the specific product card.
Within the project, you can use Russian names:
Length
Center-to-center
Overhang
Thickness
This reduces the risk of a letter from one card being mistakenly transferred to another.
If the holes already exist
When replacing a handle, the logic changes completely.
For new furniture:
first the handle → then the holes.
For repairs:
first the holes → then the handle.
If the front already has two holes with a 128 mm center-to-center distance, the handle must either have the same value, or the old holes will have to be redone and masked.
This is already a different project.
How to calculate the hole coordinates for a symmetrical bracket
If the handle has two mounting points and must be positioned strictly in the center of the front, it is convenient to calculate from the central axis.
Let the front width be 500 mm.
Handle center-to-center distance — 128 mm.
Center of the front:
500 / 2 = 250 mm.
Half of the center-to-center distance:
128 / 2 = 64 mm.
Then the horizontal hole centers:
250 − 64 = 186 mm
и
250 + 64 = 314 mm.
This calculation is more useful than marking "approximately in the center."
For a vertical handle, the same principle applies along the height if it is centered relative to a given area.
If the handle is offset toward the edge, one constant base is needed
On a hinged door, the handle is often placed closer to the free edge.
Then it is convenient to specify:
- distance from the edge to the handle axis;
- the height of the lower or upper point;
- center-to-center.
For example:
handle axis — 70 mm from the inner edge of the door.
This value is repeated on the mirrored door.
With this approach, the width of the door itself may change slightly, while the visual alignment to the central gap is preserved.
The thickness of the front affects the length of the fasteners
The same handle can be installed on a 16, 18, 19, or 22 mm front. The fasteners do not necessarily remain the same.
Before the series, check:
- the actual thickness of the front;
- the screw length;
- the presence of a washer;
- the depth of the thread in the handle;
- whether the fastener extends into an unwanted area.
This is especially important if part of the wardrobe has fronts of a different design or thickness.
Two adjacent doors: handles must be checked as a pair
On a two-door wardrobe, each handle may look good individually.
But after installation, a central pair appears.
That is exactly what a person sees.
Check:
- same height;
- mirroring;
- distance to the central gap;
- the same offset from the edge;
- parallelism;
- overhang;
- the opening trajectory.
The central gap visually amplifies the error
Suppose two doors have a 3 mm gap.
The handles are installed near the center.
If the left one is 4 mm higher than the right, the difference is especially noticeable: two long verticals are compared directly.
On separately placed fronts, the error might not catch the eye.
In a pair, it is noticeable immediately.
Template for mirrored installation
It is better to use a single template that can be flipped for the left and right doors.
This preserves:
- height;
- indent from the edge;
- center-to-center;
- symmetry.
Collision check: a single closed view is not enough
Large handles may not conflict while the cabinet is closed.
The problem appears when opening.
Possible collisions:
- handle with handle;
- handle with adjacent front;
- handle with side wall;
- handle with protruding architrave;
- handle with adjacent furniture.
Simple check before drilling
- Make two full-size handle templates.
- Temporarily attach them to the fronts.
- Open the doors.
- Check the trajectories.
- Check the hand position.
- Assess whether one handle catches on another.
For long profile models, it is better to use the actual depth, not just the paper outline.
You can temporarily attach a spacer block of the required projection.
Why projection is critical
Two handles of the same length but different depths behave differently.
The more a component protrudes from the front, the sooner it may meet the adjacent door.
A corner cabinet creates a separate collision risk
If two doors meet at an angle or one door opens next to a side panel, a front drawing is not enough.
You need to look at the top view plan.
On it, the following become visible:
- opening angle;
- handle trajectory;
- distance to the adjacent panel;
- finger space;
- possibility of full opening.
A long handle may pass next to the adjacent door when closed, but when it turns, its upper or lower end will be closer to the obstacle.
For such units, a full-size paper template is especially useful.
Check not only for collisions between parts, but also for collisions with hands
Two handles may technically not touch each other, but the user will not be able to comfortably grasp one without touching the adjacent one.
This is typical for the central pair of very closely spaced handles.
Check:
- can the handle be grasped with the whole hand;
- do the fingers press against the second handle;
- is there room for the palm between the two doors;
- is it convenient to open both doors separately.
Clean geometry does not yet guarantee normal operation.
The drawers must form a single coordinate system
With four drawers, even a small height error becomes noticeable.
A person sees not four separate handles, but a vertical row.
Therefore, marking "each drawer separately by ruler" is a weak approach.
Better to use:
- common template;
- jig;
- coordinate table;
- one baseline.
Center mounting
If the handle is centered, the following is fixed:
- half the width of the front;
- half the height or another design coordinate.
Offset mounting
In a modern wardrobe, handles are sometimes deliberately offset.
Then it is especially important that the offset is repeated consistently.
For example:
60 mm from the right edge
for all four drawers of the same type.
Different drawer heights
If the top drawer is 160 mm and the bottom one is 300 mm, the same numerical handle height from the top edge can produce a different visual effect.
Here you need to choose a principle:
- centered on each front;
- along a single horizontal line;
- according to the design grid.
And secure it once.
One long handle or two short ones on a wide drawer
A wide drawer creates a separate task.
You can install:
- one long central handle;
- two short ones;
- two buttons;
- one profile across a significant portion of the width.
There is no universal answer.
One long handle
Advantages:
- a single horizontal line;
- a clear center;
- grip in the large zone.
But it can become too noticeable.
Two short handles
Advantages:
- visual weight is distributed;
- easier to maintain symmetry;
- can be opened with two hands.
But additional markings appear.
The two elements must be positioned strictly symmetrically.
What to check besides width
The decision depends on:
- drawer construction;
- its mass;
- guides;
- facade composition;
- the selected handle size.
There is no need to introduce an artificial limit like "always two handles after 800 mm".
First, the specific drawer is checked.
Top cabinet and users of different heights
A bedroom wardrobe has one user.
A family wardrobe has several.
The top cabinet may be used by people of different heights.
Therefore, the handle should not be placed too high just for symmetry with the lower fronts.
Simple test
Make a temporary handle template at the intended height.
Ask the user to:
- reach;
- grab;
- open the front;
- close it.
If a person has to reach with their fingertips, the position is inconvenient.
Moving the handle down may be more important than perfect geometric symmetry.
Handle at the bottom on the overhead cabinet door
For some layouts, it makes sense to position the handle closer to the bottom edge.
This makes it more accessible.
But you need to check:
- whether it conflicts with the lower door;
- whether it hits the cornice;
- whether it touches the adjacent front.
One test handle before drilling all fronts
The product page provides the dimensions.
But only the physical handle shows:
- the actual grip;
- the feel of the material;
- overhang;
- finger comfort;
- visual mass;
- surface quality;
- precise mounting.
Therefore, before drilling the entire series, it is useful to order one sample.
Check on a test front
Even better — install the handle on one test front.
Checked:
- height;
- indent;
- grip;
- the adjacent door;
- opening;
- color;
- position relative to the molding.
After that, the template is fixed.
If the cabinet has several types of handles
At least one sample of each type is needed.
For example:
- one long handle;
- one button;
- one short bracket.
Only after viewing them together can you assess whether they truly form a single system.
Sample testing should not be visual only
A good handle can look appealing in a photo and disappoint in the hand.
It is useful to perform several real actions on the sample:
- open and close the door ten to fifteen times;
- open it with a wet or slightly damp hand if the cabinet is next to a bathroom or dressing area;
- check the grip with two different people;
- assess whether the edge cuts into fingers;
- check whether it is comfortable to grasp the handle from below and above;
- see whether marks are left on the chosen surface.
This is not a laboratory test. It is a simple operational check before a production run.
For a large production run, a control set is useful, not just one handle
If there are ten cabinets, one handle confirms the geometry but does not show batch consistency.
You can order a small control set and check:
- uniformity of dimensions;
- the material;
- wood shade;
- surface quality;
- completeness of the hardware.
After that, place the main order.
The sample must be linked to a specific product code and finish
It is not enough to label the box "cabinet handle".
Better:
HND-01 | HL-011 | 900 mm | oak | finish O-02 | approved.
This way, after a few months, the workshop clearly understands what was the reference standard.
Beech, oak, and the finish must support the overall cabinet system
There is no need to repeat all the material about wood species.
For a cabinet, it is more important to decide what role the wood plays.
Beech
Practical if the handles will be painted together with the fronts.
For example:
- cabinet for enamel;
- handles in the same color;
- the wood texture should not be visible.
Oak
Especially interesting if:
- the handle remains natural;
- oil is used;
- clear varnish;
- Tinting;
- the cabinet has other oak parts.
But the specific material is always verified in the product page of the selected model.
All handle types must follow the same finishing logic
If the doors have an oak profile under clear lacquer, and the drawers have a knob under thick enamel in a random color, the system can fall apart.
It is better to decide in advance:
all handles are natural
Or:
all handles are painted
Or:
there is a deliberate division into groups.
Unpainted handles and coated handles
Convenient for a custom color unpainted wooden handles.
This option is useful if:
- the cabinet is painted in a custom color;
- the handles must match the facade;
- a custom tint is used;
- a uniform gloss level is required.
If a ready-made coating option already fits, you can use Wooden handles with coating.
Then the chain is shorter:
receipt → inspection → installation.
For a cabinet with multiple handle types, the decision must be made for the entire system at once
For example:
- long handles on doors without coating;
- knobs on drawers also without coating;
- everything is painted with the same enamel.
This is how different shapes are unified by color.
If one group has a ready-made coating and the other is painted independently, you need to check whether a noticeable difference in shade and gloss will appear.
The color of the handles can be used to unify different types
If a cabinet gets profile handles on the doors and knobs on the drawers, a single color often ties them together more strongly than trying to match an absolutely identical silhouette.
This works especially well with opaque enamel.
For example:
- long beech handles;
- beech buttons;
- the same preparation;
- one color code;
- the same degree of gloss.
The shapes differ, but all the hardware reads as one system.
With a transparent finish, the material becomes more noticeable than the shape
If the handles remain in natural oak, the viewer sees:
- wood grain;
- tone;
- porosity;
- the direction of the grain.
Then a knob and a long handle can pair well if they are made of the same species and finished similarly.
If one part is oak and the other is beech under clear lacquer, the difference may become more noticeable than the difference in the shapes themselves.
For repeat orders, keep the finish card
If handles are painted in the workshop, a color name alone is not enough.
Save:
- preparation;
- soil;
- color;
- finish layer;
- gloss level;
- approved sample.
Then a new batch of handles can be entered into the same system without matching "by eye".
When an external wooden handle is not needed at all
Expert selection should not end with a mandatory handle purchase.
There are cabinets where external hardware only gets in the way.
Push-to-open front
If a mechanism is used that allows the door to be opened by pressing, a handle may be unnecessary.
This is especially relevant for smooth modern fronts, where the entire composition is built on a clean plane.
But such a solution should be evaluated not only visually. Check:
- how convenient it is to open a heavy door by pressing;
- whether permanent fingerprints remain;
- whether the mechanism suits the size and weight of the front;
- whether it is convenient to close the door;
- whether an additional pull is still needed for individual sections.
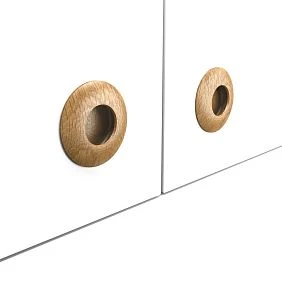
Built-in or inset pull zone
Н
HL-036 — push-to-open in three sizes
HL-036 available in sizes 37, 53 and 74 mm by main dimension.
This is useful for:
- drawers;
- small doors;
- top cabinets;
- compact sections.
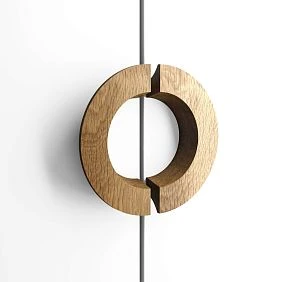
HL-049 — compact knob handle
HL-049 measures 42 × 42 × 27 mm with a 20 mm center-to-center distance according to the product card.
This is an example of how a small handle can be a separate element of a system for small fronts, while long models work on tall doors.
You need to count the full set of handles for the entire wardrobe, not the price of a single part
At the selection stage, it is easy to compare the cost of one long handle and one knob. For a real order, this says almost nothing.
You need to count the entire system.
Let's imagine a wardrobe:
- 2 tall doors;
- 4 drawers;
- 3 top cabinet doors.
Option A:
- 2 long handles;
- 4 buttons;
- 3 short brackets.
Total quantity:
2 + 4 + 3 = 9 handles.
If each group has its own price, the total cost is calculated separately:
2 × price of long + 4 × price of button + 3 × price of bracket.
But the purchase price is only the first layer.
If the handles are unfinished, the following are added:
- preparation;
- finishing materials;
- labor time;
- drying;
- inspection;
- possible reserve.
If the handles come with a ready-made finish, the cycle is shorter, but the item itself may cost more.
Different types of handles also affect the cost of drilling
Two long profile handles may require one template.
Four buttons — another.
Three brackets — a third.
The more different options, the more:
- templates;
- control dimensions;
- marking operations;
- risk of mixing up the group.
Therefore, an economically sound system is not necessarily the cheapest in terms of part prices. Sometimes a slightly more expensive single model in several sizes reduces production complexity.
Consider repeat orders
If the cabinet model will be repeated, a saved system of two or three SKUs is more cost-effective than a random set of five different ones.
Simpler:
- order again;
- keep a small reserve;
- control the finish;
- store templates;
- train the assembler.
For a one-off custom cabinet, a more complex combination can be allowed.
For a small series, standardization begins to save real time.
How to create a handle schedule for a wardrobe
If the wardrobe has several types of fronts, a separate table is useful.
For example:
| Facade | Handle type | Article | Size | Center distance | Quantity |
|---|---|---|---|---|---|
| Tall door | Profile | HND-01 | 900 мм | 768 мм | 2 |
| Drawer | Button | HND-02 | 53 мм | By card | 4 |
| Top shelf/mezzanine | Bracket | HND-03 | 180 мм | By card | 3 |
| narrow door | short profile | HND-04 | 260 мм | By card | 1 |
This is not a product catalog.
This is a wardrobe worksheet.
Add material and finish
Useful fields:
- beech / oak;
- uncoated / coated;
- finish code;
- color;
- fastener type.
Add installation coordinate
For example:
950 mm from the bottom edge
Or:
centered on the front.
This way, the handle stops being just a purchasing item and becomes part of the drawing.
How to record handles in the specification
Bad:
wooden handles — 12 pcs.
Good:
HND-01 | STAVROS | HL-011 | oak | uncoated | 900 mm | 2 pcs.
HND-02 | STAVROS | HL-036 | beech | facade enamel | 53 mm | 4 pcs.
HND-03 | STAVROS | item code | beech | enamel | 3 pcs.
If a cabinet has several types, each gets its own internal code.
Quantity per cabinet and quantity per series
If 5 identical cabinets are produced:
HND-01 | 2 pcs. per cabinet | 5 cabinets | 10 pcs. total
HND-02 | 4 pcs. per cabinet | 5 cabinets | 20 pcs. total
This way, changing the series size does not break the construction documentation.
Account for the reserve separately
If the workshop wants to keep one or two handles for repairs, this is a separate line:
estimated quantity — 20
reserve — 2
order — 22.
Do not hide the reserve within the quantity per item.
Add the cabinet version number
The handle system may change after the first approval.
For example:
- version 01 — long handles on all fronts;
- version 02 — push-to-open on drawers;
- version 03 — different installation height on the top cabinet.
If production receives only the latest image without a version number, documents can easily be mixed up.
Therefore, in the specification it is useful to write:
Cabinet SHK-04 | version 03 | handles approved.
The same number must appear on the drilling chart.
Changing a handle after approval requires a new review of related documents
If RUK-02 is changed, check:
- schedule;
- the specification;
- the drilling map;
- quantity;
- template;
- finishing.
You cannot replace the item code only in purchasing.
Archive the system as a set
After manufacturing the cabinet, save alongside it:
- a photo of the finished product;
- handle list;
- the drilling map;
- item code;
- materials;
- finish;
- fasteners;
- reserve.
A year later, the customer may ask for a second identical cabinet or to replace one handle. Then repeating it will take minutes, not a new catalog search.
The drilling map is created only after the actual handle is approved
Main production sequence:
item code → size → mounting points → sample → control facade → approval → template → series drilling.
Not the other way around.
What should be included in the drilling map
For each group of facades:
- facade code;
- handle code;
- number of holes;
- center-to-center;
- horizontal coordinate;
- vertical coordinate;
- the opening side;
- mirroring.
Example for two doors
The left and right leaves have the same height.
The handles are positioned at the central gap.
For the left:
60 mm from the inner edge.
For the right:
60 mm from the inner edge.
The coordinate is the same relative to the mirrored bases.
This makes it easier to check symmetry.
For drawers
Instead of marking out each front separately, create one template per group.
If the drawers are of different heights, the group can be divided into several types.
When it's already too late to change the handle
Before drilling, replacement is usually simple.
After drilling, the new handle must either match the mounting, or rework begins.
Risk stages
| Stage | How easy it is to change the handle |
|---|---|
| Sketch | very easy |
| Choosing the item code | Simple |
| Sample | Simple |
| Drawing | adjustment needed |
| Facade manufactured | while still possible |
| Holes drilled | already limited by center-to-center |
| Facade painted | rework is noticeably more expensive |
| Cabinet assembled | disassembly and repair possible |
Therefore, the decision on the handle must be finalized before drilling.
If the supplier offers a replacement
Do not agree just because the new model is "approximately the same length."
Compare:
- center-to-center;
- total length;
- overhang;
- the material;
- coating;
- mounting points.
If even one parameter changes, the drilling plan must be rechecked.
Common mistakes when choosing cabinet handles
The same long handle on all fronts
Why it happens: you want a unified design.
Consequence: drawers and top cabinets are overloaded.
How to avoid: use one geometric family in different sizes or two coordinated groups.
A single knob on a heavy tall door
Why it happens: the knob looks visually appealing.
Consequence: the grip is inconvenient.
How to avoid: test a physical sample on the actual door.
Drilling before making the final choice
Consequence: the new handle does not match the mounting.
How to avoid: first the article number and sample, then the template.
The overall length is taken as the center-to-center distance
Consequence: the holes were made incorrectly.
How to avoid: store the two parameters separately.
The handles of the two doors are at different heights
Consequence: the error is immediately visible on the central pair.
How to avoid: use a mirrored template.
Collision not checked
Consequence: the handles hit each other when opening.
How to avoid: two full-size templates and trajectory check.
The upper cabinet follows the coordinate of the lower door
Consequence: the user cannot reach it comfortably.
How to avoid: check the grip at real height.
Different materials without a common logic
Consequence: the wardrobe looks assembled from random parts.
How to avoid: a unified system of material and finish.
Where to buy wooden handles for a wardrobe
The main assortment is collected in the section wooden furniture handles STAVROS.
For a custom color and tint — unpainted wooden handles.
For the finished look — Handles with Finish.
By type:
If you need general information on choosing handles not only for a wardrobe, you can use the general guide to wooden furniture handles.
For a tall hinged front, this article is separately useful about long handles for a wardrobe.
Final check before ordering
Before paying for a batch, it is useful to go through one short checklist. For each group of fronts, the following must be determined: the specific item code, physical size, center-to-center distance or mounting point, projection, material, finish, quantity, installation coordinate, and the associated drilling template. For two adjacent doors, mirroring and collision when opening are checked separately. For a top cabinet, the reachability of the grip at the actual height. For drawers, one coordinate system across the entire group.
If even one item still has the wording “we'll decide later,” it is too early to send the handle for production drilling. Replacing it before drilling costs a few minutes on the drawing. Replacing it after drilling may require a new front.
For a small batch, also record the calculated quantity and the reserve separately. Then purchasing understands how many parts are needed by design and how many the workshop deliberately keeps for reorder or repair.
The main principle for the entire wardrobe:
don't try to make all handles the same physical size. Aim to make them one system.
A tall door, a drawer, and a top cabinet perform different movements and have different scales.
If one model is available in several sizes, that's a convenient path.
If not, use two coordinated groups.
In any case, the order remains the same:
facade group → grip zone → handle type → size → mounting → sample → drilling map → specification → order.
Then the handles don't look like random hardware added at the end. They become part of the wardrobe's construction and rhythm before the first facade goes to drilling.