Article Contents:
- Product basis: what to use to close the gap near the cabinet
- Why a gap appears between the cabinet and the wall
- How to close the gap: six solutions for different situations
- Sealant: only for a small even gap
- Thin molding: a neat line for a small gap
- Wooden trim: the main solution for a noticeable gap
- Batten: for a wide vertical opening
- Corner: when you need to cover two planes and protect the edge
- Bar: for large gaps where molding no longer helps
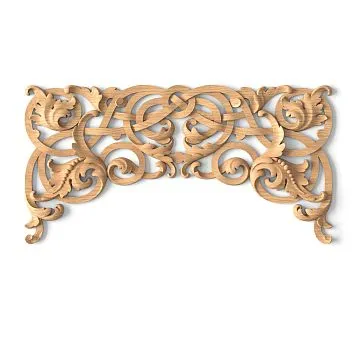
- MLD-063 — thin decorative strip for neat joining
- MLD-023 — expressive molding or trim for architectural joining
- BR-001 — bar or batten for wide gaps
- Wooden corner UG-001 — for protecting edges and external junctions
- PLT-004 — if the gap is related to the bottom line of the cabinet
- How to close the gap between the cabinet and the wall?
- How to close the gap between the wall and the cabinet in the kitchen?
- What to choose: molding or batten?
- How to close the gap between the cabinet and the wall in the hallway?
- Can the gap be closed with sealant?
- How to close a 1 cm gap between the cabinet and the wall?
- How to make the cabinet look built-in?
- Why is a wooden trim better than a plastic strip?
- How to close the side gap of a sliding wardrobe?
- What to buy together with molding or batten?
- How to calculate the length of the layout?
- Where to buy STAVROS molding, layout, batten or corner?
How to close the gap between the cabinet and the wall is a question that usually arises after furniture installation. The cabinet is in place, the fronts are aligned, the shelves are ready to use, but there is a gap on the side: somewhere 5 mm, somewhere 1 cm, and sometimes more. It seems like a trifle, but it is this gap that reveals that the cabinet is not built into the interior, but simply placed next to the wall. This is especially noticeable in the kitchen, hallway, bedroom, and room with a sliding wardrobe.
The reasons can be different: an uneven wall, a non-standard niche, a floor skirting board, a pipe, a socket, a protrusion, a technological gap after installation, or the usual difference between the cabinet dimensions and the actual opening size. But the buyer's task is almost always the same: to close the gap neatly so that it does not look like a repair patch. For this, molding, wooden layout, batten, corner, bar, skirting board, or casing are used.
STAVROS offers wooden moldings for this task: moldings, layouts, battens, corners, bars, skirting boards, and casings. In the section STAVROS wooden molding you can choose an element not just "to close a hole", but to design the cabinet's abutment to the wall as part of the interior. This is especially important in classic, neoclassical, modern, and wooden interiors, where a random plastic strip immediately spoils the impression.
A well-chosen profile solves several tasks at once: hides the side gap, protects the edge of the cabinet and wall, connects the furniture with the skirting board and casings, and makes the cabinet visually built-in. In this article, we will analyze how to close the gap between the wall and the cabinet in a room, kitchen, hallway, and near a sliding wardrobe, which STAVROS molding to choose for the gap size, how to calculate the length, how to choose the color, and what mistakes to avoid when buying.


Product basis: what to use to close the gap near the cabinet
The gap between the cabinet and the wall is not closed with one universal element. It all depends on the width of the gap, the installation location, the cabinet material, the wall color, the load on the area, and what result is needed: an inconspicuous abutment, a decorative frame, corner protection, or a visual transformation of the cabinet into a built-in one.
The main product group for such a task is wooden moldings STAVROS. This group includes elements used to design joints, edges, abutments, decorative lines, and transitions between planes. For a gap near a cabinet, moldings, trims, slats, corners, bars, and baseboards are especially useful.
It is important to understand: the molding should not look like a random overlay. If the gap is small, a thin, neat profile is needed. If the gap is wide, a thin molding may get lost or look unconvincing. If the cabinet is in a hallway where the side is bumped by bags, shoes, and a vacuum cleaner, it is better to choose a more practical solution. If it is a bedroom or living room with less load, the abutment can be made softer and more decorative.
| Model / group | Product type | Confirmed size | Material | Finish | Purpose | Features | Order conditions |
|---|---|---|---|---|---|---|---|
| wooden moldings STAVROS | Category of moldings, baseboards, architraves, slats, corners, and bars | Size depends on the specific model | Solid wood; specify the exact species and parameters in the product card | Check current finishing options in the product card or with a STAVROS manager | Designing joints, edges, gaps, and abutments of furniture to the wall | Allows you to select a profile based on the gap width and interior style | Check availability, configuration, delivery times, and order conditions before purchasing |
| Wooden molding MLD-063 | Narrow decorative molding | 14 mm; other current parameters please check in the product card | Wood; exact species please check in the product card | Current finish please check in the product card | Small gaps, edges, joints between sections, decorative lines on cabinets and case furniture | Narrow profile for neat closure of the junction | For availability and ordering conditions, please check with STAVROS |
| Molding / casing MLD-023 | Wooden molding / trim | Check the current size in the product card | Wood; exact species please check in the product card | Current finish please check in the product card | More expressive design of the cabinet junction, corners, built-in solutions | Suitable when the gap needs to be designed as an architectural line | Check the size, material, and order conditions in the product card |
| block BR-001 | Wooden block / layout strip | Check the current size in the product card | Wood; exact species please check in the product card | Current finish please check in the product card | Wide gaps, practical joints, junctions, decorative and installation tasks | Used where a thin molding is no longer sufficient | Check availability and order conditions before purchase |
| STAVROS wooden corner pieces | Corner piece for finishing corners and joints | Size depends on the model | Wood; exact species please check in the product card | Current finish please check in the product card | External connections, edge protection, covering two planes at once | Practical for hallways, passages, ends, and protruding areas | Check compatibility and specifications with STAVROS manager |
| Wooden skirting board PLT-004 | Wooden skirting board | Check the current size in the product card | Wood; exact species please check in the product card | Current finish please check in the product card | Bottom line of the cabinet, floor junction, connection of furniture with room skirting | Useful if the gap is related to the bottom contour or base | Check availability, finish, and specifications before ordering |
If the exact size, wood type, finish, configuration, fasteners, or production time are not confirmed in the product card, do not assume them. Check the current specifications in the product card or with the STAVROS manager. This is especially important if the profile must match the color of the cabinet, walls, floor, or existing architraves.


Why a gap appears between the cabinet and the wall
A gap between the cabinet and the wall appears even in good renovations. Furniture is made along straight lines, but walls in real rooms are rarely perfectly level. The niche may be wider at the bottom and narrower at the top, the corner may deviate from vertical, the plaster may have slight unevenness, and the floor may have a slope. On the drawing everything looks even, but after installation it becomes visible that the cabinet does not fit flush against the wall along its entire height.
The second reason is the standard size of the cabinet. Ready-made furniture often does not match the actual size of the niche. For example, a gap of 10–20 mm remains between the cabinet and the wall because the nearest standard module is smaller than the opening. If such a gap is left open, it collects dust, looks like an installation error, and disrupts the integrity of the interior.
The third reason is that the cabinet is installed as a freestanding unit, not a built-in one. It was placed against the wall, the fronts were aligned, but a side gap remained. This often happens in the bedroom, children's room, living room, study, or hallway. The cabinet itself may be good, but the gap on the side immediately shows that the furniture is not connected to the room's architecture.
The fourth reason is the baseboard on the floor. The floor baseboard may prevent the cabinet from being placed flush against the wall. As a result, the top of the side panel almost touches the wall, while a gap appears at the bottom. Sometimes the baseboard is trimmed, sometimes the cabinet is left in front of it, and sometimes the joint is covered with a decorative strip. The solution depends on the furniture, wall, floor, and whether the already installed baseboard can be changed.
The fifth reason is pipes, sockets, protrusions, boxes, and utilities. This is especially common in the kitchen: the cabinet needs to be placed against the wall, but the backsplash, pipe, socket, box, or an uneven corner gets in the way. In the hallway, an electrical panel, a wall protrusion, or an old door casing can interfere. In the room, a radiator pipe, a cable channel, or a wall irregularity can be an issue.
The sixth reason is a technological gap. Sometimes a small gap is left intentionally so that the furniture can be installed, leveled, the facades opened, to compensate for an uneven wall, or to avoid hitting an adjacent element. But even a technological gap should not remain open if it is visible and spoils the interior.
Therefore, the question of 'what to cover the gap between the wall and the cabinet with' is best solved not at the last minute, but logically: measure the gap, understand the reason, choose the type of profile, agree on the color, and only then buy the molding, trim, batten, corner, or block.
Our factory also produces:


What to fill the gap with: six solutions for different situations
The gap can be covered in several ways. Not every one of them is equally suitable for STAVROS furniture, a kitchen, hallway, or bedroom. Sealant only solves small gaps. Molding is suitable for a thin decorative line. Trim and batten cover a more noticeable gap. A corner protects the edge. A block is needed where the gap is already too wide for a thin profile.
Get Consultation
Sealant: only for a small, even gap
Sealant is suitable if the gap between the cabinet and the wall is very small — about 2–3 mm, the line is even, the surface is prepared, and the task comes down to a finishing seam. For example, the cabinet stands almost flush, but a thin shadow remains that needs to be removed after painting or adjustment.
But sealant should not become the main solution for a noticeable gap. If the gap is 1 cm, 2 cm, or more, trying to fill it with sealant will look like a repair patch. The seam will be wide, uneven, may collect dust, crack, differ in color, and highlight the problem.
In the kitchen, sealant is especially dangerous to use as the only solution for a wide gap. In the cabinet area, there is cleaning, humidity, temperature changes, grease, dust, and household loads. A wide sealed seam on the side of the cabinet will quickly stop looking neat.
It's better to think of sealant as an auxiliary material: you can use it to treat a thin finishing seam after installing a wooden layout or molding, close a small line near the wall, or prepare a joint for painting. But if you need to neatly close the gap between a cabinet and the wall, a profile is usually required.
Thin molding: a neat line for a small gap
Thin molding is suitable if the gap is small but already noticeable. It covers the junction line and makes it decorative. Unlike sealant, molding provides a physical strip: even, readable, and connected to the furniture and wall.
For such cases, you can consider Wooden molding MLD-063. It is described as a narrow decorative profile of 14 mm, used for finishing external edges, joints between sections, and decorative belts on cabinets, dressers, nightstands, and other case furniture. For a gap near a cabinet, this is an important quality: the profile does not look foreign because its logic is tied specifically to furniture joints and edges.
Thin molding is good in a room, bedroom, study, living room, and in a neat kitchen if the gap is not too wide. It can be matched to the color of the cabinet, wall, trim, or baseboard. If the molding is made in the color of the cabinet, the side gap visually disappears. If in the color of the wall, the cabinet begins to look more built-in. If in the color of the trims, the junction becomes part of the overall joinery logic.
Wooden layout: the main solution for a noticeable gap
A wooden layout is one of the most practical solutions for the gap between a cabinet and the wall. It is suitable when the gap is already noticeable but not so large that a massive block is required. The layout covers the opening, evens out the line, protects the edge, and looks neater than a random plastic strip.
The layout is especially useful if the cabinet is in a niche. For example, a side gap runs from floor to ceiling or from countertop to upper module. A vertical wooden strip covers this line and visually makes the cabinet look more built-in. If the color is chosen correctly, the gap ceases to be perceived as a mistake.
In the kitchen, a wooden layout can close the side gap between the cabinet and the wall. In the hallway, the gap near the wardrobe. In the bedroom, the line between the wardrobe and the wall. In the room, the junction of a cabinet, shelf, or case furniture.
When choosing a trim, it's important to consider not only the width of the gap but also the surface it will adjoin. If the wall is uneven, a too rigid and narrow strip may not cover all the irregularities. If the cabinet has a distinct color or texture, you need to decide in advance whether the trim will be an extension of the cabinet or part of the wall.
Slat: for a wide vertical gap
A strip is needed if the gap is wider than a thin molding can neatly cover. For example, a cabinet is installed in a niche, but 20–40 mm remains on the side. A narrow profile in such a situation will look accidental: it won't confidently cover the gap and won't create a built-in feel. A strip works better because it has sufficient width and visual mass.
A strip is especially appropriate in hallways and kitchens. In these areas, side joints often endure stress: they get bumped by bags, clothes, shoes, vacuum cleaners, boxes, children's items. A too thin decorative molding can quickly look flimsy. A more practical strip closes the gap and protects the joint.
The strip can be made in the color of the cabinet so that the side line is perceived as part of the furniture. It can be painted the color of the wall if you want the cabinet to look built into the niche. It can be tied to the baseboard or trim if the interior is built around wooden lines.
If the gap is wide, it's important not to try to 'disguise' it with a too thin detail. It's better to honestly design the junction with a more noticeable element than to leave the feeling of a random patch.
Corner: when you need to cover two planes and protect the edge
A wooden corner is needed where the gap is at an external joint or you need to cover two planes at once. For example, the side of a cabinet stands next to a wall, the edge is in a walkway, it can be bumped, and a simple flat strip is not enough. In such a situation STAVROS wooden corner pieces help to finish the joint and protect the edge.
A corner is especially useful in a hallway. There, the cabinet often stands in a narrow passage, next to a door, shoe rack, mirror, or entry area. The side edge can easily be bumped by a bag, suitcase, vacuum cleaner, or shoulder. A wooden corner makes the edge more finished and practical.
In the kitchen, a corner piece can be useful at the side end of a cabinet, near a wall, backsplash, or protrusion. However, in the kitchen area, it is important to consider cleaning, humidity, and proximity to work surfaces. If the area is near a sink, stove, or high-traffic zone, the finishing parameters and installation must be checked especially carefully.
The corner guard should be chosen not only by width. It's important to check how it sits on two planes, whether it interferes with opening doors, whether it protrudes too much into the passage, and whether it matches the furniture in color and style.
Block: for a large gap where molding no longer helps
If the gap is too wide, a thin molding or trim may seem like a weak solution. In such cases, a block or a more massive plank is used. block BR-001 can be considered as a practical wooden base for closing a more noticeable gap, finishing the junction, and creating a straight line.
A block is needed where the gap becomes part of the structure. For example, the cabinet does not reach the wall by several centimeters, the niche is noticeably wider than the furniture, the side gap runs the entire height, and the wall is uneven. In such a situation, a small decorative trim does not solve the problem. An element is needed that physically covers the space and looks convincing.
The block can be used as a base, which is then painted, tinted, or combined with other elements. If a decorative look is required, it can be combined with molding. But you should not invent a complex structure without checking the dimensions and base: exact parameters, material, finish, and installation method must be clarified from the product card and the STAVROS manager.
How to choose a solution based on the gap size
The main parameter is the gap width. But you need to look not only at millimeters. It's important whether the gap is even, where it is located, whether there is load on the area, whether the profile will be painted, whether a crooked wall needs to be hidden, and how the cabinet is connected to the rest of the furniture.
| Size / situation | What to choose | Solution Logic | Where especially appropriate |
|---|---|---|---|
| 1–3 mm | Sealant or thin finishing seam | If the line is straight and almost invisible | Bedroom, study, area without load |
| 3–10 mm | Thin molding | Covers the joint without visual heaviness | Room, bedroom, side of cabinet, furniture edge |
| 10–20 mm | Wooden trim or MLD-063, if size fits | Provides a neat strip and hides a noticeable gap | Kitchen, cabinet in a niche, wall-mounted cabinet |
| 20–40 mm | Slat or block | Covers a wide vertical gap | Hallway, built-in wardrobe, wide niche |
| Uneven side joint | Corner, slat or wider trim | Hides unevenness and protects the edge | Passages, hallway, area near the door |
| Gap at the floor | Baseboard or bottom trim | Connects the cabinet to the room's lower contour | Cabinet against the wall, baseboard, plinth area |
| Kitchen | Batten, corner, trim | Cleaning, protection, and a neat edge are important | Side gap between the cabinet and the wall |
| Sliding wardrobe | Trim, batten, molding | The side gap needs to be made inconspicuous | Bedroom, hallway, dressing room |
If the gap width varies in height, focus on the widest point. A thin profile may cover the top but not the bottom. In this case, it's better to choose a wider trim or batten than to try to fit a narrow molding to a crooked wall.
Before purchasing, it's useful to do a simple test: hold a strip of cardboard or paper of the required width against the gap. This way you can see how the profile will look. Sometimes the gap seems small, but against the facade and wall, it requires a more substantial strip. Other times, a batten that is too wide makes the cabinet look heavier than necessary.
What to use to cover the gap between the cabinet and the wall in the kitchen
The kitchen is one of the most challenging places to close a gap. Here, not only aesthetics matter, but also cleaning, resistance to household loads, and proximity to the backsplash, countertop, cabinets, appliances, and utilities. What to use to close the gap between the wall and the kitchen cabinet depends on where the gap is located: on the side, at the top, near the floor, near the backsplash, or next to the work area.
If the gap on the side between the kitchen cabinet and the wall is small, you can use a thin wooden strip or molding. The profile covers the line and makes the cabinet visually closer to the wall. This works especially well if the strip is matched to the color of the facade or side panel.
If the gap is noticeable and runs vertically along the entire height, it's better to consider a batten. It covers the gap more reliably than a thin molding. This is important in the kitchen: an open gap collects dust, crumbs, and grease, and it's hard to clean. The batten closes the space and makes the junction more practical.
If the joint is on a protruding edge, near a passage, or next to the end of the kitchen, a wooden corner piece might be useful. It covers the junction and protects the edge. But it's important to check that the corner piece doesn't interfere with opening the door, pulling out a drawer, installing appliances, or cleaning.
If the gap is related to the bottom line, for example, the cabinet doesn't fit against the wall due to a baseboard or the gap is visible near the floor, you can use a wooden baseboard or a bottom strip. Wooden skirting board PLT-004 It's worth considering if you need to connect the cabinet with the lower contour of the room. The exact size and application conditions should be clarified in the product card.
For the area near the sink, stove, or active work surface, you shouldn't choose a solution based only on appearance. You need to consider cleaning, possible humidity, edge protection, and finish compatibility. If the coating parameters are not confirmed, check current options with a STAVROS manager.
What to use to close the gap between the cabinet and the wall in the hallway
In the hallway, the gap near the cabinet is especially noticeable. A person enters the house and immediately sees the side of the cabinet, the wall, the mirror, shoes, doors, and baseboard. If there is an open vertical gap between the cabinet and the wall, it looks unfinished. Additionally, the hallway is a high-traffic area. Here, profiles get bumped by bags, jackets, shoes, suitcases, vacuum cleaners, and boxes.
Therefore, in the hallway, it's better to choose not the thinnest decorative solution, but a more practical profile. If the gap is small, molding will work. If the gap is noticeable, a strip or batten is better. If the edge is in a walkway, a corner piece is logical. If the gap is wide, consider a block.
Color is also important. In the hallway, there are many different lines: the entrance door, interior doors, architraves, baseboards, cabinet, mirror, floor. If you add a random strip of a different color to them, the interior will become fragmented. It's better to connect the profile with one of the existing elements. For example, make it the color of the cabinet so that the side line disappears. Or the color of the wall to make the cabinet look built-in. Or the color of the architraves and baseboard if the interior is built on wooden contours.
In the hallway, you should not leave the gap open, even a small one. It collects dust and makes cleaning inconvenient. If the cabinet is tall, the vertical gap stretches almost to the ceiling and becomes a noticeable line. A gap closed with a trim or slat looks calmer and more practical.
What to close the gap between the cabinet and the wall in a room or bedroom
In a room and bedroom, the load is usually less than in the kitchen or hallway. Therefore, the solution can be more delicate. Here, visual softness is more important: the cabinet should not look like a heavy box, but like part of the wall or a furniture composition.
If the gap is small, you can use a thin molding. It closes the gap and adds a neat line. This works especially well with cabinets in a classic, neoclassical, or calm modern interior. The molding can be repeated on the other side of the cabinet, even if there is no gap there. Then the profile will look like a decorative frame, not a forced patch.
If you need to make the cabinet visually built-in, it's better to paint the trim the color of the wall. Then the side gap disappears, and the cabinet is perceived as part of a niche. If the facades are expressive, the wood is beautiful, or the furniture should be the main element, the trim can be made the color of the cabinet.
In the bedroom, it is especially important to avoid unnecessary fragmentation. If the cabinet is large, and there are already curtains, a headboard, nightstands, lamps, and decor nearby, the profile should be calm. A too active strip on the side gap will attract unnecessary attention. It's better to choose a neat molding or a smooth trim.
If the gap between the cabinet and the wall in the room is near a desk, bookshelf, or dresser, the profile can be tied to other wooden elements. This way, the junction will look intentional.
What to close the gap at a sliding wardrobe
With a sliding wardrobe, a side gap often appears due to an uneven wall or installation in a niche. The doors may slide smoothly, the internal system works, but a gap remains on the side. An open gap spoils the feeling of being built-in, especially if the wardrobe takes up the entire height of the wall.
For a sliding wardrobe, it is important to consider the movement of the doors. The profile should not interfere with opening, guides, side brushes, stoppers, or access to internal elements. Therefore, before choosing a strip, you need to check where exactly the door passes and how much space remains near the side panel.
If the gap is small, a molding or layout will work. If the gap is noticeable and runs the entire height, a batten is better. If the side edge is in the passage, you can use an angle, but only if it does not interfere with the movement of the doors.
A good technique is to design both sides of the wardrobe symmetrically. Even if the gap is only on the right, you can repeat a similar profile on the left, if it does not interfere with the structure. Then the viewer perceives the strip as part of the wardrobe design, not as a correction of a mistake.
If the sliding wardrobe is in the hallway, choose a more practical solution. If in the bedroom, you can make the profile thinner and calmer. If in a dressing room, ease of cleaning and edge protection are more important.
Which STAVROS products are suitable for closing the gap
The choice of product depends on the width of the gap and the desired effect. Below is the practical logic for selection based on STAVROS wooden molding items.
MLD-063 — a thin decorative strip for neat joining
Wooden molding MLD-063 — a narrow decorative profile of 14 mm. It should be considered if the gap is small and needs to be closed neatly, without a heavy batten or massive block.
MLD-063 is especially useful where you need to design the outer edge of the wardrobe, the joint between sections, a decorative line on cabinet furniture, or a side abutment to the wall. Such a profile does not look foreign to the furniture because its purpose is related to edges, joints, and furniture surfaces.
It is suitable for the bedroom, room, study, hallway with a neat gap, as well as for the kitchen, if the area does not require more massive protection. If the gap is wider than the profile can cover, it is better to choose a layout, batten, or block.
MLD-023 — expressive molding or trim for architectural junctions
Molding / casing MLD-023 should be considered when the gap needs not just to be hidden, but designed as an architectural line. This could be a side junction of a built-in wardrobe, corner design, connection with trims, or a decorative frame around a furniture block.
This profile is especially useful in interiors where the wardrobe should not look like a freestanding piece of furniture. The molding can turn a side gap into a neat boundary between the wardrobe and the wall. If the profile matches door trims, baseboards, or other wooden elements, the interior looks more cohesive.
Before purchasing, you need to check the size of MLD-023 in the product card. You cannot choose an expressive molding without understanding its width and projection. A profile that is too large next to a thin facade may look heavy, while one that is too small will not cover the gap.
BR-001 — bar or strip for a wide gap
block BR-001 is suitable for situations where the gap is too wide for a thin molding. It can be considered as a practical element for closing joints, junctions, and more noticeable gaps.
The bar is especially appropriate if the wardrobe is installed in a niche, but a wide vertical strip remains between the side panel and the wall. In this case, a thin strip would look accidental, while the bar creates a more confident junction. It can be painted or finished according to the project, if such finishing is provided and confirmed.
BR-001 can also be useful as a base for a more complex solution. For example, a wide gap is closed with a bar, and a thin molding is added on top for decorative finishing. But such a scheme needs to be calculated on site: it is important not to make the side section too heavy.
Wooden corner UG-001 — for edge protection and external junctions
STAVROS wooden corner pieces are suitable for designing corners, joints, and external junctions. If the gap is on the side edge of the wardrobe, especially in a walkway area, a corner may be more practical than a flat strip.
The corner piece covers two planes at once and helps protect the edge. It is convenient in the hallway, near a sliding wardrobe, next to a kitchen end panel, in a narrow passage, or by a protruding side panel. It makes the line more complete and reduces the risk of edge damage.
But the corner piece requires precise checking. It should not interfere with doors, drawers, guides, baseboards, sockets, or adjacent furniture. Before purchasing, you need to measure the installation location and clarify the size of the selected model.
PLT-004 — if the gap is related to the bottom line of the cabinet
Wooden skirting board PLT-004 it is worth considering when the gap is related to the bottom line: the cabinet stands on the floor, a baseboard runs nearby, there is a gap near the plinth, or you need to connect the furniture with the floor contour of the room.
A baseboard can help if the cabinet does not reach the wall due to an existing floor profile or if the lower part of the junction looks unfinished. It does not always replace a vertical strip, but can work together with it. For example, a vertical trim closes the side gap, while the baseboard completes the bottom.
Before ordering, it is important to check the size of PLT-004, material, finish, and compatibility with the already installed floor baseboard. If the profiles do not match in style, the bottom line may look accidental.
Why classic is modern even in such a small detail
The gap between the cabinet and the wall seems like a technical trifle, but it is precisely such trifles that distinguish a cohesive interior from a random one. The classic approach to interior design does not necessarily mean carvings, complex ornaments, and massive furniture. In the modern sense, classic means neat joints, proportions, clear lines, and respect for the material.
Molding, trim, or corner piece turns the gap into an architectural seam. Instead of an open gap, a deliberate boundary appears. The cabinet no longer looks like it was placed "as it happened" and begins to be perceived as part of the wall, niche, or furniture composition.
A modern interior also benefits from such solutions. Minimalism does not mean you can leave a technical gap open. On the contrary, the calmer the interior, the more noticeable every imperfection. A simple wooden trim, painted in the color of the wall or cabinet, can look much more modern than an attempt to hide the problem with sealant or a plastic strip.
The tree provides a clean line. It can be connected to a baseboard, trim, facades, furniture handles, wall panels, or other elements. If the profile is matched in scale and color, it does not look like decoration for decoration's sake. It becomes part of the structure.
Therefore, the answer to the question "why is classic modern" is simple: modern classic does not overload the interior, but brings the nodes to neatness. A closed gap between the cabinet and the wall is one such node.
Materials, wood species, and finishes: what to consider before ordering
Wooden molding differs from plastic and random construction planks. Wood has texture, density, grain direction, and the ability to be processed, painted, or tinted. But specific species, finishes, and available options need to be checked in each product's card. If the species or coating is not confirmed for a selected molding, bar, or corner, do not assume them in advance.
Visually, wood works better in an interior where there are already wooden elements: facades, trim, baseboards, doors, furniture, panels, stairs, slats. Even a small layout near the cabinet can support the overall joinery logic. A plastic plank in such surroundings often looks temporary.
If the profile is to be painted, it is important to decide on the color. In the color of the cabinet — to close the gap and dissolve the plank into the furniture. In the color of the wall — to make the cabinet appear built-in. In the color of the baseboard or trim — to give the interior a unified line. A contrasting color is possible, but only if it is a deliberate design technique.
If the profile is to be tinted to look like wood, the difference in texture must be considered. Even two wooden parts can perceive the shade differently. Therefore, it is better to clarify finishing options in advance and not expect a perfect match without selection.
For the kitchen, hallway, and other active areas, the durability of the finish coating against cleaning and everyday contact is important. Specific recommendations for care, painting, tinting, and installation should be clarified based on the product and material.
How to choose the profile color
Color determines whether the profile will be noticeable or disappear. The wrong shade can ruin even a good molding, while a properly selected plank can make the cabinet visually built-in.
The most inconspicuous option is a profile in the color of the cabinet. If the facades and side panel are light, the wooden trim can be made close in color to the furniture. Then the gap disappears, and the profile is perceived as part of the cabinet. This option is especially good for kitchens, sliding wardrobes, and built-in furniture in niches.
The second option is a profile in the color of the wall. It is suitable if you need to visually integrate the cabinet into the room. The trim becomes part of the wall, and the furniture looks like it is installed in an opening. This approach is often used in bedrooms, hallways, and modern interiors.
The third option is a profile in the color of the baseboard or trim. This works well if the interior is built around wooden lines. For example, the door, baseboard, trim, and cabinet strip are all designed in the same logic. Then the gap is closed not just technically, but architecturally.
The fourth option is a contrasting profile. It should be used with caution. If the strip contrasts with the cabinet and the wall, it immediately becomes noticeable. This can be beautiful if supported by handles, doors, lights, or other details. But if the contrast appears only because the right color was not found, the profile will look random.
Before making a final choice, it is better to hold a color sample against the cabinet and wall in both daylight and evening light. Shades can change noticeably in different lighting.
How to calculate the length of linear footage
For a vertical gap, the calculation is simple:
gap height × number of vertical junctions + 10–15% allowance for trimming.
For example, a cabinet 2400 mm high stands against a wall, and the gap needs to be closed only on one side. One vertical strip at least 2400 mm long is needed. If the selected profile has a length sufficient for this height, one strip may be enough. If the length is insufficient, you will have to make a joint or choose a different cut.
If there is a gap on both sides of the cabinet, the height is multiplied by two. If there is a top horizontal gap, add the width of the cabinet or the length of the section to be closed to the calculation. If the gap runs along a complex niche, calculate each segment separately.
Stock is definitely needed. Material is consumed for trimming. If the wall is uneven, the part may require adjustment. If the corner is not straight, a simple length measured by tape may not match the actual size. It's better to have a 10–15% margin than to face a shortage of a few centimeters.
If a corner or strip is used, the calculation should be done especially carefully. These elements are more noticeable, and an extra joint on a visible vertical can spoil the appearance. If possible, long vertical sections should be covered with a single piece.
How to close a gap step by step
First, measure the gap. Check the width at the bottom, middle, and top. If the dimensions differ, the wall is uneven, and the profile should be chosen based on the widest point. Do not rely on just one measurement.
Then determine the type of gap. Is it side, bottom, top, at an external corner, near the kitchen, in the hallway, next to a sliding wardrobe, or in a room? This determines whether a molding, trim, batten, corner, strip, or baseboard is needed.
After that, choose the visual logic. Should the profile disappear or become a decorative line? If you need to hide the gap, choose the color of the cabinet or wall. If you need to design the junction, you can tie the profile to trims, baseboards, or other wooden elements.
Before installation, dry-fit the profile. Check if it covers the gap and does not interfere with doors, drawers, hinges, guides, handles, or baseboards. In the hallway, check that it does not protrude into the walkway. In the kitchen, ensure it does not hinder cleaning or access to work areas.
Next, perform the trimming. The ends need to be done neatly because they will be visible. If the profile is painted or stained, the ends must also be treated, otherwise they will differ in color.
The installation method depends on the material, base, and chosen profile. You can use glue, fasteners, or a combined option if it suits the specific situation. It's better not to invent unconfirmed recommendations: check the current parameters in the product card or with a STAVROS manager.
After installation, treat the joints. Small gaps can be carefully prepared for painting. If the profile is painted, it is important to wait for the installation materials to be ready and not to paint over a wet base.
Mistakes when closing the gap between the cabinet and the wall
The first mistake is closing a wide gap with only sealant. If the gap is larger than a few millimeters, the sealant starts to look like repair compound rather than a neat seam. It's better to use a profile.
The second mistake is installing a plastic strip in an expensive wooden or classic interior. Plastic may solve the technical problem, but visually it often looks temporary. A wooden trim, molding, or corner piece ties in better with the furniture, baseboards, and door casings.
The third mistake is not accounting for the wall's unevenness. If the gap is 5 mm at the top and 20 mm at the bottom, a thin molding won't help. You need to choose a profile based on the maximum gap or plan for adjustments.
The fourth mistake is choosing a molding that is too thin for a large gap. The profile should not only cover the line but also look proportionate. If the strip seems out of place, it's better to use a batten or block.
The fifth mistake is gluing without a test fit. The profile may interfere with the opening of a door, drawer, sliding wardrobe, baseboard, or outlet. First test fit, then install.
The sixth mistake is not painting or treating the ends. Even if the front looks neat, an exposed end can give away the work. Ends need to be planned in advance.
The seventh mistake is not coordinating the profile with the baseboard and door casings. If the door has one style, the floor another, and the cabinet a third strip, the interior becomes fragmented.
The eighth mistake is leaving the gap open in the kitchen and hallway. In these areas, the gap quickly collects dust and dirt, making cleaning more difficult.
The ninth mistake is not considering humidity, cleaning, and everyday wear. This is especially important for the kitchen, hallway, and area near the sink.
The tenth mistake is buying a profile without checking the card. Size, material, finish, availability, and order terms must be confirmed before purchase.
Who would benefit from molding, layout, batten, or corner piece
A thin molding is suitable for those with a small gap who need to neatly finish the junction. It's a good option for a bedroom, living room, study, sliding wardrobe with a small side gap, or furniture edge.
A wooden layout is suitable for those who want to practically cover a noticeable gap without making the junction heavy. It's a versatile choice for a kitchen, hallway, living room, and built-in wardrobe.
A batten is suitable for those with a wide gap or uneven wall. It provides a more confident vertical line and looks better where a thin molding would appear weak.
A corner piece is suitable for external junctions, passages, and areas where edge protection is needed. It's especially useful in a hallway and near a wardrobe side that is frequently bumped.
A block is suitable for large gaps where a decorative strip is not needed, but a full closure of the space is required. It can work as a standalone element or as a base for more complex finishing.
A skirting board is suitable if the gap is related to the bottom line of the wardrobe, floor, or an existing floor profile.
When it's better not to close the gap immediately
Sometimes it's not worth rushing with a decorative strip. If the wardrobe is temporarily installed and will be moved in the future, it's better not to glue the profile permanently. If the wall is damp, has damage, mold, or an active crack, the technical issue should be resolved first.
Если щель появилась из-за ошибки установки шкафа, стоит проверить, можно ли отрегулировать мебель. Иногда зазор уменьшается после выравнивания корпуса, регулировки ножек, подрезки плинтуса или корректировки положения. Декоративный профиль нужен после того, как шкаф стоит правильно.
Если шкаф-купе имеет проблемы с движением дверей, сначала нужно решить механику. Планка не должна маскировать перекос конструкции. Иначе после установки профиля дверцы всё равно будут работать плохо.
Если цвет профиля не подобран, лучше не покупать первый подходящий элемент. Планка у шкафа находится на виду, особенно если она вертикальная и идёт по всей высоте. Неправильный оттенок будет заметен каждый день.
Где купить молдинг, рейку, раскладку и уголок STAVROS
Начинать лучше с измерения щели. Запишите ширину зазора внизу, посередине и наверху, высоту шкафа, место установки, наличие плинтуса, цвет стены и цвет мебели. После этого откройте раздел STAVROS wooden molding и подбирайте тип элемента под задачу.
Если зазор небольшой, смотрите молдинги. Для аккуратного закрытия небольшого примыкания можно рассмотреть MLD-063. Если нужно более выразительное оформление, проверьте MLD-023. Если зазор широкий, изучите BR-001. Если нужен внешний угол или защита края, смотрите STAVROS wooden corner piecesIf the task is related to the bottom line, it will come in handy Wooden skirting board PLT-004.
Before ordering, clarify:
- exact size of the selected profile;
- material and type of wood;
- available finishing options;
- product availability;
- order terms;
- installation recommendations;
- compatibility with paint or tinting;
- what to buy together with the profile: glue, joint sealant, paint, painter's tape, trimming tool.
If the cabinet is part of a more complex interior composition, it is also useful to check out the STAVROS article on Stucco decor for a wall with a built-in cabinet. It covers a different task — how to integrate the cabinet with the wall using decorative elements, while in this article we are solving the practical gap between the cabinet and the wall.
Practical Selection Scenarios
If there is 1 cm between the cabinet and the wall, do not rush to fill the gap with sealant. For such a gap, it is better to consider a thin trim or molding. The profile will close the line more cleanly and will look like part of the furniture.
If the gap in the kitchen between the cabinet and the wall runs vertically from the countertop to the upper modules, choose a practical trim or batten. It should be easy to clean and not interfere with the facades.
If the gap in the hallway is near a passage, a corner profile or a more durable batten is better. Edge protection is important there, not just decorativeness.
If the cabinet is in the bedroom and the gap is small, a molding in the color of the wall or cabinet will work. The solution should be soft and not attract unnecessary attention.
If a sliding wardrobe is installed in a niche and the wall is uneven, choose a profile based on the widest point of the gap. Check that it does not interfere with the door movement.
If the gap is related to the baseboard, consider combining a vertical trim and the baseboard. This way the cabinet will look built-in not only from the side but also at the floor.
FAQ
What to cover the gap between the cabinet and the wall with?
If the gap is narrow, a thin molding or wooden trim will work. If the gap is wide, it is better to use a batten, block, or corner profile. Sealant is only suitable for small, even gaps where a decorative strip is not needed.
What to cover the gap between the wall and the cabinet in the kitchen with?
In the kitchen, it is better to use a wooden trim, batten, or corner profile. These elements cover the gap, protect the edge, and look neater than a random plastic strip. If the area is near a sink or work zone, check the finish and care recommendations.
What to choose: molding or batten?
Molding is suitable for small gaps and decorative junctions. A batten is needed if the gap is wider, the wall is uneven, or the area is in a high-traffic zone: in the kitchen, hallway, or near a passageway.
How to close the gap between a cabinet and the wall in the hallway?
In the hallway, it's better to use a more practical profile: a batten, corner piece, or block. This area is often bumped by bags, shoes, and vacuum cleaners, so a too-thin decorative molding may be insufficient.
Can the gap be closed with sealant?
Yes, if the gap is small — about 2–3 mm — and the line is straight. If the gap is larger, the sealant will look like a repair patch. For a noticeable gap, it's better to choose a molding, trim, or batten.
How to close a 1 cm gap between a cabinet and the wall?
For a gap of about 1 cm, a thin wooden trim or molding is usually suitable, if the profile covers the gap in width and looks good next to the cabinet. Before purchasing, you need to measure the gap at several points.
How to make a cabinet look built-in?
Close the side gap with a trim or molding in the color of the wall or cabinet. If the profile matches the wall, the cabinet looks built into a niche. If it matches the cabinet, the gap disappears as part of the furniture.
Why is a wooden trim better than a plastic strip?
Дерево можно связать с мебелью, плинтусом, наличниками и другими интерьерными элементами. Пластиковая планка часто выглядит как временное техническое решение, особенно в деревянном, классическом или премиальном интерьере.
Чем закрыть боковой зазор у шкафа-купе?
Для шкафа-купе можно использовать молдинг, раскладку или рейку. Важно проверить, чтобы профиль не мешал движению дверей, направляющим и обслуживанию конструкции.
Что купить вместе с молдингом или рейкой?
Обычно вместе с профилем нужны монтажный клей, герметик или состав для стыков, малярный скотч, краска или тонировка, инструмент для подрезки и запас материала 10–15%. Точный набор зависит от основания и выбранного изделия.
Как рассчитать длину раскладки?
Измерьте высоту щели и умножьте на количество вертикальных примыканий. Если есть верхний или нижний горизонтальный зазор, добавьте их длину. К итоговому метражу прибавьте 10–15% запаса на подрезку.
Где купить молдинг, раскладку, рейку или уголок STAVROS?
Подходящие элементы можно выбрать в разделе STAVROS wooden molding. Для небольших зазоров смотрите молдинги, для широких — бруски и рейки, для внешних примыканий — деревянные уголки.
Conclusion
The gap between the cabinet and the wall should not be left open if it is noticeable and spoils the interior. This is not just a technical gap: it affects the perception of the furniture, collects dust, complicates cleaning, and shows that the cabinet is not connected to the wall. Such a gap can be neatly closed with molding, a wooden strip, a batten, an angle, a block, or a baseboard.
The main thing is to choose a solution based on the size of the gap and the installation location. For a small gap, a thin molding will do. For a noticeable side gap, a strip. For a wide gap, a batten or block. For the outer edge and walkway area, an angle. For the bottom line, a baseboard. It is better to match the color with the cabinet, wall, trim, or baseboard so that the profile looks like part of the interior, not a random patch.
STAVROS offers wooden moldings for such tasks: moldings, blocks, angles, baseboards, and other elements that help close joints and finish abutments beautifully. Before purchasing, measure the gap, check product cards, clarify dimensions, material, finish, availability, and installation recommendations. Then the cabinet will look not just placed against the wall, but neatly built into the space.