




































































Polystyrene Baseboards
 Bestseller
5-10 days
Bestseller
5-10 days
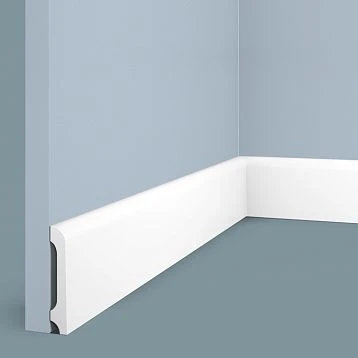
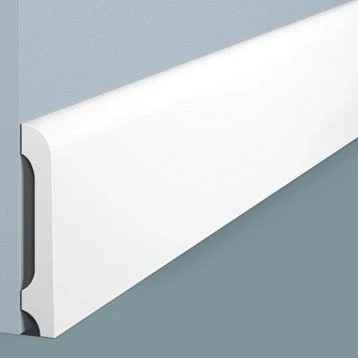
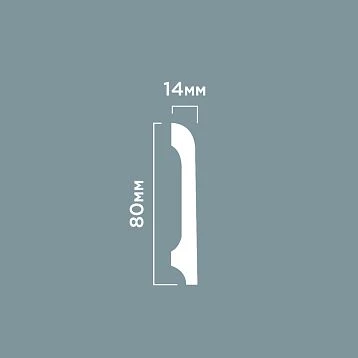
Baseboard B80B polystyrene HIWOOD 80mm x 14mm x 2.0m.
10.53 $

 Bestseller
5-10 days
Bestseller
5-10 days
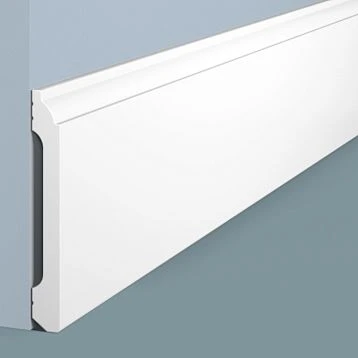
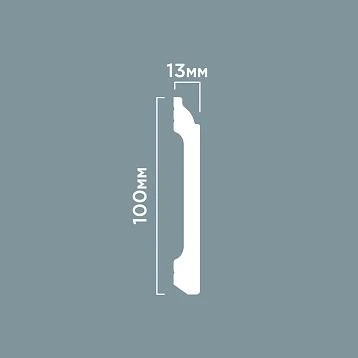
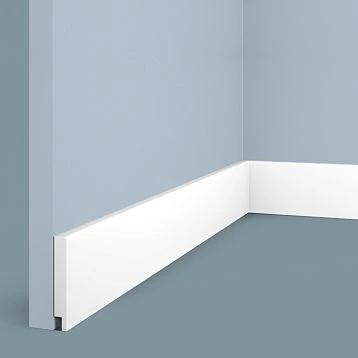
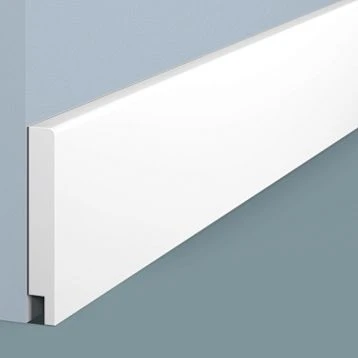
Baseboard B100C polystyrene HIWOOD 100mm x 13mm x 2.0m.
13.45 $
 5-10 days
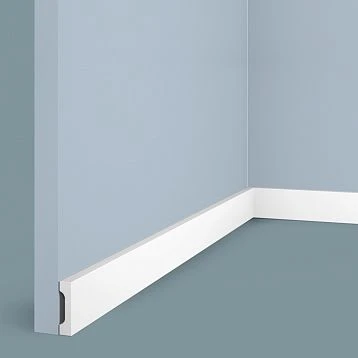
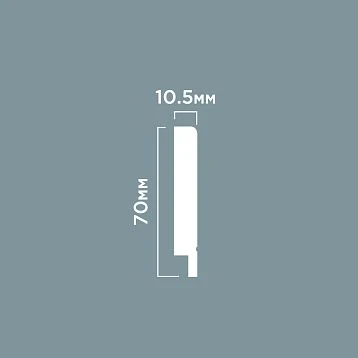
B70N Polystyrene HIWOOD 70mm x 10.5mm x 2.0m. without stripe
10.53 $
 5-10 days
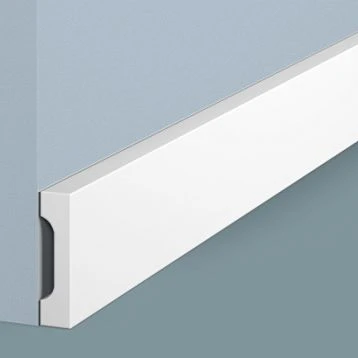
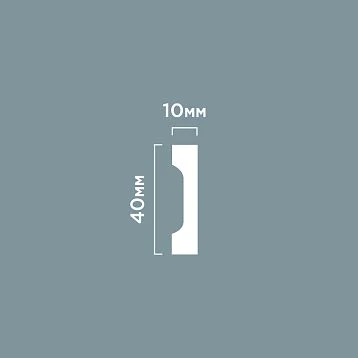
Baseboard W40V1 polystyrene HIWOOD 40mm x 10mm x 2.0m.
6.43 $
 5-10 days
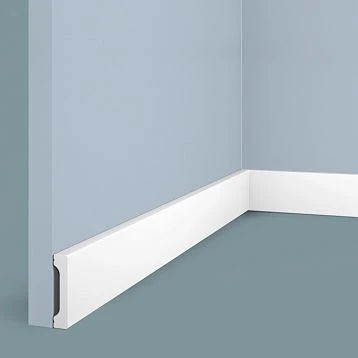
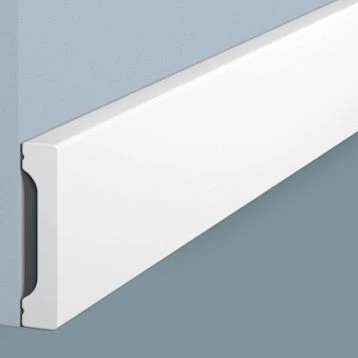
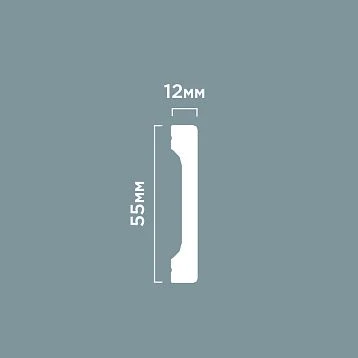
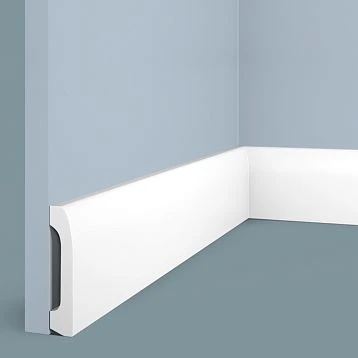
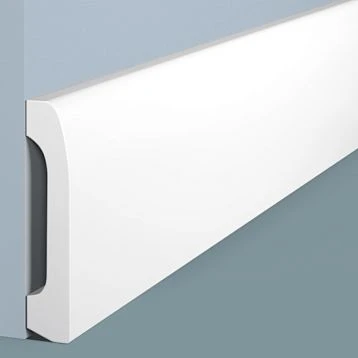
Baseboard B55V1 polystyrene HIWOOD 55mm x 12mm x 2.0m.
8.77 $
 5-10 days
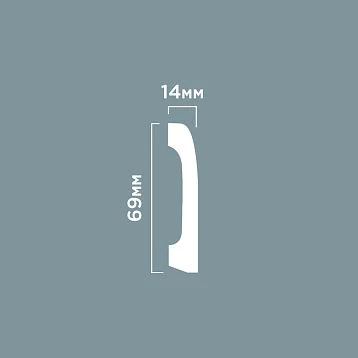
Baseboard B70V2 polystyrene HIWOOD 69mm x 14mm x 2.0m.
9.94 $

 5-10 days
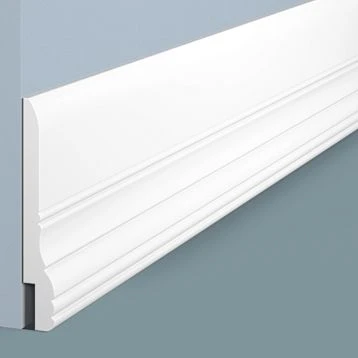
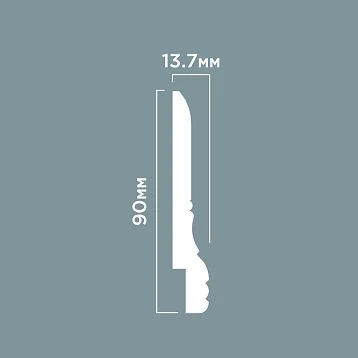
Plinth L1605 polystyrene HIWOOD 90mm x 13.7mm x 2.0m.
10.53 $

 5-10 days
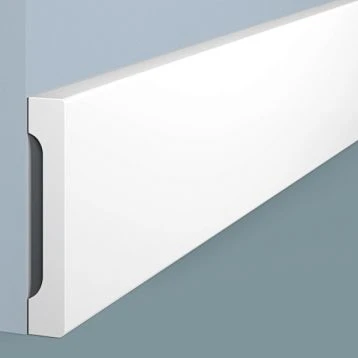
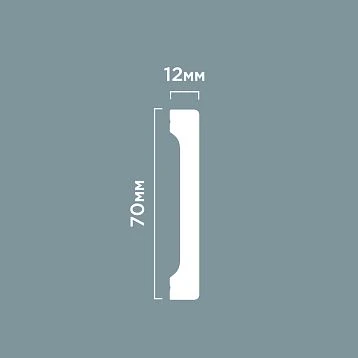
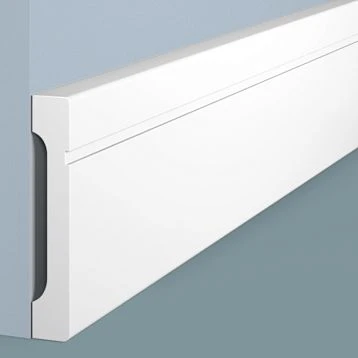
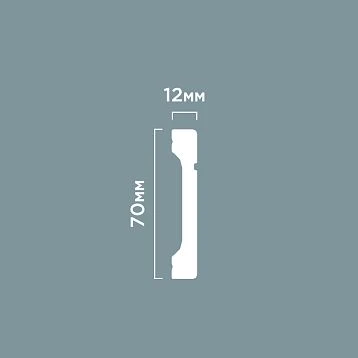
Baseboard B70V1 polystyrene HIWOOD 70mm x 12mm x 2.0m.
10.53 $

 5-10 days
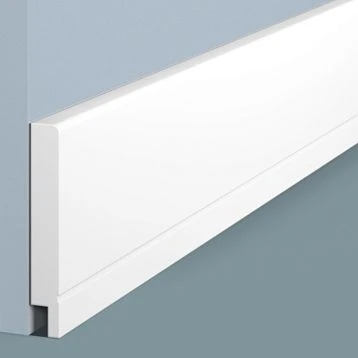
B70V1L Plastic Skirting HIWOOD 70mm x 12mm x 2.0m
10.53 $

 5-10 days
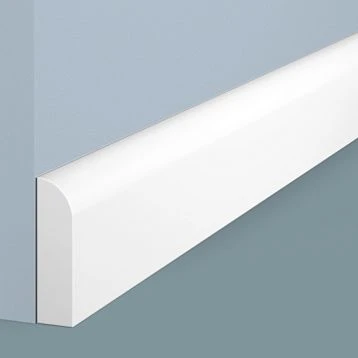
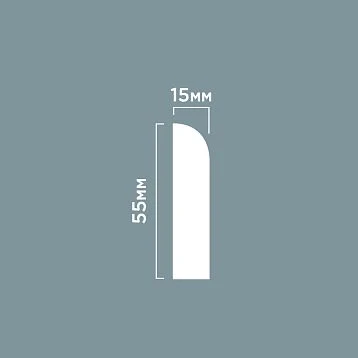
Baseboard B70 polystyrene HIWOOD 70mm x 10.5mm x 2.0m.
10.53 $

 5-10 days
Baseboard BE55 polystyrene HIWOOD 55mm x 15mm x 2.0m.
11.11 $

 5-10 days
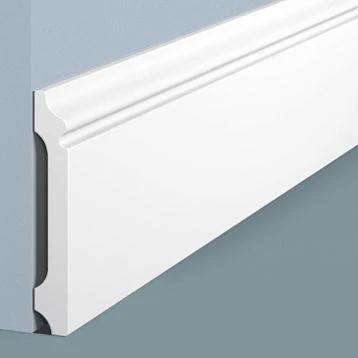
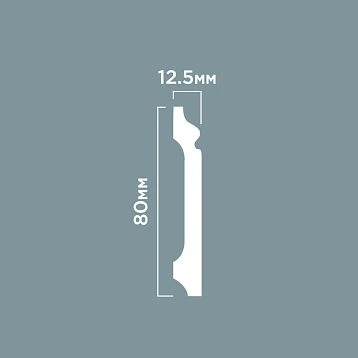
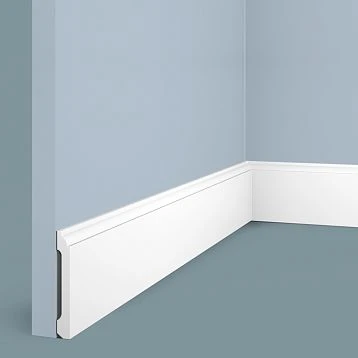
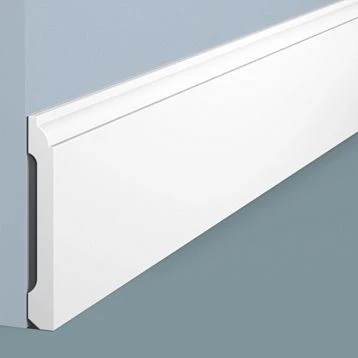
Baseboard B80A polystyrene HIWOOD 80mm x 12.5mm x 2.0m.
11.11 $
 5-10 days
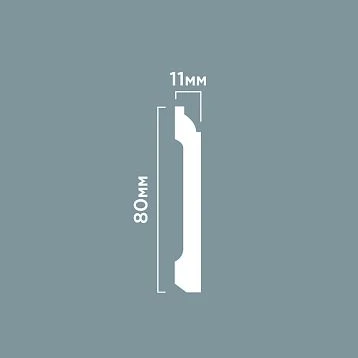
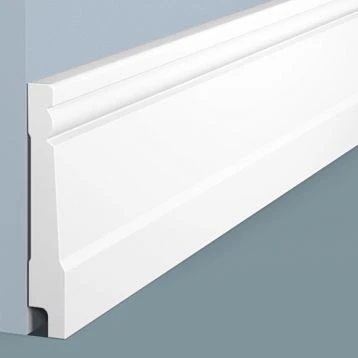
Baseboard B80C polystyrene HIWOOD 80mm x 11mm x 2.0m.
11.11 $

 5-10 days
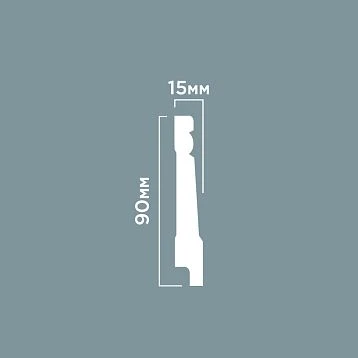
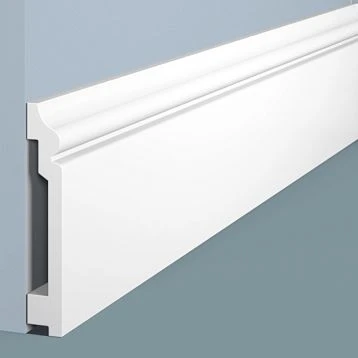
Baseboard B90 polystyrene HIWOOD 90mm x 15mm x 2.0m.
13.45 $

 5-10 days
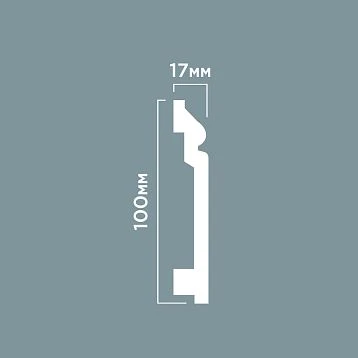
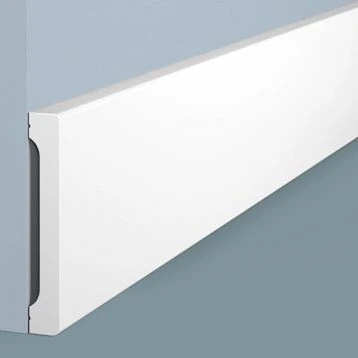
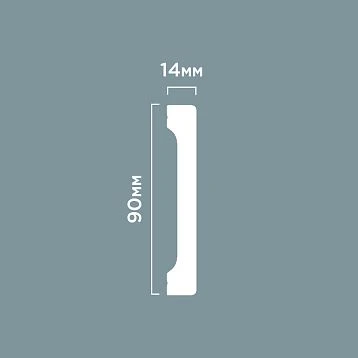
Baseboard BA100 polystyrene HIWOOD 100mm x 17mm x 2.0m.
15.21 $

 5-10 days
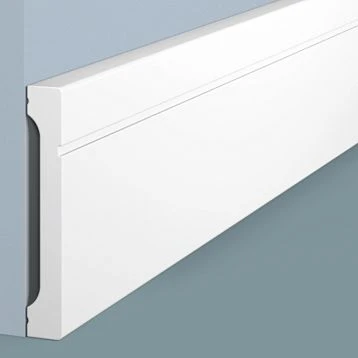
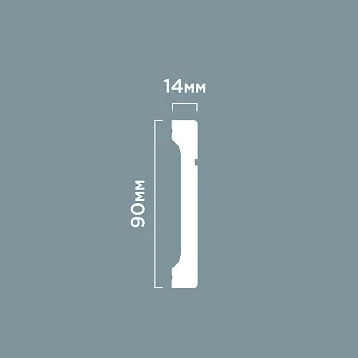
Baseboard B90V1 polystyrene HIWOOD 90mm x 14mm x 2.0m.
14.62 $

 5-10 days
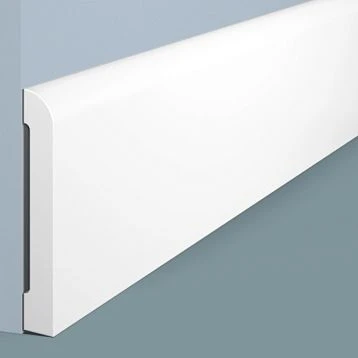
Baseboard B90V1L polystyrene HIWOOD 90mm x 14mm x 2.0m. L
14.62 $

 5-10 days
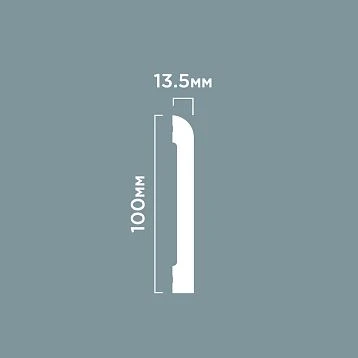
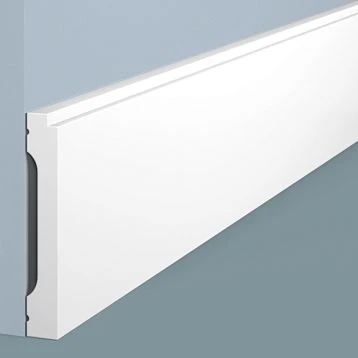
Baseboard BE100 polystyrene HIWOOD 100mm x 13.5mm x 2.0m.
14.62 $

 5-10 days
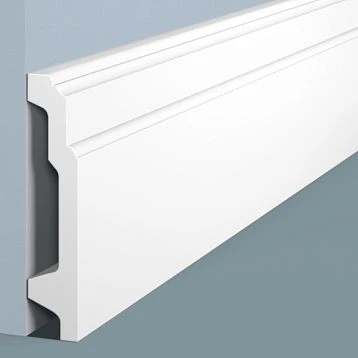
Skirting board B90V2 polystyrene HIWOOD 90mm x 14mm x 2.0m.
14.62 $

 5-10 days
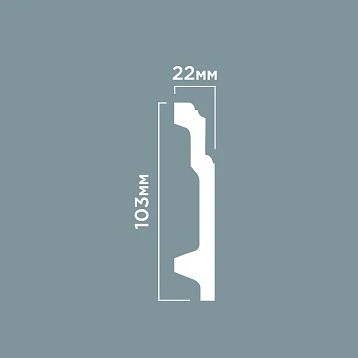
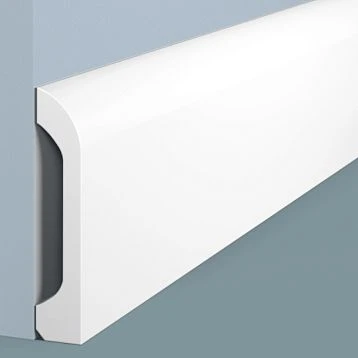
Baseboard B100V1 polystyrene HIWOOD 103mm x 22mm x 2.0m.
16.38 $

 5-10 days
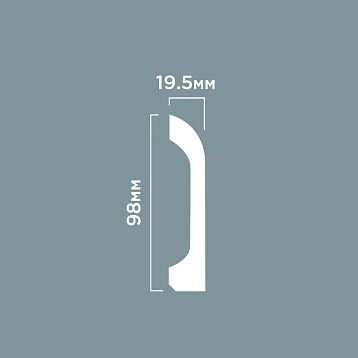
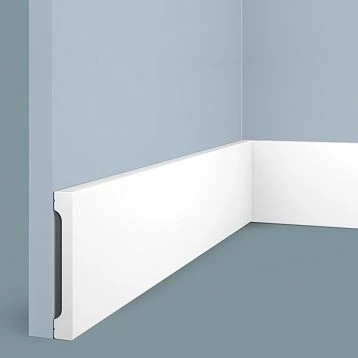
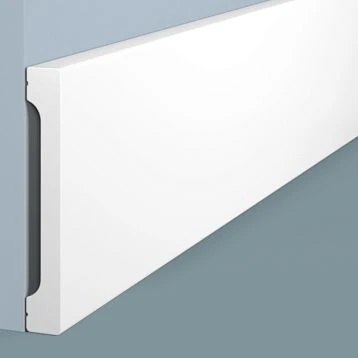
Baseboard B98V1 polystyrene HIWOOD 98mm x 19.5mm x 2.0m.
18.13 $
 5-10 days
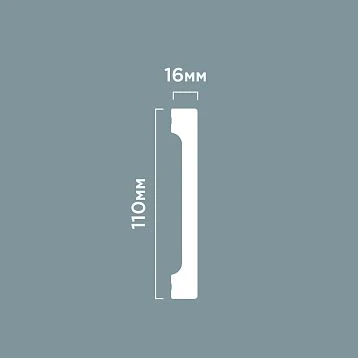
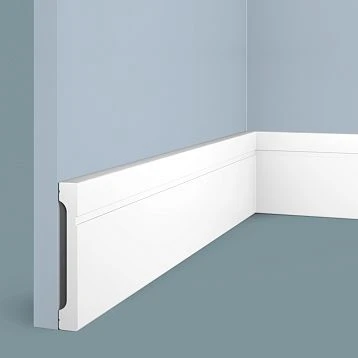
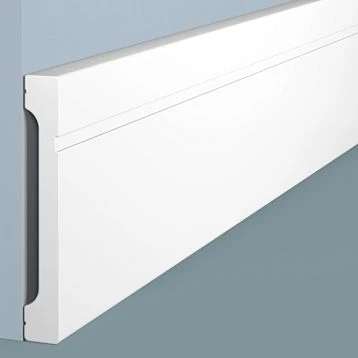
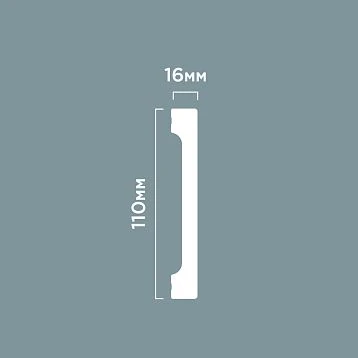
Baseboard B110V1 polystyrene HIWOOD 110mm x 16mm x 2.0m.
18.72 $
 5-10 days
Baseboard B110V1L polystyrene HIWOOD 110mm x 16mm x 2.0m. L
18.72 $

 5-10 days
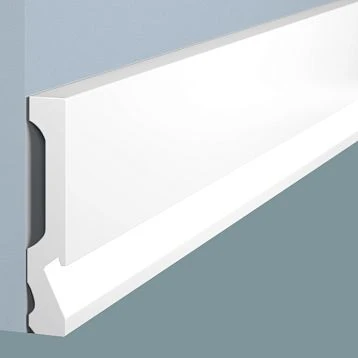
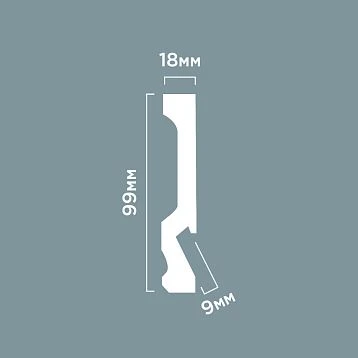
Baseboard LB99 Polystyrene HIWOOD for Lighting 99mm x 18mm x 2.0m.
18.72 $

 5-10 days
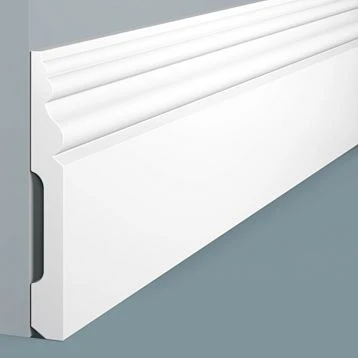
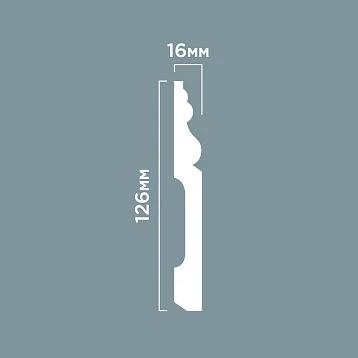
Baseboard B126 polystyrene HIWOOD 126mm x 16mm x 2.0m.
19.89 $
 5-10 days
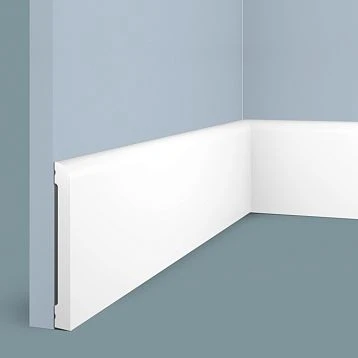
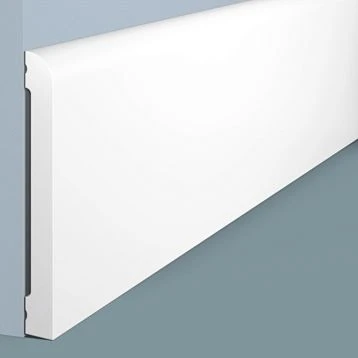
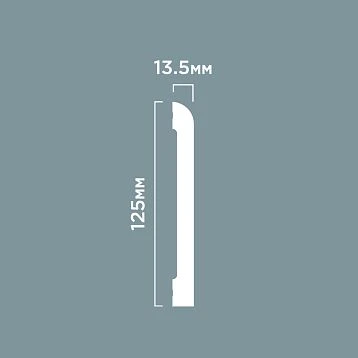
Baseboard BE125 polystyrene HIWOOD 125mm x 13.5mm x 2.0m.
21.64 $
 5-10 days
How to decorate a home and room: interior design ideas, wall and door decoration
22.23 $
HIWOOD Baseboard Molding for a Finished Interior
Baseboards define the meeting point between a wall and the floor. A simple profile gives the room a quiet, continuous outline; a taller molding with a shaped upper edge adds depth and a more architectural finish. STAVROS offers HIWOOD polystyrene baseboards in a range of heights and profiles, helping you choose the detail that suits your walls, flooring and door trim.
Explore compact baseboard trim, broad profiles with subtle top details, decorative baseboards with curved contours, and a dedicated profile for LED lighting. The collection includes heights from 40 to 140 mm, approximately 1.57 to 5.51 inches, in 2-meter lengths. Each design creates a different balance between the wall surface and the trim at its base.
These paintable baseboards can become a contrasting border or blend into the wall color. Their high-density polystyrene construction provides a practical material for interior finishing, while the choice of shapes lets you carry a consistent design through living rooms, bedrooms and hallways.
Start with the profile, then compare its height and projection with the surrounding details. For a coordinated interior, explore the wider STAVROS range of interior moldings and decorative accents.
Choose a Baseboard Profile That Suits Your Room
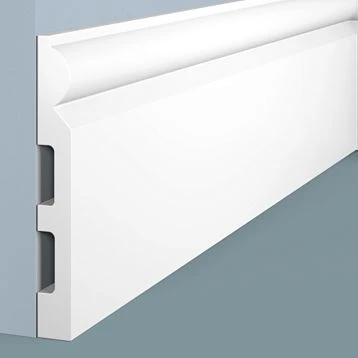
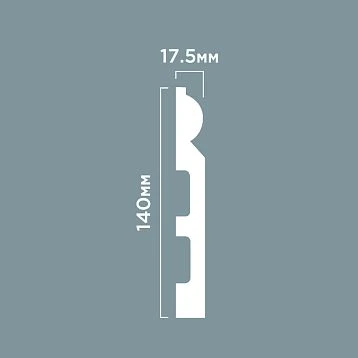
The upper edge of a baseboard has a strong effect on its appearance. Even when two profiles have a similar height, one may read as a simple band while another creates several lines of light and shadow. Look at the installed product image and the profile drawing together: the image shows the overall effect, and the drawing explains how it is achieved.
Simple Profiles for Modern Interiors
Flat baseboards and restrained profiles work well with plain doors, smooth walls and contemporary flooring. A broad, uncluttered face allows color and proportion to carry the design. A small curve or step along the top can soften the transition into the wall without creating a heavily ornamented border.
HIWOOD W40V1 provides a compact outline with a simple face. B80B offers more height with a softly curved upper edge, while B100C introduces a fine linear detail near the top. These are useful profiles to compare when selecting modern baseboards for rooms with clean lines and limited ornament.
Consider how much of the trim will remain visible once furniture is in place. In a bedroom with wardrobes and a large bed, the most noticeable sections may be beside the doorway and along one exposed wall. Those junctions deserve as much attention as the longest run of molding.
Decorative Baseboards for Classic Interiors
A shaped baseboard can give a plain wall a more developed architectural finish. B126 has several rounded contours along its upper portion, while B140 combines a prominent rounded upper detail with a broad lower face. Their profiles produce a different effect from a simple rectangular board, particularly when daylight falls across the wall.
Use this type of decorative baseboard molding alongside paneled doors, wall frames or substantial window trim. Repeat a curve, step or proportion from one element to another to give the room a sense of continuity. The pieces can have different dimensions while sharing a recognizable design language.
A taller profile also works in a restrained interior when its scale is deliberate. There is no single ceiling height that determines the correct baseboard. Door proportions, wall divisions, furniture and the desired emphasis all contribute to the choice.
Compare Baseboard Heights and Dimensions
The current HIWOOD selection covers compact profiles through taller decorative designs. All of the examples below are supplied in 2-meter lengths, approximately 78.74 inches or 6.56 feet. Dimensions in inches are rounded; use the metric measurements and product drawings when planning precise junctions.
| HIWOOD profile | Height | Projection from the wall | Profile detail |
|---|---|---|---|
| W40V1 compact baseboard | 40 mm / 1.57 in | 10 mm / 0.39 in | Simple, compact outline |
| B80B polystyrene baseboard | 80 mm / 3.15 in | 14 mm / 0.55 in | Broad face with a softly curved top |
| B100C baseboard molding | 100 mm / 3.94 in | 13 mm / 0.51 in | Fine linear detail near the upper edge |
| B126 decorative baseboard | 126 mm / 4.96 in | 16 mm / 0.63 in | Layered curves above a broad lower face |
| B140 tall baseboard | 140 mm / 5.51 in | 17.5 mm / 0.69 in | Pronounced rounded upper detail |
| LB99 baseboard for LED lighting | 99 mm / 3.90 in | 18 mm / 0.71 in | Recessed lower detail for lighting |
Height is the vertical dimension when the baseboard is installed. Projection describes how far the profile extends from the wall. Length determines how many individual pieces you need to complete each run. Treat these as separate choices: a taller baseboard does not necessarily project farther into the room.
If you are comparing products described as 4-inch baseboards, check their actual measurements. A 100 mm profile is approximately 3.94 inches high. That small difference may matter when aligning the top edge with an existing detail or replacing trim beneath a finished wall treatment.
To judge the scale at home, mark the proposed height on the wall with removable tape. View it from the doorway and beside the largest pieces of furniture. A profile sample adds the depth and shadow that a flat mark cannot show; ask about the selected HIWOOD model when exploring samples and catalogs.
Coordinate Baseboards with Door Trim and Wall Moldings
Baseboards are part of a connected trim scheme. They meet door casings, pass beneath wall decoration and establish the lowest horizontal line in the room. Planning those relationships before ordering helps the finished interior feel considered from one doorway to the next.
Begin at the door. Compare the projection of the baseboard with the thickness of the casing where the two meet. If the baseboard extends beyond the casing, plan a deliberate transition or return. A quick section sketch makes this junction easier to understand than looking at each product separately.
When designing modern baseboards and door trim together, use similar levels of detail. A plain door surround can sit comfortably beside a simple baseboard with a small top detail. A more substantial casing may suit a taller or more strongly shaped profile. Explore decorative trim as part of the overall composition, checking the dimensions of each selected piece.
For framed walls, leave a considered interval between the baseboard and the lowest molding. That clear space gives both profiles room to read. Compare wall molding profiles with the baseboard before setting the frame dimensions, especially when a lower wall panel runs across several walls.
Wall molding kits and polyurethane wall decor offer additional ways to develop the wall above the baseboard. In a more ornamental scheme, onlays and appliques can provide a focal point within a panel. A simpler baseboard can support that composition, while a shaped profile can repeat its classical character.
At the top of the room, consider the visual weight of the crown moldings. The ceiling trim and baseboard frame the wall between them. Choose their proportions together so the wall decoration, door openings and furniture remain balanced.
Baseboard Molding for LED Lighting
HIWOOD LB99 is a dedicated baseboard profile for lighting. Its 99 mm height and recessed lower detail allow you to introduce a line of illumination near the floor. It is an option to consider for a hallway, bedroom or living space where lighting is part of the architectural design.
Plan the illuminated sections alongside the room layout. A continuous run can emphasize the perimeter, while a shorter section can highlight one wall. Door openings and furniture positions determine where the line will stop, so include them in the drawing from the beginning.
The profile and the lighting components need to be selected together. Confirm the compatible LED strip dimensions, any required mounting channel, the power supply and what is included with the product. Plan cable entry and access to the power supply before installing the baseboard. These decisions influence the finished result as much as the shape of the trim.
Test a short section with the intended flooring and wall color. A glossy floor may reflect the light strongly; a textured surface will distribute it differently. Evaluate the effect at the brightness you expect to use in the room, then finalize the length and layout of the illuminated runs.
Select Baseboard Trim for Each Space
Living Rooms and Dining Rooms
In the main living spaces, baseboards often form a long, visible outline. Look at their relationship with window treatments, fireplaces, built-in furniture and wall frames. A taller profile can give a broad wall a defined base, while a compact molding keeps more attention on artwork or a textured wall finish.
If the living room opens into a dining area, a continuous profile and paint color can help connect the spaces. The decorative treatment above it may change while the baseboard provides a consistent detail along the floor.
Bedrooms and Home Offices
Bedrooms and offices benefit from careful planning around wardrobes, desks and bedside furniture. Check whether a projecting profile will prevent an item from sitting at its intended distance from the wall. Where cabinetry is fitted, agree on the junction between its plinth and the room's baseboard before either is installed.
Paint the trim to match the wall for a subtle outline, or coordinate it with the doors to make the room's architectural details more visible. A finish sample viewed beside the flooring helps establish the right contrast.
Hallways and Connected Rooms
Hallways bring several doorways into a small area, making consistency especially noticeable. Check the baseboard height against the bottom of every casing, and plan short returns around projecting walls. Use the same profile code throughout a connected run so the upper contour remains aligned.
When rooms have different floor levels or different trim schemes, place the transition at an intentional point, such as a doorway. Resolving that detail on a drawing helps avoid an abrupt change halfway along a visible wall.
Kitchens and Bathrooms
HIWOOD polystyrene profiles offer moisture resistance, but the installation also depends on the wall surface, adhesive, joints and finish. Select those materials for the conditions in the room and confirm the suitability of the chosen profile for its intended position.
In a kitchen, decide where the room baseboard ends and the cabinetry plinth begins. In a bathroom, coordinate the trim with tile edges and the floor junction. These details should be settled before selecting the final quantity of molding.
Calculate Quantities Before You Buy Baseboards
Measure each wall section that will receive trim and record it separately. Include alcoves, short returns and the sides of projecting walls. Deduct openings where the baseboard will stop, and mark areas occupied by fitted furniture according to the agreed installation layout.
Next, arrange those measured sections into a cutting plan using the available 2-meter lengths. Dividing the total perimeter by the length of one board gives a starting quantity, but the positions of joints, corner cuts and reusable offcuts determine the actual order.
For example, two wall sections measuring 1.2 meters each have a combined length of 2.4 meters. Two full boards can provide those sections, leaving offcuts that may fit shorter returns elsewhere. Recording the short pieces alongside the long runs makes the calculation more useful than a perimeter total alone.
Allow for the saw cut, corner fitting and the condition of the board ends when assigning pieces. Include a practical allowance for installation waste and future touch-ups or repairs. The appropriate allowance depends on the room layout and the complexity of the profile.
When comparing baseboard prices, check whether the amount shown is for one full length, a pack or a unit of length. A 2-meter board provides approximately 6.56 linear feet before cutting, so divide its price by 6.56 to estimate the material price per linear foot. Then compare the cost of the full quantity required for your cutting plan. Include adhesive, finishing materials and delivery in the project budget. This gives you a more useful comparison than the price of a single board, especially when two profiles have different dimensions or installation requirements.
Prepare a simple order list with the profile code, number of full lengths and intended rooms. For an illuminated section, record LB99 separately from the standard baseboard. Add the compatible adhesive, joint finishing products and paint to the project list so the installer has a complete specification.
Plan a Clean Baseboard Installation
A straight, well-fitted installation starts with the surfaces. Check the wall near floor level and identify loose coatings, uneven patches or old adhesive that would affect the fit. Confirm the finished floor level and any movement clearance required by the flooring system before setting out the trim.
Lay out the pieces before applying adhesive. Decide where joints will fall along longer walls, test the corners and check the junctions at door casings. A full-height sample or short offcut is useful for assessing the fit in places that are difficult to measure.
Use an adhesive specified for polystyrene and the wall substrate. The requirements for bonding a profile to the wall may differ from those for joining two lengths. Follow the applicable HIWOOD instructions and the adhesive manufacturer's guidance for preparation, application and curing.
Cutting should preserve the shape of the upper detail and leave a clean edge for joining. Support the profile securely and use tools suitable for the material. Test the cutting setup on an offcut before working on the lengths assigned to the most visible walls.
Dry-fit the joints, then install and finish them using compatible products. Keep the floor movement allowance required by its manufacturer. For preparation and finishing resources, browse the STAVROS installation and finishing guidance and confirm the instructions for your selected HIWOOD profile.
Paintable Baseboards: Color and Finish
Painting allows the baseboard to become part of the room's color scheme. White trim can define the edge of a colored wall, while a matching wall and baseboard color creates a more continuous surface. A darker trim color can connect the lower part of the room with dark doors, furniture or flooring.
Sheen changes the way the profile reads. A lower sheen gives a softer appearance; a satin finish makes curved and stepped details more visible as the light moves across them. Judge the sample in both daylight and the room's evening lighting before committing to the full installation.
Prepare the surface and choose paint and primer that are compatible with polystyrene. Follow the coating manufacturer's instructions and the current HIWOOD finishing guidance. Test the complete finish on an offcut, including any joint filler, so you can assess adhesion, color and texture together.
Complete the final finish across joints and corners to produce a consistent appearance. Keep a record of the paint brand, color and sheen for later maintenance. For routine care, use a soft cloth and a nonabrasive cleaner compatible with the finished surface.
Questions About HIWOOD Polystyrene Baseboards
Are Baseboards and Skirting Boards the Same Thing?
Both names describe the trim installed along the bottom of an interior wall. Baseboards and baseboard molding are the usual terms in the United States; skirting boards is common in British English. The product dimensions and material identify the specific item you are ordering.
What Material Are These Baseboards Made From?
The HIWOOD baseboards in this category are made from high-density polystyrene. Use the material listed for the individual product when selecting adhesive, paint and installation accessories. Other decorative items in the wider STAVROS catalog may use different materials.
How Do I Choose Between a Short and a Tall Baseboard?
Compare the proposed height with the door casing, wall decoration and furniture. Mark the height on the wall, then assess it from across the room. A shorter profile gives a compact outline; a taller profile makes the base of the wall more prominent. The shape of the top edge also affects its visual weight.
Can I Paint the Baseboards to Match the Walls?
Yes. Select a coating system compatible with polystyrene and follow the preparation instructions. Test the color and sheen on a sample beside the wall and flooring. Painting across completed joints helps the separate lengths read as a continuous run.
Which Profile Should I Consider for LED Lighting?
LB99 is the lighting profile in this selection. Review its drawing and confirm the LED strip, mounting arrangement, power supply and included components before ordering. Plan the electrical layout alongside the baseboard runs so the installation and lighting work together.
Buy HIWOOD Polystyrene Baseboards from STAVROS
Browse the profiles above to compare shapes, heights and current prices. Choose the design that fits your room, confirm the product dimensions and prepare a quantity list based on the cutting plan. For a wider renovation, select the baseboards alongside the wall moldings, door details and ceiling trim.
Send STAVROS your preferred HIWOOD profile codes, required quantities and delivery location to confirm availability and order arrangements. Review the payment and delivery information as you plan the purchase. With the profile, finish and junctions decided, the baseboard becomes a deliberate part of the room's design.
Order a call
Do you have questions? Fill out the form and send it.
Your request has been sent!
Our manager will contact you within 5 minutes