




































































Polystyrene Crown Molding
 Bestseller
5-10 days
Bestseller
5-10 days
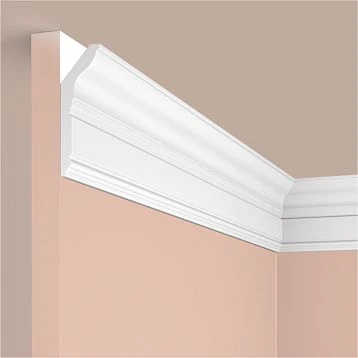
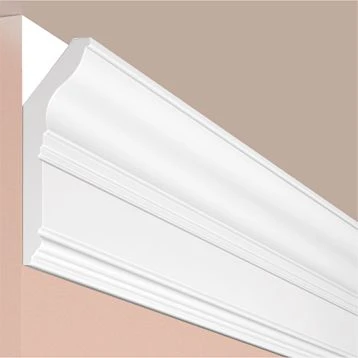
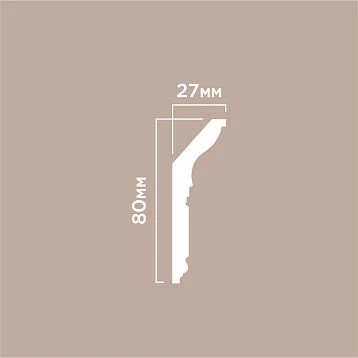
Polystyrene Crown Moulding L1902S HI WOOD 80mm x 27mm x 2.0m
14.04 $

 Bestseller
5-10 days
Bestseller
5-10 days
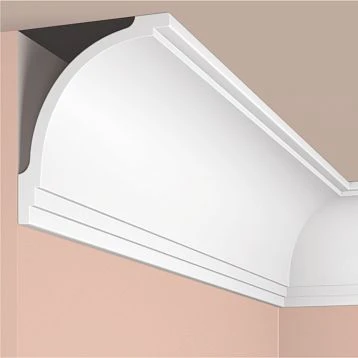
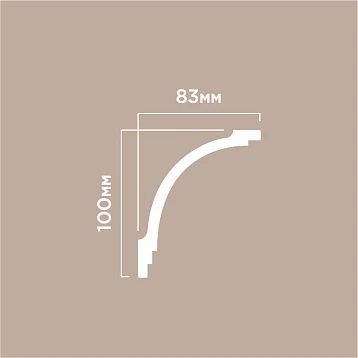
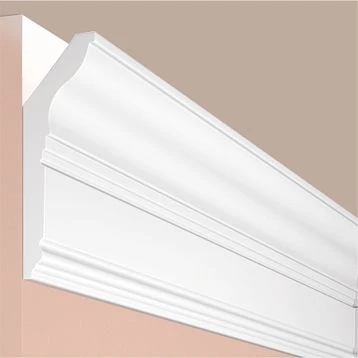
Polystyrene Crown Moulding A130V1 HI WOOD 100mm x 83mm x 2.0m
21.06 $

 5-10 days
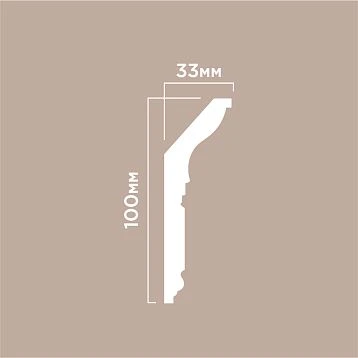
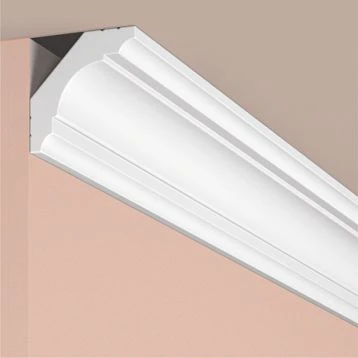
Polystyrene Crown Moulding L1902M HI WOOD 100mm x 33mm x 2.0m
17.55 $

 5-10 days
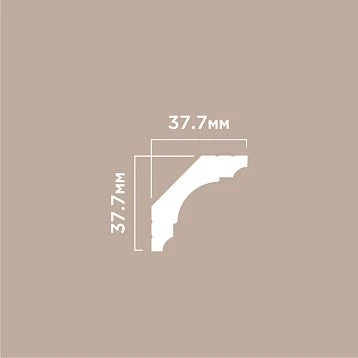
Polystyrene Crown Moulding A53 HI WOOD 37.7mm x 37.7mm x 2.0m
7.60 $
 5-10 days
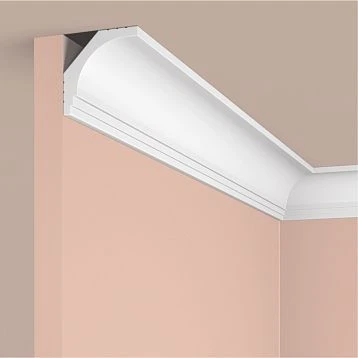
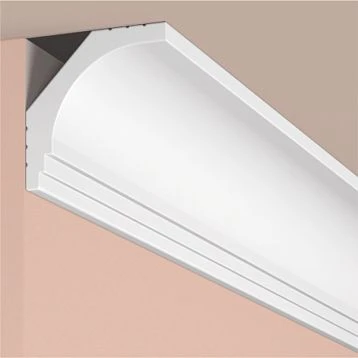
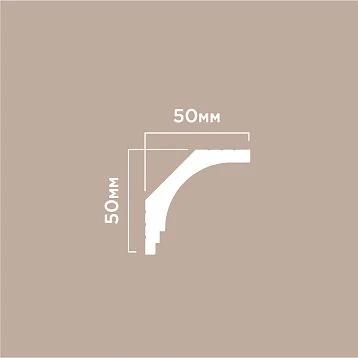
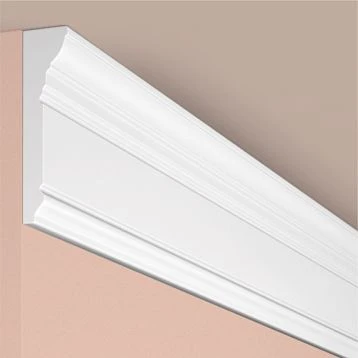
Crown A70 polystyrene HIWOOD 50mm x 50mm x 2.0m.
9.36 $

 5-10 days
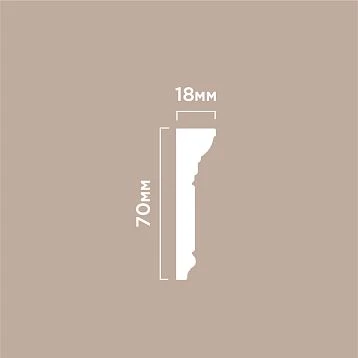
Polystyrene Crown Moulding M1702 HI WOOD 70mm x 18mm x 2.0m
10.53 $
 5-10 days
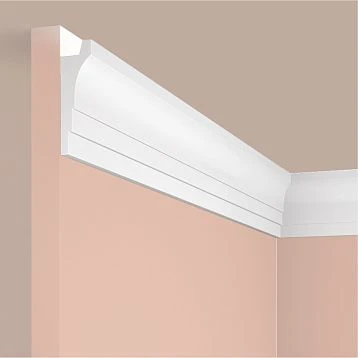
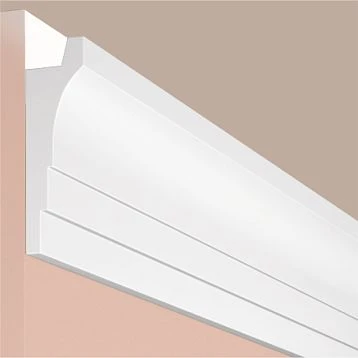
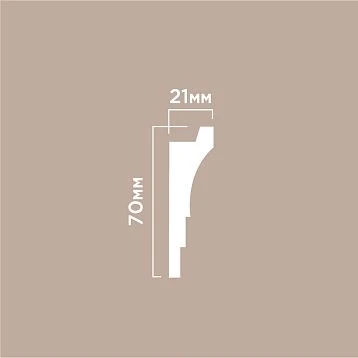
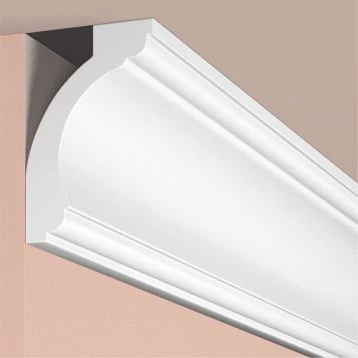
Polystyrene Crown Moulding A70V1 HI WOOD 70mm x 21mm x 2.0m
10.53 $

 5-10 days
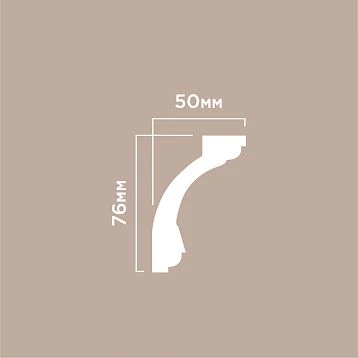
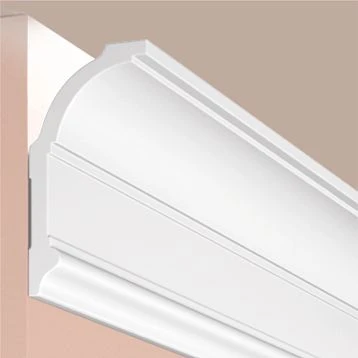
Polystyrene Crown Moulding AL75 HI WOOD 76mm x 50mm x 2.0m
13.45 $

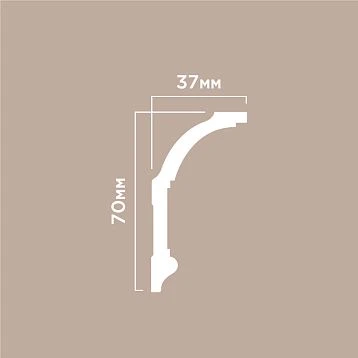 5-10 days
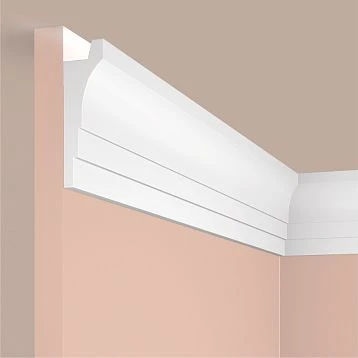
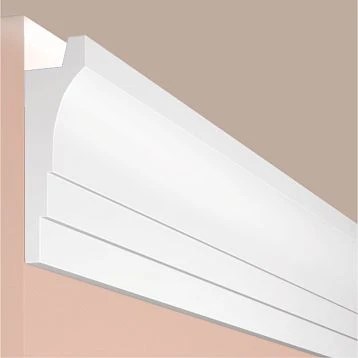
Cornice A70V2 polystyrene HIWOOD 70mm x 37mm x 2.0m.
12.87 $
 5-10 days
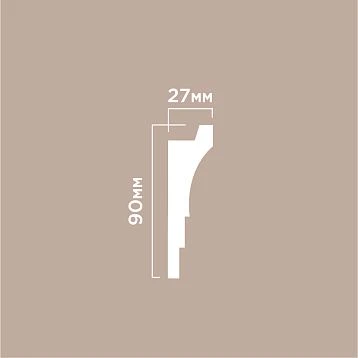
Polystyrene Crown Moulding A90V2 HI WOOD 90mm x 27mm x 2.0m
16.96 $

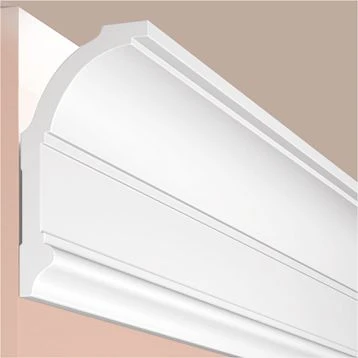
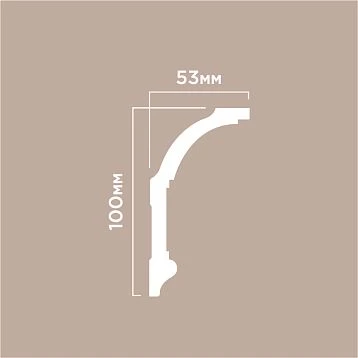 5-10 days
Polystyrene Crown Moulding A100 HI WOOD 100mm x 53mm x 2.0m
21.64 $

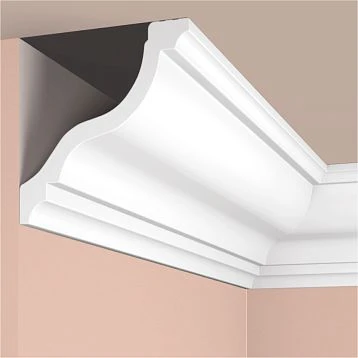
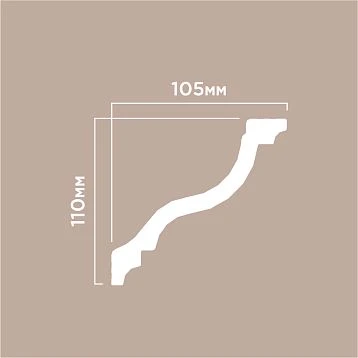 5-10 days
Polystyrene Crown Moulding A150V1 HI WOOD 105mm x 110mm x 2.0m
26.91 $

 5-10 days
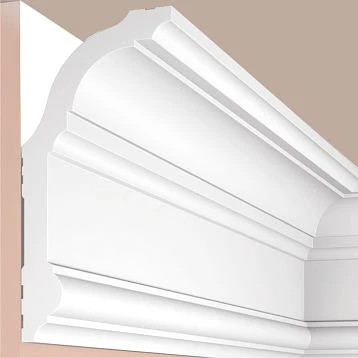
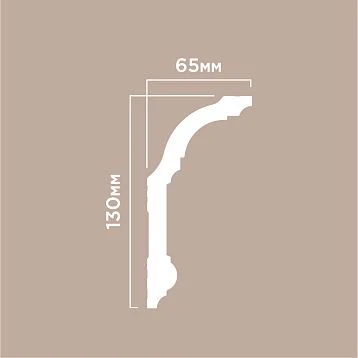
HIWOOD Polystyrene Cornice A130 130mm x 65mm x 2.0m.
35.10 $

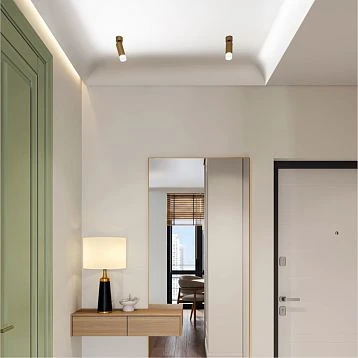
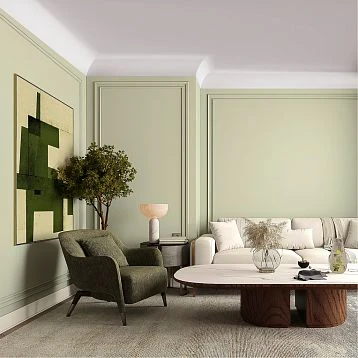 5-10 days
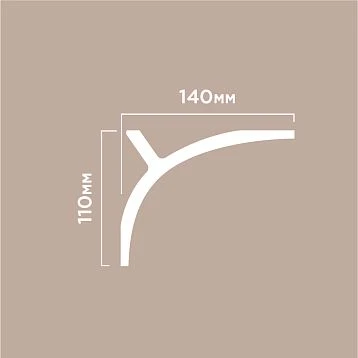
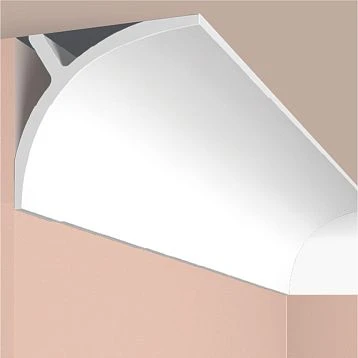
Polystyrene Crown Moulding A178 HI WOOD 110mm x 140mm x 2.0m
50.30 $
HIWOOD Polystyrene Crown Molding for a Finished Ceiling Line
Finish the transition between wall and ceiling with HIWOOD polystyrene crown molding from STAVROS. Choose a compact contour for a restrained border, a shaped profile for a traditional room, or a broad cove that makes the ceiling perimeter a distinct architectural feature.
The collection includes ceiling cornices with different proportions, curves and stepped details. Compare the product cross-sections as well as the installed views: two profiles with similar dimensions can create very different shadows. Each model has its own balance between the part seen against the wall and the part extending toward the ceiling.
HIWOOD crown moldings in this category are supplied in 2,000 mm lengths, approximately 78.74 inches or 6.56 feet. Select the profile first, then plan the individual runs, corners and joints to establish the quantity for your order.
For a coordinated interior, explore the wider STAVROS range of polyurethane moldings and decorative accents. The ceiling cornices presented here are polystyrene; wall frames, onlays and other decorative elements can be selected separately to complete the room.
Compare Crown Molding Profiles and Sizes
A useful comparison starts with the cross-section. Look at the catalog dimensions marked A and C, the shape of the face and the mounting surfaces. These details determine how much space the molding occupies and how its contour will appear once installed.
The table below brings together selected HIWOOD profiles from the collection. All are polystyrene and supplied in 2,000 mm lengths. Inch values are rounded conversions of the listed metric measurements.
| HIWOOD model | Catalog dimensions A × C | Approximate dimensions in inches | Profile appearance |
|---|---|---|---|
| A70 polystyrene crown molding | 50 × 50 mm | 1.97 × 1.97 in | Compact curved profile with a fine lower edge |
| M1702 ceiling molding | 70 × 18 mm | 2.76 × 0.71 in | Shallow profile with a broad face and restrained edge details |
| L1902S crown molding | 80 × 27 mm | 3.15 × 1.06 in | Shaped contour with layered curves and steps |
| A90V2 ceiling cornice | 90 × 27 mm | 3.54 × 1.06 in | Broad face with a curved upper transition |
| A100 decorative crown molding | 100 × 53 mm | 3.94 × 2.09 in | Defined upper curve and a shaped lower edge |
| A130V1 polystyrene cornice | 100 × 83 mm | 3.94 × 3.27 in | Open curved face with a stepped lower border |
| A150V1 crown molding | 105 × 110 mm | 4.13 × 4.33 in | Deep, sweeping contour with pronounced curves |
| A178 cove profile | 110 × 140 mm | 4.33 × 5.51 in | Broad, smooth concave face |
Use the product drawing to establish the installed wall drop and ceiling projection for the intended orientation. The model number identifies the product; it is not a substitute for its dimensions. For example, A130V1 is listed at 100 × 83 mm, while A130 is a different profile.
Choose the Scale for Your Room
Ceiling height is one part of the decision. Door heights, window heads, cabinetry and the overall room width also influence how substantial a crown molding should look. A sample held at the actual ceiling line makes these relationships much easier to judge.
In a smaller room, begin with a compact profile such as HIWOOD A53 crown molding. A fine perimeter can finish the junction while leaving the wall surface visually open. Consider its effect from the doorway, where the ceiling border is often seen as a complete composition.
For a larger room, compare a wider face with a deeper curve. These are different design choices. A100 and A130V1 both have a listed A dimension of 100 mm, but their C dimensions and contours differ. They will occupy the junction differently and produce different shadows.
Leave room for adjacent features. A window head close to the ceiling may restrict the available wall drop, while a cabinet or curtain track can affect the usable projection. Record those clearances before settling on the profile.
For connected rooms, establish where the ceiling line continues and where it changes. Repeating one profile through an open living and dining area can make the spaces feel connected. A change in ceiling height or an enclosed doorway provides a natural place to introduce a different scale.
Match New Trim to Existing Details
When adding crown molding to a finished room, begin with the details that will remain. Photograph the door casings, baseboards and any existing ceiling trim, then compare their main curves and flat sections with the proposed cornice. Similar proportions can connect the elements even when the profiles differ.
For an extension of an existing run, a photograph alone is insufficient. Record the cross-section, mounting position and both installed dimensions. A profile that looks similar from below may leave a visible mismatch where the two pieces meet. Compare physical samples at that junction before placing the order.
If an exact match is unavailable, a complete replacement within a clearly bounded room or ceiling zone may produce a more consistent result. Decide where the new trim will begin and end so the change reads as part of the design.
Find a Profile That Suits the Architecture
Clean Lines for Contemporary Interiors
A contemporary room often benefits from a clear, continuous ceiling border. Smooth faces, shallow steps and simple curves can complement plain doors, large wall surfaces and understated cabinetry.
Compare HIWOOD A70V1 ceiling trim with the other shallow profiles in the collection. Its curved upper section and broad face offer a different effect from a small cove or a more layered traditional contour.
The finish contributes to the result. Painting the molding to match the ceiling can soften the transition, while carrying the wall color over the profile can emphasize the shape through shadow. Assess a painted sample under the lighting planned for the room.
Curves and Steps for Traditional Rooms
In a traditional interior, the crown molding often relates to door casings, paneled walls and a central ceiling feature. Look for a common rhythm in the curves and stepped edges, then vary the scale according to each element's position.
The L1902M polystyrene crown molding offers a 100 × 33 mm shaped profile. For a more developed wall-facing composition, compare the HIWOOD A130 cornice, listed at 130 × 65 mm.
Keep the complete room in view when comparing decorative crown molding. A highly detailed fireplace, patterned wall covering or carved furniture may already provide the main ornament. The ceiling border can support those features with a simpler contour or repeat selected shapes at a larger scale.
Plan Crown Molding Around Everyday Spaces
Living Rooms and Dining Rooms
The main seating arrangement and dining table establish important viewing positions. From those places, consider how much of the molding's face will be visible and whether the ceiling line remains continuous around alcoves, columns and built-in furniture.
Where a dining room includes a central light, coordinate the perimeter with the decorative treatment around the fixture. The outer border can remain relatively simple if the center is elaborate. For a quieter ceiling, a more pronounced perimeter profile may provide all the detail the room needs.
Bedrooms and Hallways
In a bedroom, consider the relationship between the ceiling trim and the bed wall. Tall wall frames, a headboard or a canopy can change the available space and the apparent scale of the cornice. Lay out these elements together before ordering.
Hallways often contain many short wall sections and corners. A profile with a legible contour can give the ceiling line continuity, but the cutting schedule deserves attention. Short returns and repeated outside corners may affect material use more than the total perimeter suggests.
Kitchens and Rooms with Built-In Cabinetry
At tall cabinets, decide whether the room's crown molding continues across the cabinetry, stops with a return, or meets a separately designed cabinet cornice. Each approach needs a clear junction. Confirm the mounting surfaces and leave room for doors to open fully.
For bathrooms and other humid locations, review the selected product's use instructions together with the substrate, adhesive and coating specifications. The complete installed assembly must suit the location. Keep interior decorative profiles away from heat sources or direct exposure that their documentation does not permit.
Coordinate the Ceiling with STAVROS Wall Decor
A ceiling cornice establishes the upper boundary of a room. The wall treatment below can echo its proportions without repeating every curve. Plan the main horizontal lines first, then position smaller decorative elements within them.
Use polyurethane wall moldings to outline panels and picture frame arrangements on the wall. Leave a considered gap between the top of the frames and the lower edge of the crown molding. This lets each detail remain distinct.
For an established decorative arrangement, explore wall molding kits and polyurethane wall decor. More ornamental schemes can incorporate polyurethane onlays and appliques within the framed areas.
At floor level, compare polystyrene baseboards by their height and contour. The baseboard, door casing and ceiling molding occupy different positions, so their dimensions do not need to match. Their shapes and finish should contribute to a coherent room.
For additional detail near the upper wall, consider decorative polyurethane trim as a separate horizontal element. Check the spacing and the way its pattern ends at corners before combining it with a continuous ceiling cornice.
Complete the Ceiling Composition
A perimeter border can frame a simple painted ceiling or support a more elaborate central arrangement. Start with the positions of light fixtures, vents and any changes in ceiling level. These fixed elements determine the clear space available for decoration.
Explore polyurethane ceiling decor for larger compositions and ceiling medallions for details around a central light. Choose their scale in relation to the room, the fixture and the crown molding.
Where the ceiling has several zones, give each border a defined role. The cornice finishes the perimeter junction; applied ceiling frames can organize the surface inside it. Keep enough open area between these elements for the individual shapes to remain clear.
The AL75 ceiling cornice and A70V2 crown molding provide further contours to compare when developing the perimeter. Use their installed views and section drawings alongside the proposed ceiling layout.
Calculate the Lengths Before Ordering
Measure each wall run separately and draw the room perimeter. Include alcoves, chimney projections, short returns and changes in ceiling level. Mark inside and outside corners so the cutting list reflects the actual layout.
Add the runs to establish the total installed length. As an example, a rectangular room measuring 12 × 14 feet has a perimeter of 52 feet. At approximately 6.56 feet per 2-meter length, eight lengths exceed that perimeter only slightly. That is an initial arithmetic estimate; it does not include fitting waste or account for how the individual pieces must be cut.
Prepare a cutting plan before fixing the purchase quantity. A short remainder from one wall may suit a return elsewhere, while another offcut may be too small to use. Corner cuts and straight joints also affect the usable length of each piece.
Allow for fitting and cutting waste according to the complexity of the room. A simple rectangle and a hallway with many turns can require different allowances even when their total perimeters are similar.
Keep the model code, quantity and supplied length together on the order schedule. If several profiles are used, separate them by room and include a total for each model. This makes it easier to check the delivery and distribute the correct pieces during installation.
Prepare a Specification for Several Rooms
For a larger project, use a simple room schedule with the room name, ceiling height, chosen HIWOOD model, measured runs and planned quantity. Add a note wherever the molding meets cabinetry, stops at an opening or changes direction around a projection. These junctions often need more discussion than a straightforward wall run.
Keep the agreed finish with the specification. A single profile can look quite different in contrasting colors or sheens, so a shared product code does not describe the complete decorative result. Identify who will prepare and paint the molding and at what stage of the work.
Before the order is finalized, reconcile the room quantities with the overall model totals. Include any agreed spare lengths separately so they remain available for fitting or later repairs. A clear schedule gives the supplier and installer the same reference when quantities or room layouts change.
Prepare for a Clean Installation
The quality of the finished ceiling line depends on the background surfaces, the layout and the joints. Inspect the wall and ceiling before fitting. Loose paint, dust and uneven areas can prevent the mounting surfaces from making suitable contact.
Establish the intended position of the molding and mark consistent reference lines. In an older room, check how variations in the wall or ceiling affect the run. Resolve substantial irregularities before installation rather than relying on large amounts of joint filler to conceal them.
Use adhesive and finishing products specifically compatible with polystyrene and the receiving surface. Follow their instructions for preparation, application, working time and curing. The bonding method should also suit the mounting arrangement of the selected crown profile.
Fit Corners to Their Actual Angles
Measure the corners instead of assuming that every junction is exactly square. The required cuts depend on the room angle, the profile orientation and the cutting method. Make a trial joint from short pieces before cutting the full lengths.
Dry-fit the pieces and keep the contour consistently oriented around the room. Mark the wall side, ceiling side and direction of each cut when preparing several pieces together. This is particularly useful when inside and outside corners occur close to one another.
Treat straight joints and perimeter gaps with compatible products according to the installation instructions. Review the STAVROS finishing and installation guidance alongside the requirements for the specific HIWOOD profile and installation materials.
Paint the Molding as Part of the Room
Decide on the finished color before installation so the preparation and painting sequence can be planned. Check the supplied surface condition and the recommended primer and paint system for the selected polystyrene molding. Confirm compatibility before applying any coating.
White crown molding creates a familiar border against colored walls. Matching the ceiling can make the perimeter feel continuous, while matching the wall gives the upper part of the room a more unified appearance. A contrasting color draws attention to every turn and joint, so preparation becomes especially visible.
Test the finish on a sample, including a prepared joint. View it in daylight and with the room lights on. The sheen can make a curved face look softer or more pronounced, even when the paint color remains the same.
After installation, clean the finished molding with a soft cloth and a product suitable for its coating. Keep the model code and finish details with the project records so future touch-ups or additions can be matched accurately.
Ceiling Cornices and Indirect Lighting
Plan indirect lighting as a complete assembly. A standard crown molding's shape alone does not establish that it can support an LED strip or provide the necessary clearance. Review the intended mounting position, light source and access for maintenance before selecting the decorative profile.
For a product specifically listed for a lighting application, explore HIWOOD LB32 molding for backlighting in the moldings section. Confirm the compatible lighting components and installation requirements for the proposed arrangement.
Test a short section before committing to the full perimeter. The distance from the light to the ceiling, the surrounding finishes and the position of the profile all affect the visible band of light. Make provision for wiring, drivers and maintenance within the overall lighting design.
Questions About Polystyrene Crown Molding
What Is the Difference Between Crown Molding and Wall Molding?
Crown molding finishes the junction between a wall and ceiling. Wall molding is generally applied to a flat surface to create frames, borders or panel details. Select the product by its cross-section and intended mounting position, especially when coordinating both types in one room.
Are These HIWOOD Crown Moldings Made from Polyurethane?
The HIWOOD ceiling cornices in this category are polystyrene. STAVROS also offers polyurethane wall moldings, ceiling decor and decorative accents in related sections. Specify each product's material separately when preparing a mixed-material order.
How Long Is Each Piece?
The HIWOOD crown moldings presented here are listed in 2,000 mm lengths, approximately 78.74 inches or 6.56 feet. Use that supplied length when planning cuts and quantities. It is shorter than an 8-foot piece, which can affect joint positions on longer walls.
How Should I Compare Crown Molding for Sale?
Compare the material, cross-section, supplied length and quantity required for the room. Establish whether a displayed price is per piece, pack or unit of length. Include installation supplies, finishing and confirmed delivery costs when comparing the complete purchase.
Buy HIWOOD Crown Molding from STAVROS
Browse the profiles above, compare their dimensions and choose the ceiling line that suits your interior. Prepare the model codes and quantities from the room layout, then confirm current availability and order arrangements with STAVROS.
Explore samples and catalogs when assessing proportions and coordinating decorative elements. For a project inquiry, include the selected profiles, required quantities and delivery location. Review the payment and delivery information and confirm the terms applicable to your destination before placing the order.
Order a call
Do you have questions? Fill out the form and send it.
Your request has been sent!
Our manager will contact you within 5 minutes