Article Contents:
- Carved table legs are not chosen for their ornament
- Four separate carved legs and a ready-made base are different constructions
- First determine the final height of the table
- The apron may turn out to be more important than the leg height itself
- Armchair: a check that cannot be left until the end
- The size of the tabletop determines the placement of the four legs
- The maximum overall dimension of a carved leg is more important than a single mounting point
- Why you need a 1:1 leg template
- MN-040: one SKU, three different geometries
- MN-037: a clear example of the same rule
- MN-033: one leg can fit different furniture, but projects don't become identical because of it
- MN-038.1: 740 mm is not yet the finished table height
- MN-045: the same height does not mean the same visual mass
- How to choose a carved leg for a tabletop: a working algorithm
- 1. Fix the tabletop
- 2. Set the final height
- 3. Determine the base construction
- 4. Calculate the allowable support height
- 5. Select models by height
- 6. Compare the remaining dimensions
- 7. Check the contour
- 8. Check the stretcher
- 9. Check the person and the chairs
- 10. Only now choose beech or oak and the finish
- Oak
- Oak
- Mistake 1. Buying four parts before approving the apron
- Mistake 2. Assuming all versions of the item code are interchangeable
- Mistake 3. Looking only at the table height
- Mistake 4. Not checking the chairs
- Mistake 5. Placing the legs along the top section
- Mistake 6. Ordering oak just because the tabletop is oak
- Mistake 7. Orienting the directional grain randomly
- Mistake 8. Ordering a large batch without a first sample
- Which carved legs are suitable for a table?
- Where to buy carved wooden table legs?
- What height should dining table legs be?
- How do you account for the tabletop thickness?
- How does the apron affect the choice of legs?
- How do you check whether an armchair with armrests will fit under the table?
- What should you choose — four carved legs or a ready-made base?
- How should carved legs be positioned relative to the tabletop edge?
- What should you choose for carved legs — beech or oak?
- Should you buy a single leg as a sample before ordering a full set?
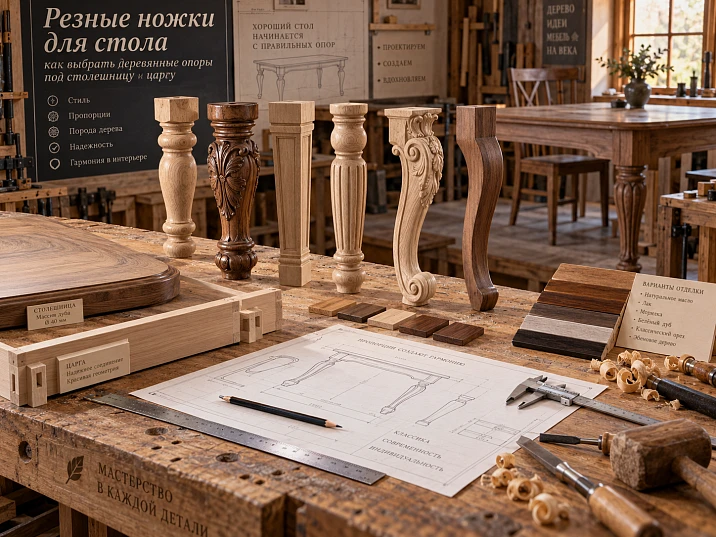
The most unpleasant mistake when ordering carved legs does not happen when the ornament turns out to be a little more pronounced than it seemed in the photo. Far more costly is the situation when four beautiful supports have already been purchased, the tabletop has been cut, and during assembly it turns out that the apron falls within the widened section of the carving, an armchair with armrests does not slide under the table, too little space is left between the legs, or the final height has drifted from the design specification.
That is why it is wiser to choose carved table legs in reverse order. First, determine what the table itself should be: what it is for, what the tabletop will be like, where the apron will run, and how much space needs to be left for a person and chairs. Then calculate the permissible geometry of the support. And only among the structurally suitable options compare the carving pattern, wood species, and finish.
For a joinery workshop, this is especially important. A single carved leg is not a ready-made base. Four identical parts still need to be turned into a rigid, convenient, and repeatable structure. That means you have to choose not only the appearance but also the specific SKU, its actual dimensions, its position relative to the apron, its orientation, the joining method, and the ability to reorder the same variant for the next piece.
If you need a general overview of leg types — from carved to modern — a separate article on table legs of various types. Here the task is more specific: to design a table on exactly four separate carved wooden legs.
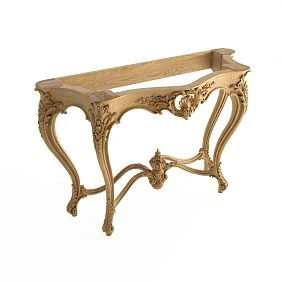
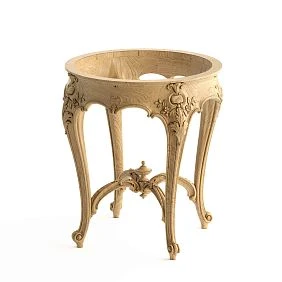

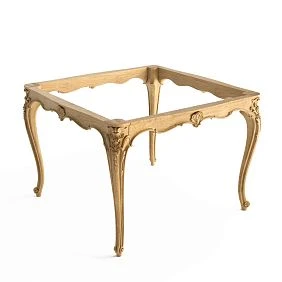
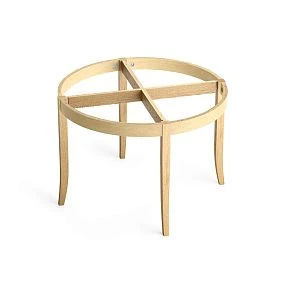
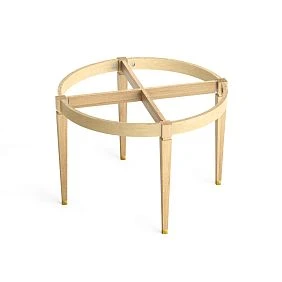
Carved table legs are not chosen based on ornament
A photograph of a leg almost always draws attention to the decorative part. You can see leaves, volutes, flutes, the cabriole line, a massive upper section, or, conversely, an elongated slender support. But on a working drawing, the first thing that should appear is not the ornament, but a set of constraints.
The selection order is as follows:
- Establish the purpose of the table.
- Determine the design final height.
- Specify the thickness and construction of the tabletop.
- Design the aprons or another assembly that connects the four legs.
- Determine the allowable leg height.
- Check the leg dimensions not only from the top, but along the entire contour.
- Check for free space for legs and chairs.
- Select suitable SKUs.
- After that, compare the thread, beech or oak, and the finish option.
The difference is fundamental. In the first scenario, the furniture maker adjusts the table to a decorative piece already purchased. In the second, the ready-made leg becomes a component of a pre-designed structure.
For a custom order, both paths are acceptable, but the consequences differ. If the client first chose a specific leg model and is ready to change the table dimensions for it, the SKU can be the starting point. If the table dimensions are already limited by the room, chairs, niche, or a specified tabletop, geometry comes first, not the pattern.
That is why the request "buy carved legs for a table" is better understood as the beginning of the selection process, not as the last operation before assembly.




Four separate carved legs and a ready-made base are different structures
Four separate legs have an important advantage: the craftsman determines the geometry of the base himself. You can set the distance between the supports, the position of the aprons, the end and side overhang of the tabletop, the connection method, the table dimensions, and the orientation of the carved pattern.
But along with freedom comes responsibility for the construction. Four parts by themselves do not form a stable table. You need to design a system that prevents the base from folding, wobbling, and losing its rectangular geometry. The specific scheme depends on dimensions, material, load, and workshop technology; it cannot be replaced by the advice "just screw the legs to the tabletop."
A ready-made base solves a different problem. It is already a connected assembly unit with its own geometry. The furniture maker selects a tabletop for it and checks compatibility, but does not design the relative position of four independent supports from scratch.
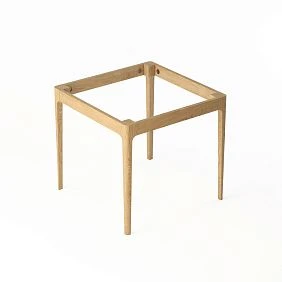
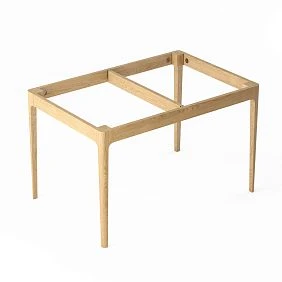
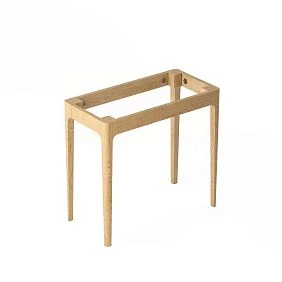
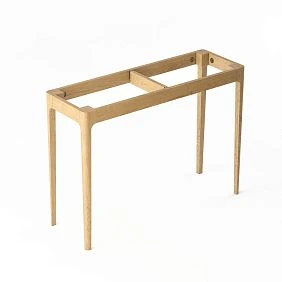
If you need exactly this kind of base, take a look at ready-made wooden table bases. But if the project requires its own apron, its own distance between the legs, and its own tabletop, it makes more sense to work with individual supports.
This is not a question of "which is better." For a custom table, individual carved legs offer more freedom. For a project that needs an already formed base, a table base reduces the amount of independent construction.
Our factory also produces:
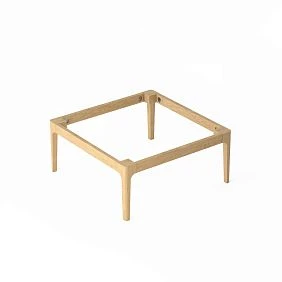
First, determine the final height of the table
The height of the leg and the height of the finished table are not the same thing.
The simplest estimate actually looks like this:
final height = vertical size of the support + connection elements on top + tabletop thickness
But this formula is only useful once the structure of the joint is clear. The tabletop may sit directly on top of the leg, fit into another assembly element, rest on a frame, or have an additional sub-top layer. That is why you cannot look at "740 mm" in the product card, add the tabletop thickness to it, and consider the project complete.
Let's imagine a tabletop 40 mm thick and a leg 740 mm high. A simple sum gives 780 mm. But this is only a geometric hint. If there is an additional structure between the top of the leg and the tabletop, the position will change. If the top of the support partially enters the joint, the calculation will be different.
It is more correct to start with the inverse equation:
required leg height = design height of the finished table − everything located above the top point of the support
This approach immediately rules out unsuitable options.
For a working drawing, it is useful to set up five lines:
| Parameter | Project value |
|---|---|
| Final table height | ___ mm |
| Tabletop thickness | ___ mm |
| Additional structure above the leg | ___ mm |
| Calculated leg height | ___ mm |
| Actual height of the selected SKU | ___ mm |
The last line is especially important. It shows whether the project needs to be changed or a different support should be found.
Get Consultation
The apron can turn out to be more important than the leg height itself
A table can have the correct height and still be uncomfortable.
The reason is often below the tabletop. The apron occupies vertical space exactly where the knees and the armrests of the chair go when seated. The higher it is and the lower it is positioned, the smaller the actual clearance.
Therefore, two different heights need to be checked:
- from the floor to the upper surface of the tabletop;
- from the floor to the lower edge of the apron or another protruding element of the base.
The second measurement is often more important for seating than the first.
Suppose the table looks visually light, and the tabletop is at a comfortable height. But the craftsman chose a tall apron because he wanted a rigid frame. A person sits down, and the knees end up too close to the lower edge. If seating is still possible, the problem seems minor. After adding chairs with armrests, it turns out they do not fit under the table at all.
There is no single universal apron size that can be given here. It depends on the chair, the table design, the user's height, and the required rigidity. But checking is mandatory: the table drawing must include not only the overall height but also the actual free clearance underneath.
A good practice is to take the chair you intend to use and add its dimensions to the same drawing, rather than choosing furniture from two independent lists.
Armchair with armrests: the check you can't leave until the end
A regular chair without armrests forgives many mistakes. An armchair does not.
If the armrest needs to slide under the tabletop, compare its top point not only with the tabletop but also with the apron. Then check the insertion depth. Sometimes the armchair fits by height, but the armrest hits the leg before the seat reaches its normal position.
The drawing needs three values:
H1 — armrest height from the floor;
H2 — distance from the floor to the lower edge of the apron;
D — the depth to which the armchair must slide under the table.
If H1 almost coincides with H2, a theoretical clearance still doesn't mean normal use. The floor isn't perfectly level, the armchair's soft elements compress, and a person doesn't move the chair strictly vertically. You need a working margin that the craftsman sets for the specific project.
There's a second conflict as well: a carved leg may widen inward. In plan, the top point of the support is far enough away, but lower down the scroll or cabriole line extends into the armrest zone. That's why for pronounced carving you check not only the attachment point but the entire contour.
This is exactly where a 1:1 template proves more useful than a beautiful render.
The size of the tabletop determines the placement of the four legs.
A rectangular tabletop has a length and a width. The base has a distance between the supports. Overhangs appear between them.
An overhang that is too large can make the legs appear visually gathered in the center: the tabletop seems like a separate large plane placed on a small base. One that is too small pushes massive carved details almost to the corners, where they begin to dominate and can get in the way of someone sitting at the end.
For the initial layout, it is convenient to calculate separately:
end overhang = distance from the end of the tabletop to the outermost point of the leg;
side overhang = distance from the side edge of the tabletop to the outermost point of the leg;
free span = distance between the inner contours of two adjacent legs.
The last parameter is more important than it seems. With a smooth square support, the inner contour is predictable. A carved leg can widen in the middle, and the actual free span becomes smaller than the distance between its upper mounting zones.
If two chairs are to stand along the long side of the table, it is useful to draw them there as well. Not as symbols, but at real scale. Then it immediately becomes clear whether the carving has taken away those 40–80 mm of space that seem insignificant in a separate photo of the leg.
The maximum overall dimension of the carved leg is more important than a single mounting pad.
With a shaped support, you cannot work only with the "top dimension".
A leg may start relatively compactly, then widen, extend outward, have a pronounced scroll, or a massive lower part. Therefore, the design must account not for a single rectangle, but for the actual envelope of the part.
In STAVROS product cards, dimensions are designated by letter parameters, and the set of letters may differ between products. For example, some models list A, E, and F, while another lists A, B, and F. These figures are useful, but before manufacturing a joint, you need to check the drawing for the specific SKU rather than assigning a meaning to a letter that is not present in your working document.
The working check looks like this:
- Take the official drawing for the selected SKU.
- Transfer to your project all dimensions that affect adjacent parts.
- Build the outer contour or at least the overall envelope.
- Overlay the stretcher rail.
- Add the countertop contour.
- Add the adjacent leg.
- Check the legroom and chair space.
If at this stage the leg conflicts with the structure, it is better to change the model rather than try to "squeeze" it into an already finished apron.
Why you need a 1:1 leg template
For a carved part, a full-size template solves several tasks at once.
For a simple project, a printed or cut-out contour in side projection is enough. For a complex one, it is useful to make two views: front and side. If the ornament is directional and the leg has a pronounced front side, an orientation mark is needed.
Then the four templates are placed under the tabletop mockup or directly on the workbench with the contour of the future part marked on it.
Check:
- how much overhang will remain;
- whether the leg falls within the apron zone;
- what the resulting free span is;
- do the chairs fit;
- how the ornament is rotated;
- do the four corners look identical;
- whether random "front" and "back" sides are formed.
The point of such a layout is not to replace an exact drawing. It catches errors of perception. On the screen, the leg is viewed separately, up close. Under a real tabletop, four identical three-dimensional elements can look considerably more massive.
For a complex cabriole, this is especially noticeable: the edge of the support visually shifts to the side, and the base takes up more space than the upper attachment point suggests.
MN-040: one SKU, three different geometries
Carved Furniture Leg MN-040 — a good example of why you shouldn't choose based only on the row with the height.
The product page presents three options:
| MN-040 option | Size per card |
|---|---|
| 650 мм | 650 × 56 × 88 mm |
| 740 мм | 740 × 64 × 100 mm |
| 900 мм | 900 × 78 × 122 mm |
That is, a change in height is accompanied by a change in the other specified dimensions. The 900 mm version is not simply a 740-millimeter part stretched by 160 mm. For design purposes, these are three separate geometric states of one family.
What a furniture maker should do:
first choose a specific size of MN-040 → then add exactly that drawing to the project → and only then assign the aprons and mounting points.
If the base has already been manufactured for the 650-millimeter version, it cannot be automatically replaced with the 740 mm one based only on the identical family article number. The geometry must be checked again.
The material is chosen later. The product page offers options in beech and oak, but the wood species will not fix an error in the layout.
MN-037: a clear example of the same rule
У carved leg MN-037 also has several sizes:
| MN-037 variant | Size per card |
|---|---|
| 600 мм | 600 × 57 × 68 mm |
| 740 мм | 740 × 70 × 84 mm |
| 900 мм | 900 × 85 × 102 mm |
These figures are useful not only for choosing new furniture. They show why upgrading a ready-made table can be more difficult than it seems.
Let's imagine that a craftsman assembled the base for the 600 × 57 × 68 mm variant, and then the customer asked to raise the table. The product page shows the 740 mm variant, and there is a temptation to leave everything else unchanged. But the taller version also has other parameters that change. This means the aprons, clearances, and mounting points require rechecking.
From an engineering standpoint, this is a correct general principle: a variation of one SKU cannot be considered interchangeable until the matching of critical mating dimensions has been verified against the drawing.
For a production workshop, this can be formalized in the specification. Not just writing MN-037. Write the full variant, including size and material. Otherwise, six months later another employee will order “the same leg,” but not the same geometry.
MN-033: one leg can fit different furniture, but projects do not become identical because of that
Carved Furniture Leg MN-033 the product page lists the size as 740 × 80 × 167 mm and describes it as a variant suitable for tables and other furniture as well.
This is a good reason to separate product purpose from structural compatibility.
The phrase "suitable for a table, console, or cabinet" refers to the product's scope of application. It does not mean that one installation scheme automatically transfers across all three items.
A console typically has a different depth, a different overhang, and a different position relative to the wall. A cabinet has a different height and load distribution. A dining table has requirements for legroom and chair placement.
Therefore, the versatility of a SKU expands the number of scenarios but does not eliminate the need for design.
For MN-033, a full-size template is especially useful. The third dimension listed in the product card is noticeably larger than that of some neighboring models, so comparing "by height of 740 mm" says practically nothing about how two different supports will occupy the space under the tabletop.
MN-038.1: 740 mm is not yet the finished table height
Carved Furniture Leg MN-038.1 is presented in the size 740 × 53 × 95 mm.
It is precisely the model with a height of 740 mm that clearly demonstrates the calculation methodology.
A craftsman sees the number 740 and may mentally label it "a leg for a standard table." But in a project, that is not enough. If a 30, 40, or 50 mm tabletop is added on top, the final level changes. If there is a separate structural element between the support and the tabletop, it is also included in the calculation.
Therefore, in the specification next to the item code, it is useful to store not only the height of the part but also the formula for the specific product:
MN-038.1 740 + structural element X + tabletop Y = final height Z
This record turns the selection into a reproducible process. A year later, you can understand why this particular leg was chosen, rather than guessing the decision again from a photo of the finished table.
MN-045: the same height does not mean the same visual mass
Carved Furniture Leg MN-045 also has a height of 740 mm, however the product page lists the size as 740 × 32 × 93 mm.
Let's place three models with a height of 740 mm side by side:
| Model | Size per card |
|---|---|
| MN-037 | 740 × 70 × 84 mm |
| MN-038.1 | 740 × 53 × 95 mm |
| MN-045 | 740 × 32 × 93 mm |
This is already enough to abandon the phrase “I need any carved leg 740 mm.”
Even without evaluating the artistic design, it is clear: the models differ in parameters, which means their behavior in the project also differs. For a final comparison, you need to open the drawings and check the contour, junction points, and direction of the carving.
At the visual level, the same rule applies. Two legs of the same height can create a completely different sense of mass. One is perceived as a vertical support. The other as a noticeable sculptural volume that requires more calm space around it.
That is why it is better to compare several SKUs within a single tabletop layout, rather than by individual product pages.
How to choose a carved leg for a tabletop: a working algorithm
Once the initial data is collected, the selection can be turned into a short procedure.
1. Record the tabletop
Write down the length, width, thickness, and material. If the shape is complex, attach a scaled outline. For an oval or round table, a bounding rectangle is not enough: the edge changes the distance to the leg as it approaches the corner.
2. Set the final height
Do not choose it based on the leg. The height is determined by the project, the chairs, and the intended use.
3. Determine the base structure
Will there be an apron? What height and thickness? Where does it connect to the leg? Are there additional bars, plates, or other parts?
4. Calculate the allowable support height
Subtract from the final height everything that is actually above the top point of the leg.
5. Filter models by height
At this step the list becomes short, but not yet final.
6. Compare the remaining dimensions
Do not consider two versions of the same item code interchangeable. Look at the specific dimension row.
7. Check the contour
Better to use the official drawing and a 1:1 template.
8. Check the stretcher
Is there room for the joint? Does it fall into the thread? Do you have to make too weak or inconvenient a joint because of the chosen leg?
9. Check the person and the chairs
Knees, armrests, how far it slides in, space at the ends.
10. Only now choose beech or oak and the finish
Material is an important parameter. But it comes after structural compatibility.
The carving and the apron must be designed together
With a smooth leg, the upper part is often easy to imagine as a simple block. With a carved one, it is more complicated: the decorative profile may start high, occupy the side face, or leave only a limited flat area.
If the apron involves a joint at the top, the furniture maker needs not the abstract width of the leg, but the actual place where the structure can be positioned without conflicting with the carving.
There are several typical mistakes.
The apron is drawn after choosing the leg, but before checking the drawing. During assembly, it lands in the decorative relief.
They rely on a frontal photograph. From the side, the geometry turns out to be different.
The same apron offset is assigned to all models. Each leg has its own contour.
The joint is too close to the edge. The desire to preserve maximum legroom worsens the structural logic.
An article cannot assign a universal mounting joint for all carved legs. This part is designed by the craftsman for their specific project and actual components. But the verification order is always the same: first the leg drawing, then the joint — not the other way around.
Beech or oak for carved table legs
Once the geometry is approved, a meaningful material choice emerges.
Beech
Beech is convenient to consider for a project where the leg will be painted with an opaque system: for example, enamel in the desired color, and the wood grain should not remain the main visual element.
For a workshop, this provides a clear scenario: legs, aprons, and other wooden parts can be included in the overall preparation and finishing cycle.
But "beech = necessarily enamel" would be too crude a rule. The specific finish is chosen according to the project's technology. Before a production run, it is more useful to make a test finish sample than to rely on general descriptions of the species.
Oak
Oak is logical to consider when the wood should be visible: with tinting, oil, lacquer, or another coating that preserves noticeable grain.
If the tabletop is also oak, the question becomes more interesting. A matching species name does not guarantee a visual match. Parts may differ in selection, cut, and their own grain. Therefore, the task is formulated not as "take oak and everything will match," but as "approve a finish sample on the specific parts."
For a set of four legs, uniformity of the solution is especially important. If one leg stands out visually after tinting, it is more noticeable under the table than on a part viewed separately.
Unpainted legs are convenient for a custom table
Section unfinished furniture legs STAVROS is interesting to workshops because the finish can be integrated into the project's own technological workflow.
For example, a single table can consist of:
- countertops;
- aprons;
- four carved legs;
- additional wooden elements.
If all surfaces should be perceived as a single piece, a shared preparation and finishing cycle allows you to coordinate color and gloss level across the set, rather than buying four finished legs and then trying to match the rest of the furniture to them.
But an unfinished part is not "you can apply anything without testing." Deep carving changes the method of surface preparation and coating application. You need a test sample or at least a test on one part before the entire batch goes to finishing.
How to finish deep carving without losing the pattern
Relief does not tolerate the approach of "the more material, the more reliable."
In recesses, the coating builds up faster. An internal corner is harder to sand evenly. On a convex edge, on the contrary, the layer can accidentally be removed more heavily. After several operations, fine pattern transitions can lose their sharpness.
Therefore, when working with carved legs, four zones are monitored:
- deep hollows;
- internal corners;
- undercuts and shadowed areas;
- thin protruding parts.
For opaque finishes, an excessive layer is dangerous: it smooths out fine detailing. For transparent finishes, preparation defects are dangerous, as they become more noticeable after tinting.
The purpose of the article is not to replace the process chart for a specific coating system. The correct conclusion is different: approving a color from a flat sample board is not enough if the main part has deep relief. The sample should be evaluated on a geometry close to the real one.
All four legs must work as a set
For a symmetrical table, the four supports are perceived simultaneously. Any inconsistency is multiplied.
Minimum set specification:
| Parameter | What to fix |
|---|---|
| Article number | full SKU |
| Size | specific variant |
| Species | Beech / Oak |
| Preparation | selected category |
| Finishing | code or approved sample |
| Quantity | 4 pcs. per table |
| Orientation | if the pattern is directional |
| Project | item/order number |
If the ornament is symmetrical in all directions, orientation may not matter. If the leg has a distinct front side, "all four identical" does not yet mean "all four installed correctly."
In the BOM, you can designate positions:
- LEG-FL — front left;
- LEG-FR — front right;
- LEG-RL — rear left;
- LEG-RR — rear right.
For a simple table, such a designation may be redundant. For a series, a complex profile, or a directional pattern, it protects against accidental rotation of parts during assembly.
One sample before ordering four or forty legs
When a craftsman makes the first table on a new SKU, one physical part is often more informative than a dozen photographs.
Scenario:
1 sample → dimension check → template → test fit with apron → trial finish → approval → order the set.
After approval, the model can be used as a repeatable component.
For ten identical tables, the arithmetic is simple: four legs per item gives forty legs. But a production order is not only 4 × 10 = 40.
Before the batch, it is worth locking in:
- which exact SKU size is approved;
- the material;
- finishing or preparation;
- acceptable visual differences;
- orientation;
- a reserve, if production needs it;
- a reference to the table drawing version.
Otherwise, the first batch is assembled from the sample, and the second from memory.
How to calculate the set for a series of tables
Suppose the workshop makes 12 identical tables.
Base quantity:
12 tables × 4 legs = 48 legs.
Next is the question of the reserve. There is no universal percentage for carved legs: it depends on procurement conditions, the ability to quickly reorder the same configuration, project requirements, and the accepted quality control system.
Therefore, instead of a mechanical “add 10%,” it is better to use production logic:
- if the item is a one-off and a quick reorder is possible, stock may not be needed;
- if the series must reach the customer all at once, the risk of an incomplete set is more costly;
- if the finish is complex and parts go through selection, stock is determined by the production technology;
- if the model is produced in several sizes, the order must not shorten the name to a single SKU.
For 48 legs, the most dangerous mistake is not mathematical but specification-related: receiving part of the batch in a different height, material, or variant.
How not to lose the SKU on a repeat order
The phrase "that carved leg we used on the big table" is not a production document.
In the project card, save:
SKU → size → material → link → approval date → drawing → product version → finish → quantity per table
It is better to store the link together with a PDF or a local copy of the project working drawing. The product page may be updated over time, but the old table will remain exactly as the workshop produced it.
Separately save your own data:
- the actual connection diagram;
- position of the apron;
- template;
- color swatches;
- photos of the assembled unit;
- notes after the first product.
This is how a finished part turns from a one-time purchase into an element of the production library.
When four carved legs are not the best scenario
Individual carved legs do not need to be chosen automatically just because the table should look classic.
There are situations where a ready-made base is more rational:
The workshop does not want to design its own connected base. Then a ready-made structure reduces the number of independently determined units.
The tabletop requires a different support scheme. Four corner legs are only one of the foundations of the architecture.
It may be necessary to free up the corners or change the placement of the person's legs. A central or other base can solve the layout differently.
The chosen carved leg requires too many compromises. If, for the sake of decoration, you have to create an uncomfortable clearance, a strange overhang, or complicate a weak joint, it is wiser to change the base.
In the catalog for such projects there are furniture frames and bases.
Here it is useful to keep the main criterion in mind: the shape of the base serves the table, not the other way around.
Mistakes when choosing carved legs for a table
Mistake 1. Buying four parts before approving the apron
The reason is clear: you liked the legs, they are in stock, and you want to lock in the order right away.
The consequence appears later — there is not enough flat area for the joint, or the apron intersects with the relief.
How to prevent it: first the specific SKU and its drawing, then the joint.
Mistake 2. Treating all versions of an item code as interchangeable
MN-037 and MN-040 show that when the height changes, other specified dimensions change as well.
How to prevent: keep the full dimension string in the project, not just the series name.
Mistake 3. Looking only at the table height
The tabletop may end up at the right level, but the apron may be too low.
How to prevent: check the clear space underneath separately.
Mistake 4. Not checking the chairs
Especially armchairs with armrests.
How to prevent: add a chair to the drawing and check the tuck-in path.
Mistake 5. Placing the legs on the top section
The carved profile may extend beyond it.
How to prevent: use the actual contour or a 1:1 template.
Mistake 6. Ordering oak just because the countertop is oak
The species matches, but the color and grain may differ after finishing.
How to prevent: do a joint color sample and approve a real sample.
Mistake 7. Orienting directional carving randomly
On four corners, this turns into a visual error across the entire composition.
How to prevent: specify the orientation in the assembly drawing.
Mistake 8. Ordering a large batch without a first sample
A geometry error scales with the quantity.
How to prevent it: for a new project, start with one physical part first, if timelines and the procurement scheme allow it.
How to compare MN-040, MN-037, MN-033, MN-038.1, and MN-045 before purchasing
There is no need to look for the "best" among the five models. Create a project compliance table.
| Model | Height available in the reviewed option | What to check first |
|---|---|---|
| MN-040 | 650 / 740 / 900 mm | the specific geometry of the selected height |
| MN-037 | 600 / 740 / 900 mm | change in dimensions between versions |
| MN-033 | 740 мм | large transverse dimension and contour |
| MN-038.1 | 740 мм | matching the height with your upper unit |
| MN-045 | 740 мм | profile, orientation, and space for the stretcher |
Then ask the same questions for each model:
- Does it provide the required final height?
- Does the stretcher fit?
- What is the maximum outline?
- How much space remains between the supports?
- Do the chairs fit?
- Is the visual scale compatible with the tabletop?
- Beech or oak?
- Is there an approved finish option?
- Can this configuration be repeated in the series?
After such a check, the decorative solution becomes the last filter, not the first.
Where to buy carved table legs
If the project has already been calculated, product search can go from task to category.
For selection specifically for the "table" application, there is a section wooden table legs.
If the execution type is primary, the catalog is useful carved furniture legs.
The entire assortment is in the section of wooden furniture legs.
For a specific project, it is better not to start with dozens of cards. First, write down the allowable height and maximum geometry. Then open the models that pass this filter and compare the drawings.
If after the check, for example, MN-037 740 mm and MN-038.1 740 mm remain, then it makes sense to choose between the plasticity of the two profiles, the material, and the finish. Before checking the construction, it would have been a choice of pictures. After — a choice of two compatible components.
Mini-specification before ordering
Before buying carved wooden table legs, the project can be summarized on a single page.
Item: dining table / desk / console
Tabletop: length × width × thickness
Overall height: ___ mm
Apron: height × thickness
Clearance: ___ mm
Chairs: model / dimensions / armrest height
Leg: SKU
Size: full line from the product card
Material: beech / oak
Quantity: 4 pcs. per table
Orientation: specified / not applicable
Finish: system code / approved sample
1:1 template: verified
Sample: approved
Drawing version: ___
This card takes up less space than a long correspondence with the client, but it protects against most reorder errors.
From choosing a single leg to a repeatable table
For a private buyer, four identical supports may be the final purchase. For a furniture maker, this is the beginning of a production system.
The first project provides data that is not in the product card: how convenient it is to assemble the unit in a specific workshop, how the chosen finish behaves on the relief, which overhang looks better with this countertop, where the safe zone of the apron runs, how to orient the pattern.
After the first approved sample, these decisions need to be saved. Then the second table is not designed from scratch.
The scheme turns out like this:
purpose → geometry → SKU → sample → assembly → finish → approval → specification → series.
Carved table legs in this system cease to be a decorative accessory. They become a normal production part with a number, dimensions, constraints, and usage rules.
This is exactly how it is more convenient to work with both a one-off custom table and a small series.
FAQ
Which carved legs are suitable for a table?
Those that simultaneously fit in height, geometry, space for the apron, free span, orientation, and finishing method. The product purpose "for a table" alone does not replace checking a specific project.
Where to buy carved wooden table legs?
Suitable options can be found in the section carved furniture legs STAVROS or in the selection legs for use on tables. Before ordering, check the specific size and drawing of the selected SKU.
What height should dining table legs be?
The height of an individual leg cannot be specified without the tabletop thickness and the connection scheme. First, the design height of the finished table is set, then all elements located above the top point of the support are subtracted. The actual height of the selected SKU must correspond to the resulting structural range.
How do you account for tabletop thickness?
Include it in the vertical section of the table. If the support is located directly under the tabletop, its thickness obviously affects the final dimension. If there is a frame or another assembly between them, the entire actual assembly is taken into account, not just the two figures from the catalog.
How does the apron affect the choice of legs?
It affects two parameters at once: the connection point with the support and the free space under the table. A leg may fit in terms of overall height but not have a convenient area for a specific apron assembly or may leave too little clearance for knees.
How do you check whether an armchair with armrests will fit under the table?
Compare the armrest height with the lower edge of the apron, then check the sliding-in depth. Add the actual leg contour to the drawing: its widening can restrict the chair earlier than the apron itself.
Which should you choose — four carved legs or a ready-made base?
Four separate supports are convenient when the maker wants to set the dimensions of the base, aprons, distance between legs, and overhangs independently. A ready-made base suits a project that needs an already connected base. The choice depends on the construction, not on the overall superiority of one solution.
How should carved legs be positioned relative to the edge of the tabletop?
Set the position based on the actual outer contour of the leg, not just the upper mounting area. Then check the tabletop overhang, the clear span, and the space for chairs. For a complex profile, a 1:1 template is useful.
What should you choose for carved legs — beech or oak?
Beech is a logical choice for many opaque finishes, while oak is chosen when you want to preserve pronounced wood grain under a clear or tinted coating. But the final choice depends on the project technology; before a production run, it is best to approve a physical sample.
Should you buy one leg as a sample before ordering a set?
For a new project, this is a useful check if the timeline and delivery scheme allow it. On a single part, you can confirm the actual dimensions, apron position, orientation, finish, and template. After approval, you then order four legs for a table or the required quantity for a production run.