Article Contents:
- What to buy for a slatted facade: kit from the first page
- Slatted facade vs slatted wall: fundamental difference
- Where wooden slats are used in a furniture project
- Cabinets with slatted facades
- Slatted wardrobe doors
- Slatted partition in the interior
- Furniture wall and side panels
- Screens and decorative inserts
- Polyurethane decor near slats: where it works
- Zone 1: frame around slat insert
- Zone 2: top cornice
- Zone 3: baseboard line
- Zone 4: adjacent walls and decorative context
- How to calculate wooden slats for facades and partitions
- Slat spacing: aesthetics and function
- Calculating slat linear footage
- Calculating polyurethane decor for the frame
- Ready-made kits for specific projects
- Set: cabinet with slatted fronts in the hallway
- Set: walk-in closet with slatted doors and cornice to the ceiling
- Set: slatted partition with molding frame
- Set: wall unit with slatted inserts
- Set: bedroom wardrobe with minimalist slats
- Single color principle: when slats and molding merge into one
- Technical details of slatted front installation
- Attaching slats to the base
- Technological gaps
- Opening doors and slats
- Polyurethane glue: a separate story
- How a slatted facade relates to a classic interior
- Mistakes when working with slatted facades and polyurethane decor
- Mistake 1: buying slats without calculating the spacing and linear footage
- Mistake 2: not accounting for door openings
- Mistake 3: forgetting about technological gaps between slats
- Mistake 4: choosing active molding next to frequent slats
- Mistake 5: not connecting slats with the baseboard
- Mistake 6: forgetting the cornice with a floor-to-ceiling cabinet
- Mistake 7: not taking a reserve for trimming
- Error 8: different color of wood and polyurethane without a single concept
- STAVROS: wooden slats and polyurethane decor in one catalog
- Frequently Asked Questions
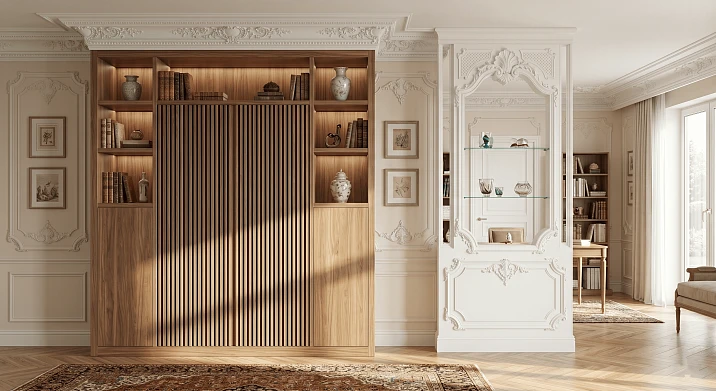
When a designer says "slatted facade," there is more behind it than just a set of wooden planks nailed to a plane. The slats create rhythm — a repeating vertical or horizontal motif that organizes the large plane of a cabinet, partition, or furniture wall so that it ceases to be just a "box."
But any rhythm has a beginning and an end. The slatted facade has a frame, baseboard, cornice, and wall junctions. This is where Polyurethane moldings: moldings, cornice profile, baseboard line, and decorative accents assemble the slatted unit into a complete interior scene.
Wooden slats and polyurethane decor are not competing materials. They are two layers of one solution: wood creates texture and working mechanics, polyurethane creates architectural framing and connection with the rest of the interior.
Read on to learn how this works in practice, how to calculate, what to buy, and what mistakes to avoid.

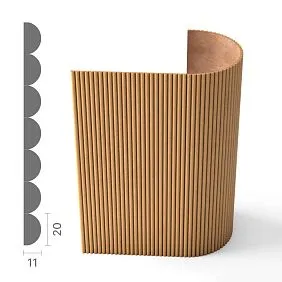
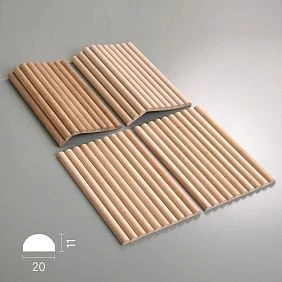
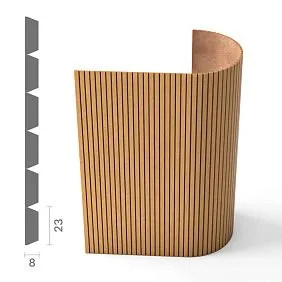
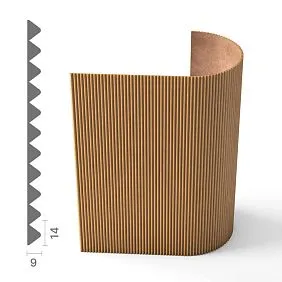
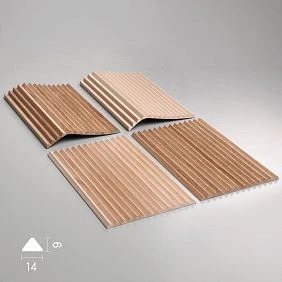
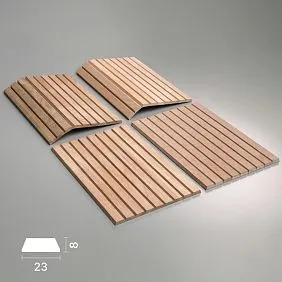
What to buy for a slatted facade: a kit from the first page
Before describing the details — a specific list. This is not an excessive list, but a minimum without which the slatted project will not be complete.
Wooden items:
-
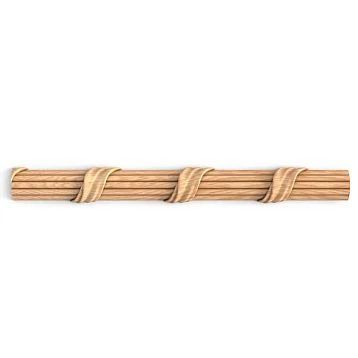
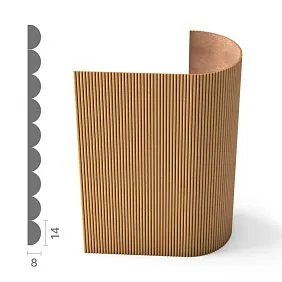
Wooden planks — main material for facades, partitions, and screens;
-
Pogonazh iz massiva — auxiliary profiles: glazing bead, layout, flashings;
-
Wooden decor and overlays — accent elements of the facade;
-
Furniture Handles — for cabinet and wardrobe doors.
Polyurethane items:
-
Moldings made of polyurethane — frame around the slatted area, side posts, adjacent wall panels;
-
Polyurethane moldings — cornice profile of the top line of the cabinet or partition;
-
Polyurethane appliqués — decorative accents without load;
-
Decor for Molding — corner inserts;
-
Polyurethane wall decor — elements on the adjacent wall next to the cabinet or partition;
-
Polyurethane trim — baseboard line.
Installation and finishing materials:
-
Fasteners for wooden slats (self-tapping screws, finishing nails, screws);
-
Mounting adhesive for polyurethane — the right choice;
-
Acrylic sealant — for joints of polyurethane with the wall;
-
Primer — for polyurethane decor before painting;
-
Paint — for polyurethane elements and, if necessary, for slats;
-
Varnish or oil — for wooden slats in their natural state;
-
Material reserve of 10–15%.
Main idea of the article: a slatted facade should not look like a wooden insert taken out of context. It should be integrated into the interior — through baseboards, cornices, moldings, and a decorative connection with other surfaces.




Slatted facade vs slatted wall: a fundamental difference
This distinction is important to understand right away because it defines the entire approach to the project.
A slat wall is a decorative plane. It is not pressed, opened, or moved. The slats on the wall are pure decor, visual texture. There are no hinges, no handles, no loads.
A slatted facade is furniture mechanics. Doors open and close. Hinges bear loads. Handles are grasped by hand. Slats may rub against adjacent facades or the wall when opening. Gaps between slats must be technologically precise. All this is a different level of requirements.
Therefore, when working with slatted facades, you need to think in two registers simultaneously: decorative (how it looks) and structural (how it works). Wooden planks — in the work area. polyurethane decor — in a decorative frame and architectural context.
Our factory also produces:

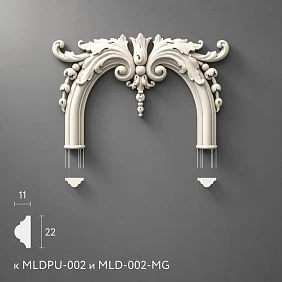
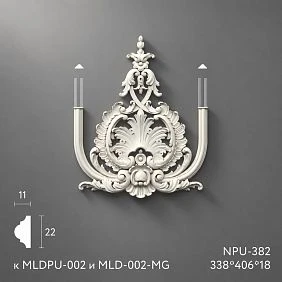
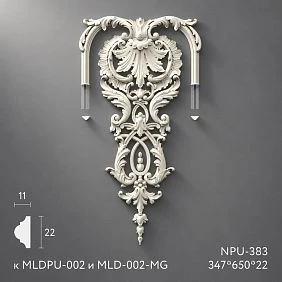


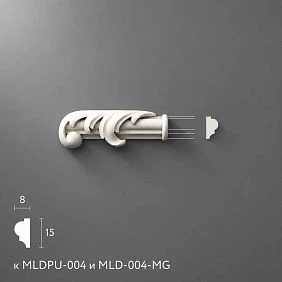
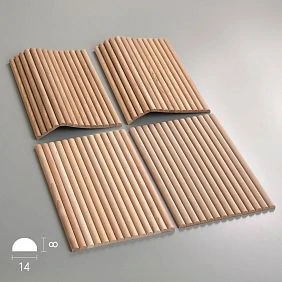
Where wooden slats are used in a furniture project
Get Consultation
Cabinets with slatted facades
Cabinets with wooden planks on doors is one of the most popular requests in modern interiors, especially in Scandinavian, Japanese minimalism, and eclectic classic. Slats provide wood texture, rhythm, and a sense of a "living" surface — as opposed to a smooth glossy or matte facade.
For a built-in wardrobe, the slatted facade can be solved in two ways:
-
Slats on a base: wooden planks are attached to an MDF or plywood base, which serves as the door facade. This is a more durable structure — the facade is rigid.
-
Slats in a frame: a wooden frame solid wood trim holds the slats without a solid base. A more "airy" structure that allows you to see the interior space of the wardrobe.
Both options work — the choice depends on the task: storing items in a closed space or displaying the contents.
Slatted doors for a walk-in closet
A walk-in closet is a special case. Here, the doors can be:
-
Hinged — standard mechanics;
-
Sliding — sliding system;
-
Folding — "accordion".
For sliding and folding doors, a slatted facade is especially advantageous: it is lightweight (less load on the guides) and allows good ventilation of the dressing room.
What to buy for a dressing room with slatted doors: Wooden planks, a frame made of solid wood trim, Furniture Handles — wooden, matching the slats, — and cornice profile made of polyurethane for the top line, if the cabinet goes up to the ceiling.
Slatted partition in the interior
A slatted partition is not a wall. It is a semi-transparent vertical structure that zones the space without completely blocking it. Light passes through the gaps between the slats; so does the gaze, albeit partially.
Slatted partitions are especially relevant:
-
In studio apartments — between the bedroom and the living room;
-
In living rooms — between the kitchen area and the dining area;
-
In studies — between the work area and the meeting room;
-
In hallways — between the entrance and the corridor.
For the partition Wooden planks are attached to the upper and lower load-bearing profile. This load-bearing frame is a good position for the wooden solid wood trim. And the partition framing on the wall side is an excellent area for of polyurethane moldings.
Furniture wall and side panels
A furniture wall — cabinets, shelves, niches — in a classic interior can include slatted inserts as a decorative element: not the entire plane, but specific sections. For example, lower sections are slatted, upper sections are glazed.
Side panels of open sections are a good area for slats: they are visible from the side, add texture, and create a sense of the product being well-finished from all sides.
Screens and decorative inserts
A slatted screen is a freestanding or mounted structure that covers a radiator, utility unit, pipes, or simply creates a decorative zone. Slats, a wooden radiator screen, are a popular solution that is easy to complement. polyurethane wall decor along the perimeter.
Polyurethane decor next to slats: where it works
The main rule: polyurethane decor does not go on the slats and does not mix with them. It works in four zones:
Zone 1: frame around the slatted insert
Any slatted zone needs a clear outline. Moldings made of polyurethane along the perimeter of the slatted insert — vertically on the sides and horizontally at the top and bottom — create a complete "picture" of the slatted field.
The width of the molding for the frame around the slats is 20–40 mm: enough to create a clear boundary, but not so wide as to compete with the rhythm of the slats.
Zone 2: top cornice
Cornice profile made of moldings from polyurethane Above a slatted cabinet or partition — this is the horizontal "finish" of the entire vertical structure. Without a cornice, the cabinet or partition looks incomplete at the top — as if it were "cut off."
This is especially important for furniture that does not reach the ceiling: the cornice visually closes the space between the top of the cabinet and the ceiling, giving the structure an architectural look.
Zone 3: baseboard line
Baseboard from polyurethane molding Under a slatted cabinet or partition — a horizontal line that "places" the structure in position. It connects the base of the cabinet to the floor and wall, creating a proper transition.
If the cabinet does not stand on a plinth and the slats start from the floor, the baseboard is mounted around the perimeter at the base — this visually "closes" the connection between the slatted structure and the floor plane.
Zone 4: adjacent walls and decorative context
A slatted cabinet or partition is a volume that exists within the room space. Adjacent walls, side areas, the area above the partition — these are the "background" that should support, not contradict, the slatted solution.
Polyurethane wall decor On the wall next to a slatted cabinet — thin moldings, light frames — create an interior context in which the slats are read not as a "wooden insert" but as part of the overall decorative system.
How to calculate wooden slats for facades and partitions
Slat spacing: aesthetics and function
The batten spacing — the distance between the centers of adjacent slats — determines the visual density of the facade. This is one of the key parameters that needs to be considered before ordering.
Spacing guidelines:
-
Frequent spacing (20–30 mm) — dense, almost solid appearance; works well in modern minimalism;
-
Medium spacing (40–60 mm) — balance between texture and gaps; versatile;
-
Wide spacing (70–100 mm) — light, airy appearance; good for partitions.
The width of the slat itself — 20–40 mm standard; custom formats are discussed with the manufacturer.
Calculating the linear footage of slats
Formula for vertical slats on a facade:
-
Facade height = length of one slat;
-
Facade width ÷ spacing (center to center) = number of slats;
-
Number of slats × facade height = total linear footage;
-
Multiply by the number of identical facades;
-
Add 10–15% allowance for trimming and defects.
For horizontal slats — same logic, but width and height are swapped.
For a partition — partition height = slat length; partition width ÷ spacing = number of slats.
Calculation of polyurethane decor for the frame
Moldings made of polyurethane for the frame around the slatted area:
-
Perimeter of the area (height × 2 + width × 2) = frame linear footage;
-
Add 15% allowance;
-
Divide by 2 (standard rod length) = number of rods.
Corner decorative inserts for moldings:
-
4 pieces for a rectangular frame.
-
Width of cabinet or partition + 10% allowance = linear length of cornice.
Ready-made kits for specific projects
Kit: cabinet with slatted fronts in hallway
Task: built-in wardrobe in hallway, slatted doors, Scandinavian style.
Wooden items:
-
Wooden planks — vertical, 40 mm spacing, finish — oil or natural varnish;
-
Pogonazh iz massiva — frame construction of doors;
-
Furniture Handles — wooden, elongated, matching the slats.
Polyurethane items:
-
Moldings made of polyurethane — thin profile around the perimeter of the cabinet opening;
-
Polyurethane stucco cornice — top line of the wardrobe;
-
Polyurethane trim — baseboard along the wardrobe.
Mounting materials:
-
Fasteners for slats, PU glue, sealant, wood oil, primer + paint for polyurethane.
Set: walk-in closet with slatted doors and cornice up to the ceiling
Task: walk-in closet 200 × 250 cm, hinged doors, slats in natural wood, modern classic.
Wooden items:
-
Wooden planks — on MDF base;
-
Pogonazh iz massiva — glazing bead for connecting slats to the base;
-
Furniture Handles — wooden, vertical.
Polyurethane items:
-
Polyurethane moldings — cornice of the top line of the wardrobe, linear molding along the width;
-
Moldings made of polyurethane — side framing posts;
-
Decor for Molding — corner inserts.
Mounting materials:
-
Fasteners, PU glue, sealant, wood varnish, primer + paint for polyurethane.
Set: slatted partition with molding frame
Task: partition between living room and study, width 120 cm, height 220 cm, slats with wide spacing (60 mm), Scandinavian minimalism.
Wooden items:
-
Wooden planks — spacing 60 mm, slat width 30 mm;
-
Pogonazh iz massiva — top and bottom support profile.
Polyurethane items:
-
Moldings made of polyurethane — side vertical partition framing posts;
-
Polyurethane moldings — horizontal cornice of the top line;
-
Polyurethane trim — baseboard at the bottom.
Mounting materials:
-
Fasteners for the supporting frame, PU adhesive, sealant, wood oil, primer + paint for polyurethane.
Set: furniture wall with slatted inserts
Task: furniture wall in the living room with several types of facades: lower ones — slatted, upper ones — with glass, middle ones — solid for painting. Style — modern classic.
Wooden items:
-
Wooden planks — for the lower sections;
-
Wooden decor and overlays — accent elements of the middle sections;
-
Furniture Handles — for all doors;
-
Pogonazh iz massiva — glazing bead for the glass of the upper sections.
Polyurethane items:
-
Moldings made of polyurethane — horizontal zone dividers;
-
Polyurethane appliqués — central accents on solid facades;
-
Decor for Molding — corner inserts;
-
Polyurethane moldings — upper cornice.
Set: wardrobe in bedroom with minimalist slats
Task: sliding wardrobe in bedroom, minimalism, thin slats (width 20 mm), spacing 40 mm, entire area painted in one color with shadows.
Wooden items:
-
Wooden planks — thin, for painting;
-
Furniture Handles — minimalist wooden.
Polyurethane items:
-
Moldings made of polyurethane — thin, minimal profile, around the perimeter of the area;
-
Polyurethane trim — baseboard.
Finishing materials:
-
Primer on all surfaces, one batch of paint for slats and polyurethane elements.
Principle of a single color: when slats and molding merge into one whole
This is one of the most effective techniques when working with slatted facades. If wooden slats and polyurethane decor painting everything in one color — white, cream, gray, blue, or any other — the difference in materials visually disappears. Only relief, rhythm, and form remain.
This creates the feeling of a cohesive author's project — as if everything is made from a single material specifically for this space.
Requirements for this technique:
-
Primer on both materials (wood and polyurethane);
-
One batch of paint;
-
Same application technique (brush, roller, or spray gun);
-
Sealing all joints before painting.
If the slats are to remain in natural wood — varnish or oil — and polyurethane decor the rest is painted, it is important to maintain stylistic balance: warm natural slats + warm paint (ivory, warm white, cream). Cold gray slats + cold paint.
Technical details of installing slatted facades
Attaching slats to the base
Slats are attached to MDF or plywood base in two ways:
-
Glue + finishing nails — for fixed structures (side panels, decorative inserts);
-
Countersunk screws — for structures that may be disassembled.
For glue installation, it is important: pressure for 30–60 minutes until set. Solvent-free liquid nails are a good option for wood.
Expansion gaps
Wood changes size with humidity changes. When laying slats tightly together, bulging may appear after six months. A gap of 2–3 mm between slats is not only a decorative solution but also a technical necessity.
For slatted partitions, the gap is part of the design: it determines the degree of transparency.
Door opening and slats
Check before installation: when the cabinet door is fully open, the slats do not touch the adjacent section, wall, or other furniture. Slats protruding above the facade plane increase the effective thickness of the door — this must be considered when calculating hinges and gaps.
The standard gap between the cabinet front and the adjacent surface for hinged doors is 5–7 mm. Slats with a thickness of 10–15 mm, protruding 8–12 mm above the base, require increasing this gap to 15–20 mm.
Glue for polyurethane: a separate story
Polyurethane moldings is mounted strictly with a special mounting adhesive for polyurethane. Adhesives with organic solvents — "Moment", nitro glue, glue 88 — cause chemical destruction of polyurethane from within: the profile deforms, "melts", and loses its shape. Details about the correct glue are in the article what to glue polyurethane molding with.
Wooden slats and polyurethane moldings are mounted with different adhesives — this must be considered when completing the order.
How a slatted facade relates to a classic interior
A frequently asked question: are slatted facades a modern style? Are they compatible with a classic interior?
Answer: yes — with the correct solution for the top and bottom lines and the correct choice of slat cross-section.
In a classic interior, slats work as a "simplified analogue" of vertical divisions. Instead of engraved pilasters and complex profiles — a rhythmic row of straight wooden planks. This is acceptable if:
-
The cornice above the slats is made of moldings from polyurethane with a classic profile;
-
Baseboard — made of polyurethane molding with a simple but clear cross-section;
-
Handles — made of solid wood, classic;
-
Slats — not too frequent (spacing 50–70 mm), cross-section — slightly flattened, with a small chamfer.
Polyurethane appliqués on adjacent walls and Wall Decor will create a classic context in which slatted furniture will look organic.
Mistakes when working with slatted facades and polyurethane decor
Mistake 1: buying slats without calculating spacing and linear footage
Without preliminary calculation — you'll either run short or have too much excess. Draw a diagram of each facade, calculate the number of slats and linear footage before placing the order.
Error 2: not accounting for door opening
Battens increase the effective thickness of the facade. When opening, a door with a standard 5 mm gap may hit the adjacent facade. Check the gaps considering the batten protrusion.
Error 3: forgetting about technological gaps between battens
Battens without gaps guarantee bulging when humidity changes. Minimum gap is 2 mm. For partitions, calculate spacing considering the desired degree of transparency.
Error 4: choosing active molding next to frequent battens
Frequent battens with a spacing of 25–30 mm create a very rich rhythm. A rich polyurethane profile next to them is a visual conflict. With frequent battens, use a thin, calm molding in the frame. With rare battens, you can afford a slightly more expressive profile.
Error 5: not connecting battens to the baseboard
Battens that start directly from the floor without a baseboard look unfinished. A baseboard made of polyurethane molding or wooden solid wood trim is a mandatory element of the bottom line.
Error 6: forgetting the cornice for a ceiling-height cabinet
A cabinet reaching the ceiling without a cornice creates a boundary between the wood and the ceiling "in the air." The cornice profile moldings from polyurethane covers this joint and gives the top line an architectural look.
Error 7: not allowing extra for trimming
Slats are trimmed to the height (or width) of the facade. Each trim wastes 1–3 cm. For 30 slats, that's 30–90 cm of excess offcuts. Without extra, the last slats won't be enough. Minimum extra: 10–15%.
Error 8: different wood and polyurethane colors without a unified concept
If the slats are natural warm beech, and Polyurethane molding painted cold gray, the contrast will be harsh and disjointed. Either a single color or a carefully planned contrast: warm wood + warm paint, cold wood + cold paint.
STAVROS: wooden slats and polyurethane decor in one catalog
The strength of a slat project lies in the unity of all its parts: slats, frame, cornice, baseboard, handles. If they come from different sources—different proportions, different wood, different profile character—the result will be inconsistent.
STAVROS is a Russian manufacturer of solid wood and polyurethane products since 2002. Production in Saint Petersburg. History — restoration of the Konstantinovsky Palace, the Hermitage, the Alexander Palace. A unified standard of proportions and styles is not a declaration, but a production reality.
The STAVROS catalog has everything you need for a slat project:
-
Solid wood slats — for facades, partitions, and inserts;
-
Pogonazh iz massiva — glazing bead, layout, nashchelniki, frame profiles;
-
Wooden decor and overlays — carved accents;
-
Furniture handles made of solid beech — 32 models, 4 finishes;
-
Moldings made of polyurethane — frames, side posts, horizontal dividers;
-
Polyurethane moldings — cornice profiles, ceiling accents;
-
Polyurethane appliqués — decorative elements without load;
-
Decor for Molding — corner and lock inserts;
-
Polyurethane wall decor — accent elements of the interior context;
-
Polyurethane trim — baseboard and transition profiles.
Order — from one piece. Contact us to confirm shipping to your destination. Warehouse in Saint Petersburg. Showrooms in Saint Petersburg and Moscow. Shipping time for stock items — from 3 business days.
STAVROS is a system decor. In it, a wooden slat and a polyurethane molding are proportionally coordinated, stylistically compatible, and produced at the same facility. This is the main condition for a slat project to be cohesive, rather than assembled from random parts.
Frequently asked questions
Can slatted facades and polyurethane stucco be combined?
Yes, and it is one of the best solutions. Wooden planks provide texture and rhythm, and Polyurethane moldings, the cornice and baseboard gather the slatted area into a complete interior composition. Wood — in work areas; polyurethane — in architectural framing.
What to buy for a cabinet with slatted facades?
Wooden slats, Pogonazh iz massiva for the door frame, Wooden handles, Polyurethane stucco cornice, Moldings made of polyurethane for framing, Skirting, fasteners, PU glue, sealant, primer, paint, and a 10–15% reserve.
Where is it better to use polyurethane decor next to a slatted facade?
In the frame around the slatted area, in the cornice of the top line, in the baseboard at the base, on adjacent walls in the form of thin moldings or wall decor. Not on the slats themselves.
How to avoid overloading the interior with slats and stucco at the same time?
Define one main accent: the slatted texture or the polyurethane relief. With frequent slats (spacing up to 30 mm) — a calm, thin molding in the frame. With sparse slats (spacing from 60 mm) — you can add a slightly more expressive polyurethane profile.
Are slatted facades suitable for a classic interior?
Yes, if you choose the right cornice, baseboard, and handles. A cornice with moldings from polyurethane a classic profile, wooden Handles и Polyurethane appliqués on adjacent walls will create the desired classic context.
How to calculate the number of wooden slats?
Facade width ÷ step (center to center) = number of slats; facade height = length of each slat. Total: number of slats × height = total linear footage. Add 10–15% reserve. Divide by rod length, round up.
Is sealant needed when installing polyurethane decor next to slats?
Absolutely. Acrylic sealant fills the joint between the polyurethane molding and the wall, the cornice and the ceiling, and the baseboard and the floor. Without sealant, cracks will appear along the joint line under the paint. Sealant is applied before priming and painting.