Article Contents:
- What exactly is being purchased: KPU-105 is carved decorative molding, not an expansion joint profile
- First, you need to understand what exactly is between the two slat sections
- Regular decorative joint
- Installation or compensation gap of the finishing system itself
- Working expansion joint
- Horizontal decorative line
- Vertical decorative line
- The linear footage runs parallel to the joint
- In the color of the slatted wall
- In the color of the smooth background
- Contrast color
- Step 1. Confirm the joint type
- Step 2. Define the boundaries of the working unit
- Step 3. Draw the decorative line KPU-105
- Step 4. Measure the left length
- Step 5. Measure the right length
- Step 6. Calculate meter strips separately
- Step 7. Check the pattern repeat and joints
- Step 8. Design two endings at the seam
- Step 9. Check the base
- Step 10. Calculate the cost
- Step 11. Order only after checking the node
- Scenario 1. Real working seam, two long slat zones
- Scenario 2. Regular joint of two panel modules
- Scenario 3. Working joint with visible specialized profile
- Mistake: considering the entire section as one length
- Mistake: covering the joint with a single strip "for aesthetics"
- Error: inventing a universal indentation
- Error: considering the remains completely interchangeable
- Error: mistaking KPU-105 for a special profile for the seam
- Can KPU-105 be run as one continuous strip through an expansion joint?
- Is it necessary to leave the same gap between KPU-105 and the seam on both sides?
- Can KPU-105 be considered a deformation profile?
- If the joint is filled with silicone, can it be covered with KPU-105?
- If 600 mm of KPU-105 is left on the left, can this piece be used on the right?
- Do I need to buy a 10% spare?
- If KPU-105 runs parallel to the deformation joint, does the problem disappear?
- Can the deformation joint be completely hidden with decorative molding?
- What is more important before ordering: the exact amount of KPU-105 or the type of joint?
- What to do if the designer does not allow a decorative profile next to the joint?
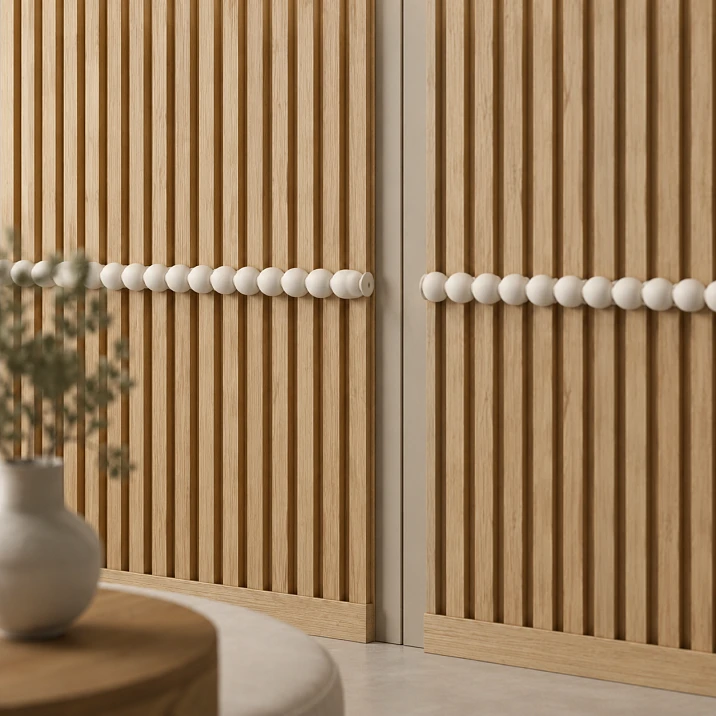
A slat wall can look like one continuous decorative plane, although structurally it consists of two independent sections. If a real working deformation joint is left between them, the decorative task changes fundamentally. Here you can no longer automatically measure the entire wall with one tape measure, add up the lengths, and run carved KPU-105 trim as a continuous strip through the joint just for visual continuity.
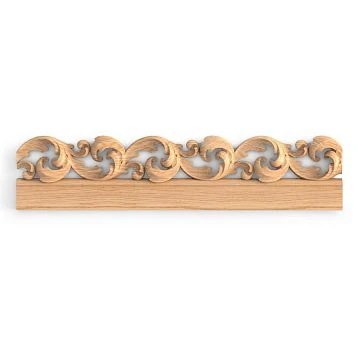
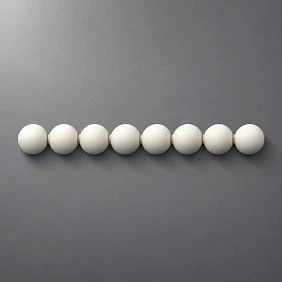
This article considers a specific product — carved decorative KPU-105 polyurethane trim measuring 11 × 6 × 1000 mm. The current STAVROS product page shows a price of 860 ₽ per one-meter strip. This is a convenient format for a thin ornamental line on the wall, but the product itself is not an element of a deformation joint and should not automatically become a rigid overlay that connects two sides of a movable assembly.
The main answer can be formulated right away: if you are dealing with a real working expansion joint, KPU-105 must be calculated and installed as at least two independent sections — on the left and right of the joint — preserving the movement capability provided by the design. The specific width of the free gap, the filling structure, and the method of finishing the joint itself cannot be invented based on a universal number: this depends on the base, the finishing system, and the design solution.
Therefore, the correct commercial approach is not "wall length ÷ 1000 mm," but rather: determine the joint type → define the boundaries of the working joint → measure the left section → measure the right section → plan the KPU-105 endings on both sides → separately count the meter strips → only then order the product.
If such a scheme is confirmed on site, buying carved decorative polyurethane molding KPU-105 is logical only after a separate calculation of both sides. If it turns out that you are dealing not with an expansion joint but with a regular decorative seam or installation gap, the algorithm will be different — and this distinction must be established before purchase.
What exactly is being purchased: KPU-105 is carved decorative molding, not an expansion joint profile
Terminology here determines the correct expectation from the product. KPU-105 is carved decorative polyurethane molding. Its purpose is to create a decorative linear composition. It is not a specialized expansion joint profile, does not replace elastic filling of a working joint, and should not be considered a structural component that holds two parts of a wall together.
For the selected option, the product card confirms the following parameters:
| Parameter | KPU-105 |
|---|---|
| Product type | Carved decorative molding |
| Material | Polyurethane |
| Size A | 11 мм |
| Size C | 6 мм |
| Length L | 1000 мм |
| Price per plank | 860 ₽ |
| The function of a working expansion joint profile | is not declared by the product card |
Dimensions A and C describe the cross-section of the product, and L = 1000 mm is the factory length of the strip, which is directly involved in the quantity calculation. But neither 11 mm nor 6 mm indicate what width of expansion joint can be "covered." Such a conclusion would be technically incorrect: the dimensions of the decorative profile and the working width of the structural joint are different parameters.
This is exactly why KPU-105 cannot be selected based on the logic "its width is enough, so it can close the gap." Even if the decorative pattern physically covers the joint line, this does not mean that the assembly will retain its function.




First, you need to understand what exactly is located between the two slatted sections.
Externally, three different assemblies may look the same: a vertical line between two parts of the finish. But their technical logic differs.
Our factory also produces:
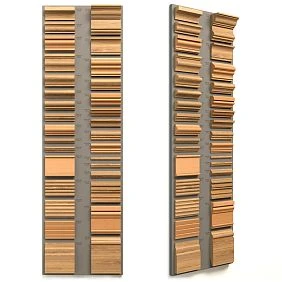
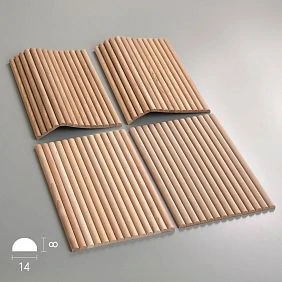
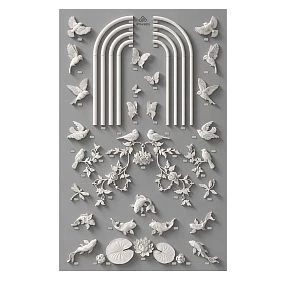
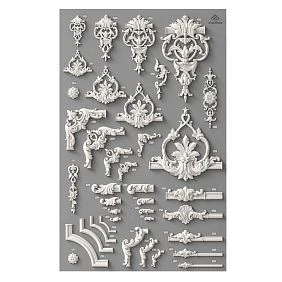
Regular decorative joint
This is the boundary of two finish fragments that does not have to accommodate mutual movements. Such a joint is sometimes indeed covered with a trim, molding, profile, or another decorative strip. But even here, you need to check the substrate, plane differences, and the method of fastening.
Get Consultation
Installation or expansion gap of the finishing system itself
Such a gap is left due to the requirements of a specific material or installation method. For example, panels may need a small free distance at the edge or at the junction. Often, the finishing profile of the system is specifically designed to visually cover this gap without interfering with its function. But this is determined by the instructions of the specific panels and profiles, not by the mere fact of the gap's existence.
Working expansion joint
This is a fundamentally different assembly. It is designed to compensate for relative movements of structural parts or finishes. If you connect it with a rigid decorative bridge, you can create a conflict between the purpose of the joint and the decorative solution. Therefore, any element crossing such a joint must be part of an approved system, not a random profile glued on.
In STAVROS articles on slat panels, both ordinary expansion gaps and separate transitions between different materials with an elastic joint are found. This clearly shows why the word "gap" alone is insufficient: first, you need to understand the function of the joint.
How to distinguish a working expansion joint from an ordinary slit without guessing
The most reliable source is the project, working documentation, installation diagram, or information from the contractor who assembled the wall. If a line on the drawing is marked as an expansion, temperature, compensation, or structural joint, it should be treated as a working joint.
If there is no documentation, it is useful to gather signs, but not to substitute them for project confirmation.
A real working joint may be indicated by:
-
coincidence of the finish line with the base separation;
-
repetition of the joint through several layers of the structure, not just on the face panel;
-
elastic filling;
-
specialized profile;
-
installers' instruction not to putty or rigidly close the joint;
-
a line running from floor to ceiling or across a significant portion of the wall;
-
continuation of the joint on adjacent surfaces.
The situation more closely resembles a regular decorative joint when only two face modules of the panels are separated, while the base is continuous and there are no movement requirements.
But it's better not to make a final diagnosis based on a photo or a single visual feature. If in doubt, before ordering KPU-105, clarify with the designer, installer, or panel system manufacturer what function the line serves.
Commercially, this is more important than any precise calculation: mistakenly treating a working joint as a regular gap means correctly calculating a completely wrong installation scheme.
Why rigidly covering a working joint with decorative trim is risky
Imagine two parts of a wall that must be able to move slightly relative to each other. The expansion joint itself allows this movement. Now, a single continuous KPU-105 strip is glued over it, with the adhesive rigidly bonding the profile to both sides.
At this point, the decorative strip becomes a bridge between the two sections. If the sides start to move, the load is transferred to the trim, adhesive, paint, and adjacent finishing layers.
Possible consequences:
-
a crack along the decorative profile or near it;
-
tearing off one edge;
-
opening of the joint in an unpredictable place;
-
damage to the paint coating;
-
appearance of a "step";
-
disruption of the normal operation of the intended joint.
It is impossible to say in advance which consequence will occur first: it depends on the magnitude and direction of movements, the base, the adhesive, and the geometry of the assembly. But the principle remains: if the joint is supposed to work, the decorative element should not accidentally turn it into a rigid connection.
Therefore, the correct task of the article is not to come up with a beautiful way to hide the joint, but to show how to preserve the decorative line on both sides without canceling the technical meaning of the assembly.
Main scheme: KPU-105 ends on one side of the joint and starts anew on the other
For most interior scenarios where KPU-105 is not part of a special expansion joint system, the most understandable approach is to divide the decorative line into independent segments.
Schematically:
left decorative line KPU-105 → ending → working joint → new beginning → right decorative line KPU-105.
Here it is important not just to physically cut the profile. You need to think in advance about the visual completion of the two ends. They can match in height, pattern, and color, but they should not be glued together through the movable zone.
This approach solves four tasks at once:
-
preserves the meaning of the expansion joint;
-
allows KPU-105 to be counted for each section separately;
-
makes future repair or maintenance of the joint possible without dismantling the long common plank;
-
turns the break in the decorative line into a deliberate element of the composition, not a random gap.
If the joint itself has a special visible profile, the ends of KPU-105 can be compositionally tied to its edges. If the joint is filled with elastic material and is barely noticeable, the trim should still not automatically extend onto it without an agreed decision.
Why you cannot first add 2350 and 1740 mm, and then divide the total sum by 1000
Let's take a practical example from the problem statement.
To the left of the working seam, the decorative line should run 2350 mm. To the right — 1740 mm. KPU-105 is produced in lengths of 1000 mm.
The erroneous arithmetic looks like this:
2350 + 1740 = 4090 mm.
Then the buyer thinks: 4090 / 1000 = 4.09, so 5 planks are needed.
Sometimes the final quantity may coincidentally match the correct one, but the logic itself is wrong, because the remainder of one side cannot be automatically used as a continuation through the working seam. Cutting must be planned independently.
Left side:
2350 mm → minimum 3 meter-long planks.
Right side:
1740 mm → minimum 2 meter-long planks.
Total geometric minimum — 5 planks of KPU-105, at 860 ₽ each amounts to 4,300 ₽.
But now much more useful information is visible. On the left side, the total factory remainder will be up to 650 mm, on the right — up to 260 mm, but these remainders cannot be considered automatically interchangeable: you need to account for the pattern, the beginning/end of the ornament, seam locations, and the condition of the cut.
That is, a separate calculation gives not only the quantity but also a real cutting map.
How to calculate meter strips for each side of the seam
The basic formula is simple:
Nside = rounding up (Lside / 1000 mm).
Then the left and right zones are calculated separately:
Ntotal = Nleft + Nright + additional strips, if they are really needed due to the repeat or complex cutting.
A few examples:
| Left zone | Right zone | Minimum on the left | Minimum on the right | Total planks | Cost |
| 800 мм | 800 мм | 1 | 1 | 2 | 1 720 ₽ |
| 1500 мм | 900 мм | 2 | 1 | 3 | 2 580 ₽ |
| 2350 мм | 1740 мм | 3 | 2 | 5 | 4 300 ₽ |
| 3100 мм | 2200 мм | 4 | 3 | 7 | 6 020 ₽ |
The table shows the geometric minimum by length. It does not account for the artistic repeat and does not set the gap width near the seam itself.
After checking the layout and the design node, you can order KPU-105 11 × 6 × 1000 mm already with a clear number of planks, not "with a reserve because the wall is long."
Why the remainder of one side cannot be transferred to the other without checking
Formally, a piece 650 mm long left after cutting the left section may be useful on the right. But for carved molding, not only the length matters, but also the pattern.
Before using the remainder, you need to check:
-
whether the repeat matches;
-
is it possible to get a neat start near the seam;
-
does it not require placing too short a fragment in the most visible spot;
-
is there a proper factory or well-finished edge;
-
does the transfer of the remainder not create an extra joint on the right side;
-
is the direction of the pattern suitable.
Sometimes saving one meter leads to two additional joints and a visually weak result. In another project, the remainder actually allows reducing the order without losing quality.
Therefore, the correct commercial recommendation is this: first make a cutting map, then use remainders where they do not worsen the pattern. There is no need to automatically discard remainders, but there is also no need to automatically consider them full-fledged substitutes for a new plank.
How to finish KPU-105 ends at an expansion joint
A break in the decorative line itself can look neat if both ends are designed in advance. Problems appear when the installer first glues a long run of molding, and then on site, "as it happens," cuts out the section above the joint.
Before ordering, it is useful to determine:
-
where exactly does the decorative part end on the left;
-
where does the right one begin;
-
will the end of KPU-105 be visible;
-
is trimming of the pattern at the symmetrical point needed;
-
are the ends painted;
-
is there a separate free field between the end of the molding and the working area of the seam;
-
how the solution looks from the main viewpoint.
There is no universal mandatory gap for KPU-105 like "5 mm from the seam" or "10 mm on each side." Such figures without a project would be made up. The endings are tied to the actual boundary of the moving joint and the requirements of its system.
If the seam has a decorative cover or a specialized profile, KPU-105 can be visually brought up to it, but not turned into its functional extension without confirmation of compatibility.
The horizontal line and vertical line of KPU-105 near the seam are different compositional tasks
The topic title does not specify the direction of the molding, so the article should account for both options.
Horizontal decorative line
If KPU-105 runs horizontally along a slat wall and crosses a vertical expansion joint, the gap becomes very noticeable. This is exactly where the strong temptation arises to maintain continuity at any cost.
The best way to make the gap deliberate is to strictly maintain the line height on both sides and carefully finish the ends. Visually, the eye will continue the horizontal line through a small technical gap, even if the parts are not physically connected.
Vertical decorative line
If the expansion joint itself is horizontal, the same logic applies vertically. But you need to separately check whether the molding coincides with a structural profile, baseboard, ceiling junction, or horizontal panel division.
Molding runs parallel to the joint
This is the third scenario. If KPU-105 is located near the joint but does not cross it, the risk of a rigid bridge is lower. Then the main factors become the distance to the moving zone and the substrate to which the profile is glued. Even here, you should not apply adhesive to the area that is supposed to move.
The direction of the decorative line changes the composition, but not the basic principle: the working joint remains independent.
How the relief of slat panels affects the installation of KPU-105
The key topic of the article is the expansion joint, but there is another technical limitation nearby: the slats themselves create a textured surface.
If the KPU-105 is to run across protruding lamellas, you cannot automatically assume it has continuous adhesive support. The narrow profile of 11 × 6 mm may only touch the top edges of the slats, leaving gaps without a base between them.
Therefore, before ordering, you need to understand where the trim is actually attached:
-
to a smooth insert;
-
to a specially prepared strip;
-
to a flat section of the panel;
-
to a separate base over the slat composition.
If the decorative line runs along the slat, the situation may be simpler, but you still need to check the width of the contact area.
Another important distinction: the KPU-105 should not automatically serve as the end profile of a slat panel unless its specification states so. The technical termination of a slat system and decorative carved trim are different tasks.
If the slat finish is still at the selection stage, buy slat panels for walls for interior finishing it is reasonable after the construction of the seam, the base, and the line of future decor are understood.
What changes if the seam passes only through the finish, and the base is continuous
This is one of the most important boundary situations. Two slat fields can be separated by an installation gap, but the structural wall behind them is continuous. In such a case, the term "expansion joint" might have been used too loosely in the project or refer only to the finishing system.
Here, the rules for a building's structural joint cannot be applied automatically. You need to refer to the instructions of the specific panel system and find out:
-
why the gap is left;
-
whether it must remain free;
-
whether it is allowed to be covered by a decorative profile;
-
which profile the manufacturer recommends;
-
where adhesive is permitted to be applied.
If the panel manufacturer explicitly provides for a decorative layout that covers the expansion gap and is attached only on one side or works according to a special scheme, this may be a standard solution. But KPU-105 does not automatically become such a profile just because it visually matches in width.
Therefore, the name "expansion joint" must be technically confirmed, and only then decide the fate of the trim.
What changes if the joint passes through the wall base itself
If the working joint separates not only the panels but also the base, the situation is stricter. Here, the decorative layer must not accidentally create a rigid bridge between two structurally independent parts.
Special caution should be applied to:
-
continuous putty across the joint;
-
a rigid adhesive bridge;
-
a single long decorative profile;
-
reinforcing mesh across the working line, if the project does not provide for it;
-
painting that visually masks the location but does not account for movement.
KPU-105 in such a situation should be considered only as decoration for individual adjacent fields. The deformation node itself must be resolved by a system designed for its movement.
If the project documentation requires a specialized profile, the decorative composition follows it, not the other way around.
Why decorative continuity does not require physical continuity
This is an important design principle. The eye can perceive a line as a single composition even with a slight deliberate break.
If the left and right KPU-105 are at the same height, painted identically, have a consistent pattern, and end neatly, the expansion joint can be read as a technical pause rather than a visual error.
On the contrary, trying to physically connect everything into one strip sometimes makes the joint worse: the decorative line starts to crack, shift, or peel off, and then the technical problem becomes even more noticeable.
Therefore, it is better to design the break as part of the composition. Several techniques can be used:
-
align the endings along one axis;
-
finish the ornament with the same motif on both sides;
-
use a joint color close to the wall background;
-
support the vertical of the joint with another architectural line;
-
leave a small quiet zone around the working profile.
This composition honestly shows the wall construction while preserving the decorative rhythm.
How to create a cutting map before purchasing KPU-105
For meter-long runs, it is especially useful to draw a simple scale plan. No complex CAD program is needed—a sheet of paper is enough.
Mark:
-
left edge of the decorative line;
-
length of the left zone;
-
boundary of the expansion joint;
-
width/construction of the joint per the project—if known;
-
start of the right decorative line;
-
length of the right zone;
-
each meter-long KPU-105 plank;
-
joint locations;
-
remnants;
-
direction of the carved pattern.
After this, the layout becomes clear. You see where a short leftover can really be used, and where it is better to start a new plank.
For example, 2350 + 1740 mm, the scheme might look like this:
-
left: 1000 + 1000 + 350 mm;
-
working seam: without a rigid decorative bridge;
-
right: 1000 + 740 mm.
This is five factory planks, if the ornament and joints allow such cutting without additional reserve.
If the repeat requires trimming the 350-mm or 740-mm fragment at a different point, the map helps to see this before ordering.
When it is worth buying one more plank than the geometric minimum
The reserve should not be an automatic percentage "just in case." For KPU-105, it is more reasonable to tie it to a specific risk.
An additional plank is justified if:
-
the pattern repeat does not allow using the geometric remainder;
-
symmetrical ends at the seam are needed;
-
there are several noticeable joints on the long side;
-
complex cutting is expected;
-
there is no possibility to quickly reorder material on site, and installation is done in one shift;
-
one plank is needed as a reserve for a test cut or pattern matching.
An additional plank is not automatically needed if the cutting already provides sufficient remainder and the joints are simple.
The price of one additional KPU-105 is 860 ₽. Therefore, the decision on the reserve can be made specifically: "I am buying the sixth plank because the pattern repeat and two symmetrical ends require more cutting," rather than "I take plus 10% because that's the custom."
How to position the meter-long KPU-105 joints within each section
The expansion joint is not the only place where the line is interrupted. The KPU-105 itself is 1000 mm long, so on a long wall, regular joints between the planks appear.
These connections should not be confused with the working joint.
Regular KPU-105 joint:
-
is part of the decorative line;
-
can be matched to the pattern;
-
after installation, it is usually treated as a connection of two parts of the decor;
-
is not intended to compensate for structural movement.
Working expansion joint:
-
must maintain the intended mobility;
-
should not turn into an ordinary glue joint just for the sake of an invisible connection;
-
requires a separate design solution.
On each side of the expansion joint, regular KPU-105 connections are best distributed so that the shortest piece does not end up right at the working gap unnecessarily. Visually, it is neater when the end near the joint looks like a complete fragment of the pattern.
Lighting can make the gap near the expansion joint more noticeable — and this needs to be checked in advance
Side lighting emphasizes any lines, shadows, and transitions. If the expansion joint is located on an accent slat wall with backlighting, the KPU-105 gap may be more noticeable in the evening than during the day.
Before ordering, it is useful to stick a narrow paper strip or painter's tape imitating the decorative line. Stop it on both sides of the joint as planned in the project, and look:
-
under natural light;
-
under main ceiling lighting;
-
under side sconce lighting;
-
under linear slat backlighting.
If the gap seems too active, that is not a reason to rigidly cover the seam. It is better to change the composition: for example, add a small calm zone, bring a decorative line to a special profile, or adjust the color.
The technical function of the seam takes priority over the desire to make the line absolutely continuous.
How the color of KPU-105 affects the perception of the seam
Color can either soften or emphasize the break in the decorative line.
In the color of the slat wall
KPU-105 is read as a relief, not as a separate contrasting strip. The gap at the expansion joint usually looks calmer.
In the color of the smooth background
If the molding runs along a prepared strip between the slats, this option can integrate the decor into the main plane of the wall.
Contrast color
The most demanding scenario. Any gap becomes graphic. If the seam must remain visible as part of the architecture, this can be a deliberate technique. If the goal is a maximally calm wall, contrast often complicates the task.
Painting does not solve the technical joint, but it affects how much an honest gap is perceived as a defect or as a deliberate detail.
When it is better not to use KPU-105 on this wall at all
Sometimes the right decision is to completely abandon decorative molding in the deformation joint area.
This is reasonable if:
-
the working profile itself is expressive and does not need an additional line;
-
the slat wall already has a complex rhythm;
-
KPU-105 would have to be cut off in a visually random place;
-
the base under the narrow molding is inconvenient;
-
the level difference between sections makes the line uneven;
-
the joint requires maintenance;
-
the designer does not allow adjacent rigid finishing;
-
The decorative line does not solve an independent compositional task.
In this case, it is better to leave the joint as part of the wall's architecture, and use KPU-105 in another area or exclude it from the order altogether.
This is a normal commercial result: 0 slats for this particular line can be more professional than five slats that will create a conflict after installation.
When KPU-105 is suitable as a decorative line on both sides of the working joint
The positive scenario should also be formulated clearly.
KPU-105 looks like a logical choice when:
-
the function of the joint is confirmed;
-
the boundaries of the movable zone are known;
-
the decorative molding does not rigidly overlap it;
-
there is a stable base on the left and right;
-
the KPU-105 line is really needed compositionally;
-
the ends near the seam are designed;
-
the side lengths are measured separately;
-
the cutting of meter-long strips is calculated;
-
the pattern repeat is checked;
-
the final cost is clear before purchase.
Then KPU-105 works as decor for adjacent fields, not as an attempt to turn a structural joint into an ordinary decorative gap.
If you want to compare other linear elements, you can buy carved polyurethane moldings in the corresponding section of the catalog, keeping the same principle: any alternative profile also needs to be checked against the working seam.
How to proceed if the wall is still only being designed
At the design stage, the task is simpler because the decorative line can be coordinated with the expansion joint in advance.
A good sequence:
-
the designer fixes the position and construction of the joint;
-
the type of slat panels is determined;
-
the technical termination of the panels at the joint is assigned;
-
the KPU-105 line is selected;
-
the ends of the profiles are tied to the boundaries of the working joint;
-
the base is checked;
-
the layout is done by meters;
-
only then the order is formed.
At this stage, it is even possible to shift the decorative line by a few centimeters in height or width if it improves the composition and does not interfere with the structure.
If the panels are not yet ordered, the second commercial transition is Buy slatted panels for wall finishing justified here: first, the entire wall system is coordinated, not the decor and panels separately.
What to do if the wall is already finished
On a finished wall, there is less room for maneuver. The deformation joint cannot be changed just to make it more convenient to install the trim.
The procedure is as follows:
-
find the design boundary of the joint;
-
determine what it is filled with or covered by;
-
make sure that the current finish does not mask a wider working area;
-
measure the clear length of the decorative field on the left;
-
measure the clear length on the right;
-
make a paper template of KPU-105 along the line;
-
plan the endings;
-
calculate the quantity;
-
check whether the base can be prepared without intruding into the seam.
If the finished structure does not allow for neat endings, it is better to move or omit the decorative line. The finished working seam takes priority over the decorative idea.
Wet areas: the expansion joint and sealing cannot be replaced by molding
In the bathroom, toilet, kitchen, and other moisture-prone zones, the joint gains an additional function—protecting the junction from water. STAVROS, in its material on combining slat panels with tiles, specifically points out the expansion joint with elastic filling in the transition area.
This leads to an important practical conclusion: KPU-105 should not replace the sealing material or cover the joint in such a way that its condition cannot be assessed.
If the molding line runs near a wet joint, check separately:
-
what the seam is sealed with;
-
whether the elastic material remains accessible;
-
does KPU-105 glue get into the work area;
-
is a water pocket created;
-
can the sealant be replaced in the future without destroying the entire decorative line.
That is, decorative molding and moisture protection solve different tasks.
What questions to ask the installer or designer before purchasing
If you are not sure about the type of joint, a short list of questions will help get an accurate answer.
-
Is this a real working expansion joint or just an installation gap in the finish?
-
Through which layers of the structure does it pass?
-
Should it remain visible/accessible?
-
What is it filled with?
-
Is a decorative element allowed next to it?
-
Can KPU-105 be attached on both sides independently?
-
Where is the exact boundary of the zone where rigid adhesive cannot be applied?
-
Is there a special profile that should remain the main element of the joint?
-
Is access to the seam needed for maintenance?
-
How is the junction intended to be painted?
These answers are much more useful than the request "tell me if the gap can be closed with a molding." They show the real mechanics of the joint.
Practical algorithm for ordering KPU-105 for a wall with a working joint
Let's put it all into one sequence.
Step 1. Confirm the type of joint
Do not call any line a deformation joint and do not consider any deformation joint a decorative gap.
Step 2. Fix the boundaries of the working unit
According to the project, profile, or installer's instructions.
Step 3. Draw the decorative line KPU-105
Separately on each side of the joint.
Step 4. Measure the left length
Up to the boundary where the decorative profile should end.
Step 5. Measure the right length
From the new starting point to the end of the decorative line.
Step 6. Calculate meter strips separately
Round up each side, not just the total amount.
Step 7. Check the pattern repeat and seams
Decide whether leftovers can be used.
Step 8. Design two endings at the seam
Do not leave this task until the moment of gluing.
Step 9. Check the base
The narrow KPU-105 must have a stable surface for installation on each side.
Step 10. Calculate the cost
Number of planks × 860 ₽.
Step 11. Order only after checking the joint
If the constructive solution is confirmed, you can proceed with the purchase.
Three scenarios with different commercial outcomes
Scenario 1. A real working seam, two long slat zones
Left 2350 mm, right 1740 mm. The seam must maintain movement. KPU-105 ends before the working zone and starts again after it.
Result: geometric minimum 3 + 2 = 5 slats, 4,300 ₽, then the repeat is checked.
Scenario 2. A regular joint of two panel modules
After checking, it turns out that this is not a deformation seam of the base, but a regular boundary of two panel modules, which the system allows to be closed with a profile.
Result: the algorithm from the article about the working seam is no longer applied automatically. You need to follow the panel instructions and separately check whether KPU-105 is suitable as a decorative profile for such a joint.
Scenario 3. A working seam with a visible specialized profile
The seam is already finished with a factory technical profile. Adding KPU-105 on both sides creates too complex a composition.
Result: do not buy KPU-105 for this line. Keep the special profile as the main element.
These scenarios are important because they change not the numbers, but the purchase decision itself.
The adhesive should also not become a hidden rigid bridge across the joint.
Even if the KPU-105 itself is physically cut over the expansion joint, an error is possible at the adhesive layer level. Imagine an installer applies adhesive in a long continuous strip on the wall, then glues the left and right fragments of the molding with a neat gap between them. Visually, it seems the joint is preserved. But if the rigid adhesive material got into the working area and bonded the two sides of the base, the decorative gap does not fully solve the problem.
Therefore, the joint boundaries should be considered not only when cutting the KPU-105, but also when preparing the surface. Before installation, it is useful to mark with painter's tape the area where adhesive, putty, or another rigid compound must not be accidentally applied, if the project requires movement there.
This is especially important after painting. The working joint may be barely visible, and an installer who came only to install the molding does not know that the thin vertical line has a structural purpose. If it is not marked in advance, it can easily become an "irregularity that needs to be filled."
Correct sequence:
-
determine the boundaries of the working joint;
-
protect it from accidental rigid filling;
-
prepare the base on the left and right independently;
-
on
Expansion joint near a doorway, corner, or niche: the end of the molding may be a double constraint.
In a real interior, the working joint is rarely in an ideal empty field. It may run next to a door, an external corner, a niche, a built-in wardrobe, or the end of a slat panel. Then KPU-105 has two boundaries at once.
For example, to the right of the joint, only 620 mm remains to the door casing. Formally, one meter-long plank is enough. But you need to check how a short fragment between two strong verticals—the joint and the door—will look. If the pattern breaks off on both sides almost immediately, the decorative band may become visually restless.
Three solutions are possible:
-
leave KPU-105 on the short section if the pattern reads normally;
-
end the decorative line before the joint and do not continue it on the small fragment;
-
completely abandon KPU-105 on both sides if the working joint and architectural elements already provide enough lines.
A similar situation occurs at an external corner. If the trim must turn onto the adjacent wall, first the regular corner joint is solved, and then the expansion joint separately. You cannot combine two different tasks into one complex piece and hope that the installer will "fit it on site."
The commercial conclusion here is interesting: sometimes the geometric calculation says "one plank is needed," but the compositional analysis says "this section is better left without trim." Therefore, the final basket is formed only after a visual layout.
How to maintain the expansion joint after installing KPU-105
The working joint may require inspection, renewal of elastic filling, or repair of the finish coating. If KPU-105 is located too close or actually blocks access to the node, future maintenance becomes inconvenient.
Before installation, it is worth answering four questions:
-
is the condition of the seam visible after installing the decor;
-
can the elastic material be replaced without removing long sections of KPU-105;
-
does the trim interfere with the tool;
-
is it clear to the next craftsman that this is a working joint, not a decorative gap.
The last question is often underestimated. In a few years, the interior may be renovated by another person who has not seen the project. If the working seam is completely masked by decor and paint, it can easily be mistakenly filled with putty. A deliberate gap in KPU-105, on the contrary, helps maintain the readability of the structure.
In commercial material, this is a strong argument in favor of independent endings. The buyer gets not only a beautiful wall on the day of installation, but also a maintainable joint.
What happens when the wall and trim are repainted
After installation, polyurethane decor is often painted together with the wall or in a separate tone. In a few years, the interior may be repainted. It is at this moment that the movable seam risks turning back into a rigid decorative bridge — no longer due to KPU-105, but due to finishing materials.
If the painter fills the gap with regular putty, seals it with an unsuitable rigid compound, or repeatedly covers it with paint without considering the joint's function, the original logic of the project is lost.
Therefore, it is useful to keep a photo or diagram of the wall with the marked joint. Ideally, the renovation documentation should state that the decorative KPU-105 is intentionally interrupted here.
For refinishing, the sequence is the same:
-
determine the boundaries of the working joint;
-
do not connect the left and right KPU-105 with a rigid finishing material;
-
refresh the joint itself only in a compatible way;
-
paint decorative elements so as not to cancel the structural gap.
This is another reason not to mask the working line at any cost: a clear joint is easier to preserve during subsequent renovations.
Can a decorative "bridge" be made, attached only on one side
In some expansion joint systems, covers, plates, or profiles are indeed used that overlap the visual gap while allowing movement thanks to a special mounting design. But the existence of such systems does not imply that KPU-105 can simply be glued on one side and the other edge left free.
For KPU-105, such a function is not stated in the product card. A homemade cantilever scheme may cause the free edge to vibrate, catch, deform, or look uneven. Moreover, it is unclear what range of movement it should accommodate.
If the project needs a decorative cover over the seam, the right approach is to select a specialized seam system element. KPU-105 can be brought up to it as adjacent decor.
This is an important limitation of the article: we not only prohibit rigidly gluing the strip through a movable joint, but we also do not invent an alternative engineering structure from a decorative product for which there are no confirmed characteristics.
How to check the composition with a paper mockup before ordering
KPU-105 has a small cross-section, so on the product card screen, the line break near the seam may seem almost unnoticeable. On a real wall, everything depends on height, length, color, and lighting.
Make a simple mockup:
-
cut out or glue a narrow paper strip along the intended KPU-105 line;
-
stop it on the left at the seam boundary;
-
start a new strip on the right;
-
do not try to visually "fill in" the gap;
-
step back 2–4 meters;
-
evaluate the wall frontally and at an angle;
-
photograph it in daylight and evening light.
The mockup answers a question that cannot be solved by arithmetic: does the physical gap look like a neat technical pause or does it ruin the entire composition?
If the gap is perceived poorly, the placement of the decorative line needs to be changed, not the function of the seam. For example, you can move KPU-105 higher/lower, end it at another architectural element, or abandon the line on this wall altogether.
Such a test costs almost nothing and can save several meter-long strips and subsequent rework.
Mistakes when ordering KPU-105 near an expansion joint
Mistake: treating the entire section as one length
Reason: decoratively, the wall looks continuous.
Consequence: the cutting plan ignores the independence of the two sides.
Check: measure the left and right zones separately.
How to avoid: create a layout map before ordering.
Error: covering the seam with one strip "for beauty"
Reason: want to hide the technical line.
Consequence: the decorative profile can become a rigid bridge between moving parts.
Check: determine the function of the seam and how it works.
How to avoid: finish KPU-105 on the sides if the project does not provide for another solution.
Error: inventing a universal offset
Reason: want to get a simple rule in millimeters.
Consequence: the offset may not match the actual working area.
Check: look at the project and the boundaries of the node.
How to avoid: do not use invented 5, 10, or 20 mm as a universal standard.
Mistake: consider remnants completely interchangeable
Reason: arithmetically the length fits.
Consequence: the pattern breaks, extra joints appear.
Check: lay out the pattern on the diagram.
How to avoid: use the remnant only after checking the ornament.
Mistake: mistake KPU-105 for a special profile for the seam
Reason: decorative molding visually resembles a divider strip.
Consequence: the product is attributed with an unclaimed function.
Check: read the product card and the project seam system.
How to avoid: use KPU-105 only as a decorative element of adjacent fields, unless otherwise confirmed.
Decision tree before adding KPU-105 to the cart
Question If "yes" If "no" Is this a confirmed working expansion joint? preserve its independence clarify the joint type and apply the rules of the specific system Are the boundaries of the movable zone known? measure the decor on the sides first obtain the design data Can I finish KPU-105 before the seam and start after it? Proceed to cutting Change the composition or abandon KPU-105 Is there a stable base on both sides? Count the planks First decide on the mounting base Are the repeat and endings planned? Form the order Refine the layout Is the decorative line really needed? buy the calculated quantity do not buy KPU-105 for this zone Such a tree removes the main risk: buying material before the function of the node is understood.
How to embed commercial links naturally
The article should guide the reader along a real solution path, not just repeat one card.
When a specific KPU-105 is confirmed, a product link to it is appropriate. When a different pattern or a different linear element is needed, a section is logical buy carved polyurethane moldings. If the task becomes broader and a person chooses finishing material in general, one can buy decorative polyurethane molding.
For an alternative decorative scenario, the user can also go to the section Buy Polyurethane Molded Decoration, if linear trim for this wall turns out to be excessive.
This route preserves the product, category, and parent levels and does not force a single KPU-105 card to perform all internal linking functions.
When an informational article about slat panels is more useful than a product card
The KPU-105 card confirms dimensions, material, and price, but does not explain the structure of a specific slat wall. Therefore, before installation, it is useful to compare the product with the broader logic of the panel system.
The STAVROS article on slat panels for bathrooms and moldings explains that deformation joints with elastic filling may be used in transition nodes. This is useful not as a universal design for any room, but as a reminder: different materials and finishing areas may require special movable connections.
If the node of your project is similar, first you need to understand its technical function, and only then decide where KPU-105 ends.
Final order check in the example of 2350 + 1740 mm
Let's return to the original scenario and go through it completely.
Initial Data:
-
KPU-105 — 1000 mm;
-
price — 860 ₽/pc.;
-
left zone — 2350 mm;
-
right — 1740 mm;
-
between them — a confirmed working expansion joint.
Step 1. We do not include the joint in the decorative length as a section that needs to be covered.
Step 2. Left: 2350 / 1000 → minimum 3 planks.
Step 3. Right: 1740 / 1000 → minimum 2 planks.
Step 4. Geometric minimum: 5 planks.
Step 5. Cost: 5 × 860 = 4,300 ₽.
Step 6. We check the repeat. If five planks allow for neat endings and internal joints, the order remains 5 pcs.
Step 7. If a symmetrical pattern at the joint requires additional trimming, we separately justify a sixth plank. Then the cost becomes 5,160 ₽.
Thus, the article helps form a real cart, but does not replace the joint design. The quantity of KPU-105 can be calculated precisely; the working width of the expansion joint — only according to the documentation of the specific system.
Result: KPU-105 should not turn a working joint into a decoratively beautiful but rigid bridge.
The carved decorative molding KPU-105, sized 11 × 6 × 1000 mm and costing 860 ₽ per strip, is suitable for creating a thin ornamental line on a slat wall. However, the presence of an expansion joint completely changes the purchasing procedure.
First, you need to determine whether the line is actually a working expansion joint. Then, find the boundaries of the movable assembly. After that, divide the decorative line into independent sections, measure left and right, and only then calculate the meter-long strips.
For example, with 2350 mm on the left and 1740 mm on the right, the geometric minimum is 5 strips of KPU-105 totaling 4,300 ₽, if the repeat allows such cutting. But counting 4090 mm as one continuous line is technically incorrect, because this way the main purpose of the task is lost—preserving the working joint.
There is no need to invent a universal offset in millimeters, and there is no need to consider the dimensions of KPU-105 as an acceptable width for covering the joint. The edges of the molding must conform to a specific design node. If the project requires a special expansion profile or elastic filling, that remains the primary solution, while KPU-105 works only as an adjacent decorative element.
The correct commercial conclusion here is simple: first preserve the mobility of the joint, then design two neat endings, then calculate the strips, and only after that purchase KPU-105.
FAQ
Can KPU-105 be run as one continuous strip across an expansion joint?
If it is indeed a working expansion joint, without a confirmed design solution this should not be done: a continuously glued decorative profile can create a rigid bridge between independent sections.
Is it necessary to leave the same gap between KPU-105 and the joint on both sides?
There is no universal number for all systems. The boundary of the decorative element is determined by the working zone of the specific joint and its design treatment.
Can KPU-105 be considered a deformation profile?
No. The product card describes it as decorative molding/carved polyurethane trim, and it does not claim the function of a specialized deformation profile.
If the joint is filled with silicone, can it be covered with KPU-105?
The mere fact of elastic filling does not automatically allow rigid covering. You need to understand whether the filled joint should remain free and how the specific system is designed.
If there is 600 mm of KPU-105 left on the left, can this piece be used on the right?
Only after checking the repeat, pattern direction, end condition, and the number of future joints. A decision is not made based on length alone.
Is it necessary to buy a 10% spare?
Not necessarily. For meter-long carved trim, it is more useful to calculate specific cuts, repeats, and endings. An extra plank is purchased for a clear risk, not by a universal percentage.
If KPU-105 runs parallel to the deformation joint, does the problem disappear?
The risk of a rigid bridge is lower, but you still need to avoid getting glue and profile into the movable working area and ensure that the nearby base is suitable for installation.
Is it possible to completely hide an expansion joint with decorative molding?
Only if this is provided for by the joint system itself and a specialized method that preserves its function is chosen. KPU-105 should not be automatically assigned as such a system.
What is more important before ordering: the exact quantity of KPU-105 or the type of joint?
First, the type of joint. Calculating the quantity only makes sense after it is clear where the decorative line can actually run and where it should end.
What to do if the designer does not allow a decorative profile near the joint?
Abandon KPU-105 in this area or move the decorative line. The structural function of the working joint takes priority over decoration.
-