
























































Article Contents:
- Why corners are the main risk when buying MDF skirting boards
- Where most problems occur
- Types of corners: internal, external and non-standard
- Inside corner
- Outside corner
- Non-standard corner
- Joint with trim
- Cutting MDF skirting boards: what is important to know before buying
- What is a cut and why is it needed
- How the profile affects the complexity of the cut
- How to cut MDF baseboard without chipping
- Miter box: for small tasks with right angles
- Miter saw: professional standard
- How to avoid chipping when cutting
- Test cut as a mandatory step
- Inside corner: miter cut or overlay element
- Classic 45-degree miter cut
- Ready-made corner element: reliable and fast
- Outside corner: how to make it neat
- Miter cut for outside corner
- Wooden corner as a solution for external corners
- MDF baseboard connector: when it is needed and when it is not
- When a connector is indispensable
- When a connector is unnecessary
- How to calculate allowance for corners and trimming
- Basic formula
- Correction factors for complex rooms
- Example calculation with allowance
- How to count the number of planks
- Which profile is easier to miter
- Straight MDF baseboard: minimal risk of error
- Flat profile: architectural rigor
- Shaped profile: beautiful but demanding
- Wide baseboard: scale requires precision
- White, paintable or wood-like: where errors are more noticeable
- White MDF baseboard: maximum visibility of errors
- Paintable baseboard: possibility of refinement
- Wood-like baseboard: pattern and shade matter more than gaps
- Junction with architraves: details that define the class of renovation
- What should match
- How to properly finish the baseboard at the architrave
- Errors when buying and installing MDF baseboards
- Buying baseboard exactly to the perimeter without spare
- Not counting the number of corners
- Choosing a complex profile without understanding the cut
- Cutting white baseboard with a regular saw
- Not making a test cut
- Buying short planks for long walls
- Not checking the geometry of corners in advance
- Not planning final touch-up painting of joints
- What to buy with the baseboard: a comprehensive approach
- Installation materials
- Related interior trim elements
- Final block: how to properly prepare for purchase
- FAQ: frequently asked questions about cutting and joining MDF baseboards
- Which MDF baseboard is easier to cut at corners?
- How much extra length to allow for trimming MDF baseboards?
- What to use to cut MDF baseboards without chipping?
- Are connectors needed for MDF baseboards?
- How to finish the joint between baseboard and door casing?
- How to fix a gap in the corner after installation?
- Can MDF baseboards be installed without a saw?
- About the Company STAVROS
You know what the main trap is when buying baseboards? A person looks at a straight wall section — everything is beautiful, everything is neat, everything lies perfectly. Then comes the moment of the first corner. And it turns out the angle isn't 90 degrees, the saw is wrong, there's no spare, and the profile is too complex for a manual miter box. The result — chips, gaps, crooked joints, and several planks wasted on experiments.
This article is written precisely so you can get through that moment without losses. It covers corners, cuts, joints, defects, spare stock, and profile selection. MDF Skirting Boards from the perspective of someone who understands that a neat result begins long before installation.
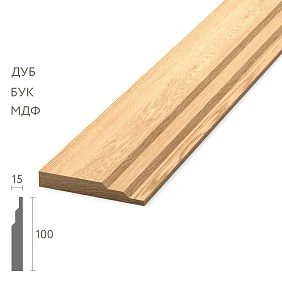
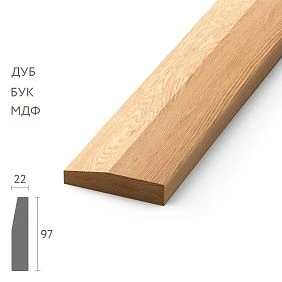
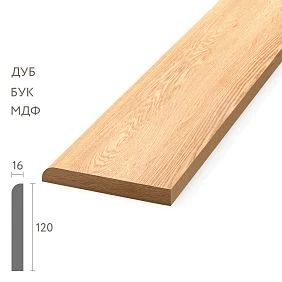
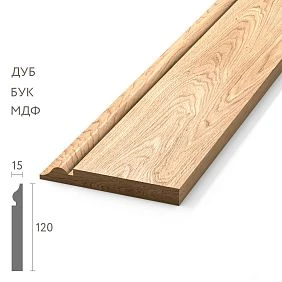
Why corners are the main risk when buying MDF baseboards
On a straight wall, MDF baseboards look predictably good. A flat plank pressed against a flat base, fasteners hold it, the result — a neat lower wall contour. There's almost nothing to mess up here if basic installation practices are followed.
Everything changes as soon as a corner comes into play.




Where most problems arise
Internal corners between walls — where two pieces of baseboard meet, and their ends must either align at a precise cut angle or be covered by a corner piece. External corners — columns, boxes, partitions, protrusions — where the baseboard wraps around a convex structural element. Each doorway is a separate story: here the baseboard meets the trim, and this joint either looks professional or reveals that the renovation was done without proper attention to detail.
Add to this non-standard angles — not 90, but 87 or 93 degrees — and you get a picture that most buyers don't consider when choosing a profile and calculating quantity.
That's why MDF baseboard corners are not just a technical nuance, but a separate commercial topic: the right profile, the right tool, and the right spare stock determine whether you get a beautiful result or a redo.
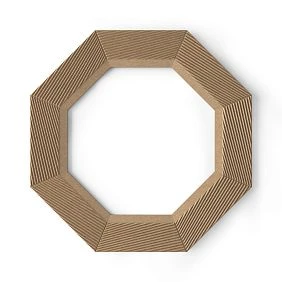
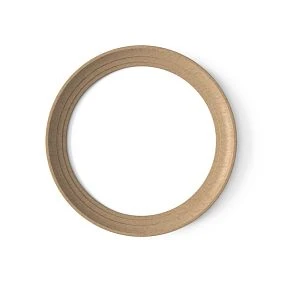
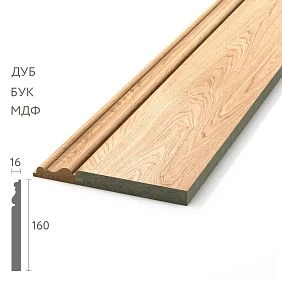
Our factory also produces:
Types of angles: internal, external, and non-standard
Before discussing the tool and cutting technique, let's understand the classification. It is simple but fundamentally important for calculating material consumption and choosing the installation method.
Get Consultation
Internal corner
This is the angle between two walls inside a room — the most common type. In a standard rectangular room, there are four of them. The classic way to finish it is to cut each of the two meeting planks at 45 degrees so that the ends meet in one line.
The problem is that a 'standard 90-degree internal angle' is less common in practice than one would like. In panel buildings, a deviation from the right angle of 2–5 degrees is the norm, not the exception. In monolithic and brick buildings, the situation is somewhat better, but still not ideal.
With a classic 45+45 cut, any deviation from the right angle will immediately create a gap — either on the face side or near the wall. The higher and more complex the profile, the more noticeable this gap becomes.
External corner
External angles are protruding structural elements: columns, utility boxes, wall projections, piers between windows. Here, the baseboard goes around the corner from the outside, and both planks are cut mirror-wise — at the corresponding angle so that the ends meet at the top of the protrusion.
An external angle is even more demanding of precision than an internal one: the ends of the planks on the protrusion are visible from two sides, and any discrepancy is immediately noticeable.
Non-standard angle
Bay windows, diagonal walls, slanted partitions, slopes in attic floors — all these are non-standard angles where a 45-degree cut is not applicable. Here, precise angle measurement, dividing the actual angle in half, and cutting each of the two planks at the corresponding correct angle are required.
For such situations, a miter saw with a rotating table is especially important: only it allows you to accurately set any required angle with a controlled result.
Joint with trim
A separate risk zone that is often underestimated. Where the baseboard meets the door trim, a joint is formed: the end of the baseboard contacts the side surface of the trim. For this joint to look professional, several conditions are needed: the baseboard and trim must match in thickness, or the trim should be slightly thinner than the baseboard; the end of the baseboard must be even and clean; and the color and style of the elements must harmonize.
Wooden casings Made of oak or beech STAVROS are produced in the same color system as baseboards — this allows you to select elements so that the entire lower contour of the room and doorways work as a single system.
Cutting MDF baseboards: what to know before buying
Before choosing a profile, ask yourself one question: what tool do you plan to use to cut the baseboard? This is not a rhetorical question — it is a determining factor that influences which profile suits you.
What is a cut and why is it needed
Cutting an MDF baseboard is a transverse cut at the required angle to form a corner, end, or joint. In a standard situation, the cut is made at 45 degrees (for 90° corners), but the actual cut angle is always selected for the specific angle of the room.
The quality of the cut directly determines the quality of the final result. A ragged cut — and a chip is visible on the white baseboard. An inaccurate angle — and the joint in the corner has a gap. A skewed cut line — and the baseboard does not fit evenly against the wall.
MDF is a material that cuts significantly cleaner than chipboard or fiberboard, but worse than solid wood. Its surface layer, with the wrong tool and cutting method, produces chips that are especially noticeable on painted and white profiles.
How the profile affects the complexity of the cut
A straight rectangular baseboard is the simplest to cut: the cut line goes through a uniform cross-section, without relief transitions or chamfers. An error here is minimally noticeable.
A shaped profile is more complex: it has protruding elements, radius transitions, and shelves. When cutting, the cut passes through different levels of the profile, and if the angle is slightly inaccurate, the relief looks different on each side of the joint. Matching two such cuts into a perfect angle is a task requiring precise tools and experience.
A wide baseboard: here cutting is more difficult not because of the profile, but because of the size: the taller and wider the plank, the longer the cut line and the more noticeable the slightest angle deviation.
The conclusion is simple: the more complex the profile, the stricter the requirements for the tool and precision.
How to cut MDF baseboard without chipping
This is a practical question, the answer to which depends on the volume of work, budget, and available tools. Let's consider options from simple to precise.
Miter box: for small tasks with right angles
A miter box — mechanical or plastic — is a budget tool for manual cutting at 45 or 90 degrees. It is sufficient for simple tasks: a few rooms, standard right angles, low profile.
Limitations: a miter box does not allow working with non-standard angles; with a high profile, the cut requires noticeable effort and may be uneven; cheap plastic miter boxes wear out quickly and lose accuracy.
For cutting MDF baseboard in a miter box, it is important to use a fine-tooth saw — from 18 teeth per centimeter and above. A large tooth tears the surface layer of MDF and produces an ugly fuzzy end.
Miter saw: professional standard
Cutting MDF baseboard on an electric miter saw is a fundamentally different level of precision and quality. The tool allows you to set any angle from 0 to 45–50 degrees, provides a stable, repeatable cut, and works with profiles of any height.
For MDF baseboard, use a blade with fine teeth — from 40 teeth and above for profiles up to 100 mm wide, from 60 teeth for wider and more complex profiles. The material feed speed should be moderate: no need to push, the saw will do its job.
An important practical nuance when cutting MDF baseboard: always make a test cut on a scrap piece before the first working cut. This ensures the angle is set correctly and the cut quality meets expectations — without the risk of ruining the work piece.
How to avoid chipping when cutting
Chips on the front surface are the main problem when cutting MDF with an unsuitable blade or with too fast feed. Here are practical ways to prevent them:
-
Masking tape along the cut line on the front side — the tape holds the surface layer when the saw tooth exits.
-
Fine-tooth blade — don't skimp on this: the difference between a 24-tooth blade and a 60-tooth blade on the final cut is fundamental.
-
Cut with the front surface facing down — when working on a miter saw, the baseboard is placed face up, so the tooth exit is on the bottom (back) side, and any chipping, if it occurs, is on the back.
-
Moderate feed speed — don't rush, especially when the saw exits the material.
-
Material fixation — the baseboard must be pressed tightly against the saw stops and not vibrate.
Test cut as a mandatory step
It cannot be emphasized enough: always make a test cut on a scrap piece. This rule applies to any profile, any tool, and any angle. A test cut allows you to check three things: angle accuracy, cut quality, and how two pieces fit together at the joint. If something is wrong — adjust on the scrap, not on the working plank.
Internal corner: miter cut or overlay element
When finishing internal corners, you have two fundamentally different approaches. Each has its own area of application.
Classic 45-degree miter cut
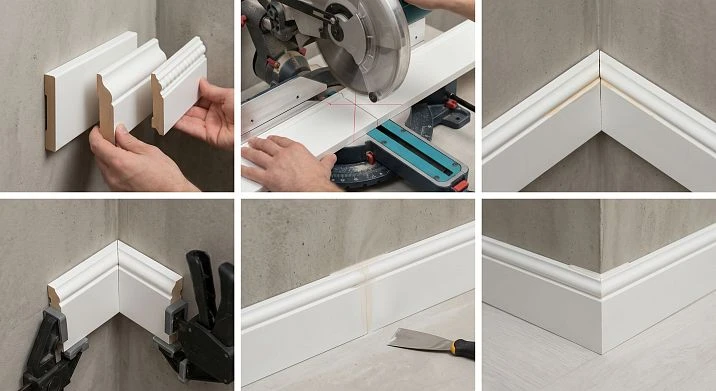
This is a professional method that, when executed precisely, gives the cleanest and most architecturally correct result. Both meeting planks are cut at 45 degrees (or half the actual room angle), and their ends meet in a single line.
How to properly miter an MDF baseboard for an internal corner:
-
Measure the actual angle with an angle finder or protractor.
-
Divide the angle value by 2 — this is the required miter angle for each of the two planks.
-
Cut both strips, place them in the corner, and check the fit.
-
If there is a minor gap, it is filled with acrylic sealant matching the baseboard color after installation.
With precise tools and correct measurements, the corner fits almost without a gap. A residual gap is normal: the sealant will cover it, and after painting, the joint becomes invisible.
Ready-made corner element: reliable and fast
A ready-made corner cover is a plastic or wooden element installed at the joint of two strips without miter cutting. In this case, the baseboards are cut strictly at 90 degrees, and the corner is covered with a decorative cover.
The advantage is simplicity and independence from the accuracy of the room's angle. The disadvantage is a visible joint element that does not always fit into an expensive interior. For white baseboards with white corner covers, this is often acceptable; for a shaped wood-like profile, it becomes a matter of aesthetics.
External corner: how to make it neat
The external corner is the most critical element. It is visible from two sides simultaneously, and any mistake is doubled in perception.
Cutting the external corner
Both pieces of baseboard are cut at an angle so that their ends meet at the top of the protrusion. If the external corner is exactly 90 degrees, each strip is cut at 45 degrees. If the angle differs, it is recalculated similarly to the internal corner.
A crucial point: on an external corner, the ends of the planks are in the zone of maximum vulnerability to mechanical damage. MDF on an open end is not the most durable material. That is why it is especially important to use an end cap or protective corner for external corners.
Wooden corner as a solution for external corners
Wooden angle made of solid wood — this is an element that covers the external corner and simultaneously protects the ends of the baseboard. It is installed over the joint, covering it completely. For interiors with protruding columns, boxes, or partitions, a wooden corner element is the right and beautiful solution: it gives the corner a finished look and protects against chipping.
MDF baseboard connector: when it is needed and when it is not
An MDF baseboard connector is a decorative element that covers the straight joint of two planks on a long wall. The question is whether you need it — and if so, where exactly.
When a connector is indispensable
On walls longer than 2.7–3 meters, one standard plank is not enough. You need either a joint of two planks or a special order for a non-standard length plank.
A straight joint of two planks on a long wall is a place that, if executed carelessly, will be noticeable. Especially on a white baseboard with side lighting. The connector element covers the joint and makes the transition decorative rather than accidental.
When a connector is unnecessary
In an expensive interior with high requirements for details, connectors are minimized. To do this, when calculating the order, the length of the planks is specially selected taking into account the length of the walls: if the wall is 3.6 meters, two planks are used — one full and one cut — placing the joint in the least noticeable area (behind furniture, near a door, in a less lit place).
Ideally, the joint of two planks should fall behind built-in furniture or in the area of a doorway — there it is almost invisible.
How to calculate the allowance for corners and trimming
Here is the very topic that brought most readers to this page. How much baseboard should you take with a reserve?
Basic formula
Number of linear meters = Room perimeter − Width of doorways + Reserve 7–10%
This is a standard formula for a rectangular room with a typical number of corners and doors.
Correction factors for complex rooms
A standard reserve of 7–10% may not be enough if:
-
the room has more than four internal corners (L-shaped, T-shaped layout, niches, ledges);
-
there are external corners (columns, boxes);
-
a high figured profile is used, where a miter cut error is more costly in terms of material;
-
the corners in the room are non-standard (not 90 degrees) — higher chance of having to cut more during fitting;
-
walls longer than 3 meters require joints.
In such cases, the allowance should be increased to 12–15%.
Example calculation with allowance
Room: L-shaped living room, perimeter 24 meters, two doorways of 0.9 meters each, two external corners, six internal corners.
-
Net length: 24 − 1.8 = 22.2 m
-
Complexity: L-shaped, external corners → allowance 12%
-
Result: 22.2 × 1.12 = 24.9 m → order 25–26 linear meters
This is a difference of almost 4 meters compared to the calculation "without allowance" — in terms of planks 3 meters long, that's one and a half extra planks, which, with intensive use on corners, will save you from a "not enough" situation.
How to calculate the number of planks
Once you have the total number of linear meters, divide it by the length of one plank (2.4 or 3 meters). Round the result up. Leftovers from trimming on short sections (behind the radiator, in a niche, behind a cabinet) are normal waste, not a defect.
Which profile is easier to cut
Choosing a profile is not only a matter of style, but also a matter of installation complexity and the risk of defects during cutting.
Straight MDF baseboard: minimal risk of error
A straight rectangular profile is the most technologically advanced in terms of cutting. The cut line is uniform across the entire height: there is no need to align decorative elements on two meeting ends. Even if the cut angle is slightly inaccurate, it is much less noticeable than on a shaped profile.
For those who install it themselves and do not have much experience with a miter saw, a straight profile is the right choice. This is not a compromise on aesthetics — a straight Baseboard MDF looks modern, strict, and expensive in minimalist interiors.
Flat profile: architectural rigor
A flat MDF baseboard is a thin rectangular plank with minimal protrusion. It is easy to cut, like a straight one, but creates a special aesthetic: the lower contour of the wall is marked delicately and precisely. It works great in rooms with clean architecture and minimal decor.
Shaped profile: beautiful but demanding
A shaped profile with shelves, heels, and radius transitions is a decorative accent for the lower part of the wall. In classic interiors, neoclassicism, and rooms with wooden moldings и with wooden cornices such a profile is indispensable.
But the complexity of the cut here is objectively higher. At the corner joint, not just the ends must align—the relief elements must also match. A discrepancy of even one or two millimeters will result in a visible mismatch of the shelf or heel, which on a shaped profile is much more noticeable than on a straight one.
Working with a shaped profile requires a miter saw with a precise angle gauge, a test cut on a scrap piece before each corner joint, and the skill of aligning profiles during fitting.
Wide baseboard: scale demands precision
Wide Wooden Skirting Board with a height of 100–120 mm is an architectural element that works with the scale of the room. But in cutting, it demands precision: the longer the cut line, the greater the potential angle deviation and the more noticeable the mismatch at the joint.
For a wide profile, a miter box is no longer suitable—a miter saw with sufficient cutting length is needed. But the result with proper installation is flawless: a wide baseboard in well-made corners looks like an architectural detail, not just a strip near the floor.
White, for painting or wood-like: where errors are more noticeable
The color of the baseboard affects how visible installation errors are. This is not a reason to choose a color based on 'defect concealment'—but it is an important factor to consider.
White MDF baseboard: maximum visibility of errors
White MDF baseboard is the most popular and the most demanding in terms of installation quality. The white surface highlights any shadow: the shadow from a gap in the corner, the shadow from the gap between the baseboard and the wall, the shadow from an uneven cut. With side lighting, even a millimeter gap reads as a noticeable defect.
For a white profile, it is especially important:
-
precise cutting with minimal gap in the corners;
-
careful filling of residual gaps with white acrylic sealant;
-
a clean cut without chips on the front surface;
-
final touch-up of joints with white enamel after the sealant has dried.
Baseboard for painting: possibility of refinement
MDF baseboard for painting provides an important advantage: joints and cut areas can be refined after installation. Small gaps, residual gaps in corners, fastener exit points — all of this is puttied, sanded, and painted in a single color. Final painting makes joints virtually invisible if the work is done carefully.
That is why professional painters and finishers often recommend choosing a baseboard for painting rather than a ready-made white or colored one: after installation and final painting, the result is flawless regardless of minor cutting inaccuracies.
Baseboard for wood: pattern and shade matter more than gaps
On a profile with a wood texture, small gaps in the corners are less noticeable than on a white one — the texture pattern partially masks them. However, another problem arises here: at the corner joint, the texture pattern should look organic, not like two different pieces from different places.
On a shaped wood-grain profile, mismatched relief elements at the joint are a double problem: both the shape and the pattern don't match. For such profiles, the cut must be especially precise.
A dark baseboard (wenge, dark walnut, black oak) forgives small chips on the ends better than a light one: the dark color of the MDF end on a dark profile is less noticeable. But it highlights the slightest gap against a light wall.
Joining with architraves: details that determine the class of renovation
This node — the joint of the baseboard and architrave at the doorway — most often turns out to be a weak spot in a renovation that is otherwise done well.
What should match
First: thickness. If the architrave protrudes from the wall by 14 mm, and the baseboard by 18 mm, the end of the baseboard will extend beyond the architrave. This is visible and looks sloppy. The correct ratio: the baseboard is equal in thickness to the architrave or thinner than it.
Second: color and style. White baseboard to white doors, wood-grain baseboard to wooden architraves. If one element is from one color system and the other from another, the transition will be unattractive.
Third: decorative character. A shaped baseboard requires a correspondingly styled architrave. A straight minimalist baseboard next to a classic shaped architrave creates a stylistic conflict.
Wooden casings STAVROS products are manufactured in a system coordinated in color and scale with baseboards and moldings — this eliminates the problem of mismatch at the ordering stage.
How to properly finish a skirting board at a door casing
The end of the skirting board at the door casing is cut strictly at 90 degrees and pressed tightly against the end of the casing. The gap between them is filled with sealant matching the material color. If the skirting board is for painting, the joint is puttied and painted together with the skirting board.
If the door casing is installed after the skirting board, it covers its end, and the task is simplified. If the skirting board is installed after the door casing, the end of the skirting board must be clean and precise.
Mistakes when buying and installing MDF skirting boards
This is a compilation of real situations — not theoretical ones, but those that occur during the renovation process.
Buying skirting board exactly by perimeter without spare
The most common mistake. 'Room 4×5 meters, perimeter 18 meters, I'll buy 18 meters.' As a result, one and a half meters are missing — and that's the best-case scenario. Worse if three to four meters are missing, and the required profile is out of stock at the warehouse.
Not counting the number of corners
The perimeter is calculated, but the corners are not. An L-shaped room with six internal corners and two external corners on columns means 32 additional cuts of at least 60–80 mm each. That's almost 3 meters just for corner waste.
Choosing a complex profile without understanding the cut
A beautiful shaped profile looks attractive in the store. At home, it turns out that a miter saw is needed for its precise cut, which you don't have, and a miter box causes mismatched relief elements at the joint.
They cut white baseboard with a regular saw
A regular wood-cutting saw blade on a white painted MDF baseboard guarantees chips on the front surface. The white color will highlight every chip. A special fine-tooth blade or a metal-cutting blade is needed.
They don't make a test cut
They set up the tool and cut the working piece immediately. The angle is slightly off — the first piece is scrap. A test cut on a scrap piece is a 30-second check that is worth more than any scrap.
They buy short planks for long walls
A 5-meter wall, planks of 2.4 meters — there will be two joints on one wall. Joints are visible. It's better to use 3-meter planks and have one joint that can be hidden behind furniture.
They don't check the geometry of corners in advance
An angle finder is cheap. Ten minutes to measure all room corners before purchase is information that determines the necessary tool, material allowance, and installation tactics.
They don't plan for final touch-up painting of joints
The white baseboard is installed, the sealant is applied. After a day it dried — and it turned out that the sealant is slightly yellowish, while the baseboard is cold white. Final touch-up with white acrylic enamel is a standard step that should be planned from the start.
What to buy together with the baseboard: a comprehensive approach
A good installer always orders everything needed in one shipment. This saves time, eliminates trips for small items, and guarantees material consistency.
Installation materials
-
Mounting strip — for concealed professional fastening.
-
Clips — for profiles with snap-on fixation.
-
Screws and wall plugs — for direct fastening through the baseboard body.
-
Acrylic sealant — for filling corner and end joints.
-
Construction adhesive — as an auxiliary element.
Related interior finishing elements
Wooden casings — must be paired with the baseboard for a neat, unified door assembly.
Wooden moldings — if wall panels or horizontal decorative strips are planned.
Wooden planks — if the project features accent slatted walls where the baseboard covers the lower end of the structure.
Wooden angle — for neat finishing of external corners on columns, boxes, and partitions.
wooden cornice — a ceiling element that, together with the baseboard, forms a horizontal wall finishing system.
wood trim items — for a systematic approach to finishing, where everything comes from a single production source.
Skirting made of solid wood — if some rooms are finished in natural wood and others in MDF, a systematic approach in a single catalog maintains color scheme consistency.
Final block: how to properly prepare for purchase
Before placing an order for to buy MDF skirting board, follow this short algorithm.
Step 1. Measure all walls including door openings. Sum up the linear meters for each room.
Step 2. Count the angles. Internal, external, non-standard — separately. This affects the safety factor.
Step 3. Evaluate the geometry of the angles. If you have a protractor, use it. If not, apply a square in each corner and visually assess the deviation.
Step 4. Choose a profile considering the tool. If you don't have a miter saw, take a straight or flat profile that can be cut in a miter box.
Step 5. Determine the color considering error visibility. White requires maximum precision. Paintable forgives more and allows for finishing. Wood-like requires texture matching.
Step 6. Include a margin. From 7% for simple rooms to 15% for complex ones.
Step 7. Include related items in the order. Architraves, fasteners, sealant, corner pieces — all in one order.
buy MDF skirting board with Contact us to confirm shipping to your destination. — in the STAVROS catalog. Consultation on profile selection, quantity calculation, and configuration — free of charge.
FAQ: frequently asked questions about cutting and joining MDF baseboards
Which MDF baseboard is easier to cut at corners?
The easiest to work with is a straight or flat rectangular profile: the cut line is uniform across the entire height, and cutting errors are less noticeable. A shaped profile requires precise alignment of relief elements at the joint, which is only possible with accurate tools and experience.
How much spare MDF baseboard should I allow for cutting?
Standard is 7–10% of the net perimeter. For rooms with many corners, niches, external protrusions, and short sections — 12–15%. It's better to have leftovers than to buy one more strip with the risk of a batch color difference.
What tool should I use to cut MDF baseboard without chipping?
A miter saw with a fine-tooth blade (40 teeth or more) is the optimal tool. For a manual miter box, use a fine-tooth hacksaw blade, apply painter's tape along the cut line, and apply moderate pressure. White painted baseboard is especially demanding on the tool: a large tooth will cause chips on the face side.
Are connectors needed for MDF baseboard?
It depends on the wall lengths and your approach to joints. On walls longer than 3 meters, a connector is necessary. In expensive interiors, joints are hidden behind furniture or in inconspicuous places. A connector is a decorative solution that makes the joint visible but neat.
How to finish the joint between baseboard and door casing?
The end of the baseboard is cut strictly at 90 degrees and placed flush against the end of the casing. Any remaining gap is filled with acrylic sealant matching the material color. Baseboard intended for painting is puttied and painted together with the casing in a single final color.
How to fix a gap in the corner after installation?
A small gap in the corner is normal even with a good cut, because room corners are rarely perfectly straight. The gap is filled with acrylic sealant matching the baseboard color. For baseboard intended for painting, it is puttied and painted. After drying, the joint becomes nearly invisible.
Can MDF baseboard be installed without a saw?
If the room has no complex corners or short sections, you can work with a miter box and hacksaw. But for precise angles, non-standard profiles, and wide moldings, it's difficult to do without a miter saw. Many craftsmen rent tools for a specific project — this is more reasonable than working with the wrong tool.
About the company STAVROS
Behind any good material is a manufacturer who understands not only what to make, but also why. And in the case of decorative moldings, this is doubly important.
STAVROS has been operating since 2002. It started with wood carving and restoration of historical sites — Konstantinovsky Palace, the Hermitage, Alexander Palace, Trinity-Izmailovsky Cathedral, Sheremetev mansions. It is this experience with high-end materials and complex architectural tasks that laid the standards the company maintains today.
STAVROS is a full-cycle production in Saint Petersburg with showrooms in Saint Petersburg and Moscow. Product range: MDF Skirting Board, Skirting made of solid wood, Wooden casings, Moldings, rails, Crown Molding and a full range wood trim. Shipment from one piece. Contact us to confirm shipping to your destination. and CIS countries.
Over 264 reviews with a rating of 5.0. Over 20 years on the market. Real projects, real geometry, real quality.
STAVROS is a manufacturer where a neat cut and clean joint start with the right material.