Article Contents:
- Why gaps appear in skirting boards on uneven walls
- Three main reasons for gaps
- Which MDF skirting board profile best hides unevenness
- Overlay profile: the most practical choice
- Higher profile: a visual solution
- Straight profile: strictness requires precision
- Wide MDF skirting board: expressiveness with nuances
- MDF skirting board with soft edge: when it is needed
- When a soft edge really helps
- When a soft edge doesn't solve the problem
- Overlay MDF baseboard: why it's more practical for finished renovations
- Compatibility with other finishing elements
- How to attach MDF baseboard to uneven walls
- Glue: when it's possible, when it's not
- Mounting strip: a professional solution
- Combined mounting
- Fastening with self-tapping screws and decorative cover
- Which baseboard color to choose for uneven walls
- White baseboard
- Baseboard in wall color
- Wood-look skirting board
- Which baseboard height to choose for uneven walls
- 60–70 mm: a delicate format
- 80 mm: universal standard
- 100 mm and above: baseboard as an architectural element
- How to check walls before buying a baseboard
- Wall inspection checklist
- Mistakes when buying MDF baseboard for uneven walls
- They choose the stiffest profile without checking the walls
- They choose a white baseboard for a dark wall
- They only use glue on a wavy wall
- They don't account for corners and junctions with architraves
- Don't account for cutting allowance
- They confuse a baseboard with a soft edge and a regular profile
- They think the baseboard will fix a crooked wall
- Neglect sealant
- What to buy together with MDF skirting board
- Fasteners and mounting materials
- Corner and Connecting Elements
- Related moldings and decor
- MDF baseboard for painting: a separate topic
- Installing MDF baseboard in corners: how to avoid gaps
- Classic 45-degree miter cut
- Pre-cut corner elements
- Sealant in corners
- Final CTA: how to make the right decision
- FAQ: popular questions about MDF baseboard for uneven walls
- Which MDF baseboard is best to buy for uneven walls?
- Does a baseboard with a soft edge hide crooked walls?
- Can MDF baseboard be glued to a crooked wall?
- What color of baseboard minimizes gaps?
- Do I need to level walls before installing baseboards?
- How does MDF baseboard differ from wooden?
- How to calculate the amount of baseboard for a room?
- How to finish the joint between baseboard and door casing?
- About the Company STAVROS
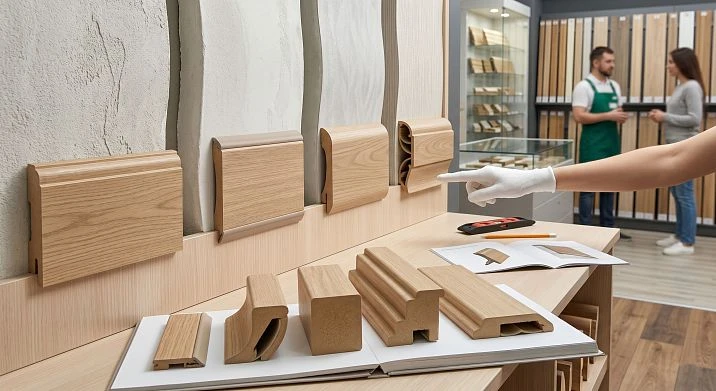
An uneven wall is not a death sentence. It's a condition that needs to be taken into account even before you open the baseboard catalog. Most problems with gaps, waves, and unsightly joints in baseboards occur not because the material is bad, but because the choice of profile, height, and attachment method did not match the actual condition of the walls. This article is for those who want to do renovations once and get a neat, professional result.
If the walls in your apartment or house are far from ideal, you need MDF Skirting Board with a properly selected profile, a well-thought-out attachment method, and an adequate height. That's exactly what this is about — in detail and without generalities.
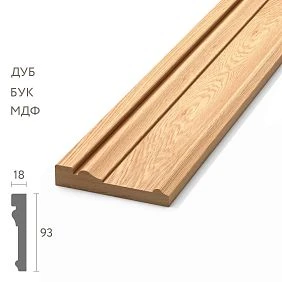
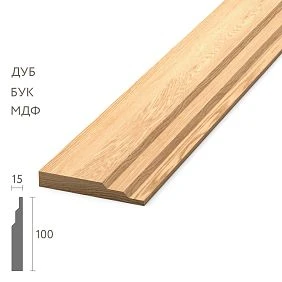
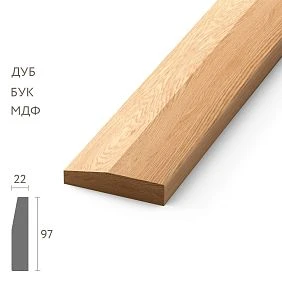
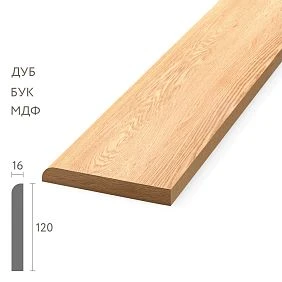
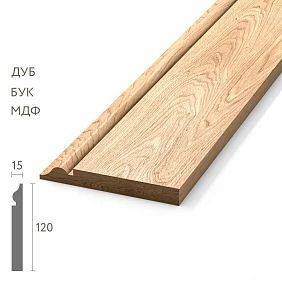
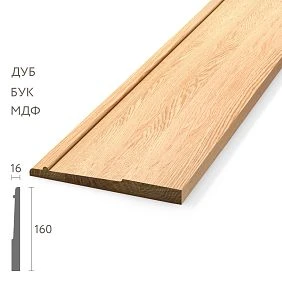
Why do gaps appear in baseboards on uneven walls?
Before choosing a profile, it's worth understanding the mechanics of the problem. This will help you make the right decision, rather than acting on the principle of 'it'll probably press down.'




Three main reasons for gaps
First — wall unevenness. Plaster is rarely perfectly flat. Even well-executed finishing has deviations of 3–5 mm over two meters. The baseboard is a rigid straight strip. Where the wall recedes, a gap forms. This is especially noticeable with side lighting: for example, when a floor lamp or built-in lighting runs along the wall.
Second — the angle is not 90 degrees. Interior corners in most Russian apartments are a separate story. An 87-degree angle looks normal to the eye, but when cutting the baseboard at 45 degrees, it creates a noticeable gap. The stiffer and thinner the profile, the more this problem stands out.
Third — floor level difference. The screed or underlayment for the flooring is not always perfectly level horizontally. A baseboard installed evenly at one end of the wall may lift above the floor at the other. This is especially common in older homes, where floor differences reach 10–15 mm.
Understanding these three reasons immediately narrows down the choice. For each situation, there is its own solution: profile, height, fastening, sealing method.
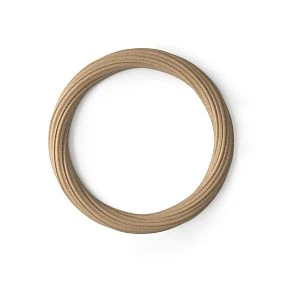
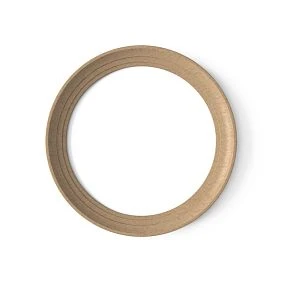
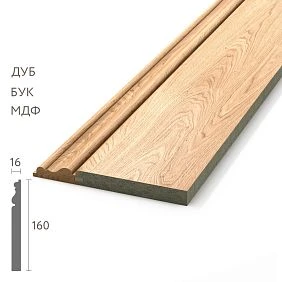
Our factory also produces:
Which MDF baseboard profile best hides unevenness
The answer to this question depends on what type of unevenness is being discussed. There is no universal solution, but there is clear logic.
Get Consultation
Overlay profile: the most practical choice
An MDF overlay baseboard is a classic floor strip that is installed on top of the finished finish. It can be installed after laying the flooring, after painting the walls, in an already lived-in room. The overlay profile is the most popular choice for finished renovations, and for good reason.
First, such a baseboard can be carefully pressed against the wall with mechanical fasteners — and this fastener will hold the strip along its entire length, compensating for small surface waves. Second, the overlay profile pairs with door wooden casings and moldings — it easily fits into a unified finishing system.
Third, an overlay MDF baseboard is easier to trim, adjust, and replace if necessary. This is important if you want to update the finish or repaint the walls in a few years.
Higher profile: a visual solution
The higher the baseboard, the more of the lower part of the wall it covers. If your plaster irregularities are concentrated in the lower area — a wide MDF baseboard with a height of 100 mm or more will simply cover the problem area.
This is not masking — it's a functional solution. The baseboard is originally designed to finish the joint between the floor and the wall. If this joint is problematic — it needs to be covered with a profile of the appropriate size.
However, there is a downside: the higher the rigid strip, the more noticeable the gap will be where the wall curves inward. Therefore, for high profiles, proper fastening with a sufficient number of attachment points along the length is especially important.
Straight profile: strictness requires precision
A straight MDF baseboard is a laconic rectangular profile without a chamfer or rounding. It looks great in modern interiors: minimalism, contemporary, loft, high-tech. But it has one nuance that many overlook.
A straight profile does not 'forgive' deviations. With a classic shaped baseboard that has a rounded top edge, a small gap near the wall is visually smoothed out: the eye glides along the curve without focusing on the crack. With a straight profile, the top end is a straight horizontal line. Any deviation from the wall is instantly perceived as a defect.
Therefore, a straight MDF baseboard for curved walls requires either good surface preparation or the use of a sealant in the color of the baseboard to fill residual gaps.
Wide MDF baseboard: expressiveness with nuances
Wide MDF baseboard — these are formats from 100 mm and above. It makes the lower contour of the wall architecturally significant, visually raises the ceiling, and gives the interior solidity. For rooms with a height of 2.7 meters or more, this is a logical and beautiful choice.
But for uneven walls, a wide baseboard requires a special approach to installation. The wider the plank, the larger its contact area with the wall and the more noticeable any deviations from the plane. If the wall is wavy — when installing a wide baseboard, fasteners should be used with a spacing of no more than 40–50 cm, and gaps between the baseboard and the wall should be filled with elastic acrylic sealant.
MDF baseboard with a soft edge: when it is needed
The topic of baseboards with a soft edge raises many questions. Let's break it down without evasion.
An MDF baseboard with a soft edge is a profile where the upper edge (the one that adjoins the wall) is made in the form of a flexible gasket or a beveled chamfer. The purpose of this element is to compensate for small deviations in the wall junction, creating a tighter visual contact.
When a soft edge really helps
A soft edge is useful in the following situations:
-
small wall deviations within 1–3 mm along the length of the plank;
-
the wall is painted and has a slight texture from a roller or brush;
-
the floor covering has slight elasticity (carpet, soft linoleum), which causes the baseboard to spring slightly at the floor;
-
need to close thin hairline gaps without using sealant.
When the soft edge doesn't solve the problem
If the wall irregularities are 5 mm or more per meter of length — the soft edge won't help. It's not a magic element that will cover all base imperfections. For significant deviations, either surface preparation, proper fastening, or a combination of both approaches is needed.
buy MDF skirting board with a soft edge is suitable when the walls are generally level, but there are slight local deviations. For severely crooked walls — this is not a primary selection parameter.
Overlay MDF baseboard: why it's more practical for finished renovations
Let's examine this question in more detail — because this is where confusion between types of baseboards most often arises.
In modern renovations, there are several concepts for installing baseboards: overlay, hidden (shadow), and built into the wall base. The latter two require that the corresponding node be planned at the rough work stage. A hidden baseboard is mounted flush with the wall in a special niche formed in plaster or drywall. It's beautiful — but it's not an option for finished renovations.
An overlay MDF baseboard is installed on top of the finished finish. This means it can be installed at any time: after laying parquet, after painting walls, even a year after the main renovation is completed. This is the most flexible and accessible option.
Compatibility with other finishing elements
An overlay MDF baseboard organically combines with:
-
wooden casings on doors — with the correct selection of height and color, they form a unified system;
-
wooden moldings on walls — if you are making wall panels or niches;
-
wooden planks — if the slats run vertically across the entire wall, the baseboard covers the lower end of the slatted structure;
-
with wooden cornices — when decorating walls in a classic style, the baseboard and cornice form a symmetrical horizontal frame of the space.
This is a systematic approach to finishing, where each element enhances the overall visual effect.
How to attach MDF baseboard to uneven walls
The method of attachment is not a technical nuance, it is a fundamental issue. It is the fastening that determines whether the baseboard will be pressed tightly against the wall or leave gaps on the waves.
Glue: when it is possible, when it is not
What to use to glue MDF baseboard to the wall is a question asked by those who want to avoid drilling. Glue on a smooth and level wall is a perfectly workable option. Acrylic mounting adhesives or special compounds based on synthetic rubber are used.
But on a crooked wall, glue does not solve the problem — it fixes the baseboard in the position in which you pressed it. If there is a gap between the baseboard and the wall at several points, the glue will not correct this gap — it will simply fix it.
When using glue on an uneven wall, temporary fixation technology is mandatory: press the baseboard and secure it with painter's tape until the glue is completely dry (24–48 hours). Even in this case, the result will be unsatisfactory on significant unevenness.
Mounting strip: a professional solution
A mounting strip for MDF baseboard is a metal or plastic profile that is attached to the wall with screws, and the baseboard snaps onto it. The main advantage of this method is that the attachment points of the strip can be adjusted in depth, compensating for the wall's unevenness. The strip is screwed onto all protruding points of the wall, and the baseboard lies along their single level.
This is a professional method used by craftsmen on sites with crooked walls. It is slightly more complex to install, but the result is incomparably better than just glue.
Combined mounting
For tall and rigid baseboards on complex walls, a combination is used: the lower point is attached to the floor or baseboard block, the upper point to the wall. This approach ensures a tight fit both at the bottom and top, even if the wall has a significant slope.
Fastening with self-tapping screws and decorative covering
The classic method is fastening with self-tapping screws through the body of the baseboard, followed by covering the holes with decorative caps or putty matching the baseboard color. For baseboards intended for painting, this is an ideal option: the holes are puttied, sanded, and painted together with the entire surface.
How to properly attach MDF baseboard to the wall with self-tapping screws: the distance between attachment points is 40–50 cm on flat walls, 30 cm on wavy ones. Special attention to corners and ends: the first attachment point should be no further than 10 cm from the corner.
What color of baseboard to choose for uneven walls
This question is not cosmetic. The color of the baseboard affects how noticeable gaps and crevices will be—and this must be considered when choosing.
White baseboard
MDF skirting board for painting in white is the most common choice. But it is the white skirting board that maximally highlights gaps on a dark wall. The reason is high contrast: a dark gap on a white background is visible even with a small width.
White skirting board is optimal where walls are light or white, where installation quality will be high, and where sealing joints with acrylic sealant for painting is intended.
Baseboard in wall color
This is a psychologically correct solution for uneven walls. When the skirting board matches the wall shade, the gap — if any — becomes almost invisible. The eye does not fixate on the transition because there is no contrast. Designers regularly use this technique on problematic projects.
MDF skirting board for painting gives maximum freedom in color selection: it is painted in the same shade as the wall — and the problem is solved.
Wood-look baseboard
Skirting board with wood texture is a natural connecting element for interiors with parquet, wooden doors, solid wood or veneer furniture. In this case, the skirting board visually "belongs" to the floor covering, not the wall, and small deviations near the wall are perceived as part of the texture, not as an installation defect.
Skirting made of solid wood in combination with parquet or wooden mouldings creates a unified tectonics of materials — the interior reads as cohesive and well-thought-out.
What skirting board height to choose for uneven walls
Skirting board height is a parameter that simultaneously affects both aesthetics and installation practice in conditions of crooked walls.
60–70 mm: delicate format
A low baseboard works quietly: it doesn't pretend to be an architectural accent, it just neatly covers the joint. For small spaces and calm interiors, it's the right choice. The downside: it covers less of the lower part of the wall, and if there are uneven spots there, they remain visible.
80 mm: универсальный стандарт
This is the most popular format. It's tall enough to cover most lower wall imperfections without creating visual heaviness in standard rooms. 80 mm is most often chosen for residential apartments, offices, and commercial spaces with standard ceiling heights.
100 mm and above: baseboard as an architectural element
High Wide Wooden Skirting Board — this is no longer just a functional element, but part of the decor. It visually "lowers" the space, makes it cozier, and sets the scale. With ceilings of 2.7–3 meters and higher, a 100–120 mm baseboard looks organic and rich.
An important nuance: the higher the baseboard, the stricter the requirements for installation quality. A tall rigid plank on a wavy wall will create a noticeable gap at the point of maximum deviation. This can only be compensated by using fasteners with a small spacing or by prepping the base.
How to check walls before buying a baseboard
Five minutes of diagnostics is the best investment before heading to the store or placing an order. Here's a short working checklist.
Wall inspection checklist
-
Place a two-meter level or a straight batten against the wall horizontally near the floor. Look at the gap: where and how much does the wall deviate? If the gap is more than 5 mm, it's a critical unevenness for a baseboard without prior preparation.
-
Check the vertical straightness of the wall with the same level, but vertically. If the wall is "leaning," it will cause problems in the corners when cutting the baseboard.
-
Measure the angle between the walls at the bottom. Use a protractor or angle gauge. A deviation from 90 degrees by more than 2–3 degrees will require correction during cutting.
-
Check the floor level difference near the baseboard area: place a level on the floor along the wall and see if there is a slope. If there is, the bottom edge of the baseboard will need to be trimmed horizontally during installation.
-
Determine the thickness of the flooring and decide whether the baseboard will go over it or flush with it. This affects the bottom gap and installation geometry.
-
Look at where the doors and architraves are. The baseboard should neatly meet the architrave in the same plane — otherwise the joint will look ugly. Choose the baseboard thickness accordingly. wooden casings.
-
Decide on the color in advance: baseboard matching the wall, floor, or door color. This choice determines how noticeable any remaining gaps will be.
Mistakes when buying MDF baseboard for curved walls
Let's break down typical mistakes — so you don't repeat them.
Choosing the stiffest profile without checking the walls
A stiff profile cannot be pressed against a wavy wall even with fasteners — it will sit on bumps and create gaps in depressions. Before buying, you need to know the actual profile of your walls.
Choosing white baseboard for a dark wall
A white baseboard against a dark gray or blue wall turns every millimeter of gap into a visible defect. If the walls are dark and not perfect, choose a baseboard in the color of the wall or a neutral gray.
They are installed only with glue on a wavy wall.
Glue fixes but does not straighten. It will hold the baseboard in the position it was in when applied — with all gaps and deviations. For crooked walls, mechanical fastening is needed.
They do not account for corners and junctions with door casings.
They bought the baseboard, brought it, started installation — and discovered that its thickness protrudes beyond the door casing. This means rework or replacement. Measure first, then buy.
Don't account for cutting waste
Each corner consumes 50 to 100 mm of material. If a room has four corners plus two doors, that's 600–800 mm of extra waste. Not allowing a 5–7% margin means you'll be short one strip at the end.
They confuse a baseboard with a soft edge and a regular profile.
A baseboard with a soft edge is not a solution for severely crooked walls, but a help for minor deviations. If you expect a miracle from it, you will be disappointed.
They think the baseboard will fix a crooked wall.
The baseboard covers the joint. It does not level the wall or mask significant defects in the substrate. If the wall is crooked, it needs to be prepared. The baseboard is the final touch, not a masking tool.
They neglect sealant
Even with good installation, small gaps remain — this is normal. Filling with acrylic sealant matching the baseboard color is standard professional practice. White baseboard — white sealant, wood-look baseboard — matching sealant. After painting, the seam becomes invisible.
What to buy together with MDF baseboard
The baseboard is part of the system. If you order it separately, without considering accompanying elements, unpleasant surprises may arise during installation or in the final interior picture.
Fasteners and installation materials
-
Mounting strip or clips — if you choose a hidden fastening method.
-
Dowels and screws for fastening through the baseboard body.
-
Acrylic sealant for filling gaps — matching the baseboard color or paintable.
-
Construction adhesive — as an auxiliary element for combined installation.
Corner and Connecting Elements
-
Internal and external corner caps — for neat corner finishing without cutting.
-
Connector — for joining two planks on a straight section on long walls.
-
End caps — for finishing open ends in openings.
Related moldings and decor
A well-designed interior is built on the unity of materials and proportions. If you have chosen an MDF baseboard, it is wise to immediately consider:
-
Wooden casings on the door — framing the doorway in the same system;
-
Wooden moldings — for creating wall panels or horizontal accent strips;
-
decorative wooden slat — for accent vertical zones on walls;
-
Wooden angle — for neat finishing of external corners;
-
wooden cornice — for completing the vertical slat composition at the ceiling;
-
Skirting made of solid wood — if some rooms you want to finish in a richer material.
All these are elements of a unified finishing system that, when properly selected, work together to create a cohesive and luxurious interior.
MDF baseboard for painting: a separate topic
Baseboards for painting are a separate and very practical segment. The idea is that you get a geometrically precise profile with a primed or prepared surface and paint it any color you want — whether it's the same shade as the wall or a contrasting accent.
MDF baseboard for painting is especially convenient in the following situations:
-
you haven't made a final decision on the interior color yet and want to have the freedom to choose;
-
you plan to repaint the walls periodically and want the baseboard to change color along with them;
-
you are working on a design project with non-standard colors that are not available among ready-made coatings;
-
you want to precisely match the baseboard color with the wall shade to minimize the visibility of gaps.
The technology for painting MDF baseboards is simple: sand the surface with fine sandpaper (240 grit), apply a primer-isolator, wait 24 hours, apply two coats of acrylic interior enamel with intermediate drying. The result is a smooth, uniform surface indistinguishable from a factory finish.
Installing MDF baseboards in corners: how to avoid gaps
Corners are the most challenging area. This is where gaps, spaces, and unsightly joints most often occur.
Classic 45-degree miter cut
This is a standard technique that yields a beautiful result provided the angle is exactly 90 degrees. In practice, angles can be 87–93 degrees. With a classic 45+45 cut, this will result in a gap or overlap.
If the angle differs from 90 degrees, the miter cut angle needs to be adjusted. To do this, measure the actual angle with a protractor, divide it in half, and cut each plank at the corresponding angle. It sounds complicated, but in reality, it's 10–15 minutes of work with a miter saw.
Pre-cut Corner Elements
An alternative is using ready-made corner trims: internal and external corners. These are plastic or wooden elements that simply snap onto the joint of two planks. They compensate for angle inaccuracies and provide a neat appearance without complex cutting. For complex curved walls, this is often the best solution.
Sealant in corners
After installation, a thin layer of acrylic sealant is applied to the corners — it fills any remaining gaps and creates a uniform surface. After drying, the sealant is painted along with the baseboard. This is standard professional practice.
Final CTA: how to make the right decision
If the walls in your room are far from perfect — don't be upset. This is a common situation that most apartment and country house owners face. A properly chosen MDF baseboard for floor with thoughtful fasteners, the right color, and careful installation will yield excellent results even on challenging walls.
The decision-making algorithm is simple:
-
Measure the actual condition of the walls — a straightedge, level, protractor.
-
Determine the type of unevenness: wave, lean, crooked corner, floor drop.
-
Choose the height of the baseboard based on how much of the lower part of the wall needs to be covered.
-
Determine the profile: overlay, straight, or shaped — depending on the interior style.
-
Choose the mounting method: glue — only for flat walls, mounting strip or self-tapping screws — for uneven ones.
-
Determine the color: matching the wall, matching the floor, or contrasting — considering the visibility of gaps.
-
Take a 7–10% margin for trimming.
-
Order accompanying elements: architraves, moldings, corners, connectors.
buy MDF skirting board with Contact us to confirm shipping to your destination. and detailed consultations on profile and fastener selection can be found in the STAVROS catalog.
FAQ: popular questions about MDF baseboards for uneven walls
Which MDF baseboard is best to buy for uneven walls?
The best choice is an overlay MDF baseboard with sufficient height (from 80 mm) and mechanical fasteners spaced 30–40 cm apart. To minimize visible gaps, choose a baseboard matching the wall color or one that can be painted in the same shade. On heavily wavy walls, use a mounting strip and acrylic sealant to fill residual gaps.
Does a skirting board with a soft edge hide uneven walls?
It helps with minor deviations — up to 2–3 mm along the length of the plank. If the wall is wavy with differences of 5 mm or more, the soft edge won't provide a noticeable effect. In such cases, proper fastening and base preparation are more important.
Can MDF skirting board be glued to an uneven wall?
Glue is an auxiliary tool, not the main one on an uneven wall. It fixes the skirting board in the position it ended up in during installation. If there are gaps, glue won't close them. On wavy walls, mechanical fastening is needed: a mounting bracket or self-tapping screws with a step of 30 cm.
What color of skirting board minimizes the visibility of gaps?
A skirting board in the color of the wall is the safest solution. A contrasting white skirting board on a dark wall makes any gap noticeable. A paintable skirting board offers maximum freedom: it is painted in the exact shade of the wall, and residual gaps visually disappear.
Is it necessary to level the walls before installing the skirting board?
If the differences are more than 5–7 mm per linear meter, it's better to level the lower zone of the wall: 10–20 cm of putty will drastically simplify installation and improve the result. If the differences are within 3–4 mm, they are compensated by fasteners with a small step and sealant.
How does MDF skirting board differ from wooden skirting board?
MDF skirting board is made from fiberboard by pressing — it is cheaper, more stable in geometry, and holds its shape better under conditions of humidity fluctuations. Wooden baseboard made of solid oak or beech — this is natural wood with a unique texture, a higher price, and the possibility of repeated restoration. For interiors with natural materials, a solid wood baseboard is preferable; for budget and standard projects, MDF is better.
How to calculate the amount of baseboard for a room?
Measure the perimeter of the room, subtract the width of all doorways. Add 7–10% for cutting at corners and joints. If the room is 4×5 meters with one door 900 mm wide, the perimeter is 18,000 mm, minus 900 mm for the opening = 17,100 mm + 10% reserve = approximately 19 linear meters.
How to design the joint between the baseboard and the door casing?
The end of the baseboard is cut cleanly and placed flush against the end of the casing. If both elements have good geometry, the joint will be neat. If there is a small gap, it is filled with acrylic sealant matching the material color. Wooden casings STAVROS are produced in the same profiles and sizes as baseboards — this simplifies fitting.
About the company STAVROS
When choosing a baseboard for uneven walls, it is important to deal with a manufacturer that has real experience and an understanding of the nuances of finishing materials.
The STAVROS company has been operating since 2002. The history began with a workshop of two artist-carvers who were invited to the reconstruction of the Constantine Palace in Strelna. Since then, STAVROS has completed projects in the Hermitage, the Alexander Palace, the Trinity-Izmailovsky Cathedral, and dozens of private mansions and commercial properties throughout Russia.
Today, STAVROS is a full-cycle production with showrooms in St. Petersburg and Moscow. The assortment includes MDF Skirting Board, Skirting made of solid wood, Trimming Items, Wooden planks, Moldings, Casings and a full range of decorative moldings made of oak and beech.
Over 264 reviews with a 5.0 rating. Shipping from one piece. Contact us to confirm shipping to your destination. and CIS countries. Free consultation on profile, color, and fastener selection.
STAVROS is a manufacturer that understands the difference between a baseboard that simply lies against the wall and one that looks like part of a professional interior.