Article Contents:
- Mistake #1: buying stucco without a purpose
- How to properly define the purpose before buying
- One purpose — one result
- Mistake #2: choosing moldings only from catalog photos
- What you actually need to consider when choosing moldings
- Practice: how to 'try on' a molding before buying
- Mistake #3: not calculating the quantity of moldings and forgetting about the reserve
- Corners: every corner is a loss
- Trimming and fitting
- Defects and installation errors
- Length mismatches and leftovers
- How much to take as a reserve
- Why buying more later is worse than having a reserve
- Mistake #4: buying a ceiling rosette that doesn't match the chandelier
- Key parameters for choosing a rosette for a chandelier
- Typical story: a "beautiful rosette" from a catalog
- Ceiling rosette and cornice: don't forget about the distance
- Mistake #5: buying decorative molding without a specific place
- Five most effective spots for decorative molding
- How not to buy decorative molding in vain
- Paired overlays and symmetry: a special case
- Mistake #6: not buying glue and consumables in one order
- Complete list of consumables needed for molding installation
- Molding stock is also a consumable
- Ready checklist for ordering molding
- Mistake #7: mixing incompatible molding styles
- How to ensure stylistic unity
- Mistake #8: ignoring the connection between walls and ceiling
- How to connect walls and ceiling into a single system
- Mistake #9: underestimating painting as the final stage
- How to paint molding correctly
- Mistake #10: buying molding 'for growth' without a real plan
- Mistake #11: not using molding as a system, but buying scattered elements
- How to calculate molding before purchase: step-by-step algorithm
- Step one: define tasks
- Step two: choose elements for each task
- Step three: calculate the quantity
- Step four: add consumables
- Step five: check style compatibility
- FAQ: самые частые вопросы перед покупкой лепнины
- About the Company STAVROS
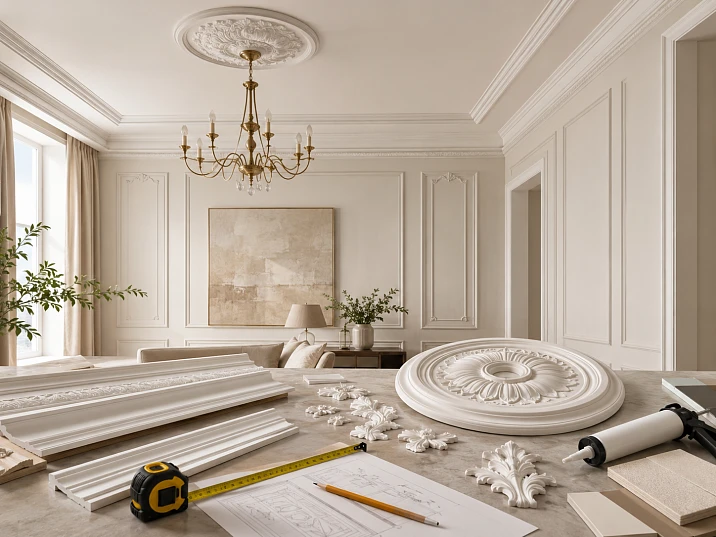
Ремонт подходит к концу. Стены покрашены, мебель выбрана, освещение продумано — и тут приходит идея добавить лепнину. Молдинги на стенах, розетку под люстру, может быть, декоративные накладки над зеркалом. Открываете каталог — красиво. Добавляете в корзину то, что понравилось. И вот здесь начинается самое интересное.
Молдинги куплены — оказались слишком узкими, их почти не видно на стене. Розетка выбрана по красивому фото — в реальности вдвое больше люстры и занимает полпотолка. Декоративная накладка лежит на полке три месяца, потому что непонятно, куда её вообще клеить. Клей не куплен. Краски нет. Начинать монтаж невозможно, а делать повторный заказ — значит ждать ещё неделю и тратить деньги дважды.
Всё это реальные, распространённые ошибки при покупке лепнины. И почти каждая из них устраняется одним простым способом: думать до покупки, а не после. Именно об этом — данная статья.
Здесь не будет абстрактных советов. Только конкретные ошибки, конкретные последствия и конкретные решения. Сохраните её перед заказом — она сэкономит вам время, деньги и нервы.
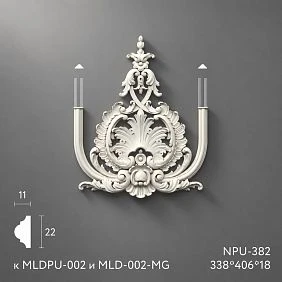
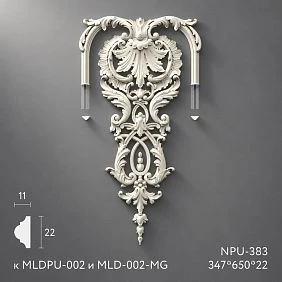


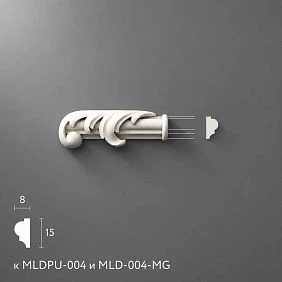
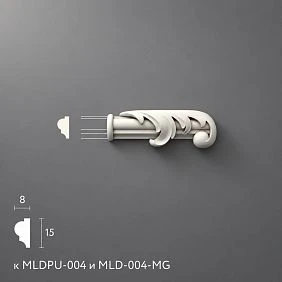
Ошибка №1: покупать лепнину без задачи
Это самая распространённая и самая дорогостоящая ошибка. Человек видит красивый элемент в каталоге — картуш с орнаментом, широкий рельефный молдинг, пышную потолочную розетку — и покупает, потому что красиво. Задача не сформулирована. Место не определено. Стиль не согласован.
Результат предсказуем: декор куплен, но не работает. Розетка лежит в коробке, потому что оказалась слишком крупной. Накладка висит в неправильном месте и выглядит случайным украшением. Молдинг смонтирован, но не сочетается с мебелью. Деньги потрачены, эффект — нулевой.




Как правильно формулировать задачу перед покупкой
Before to buy molding, ответьте себе на один вопрос: что именно нужно оформить? Это не риторика — это конкретный список возможных задач, и каждая из них требует своего решения.
Task: frame a wall with borders. Solution — moldings. Specific profile, specific width, specific footage calculation.
Task: frame a chandelier. Solution — ceiling rosette. Specific diameter, specific style to match the light fixture.
Task: decorate the ceiling along the perimeter. Solution — ceiling cornice. Specific profile height, calculation based on room perimeter.
Task: add an accent above the mirror. Solution — decorative overlay. Specific size to match the mirror width.
Task: create a finished headboard area in the bedroom. Solution — moldings for the frame plus overlays in corners or center.
Task: connect walls and ceiling into a unified system. Solution — moldings on walls, cornice at the wall-ceiling junction, rosette in the center of the ceiling.
See the difference? When the task is defined, all subsequent choices become logical and consistent. You are not looking for "something beautiful" — you are looking for a specific element for a specific place with a specific function.
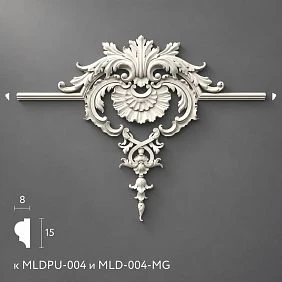
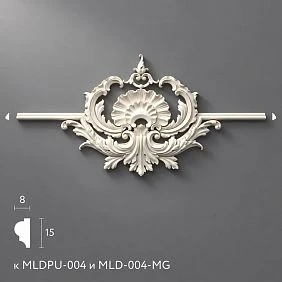
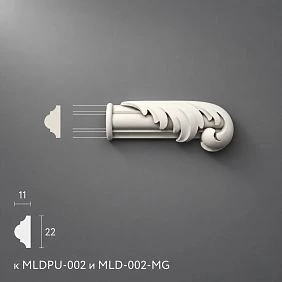
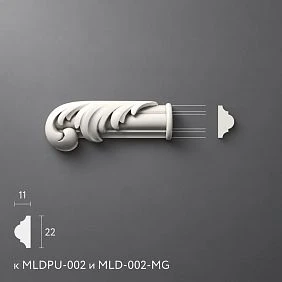
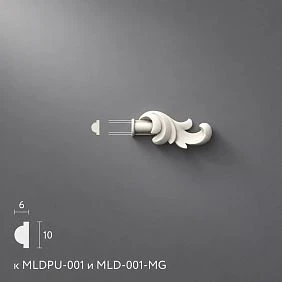
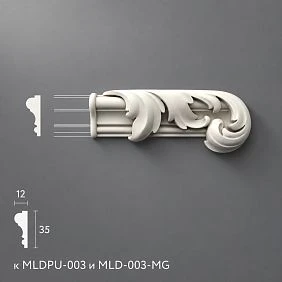
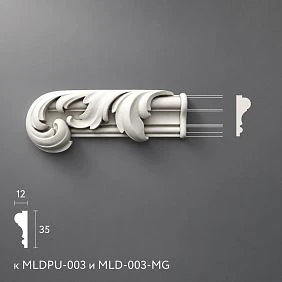
Our factory also produces:

One task — one result
Another important point: do not try to solve all tasks in one order if the renovation is not yet finished. Decor bought before the final finishing stage often turns out to be unsuitable — because the furniture is not yet arranged, the lighting is not installed, and the actual picture of the wall is still unknown.
The one-task rule: first complete rough and finishing work, arrange furniture, hang curtains. Then look at the finished space and decide what decor it needs. This way you will buy exactly what you need — and nothing extra.
Get Consultation
Mistake #2: choosing moldings only from catalog photos
A photo in a catalog is always ideal conditions. A large room, high ceilings, professional lighting, the right angle. The molding in the photo looks wide, expressive, solid. The same molding in your apartment with a 2.5-meter ceiling may turn out either too thin and unnoticeable, or too wide and bulky.
This is not the catalog's fault or the manufacturer's mistake. It's a problem of perception without context. The photo doesn't show proportions. Only real sizes and calculations for your room matter.
What you actually need to consider when choosing moldings
Moldings made of polyurethane are selected based on several parameters simultaneously. Miss even one, and the result may disappoint.
Ceiling height. This is the main parameter. With a 2.5 m ceiling, the most comfortable width for frame decor moldings is 25–35 mm. Perimeter cornice — up to 50 mm. With a 3 m ceiling, you can work with profiles 35–55 mm for frames and 60–80 mm for cornices. With a 3.5 m ceiling and higher, the range expands significantly.
Wall size. The molding should be proportionate to the wall. On a 4 × 2.5 m wall, frames made of 15 mm molding look like a pencil sketch — barely noticeable. Frames made of 40–50 mm molding will give a normal expressive result.
Room style. A smooth profile is for modern interiors. A relief profile is for classic and neoclassical styles. An overly ornate molding in a minimalist apartment looks like a foreign element.
Distance between frames and from the frame to the ceiling and floor. This affects the visual breathing of the space. Frames should have clear margins: from the ceiling — at least 15–20 cm, from the floor — at least 30 cm, between frames — 5–10 cm.
Paint color. A molding painted the same color as the wall creates an embossed effect — it is less noticeable but elegant. A white molding on a colored wall is a contrasting accent. This changes the perception of width: a thin white molding on a dark wall looks more significant than the same molding painted to match.
Practice: how to "try on" molding before buying
There's a simple trick: cut a strip of thick paper or cardboard of the desired width (e.g., 30 mm or 40 mm) and 50–60 cm long. Hold it against the wall where the molding will go. Take a photo. Look at the photo. It becomes much clearer.
This trick is especially useful when choosing the width of molding for frame decor. Five minutes with a cardboard strip — and you'll know for sure whether you need a 25 mm profile or a 40 mm one.
buy polyurethane moldings the right width is the first step to a result that will look exactly as intended.
Mistake #3: not calculating the amount of molding and forgetting about the reserve
It seems simple: measure the wall, calculate the meters — done. But this is where people most often underestimate. They buy exactly as much molding as needed "in theory." In practice, it's not enough.
Why? Because the actual consumption of molding is always greater than the theoretical one. Let's see where the footage "goes."
Corners: each corner is a loss
Molding is cut at 45-degree angles at corners. When cutting, each corner "consumes" a segment of molding equal to its width. A frame made of 30 mm wide molding — each of the four corners consumes 30 mm. Total for just the corners of one frame: 4 × 30 mm = 120 mm. That's almost 0.5 meters of additional consumption for one frame that people simply don't account for.
Multiply this by 6–8 frames on a living room wall — and you get several meters of "unaccounted" material.
Trimming and fitting
During installation, it is often necessary to trim pieces for precise fitting. Each trim results in a loss of 2 to 10 cm. It may seem trivial. But if there are many frames and the molding comes in 2-meter pieces, fitting creates accumulated waste that is not accounted for in the basic calculation.
Defects and installation errors
Even an experienced craftsman occasionally makes an incorrect cut. Beginners do it more often. One incorrectly trimmed piece — and that part of the molding goes to waste. Without a reserve, installation will stop until the next batch arrives.
Length mismatches and leftovers
Moldings are sold in standard lengths — usually 1, 2, or 3 meters. Your frames have their own sizes. When cutting, leftovers inevitably appear that are not suitable for the next piece. Without a reserve, these leftovers cannot be used, and a shortage occurs.
How much to keep in reserve
Rule for moldings: reserve 15–20% of the calculated length. For complex configurations (many frames, non-standard angles, complex intersections) — up to 25%.
Example: a wall with six frames, total molding length 24 m. Reserve 20%: 24 × 1.2 = 28.8 m. Order 30 meters. This reserve will not be wasted: leftovers will be used for additional elements or stored for repairs.
Why reordering is worse than having a reserve
There is another argument in favor of having a reserve: batch consistency. Polyurethane moldings are produced in batches, and the shade of white may vary slightly from batch to batch. The difference is only noticeable when compared directly—but on a mounted wall, it can stand out. If you buy all the material from the same batch, this problem does not exist.
Mistake #4: choosing a ceiling rosette that does not match the chandelier
A ceiling rosette is the framing for a chandelier. It works together with it, as a pair. If the rosette is chosen without considering the chandelier, the result can be one of two types: the rosette is too small (the chandelier "covers" it, and the rosette is barely visible) or the rosette is too large (it dominates the chandelier and looks like an independent decorative object unrelated to the light fixture).
Both situations are mistakes. Both can be resolved if you choose correctly.
Key parameters for choosing a rosette for a chandelier
Chandelier diameter. This is the starting point. The diameter of the rosette should be 1.5–2 times larger than the diameter of the upper part of the chandelier (base, basket). If the chandelier base is 15 cm, the rosette should be 25–30 cm. If the base is 25 cm, the rosette should be 40–50 cm.
Room area. The more spacious the room, the larger the rosette should be—otherwise, it gets lost in the space. For a bedroom of 14 sq. m, a rosette of 35–45 cm. For a living room of 25 sq. m, 55–70 cm. For a large living room or hall, from 70 cm.
Ceiling height. With a ceiling of 2.5 m, a 70 cm rosette will look bulky. With a ceiling of 3.5 m, the same rosette is just right. Height affects the perceived scale.
Chandelier style. A modern chandelier made of metal and glass—a minimalist rosette with a geometric profile. A classic chandelier with crystal and gilding—a rosette with floral ornamentation. Industrial style (loft)—possibly no rosette at all or a minimal geometric element.
Is there a ceiling cornice. If Ceiling molding already exists around the perimeter, the rosette must match its style. A strict cornice — a rosette with a geometric pattern. A relief ornamental cornice — a rosette with a matching relief.
A typical story: a "beautiful rosette" from a catalog
A person chooses ceiling outlet 80 cm in diameter for a 16 sq m bedroom with a 2.6 m ceiling. In the catalog photo, it looks luxurious — in a large room with a 3.5 m ceiling. In the actual bedroom, the rosette takes up a third of the visible ceiling and overwhelms the entire space. The chandelier under it looks small and out of place.
Solution: before buying, take a construction compass or a cord and draw a circle of the desired diameter directly on the ceiling. See how it looks from different points in the room. Five minutes — and you'll know for sure whether an 80 cm rosette suits you or you need a 55 cm one.
Ceiling rosette and cornice: don't forget about the distance
Another specific mistake: a rosette of such a diameter that, with a ceiling cornice, the distance from the edge of the rosette to the cornice is less than 20 cm. This visually "overwhelms" the ceiling — it looks overloaded. Be sure to check this distance before purchasing.
Buy ceiling molding — the cornice and the rosette — better at the same time, after checking the dimensions and making sure they coexist normally on your ceiling.
Mistake #5: buying decorative molding without a specific place
A decorative overlay is an accent. An accent only exists in context. Without context — without a specific place, a specific object, a specific zone — the overlay is just a beautiful item in a box.
This is a special kind of mistake: a person didn't buy something unnecessary, they bought a necessary item without a plan for its use. And now they either hang it somewhere random (and it looks out of place), or they don't hang it at all (and it gathers dust in the closet).
The five most effective places for decorative molding
Above the mirror. This is a classic that works flawlessly. An elongated horizontal medallion or cartouche above the mirror creates a complete decorative zone. The width of the overlay is 60–80% of the mirror's width.
In the corners of a molding frame. Corner overlays transform a molding frame from a geometric shape into an architectural decorative element. They cover the joints in the corners and add an ornamental accent.
Above the door frame. The area above the door has long been used in classic interiors for stucco decoration. One cartouche or horizontal medallion — and the door frame gains completeness.
Above the headboard of the bed. A small overlay in the center of the wall above the bed creates an axis for the sleeping area. This works even in a modern interior — provided the overlay is concise and not too large.
On a furniture facade. Decorative stucco on the facades of a dresser or cabinet — this is a technique that turns standard furniture into a stylish piece. Small overlays on the doors, painted to match the furniture — elegant and inexpensive.
How not to buy decorative molding in vain
Before purchasing, determine the location. Measure the object the overlay will work with (mirror, frame, door). Choose the size according to the proportion. Only then — go to the catalog.
buy decorative moldings For a specific place — this is not a limitation, it's a guarantee of results. An overlay bought for a specific mirror or specific frame will work. An overlay bought "because it's beautiful" will just sit there.
Paired overlays and symmetry: a special case
A separate story is paired overlays. If you want to create a symmetrical area (two sconces on each side of the bed, two overlays on each side of the mirror, symmetrical decor on two cabinet doors) — make sure you choose exactly paired L/R elements, not identical single ones. These are different products: paired ones are mirrored, single ones are identical.
Buy Moldings in the form of L/R pairs — means immediately getting a ready-made symmetrical solution without needing to pick a "similar" second element.
Mistake #6: not buying glue and consumables in one order
This is the most trivial and most frustrating mistake. The stucco is bought. The moldings are at home. The rosette is in place. And suddenly it turns out there is no glue. Or there is glue, but no sealant. Or no suitable paint. Or no painter's tape. Or no miter box for cutting corners.
Installation gets delayed. You have to place another order or go to a hardware store separately. Extra time and money spent — even though all of this could easily have been ordered in one set.
Full list of consumables needed for stucco installation
Acrylic mounting glue. The foundation. Without it, installation is impossible. Consumption: one tube of 300–400 ml per 10–15 meters of molding or per one rosette up to 60 cm in diameter. For large volumes — several tubes with a reserve.
Acrylic sealant. Needed for sealing joints of molding at corners and along the edge of a rosette or overlay. Without sealant, joints look unfinished. Consumption: 1 tube per 15–20 meters of molding and 2–3 rosettes or overlays.
Painter's tape. Needed for temporary fixation of moldings and trims until the glue sets. Also needed for separate painting of the molding and the wall.
White acrylic paint. Finish painting is always needed — even if the molding is white, it must be coated with the same paint as the ceiling or wall to match the shade. Consumption is low, but if there is no paint, the finish is delayed.
Thin brush. For painting relief areas. A roller does not reach into the recesses of the ornament.
Miter box or corner template. For precise cutting of moldings at 45 degrees. Without a miter box, making an even corner is extremely difficult.
Level and tape measure. For accurate marking of frames and placement of trims.
Spare moldings — also a consumable
We already mentioned this in the third mistake, but we will repeat it in the context of consumables: a material reserve is a mandatory item in the order, not optional. 15–20% above the calculated footage. This is not an overpayment — it is insurance.
Ready checklist for ordering stucco
Before placing an order, go through this list:
-
Moldings of the required width and profile (with a 15–20% reserve)
-
Ceiling rosette of the required diameter (if needed)
-
Decorative overlays for specific locations (with specified dimensions)
-
Ceiling molding For the cornice (if needed, calculated by perimeter + 10% margin)
-
Mounting adhesive (with extra)
-
Acrylic sealant
-
Painter's tape
-
White acrylic paint
-
Thin brush
If anything from this list is missing — add it to the order now, not later.
Mistake #7: mixing incompatible stucco styles
This is a taste mistake, and it happens more often than it seems. A person buys smooth minimalist wall moldings — and pairs them with a lush Baroque ceiling rosette with acanthus leaves. Or chooses strict classical moldings with a meander pattern — and overlays in Provence style with delicate floral garlands.
Each of these elements is good on its own. Together, they create a stylistic mess that the eye catches immediately — even without special design knowledge. It's just 'something is off,' and the person can't explain what.
How to ensure stylistic unity
Simple rule: all stucco elements in one room should speak the same "language." This doesn't mean you need to buy everything from the same series (though that's easier). It means the ornamental style should be unified.
Smooth and geometric moldings → smooth or geometrically ornamented rosette → laconic overlays without floral ornament.
Relief moldings with a classic profile → rosette with matching relief → decorative stucco with classic ornament (leaves, scrolls, meander, ionics).
Moldings with geometric Art Deco ornament → rosette with radial or concentric pattern → overlays with geometric motif.
If you're unsure — stick to one series from one manufacturer. This guarantees stylistic compatibility.
Mistake #8: ignoring the connection between walls and ceiling
A common picture: walls are beautifully decorated with molding frames, while the ceiling is empty. Or vice versa, the ceiling has a cornice and rosette, but the walls are bare. Two well-executed decors that exist in parallel and don't communicate with each other.
This isn't a disaster, but it's a loss of potential. An interior with a coordinated vertical solution — from floor to ceiling — is perceived an order of magnitude higher than the same interior with unconnected planes.
How to connect walls and ceiling into a unified system
Ceiling cornice as a transitional element. Buy ceiling molding In the form of a cornice means creating a clear transition between vertical and horizontal planes. The cornice brings walls and ceiling together into a single "box".
Consistent profile of moldings and cornice. If the moldings on the walls are smooth, the cornice is also smooth. If they are embossed, the cornice has a matching relief. This does not require the same ornament, but it does require the same "character".
Rosette as the completion of the ceiling theme. Cornice around the perimeter + rosette in the center = a finished ceiling. Between them is a clean surface that works like the space between a frame and a medallion in classical painting.
One practical tip: if the budget is limited, first decorate the walls with moldings — this has the most noticeable effect. The ceiling cornice is the second step. The rosette is the third. These are three separate, sequential decisions, each improving the result of the previous one.
Mistake #9: underestimating painting as the final stage
Good stucco was bought. It was installed correctly. And then — the final result disappoints. Why? Because the moldings are not painted, or painted unevenly, or the relief is not painted in the recesses, or the white molding with a yellowish tint does not match the cold white ceiling.
Painting is the final chord that either completes the work or exposes all its flaws.
How to paint stucco correctly
Always paint together with the surface. Moldings, overlays, and rosettes are painted simultaneously with the wall or ceiling — in one go, with the same paint. This ensures a uniform tone.
Paint the relief with a brush. A roller provides an even coating on flat surfaces but does not reach into the recesses of the ornament. A thin brush is an essential tool for painting relief moldings and overlays.
Two thin layers are better than one thick one. A thick layer of paint "fills in" the relief and blurs the details of the ornament. Two thin layers with intermediate drying (2–4 hours) provide an even matte finish that preserves the clarity of the relief.
Watch the tone. If the moldings should be the same tone as the wall or ceiling, use the same paint, not an "approximately similar" one. A difference of 1–2 tones is noticeable on a mounted surface.
Don't rush with the chandelier. The rosette must be completely painted and dry (at least 24 hours after the last coat) before installing the chandelier. Otherwise, you will either have to remove the light fixture or paint around it, which creates additional difficulties.
Mistake #10: buying stucco "for growth" without a real plan
Sometimes a person buys many moldings, several overlays, and a rosette — with the expectation of "decorating all rooms later." Later rarely comes. The moldings lie around for six months. During this time, the plan, furniture, or wall color may change, and the purchased profile no longer fits.
Stucco, especially moldings, is best purchased for a specific project. If several rooms are planned, calculate each one separately and order in stages: first the living room, then the bedroom, then the hallway. This way, you don't freeze money in materials and don't risk being left with an unsuitable stock.
Mistake #11: not using stucco as a system, but buying disparate elements
One molding on one wall. One overlay somewhere unclear. A rosette without a cornice. A cornice without moldings on the walls. Each element is beautiful on its own, but together they do not create a system.
Stucco works as an architectural system, not as a set of individual decorations. When moldings, cornice, rosette, and decorative overlays are chosen consistently and applied sequentially, the result exponentially surpasses the sum of the individual elements.
Good decoration system:
-
Moldings made of polyurethane for wall frame decor
-
Cornice made of ceiling moldings along the perimeter of the ceiling
-
Ceiling rosette in the center of the ceiling
-
Decorative overlays as point accents
Four elements. One system. The result is an interior that looks professional and expensive.
How to correctly calculate molding before purchase: step-by-step algorithm
To put it all together, here is an algorithm that will help you place the right order without mistakes.
Step one: define tasks
Write down a list of tasks:
-
What are you decorating (walls, ceiling, chandelier, mirror, furniture)?
-
Which rooms?
-
What interior style?
-
What is the ceiling height?
-
What is the area of the premises?
Step two: select elements for each task
For each task — a specific type of product:
-
Wall with frames — moldings
-
Ceiling perimeter — cornice made of ceiling stucco
-
Ceiling center — rosette
-
Accent above the mirror — decorative overlay
-
Frame corners — corner overlays
Step three: calculate the quantity
Moldings for frames: draw a wall plan, mark the frames, calculate the perimeters of all frames, add 15–20% reserve.
Perimeter cornice: measure the room's perimeter, add 10% spare.
Rosette: determine the diameter from the table (room area, ceiling height, chandelier diameter).
Overlays: select specific locations, choose size for each location.
Step four: add consumables
Glue, sealant, tape, paint — all of this goes into the cart along with the main order.
Step five: check style compatibility
All elements — moldings, rosette, overlays, cornice — must share the same stylistic 'language'. Check this before placing the order.
FAQ: most common questions before buying stucco molding
How to avoid mistakes when buying polyurethane stucco molding?
First, determine the purpose and location for each element. Then — size, style, quantity, spare, and consumables. Never buy stucco molding based on 'looks nice in the photo'.
How many moldings are needed per wall?
Calculate the total perimeter of all planned frames. Add 15–20% for corners, trimming, and reserve. The result is your ordered footage.
Is a reserve of moldings needed?
Absolutely. At least 15% of the calculated footage. Better 20%. Reserve is needed for corners, trimming, joints, and possible installation errors.
How to choose the width of the molding?
Consider the ceiling height. Ceiling 2.5 m — molding for frames 20–35 mm, for cornice up to 50 mm. Ceiling 3 m — frame molding 35–55 mm, cornice up to 80 mm.
How to choose a ceiling rosette for a chandelier?
The diameter of the rosette is 1.5–2 times larger than the diameter of the chandelier base. Additionally, consider the room area and ceiling height.
What to buy together with stucco?
Mandatory: mounting glue, acrylic sealant, painter's tape, white paint, thin brush. Optional: miter box for trimming, level, tape measure.
Can moldings from different series be combined?
Yes, if they share the same stylistic 'language' — for example, all smooth and geometric or all with a classic floral ornament. Mixing styles (classic + minimalism) creates visual dissonance.
Where does decorative stucco look best in an apartment?
Above the mirror, in the corners of molding frames, above a console, above the headboard of a bed, above a doorway, on furniture facades — everywhere there is a specific object or area that the overlay works with.
Is it necessary Ceiling molding, if moldings are already on the walls?
Preferably. A cornice at the junction of the wall and ceiling "stitches" the two planes into a single system. Without it, the walls and ceiling exist separately.
Can you install polyurethane stucco yourself?
Yes. Installation is accessible with basic skills: glue, sealant, marking, a miter box for cutting corners. The main thing is accuracy and the correct sequence of actions.
About the company STAVROS
When the mistakes when buying stucco are sorted out, when the task is formulated, the dimensions are calculated, and consumables are included in the list — all that remains is to find the right supplier. STAVROS is a Russian company with a wide range of decorative polyurethane products for residential and commercial interiors.
In the Stavros catalog — Moldings made of polyurethane of various profiles and widths, ceiling rosettes from compact to large representative ones, Ceiling molding for cornice design and Decorative stucco in the form of overlay elements for walls and furniture. All products are made of high-quality polyurethane with a clear relief and stable dimensions, ready for installation and painting.
STAVROS works with Contact us to confirm shipping to your destination. If you are unsure about your choice, the company's specialists will help you select the right set of decor for your task, calculate the footage, and assemble a complete order without errors. Stucco looks expensive precisely when chosen without mistakes — and STAVROS helps achieve that.