Article Contents:
- The philosophy of layering: why one material is no longer sufficient
- Material base of the first layer: solid wood and its alternatives
- Second layer: polyurethane decor as architectural sculpture
- Composition design: the mathematics of beauty and visual axes
- Color strategies: from contrast to monochrome
- Installation of the first layer: technology for mounting wooden panels
- Installation of the second layer: mounting polyurethane overlays
- Practical scenarios: two-layer finishing in different rooms
- Durability and care of the two-layer system
- STAVROS: comprehensive solutions for multi-layer interiors

The wall in a modern interior has definitively ceased to be a neutral background for furniture and accessories. In 2026, professional designers view the wall as an independent architectural object, a multi-layered composition where each level serves its own purpose while simultaneously contributing to the overall visual effect. The most expressive and technologically refined technique is the two-layer finishing system, where a textured base of wooden panels is complemented by relief decor made of polyurethane. This combination creates spatial depth, tactile richness, and visual complexity unattainable by painting, wallpaper, or monolithic wood cladding alone. Wood brings organic warmth and natural texture, while polyurethane adds architectural precision and classical ornamentation. Together, they form a new standard for wall design, where beauty is inseparable from functionality, and traditional materials receive a modern interpretation through layering, interplay of textures, and the spatial depth of the composition.


The philosophy of layering: why one material is no longer sufficient
Monolithic wood wall cladding from floor to ceiling creates a feeling of a log cabin or a Scandinavian sauna — natural, eco-friendly, but visually monotonous and static. The eye has nothing to catch onto, the space becomes homogeneous, devoid of visual accents and rhythmic structure. Painted walls with polyurethane decor, for all their sophistication, remain flat, two-dimensional, lacking the material depth provided by natural wood. The two-layer system combines the advantages of both approaches and neutralizes their shortcomings.Solid wood panelsform the basic structure with natural texture and tactile warmth, whilePolyurethane appliquésadd the final visual accents with the architectural precision of ornaments.
The fundamental difference between a two-layer system and a simple combination of materials lies in hierarchy and spatial layering. The first layer — wooden panels — occupies a specific zone of the wall, most often the lower third with a height of ninety to one hundred twenty centimeters, forming a so-called wainscot or panel zone. Between the upper edge of the wooden panels and the ceiling, there remains an intermediate zone — a painted or wallpapered wall, which serves as a visual buffer and background. The second layer — polyurethane overlays — is placed on top of this intermediate zone, creating relief accents. This layered construction forms visual depth: the wall is perceived not as a plane, but as a sequence of planes — the base material of the wall, the wood cladding, the painted background, the relief decor. Each plane has its own texture, color, materiality, and their interaction creates a complex, multi-dimensional perception of space.
This layering corresponds to a fundamental principle of architectural thinking — dividing the large into the small, creating a hierarchy from the general to the specific. The wall as a large plane is divided into zones vertically — the panel part, the middle part, the upper part near the ceiling. Each zone receives its own treatment. The panel part is subdivided into individual wooden panels or raised panels, creating a horizontal or vertical rhythm. The middle part is organized by placing polyurethane overlays with a certain spacing and symmetry. The upper part is finished with a cornice or frieze. This multi-level division creates visual musicality — rhythm, pauses, accents, climaxes. The space begins to resonate, not merely exist as a neutral container for furniture.


Material base of the first layer: solid wood and its alternatives
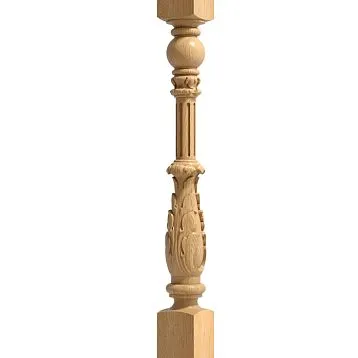
The choice of material for wooden panels is determined by the project budget, stylistic requirements, and practical operating conditions. Solid wood of noble species — oak, ash, walnut, beech — represents the benchmark solution for classical and neoclassical interiors, where the natural beauty of the wood is a valuable design element in itself. Oak panels have a pronounced, large texture with clear annual rings, high density of seven hundred kilograms per cubic meter, and exceptional durability. Oak is resistant to humidity after proper drying and treatment, is not afraid of mechanical loads, and acquires a noble patina over the years. Ash demonstrates an even more contrasting texture with lower density; its light silvery hue is ideal for Scandinavian and modern interiors. Walnut brings a dark, noble palette with beautiful grain patterns, creating an atmosphere of luxury and solidity. Beech is distinguished by a uniform, fine texture of a pinkish tone and plasticity during processing, allowing for the creation of complex curved elements.
High-density European MDF with veneer from noble wood species represents a reasonable compromise between the aesthetics of solid wood and the stability of an engineered material. MDF does not warp from humidity fluctuations, maintains perfect geometry, and allows for milling complex profiles with high repeatability. Veneer of oak, walnut, or ash with a thickness of one and a half to two millimeters provides visually the same natural texture as solid wood, but at a significantly lower cost and greater technological efficiency. High-quality MDF with a density of seven hundred fifty to eight hundred fifty kilograms per cubic meter lasts for decades without deformation, and the veneered surface after varnish or oil coating is practically indistinguishable from solid wood.
MDF for enamel painting opens up possibilities for modern monochrome interiors, where the natural wood texture is less important than geometric purity of forms and perfect surface smoothness. After multi-layer priming and sanding, MDF accepts enamel in such a way that the surface becomes akin to ceramics — absolutely smooth, dense, without the slightest pores. Painted panels can be white, gray, graphite, colored — the palette is limited only by the designer's imagination. This solution is ideal for neoclassicism, art deco, and modern styles, where classical wall architecture is combined with a contemporary color interpretation.
The thickness of wooden panels influences the visual weight of the composition and mounting solutions. Thin panels of ten to twelve millimeters made of veneered MDF create a light, almost graphic structure, minimally protruding from the wall plane. Such panels are mounted with adhesive directly onto a leveled wall, forming an almost flat surface with delicate seams between elements. Medium panels of eighteen to twenty-two millimeters made of solid wood or MDF are a universal solution, providing sufficient visual mass without excessive heaviness. Installation is done on battens or with adhesive, depending on the evenness of the base wall. Thick panels of thirty to forty millimeters made of solid wood create a pronounced relief, a powerful architectural structure characteristic of palace interiors. They are attached to a wooden batten frame, forming an air gap between the panel and the wall, which improves sound insulation and allows for concealing irregularities of the base wall.
The surface treatment of wooden panels radically affects visual perception. A smooth, sanded surface under clear varnish or oil showcases the natural beauty of the wood in its entirety — each annual ring, each natural grain pattern becomes part of the visual design. Glossy varnish creates a mirror-like surface with deep illumination of the texture, characteristic of palace interiors and high-style classicism. Matte oil preserves the natural tactility of the wood, allows one to feel the wood's texture upon touch, and creates a more intimate, cozy atmosphere. A brushed surface with mechanically revealed structure — soft early wood fibers removed with a metal brush, hard late wood forming a tactile relief — enhances the visual and tactile activity of the wood, making it the central element of the composition. A patinated surface with artificial aging through the application of contrasting dyes into the wood pores creates an effect of antique furniture, which is in demand in Provencal, country, and vintage interiors.
Our factory also produces:

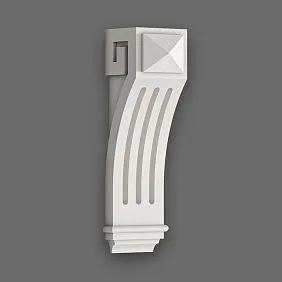


Second layer: polyurethane decor as architectural sculpture
Polyurethane as a material for decorative overlays possesses a unique combination of properties unattainable by traditional materials. High relief detail allows for reproducing the finest ornaments with elements as thin as one to two millimeters, which is impossible in plaster or wood without the risk of chipping. Absolute geometric stability means the overlay does not deform from humidity, temperature, or time — after twenty years, it will retain the same clarity of relief as on the day of installation. Low weight simplifies mounting and reduces the load on the wall — a large rosette with a diameter of sixty centimeters weighs three hundred to five hundred grams compared to several kilograms for a plaster equivalent. Moisture resistance allows the use of polyurethane overlays even in bathrooms and kitchens, where plaster would deteriorate from condensation.
The typology of polyurethane overlays encompasses the entire arsenal of classical architectural ornamentation. Rosettes — round or polygonal centric compositions with diameters from fifteen to eighty centimeters — serve as the main focal points. A rosette is placed in the center of the panel composition or symmetrically relative to the vertical axis of the wall, attracting the eye with a complex interweaving of floral or geometric motifs. A classical rosette may include several concentric circles of ornament — an inner one with fine details, a middle one with large palmettes, an outer one with a laurel wreath. A Baroque rosette is distinguished by asymmetrical, dynamic swirls, creating an impression of rotation. An Empire-style rosette includes military symbolism — swords, torches, shields, eagles.
Medallions — oval or rectangular compositions of elongated form — are suitable for vertical or horizontal accents. A vertical medallion is placed above a doorway, between two narrow wooden panels, or in a wall section between windows. A horizontal medallion forms a frieze above the panel zone, creating a continuous ornamental band around the room's perimeter. Corner elements — specific L-shaped overlays decorated on two adjacent sides — turn technical room corners into architectural events. Placed in the upper corners of the wall at the ceiling junction, they create a visual frame and emphasize the geometry of the space. Capitals — overlays imitating the upper part of a classical column — are placed on the ends of vertical wooden panels or pilasters, turning flat elements into three-dimensional architectural details.
The ornamental content of overlays determines the stylistic affiliation of the interior and must align with the overall concept. Ancient motifs—meander, egg and dart, ionics, beads—create a strict classical atmosphere characteristic of Palladian interiors and Greek Revival. Floral motifs include acanthus with large serrated leaves, fan-shaped palmettes, laurel wreaths, garlands of flowers and fruits. Geometric ornaments operate with circles, rosettes, stars, interlaces, creating mathematical harmony. Baroque scrolls and rocaille demonstrate asymmetrical dynamics, theatrical excess, festive opulence. Empire military symbols—eagles with outstretched wings, torches, swords, victors' laurel wreaths—form solemn monumentality. Art Nouveau introduces flowing floral lines, stylized irises and lilies, asymmetrical compositions with elegant fluidity of forms.
The size of polyurethane overlays follows the mathematics of proportions relative to wooden panels and the overall scale of the room. In a room with a ceiling height of two seventy and wooden panels one hundred centimeters high, a central rosette with a diameter of thirty to forty centimeters creates the correct balance—large enough to be noticed but not excessively dominant. In a high room of three fifty with panels one hundred twenty centimeters, a rosette of fifty to sixty centimeters is appropriate. Overlays that are too small get lost against the powerful texture of wood, while overly large ones visually overwhelm and disrupt the balance. The rule: the diameter of the central rosette should be one-third to one-half the width of the wooden panel against which it is placed.
Get Consultation
Composition design: the mathematics of beauty and visual axes
Creating a harmonious two-layer composition begins with a drawing—a wall development in scale, where all elements are precisely marked. The first step is determining the height of the panel zone. The classical height is one-third of the wall height to the ceiling—for a ceiling of two seventy, this gives ninety centimeters; for three meters, one hundred centimeters; for three fifty, one hundred twenty centimeters. This proportion is historically justified—the so-called 'chair rail panel' protected walls from chair backs pushed against the wall. In modern interiors, the function has changed, but the proportion remains as visually harmonious. The second step is dividing the panel zone into individual fields or panels. The width of one field is determined by the total wall length and the desired rhythm. For a wall four meters long, five to six fields sixty to eighty centimeters wide each is optimal. For a six-meter wall—eight to ten fields.
Rhythmic structure is created through alternation and repetition of elements. Regular rhythm—all wooden fields of equal width, all polyurethane overlays of the same size and shape, placed at uniform intervals—creates a calm classical composition without visual accents. Such rhythm suits long walls of corridors, galleries, enfilades, where continuity and uniformity are important. Accent rhythm highlights the central part of the wall through enlarged elements—the central wooden field is made wider than the side ones, the central rosette is larger than the side ones. This creates a compositional center, a visual climax. Progressive rhythm gradually increases or decreases the size of elements from edge to center or from bottom to top, forming directed eye movement.
Symmetry creates a sense of order, stability, classical harmony. The central vertical axis divides the wall into two mirror-equal halves. The central wooden field is positioned exactly on the axis, with identical fields placed symmetrically on the sides. The central polyurethane rosette is installed on the axis above the panel zone, with smaller side rosettes placed symmetrically. Such composition is characteristic of formal interiors—living rooms, dining rooms, studies, halls. Asymmetry creates dynamics, modernity, visual complexity. A large rosette is shifted from the center, wooden fields have different widths, creating an impression of free composition. Asymmetry is more complex to design—requiring a subtle sense of visual balance, but the result is more individual and contemporary.
Vertical zoning of the wall through a two-layer system divides the height into functional and visual zones. The lower zone from the floor to the top of the panels—protective and textural, where wood dominates. The middle zone from the top of the panels to a conditional line at a height of two hundred to two hundred twenty centimeters—decorative, where polyurethane overlays are placed on a painted or wallpapered background. The upper zone under the ceiling—finishing, where a cornice or frieze is located, closing the composition from above. This three-part division creates visual completeness—base, body, crown—a classical architectural principle transferred from the building facade to the interior wall.
Horizontal and vertical divisions interact, creating a composition grid. The horizontal line of the panel top intersects with the vertical axes of the wooden fields, forming nodes—points of compositional tension. Polyurethane elements can be placed at these nodes—rosettes exactly above the center of a wooden field, vertical overlays at the junction of two fields. The grid can be regular or free, but it must always be conscious, designed, not accidental.
Color strategies: from contrast to monochrome
The color solution of a two-layer composition determines its character no less than form and proportions. A contrast scheme with dark wood and light decor creates maximum visual clarity and classical solemnity. Wooden panels of stained oak, dark walnut, or tinted wenge form a rich dark base. The wall above the panels is painted in a light shade—white, cream, light gray. Polyurethane overlays are painted white, creating bright relief spots on a light background. DarkWooden baseboardand dark panels form a powerful horizontal at the bottom, white overlays create light accents at the top. The contrast between the heavy bottom and light top visually stabilizes the space, making it respectable, status-worthy. This solution is characteristic of English studies, French salons, palace living rooms.
Reverse contrast—light wood and dark decor—creates a more contemporary, less traditional sound. Panels of light ash, bleached oak, or gray-painted MDF form a neutral base. The wall is painted in a medium or dark tone—graphite, dark blue, anthracite. Polyurethane overlays are painted the same dark color or a contrasting light one. Such a scheme suits modern interiors, where classical architectural elements receive an unexpected color interpretation.
A tonal scheme uses close shades of one color for all elements. Light wooden panels, a slightly darker wall paint, polyurethane overlays of an intermediate tone create a soft gradation without sharp transitions. For example, panels of natural beech with a pinkish tint, a beige-pink wall, cream overlays. Or panels of silvery ash, a light gray wall, white overlays. Tonality creates visual unity, expands space, makes the interior more intimate and cozy. This is a choice for bedrooms, children's rooms, small living rooms, where contrast would be excessively active.
A monochrome scheme paints all elements in a single color, erasing material differences. Wooden panels, wall, and polyurethane overlays are coated with one enamel—white, gray, graphite, colored. Material differences are read only through texture and relief—wood has a natural grain even under paint, polyurethane is perfectly smooth. Monochrome creates contemporary sophistication, sculptural quality of space, where form is more important than color. This is a choice for minimalist, Art Deco, modern neoclassical interiors.
An accent color scheme highlights polyurethane overlays with a contrasting bright color on a neutral background. Wooden panels and wall are painted in calm tones—gray, beige, white. Polyurethane rosettes are painted in a saturated color—emerald, sapphire, burgundy, gold. Colored overlays become jewel-like accents, artistic objects on a neutral background. This technique works in eclectic, contemporary, authorial interiors, where boldness is allowed.
Gilding and patination of polyurethane overlays creates an effect of antique luxury. Overlays are painted with a base color—white, cream, gray—then the relief protrusions are coated with gold or silver paint, creating an effect of antique gilding. Patina—dark paint applied in the recesses of the relief and partially wiped from the protrusions—enhances the depth of the ornament, creates artificial aging. Gilded and patinated overlays are characteristic of Baroque, Rococo, Empire, palace styles.
Installation of the first layer: technology for installing wooden panels
Preparation of the base wall begins with assessing its condition. For panel installation with adhesive, a level surface with a deviation of no more than two to three millimeters over two meters of length is required. If the wall is uneven, it is either leveled with plaster or installation on a frame is used, which compensates for irregularities. The wall must be dry—humidity no more than four percent, strong—without flaking plaster or paint, clean—without dust, grease stains, efflorescence. Before installation, the wall is primed with a deep-penetration compound to improve adhesive adhesion.
Marking the panel layout is done using a laser level and composition drawing. A horizontal line of the panel zone top is marked on the wall—usually ninety to one hundred twenty centimeters from the floor. This line must be absolutely horizontal even if the floor is uneven—panels are oriented to the level, not the floor. Vertical lines of individual panel boundaries are marked considering symmetry relative to the wall center or other architectural axes—windows, doors, fireplaces. It is important that seams between panels do not fall on the edges of door openings—this creates visual sloppiness.
Installation on a frame is used for significant wall irregularities or when an air gap is needed for laying utilities. The frame is assembled from wooden battens with a cross-section of thirty by forty or forty by fifty millimeters. Battens are attached to the wall with dowels vertically at intervals of forty to sixty centimeters. Horizontal battens are installed at the top and bottom of the panel zone. The frame is leveled with a level and plumb, creating a perfectly flat plane regardless of the base wall curvature. Wooden panels are attached to the frame with countersunk-head screws, which are sunk into the panel body and covered with wooden plugs or filled. Seams between panels can be left open as a design element—shadow seams two to three millimeters wide create a graphic grid. Or closed with wooden moldings—overlay strips that turn the seam into a decorative element.
Installation with adhesive is used on level walls and gives a flatter surface without an air gap. Special mounting adhesives based on polyurethane or MS polymer are used, which compensate for thermal expansion of wood and provide strong elastic bonding. Adhesive is applied to the back of the panel in a zigzag or dots at intervals of fifteen to twenty centimeters. The panel is pressed against the wall, aligned with the markings, fixed with temporary supports until the adhesive sets. Setting time depends on the adhesive type—from fifteen minutes to several hours. After installing all panels, seams between them are treated—either left open, filled with elastic sealant matching the wood tone, or covered with moldings.
Corner treatment of the room requires precise fitting. Internal corners are finished either by joining panels at ninety degrees with seam filling with sealant, or by installing a wooden corner element—a special profile covering the joint. External corners are more complex—here panels are cut at forty-five degrees and joined in a miter, or a corner overlay is used. The quality of corner treatment is critical for the overall impression—sloppy corners ruin the impression of even the most expensive finish.
Final treatment of wooden panels is performed after installation. If solid wood panels were supplied unfinished, they are sanded with sandpaper grit one hundred twenty to one hundred eighty, cleaned of dust, coated with oil, wax, or varnish in two to three coats with intermediate sanding. If panels were supplied with factory finish, final treatment is not required. MDF panels for painting are primed, sanded, painted with enamel in two to three coats with intermediate sanding.
Installation of the second layer: mounting polyurethane overlays
Preparation of the intermediate zone between wooden panels and ceiling is done after panel installation. This zone is painted or wallpapered according to the project. Painting is done with high-quality interior paint in two to three coats after priming. It is important to achieve a perfectly even surface without drips, runs, or uneven tone—relief overlays will be placed on this background, and any defects will be noticeable. If wallpaper is used, textured or smooth types are chosen depending on the concept. Wallpaper is applied before installing overlays.
Marking the installation locations of overlays is done according to the composition drawing. Centers of rosettes, axes of medallions, points for corner elements are determined. Marking is transferred to the wall with a pencil using a laser level to control horizontals and verticals. Symmetry is checked with measurements—distances from the rosette center to room corners should be equal if the composition is symmetrical. Installation height is determined by proportions—usually the rosette center is positioned at the mid-height of the intermediate zone between the panel top and the cornice start.
Preparation of overlays includes inspection for defects, if necessary cleaning minor burrs with sandpaper, priming and painting before installation. Painting installed overlays is more difficult—it's hard to paint relief recesses without drips. Therefore, overlays are painted before installation in two to three coats with intermediate drying and sanding. If overlays will be the same color as the wall, final joint painting after installation is allowed for visual unification.
Installation of overlays is done with special mounting adhesive for polyurethane or universal construction adhesive based on polyurethane. Adhesive is applied to the back of the overlay in a zigzag or continuous layer depending on element size. Small overlays up to twenty centimeters in diameter can be glued with dots of adhesive. Large rosettes require continuous application. The overlay is pressed against the wall exactly according to markings, held by hand or fixed with painter's tape during adhesive setting—usually fifteen to thirty minutes. Excess adhesive squeezed out at the edges is immediately removed with a damp sponge before hardening. After setting, tape is carefully removed.
Additional fixation of large and heavy overlays is done with thin screws through pre-drilled holes in inconspicuous places—in the depth of the relief. Screws are countersunk, holes are filled and painted over. This ensures the overlay does not detach over time under its own weight.
Filling gaps between overlay and wall is done with acrylic sealant matching the color after installation. Due to wall irregularities or minor deformations of overlays, gaps may form around the perimeter. Sealant is carefully applied in a thin line, smoothed with a wet finger or rubber spatula, excess removed. After drying, the sealant is painted along with the overlay, creating an impression of monolithic fit.
The final painting of the entire composition is performed if a monochrome scheme is selected. Wooden panels, the intermediate wall zone, polyurethane overlays, baseboards, and cornices are painted with a single paint in a unified color. This creates a sculptural effect, where the difference between elements is perceived only through texture and relief.
Practical scenarios: two-layer finishing in different rooms
The living room, as the formal space of the house, requires maximum expressiveness of the two-layer composition. The wall behind the sofa or fireplace becomes an accent wall. The lower third is clad with wooden panels made of noble oak or walnut with classic raised panels. The panels are stained in a rich dark shade and coated with matte oil. The middle part of the wall is painted in a complex gray-beige or dusty blue tone. Against this background, a composition of polyurethane overlays is placed — a central large rosette with a diameter of forty-five to fifty centimeters with Baroque curls precisely above the center of the sofa, two smaller side rosettes at the edges. Between the rosettes — vertical overlays creating rhythmic articulation. Under the ceiling — a widea polyurethane cornicewith a classic profile, completing the composition from above. The entire wall becomes an architectural panel, a background for the furniture group, creating an atmosphere of classic luxury.
The bedroom requires a more delicate, intimate interpretation. The wall behind the headboard is clad across the entire width of the bed plus thirty to forty centimeters on each side with wooden panels of light ash or whitewashed oak. The panels are painted in a soft gray-beige tone and coated with matte varnish. The panel height is one hundred to one hundred twenty centimeters from the floor. Above the panels, the wall is painted in a slightly lighter shade. At the level of the upper third of the bed's height, a single polyurethane overlay is placed — an oval medallion with a delicate floral ornament, painted to match the wall color. The medallion is perceived thanks to the relief and play of light, without creating excessive activity. Behind the panels, an LED strip is installed, creating soft contour lighting. The composition forms a visual headboard for the bed, integrated into the wall architecture, creating coziness and a sense of protection.
The dining room, with its formal character, is ideal for a symmetrical classic composition. All walls are clad with wooden panels to a height of one hundred ten centimeters — the classic height of a dado rail. Solid oak panels with rectangular raised panels are stained in a medium walnut tone and coated with semi-matte varnish. The walls above the panels are painted in a warm cream shade. On each wall, two to three polyurethane rosettes with classic palmettes are symmetrically placed, painted white. The distances between the rosettes and to the corners are equal, creating a rhythmic structure. Under the ceiling runs a wide cornice with a classic profile. The space acquires the character of a formal dining room from the classical era, where every detail is subordinated to the rules of architectural harmony.
The study requires solidity and restraint. The walls are clad with wooden panels made of dark walnut to half the height — one hundred thirty to one hundred fifty centimeters. The panels are assembled from vertical boards, creating a strict vertical graphic. The upper part of the wall is painted in a deep graphite gray. Polyurethane overlays are used minimally — only corner elements in the upper corners of the walls and one central rosette on the wall behind the desk. The overlays are painted to match the wall color, creating a restrained relief. The overall atmosphere is seriousness, concentration, masculine restraint.
The hallway requires maximum wall protection while maintaining visual appeal. The lower part of the walls up to a height of one hundred to one hundred twenty centimeters is clad with wooden panels made of hardwood — oak or larch — with a durable varnish coating. The panels protect against shoe impacts, bag scratches, and dirt. Small polyurethane rosettes are placed on the panels, adding sophistication to the utilitarian space. The mirror receives an architectural frame made of wooden molding with polyurethane corner elements. Functionality and beauty are combined.
Durability and care for the two-layer system
A properly installed two-layer system lasts for decades without losing its appearance. Wooden panels made of solid hardwood with high-quality varnish or oil coating retain their properties for thirty to fifty years. Polyurethane overlays are practically eternal — the material does not age, does not yellow with quality painting, does not crumble, and retains the clarity of relief indefinitely.
Care for wooden panels includes regular dry cleaning with a soft cloth or vacuum with a soft brush attachment, wet wiping with a well-wrung cloth once every one to two weeks. Avoid excess water — wood does not like moisture. For panels with an oil coating, renewal is recommended once every one to two years — applying a thin layer of the same oil to restore protective properties and refresh the color. For varnished panels, this procedure is not required.
Care for polyurethane overlays is minimal — wiping dust with a soft cloth or brush once every week or two. The relief ornament collects dust in the recesses, so periodic cleaning with a soft brush or vacuum on low power is useful. If soiled, wet wiping with a weak soap solution is allowed. Abrasive agents are prohibited — they scratch the painted surface.
Repainting may be required after seven to ten years depending on operating conditions and the quality of the original painting. Polyurethane overlays and painted panels are lightly sanded with fine sandpaper to improve adhesion, cleaned of dust, primed, and repainted. This refreshes the interior and allows changing the color scheme if desired.
Repair of damage to wooden panels depends on the nature of the defect. Minor scratches on varnished panels are filled with repair wax in the matching tone and polished. Deep scratches and chips require sanding the area and reapplying varnish. On oiled panels, defects are eliminated by local sanding and application of oil. Polyurethane overlays are practically undamaged — the material is elastic and impact-resistant. If an overlay has come unglued, it is re-glued with the same mounting adhesive.
STAVROS: comprehensive solutions for multi-layer interiors
Creating a harmonious two-layer wall composition requires not only design vision but also quality materials, precise manufacturing, and professional installation. The company STAVROS offers a full cycle — from design to final implementation. The collectionswood panelsinclude solutions made of solid oak, ash, walnut, beech with various surface treatment options and finish coatings. The catalogpolyurethane decorfeatures hundreds of elements from all historical styles — from strict antique classicism to lush Baroque, from graphic Art Deco to flowing Art Nouveau. The possibility of custom manufacturing elements for a specific project allows realizing any design concept. The experience of hundreds of completed projects, from city apartments to country residences, guarantees an understanding of proportions, a sense of style, attention to detail, where every element works towards the perfection of the whole, turning a wall into a work of architectural art.