Article Contents:
- Anatomy of molding: what it really is?
- Profile: from simple to complex
- Dimensional classification: from delicate to monumental
- Polyurethane: the material of the new generation
- Typology by purpose: each place - its own molding
- Wall moldings: creators of panels and frames
- Ceiling moldings: cornices and decorative elements
- Corner moldings: solution for complex joints
- Flexible moldings: for curved surfaces
- Wide moldings: accents of scale
- Facade moldings: exterior finishing
- Compositional strategies: how moldings create an interior
- Panel system: classic structure
- Frame composition: focus on the focal area
- Horizontal division: visual correction of proportions
- Vertical division: rhythm and dynamics
- Combined composition: complex architecture
- Molding installation: technology for professional results
- Surface Preparation: The Foundation of Quality
- Marking: accuracy determines the result
- Molding trimming: straight and corner joints
- Adhesive Application and Installation
- Sealing Joints: Invisible Connections
- Painting: final coating
- Combination with other elements: decorative system
- Rule of proportions: cornice, molding, baseboard
- Unity of profile: stylistic consistency
- Color harmony: monochrome or contrast
- Answers to popular questions
- Can Moldings Be Glued to Wallpaper?
- How to join moldings on uneven walls?
- How much time does it take to install moldings in a room?
- How to Care for Moldings?
- Can polyurethane moldings be used in the bathroom?
- How to choose the width of molding for a specific room?
- Polyurethane or wood moldings - what to choose?
- Do moldings need to be primed before painting?
- Conclusion: Line as the Foundation of Architecture

A line can change everything. A single element—and space gains structure. A vertical line lifts the gaze to the ceiling, visually increasing height. A horizontal line segments the wall, creating rhythm. A frame highlights an accent zone, turning a fragment of the wall into an independent object of attention.Moldings made of polyurethane—these are the very lines that create interior architecture. Thin or massive, smooth or ornamented, they work as graphic tools, outlining boundaries, setting proportions, connecting individual elements into a unified whole. Forget about plaster that crumbles and cracks. Forget about wood, accessible only to a select few. Polyurethane has democratized classical architecture, making it accessible to everyone. Easy installation, moisture resistance, durability, perfect geometry—technological advantages do not negate the main thing: aesthetic expressiveness.polyurethane wall moldingstransform a smooth, featureless surface into a coordinate system where every interior element finds its place. How to choose the right profile? How to combine moldings with each other? How to install them so the result looks professional? Let's examine it in detail.


Anatomy of a Molding: What Is It Really?
A molding is a linear decorative element, a profiled strip of constant cross-section, mounted on a wall, ceiling, or furniture to create relief and structure. The standard strip length is 200 or 240 cm. Width varies from 10 mm to 200 mm. Thickness—from 5 mm to 35 mm depending on the profile.


Profile: From Simple to Complex
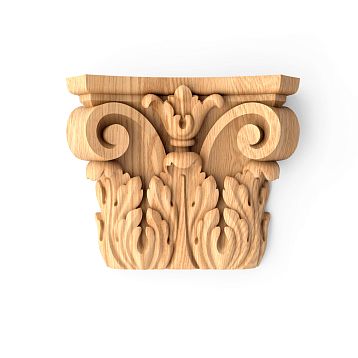
A profile is the cross-section of a molding, its 'drawing' in section. The simplest profile is a rectangle, a flat strip of constant width without relief. Slightly more complex—a strip with a chamfer (a beveled edge at 45 degrees), creating a play of light on the edge. The next level—a bead (a rounded convexity along the molding) or a flute (a rounded groove). Classical profiles include combinations of elements: bead + flute + chamfer. Ornamented profiles have a relief pattern—egg-and-dart (egg-shaped elements), dentils (tooth-like elements), plant scrolls, meanders.
The more complex the profile, the more expressive the molding, the stronger the play of light and shadow. But the more demanding it is of the room's scale—in a small room, a complex ornamented molding will create visual overload. Simple profiles are universal, working in both classical and contemporary interiors.
Our factory also produces:


Dimensional Classification: From Delicate to Monumental
Narrow moldings 10-30 mm wide—delicate lines for minimalist interiors, small rooms, creating small frames. Relief thickness is minimal, emphasis on the graphic quality of the line, not on volume.
Medium moldings 35-70 mm wide—the most universal category, applicable in most interiors with an area of 15-30 m². Sufficient width for expressive relief, but without monumentality. Optimal for creating wall panels, framing door and window openings.
Wide moldings 80-120 mm wide—for spacious rooms with high ceilings (from 3.0 m). Create monumentality, scale, suitable for classical interiors where decor should be noticeable and rich. Often used as ceiling cornices.
Very wide moldings over 120 mm wide—for palatial interiors, halls, public spaces. In standard apartments, they look excessive, overwhelming the space.
Get Consultation
Polyurethane: The Material of a New Generation
Why has polyurethane displaced traditional materials? Plaster is heavy (a 2 m long, 100 mm wide plaster molding weighs about 8-10 kg, polyurethane—0.6-1.0 kg), fragile (cracks from impacts, crumbles when drilled), fears moisture (absorbs water, deforms, gets moldy). Wood is expensive (a carved wooden molding costs 10-15 times more than a polyurethane one), heavy, requires special care, deforms with changes in humidity.
Polyurethane is lightweight (density 180-350 kg/m³ depending on the series), durable (impact resistance allows it to withstand household loads without chipping), moisture-resistant (does not absorb water, used in bathrooms and kitchens), long-lasting (does not deform over time, retains geometry for decades), easy to install (glued with special adhesive without complex fasteners), paintable (accepts any acrylic paint, can be tinted any color).
Typology by Purpose: The Right Molding for the Right Place
buy polyurethane molding—means first determining the purpose. Functionality dictates the choice of profile, size, and mounting type.
Wall Moldings: Creators of Panels and Frames
Wall moldings are installed on vertical surfaces to create decorative structure. The most popular application—panels. The wall is divided by moldings into rectangular or square sections, inside which contrasting paint, wallpaper, fabric, or another material is used. The classic paneling scheme: a wall 270 cm high is divided horizontally at the 180 cm level. The upper part (from 180 cm to the ceiling)—light-colored paint. The lower part (from the floor to 180 cm)—is divided by vertical moldings into 3-4 panels, inside the panels—wallpaper or contrasting paint. The horizontal boundary between the upper and lower parts is marked by a wide molding 60-80 mm wide. Panel frames are formed by moldings 40-50 mm wide.
The second application of wall moldings—framing. A mirror on the wall is framed with a molding instead of a traditional frame. A painting or panel receives an architectural frame made of molding glued to the wall around the image. A wall-mounted TV is framed with molding, creating a visual 'frame' for the screen, integrating the technology into a classical interior.
The third application—zoning space. In studio apartments or large rooms, vertical moldings from floor to ceiling visually divide the space into zones without physical partitions. The living area is separated from the dining area by two vertical moldings 80-100 mm wide, installed 100-120 cm apart. Between them—contrasting wall paint or wallpaper, visually marking the boundary.
Ceiling Moldings: Cornices and Decorative Elements
Ceiling molding made of polyurethane—are primarily cornices, horizontal strips at the junction of wall and ceiling. The functions of a cornice are diverse. Visual completion of the wall—a cornice creates a clear boundary where the wall ends and the ceiling begins. Masking defects—the wall-ceiling joint is rarely perfectly even; a cornice covers unevenness, cracks, gaps. Base for hidden lighting—behind a wide cornice (80-120 mm), an LED strip is installed, creating soft diffused light reflected off the ceiling.
The size of a ceiling cornice is chosen depending on ceiling height and room area. For low ceilings (2.3-2.5 m)—cornices 40-60 mm wide with a simple profile, white or ceiling-colored, to avoid drawing attention to height. For standard ceilings (2.6-2.8 m)—cornices 70-90 mm wide with medium relief, a light ornament is possible. For high ceilings (3.0 m and above)—cornices 100-150 mm wide with rich ornamentation, creating an expressive horizontal line.
Besides cornices, moldings are used on ceilings to create coffers—rectangular or square recesses. The ceiling is marked with moldings into 80×80 cm or 100×100 cm squares, inside each square—contrasting paint or a rosette. A coffered ceiling—a hallmark of luxurious classical interiors, requires a height of at least 3.2 m.
Corner Moldings: Solving Complex Joints
Polyurethane corner moldings—are specialized elements for finishing the corners of frames. When creating panels on a wall, straight moldings join at a 90-degree angle, forming frame corners. The joint can be made by miter-cutting the moldings at 45 degrees (requires precision and experience) or by using a ready-made corner element. A corner molding is an L-shaped overlay installed at the joint of two straight moldings, covering it and creating a decorative accent.
Sizes of corner moldings range from 50×50 mm to 150×150 mm (size of one side of the corner). The ornament of the corner element matches the ornament of the straight molding—if the straight molding has beads, the corner one also has beads. If the straight one has acanthus, the corner one has acanthus.
Using corner elements speeds up installation (no precise cutting needed), improves appearance (the corner becomes perfectly straight, with a decorative accent), and reduces waste (fewer damaged planks from unsuccessful cuts).
Flexible moldings: for curved surfaces
flexible polyurethane moldingIt is made from elastic polyurethane with reduced density (150-200 kg/m³), which allows it to be bent without breaking. The bending radius depends on the width of the molding. Narrow profiles 30-50 mm wide bend to a radius of 30-50 cm. Medium widths of 60-80 mm — up to a radius of 60-80 cm. Wide ones require larger radii or heat treatment (heating with a construction heat gun before bending).
Flexible moldings are used for framing arched openings (the arch is framed with a flexible molding that follows the curve), columns and half-columns (the molding is glued vertically around the cylindrical surface), curved walls (in rooms with rounded corners, flexible molding smoothly follows the curve), radius furniture (facades with convex or concave surfaces are decorated with flexible molding).
Installing flexible molding requires care — the strip must be bent gradually, fixing sections of 30-40 cm at a time, allowing the adhesive to set. Forced bending can lead to material rupture.
Wide moldings: scale accents
Wide polyurethane moldingsWith a width of 100-200 mm — these are no longer just lines, but full-fledged decorative elements, comparable in expressiveness to friezes and panels. They create monumentality, emphasize ceiling height, and function as architectural accents.
The use of wide moldings is limited to spacious rooms. In a living room with an area of 35-40 m² and a ceiling height of 3.2 m, a wide cornice 150 mm wide creates an expressive horizontal line, emphasizing the scale. In a bedroom with an area of 18 m² and a ceiling of 2.6 m, the same cornice will look overwhelming, visually lowering an already low ceiling.
Wide moldings often have a complex ornamental profile — multi-tiered relief with beads, grooves, dentils, and floral elements. Such a profile creates deep chiaroscuro, enhances three-dimensionality, and makes the molding a dominant decorative element.
Painting wide moldings can be contrasting — gilding the ornament against a white background, patinating the recesses. Such painting further enhances expressiveness.
Facade moldings: exterior finishing
Polyurethane facade moldings— a specialized category designed for exterior installation. They are UV-resistant (do not fade, do not lose color), frost-resistant (withstand freeze-thaw cycles without deformation), moisture-resistant (do not absorb water, do not swell).
Facade moldings are used for framing windows and doors (casings, pediments — decorative elements above openings), horizontal articulation of the facade (moldings encircling the building at the level of interfloor ceilings), creating decorative frames and panels on the facade (especially relevant for classical styles — neoclassical, art deco).
The dimensions of facade moldings are larger than interior ones — width from 80 to 300 mm, thickness up to 50 mm. Large scale is necessary so that the elements are legible from a distance and do not get lost on the facade.
Installation of facade moldings is performed using special frost-resistant adhesive foam or dowels (through the body of the molding with subsequent masking of the fastening points). After installation, the moldings are painted with facade acrylic paint in 2-3 layers for additional protection.
Compositional strategies: how moldings create an interior
Buy polyurethane wall moldings— is only the beginning. It is important to correctly plan the composition so that moldings are not just present, but work for the architecture of the space.
Panel system: classical structure
Panel system (boiserie) — dividing a wall into rectangular sections using moldings. A classic scheme for a living room: wall height 270 cm, length 4.5 m. Horizontal division at a height of 180 cm with a molding 70 mm wide. The upper part (from 180 cm to the ceiling) is painted a light color. The lower part (from the floor to 180 cm) is divided by vertical moldings 50 mm wide into three panels approximately 140 cm wide each. Inside the panels — wallpaper with a damask pattern or contrasting paint. At the corners of each panel — corner overlays sized 80×80 mm.
Effect: a structured wall that does not look empty even without furniture and paintings. The panels create a self-sufficient composition. Color and texture inside the panels enhance expressiveness.
Alternative scheme — panels covering the entire wall height. A wall 270 cm high is divided by vertical moldings into 4 narrow panels 100-110 cm wide each. Inside the panels, wallpaper and paint alternate. The result is vertical striping, which visually stretches the room upward — useful for rooms with low ceilings.
Frame composition: accent on the focal zone
One large frame made of moldings on an accent wall highlights the focal zone. Behind the sofa in the living room, a frame sized 200×150 cm is created from molding 60 mm wide. Inside the frame — contrasting paint (e.g., dark blue against a general white wall) or decorative plaster with texture. In the center of the frame — a mirror, a panel, a composition of paintings, or a large decorative overlay.
Effect: the sofa gets a visual 'background' that connects the furniture with the wall into a single composition. The gaze is automatically directed to this zone, making it the compositional center of the room.
Horizontal articulation: visual correction of proportions
For rooms with disproportionate height, horizontal division with moldings is used. In a room with a low ceiling (2.4 m), a horizontal molding is installed at a height of 200 cm. Below the molding, the wall is dark; above — light or the color of the ceiling. Visually, the ceiling starts from the light part, i.e., from the molding. The dark part is perceived as a 'plinth,' a separate element. The ceiling appears higher than it actually is.
In a room with an excessively high ceiling (3.5 m), a horizontal molding is installed at a height of 240-260 cm. Above the molding — dark paint or a frieze with an ornament. The ceiling visually 'lowers' to the level of the molding, the room becomes more intimate and cozy.
Vertical Division: Rhythm and Dynamics
Vertical moldings create rhythm and direct the gaze upward. In a dining room with a high ceiling (3.2 m), five vertical moldings 50 mm wide are installed from the baseboard to the cornice at 80 cm intervals. The verticals visually stretch the space even more, emphasizing the height. Between the vertical moldings — alternating light and dark stripes of paint, enhancing the rhythm.
Effect: a dynamic space where the gaze constantly moves upward. Suitable for formal ceremonial rooms — halls, living rooms, dining rooms.
Combined composition: complex architecture
The combination of horizontal and vertical moldings creates a complex wall architecture. The classic scheme: a horizontal molding at a height of 180 cm divides the wall. Below, vertical moldings form panels. Above is a smooth wall with a ceiling cornice. Additionally, vertical moldings are installed in the corners of the room from floor to ceiling, imitating pilasters.
Effect: multi-layered architecture, where each level of the wall has its own logic. Suitable for classic interiors, requires spacious rooms (from 25 m²) and high ceilings (from 2.8 m).
Molding installation: technology for a professional result
polyurethane decorative moldingsare installed using the same technology, regardless of purpose and profile.
Surface preparation: the foundation of quality
The surface must be level (deviations over 3 mm per meter must be corrected with filler), clean (free of dust, grease, remnants of old coatings), dry (moisture content no more than 4%), and strong (old paint or plaster should not be peeling).
Irregularities are detected using a long straightedge or laser level. Bumps are sanded down, depressions are filled with filler. After leveling, the surface is sanded with 120-150 grit sandpaper until smooth.
Dust after sanding is removed with a vacuum and a damp cloth. The surface is primed with deep-penetration acrylic primer in two coats with intermediate drying of 2-4 hours. The primer strengthens the surface and improves adhesive bonding.
Marking: Accuracy Determines the Result
Marking is a critical stage; errors here will lead to crooked lines. For horizontal moldings, a laser level is used—it projects a perfectly horizontal line onto the wall. Along the projected line, marking is done with a pencil (the laser cannot be left on during installation, as it strains the eyes).
For vertical moldings, a plumb line or laser level in vertical mode is used. A 2-meter-long spirit level is also suitable but requires attentiveness—the bubble must be exactly centered.
For panels, the corners of the rectangles are marked first, then lines are drawn between the corners. Squareness is checked—the diagonals must be equal (measured with a tape measure).
Molding cutting: straight and corner joints
A straight butt joint of two strips is done as follows: the ends of the strips are cut strictly at 90 degrees using a miter saw or a fine-toothed saw in a miter box. The ends are sanded with sandpaper to remove burrs. During installation, the strips are joined tightly, without gaps.
A corner joint at 90 degrees (inner corner of a frame) is done by cutting at 45 degrees. Each strip is cut at 45 degrees in a miter box. When joining two strips cut at 45 degrees, a right angle is formed. Important: the cutting direction must be mirrored—the right strip is cut from left to right, the left from right to left.
An alternative to miter cutting is using corner elements. Straight strips are joined at 90 degrees without cutting, and a corner element is glued over the joint, covering the connection point.
Applying Adhesive and Installation
Adhesive is applied to the back of the molding. For narrow moldings (up to 50 mm)—a snake pattern along the center. For wide ones (over 50 mm)—two parallel lines along the edges or over the entire surface with a notched trowel in a thin layer.
Use polyurethane construction adhesive (Tytan, Makroflex, Soudal) or liquid nails for heavy structures. Do not use water-based adhesives (PVA, Bustilat)—weak adhesion, long drying time.
The molding is applied to the wall along the marking and pressed along its entire length. Press evenly to avoid deformation. Hold for 30-60 seconds until the adhesive sets. Long moldings (ceiling cornices) are convenient to install with two people—one holds one end, the other presses along the length.
Excess adhesive that squeezes out from under the molding is immediately removed with a damp sponge. Dried adhesive is difficult to remove and will have to be scraped off with a knife.
Heavy, wide moldings are additionally secured with finishing nails or screws with decorative heads at 40-60 cm intervals. Fasteners are countersunk into the molding body by 1-2 mm, and the indentations are filled.
Sealing joints: invisible connections
After the adhesive has fully dried (24 hours), the molding joints are filled with acrylic filler. The filler is applied with a rubber spatula, excess is removed. The surface is smoothed flush with the molding. After drying (2-4 hours), the filler is sanded with fine sandpaper (180-220 grit) until perfectly smooth.
The quality of the joint is checked by running a finger over it—the transition from molding to filler should be imperceptible to the touch.
Painting: final coating
Moldings are primed with acrylic primer (if painting in a color other than white is planned). The primer is applied with a brush, thoroughly covering the relief. After the primer dries (1-2 hours), paint is applied.
Use acrylic water-based paint in 2-3 coats with intermediate drying of 3-4 hours. The first coat is applied with a brush, thoroughly covering the recesses of the relief. The second and third coats can be applied with a roller (for smooth profiles) or a brush (for ornamented ones).
If gilding or patination is intended—a base white coat in 2 layers, then gold or patinating paint is applied with a sponge or fine brush only to the raised parts of the relief.
Combination with other elements: decorative system
Moldings do not exist in isolation—they are part of a decorative system that includes baseboards, cornices, overlays, and rosettes. Harmony is achieved when all elements are coordinated in style, scale, and profile.
Rule of proportions: cornice, molding, baseboard
Classic proportion: if the baseboard has a height of 120 mm, the cornice—a width of 110 mm, then the horizontal molding dividing the wall should be 60-80 mm wide. That is, the molding is approximately 30-40% narrower than the cornice and baseboard. This creates a visual hierarchy—the cornice and baseboard are primary, the molding is secondary.
If all elements are the same width—there is no hierarchy, the composition looks flat. If the molding is wider than the cornice—it breaks the logic, causing imbalance.
Profile unity: stylistic consistency
If the cornice has a classic profile with beads and egg-and-dart, the wall moldings should also be classic. Combining a classic cornice with minimalist flat moldings creates stylistic dissonance.
If modern minimalism is chosen — all elements have simple geometric profiles, without ornament. If classic — all elements are ornamented, coordinated in motifs.
Color harmony: monochrome or contrast
Monochrome scheme — all elements are painted one color (usually white). Walls can be colored, but all moldings are white. This is the most universal option, creating purity and elegance.
Contrast scheme — moldings are a contrasting color relative to the walls. White moldings on dark blue walls, black moldings on white walls. Contrast enhances graphic quality, making moldings an active element.
Tonal scheme — moldings are a tone lighter or darker than the walls. Light gray moldings on dark gray walls. Creates soft relief without sharp contrast.
Answers to Popular Questions
Can moldings be glued onto wallpaper?
Yes, but with limitations. Wallpaper must be firmly glued, not peeling. Moldings must be lightweight (narrow and medium profiles). Heavy wide moldings can tear wallpaper off the wall. The adhesive must be high-quality (polyurethane mounting adhesive). For reliability, it's better to glue moldings onto a painted or plastered wall before wallpapering, but this requires prior planning.
How to join moldings on uneven walls?
If the wall is uneven (old building, crooked corners), the molding will not fit tightly. Solutions: level the wall with filler before installation (labor-intensive but correct), use flexible polyurethane that partially follows irregularities (works for minor defects), fill the gaps between the molding and the wall with acrylic sealant after installation, then paint (visually hides the gap, but the wall relief remains).
How long does it take to install moldings in a room?
For a 20 m² room with installation of a ceiling cornice around the perimeter (18 linear meters) and three panels made of moldings on an accent wall (approximately 20 linear meters): wall preparation (leveling, priming) — 1 day, marking — 1-2 hours, cutting moldings — 2-3 hours, installation — 4-6 hours, adhesive drying — 24 hours, joint finishing — 2-3 hours, painting in 2 coats — 1 day. Total: 3-4 days for DIY work, 2 days with a professional crew.
How to care for moldings?
Dust is removed with a dry soft cloth or a brush with long soft bristles once every 1-3 months. For ornamented profiles, a watercolor brush (No. 6-8) is convenient — it penetrates into the recesses of the relief. Stains (grease in the kitchen, splashes) are removed with a damp sponge and a mild soap solution. Painted moldings withstand wet cleaning. Do not use abrasives, solvents, or stiff brushes — they will damage the paint.
Can polyurethane moldings be used in the bathroom?
Yes, polyurethane is moisture-resistant, does not absorb water, does not deform, does not develop mold. Moldings in the bathroom are used the same as in other rooms. The only condition is high-quality painting with moisture-resistant paint (acrylic latex for wet areas) in 2-3 coats. This protects the surface from constant contact with steam.
How to choose the width of molding for a specific room?
Formula: molding width in cm = (ceiling height in cm + room area in m²) / 20. Room 20 m² with a 270 cm ceiling: (270+20)/20 = 14.5 cm. This is a guideline for the ceiling cornice. Wall moldings — approximately 60-70% of the cornice, i.e., 9-10 cm. The formula is approximate, adjusted depending on style and personal preference.
Polyurethane or wood moldings — which to choose?
Polyurethane: lightweight, moisture-resistant, inexpensive, easy installation, does not deform, wide selection. Wood: nobility, naturalness, tactile warmth, possibility of multiple restorations, high price, heavy, deforms from moisture, requires professional installation. Polyurethane — for most projects with a limited budget. Wood — for elite interiors where budget is not limited and the naturalness of materials is important.
Do moldings need to be primed before painting?
Yes, definitely. Polyurethane moldings come pre-primed, but this primer is basic; an additional coat is needed for final painting. Primer improves paint adhesion (paint adheres more firmly, does not peel), evens out absorbency (paint applies evenly, without stains), saves paint (on a primed surface, paint consumption is lower). Use acrylic primer, apply with a brush in one coat, after drying (1-2 hours) paint.
Conclusion: line as the foundation of architecture
Molding is not just decoration, it is an architectural tool with which empty space is transformed into a structured environment. The line sets the rhythm, creates proportions, connects individual elements into a unified composition.Moldings made of polyurethanePolyurethane moldings have made this tool accessible — lightweight, durable, moisture-resistant, easy to install, they allow creating classic interiors without astronomical budgets and involving elite craftsmen.
The variety of profiles — from delicate narrow lines 10 mm wide to monumental cornices 200 mm wide, from smooth minimalist to richly ornamented Baroque — allows implementing any designer concept. Flexible moldings solve the task of decorating curved surfaces. Corner elements simplify installation and improve the appearance of joints. Facade moldings transfer classical architecture to exterior walls.
Competent composition — panel systems, frame accents, horizontal and vertical articulation — transforms moldings from individual elements into a holistic wall architecture. Proper selection of proportions, profile unity, and color harmony ensure visual consistency of all decorative elements.
Installation technology is accessible for DIY — surface preparation, precise marking, careful cutting, reliable gluing, quality joint finishing, professional painting. Each stage is important; skipping any leads to reduced quality. But with careful adherence to the technology, the result is indistinguishable from professional work.
Company STAVROS — a leader in the Russian polyurethane molding market, a manufacturer with 24 years of experience, creating world-class products in its own production facilities.
The STAVROS molding assortment includes over 500 profiles — narrow 10-30 mm for minimalist interiors and small rooms, medium 40-70 mm for universal use in creating panels and frames, wide 80-150 mm for spacious rooms with high ceilings and classic interiors, extra-wide 160-200 mm for palatial interiors and public spaces.
By profile type, there are smooth moldings with simple geometric cross-sections for modern styles, moldings with beads and flutes of classic profile for neoclassical interiors, ornamented moldings with dentils, egg-and-dart, acanthus for rich classic styles (Baroque, Empire, Classicism), flexible moldings for arches, columns, curved walls.
All STAVROS moldings are made from polyurethane with a density of 200-280 kg/m³ (depending on the series), ensuring strength, sharp relief definition, and geometric stability. The standard plank length is 240 cm, which reduces the number of joints during installation. The surface is primed (white) and ready for painting.
Specialized series include moldings for hidden lighting (with a shelf for LED strip installation), facade moldings with enhanced frost resistance and UV stability, patinated moldings (artificial aging) for vintage interiors, and gilded moldings for luxurious classic interiors.
STAVROS corner elements — over 150 options for all molding profiles, ensuring perfect corner joints for frames without labor-intensive 45-degree cutting. Each corner element precisely matches the profile of the straight molding, and the joint becomes invisible after painting.
STAVROS production facilities are located in Russia, using European raw materials (polyurethane from leading chemical companies in Germany and Italy) and modern injection molding equipment. This ensures high geometric precision (deviation no more than 0.5 mm over 2.4 m length), absence of cavities and defects, and sharp ornament detail.
STAVROS quality control is multi-stage. Incoming raw material control (checking density, viscosity, curing time). Molding process control (temperature, pressure, mold holding time). Final product control (geometry, absence of defects, priming quality). Selective testing for impact resistance, moisture resistance, coating adhesion. Only products that pass all control stages are released for sale.
The STAVROS stock program ensures availability of popular molding profiles in quantities sufficient for immediate shipment. Orders placed today are shipped tomorrow. Delivery within Moscow and the Moscow Region — by courier in 1-2 days. To St. Petersburg and the Leningrad Region — by courier in 2-3 days. To other regions of Russia — by transport companies in 3-10 days depending on distance.
Molding packaging is professional, ensuring safe transportation. Planks are wrapped in bubble wrap, placed in rigid cardboard boxes, and voids are filled with cushioning material. Boxes are marked (top, bottom, fragile). Over 24 years of operation, the damage rate during delivery is less than 0.5% — a result of quality packaging and selection of reliable transport partners.
STAVROS consulting support assists at all project stages. Company designers will develop a concept for room decoration with moldings, considering interior style, area, ceiling height, and budget. They will propose panel system options, calculate material quantities, and select profiles and corner elements. Technical specialists will provide recommendations on installation, adhesive and paint selection, and jointing techniques. The STAVROS website features video installation guides, a gallery of completed projects, and a material calculation calculator.
STAVROS installation services are available in Moscow, St. Petersburg, and major regional cities. Experienced craftsmen will install moldings professionally, with a 12-month warranty on workmanship. Installation cost starts from 250 rubles per linear meter (straight sections) up to 400 rubles (complex joints, corners, curved sections). Molding painting — from 150 rubles per linear meter for one coat. A comprehensive order (materials + installation + painting) — with a discount of up to 15%.
Custom molding manufacturing based on client sketches is available for exclusive projects. Need a molding with a unique profile? Reproduction of a historical sample from an old estate? A molding of non-standard length (over 240 cm as a single plank)? STAVROS will create a master model (hand carving or 3D printing), produce a silicone mold, and cast the product. Minimum order from 50 linear meters, production time 6-10 weeks, cost from 2500 rubles per linear meter.
STAVROS warranty — 5 years for interior moldings, 3 years for facade moldings. If during the warranty period the product deforms, cracks, or changes geometry (with proper use and installation) — STAVROS will replace it free of charge. The warranty is formally documented and supported by certificates of conformity and test laboratory reports.
ChoosingMoldings made of polyurethaneWith STAVROS, you choose European-level quality at Russian prices, the widest range of profiles and styles, professional support at all stages, and the reliability of a proven manufacturer with a 24-year history. Create interiors where wall architecture is meticulously thought out, where lines are not random but deliberate, where every element contributes to overall harmony. STAVROS — your partner in creating spaces that impress with flawless architecture. Quality that is visible. Beauty that inspires.