Article Contents:
- Types of moldings
- “Frames” and Panel Molding
- Combining with Lattice Panels
- Fine Joints
- Materials and Painting
- Conclusion: Structure Without Excess
- Frequently Asked Questions

When people talk about Russian style, they often imagine excess: painted boxes, Хохломa spoons, embroidered towels on every surface. This is kitsch — superficial stylization that turns an interior into a souvenir shop. True Russian style is restraint, clarity of form, honest construction. AndWall wood molding — horizontal arrangement that can run at the level of a chair back, window sill, or mid-wall. Molding divides walls into horizontal zones, creates rhythm, and structures space.— one of the tools that helps create this restrained elegance.
Molding is a profiled strip that frames, divides, and structures a wall's surface. In Russian estate architecture, moldings were used to create panel compositions, divide walls into tiers, frame doors and windows. They were not an end in themselves, but served the architectural logic of space: they created proportions, rhythm, hierarchy of elements.
A modern interior in Russian style requires the same approach. Moldings should organize the wall, not merely decorate it. They create “frames” — rectangular or square zones, within which contrasting paint, wallpaper, fabric, or mirror can be placed. These frames make a large wall surface understandable, proportional to the human scale, cozy.
In this article, we will examine the types of moldings suitable for Russian style, learn how to create panel compositions, combine moldings with lattice panels, achieve perfectly fine joints, and choose the right materials. This guide is for those who want to create an interior with character, where tradition is expressed not through excess, but through precision and taste.


Types of Moldings
Molding is a general term for any profiled strip attached to walls, ceilings, or furniture. But behind this general term lies a vast variety of shapes, sizes, and purposes. Not all types of moldings are suitable for Russian style — it is important to choose those that correspond to the spirit of tradition.
Wall moldings: the basis of composition. These are horizontal or vertical strips attached to walls to create decorative frames, divide zones, and frame elements. The width of wall moldings is usually 20 to 100 mm, thickness (projection from the wall) 5 to 30 mm.
For Russian style, prefer moldings with simple profiles: rectangular, with slight rounded edges, with one or two moldings (concave or convex elements). Avoid overly decorated moldings with scrolls, rosettes, or plasterwork — this is already classicism or baroque, not Russian tradition.
The width of the molding should correspond to the scale of the room and the size of the frames being created. For small frames (50×70 cm), a narrow molding of 30-40 mm is sufficient. For large frames (100×150 cm), a wider molding — 60-80 mm — is needed so the frame is readable and does not disappear on a large wall surface.
Borders: horizontal dividers.Wooden border for walls— a horizontal molding that runs at a certain height around the entire room perimeter, dividing the wall into upper and lower parts. Traditional border height — 90-110 cm from the floor (height of a chair back) or 150-170 cm (approximately 2/3 of wall height).
A border visually lowers the height of the room, making it more intimate and cozy. This is important for rooms with high ceilings (3 m and above), where without horizontal division, the space feels cold and unwelcoming. For standard 2.7 m ceilings, borders are used less often, as they may create the impression of a low ceiling.
In Russian style, borders are often painted in a contrasting color relative to the walls. Light walls — dark border (oak, walnut) or vice versa. This creates a clear horizontal line that organizes space, making it more structured.
Baseboards and cornices: boundaries of space. Baseboards (floor moldings) and cornices (ceiling moldings) technically also belong to moldings. They create boundaries between the wall and floor/ceiling, completing the vertical composition.
In Russian style, baseboards are typically high (120-180 mm) and cornices are expressive (80-150 mm projection from the wall). They should be proportionate to each other: if the baseboard is substantial, the cornice should also be sufficiently expressive to create balance. A too thin cornice with a thick baseboard creates the impression that the upper part is weaker than the lower part, making the composition unstable.
Casing: framing openings. Casing is a molding that frames a door or window opening. It covers the joint between the wall and frame, creates a decorative frame, and emphasizes the architectural element.
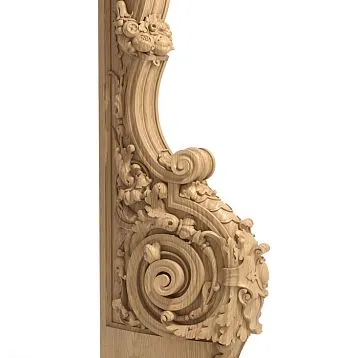
In Russian style, casings can be simple (rectangular strips 70-100 mm wide) or carved (
). Simple casings suit restrained, modern interpretations of Russian style. Carved casings are for more traditional designs where connection to folk art is important.Carved wooden window casingsThe width of the casing should match the width of wall moldings. If wall moldings used for frames are 60 mm, the casing should also be 60-70 mm. This creates visual continuity, a sense of system.
Corner elements and rosettes. At intersections of moldings (corners of frames, joints between horizontal and vertical strips), decorative corner elements or rosettes can be used. They cover the joint, transforming it from a technical solution into a decorative accent.
Corner elements and rosettes. At intersections of moldings (corners of frames, joints between horizontal and vertical strips), decorative corner elements or rosettes can be used. They cover the joint, transforming it from a technical solution into a decorative accent.
For Russian style, suitable are rosettes with simple geometric or plant motifs: a rhombus with a point in the center, a four-petal flower, a solar symbol. Avoid rosettes with angels, grape clusters, classical volutes — this is not Russian aesthetics.
Molding profiles: from simple to complex. A simple rectangular profile — a plank with a constant rectangular cross-section. Universal, suitable for any style, including modern interpretations of Russian style.
Profile with bevel — a rectangular plank with beveled edges at 45°. The bevel creates a subtle play of light, makes the molding less flat, but retains simplicity.
Profile with a fillet (concave or convex element) — creates a more pronounced relief and play of light and shadow. One or two elements (a ridge and a fillet) — this is optimal for Russian style. More — already excessive.
Complex multi-level profiles with numerous protrusions, grooves, ornaments — these are for Baroque, Empire, but not for Russian style. Russian tradition — simplicity of form with richness of content.


Frames and panels
Panelled wall — this is a classic decorative technique, when a large plane is divided by moldings into rectangular or square zones (panels). This technique originated in European architecture, but firmly established itself in Russian estate interiors of the 18th-19th centuries and is experiencing a new rebirth today.
Principles of frame marking. The first step — determine how many frames will be on the wall and their size. The classic option — a symmetrical grid with equal intervals. For example, a wall 2.7 m high and 4 m long is divided into six frames: two rows horizontally (upper and lower) and three columns vertically.
Frame proportions are important. Square frames (1:1) look static and stable. Vertical (2:3 or 3:4) — more dynamic, upward-looking. Horizontal (3:2 or 4:3) — calmer, expand the space. Vertical and square proportions are characteristic for Russian style.
The distance between frames (gap width) should be proportional to the width of the molding. If the molding is 60 mm, the gap between frames — 80-120 mm. Too narrow a gap (less than molding width) creates a feeling of confinement. Too wide (more than two widths) — frames will appear disconnected, uncoordinated.
Height of frame placement. If frames run along the entire wall height (from skirting to cornice), the question does not arise. But if frames occupy only part of the wall, the height of their placement is important.
Classic option — frames start at skirting height (or 10-20 cm higher) and end at 2/3 wall height (180-200 cm from floor). The upper part of the wall remains smooth, painted in frame tone or contrasting. This creates a sense of solid base and light upper part.
Alternative — frames only in lower part of wall, 100-120 cm high (height of chair back). This is more of a protective panel than a decorative composition, but it also has its place, especially in dining rooms and hallways, where lower wall part is prone to dirt.
Filling panels. Anything can be inside the frame, and this determines the character of the interior. Contrasting color — the simplest option. Walls light gray, inside frames dark gray or beige. Or vice versa: walls dark, panels light. Contrast creates volume, makes the wall three-dimensional.
Wallpaper with ornament — more complex option. Walls smooth and painted, inside frames — wallpaper with plant or geometric pattern. For Russian style, suitable are patterns stylized after folk motifs: rhombuses, rosettes, stylized flowers. Avoid tropical palms, exotic birds — this is not our aesthetics.
Fabric — for the most refined interiors. Fabric (linen, cotton, jacquard) is stretched over a frame or directly on the wall inside the frame. Fabric can be solid color (matching wall or contrasting) or patterned. Fabric panels create coziness, warmth, tactile quality.
Mirror — for visual space expansion. A molding frame surrounds a mirror panel inserted into the wall. Several such mirror frames on one wall create an infinity effect, making the room larger, brighter.
Wooden panel — for creating a warm, natural atmosphere. Inside the frame — veneered or solid wood panel with visible wood texture. Walls can be painted, while panels — wooden. Or vice versa: walls covered with wood, panels painted in contrasting color.
Symmetry and asymmetry. Classic approach — absolute symmetry. Frames of equal size, placed at equal distances, forming a regular grid. This creates order, calmness, classic beauty. Such an approach is characteristic of Russian classicism.
Modern approach allows asymmetry. Frames of different sizes, placed not on a grid, but in a more free composition. A large frame on the left is balanced by two small ones on the right. Vertical frame neighbors horizontal. This creates dynamism, modernity, but requires very precise sense of balance.
For Russian style, symmetry is preferable. Asymmetry — this is already the influence of modernism, which is permissible in modern interpretations, but less authentic.
Color solutions for frames. Monochrome — frames and wall are one color, frames are perceived only through the relief of the molding. This is the most restrained, elegant option. Suitable for minimalist interpretations of Russian style.
Light contrast — frames one to two tones darker or lighter than the wall. Creates a delicate division, not loud, but noticeable. Good choice for bedrooms, living rooms, where calmness is important.
Strong contrast — white walls and dark (oak) moldings or vice versa. Creates graphic effect, clarity, character. Suitable for formal rooms, offices, libraries.
Colored panels — walls neutral (white, gray, beige), inside frames — color (blue, green, terracotta). Color should not be toxic or acidic — only natural, muted shades characteristic of natural dyes.
Our factory also produces:


Combination with lath fields
Moldings andWooden plank for wall— two tools for creating structure on the wall. They can work separately, but the most interesting solutions arise when combined. A molding frame surrounds a lath field — and the result is a composition with structure (frame), texture (laths), and rhythm.
Vertical laths inside frames. Classic scheme: wall divided by moldings into rectangular frames, inside each frame — vertical laths with a certain spacing. Molding — this is the contour, the boundary. Laths — this is the filling, the texture.
Spacing of laths inside the frame depends on frame size. For a small frame (50×100 cm) 3-5 laths with 15-20 cm spacing are sufficient. For a large frame (100×200 cm) — 7-10 laths with 25-30 cm spacing. Too frequent laths create a feeling of overloading. Too sparse — lose rhythm.
Laths can run from the lower molding plank to the upper (filling the frame completely) or with a 5-10 cm offset from the molding (creating an inner boundary). The second option gives a more complex, multi-level composition.
Horizontal slats as an alternative. Less common but interesting option — horizontal slats inside vertically oriented frames. This creates a contrast of directions: frame vertical, slats horizontal. Such contrast adds dynamism, making the composition more active.
Horizontal slats are usually made thinner (10×30 or 10×40 mm) to avoid being too bulky. The vertical spacing between them is 15–25 cm. It’s important that the number of slats is odd (3, 5, 7) — this creates symmetry relative to the central slat.
Slatted field without frame. Intermediate option: part of the wall is smooth with molding frames, part is a solid slatted field without frame. For example, one wall in a room is paneled with molding, the opposite wall is slatted. This creates a dialogue between two types of finish, preventing the interior from being monotonous.
Or the lower part of the wall (up to 120 cm height) — slatted panel, the upper part — with molding frames. Slats at the bottom protect the wall, create texture. Frames at the top add decorative elegance.
Molding as framing for slatted panel. If there’s already a slatted panel on the wall (e.g., accent wall behind the sofa, vertical slats from floor to ceiling), it can be framed with molding around the perimeter. Molding creates a frame that separates the slatted panel from the rest of the wall, making it a distinct element.
The width of the molding framing the slatted panel should match the width of the slats. If slats are 20×40 mm, molding should be 40–60 mm. If slats are 10×30 mm, molding should be 30–50 mm. A wider molding will start to dominate and overpower the slats.
Slat thickness and molding thickness. Important point: slats usually protrude from the wall by 10–50 mm (depending on mounting construction). Molding also has thickness (projection from the wall) of 5–30 mm. If molding frames the slatted field, its thickness should be no less than the slat thickness, otherwise the molding will 'sink behind' the slats and won’t be visible.
Ideal option — molding 5–10 mm thicker than slats. It protrudes slightly more, creating a clear boundary. If molding is thinner, it can be mounted on backing strips (strips of the same thickness as the slat substructure) to align it with the slats or slightly beyond.
Color combinations. Molding and slats of the same color — creates unity and coherence in composition. White molding, white slats on a light background — this is a light, airy composition typical of a sunroom or northern interior.
Contrasting colors — white molding, natural wood slats (pine, oak) or vice versa. Creates a striking contrast, emphasizing structure. Works well on neutral backgrounds (gray, beige walls).
Background contrasts with slats, molding matches background — complex three-color composition. Dark wall, light slats, dark molding (matching wall tone). Molding blends into the wall, leaving only the light slatted field framed by a dark outline. Requires precise shade selection.
Get Consultation
Thin joints
The beauty of molding compositions lies in the details. Rough joints with gaps, misalignments, or glue marks instantly ruin the impression. Professional work features perfectly thin joints that are almost invisible. Let’s examine how to achieve this.
45-degree corner joint. Classic way to join moldings at frame corners — bevel cut at 45°. Two moldings are cut at this angle, their ends join to form a straight 90° frame corner. For precise beveling, a miter saw with a rotating table is required.
Critical to set the saw: angle must be exactly 45.0°, no deviations. Even a 0.5° difference will result in a gap at the joint. Before starting work, make a test cut on offcuts, join them, check the joint tightness. Only after confirming everything is perfect, proceed to the main material.
Cutting direction is also important. For external frame corners (top corners, for example), the bevel runs from the front side of the molding to the back at 45° to the right for the right piece, left for the left. For internal corners — opposite. Confusion over direction is a common mistake among beginners.
Joining along length. If the wall is longer than the standard molding (usually 2.2–2.5 m), two moldings must be joined. A straight end-to-end joint is noticeable and may separate over time. Better to make a diagonal joint at 30–45° to the molding’s longitudinal axis.
Both ends are beveled at the same angle, joined with a small overlap, glued, and secured with finishing nails. A diagonal joint is less noticeable than a straight one, especially if the molding is painted. The joint location should be placed not in the middle of the wall, but closer to the corner or vertical element, where it will be less noticeable.
Filling gaps. Perfect joints don’t exist — there are always micro-gaps of 0.1–0.3 mm. These are filled with acrylic sealant or wood putty in the molding’s tone. Sealant is good for painted moldings (white, colored) — it’s elastic and doesn’t crack under minor wood movement.
Wood putty is better for moldings finished with varnish or oil, where visible texture matters. Putty is matched to the wood tone (light oak, walnut, mahogany), applied with a rubber putty knife, excess immediately wiped off with a damp cloth. After drying, the putty area is lightly sanded with fine sandpaper (grit 220–320).
Important: gaps must be filled before final painting or varnishing. If the molding is already painted, sealant or putty will show as a gloss or tone mismatch. Correct sequence: installation — gap filling — final sanding — painting/varnishing.
Mounting without marks. Molding is mounted to the wall with adhesive or a combination of adhesive + mechanical fasteners. Adhesive mounting gives a clean surface without marks, but requires a flat wall and good adhesive (polymer-based construction adhesive or D3/D4 grade carpentry PVA).
If finishing nails or screws are used, they must be driven in 1–2 mm below the molding surface. The recess is filled with matching putty, then sanded after drying. Properly filled fastener spots become completely invisible after painting.
Mounting spacing — 40–60 cm for moldings up to 80 mm wide, 30–40 cm for wider ones. Less frequent mounting may cause the molding to detach from the wall, especially if the wall is uneven. More frequent mounting is excessive and only increases the number of spots requiring putty.
Plane control. When installing moldings, plane is critically important. All frame elements must lie in one plane, without protrusions or dips. Checked with a long straight rule (level) or laser level: place the rule against the moldings — no gaps, everything in one plane.
If the wall is uneven (which is typical in most apartments), shims or backing strips are placed under the molding to bring it to a single plane. This is labor-intensive but necessary: a wavy molding looks amateurish and ruins the entire composition’s beauty.
Final finishing. After installing all elements, final finishing is required: inspect all joints, check plane, fill any detected gaps, remove glue marks. Glue marks are wiped off with a damp cloth immediately while still wet. Dry glue must be scraped off with a sharp knife or sanded — this may damage the molding surface.
Final sanding with fine sandpaper (220–320), dust removal, application of final finish. Only after this is the molding composition considered complete.
Materials and painting
Choice of molding material and its finish determines not only appearance but also durability, eco-friendliness, and tactile feel. For Russian style, where connection to natural materials and tradition is important, material choice is crucial.
Wood: genre classic. Wooden moldings are the only fully authentic option for Russian style. Wood is warm, alive, has visible texture, pleasant to the touch. It is eco-friendly, long-lasting with proper treatment, repairable (can be sanded and repainted).
The same wood species are used for moldings as for other interior elements: pine (affordable, easy to work with), birch (dense, light, excellent for painting), oak (most durable and noble, but expensive). It is important that the wood is dry (humidity 8-12%) — only then it is stable and does not warp.
Wooden moldings can be smooth (sanded, polished) or carved (with ornament, made on a milling machine or by hand). Smooth moldings suit restrained interpretations of Russian style. Carved moldings are for more traditional, rich interiors.
MDF: alternative to solid wood. MDF moldings are cheaper than wooden ones, more stable (do not warp from humidity), can have very complex profiles that are difficult to make from solid wood. But MDF is compressed wood dust, it has no living wood texture, it is less eco-friendly (contains binding resins).
For Russian style, MDF is acceptable if the molding will be fully painted with a covering paint (white or colored), where texture is not important. If transparent finishing (lacquer, oil) is planned, where texture is visible, MDF is not suitable — solid wood is required.
MDF moldings are usually sold already primed, ready for painting. This is convenient and saves time on preparation. They are painted the same way as wooden moldings: acrylic or alkyd enamel in 2-3 layers.
Polyurethane: practical but not authentic. Polyurethane moldings are lightweight, do not fear moisture, inexpensive, easy to install (stick with regular construction glue). They can imitate complex moldings that are difficult or expensive to make from wood.
But polyurethane is plastic. It feels cold to the touch, has no living texture, looks artificial. For Russian style, where natural materials are important, polyurethane is not the best choice. It can be used for ceiling cornices (where they are not touched), but for wall moldings, especially in the lower part of the wall, wood is preferable.
Gypsum: for true connoisseurs. Gypsum moldings are the highest level of craftsmanship, characteristic of palace interiors. Gypsum allows creating the finest details, complex moldings, relief ornaments. But gypsum is heavy, fragile, requires professional installation, does not tolerate moisture.
For Russian style in a country house, large living room, or library, gypsum moldings may be appropriate — they create the atmosphere of an estate or classic mansion. But in a regular city apartment, they are excessive — simpler, more practical, and more authentic to use wood.
Painting with white enamel. White color is classic for moldings in Russian style. White refreshes, expands space, makes the interior lighter. White moldings on light walls create a delicate relief, readable through play of light and shadow.
Uses water-based acrylic enamel (odorless, dries quickly, eco-friendly) or alkyd (more durable, with slight gloss). Applied in 2-3 layers with brush or roller with intermediate sanding. First layer — diluted (primer), second and third — full density.
Toning and lacquering. If you want to preserve visible wood texture, use transparent finish: stain + lacquer or oil. Stain colors the wood from within, without hiding texture. Color can be chosen from light (natural oak) to dark (wenge, stained oak).
After staining, lacquer (acrylic or polyurethane) is applied in 2-3 layers for protection. Lacquer creates glossy or matte film (depending on type). Alternative to lacquer — oil with hard wax, which penetrates deeper into wood, keeps it breathable, but requires renewal every 3-5 years.
Patina: effect of antiquity. To create the effect of old, repeatedly painted wood, patina is applied. The molding is painted in base color (usually dark), then lighter paint is applied in places, which is rubbed off so that it remains only in the recesses of the profile.
This creates a multi-layered surface where dark base shows through on protrusions, light patina lies in recesses. This creates an illusion that the molding has hung on the wall for decades, accumulating time patina. For interiors in the style of old estates, this is a very appropriate technique.
Combination of different finishes. An interesting effect is achieved by combining different types of finishes in one composition. Horizontal moldings (border, skirting, cornice) — natural wood under oil. Vertical frame moldings — white enamel. Or vice versa. Such combination creates contrast of textures, adds complexity and depth to the composition.
The key is that this should be an intentional technique, not a coincidence. The combination should be justified: for example, horizontals connect with floor and ceiling, so they are wooden (in floor tone), while verticals connect with walls, so they are painted (in wall tone).
Conclusion: structure without excess
Moldings in Russian style are not decoration, but a way to organize space. They create structure, rhythm, proportions, make large wall surfaces understandable and proportional to humans. They work as architectural elements, not as decoration.
Avoid kitsch by following simple principles: restrained forms (simple profiles without excessive moldings), natural materials (wood, not plastic), correct proportions (moldings proportional to the room), quality execution (perfect joints, clean finish).
A molding composition can be very simple — a few frames on the wall, a framed mirror, a border at chair height — and still create a strong impression. Because here it is not quantity, but quality that matters. Not excess, but precision. Not stylization, but style.
decor in Russian styleIt is always a balance between tradition and modernity, between richness and restraint, between form and content. Moldings help find this balance, create an interior that speaks of culture, taste, and respect for heritage.
STAVROS produces moldings from solid wood of all types and profiles. We offer a wide selection: from simple rectangular strips to complex profiled and carved moldings. We work with pine, birch, oak, offer items ready for painting (sanded, polished, primed) and factory-finished (painted, toned, lacquered).
Standard molding length is 2.2 m, but we can manufacture non-standard lengths upon request. Dimension accuracy — ±0.3 mm, ensuring tight joints without gaps. All wooden items are made from kiln-dried wood (humidity 8-10%), guaranteeing shape stability.
We have ready-made solutions for creating panel compositions: molding sets for standard-sized frames, corner elements, rosettes with traditional ornaments. We can also develop a custom molding profile for your project, manufacture carved elements according to sketches.
STAVROS works with retail customers and professionals — designers, architects, construction companies. We consult on profile selection, help calculate material quantity, provide installation and finishing recommendations. Our products are used in projects throughout Russia — from private apartments to restaurants, hotels, museums.
When contacting STAVROS, you receive quality proven over time and service oriented toward results. 23 years on the market, thousands of completed projects, hundreds of grateful clients — this is our reputation, which we value.
Frequently asked questions
What width of molding is optimal for creating frames on the wall?
It depends on the size of the frames and the scale of the room. For frames 60×90 cm — molding 40-50 mm. For frames 100×150 cm — 60-80 mm. For large frames (over 150 cm) — 80-100 mm. General rule: molding width should be approximately 1/20 — 1/15 of the smaller side of the frame.
Technically yes, but aesthetically undesirable for Russian style. Wood and polyurethane look different (different texture, gloss, tactile feel), and the difference is noticeable. If using polyurethane, use it for ceiling cornices (where they are not touched), and all wall elements should be made of wood.
How to calculate the amount of molding for a room?
Measure the perimeter of all frames you plan to create. For example, 6 frames of 80×120 cm: perimeter of one frame (80+120)×2 = 400 cm = 4 m. Total: 6×4 = 24 m. Add 10-15% for trimming and errors: 24×1.15 = 27.6 m. Order 28 m. If the standard plank is 2.2 m, you will need 13 planks.
Measure the perimeter of all frames you plan to create. For example, 6 frames of 80×120 cm: perimeter of one frame (80+120)×2 = 400 cm = 4 m. Total: 6×4 = 24 m. Add 10-15% for trimming and errors: 24×1.15 = 27.6 m. Order 28 m. If standard board is 2.2 m, you will need 13 boards.
Should moldings be painted before or after installation?
For wooden moldings on dry, flat walls — carpentry PVA of class D3 (water-resistant). For uneven walls — polymer-based mounting adhesive like "liquid nails" (white, non-yellowing). For MDF and polyurethane — special mounting adhesives compatible with these materials.
Which adhesive to use for attaching moldings?
For wooden moldings on dry, flat walls — carpenter's PVA grade D3 (water-resistant). For uneven walls — polymer-based construction adhesive, type 'liquid nails' (white, non-yellowing). For MDF and polyurethane — special construction adhesives compatible with these materials.
How to avoid gaps in the corners of frames?
Use a quality miter saw with precise 45° angle adjustment. Before the main work, make test cuts and check the joint tightness. Join moldings with adhesive (apply adhesive to both ends before joining). Fill small gaps up to 0.3 mm with acrylic sealant in matching color.
Can moldings be installed on wallpaper?
Not recommended — moldings on wallpaper hold poorly and may peel off over time. Correct sequence: install moldings on plastered walls — paint moldings and walls (or apply wallpaper). If wallpaper is already applied, remove it at the molding installation points to expose the plaster.
Which molding profile is best for modern Russian style?
Simple profiles: rectangular, with bevel, with one ogee (concave or convex). Avoid overly decorated profiles with multiple elements — that’s already classicism. For modern Russian style, simplicity of form is key when using natural materials and proper proportions.
How much does creating a molding composition in a room cost?
For a 20 m² room with 6-8 frames on walls: material (60 mm wooden molding, pine) — 12,000–18,000 rubles, labor (installation, fitting, joint spackling) — 15,000–25,000 rubles, painting (2 layers of enamel) — 8,000–12,000 rubles. Total: 35,000–55,000 rubles. More expensive if using oak, complex profiles, or patina.
Can you create molding frames without moldings, just using painter’s tape?
Technically yes — apply painter’s tape to the wall along the frame outline, paint inside with contrasting color, then remove the tape. This creates a flat, colored frame without relief. It’s a budget solution, but it doesn’t provide volume, light play, or the tactile quality of real molding. For a full effect, real wooden moldings are needed.