Article Contents:
- What does “furniture handle for painting” mean
- When a handle matching the facade color solves the project's task
- First shape and grip, then shade
- How the handle type affects fitting and installation
- Why choose the handle before drilling the facade
- How to check the fastening before painting
- Beech or oak: the material must be in the specification even under enamel
- What to check on the surface of an unpainted handle
- Mounting areas must be protected before applying the coating
- Test spray-out: one handle goes through the entire cycle
- Why a spray-out is compared to the actual facade
- Color and gloss level are agreed upon separately
- The handle experiences constant contact with hands
- When the painted handle can be installed
- Paint handles together with facades or separately
- One sample for fitting and a control finish sample
- How to calculate the number of handles for a set and a series
- What to record in the furniture handle specification
- How to achieve a consistent result in a small batch
- When to choose a custom finish and when to choose a ready-made coating
- Frequently asked questions before ordering
- Can the handle color be matched from a photo of the cabinet front?
- What should I do if I need to replace one painted handle?
- What should I give the painter if the handles are painted by another workshop?
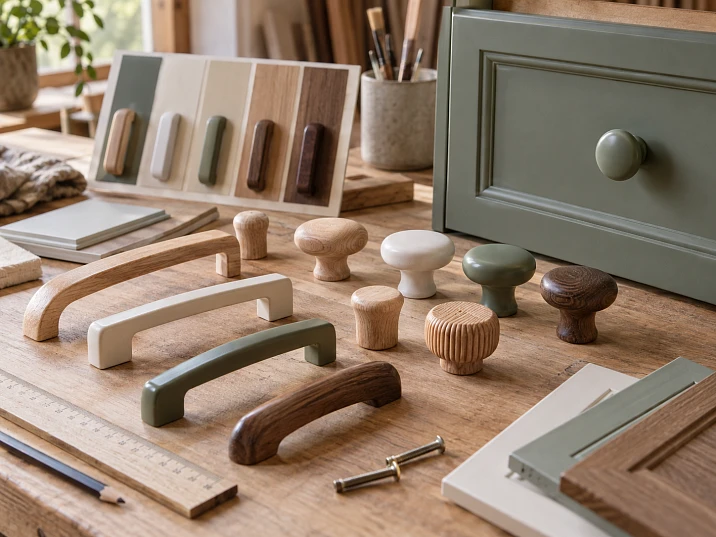
A handle can be painted using the same code as the cabinet front, yet after installation it may look noticeably different: a different sheen, a pronounced texture, or a dark line in the recess. Another problem can also occur — the color matches, but there is not enough finger room, the mounting does not align with the holes, and a thick coating layer prevents a tight fit. All of this is easier to spot on a single sample than to fix on a finished set.
Furniture handles for painting are chosen for a specific cabinet front and a specific finishing system. First, the shape and mounting are checked, then a sample is prepared from the required wood species, painted, and evaluated next to the actual cabinet front. Only after that is the finish approved and the quantity ordered for all the furniture.

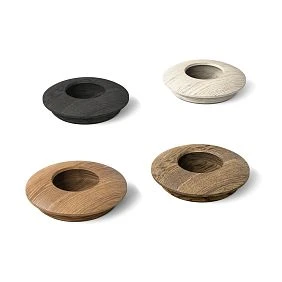
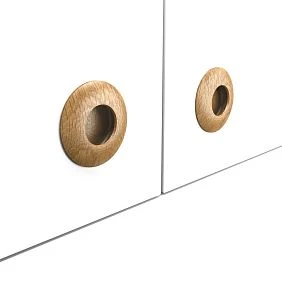

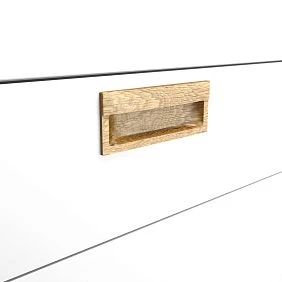
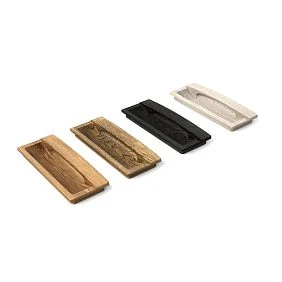
What does “furniture handle for painting” mean?
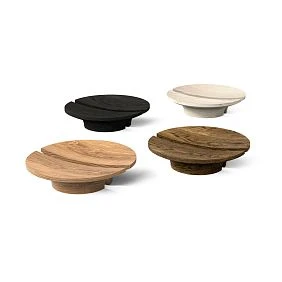
In this scenario, the workshop purchases a shaped wooden handle without a finish. Its appearance and dimensions are already determined by the model. The buyer must inspect the part, perform the preparation required by the chosen coating, finish it, and install the handle.
In the section of unfinished furniture handles they choose the future furniture component itself. However, the label "uncoated" alone does not indicate which operations have been performed on the mounting holes, how thoroughly the recesses have been treated, or whether additional sanding will be required. This information must be verified against the specific item and the received piece.
The name "furniture handle blanks" is used with different meanings. It can refer either to a formed part or to material that still needs to be shaped. Therefore, for purchasing, a precise description is more useful: model, dimensions, material, surface preparation, mounting type, and absence of finish. Such a record immediately shows which part of the work is done by the supplier and which by the furniture workshop.




When a handle in the facade color solves the project's task
A matching color helps unite the handle with the door or drawer. This is appropriate when the facade should remain the main element: its proportions, frame, milling, or the overall rhythm of the furniture. The handle continues this composition, while ease of opening is preserved through its shape and projection.
At the same time, the same color does not make a three-dimensional part invisible. Highlights appear on the protrusions, a shadow appears under the handle, and the angle of light reflection changes on the curves. The expectation should be formulated in advance: whether you need a calm part within the overall palette or the most inconspicuous solution possible. In the second case, color matching alone may not be enough — the shape itself will have to be reconsidered.
If the project is built on natural texture, an opaque enamel may remove exactly the effect for which the solid wood was chosen. In that case, tinting, oil, or clear lacquer are considered within a suitable finishing system. This already places different requirements on wood selection and sample evaluation.
Our factory also produces:

First shape and grip, then shade
Before coloring, the handle is test-fitted to the facade in its working position. For a drawer, this means not just placing the part in the center, but checking opening with the slides installed and with a typical load. For a door, it means assessing the grip, finger access, and movement of the leaf near a wall or adjacent furniture.
Wooden handles for a wardrobe and a small drawer may require different projection and grip length. A space that is too tight behind the handle cannot be fixed with a different color. Increasing the decorative thickness also does not guarantee convenience: what matters is which part a person actually grasps.
During the test fitting, five things are checked:
- Is there enough space for fingers between the handle and the front.
- Are the edges and transitions of the profile comfortable when opening.
- Does the handle size match the width of the drawer or door.
- Does the part interfere with the adjacent front, countertop, or wall.
- Can the handle be installed and subsequently removed with the chosen fasteners.
After painting, this check is repeated. The finish changes the feel of the surface, and in tight joints even a slight buildup of coating can matter. The sample should demonstrate the behavior of the finished assembly, including its back side.
Get Consultation
How the handle type affects fitting and installation
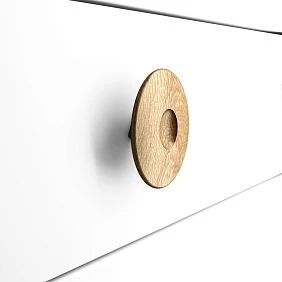
For a small cabinet, you can consider wooden knob handles. If the selected model has a single mounting point, during the trial assembly check the tightness of fit and how securely the part holds the required position. The name "knob" itself does not replace information about the fastening.
У wooden handle brackets the space under the bridge and the actual drilling pattern are especially important. The overall length of the handle and the distance between the mounting holes are different parameters. Two outwardly similar pulls may require different drilling templates.
for wooden profile handles you need to understand which part of the profile the fingers grip, how it is positioned relative to the edge of the front, and what is provided for mounting the specific model. You should not automatically transfer to it the mounting pattern of a familiar metal profile handle.
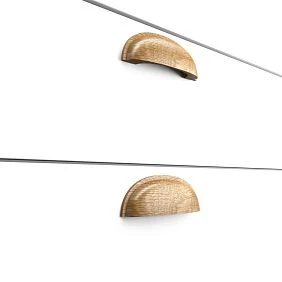
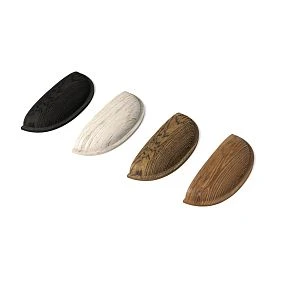
Choosing wooden shell handles, check access to the inner surface during painting and the convenience of gripping from below or above — depending on the position on the furniture. A beautiful front relief does not show how convenient it is to use the recess.
Why the handle is chosen before drilling the front
The article number and size must be known before making the drilling template. Then, using the drawing, check the number of mounting points, the distances between them, and the reference to the edge of the front. An approved sample helps verify that the dimensions have been read correctly and the orientation of the part has been chosen properly.
Illustrative example: a handle 180 mm long may have a center-to-center distance of 128 mm. If the overall length is taken as the distance between holes, it will not be possible to install it using such a layout. These numbers illustrate the difference in parameters; to place an order, the dimensions of the selected model are required.
It is useful to first test the template on a technological sample of the same thickness as the facade. When drilling from the reverse side, take into account the mirrored position of the layout and mark the top, bottom, and base edge in advance. This is especially important for asymmetrical parts and handles installed off-center.
If the facades have already been drilled, the selection begins with the existing hole pattern. The ability to cover an old hole with a handle does not yet mean that the fastening assembly will be reliable and the finish will remain neat.
How to check the fastening before painting
The screw length depends on the facade thickness, the parts between the head and the handle, and the permissible screw-in depth. Fasteners that are too short may not provide the required connection, while ones that are too long may hit the bottom of the hole before the handle is pressed against the facade. The thread size and permissible depth are determined by the specific hardware.
One should not assume that screws are included with any wooden handle or that a single diameter is suitable for all models. When selecting furniture hardware it is necessary to compare both sides of the connection: the mounting part of the handle and the construction of the facade. If threaded inserts are provided, it is important not to damage them during trial assembly and subsequent finishing.
At this stage, the position of the handle is also fixed. If the holes have to be moved after painting, the rework will affect the already finished front surface. For a small batch, a proven template and one assembled door are usually more useful than a separate approval of a beautiful photo of the handle.
Beech or oak: the material must be specified even under enamel
An opaque coating hides the color of the wood, but the requirements for surface preparation remain. Therefore, it is not enough to specify “wooden handle, white” in the order. The species is included in the part description along with the article number and size.
Wooden furniture handles are selected with the desired surface after finishing in mind. If the front should look smooth and uniform, this requirement is communicated to the painter in advance. If a visible wood structure is acceptable, it is also shown on the sample. The word "enamel" without such clarification describes the coating material but does not fully define the result.
For example, in the product page Wave HL-006 handles options in beech and oak are available, as well as several sizes. The model name alone is not enough for a repeat purchase: the selected finish must be saved.
Beech handles for enamel are a logical option to consider when opaque painting in the overall furniture color is required. However, the result depends on the specific surface, priming, and the entire coating. The promise that "beech always paints perfectly" will not help evaluate the received batch.
Oak furniture handles are often chosen for their pronounced texture. Under an opaque finish, it must be separately agreed whether its relief is acceptable or the customer expects a visually smooth surface. In the second case, the preparation must ensure exactly that result. A transparent or tinted finish, on the contrary, keeps the wood as part of the design and requires taking its natural heterogeneity into account.
The approval sample is made from the same species as the production handles. A successful paint test on beech does not serve as ready confirmation of the finish for an oak batch. Replacing the material after approval requires checking the result again.
What to check on the surface of an unpainted handle
A finished shape does not mean the same preparation of all items for any enamel. Before work begins, the front and back sides, ends, recesses, edges, and areas around the mounting points are inspected. Traces of processing, raised fibers, contamination, and local defects that may appear after the finish is applied are checked.
STAVROS describes the differences between sanding options in the section “Product quality”: the “Prestige” preparation includes additional hand finishing compared to “Standard”. The available option is specified for the selected model. The quality name does not override the requirements of the primer and coating manufacturer.
Preparation is determined by the actual condition of the part and the technical data sheet of the finishing system. A universal recommendation to use a certain grit and apply the same number of coats to all wooden furniture handles is unreliable here. On a smooth bar handle and a shaped shell handle, access to the surface and the risk of altering the relief during sanding differ.
Thin edges and small protrusions are treated with their shape in mind. If the profile is noticeably rounded during preparation, painting will no longer restore the original geometry. Dust residues in recesses must also be removed in a way compatible with subsequent finishing. The goal of preparation is to obtain a repeatable base for the coating while preserving the size and convenience of the handle.
Mounting areas must be protected before applying the coating
Before painting, determine which surfaces should receive the finish and which need to be protected from it. These may be threads, mounting holes, or other areas where the coating layer interferes with proper assembly. The decision depends on the handle design and the requirements of the chosen technology.
There is no need to automatically leave the entire back side bare: it may also need finishing. But filling a threaded hole with enamel cannot be considered a normal painting method either. Protection areas are marked on the working diagram, and masking is chosen so that its removal does not damage the adjacent coating.
A separate issue is the contact area between the handle and the front panel. Any buildup on it can prevent a flush fit. If, after drying, the fastener goes in with unusual effort, determine the cause before tightening. Trying to force past the obstruction with the screw can damage the joint or the finish.
For series work, it is useful to plan in advance a fixture that holds the handle during application and drying. It should provide access to the required sides, preserve protected areas, and leave no marks on visible areas. This mounting method is tested together with the first test coat.
Test paint run: one handle goes through the full cycle
A sample makes sense if it reproduces the future work. On a handle made of the selected material, the specified preparation, priming, intermediate operations, and finishing are carried out. Materials, mixing proportions, and curing conditions are taken from the approved finishing system.
A flat board helps with preliminary color selection, but it does not show how the coating behaves on a finished handle. On a curve, gloss appears differently, material can accumulate in a recess, and the inner surface may be difficult to reach with tools. Therefore, the control sample must have exactly the shape that will go into production.
It is convenient to divide the evaluation into three stages:
| Stage | What to Check | What decision to make |
|---|---|---|
| Before finishing | Geometry, grip, surface, mounting | Is the model itself suitable |
| After a full coating cycle and the required curing time | Shade, gloss, texture, recesses, edges | Is the finishing system suitable |
| On a trial assembly with the front | Fit, finger access, appearance, opening | Whether the set can be launched |
If the result is unsatisfactory, change one specific parameter: preparation, coating material, application method, or handle shape. Then repeat the trial. Replacing several conditions at once without recording them makes it difficult to understand why the next piece turned out well.
The coating is approved only after the drying required by the technology. The color of the wet layer and the feel of the surface immediately after application do not describe the finished handle.
Why the test panel is compared with the actual front
The facade and the handle should meet already at the sample stage. If the door is made of MDF and the handle is made of solid wood, check the combination of these two substrates with their actual preparation. A small wooden sample does not automatically reproduce the appearance of a finished painted facade.
The handle is placed where it will actually sit, and it is assessed from a normal distance, then up close. Look at the front face, the side surfaces, and the shadows where it meets the surface. For a long vertical handle, it is useful to check the entire length: a small painted fragment does not convey the overall impression.
A RAL or NCS code sets a color reference, but the result also depends on the coating, substrate, texture, gloss, and lighting. It is impossible to promise an exact visual match based on the same code alone.
It is worth looking at a pair of samples in daylight and under the lighting of the future room. NCS explains the phenomenon metamerism: two samples may match in color under one light source and differ under another. The practical takeaway for furniture is to approve the handle and facade together under the conditions in which they will be used.
If the furniture is intended for a project with already selected light fixtures, the comparison conditions are recorded together with the result. That way, on re-inspection there is no need to figure out why a sample approved near a window looks different under the kitchen's working lighting.
Color and degree of gloss are approved separately
The note "white matte handle" leaves too much freedom for a repeat order. A color code, a specific coating material, and an agreed gloss level are needed. If the manufacturer specifies a numerical gloss value, it is kept together with the measurement conditions rather than mechanically transferred to another brand's product.
Even with a close shade, a glossier handle can stand out noticeably against a matte facade. On a shaped surface, highlights further emphasize the raised areas and transitions. Therefore, not only the frontal view is approved, but also the impression when moving along the furniture.
Texture is another independent parameter. A smooth opaque surface, visible pores under enamel, and a pronounced wood grain under tinting give different results. The wording "to match the front color" is usefully supplemented with the expected texture, otherwise the craftsman and the client may read different meanings into it.
When the relief is chosen deliberately, there is no need to endlessly build up the coating for the sake of similarity to a flat door. It is more correct to approve the appearance of the finished sample and keep it as a reference for production.
The handle is in constant contact with hands
Wooden kitchen handles are touched by fingers every day, wiped, and used to pull open loaded drawers. On dresser and cabinet handles, the load on the surface is also concentrated in a small grip area. Therefore, a suitable color is only part of the requirements for the coating.
The chosen system must match the material, the purpose of the furniture, and the expected care. A composition that looks good on a decorative element should not automatically be considered suitable for a handle. The requirements for the contact surface and the cleaning agents used are clarified with the coating manufacturer.
On the sample, after the required curing time, check the feel when gripping: whether there is roughness, stickiness, or sharp ridges. If the project specifies a particular care product, its compatibility is confirmed by the technical documentation and an agreed test. Such a check helps identify an obvious problem, but does not replace the established wear-resistance tests for a serial product.
When choosing materials for installation and finishing you need to assemble a compatible system. A primer, enamel, lacquer, or patina do not become compatible simply because each of them is intended for wood.
When a painted handle can be installed
The surface may stop being tacky before the coating has gained the necessary hardness. This matters when tightening fasteners, packing, and using the furniture: contact pressure can leave a mark on a layer that is not yet ready.
Manufacturers distinguish drying stages. For example, in the documentation Helmi 30 furniture paint The dust-dry, recoat, and full-hardness times are listed separately. These values apply to the specific product and do not carry over to another enamel.
For the selected system, clarify the permissible time before assembly, packing, and use, as well as the holding conditions. A single general rule of “leave it until tomorrow” is not enough. In the production schedule, drying must be a separate stage, not time that happens to remain before shipment.
Before packing, inspect the back side of the handle as well. Marks from the fixture, uncured areas in recesses, or damage from temporary fasteners may only be discovered during final installation, when correcting them is already inconvenient.
Paint handles together with the fronts or separately
A unified finishing system does not require applying coating to already assembled furniture. For many removable handles, separate painting is more convenient: the back side and grip area are accessible, edges are easier to control, and no paint bridge forms between the handle and the door. The specific order depends on the design.
Handles and fronts can be included in a single coordinated finishing cycle while maintaining separate fixtures and preparation conditions for each substrate. Approved materials, formulation, and final appearance are important. Using the same paint does not eliminate the differences between preparing solid wood and preparing a front.
When painting an installed handle, access to hidden areas and the possibility of subsequent removal are assessed in advance. If the coating joins two parts, disassembly may damage the finish edge. This must be decided before starting the batch, especially for furniture in which handles are expected to be replaced during servicing.
One unit for fitting and a control finishing sample
For a new model, it is useful to first buy one handle in the required size and material. It allows you to check the geometry, installation, and future painting. But after approval, you need to decide whether this sample will remain in the workshop or be installed on the furniture.
It is convenient to store the control handle together with a sample of the actual front and a record of the finishing system. A photograph complements this set but does not replace it: the camera and screen change the perception of shade and gloss. Samples protect against contamination and conditions that could alter their appearance.
Section "Product samples" helps clarify the available samples, but a universal wood sample does not replace the selected handle for checking grip and coating on its shape. Such a test requires a unit of the specific model.
After approval, the sample card is marked "Approved," along with the date and finish version. If the wood species, shape, primer, or topcoat material then change, it is checked whether the approved result is preserved. The old sample must not imperceptibly become the basis for a different technology.
How to calculate the number of handles for a set and a series
The quantity is determined by the fronts on which the handles are installed and the accepted layout scheme. In the conceptual chest of drawers project, there are four drawers, each with two handles:
4 drawers × 2 handles = 8 handles per chest of drawers.
For six identical chests of drawers, the following is required:
6 chests of drawers × 8 handles = 48 handles for installation.
The sample piece and the reserve are counted separately. If one approved handle is kept in the workshop, 49 pieces will be required: 48 for the furniture and one as a reference. If only 48 are purchased and one is kept as a sample, 47 will remain for assembly.
| Purpose | Quantity in the example | How to account |
|---|---|---|
| Installation on six chests of drawers | 48 | Mandatory production set |
| Control copy | 1 | Remains in the workshop, not included in the furniture set |
| Reserve | At the workshop's discretion | Determined separately, taking into account re-purchase and finishing |
A universal percentage reserve is not needed here. The decision depends on the number of different models, the complexity of the finish, the likelihood of damage, and the reorder conditions. Fasteners are calculated based on the actual layout of the selected handle: the number of parts cannot be automatically equated to the number of screws.
What to record in the furniture handle specification
The specification should allow the order to be repeated without searching for “the same white handle” from a photo. It links the product item to the drilling drawing and the approved finish. Below is the record composition for a conventional chest of drawers series; the designations R-01 and O-04 are internal project codes.
| Field | What to fix |
|---|---|
| Project item | R-01, drawer handle |
| Product item | Exact SKU, name, and link to the product page |
| Finish | All selected sizes, wood species, preparation option |
| Installation | Hole layout drawing, fasteners, facade thickness |
| Finishing | O-04: approved preparation, primer, and finish |
| Color and surface | Color code, gloss level, agreed texture |
| Per item | 8 handles |
| Per series | 48 handles for installation |
| Sample and reserve | Individual items with purpose and quantity |
| Approval | Date, version, "Approved" mark |
An internal finish code must be backed by an available process record. It includes products, tinting formula, applicable thinners or hardeners if provided by the system, application method, and curing schedules. The designation “О-04” is convenient only when the painter understands where to find its explanation.
The front is also linked to this record. Otherwise, after a few months you can accurately reproduce the handle, but attach it to a door with an already changed finish. The handle and front versions must belong to the same approved set.
How to keep a consistent result in a small batch
When handles arrive, the marking and actual finish are checked against the specification. The quantity, material, dimensions, surface, and mounting areas are verified. If the project has several similar models or lengths, the parts are sorted by item before being sent to finishing.
Batch marking is organised so that it survives the process and does not end up on visible surfaces. After painting, two different positions may look almost identical, and a difference in mounting will only be discovered at assembly. Labelled trays and a work card help avoid such confusion.
Before painting the entire batch, it is useful to compare the first finished parts with the approved "handle — front" pair. The shade, gloss, and texture are checked, then the areas that are especially sensitive to application are inspected: recesses, edges, and the back side. For a set of handles for one chest of drawers, consistency between adjacent parts is important.
If a difference occurs, you should not try to hide it by randomly distributing the handles across the furniture. You need to find the cause and determine which part of the batch requires rework. The modified technology is recorded, and the acceptable result is agreed again.
The cause of the discrepancy is sought based on the observed sign. If the shade differs across the entire surface, the materials used and the formulation are compared. If the difference is noticeable mainly in reflected light, the gloss and texture are additionally checked. A local buildup in a recess requires an assessment of the application in that area. These signs help choose the direction of the check, but by themselves do not prove the cause: recoating the entire batch before inspecting samples is premature.
Parts that have undergone the required curing are handed over to packaging. The method of separating the handles is chosen taking the coating into account, so that they do not rub against each other and the packaging does not leave marks. A labelled set reduces final assembly time and makes it easier to find a part when replacing it.
When to choose your own painting and when to choose a ready-made coating
An unfinished handle is convenient if the workshop uses its own finishing system, a non-standard shade or an agreed patina. This choice allows the handle to be included in the overall process together with the other wooden furniture elements. At the same time, you need to allow for the labour of preparation, application, drying and inspection.
Wooden handles with coating it is worth considering when a suitable finish is already available and there is no need to reproduce a special front finish. Before purchasing, the ready-made option is still compared with the furniture: a similar colour name does not replace a sample.
For a solution, it is useful to compare the cost of the installed component. The price of an unpainted handle includes material consumption, labor, making a fixture if necessary, space for drying, and inspection. A low price for an unfinished part does not automatically mean lower costs for the entire set.
If the workshop already produces this furniture using an approved technology and obtains a consistent finish for the handles, there is no need to choose the shape and shade anew each time. It is enough to follow the accepted specification and batch control. A full repeat test is scheduled when there are significant changes to the component or the finishing system.
Frequently asked questions before ordering
Can the handle color be matched from a photo of the facade?
A photograph is suitable for preliminary discussion of the palette and shape. For final approval, a physical sample of the facade or an approved sample of its coating is needed. In a photo, it is impossible to reliably assess gloss, texture, and how the color behaves under different lighting.
What should be done if one painted handle needs to be replaced?
Start with the saved article number and finish record, then compare the new piece with the existing furniture. Over time, the appearance of the coating may have changed, so the original color code does not guarantee an invisible replacement. If the difference is noticeable, the solution is agreed upon for a specific group of fronts rather than touching up the handle at random.
What should be given to the painter if the handles are painted by another workshop?
Provide the exact model and material of the handle, a sample of the actual facade, requirements for color, gloss, and texture, as well as the layout of the mounting areas. Separately agree on who performs the final preparation, on which item the result is approved, and when the parts can be released for assembly. If a control handle already exists, it is sent along with the process record. Specifying only a color code does not replace this brief.
Where to buy furniture handles for painting
In the STAVROS catalog Wooden furniture handles can be selected by shape and design, and for a custom finish, move on to options without a coating. In the product page of the chosen model, you need to check the material, size, surface preparation, and mounting geometry.
Before buying wooden furniture handles for the entire project, prepare a short request to the supplier: article number and size, beech or oak, unfinished version, quantity for a sample, and quantity for the series. Separately clarify the hardware included and any information missing for drilling. For production, it is useful to study in advance conditions for manufacturers.
If a trial and a main purchase are planned, their timing is coordinated with the finishing schedule. Current availability, price, and delivery time are checked for the selected version; Payment and delivery are taken into account when planning both purchases.
Furniture handles for painting are ready for a series order when the specific article number is known, the mounting has been checked, and a painted piece has been approved next to the front. Then the order contains everything needed for a repeatable result: the part, material, finish, and exact quantity.