Article Contents:
- Why a furniture maker should buy an unfinished handle
- Who this suits
- Unfinished handle vs. handle with a ready finish: two different tasks
- What to choose
- What changes in the workflow
- Choose the SKU first, paint later
- What to look at in the product card
- Why this sets apart a production approach
- Non-standard sizes
- Beech or oak for a handle to be painted
- Oak
- Oak
- Glue grade for the handle
- Summary
- The same RAL does not yet mean the same color
- That is why the color is checked with a test spray-out
- What to record
- The "same color" trap
- Should the handle be painted with the same paint as the facade
- What to do
- Manufacturer's recommended sequence
- Test spray-out: one handle before the entire batch
- Where to get a handle for the test
- What to keep
- When the test can be skipped
- How to match a handle to a facade
- Comparison method
- Set the tolerance
- When it's better not to match the handle to the facade color
- How to choose a solution
- Example solution
- Paintable button handle
- Painting specifics
- How to paint small parts
- When a button is more convenient than other shapes
- Wooden bar handle for painting
- Painting specifics
- How to choose the finish
- Length control
- Profile handle: paint separately or together with the facade
- Separately or together
- Mounting zones
- Long line
- What must not be painted without control
- Why this is important
- How to protect the zones
- Inspection after painting
- Paint before or after installation
- When to paint after installation
- What depends on the model
- Order in the workshop
- How to paint a batch so twenty handles don't differ
- How to control
- Mistake: touching up as needed
- How much to take as a reserve
- How to record a handle for painting in the specification
- What to add
- Why this is needed
- Statuses
- Examples of real unpainted STAVROS handles
- Proun HL-053-1
- Jupiter HL-064
- How to use examples
- Purchasing and budget calculation for a series
- What to add to the budget
- Comparison with ready-made options
- Reserve
- Where to buy unfinished furniture handles
- Order terms
- What to clarify with the manager
- Workshop questions
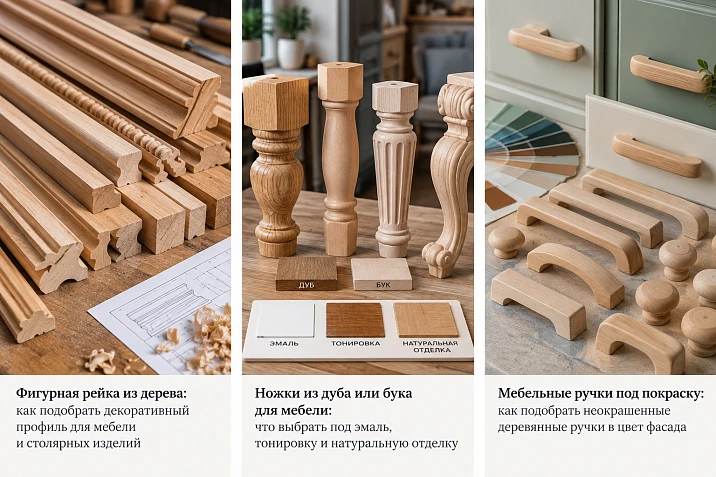
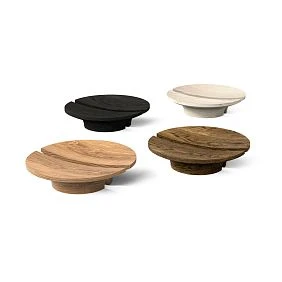
The fronts have already been painted in a custom color that the client approved based on a sample. Only the hardware remained, and it turns out that the ready-made wooden handles from the catalog differ from the front: slightly warmer, slightly glossier, with a different character of sheen. Individually, each looks decent, but on the front the difference is immediately noticeable. The solution is to take an unfinished handle and finish it with the same system as the front.
An unfinished wooden handle is a blank that the workshop brings to the required color and sheen along with the rest of the furniture. The logic is simple: determine the front finish, choose the item and wood species for that finish, make a test coat on one handle, approve the result, and only then paint the batch. Below is the entire path from selection to installation: what to buy, how to prepare the surface, how to compare color, what must not be painted over, and how to record everything in the specification. How to choose handles by mounting and drill the fronts is not covered here. The interior side of unfinished handles is discussed in the article about unfinished wooden handles in modern interiors, while here we are talking about a production task.
Why a furniture maker should buy an unfinished handle
Let's start with a production situation, not with the history of hardware. A workshop makes a kitchen or a chest of drawers. The fronts are painted in a color according to RAL, NCS, or the customer's sample. A ready-made handle from the catalog may fit in shape but not in color. Then there are two options: look for a ready-made handle in almost the same shade, or take an unpainted one and paint it together with the fronts.
The first option leaves a gap between the color of the front and the color of the handle. The second eliminates it: one system, one color, one gloss. For a workshop with a painting area, the second option is more natural, because the handle goes through the same operations as the front.
Typical scenarios:
-
fronts in RAL color, and the handles must match it;
-
a custom NCS or customer sample that is not available in ready-made versions;
-
the workshop's own stain that needs to be replicated on the handles;
-
oak furniture under oil, where the handles should look like part of the body;
-
beech parts under enamel, where an even opaque surface is needed;
-
classic furniture with patina, where the handle should look aged just like the front.
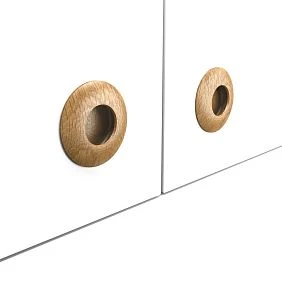
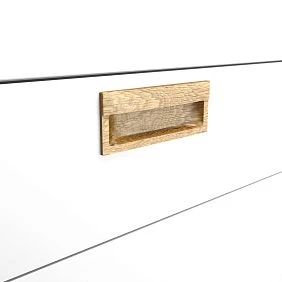
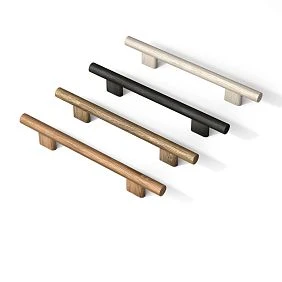
In the STAVROS catalog, unpainted handles are collected in a separate section unpainted furniture handles. At the time of checking, it contains 50 items. Product types: mortise, surface-mounted, push-button, profile, shell, bracket, as well as stands and samples. There are Kids and Nature collections. Filters allow you to select products by dimensions: A is length, B is thickness, C is height, as well as by availability in Moscow and St. Petersburg. Prices start from 590 rubles (Palmer HL-054) and go up to 7,890 rubles (Eclipse HL-072); prices are as of the time of checking, please check the product page before ordering.




Who this is suitable for
For joinery workshops, custom furniture manufacturers, paint shops, furniture designers, and restorers. If you do not have your own finishing area, painting handles becomes a separate operation, and then it makes more sense to consider ready-made finishes. The manufacturer states that they paint products when ordering goods worth 150,000 rubles or more, but for small workshops this is a threshold to keep in mind.
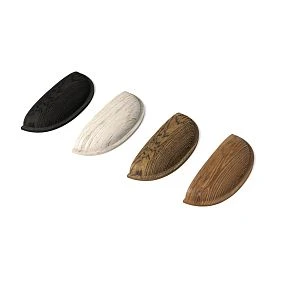
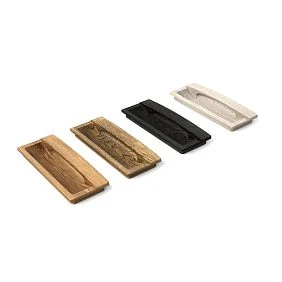
Our factory also produces:
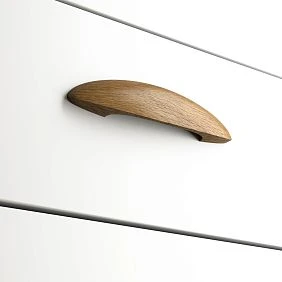
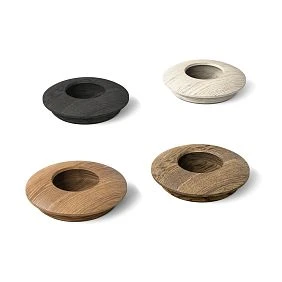
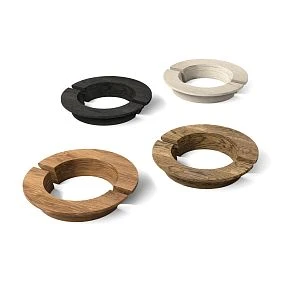

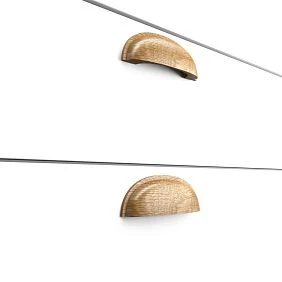
Unpainted handle vs. handle with a ready-made finish: two different tasks
Do not confuse these options: they solve different problems.
An unpainted handle is needed when:
-
the handle must match the facade color exactly;
-
all furniture is painted simultaneously with one system;
-
the workshop's own finishing system is used;
-
a custom shade is needed that is not in the catalog;
-
toning is required to match a specific wood species.
A pre-finished handle is needed when the existing finish is suitable, no additional painting is required, and a fully ready component is what you need. Section Handles with a ready-made coating saves time but limits color choice to what is available in the catalog.
Get Consultation
What to choose
If the fronts are painted in a standard color and the catalog handle finish matches it, choose a pre-finished one. If the color is custom, the batch is large, or the finishing system is already established in the workshop, choose an unfinished one. For one or two handles on a single piece, separate painting may not pay off: the time for preparation, primer, and drying is comparable to the cost of the handle.
What changes in the workflow
With an unfinished handle, you take on preparation, finishing, and quality control. With a pre-finished one, you are responsible only for installation. This is neither good nor bad, but a matter of organization. If the finishing area is busy, every extra operation on handles extends the timeline. If the area is free and color is critical, an unfinished handle gives you more control.
Choose the SKU first, paint later
The key point for production: you cannot take “any wooden handle, we'll paint it later.” The order is: SKU, shape, size, material, sample, test finish, approval.
Before finishing, lock in seven parameters: SKU, dimensions (sizes A, B, and C in the product card), handle type, material, quantity, surface condition, and mounting method. Without them, it is impossible either to repeat the order or to check compatibility with the front.
What to look for in the product card
The catalog provides finish options for each item. Check which materials are available (oak, beech, or both), which sanding grade ("Standard" or "Prestige"), and which glue-up grade. Check the package contents: for example, the Proun HL-053-1 product page states that the handle is fastened with metal screws included in the kit, and the recommended hardware section suggests decorative metal caps FUR-032 and FUR-033 at 59 rubles each.
Why this sets a production approach apart
In the DIY approach, the handle is chosen by appearance and painted "however it turns out." In the production approach, the part is fixed first, then the coating system, then a test is run. This makes the result reproducible: six months later, you can order the same handles and get the same look.
Non-standard sizes
If the required size is not available, the manufacturer states that it can produce items in the required size and custom items to individual designs, but only works with batch orders. For single fronts, this is usually not an option, so choose a handle from the catalog.
Beech or oak for a handle to be painted
Here, the wood species is considered only in relation to the handle and finish. A general comparison of species is covered in the material on legs, but the handle has its own specifics: it is small, sits in the hand, and is clearly visible up close.
Beech
Beech is a dense, non-porous wood that, as the manufacturer notes, is most often used in items intended for enamel. It makes sense when a dense, opaque enamel is planned, a calm surface is needed, and natural texture is not part of the design. The even surface of beech allows for a clean color without pores showing through, which is important for a handle seen up close.
Oak
Oak is a dense, porous wood with a pronounced natural texture, often used with a semi-transparent finish that highlights the grain. It is interesting when stain, oil, clear lacquer, or semi-transparent tinting will be used and the texture should remain visible. For a small knob handle, the oak grain is visible on just a few square centimeters, so the effect depends on the shape: on a sphere, the fibers form arcs; on a flat face, they form stripes.
Glue-up grade for a handle
The catalog distinguishes two grades. "For enamel" is glued without matching the lamellas by color and texture: contrasting differences are acceptable, and such a blank is chosen for opaque painting. "For tinting" is glued with matching by color and texture, and it is chosen for a semi-transparent finish. For small handles, this matters: on a compact part, a contrasting lamella on the front face is immediately noticeable. Record the grade in the specification.
Summary
| Finish | Species | Bonding grade |
|---|---|---|
| Dense enamel | Beech | For enamel |
| Stain, tinting | Oak, less often beech | For tinting |
| Oil, clear lacquer | Oak or beech in the desired grain pattern | For tinting |
| Tone-on-tone with the enameled front | Beech | For enamel |
Decide on the price for the wood species using the card of the specific item: the price depends on the finish. Don't choose oak "just in case" if the handle will be covered with enamel: no one will see the grain.
The same RAL does not yet mean the same color
A color number describes the target shade but does not guarantee the result. The same RAL looks different on different substrates. What matters is the substrate material, primer, number of coats, application method, degree of gloss, surface preparation, and lighting.
What this means in practice. Enamel on an MDF facade and on a beech handle is applied to different substrates: MDF is smooth and uniform, while beech has its own structure and absorbs primer in its own way. The layer on the flat facade surface and the layer on the rounded handle surface form differently: on a convex surface the paint runs off and ends up thinner at the edges. The application method also matters: spraying and brushing produce different textures, and texture changes color perception. The degree of gloss shifts the perceived tone: a matte surface looks lighter and softer, a glossy one darker and deeper.
That is why color is verified with a test panel
Color is verified with a physical sample, not just a number. A test panel is a trial piece coated with the same system as the facade: the same primer, the same color, the same number of coats, the same gloss. You should compare a finished test panel with a finished facade, not a paint sample in a can.
What to record
For each test panel, record: color (RAL, NCS, or sample), substrate material, type and number of primer coats, type and number of finish coats, degree of gloss, application method, drying conditions, and date. Without these records, the test panel cannot be reproduced.
The “same color” trap
A formally identical RAL on a handle and a facade can look different simply because of the different shapes: on a rounded handle, light and shadow are distributed differently than on a flat facade. Even a perfect test panel will read slightly darker on a curve. This is the physics of the surface, not a painting error. Take it into account when evaluating: compare the handle with the facade from the angle at which they will be seen.
Should the handle be painted with the same paint as the facade
There is no universal “yes” here. If the system is suitable for wood and for the handle’s operating conditions, a single system makes color matching easier. But the handle differs from the facade in load: it is constantly in contact with hands, experiences abrasion, receives localized stress, and is especially sensitive to coating quality at the edges.
The finish must account for the handle’s use, not just decorative matching. Check three things.
First: whether the material is suitable for painting wood. The front can be made of MDF, the handle of solid beech, and systems designed for MDF do not always behave the same way on solid wood.
Second: wear resistance. The front is touched rarely and in passing, the handle is taken in hand every day. A soft coating that looks good on the front may wear off on the handle within months. Ask the coating manufacturer whether it is suitable for surfaces subject to increased abrasion.
Third: edges. A handle has many convex surfaces and edges where the coating is thinner and wears faster. Pay attention to the edges when applying and evaluate them when inspecting a sample.
What to do
If the material is suitable both in terms of load and color, use one system: this is the easiest way to achieve a match. If not, select a system for the handle separately and achieve a match in color and gloss, checking a test patch next to the front. The second path is more difficult, but more reliable in use.
Recommended manufacturer sequence
The manufacturer gives four steps for products under varnish or enamel. First: dust removal after sanding. Second: uniform application of primer. Third: after the primer has fully dried, matte the surface with light sanding for better adhesion. Fourth: final coating with varnish or enamel in two layers with interlayer drying. This sequence can be taken as the basis for a process chart, while specific materials and conditions should be determined according to the documentation for your compositions.
Test patch: one handle before the whole batch
For production, the scheme is as follows: one handle, preparation, primer, color, finish, drying, comparison with the front, approval. Only after that are ten, twenty, or forty handles painted.
What to check on the test handle:
-
shade: does it match the facade;
-
gloss level: is it more or less glossy;
-
uniformity: are there any drips, streaks, or different tones on different faces;
-
relief: is the shape pattern preserved, are the transitions not clogged;
-
edges: is the coating not thinner at the edges;
-
wood species: for a transparent finish, how the grain looks;
-
tactility: how the surface feels in the hand.
The last point is often forgotten. A handle is taken by hand, and roughness or stickiness of the coating is immediately noticeable. Check that the surface is smooth and does not leave the impression of an under-dried layer.
Where to get a handle for a sample
The catalog ships items from one piece, so a sample handle can be ordered without commitment to a batch. Keep the timing in mind: items in stock are stored in the warehouse unpolished and ship within three business days, and if the item is not available, the production time is 5–10 business days. Order the sample in advance so that testing does not delay the launch of the facades.
What to keep
Do not throw away the test handle. It is the reference for the batch: if in doubt, compare the next handle with it. Keep the coating system record nearby. For a repeat order, the reference and the record save a day of work.
When the test can be skipped
If you have already painted this item with this system on this facade and the result has been approved, a repeat test is unnecessary. It is also not needed for a single handle if you are ready to accept the result as is. For a new series in a new color, skipping the test is a risk.
How to compare the handle with the facade
It is not enough to place the handle next to the facade on a table. The evaluation conditions must match the operating conditions.
Look in daylight and under the main interior lighting: the color changes depending on the light source. Evaluate on a vertical facade, not on a horizontal surface, because gloss and shadow depend on the angle. Look from different angles: hold the handle against the facade and step back, then come closer. Check after the coating has fully formed, not immediately after application: color and gloss change during drying and polymerization.
Compare especially carefully if the handle must be tone-on-tone. A difference that is not visible on a table shows up on a vertical facade in side light.
Comparison method
Hold the painted handle against a facade sample mounted vertically and photograph it in daylight and under artificial light. Then evaluate the photos and the live sample. This will take ten minutes and will reveal most discrepancies.
Record the tolerance
Agree in advance on what deviation is acceptable. For tone-on-tone, the tolerance is minimal; for a handle that is "slightly darker," a noticeable but intentional difference is acceptable. If the tolerance is not specified, a dispute about whether it "matched or not" arises after installation, when it is too late to fix.
When it is better not to make the handle match the facade color
Painting everything in one color is not always right. The design decision determines how the handle should relate to the facade.
Tone-on-tone: the facade and handle are the same color. The handle almost dissolves, and the furniture looks smooth. This is the most demanding option for color matching.
Half a tone darker: the handle is visible but does not become a separate accent. A practical option: a slight difference hides minor discrepancies and helps the handle not blend into the facade. It is also easier to execute because it does not require an exact match.
Natural wood on a painted facade: the handle intentionally shows the material. An oak handle under oil on a white facade creates a warm accent. Here you need to choose oak in advance, a "for tinting" grade, and a clear-finish system.
Contrast: the handle works as an independent graphic detail. A dark handle on a light facade or vice versa. It does not need to match, but the color and sheen must be coordinated with the overall palette.
How to choose a solution
Ask the question: what should the handle do in the composition? Hide, support, or accent. Tone-on-tone and "half a tone darker" hide and support; natural wood and contrast accent. For accent solutions, painting to match the facade color is not needed at all, which means whether an unpainted handle is needed is determined by something else: you want to choose the finish yourself.
Example solution
A kitchen with matte graphite-colored fronts. Tone-on-tone handles are almost invisible, and the kitchen looks monolithic. Handles half a tone darker read as a line. Oak handles under oil create a warm contrast. Three solutions from one catalog, and all require different preparation.
Knob handle for painting
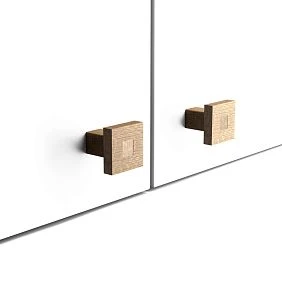
A knob handle is a small element that suits drawers, cabinets, dressers, and kitchen fronts. A test paint on it is easy to do: the part is compact, and one or two pieces take little material. Section knob handles without coating contains such items.
Painting specifics
A knob has a small surface and, as a rule, a rounded shape: sphere, cone, cylinder. The convex surface creates three problems. The coating on the top and on the sides forms differently. Paint can run down to the base and collect in a drip. The grip area is especially sensitive to wear.
Example from the catalog: the spherical handle Jupiter HL-064, size 29 × 29 × 42 mm, is made of beech (the card title states beech, while the text mentions oak and beech, so check the card for wood availability). A sphere about 29 mm in diameter is convenient for a test: it shows how enamel lays on a convex surface.
How to paint small parts
Secure the handle so that you do not touch the surface being painted: on a screw or stud in a stand. This allows you to coat all sides in one go and dry the part without contact. Apply in thin layers, because a thick layer runs on a sphere.
When a button is more convenient than other shapes
When you need a series of identical small parts and ease of painting matters. For buttons, a test paint is faster and material consumption is lower. But quality requirements are also higher: a small part in the hand is seen up close, and defects are noticeable.
Wooden pull handle for painting
The pull handle has a long body, and this changes the requirements. Uniformity of coating along the entire length, edges, grip area, and color consistency from start to finish are important. Section pull handles without coating collects such items.
Painting specifics
On a long part, it is easier to notice the difference in tone between the ends if the coating was applied unevenly. The edges and ends of the pull handle, which bear the load during use, require special attention: if the layer is under-dried, they stretch; if it is thin, they wear off. The inner surface of the pull handle, where fingers go, is often inaccessible to a brush and requires spraying or a well-thought-out application sequence.
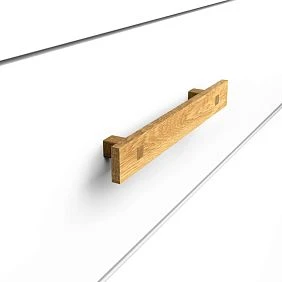
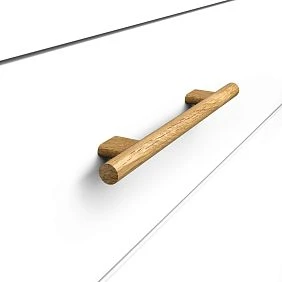
Example from the catalog: Proun HL-053-1. According to the description, it has a rectangular front panel and a square end-grain pattern of the penetrating leg tenon. An important detail for finishing: after being coated with clear and semi-transparent materials, the end-grain squares become darker and stand out as a decorative feature. This means that if you finish Proun with opaque enamel, this effect is lost. And if you want to preserve it, choose a tint or clear oil and order the "for tinting" grade. Another subtlety: in the product card description, Proun is called a bow handle, but in the text below it is called a button handle, so check the type and dimensions against the drawing.
How to choose a finish
A handle whose end-grain pattern is intended as decor is not suitable for dense enamel: you are paying for a part that you will paint over. Choose a handle with a smooth shape for enamel, and leave Proun for transparent finishing.
Length control
After painting, place the bracket next to the facade and compare the shade at both ends and in the middle. A difference indicates an uneven layer or insufficient preparation. This must be corrected before the batch.
Profile handle: paint separately or together with the facade
A profile handle is a long line that adjoins the facade. What matters here is the fit, color match, stable layer thickness, and the absence of sags in the seating area. Section profile handles without coating contains these items; for specific dimensions and geometry, see the product cards, as they differ for profiles.
Separately or together
It is more convenient to paint the profile separately from the facade: all sides are accessible, the layer is controlled, and the facade is not contaminated. Painting together with the facade is possible if the profile is built in and has no seating of its own, but then the handle cannot be replaced without repainting.
For production, choose the first option. Finishing separately allows you to control every part, and installation after complete drying eliminates damage to the coating.
Seating areas
For the profile, the area where it meets the facade is critical. A layer that is too thick on the surface that rests against the facade creates a gap or misalignment. Check that the coating in this area is thin and even, and if necessary leave it unpainted if the design allows it.
Long line
On a long part, any waves and unevenness are noticeable. Apply the coating evenly and in one direction, avoid stopping in the middle. Check the line under side light: it reveals defects that are not visible in diffused light.
What must not be painted without control
Some areas of the handle must not be painted haphazardly. A coating that is too thick changes the fit and impairs functionality.
Pay especially close attention to:
-
the seating surfaces with which the handle rests on the facade;
-
the holes into which the screws go;
-
the threads, if they are part of the design;
-
the mounting points and mating surfaces;
-
metal inserts, if any.
Why this is important
A paint layer just tenths of a millimeter thick in the hole can prevent the screw from going in, and create a gap on the mounting surface. In a batch of twenty handles, this turns into twenty small installation problems.
How to protect the areas
Before painting, mask the holes with painter's tape or cover them with suitable plugs. Leave the mounting surface exposed or apply a thin coat. After painting, remove the protection before it is fully dry so you don't pull off the coating film.
Post-painting check
Take a test screw and insert it into the hole of each handle in the batch. Place the handle against a sample facade and make sure it seats without a gap. The check takes a minute per handle and eliminates on-site fitting.
The hardware included with Proun HL-053-1 consists of metal screws, and to cover the heads, the catalog offers decorative metal caps FUR-032 and FUR-033 at 59 rubles at the time of checking. For other items, see the product page for what's included. Metal parts don't need painting, while wooden ones are painted together.
Paint before or after installation
The main option for production: finish the handle separately, dry it completely, check it, and install it. This is advantageous for four reasons. It's easier to paint on all sides, including the back. The facade doesn't get dirty. You can control the finish separately from the furniture. There are no paint marks or drips near the base of the handle.
When to paint after installation
Painting after installation is acceptable if the handle is simple and the facade is also painted on site. But then you won't be able to cover the hidden sides, and you'll have to carefully protect the surface around the base.
What depends on the model
The final technique depends on the specific handle and coating system. A handle with a metal base, such as Jupiter HL-064, needs to be painted separately only on the wooden part, while a handle with a mortise fit may need to be finished after fitting. Check the product card and a sample.
Workshop procedure
-
Prepare the batch: sanding, dust removal.
-
Seal the holes and fitting areas.
-
Apply primer and wait until dry.
-
Matte the surface with light sanding.
-
Apply color and finish according to the system, with intercoat drying.
-
Let the handles cure until the coating is fully ready.
-
Check with a control screw and compare with the reference sample.
-
Install on the fronts.
Observe the pauses according to the technical data sheet for your material. Do not rush drying: the handle is installed and touched by hand immediately, and an under-dried layer will leave marks.
How to paint a batch so that twenty handles do not differ
The batch problem is familiar to every workshop: the first and the twentieth handle are formally the same color, but visually they differ. The cause is usually small process variations that accumulate.
To prevent this, keep the following fixed: one article, one batch of handles, one primer system, one color, one batch of coating material, the same number of coats, the same application mode.
Let us break down each condition. One article and one batch of handles, because wood from different batches may differ in color and density. One primer system, because the primer affects the final tone. One color and one batch of material, because the shade may vary slightly from batch to batch. The same number of coats, because layer thickness affects saturation. The same application mode: distance, pressure, speed, intervals.
How to control
Paint the entire batch in one go if possible. If not, keep a control handle from the first part and compare the second with it. Record the conditions of each run. If a discrepancy is found, split the batch: place slightly different handles in hidden areas or on separate items.
Mistake: painting more as needed
If you paint ten handles at a time as the fronts become ready, days pass between runs, and material batches and conditions change. It is better to gather the entire requirement and paint it in one run, and if you need to paint more, do so with a control handle nearby.
How much to take as a reserve
Determine the reserve by risk, not by percentage. With enamel on beech, defects are minimal; with oak tinting, they are higher. A trial batch will show the probability of mismatch. Record the reserve as a separate line.
How to record a handle for painting in the specification
The entry “wooden handle, white” is useless. The specification must allow the order and the finishing result to be repeated.
Example entry: HND-01, item code STAVROS, beech, unfinished, RAL from sample, finishing system F-02, quantity 12.
| Field | Value |
|---|---|
| SKU | Item code from the catalog |
| Material | Beech or oak |
| Finish status | Unfinished |
| Color | RAL, NCS, or sample |
| Finish ID | Coating system |
| Quantity | Quantity |
| Status | SAMPLE or APPROVED |
What to add
For completeness, add the gluing grade (“for enamel” or “for tinting”), the sanding level (“Standard” or “Prestige”), dimensions A, B, C, handle type, hardware set, and approval date. For the coating system named F-02, keep a separate card: primer, color, finish, number of coats, gloss, application method, drying mode.
Why this is needed
Six months later, the client asks to order two additional handles for the kitchen. You open the specification, see the article number, wood species, color, and coating system, and reproduce the result. Without a record, you would have to select them again and risk a mismatch.
Statuses
SAMPLE means the sample has been ordered and is undergoing testing. APPROVED means the color sample has been approved. Order the batch only for APPROVED lines.
Examples of real unfinished STAVROS handles
Below are two items verified against the catalog cards.
| Model | Type and shape | Material | What matters for painting |
|---|---|---|---|
| Proun HL-053-1 | A bracket (also referred to as a button in the card text), rectangular front panel, square end pattern | Oak or beech | Under a clear finish, the end squares darken and become a decorative feature; under enamel, this effect is lost |
| Jupiter HL-064 | Sphere 29 × 29 × 42 mm with a metal base | Beech (oak is also mentioned in the text) | A convex surface requires thin coats; do not paint the metal part |
Proun HL-053-1
The Proun handle belongs to minimalism and constructivism. The manufacturer calls it universal for drawers and hinged fronts, and specifies mounting with metal screws included in the kit. It is supplied unpainted so you can match the color to the interior. For painting, this means the following. If you want to preserve the decor of the ends, use tinting or oil and order the "for tinting" grade. If you want a solid color front, the effect of the ends will disappear, and it is more advantageous to choose a simpler shape. Another circumstance: nearby in the related products block, the catalog shows Rubio Monocoat Oil Plus 2C Pure for 808 rubles at the time of checking. This is a hint that finishing materials are offered for handles, but verify compatibility with your system yourself.
Jupiter HL-064
The Jupiter handle is compact: 29 × 29 × 42 mm. The spherical shape raises the question of coat uniformity on the convexity, and the metal base requires protection during painting. The product page text mentions an "enamel-ready coating," but the section on unpainted handles and the catalog logic indicate an "enamel-ready" glue grade rather than a finished coating, so check the presence of a coating and the wood species before ordering. Nearby in the "customers also buy" block, Jupiter HL-064M is shown from 1,490 rubles: options within the same series differ, so clarify which one you need.
How to use the examples
Compare parameters, not pictures: size, shape, wood species, configuration, glue grade. Then order one handle and run a test. Only after approval should you order the batch.
Calculating procurement and budget for a series
The formula is simple: the number of handles per item multiplied by the number of items. A dresser with six drawers and two doors requires eight handles. A series of ten dressers yields 80 handles.
For the budget, let's take the "from" prices from the list of unpainted handles at the time of checking. The Palmer HL-054 handle costs from 590 rubles: 80 pieces will cost at least 47,200 rubles. The Proun HL-053 handle from 800 rubles: 80 pieces cost at least 64,000 rubles. FUR-032 plugs at 59 rubles for 80 handles come to 4,720 rubles. These are rough calculations for order of magnitude: the actual price depends on the finish and size, and for Jupiter HL-064 the price is not displayed openly.
What to add to the budget
Finishing materials: primer, enamel or stain, lacquer or oil. Consumables: tape, stands, abrasives. Time for preparation and painting, which in a series of 80 handles is significant: each one goes through four operations and intercoat drying. If time is worth more than the price difference, consider handles with a ready-made coating.
Comparison with ready-made
Calculate the full cost of painting your handles: the price of an unpainted handle plus materials plus time. Compare it with the price of a ready-made handle in the required color from the catalog. Often, for a large batch, painting on your own is more cost-effective, while for a small batch, a ready-made handle is cheaper.
Reserve
Determine based on the test results. If one out of eight test handles failed due to color or defects, allow for more. If all passed, the reserve is minimal. Record the decision in the specification with justification.
Where to buy furniture handles for painting
The purchase order follows the project: facade finish, article and wood species, sample, paint test, batch.
-
Wooden furniture handles: general section.
-
unpainted wooden handles: main section for painting.
-
Handles with a ready-made coating: when painting is not needed.
-
handle-buttons, handle-eyes и profile handles uncoated by appearance.
Order conditions
Items are shipped from a single piece. In-stock goods are stored unsanded and shipped within three business days; custom-made production takes on average 5–10 business days. Delivery is available across Russia and CIS countries via CDEK and DPD or by pickup; showrooms in Moscow and Saint Petersburg, production in Saint Petersburg. Before ordering, the manufacturer recommends starting the design process with drawings, which can be downloaded on the website.
What to clarify with the manager
Availability of the entire batch in a single delivery, the gluing grade and sanding level, the fastener kit, and the wood species available for a specific model. Before placing an order, check the current price and availability in the product card.
Workshop questions
Which furniture handles can be painted?
Unpainted wooden handles made of beech and oak. In the STAVROS catalog they are gathered in a separate section; at the time of checking, it contains 50 items. Handles with a finished coating do not need painting, and repainting them is more difficult.
Where to buy unpainted wooden handles?
In the section unpainted furniture handles STAVROS catalog. Orders are possible from a single piece, which is convenient for testing.
Can a wooden handle be painted with the same enamel as a furniture facade?
If the material is suitable for wood and withstands abrasion, a unified system makes color matching easier. Check the material documentation and assess the edges: the coating on a handle is thinner and wears off faster than on a facade.
What to choose for painting: beech or oak?
For opaque enamel, choose beech: its non-porous structure gives a smooth surface. For stain, oil, and clear lacquer, choose oak if you need to see the grain. Choose the glue-up grade based on the finish: "for enamel" or "for tinting".
Do wooden furniture handles need to be primed?
For products under lacquer or enamel, the manufacturer recommends the following sequence: dust removal, primer, sanding after drying, and two finish coats with drying between coats. Determine the specific materials and settings according to the documentation for your system.
Can unfinished handles be tinted?
Yes, and this is one of the main scenarios for oak. Order the "for tinting" grade and check the result on a sample handle: stain color looks different on different wood species.
How do I match a handle exactly to the facade color?
Paint the handle with the same system and compare the finished sample with the finished facade under daylight and interior lighting on a vertical surface. An RAL or NCS number does not guarantee a match, because the result depends on the substrate, primer, coats, and sheen.
What is a sample paint-out for a furniture handle?
This is one handle coated with the same system as the facade: primer, color, finish, number of coats, sheen. It is compared with the facade and approved before painting the batch. The sample handle is kept as a reference.
When should handles be painted: before or after installation?
For production, it is better before installation: it is easier to coat all sides, the front does not get dirty, and the finish is controlled separately. Before installation, the coating must be completely dry, and the mounting areas and holes must be protected from excess paint.
How to paint a batch of wooden handles evenly?
Stick to one article number and one batch of handles, one primer system, one color and one batch of material, the same number of coats and application mode. If possible, paint the entire batch in one go and compare with the reference handle.
The specifications of the Proun HL-053-1 and Jupiter HL-064 cards, prices of unpainted handles, glue grades, sanding levels, recommended finishing sequence, and ordering conditions were verified against the STAVROS catalog at the time of preparation. Calculations are conditional.