Article Contents:
- What counts as a small batch for a furniture workshop
- How many handles are needed for a series of dressers, nightstands, or wardrobes
- How to record the chosen handle so it can be reordered
- Knob or pull — what changes when making a small series
- Handle with one mounting point
- Handle with two mounting points
- Can handles for different customers be combined into one batch
- Should a spare handle be stored already painted
- Is one handle enough to check a paired composition
- What to do if the handle is only available in another size
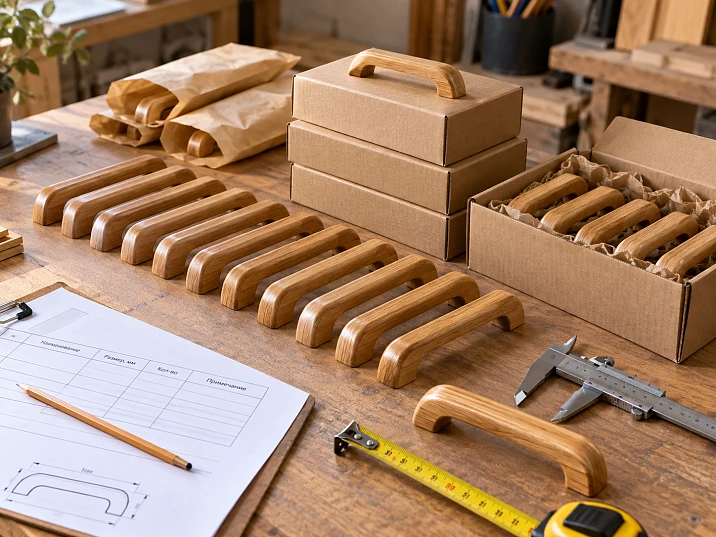
Six chests with two drawers each means twelve handles. The order seems simple until assembly reveals that one handle was left on a test paint sample, the fasteners are designed for a different facade thickness, and for the next pair of chests only a photo remains without a product code. Even a small purchase requires precision: an error in one detail can delay the delivery of an entire piece of furniture.
It is more convenient to order furniture handles in small wholesale quantities after testing one selected model on an actual facade. First, the consumption per item is determined, and the size, mounting, wood species, and finish are approved. Then the entire series is calculated, the reserve is allocated separately, and the information is saved for a repeat purchase. This way, twelve identical handles become a clear production set that can be checked upon receipt and reproduced in the next order.
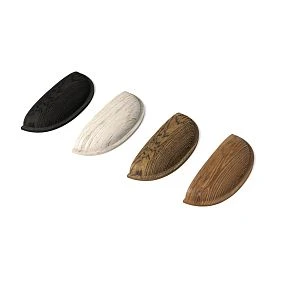
Identical wooden handles should be understood as matching model and agreed specifications. The grain pattern of natural wood may differ. If a particularly close texture is needed for a series, this issue is resolved before purchase and finishing, not after installation on finished facades.
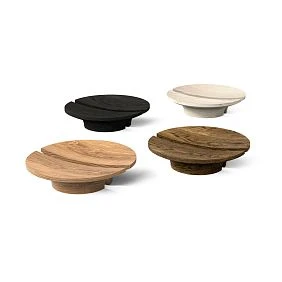
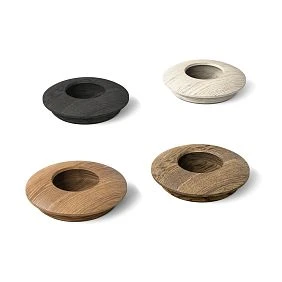
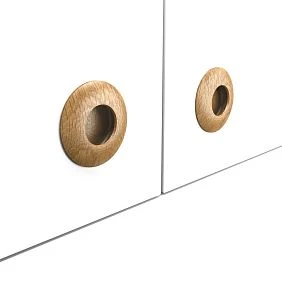

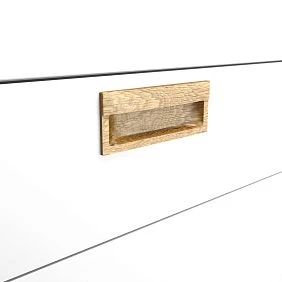
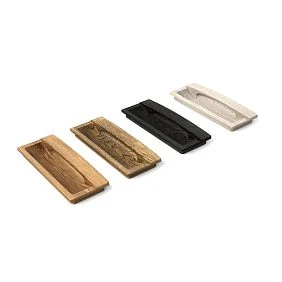
What counts as a small batch for a furniture workshop
For a workshop producing several pieces of furniture in a single order, a small batch may be six, twelve, or thirty handles. There is no universal quantity at which small wholesale begins. The practical purpose of such a purchase is to obtain repeatable parts for a specific series without creating a stock of random hardware.
For a manufacturer of five identical chests of drawers, the need is predictable: the number of drawers, the handle model, and the consumption per each cabinet are known. For a craftsman who is still choosing the design of the first chest, the task is different. He first needs samples, and buying twenty handles in advance may be premature.
Do not confuse batch size with pricing terms. The ability to buy a small quantity does not automatically mean a discount from a given number of units. To compare offers, request the price of a specific configuration, the complete set of components, the lead time, and delivery for the entire order.
in the STAVROS catalog Wooden furniture handles with and without coating; the section page states that ordering from one unit is possible. This lets you start by checking the selected model. The availability of the required quantity and the lead time for the remaining handles should be confirmed at the same time as ordering a sample.




How many handles are needed for a series of chests of drawers, nightstands, or wardrobes
The calculation starts with one finished piece of furniture. Count all active fronts and record how many handles are planned for each. For a wide drawer, the design may include two handles; for a narrow one, one; and for a push-to-open front, no handle is needed at all. The number of drawers alone does not equal the number of handles.
Working requirement = number of furniture pieces × number of handles per piece.
If the items differ, first calculate each type separately. Rows can be combined only after verifying that they are indeed the same model, size, wood species, and finish.
| Order composition | Handles per item | Items | Working quantity |
|---|---|---|---|
| Two-drawer nightstand, one handle per drawer | 2 | 6 | 12 |
| Chest of drawers with four drawers, one handle per drawer | 4 | 5 | 20 |
| Wardrobe with three doors, one handle per door | 3 | 4 | 12 |
| Chest of drawers with two narrow and two wide drawers, with two handles on the wide ones | 6 | 3 | 18 |
These are calculation examples, not universal installation schemes. On a specific chest of drawers, the decision about one or two handles is made based on the design, ease of opening, and the appearance of the front.
For a kitchen, a front map is more useful. It separately marks doors, pull-out drawers, pull-out sections, and decorative fixed panels. Handles on two outwardly identical panels may serve different purposes: one actually opens a drawer, while the other is provided only by the design concept. Counting from a photo of a kitchen without a map easily produces extra items.
After the working quantity, the purchasing quantity is determined:
Quantity to order = working requirement + reserve + separate samples for storage − suitable free leftovers.
A sample that the workshop needs for subsequent comparisons cannot simultaneously be counted as a handle for finished furniture. And a previously purchased handle can be deducted from the requirement only when it matches the final version and will actually be used for installation.
For example, six cabinets need 12 handles. The workshop decided to keep two spare ones, and the sample already received is suitable for installation. Then 13 more pieces must be ordered: 12 + 2 − 1. If the sample remains in the workshop as a reference, the order will be 14 pieces. The difference arises from the purpose of the sample, not from the arithmetic.
Our factory also produces:
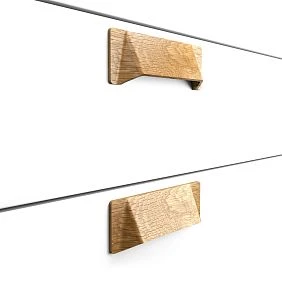
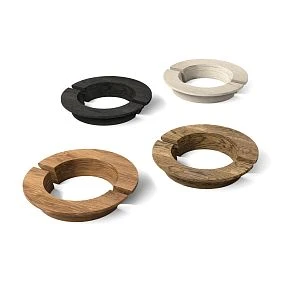
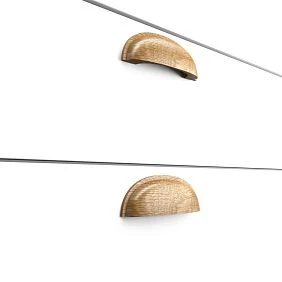
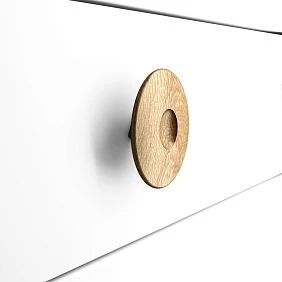
How to record the selected handle so that it can be reordered
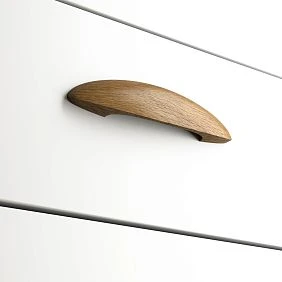
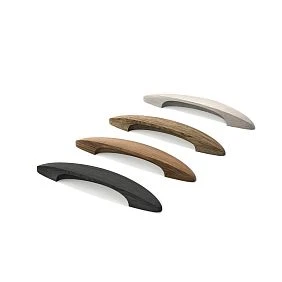
The phrase "a round wooden handle, like last time" does not identify the product. Visually similar models may differ in diameter, protrusion above the facade, base shape, and mounting. From the front in a photo, these differences are sometimes almost invisible, but when installed side by side they become obvious.
The basis of an order is the manufacturer's item code. The selected variant is added to it: size, wood species, finish, and other parameters, if they are provided by the product card. A single item code does not always describe all variants of a product, so a line with just one number may also be incomplete.
| What to record | Why this will be needed |
|---|---|
| Manufacturer and exact item code | Find the same model on the next order |
| Size of the selected variant | Avoid buying a different length or diameter |
| Number and placement of mountings | Match the handle to the holes in the facade |
| Wood species | Repeat the material and the agreed finish |
| Finish or unfinished condition | Understand what goes into assembly and what goes into painting |
| Link to the product card | Quickly open product details |
| Quantity per item and per series | Check consumption before submitting the request |
| Sample approval date | Distinguish the current solution from an earlier selection |
It is better to keep fastening details together with the drawing. The field “length 160 mm” does not explain whether the size refers to the entire handle or to the distance between the centers of the holes. Write out dimensions in full, even if the person placing the first order understands the difference perfectly. Six months later, the purchase may be repeated by another employee.
A photograph is useful as a supplement. Take pictures of the front and back sides of the handle, the packaging markings, and the installed sample on the facade. Name the folder after the furniture model and the approval date. Then the correspondence with the supplier, the drilling diagram, and the finish sample will all refer to the same solution.
Get Consultation
Button or clip — what changes when manufacturing a small series
For a batch of identical fronts, the handle type determines not only the appearance but also the operations in the workshop. Marking, the number of holes, the verification method, and the possibility of later replacement all differ.
Handle with a single mounting point
wooden knob handles they are convenient to consider in projects with compact fronts. With the single central mounting model, you do not need to maintain the distance between two holes. But the position of the point itself must still be repeated on every drawer: even a small handle's offset is clearly visible in a vertical row.
Check the grip shape. The round face may look large, while the space for fingers behind it may remain tight. A paper circle on the front shows the scale but does not replace checking with your hand.
For a shaped handle, orientation is additionally important. If it has a single mounting point, you need to find out how the design holds the required position and what the manufacturer recommends. You cannot assume that any rotation is eliminated by tightening the screw harder.
Handle with two mounting points
Wooden handle brackets they are usually chosen when an extended grip is needed. For a two-mount model, the center-to-center distance must be included in the drilling chart — the distance between the centers of the mounting holes.
The overall length of the bar and the center-to-center distance are different dimensions. Two handles of the same length may not fit the same holes. The opposite situation is also possible: the mountings match, but the new model protrudes further or takes up more space near the edge of the front.
Do not assign the handle type based only on the door weight or drawer width. Ease of use is affected by the opening force of the mechanism, the grip shape, and hand position. You need to check the assembled unit. If the drawer runs stiffly due to slide adjustment, replacing a knob with a bar handle does not eliminate the cause.
Why the handle is chosen before drilling the fronts
Pre-drilled holes limit further options. This is especially noticeable with two-point mounting: a model you like may turn out to be incompatible with the existing drilling pattern. On a painted front, relocating holes may require refinishing.
The sequence for a new series is as follows:
- Select a specific handle version and get its drawing.
- Check the actual sample and the fasteners.
- Mark out one control front or a blank of the same thickness.
- Drill the holes and install the handle without forcing it against the front.
- Check the position, grip, and opening.
- Lock in the successful layout and only then proceed to the remaining fronts.
For symmetrical installation of the bracket, you can calculate the hole coordinates. Suppose the front width is 400 mm, and the confirmed center-to-center distance of the selected handle is 128 mm. When centered, the holes will be located at 136 and 264 mm from the left edge: (400 − 128) ÷ 2 = 136 mm. The height of the drilling line is set separately.
Here, 128 mm is a conditional value used to explain the calculation. It cannot be applied to another handle without checking the drawing. The calculation itself also does not account for possible asymmetry of the handle body relative to the mountings.
A template must have clear reference edges. Label which edge it is installed from and which facade orientation it is intended for. For left and right doors, the mirrored layout sometimes requires separate verification. A correctly made template can be applied incorrectly — and produce a neat series of identically wrong holes.
The drilling diameter, fasteners, and permissible tightening torque are selected based on the product design. There is no universal screw size for all wooden handles. If fastening information is missing, find it out before processing the facades.
What a test sample should show
For a new furniture model, buying one handle is justified when the product page does not allow you to confidently assess the grip, fit, or finish. This check is especially useful before ordering shaped wooden handles, large pulls, and models positioned next to relief decor.
First, place the handle against the facade at a one-to-one scale. Assess it from a normal distance: for a nightstand — in the position next to the bed, for a wardrobe — standing in front of the door. A separate handle on a table and the same piece on a tall facade are perceived differently.
Then check what is not visible in a flat drawing:
- whether fingers fit in the grip area;
- whether the frame, overlay, or adjacent handle gets in the way;
- whether you have to pull the door by the very edge of the piece;
- whether fastening from the back is accessible;
- whether the handle touches the wall or the adjacent front when opening;
- whether its protrusion interferes with the extension of a nearby drawer.
Fasteners are checked against the actual thickness of the assembly. On a door, the screw may pass only through the front, while on a drawer it may pass through the front and an additional front panel, if the joint is designed that way. The same handle on these two parts will not necessarily require the same screw length.
A screw that is too long may bottom out in the threaded hole before it presses the handle tight. The tightening may already feel complete, but there is still movement between the base and the front. A short screw, on the other hand, may not engage enough with the mating part. The length and depth of engagement should be checked against the recommendations of the specific fastener manufacturer; they must not be selected based on tightening feel alone.
For the opening test, use an assembled drawer with the intended contents, without exceeding the limits of its mechanisms. Check the usual actions: open with one hand, close, grasp from the side. Sample acceptance should confirm everyday convenience, not just conformity with the sketch.
Beech or oak for a repeating set of handles
The species is chosen together with the future finish. Under dense enamel, the wood grain is hidden, while under a clear coating it becomes part of the appearance. Therefore, the same color name in the finish does not yet make handles from different species look visually identical.
Beech can be considered for a painted series when a calm surface without pronounced large-pore grain is required. But the evenness of the finished enamel also depends on sanding, primer, and the entire preparation system. Buying a beech handle by itself does not guarantee the required surface after painting.
Oak is appropriate when the wood texture should be visible on the handles: for example, in combination with an oak countertop or body parts. It has a pronounced grain, and a clear finish preserves the differences between individual parts. If the customer expects almost indistinguishable handles, show them several real samples, not just one particularly successful one.
When purchasing, the type of blank is also specified. On the STAVROS page o materials and product quality there are variants for enamel and for tinting. In the first case, matching lamellas by color and texture is not provided; in the second, it is done, but slight differences are possible. The applicability of a specific finish to the selected handle should be checked in its product card or agreed upon when ordering.
For a single series, the wood species is fixed in advance. Replacing missing oak handles with beech ones under the same clear finish without new approval is not advisable: the finish will appear differently on different wood. Even if the geometry fits, the appearance of the set will change.
Order handles without a finish or ready for installation
The choice depends on where the supplier's work ends and finishing in the workshop begins. You should compare the final readiness of the handle, not just the price of the unfinished part.
unpainted furniture handles suitable for a project where color and gloss level are agreed together with the fronts. The workshop gets the opportunity to make a test paint and finish the entire batch according to one scheme. At the same time, the time for preparation, application of the coating, and its drying must be included in the production schedule.
Compare handles and fronts made of different materials especially carefully. The same enamel on a wooden handle and on an MDF front may look different due to substrate preparation, relief, and application method. It is advisable to approve the color on a pair of “front and handle,” not from a separate shade card.
Wooden handles with coating should be considered when a ready-made finish already suits the project or there is no in-house painting area. Before purchasing, compare a real sample with the front under the lighting in which the furniture will be used. A phone screen is not sufficient for this.
Separately clarify the care requirements and conditions of use for the coating. For a kitchen handle, regular contact and cleaning are important, but the properties of one varnish or oil cannot be transferred to any finished product.
Do not purchase the entire batch for painting until the finishing technology has been tested on a sample. If the composition changes the shade more than expected or the surface is unsatisfactory after drying, adjusting one test piece is easier than redoing twenty-four handles.
How to coordinate the shade and not mix up handles after finishing
For a transparent finish, one approved color is not enough. The result depends on the original tone of the wood, its grain pattern, and surface preparation. Two parts treated with the same product do not have to become exact copies of each other.
Before finishing, lay out the handles in sets for each piece of furniture. For a chest with four drawers, compare all four parts at once; for a pair of identical nightstands, compare both nightstands together. This makes it easier to notice a handle that stands out sharply within a small set and to resolve the issue before applying the finish.
If the natural non-uniformity of the wood is intended by the design, there is no need to try to remove every difference. It is more useful to agree on an acceptable range: show the customer several characteristic handles and keep photographs together with a physical sample. A photograph records the composition of the set, but it does not serve as an accurate color reference.
The note “oil, brown” is too approximate for reproducing a finish. Save the name and designation of the product, the preparation method, the application sequence, the number of coats, and the conditions from the technical instructions. When mixing shades, record the proportions. If different materials are used for priming and finishing, the entire system is noted.
Finishing a batch at the same time reduces the number of changing conditions, but it does not eliminate the natural variation of the wood. Check the result after the necessary drying: a wet surface does not show the final shade and sheen.
After the sets have been approved, label the packaging, for example “Nightstand 1, top drawer.” It is better to place the marking on the packaging or on a separate tag so as not to contaminate the visible surface and not to interfere with the finish. If the handles are mixed again in a common box, the work of matching the sets will lose its meaning.
What reserve does a small workshop really need?
Buying a reserve at the same percentage for every order is inconvenient. For six handles, even one additional part noticeably increases the quantity, while for several dozen it may be a reasonable reserve. The decision depends on the possible loss and the lead time for resupply.
Divide the reserve by purpose. A production reserve is needed in case of damage during preparation and finishing. A service reserve is for later replacement on finished furniture. A sample for storage is needed for comparison. These parts have different tasks, and one handle cannot cover all three at once if it has already been installed or used in testing.
| Situation | How to approach the reserve |
|---|---|
| Proven handle with a ready finish, reorder available | Assess the need for a service replacement; do not add stock automatically |
| A new finish for which the process has not yet been established | Allocate parts for samples separately from the quantity for furniture |
| One missing handle will delay the release of the entire order | Weigh the cost of the additional part against the consequences of delay |
| No repeat of the furniture model is planned for now | Do not buy a large remaining stock just for a possible future order |
| The handles must match the previously produced series | Consider storing a signed sample and an approved service kit |
Suppose you need to make twelve chests of drawers with four handles each. The working requirement is 48 pieces. The workshop separately decided to keep two for maintenance — the final order will be 50 pieces if there are no usable leftovers. Both lines must remain in the list: 48 for production and 2 for reserve. The number "50" itself does not explain to the assembler how many parts can be used.
If part of the stock has been used, update the remaining quantity in the records. A box labeled "two spare handles" that contains only one creates an error for the very next order.
How to receive a batch before the fronts go into production
It is more convenient to check the delivery before painting and assembly. For a small number of handles, it makes sense to inspect each one: the time cost is small, and you won't have to look for a mix-up or damage among parts that are already installed.
First, check the packages against the order: item code, size, material, finish, and quantity. Then sort the handles by variant. It is better to separate similar items from neighboring orders right away, especially if only the length or shade differs.
The inspection includes several different tasks:
- Geometry. Compare the main dimensions with the documentation and the approved sample. For two-point mounting, check the center-to-center distance; use a measuring tool or a verified control template.
- Fit. Make sure the base sits against the intended surface. For a flat front, it should not be necessary to pull a clearly skewed handle tight with a screw.
- Fastening. Check that the components match the selected variant and that there is no obvious thread damage. The screw should go in without skewing or excessive force.
- Surface. Inspect the visible side and the grip area. Look for cracks, chips, dents, weak spots, and finish damage.
- Appearance of the set. Compare the handles under the same lighting and assign them to furniture items if shade matching is required.
Acceptable tolerances are taken from the supplier's documentation or pre-agreed requirements. You cannot arbitrarily assign a single limit for all wooden handles. If a measurement is in doubt, repeat it the same way on another part and compare it with the drawing.
Do not try to immediately fix a questionable handle by sanding, drilling, or over-tightening. First set it aside, photograph the discrepancy, and contact the supplier with the order number. After making your own modifications, it will be harder to establish the original cause of the problem.
Finally, recount only the usable quantity. The resulting 24 handles and 24 handles approved for installation are different states of the batch if one has a damaged fastener. A set-aside part should not remain in the calculation of the finished set.
How much does a handle ready for installation cost
The price in the product card is needed for an initial comparison, but the workshop pays for the entire journey of the part to the furniture. For unfinished handles, finishing materials, labor, and time are added to the purchase. For finished handles, different fasteners may be required for a specific facade. The sample and delivery are also included in the project costs.
For a preliminary calculation, it is convenient to use this notation:
Cost of handles for the order = cost of all purchased handles + delivery + additional fasteners + finishing + preparation labor.
If a trial handle was purchased separately and has not yet been included in the total amount, add it once. Include the purchase of spare parts in monetary costs, but continue to show their quantity separately from working consumption.
To estimate the load on the project, divide the total costs by the number of furniture items being produced. With the same handle consumption, this will give the average cost per item. For chests of drawers and cabinets with different numbers of handles, distribute the cost in proportion to the actual configuration; otherwise, a simple cabinet will partially pay for a more expensive chest of drawers.
Let's consider delivery only, without reference to the seller's rates. If it conditionally costs 600 rubles, for a batch of 12 handles that comes to 50 rubles per piece. For 24 handles at the same shipping cost — 25 rubles each. But saving on delivery does not justify buying twelve extra parts when there is no confirmed use for them. Real furniture orders must come first.
When comparing handles for painting and ready-made versions, take into account the finishing area's workload. A lower purchase price may come with an additional operation that delays the entire series. If, however, the handles are finished together with the fronts using an already proven technology, in-house painting can be a convenient part of the process. The answer comes from calculating a specific order.
How to repeat an order a month later and maintain compatibility
For a repeat purchase, use the approved furniture model card. There is no need to start the selection from the catalog again, but you must check whether the required version is still available and whether its specifications have changed.
Suppose the first series consisted of 12 handles, then 12 more were needed, and later 24. The quantity changes, while the other agreed parameters remain in the request. Along with the item code, provide the size, material, surface condition, and the previous order number. A request to "repeat" becomes unambiguous only in combination with this information.
After receiving the additional order, compare the new handle with the saved sample and the reference mounting diagram. A matching item code makes searching easier, but it does not replace incoming inspection. If the fastening has changed or the supplier offers a different version, the decision must be made before drilling the new fronts.
For a clear finish, check the appearance separately. A handle that has already been on furniture for several months may differ from a fresh part due to lighting and use. Therefore, for control purposes it is useful to store a signed sample under suitable conditions, and to additionally evaluate a service replacement on the furniture itself.
If the customer changes the color or size, assign the configuration a new revision — for example, "Cabinet, option 2, approved on November 15." Do not delete the old document: spare parts may be needed for furniture already produced according to it. New and previous handles must be stored separately.
Replacing with a similar model is acceptable after verification. Compare the mounting, dimensions, grip, and finish, then show the result on the front. If one handle stands out noticeably in a row of drawers, it is better to discuss replacing the entire visible set in advance than to pass off a random part as an exact match.
When it is still too early to buy the whole batch
It is worth postponing the purchase if the workshop continues to change the facade design or the customer has not approved the appearance. After replacing a flat door with a framed one, the mounting point and the available grip area may change. An increase in facade thickness will require rechecking the fasteners. A previously approved handle does not always automatically fit the updated design.
A full batch is also premature when only the color has been chosen on screen and the combination with the actual facade has not yet been verified. In that case, a sample of the required finish is purchased first. Several trial pieces of different models are treated as development costs rather than useful stock inventory.
Another reason to pause is the unclear purpose of the future furniture. A handle that is convenient on a bedside table may not be suitable for a wardrobe with a different opening force or for furniture that will be used differently. Scaling the order should follow verification of the operating conditions.
When handles are needed at the same time as legs, overlays, and trim, the overall purchase composition can be prepared using the material on how to assemble wooden decor in small wholesale quantities without excess leftovers. For the handles themselves, keep a separate list: it is tied to the facade map and holes, not to the linear meters or area of the decor.
Additional questions before purchasing
Can handles for different customers be combined into one batch
Yes, if the model and all selected parameters match. The requirement for each order is first calculated separately and then summed up. Upon receipt, the sets are immediately separated and labeled. If one customer later changes the color, their handles can no longer be issued from the common stock without verifying the finish.
Should a spare handle be stored already painted
For quick service replacement, a ready-made handle is more convenient. For future furniture with an as-yet-unknown finish, an unfinished blank may be more useful. The choice depends on the purpose of the stock. When storing finished parts, protect the surfaces from friction and follow the coating manufacturer's requirements; do not pack them tightly until the necessary drying is complete.
Is one handle enough to check a paired composition?
One part shows the material and grip, but it does not always allow you to evaluate a pair. If two handles form a common shape on adjacent doors or should look mirrored, it is useful to check both at the same time. Particular attention is paid to the gap between them and the door opening trajectory.
What to do if the handle is only available in another size
You can compare it, but it cannot be considered a direct replacement. Even if the mounting holes match, the free field of the facade, the finger position, and the distance to neighboring decor change. If the size affects the design of the series, an updated sample is approved first. For already drilled facades, hole compatibility is checked separately.
Where to buy a small batch of wooden furniture handles
Before contacting the supplier, prepare a short request for each item: exact article number, size, wood species, finish, quantity, and required delivery date. Attach information about the facade thickness and mounting if components need to be selected. For a repeat order, specify the previous delivery and note which parameters must be preserved.
. STAVROS cooperation terms can be clarified on the page for furniture manufacturers. It lists special prices and shipment from one piece. The cost of a specific batch, availability of the selected version, and order preparation time are agreed separately; quantity alone does not confirm a specific discount size.
Before payment, compare the offer with the list: how many handles are needed for the furniture, how many will remain in reserve, and which parts the workshop already has. Clarify whether the required mounting hardware is included in the selected set, and check payment and delivery terms. For the production schedule, the date of receipt of the batch is required, so order preparation and transportation time are accounted for separately.
Buying wooden furniture handles in a small batch is easier when the choice is already fixed on a control facade. Pass its approved finish and calculated quantity into the order, and keep the article number, drawing, and finish sample in the furniture model folder. On the next production run of chests of drawers or nightstands, they will become the source data for a repeat order.