
























































Article Contents:
- Why Wall Sconces and Decorative Molding Work So Well Together
- Molding Gives the Fixture a Visual Context
- Wall Sconces Reveal the Relief of Molding
- Lighting Establishes a Focal Point
- Decorative Trim Connects Lighting to Furniture
- Thin Polyurethane Molding: Subtle Architectural Lines
- Medium Polyurethane Molding: A Defined Decorative Frame
- Wide Architectural Molding: Stronger Wall Relief
- Choosing Between Narrow, Medium and Wide Profiles
- Layout 1: A Wall Sconce Centered Inside a Molding Frame
- Layout 2: Two Sconces Flanking a Large Central Frame
- Layout 3: Matching Bedside Sconces Inside Two Vertical Frames
- Layout 4: A Sconce Between Two Vertical Molding Panels
- Layout 5: A Sconce Above a Decorative Polyurethane Onlay
- Layout 6: A Repeating Hallway Wall Panel System
- Typical Starting Heights
- Bedside Reading Sconces
- Hallway Sconces
- Mirror and Vanity Sconces
- Visual Clearance
- Fixture Backplates
- Swing-Arm Fixtures
- Heat and Light Distribution
- Grazing Light
- Upward-Facing Sconces
- Downward-Facing Sconces
- Up-and-Down Wall Lights
- Diffused Decorative Sconces
- Warm vs. Cool Light
- Polyurethane Molding for Frames
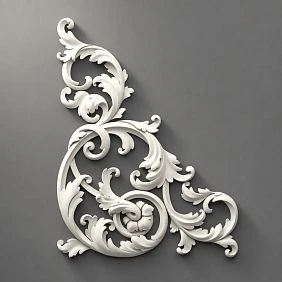
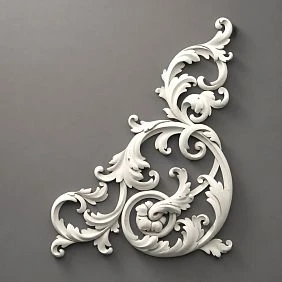
- Ornamental Corners
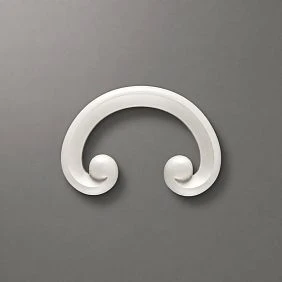
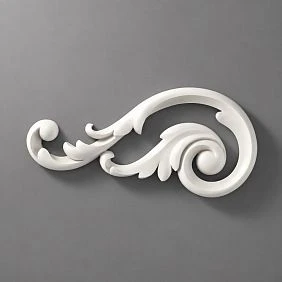
- Smaller Decorative Accents
- Floral and Classical Onlays
- Beaded Molding
- Rope Molding
- Ornate Molding
- Choosing the Visual Hierarchy
- Symmetrical Bedside Panels
- One Large Frame Behind the Headboard
- Modern Bedroom With Minimal Trim
- Practical Bedside Considerations
- Sconces Beside a Sofa
- Sconces Around a Mirror
- Sconces Near a Fireplace
- Long Living Room Walls
- Entry Console Composition
- Mirror With Matching Sconces
- Narrow Hallways
- Dining Room
- Home Office
- Neoclassic Collection
- Neoclassic Light Collection
- Japandi Collection
- Versailles Light Collection
- Versailles Collection
- Project Dimensions
- Calculate One Frame
- Calculate Two Frames
- Calculate Stock Lengths
- Prepare the Cut List
- What About Decorative Corner Pieces?
- Adhesive and Finishing Materials
- Establish the Frame Position
- Locate the Sconce
- Verify the Actual Bedside Function
- Check the Electrical Mounting Area
- Do Not Hide Wiring Splices Behind Decorative Molding
- Do Not Use an Ordinary Polyurethane Onlay as a Junction-Box Cover
- Plan Electrical Work Before Decorative Installation
- Do Not Drill Into Unknown Wall Areas
- Respect Fixture Instructions
- Commercial and Hospitality Installations
- Step 1: Develop the Complete Wall Elevation
- Step 2: Confirm the Light Fixtures
- Step 3: Establish Electrical Locations
- Step 4: Prepare the Wall
- Step 5: Mark the Molding Layout
- Step 6: Cut and Dry-Fit the Molding
- Step 7: Install the Decorative Profiles
- Step 8: Finish the Joints
- Step 9: Prime and Paint
- Step 10: Install and Test the Sconces
- Tone-on-Tone Painting
- White Molding Against a Colored Wall
- Dark Molding on a Dark Wall
- Metallic Decorative Accents
- Installing the Fixture Before Designing the Wall
- Letting the Sconce Overlap the Frame
- Using a Frame That Is Too Small
- Using a Frame That Is Too Large
- Installing Paired Sconces at Different Heights
- Mixing Incompatible Molding Profiles
- Ignoring Light Distribution
- Overdecorating the Wall
- Treating Decorative Moldings as Electrical Raceway
- Buying Without a Cutting Plan
- Decorative Materials
- Lighting Components
- Choosing Between Individual Profiles and Kits
- STAVROS Products by Project Type
- Can You Install a Wall Sconce Inside Picture-Frame Molding?
- What Molding Is Best for Wall Sconces?
- What Is Picture-Frame Molding?
- How High Should Wall Sconces Be Mounted?
- Can Wall Sconces Be Installed Above a Bed?
- Should Wall Sconces Be Centered in the Molding Frame?
- Can Two Sconces Be Installed on Either Side of a Large Decorative Frame?
- What Is the Best Molding for a Neoclassical Wall?
- Can Polyurethane Molding Be Painted the Same Color as the Wall?
- Does Polyurethane Molding Need Primer?
- Can I Hide Electrical Wiring Behind Polyurethane Molding?
- Can a Decorative Polyurethane Onlay Cover a Wall Sconce Junction Box?
- Are Wall Sconces With Molding Suitable for Hallways?
- Can Decorative Wall Molding Be Used in a Japandi Interior?
- How Much Molding Do I Need for Two Sconce Frames?
- Is Beaded Molding Suitable for a Wall Sconce Frame?
- Can I Add Decorative Corners to a Wall Sconce Frame?
- Are STAVROS Wall Decor Kits Made Entirely From Polyurethane?
- Does STAVROS Sell Wall Sconces?
- Where Can I Buy Polyurethane Molding for Wall Sconce Decoration?
A beautiful wall sconce does more than provide light. It can emphasize a doorway, define a bedside reading area, illuminate artwork, or create a welcoming atmosphere in a hallway. Yet even an expensive fixture may look surprisingly ordinary when installed on a large, completely undecorated wall.
The difference often comes down to architectural context.
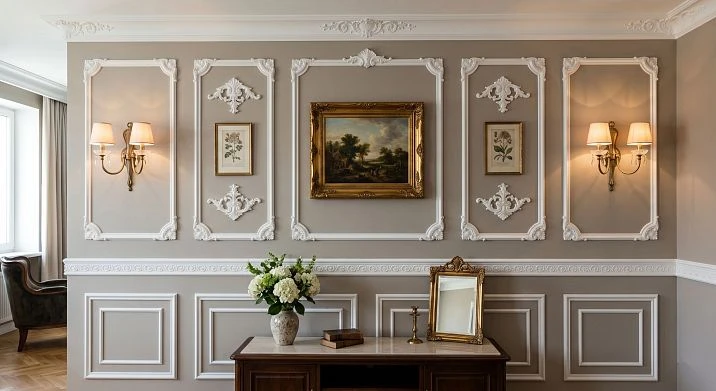
A rectangular molding frame, carefully positioned vertical trim, a decorative corner ornament, or a symmetrical arrangement of two wall sconces can transform a simple lighting fixture into part of a complete interior composition.
The wall no longer functions merely as a surface supporting the light. It becomes an architectural feature in which geometry, relief, and illumination work together.
This approach is especially effective in American traditional, transitional, neoclassical, Art Deco, and selected contemporary interiors. It can also work in restrained modern bedrooms, where a narrow molding profile provides subtle definition without overwhelming the space.
Wall sconce molding combines two elements: architectural trim that organizes the wall and lighting that reveals its shape.
A sconce casts light across the surface. Moldings catch that light and create controlled shadows. The resulting contrast makes even relatively shallow decorative profiles appear more dimensional.
However, an attractive result depends on much more than choosing a beautiful fixture.
The molding must be proportionate to the wall. The fixture should be placed according to its function and beam distribution. The electrical mounting location must be coordinated with the decorative layout. Joints, corners, switches, and nearby furniture must all be considered.
And the electrical installation must remain safe and code-compliant.
This guide explores wall sconce molding ideas, including picture-frame molding, polyurethane wall trim, decorative wall panels, architectural onlays, and coordinated lighting compositions.
You'll learn how to arrange sconces in bedrooms, living rooms, hallways, dining rooms, and home offices; select the correct molding profile; calculate materials in inches and linear feet; and coordinate decorative products from STAVROS into a practical residential design.
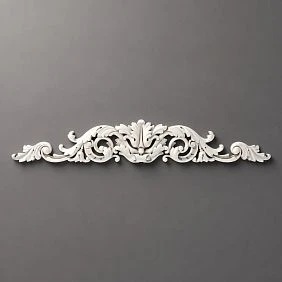
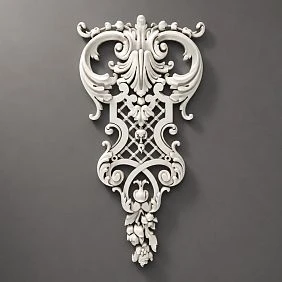
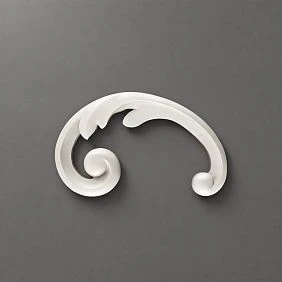
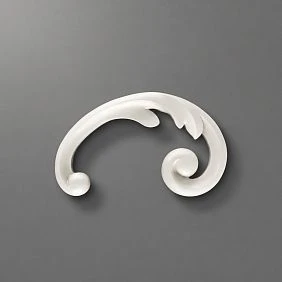
Why Wall Sconces and Decorative Molding Work So Well Together
Wall sconces and decorative molding perform different functions, but their visual effects complement one another.
The molding establishes structure.
The light reveals that structure.
Together, they can create an architectural effect that would be difficult to achieve with either element alone.




Molding Gives the Fixture a Visual Context
Imagine a wall measuring 12 feet wide and 9 feet high.
A single small sconce mounted in the middle of that surface may appear isolated.
Now place the same sconce inside a carefully proportioned decorative frame.
The molding establishes a defined area around the fixture.
The light becomes the focal point within that area.
The installation appears more deliberate because the frame provides a clear architectural boundary.
This is one reason that picture-frame molding with wall sconces can work effectively in otherwise simple rooms.
The profiles do not need to be elaborate.
A narrow raised line may provide sufficient visual structure.
Наша фабрика также производит:
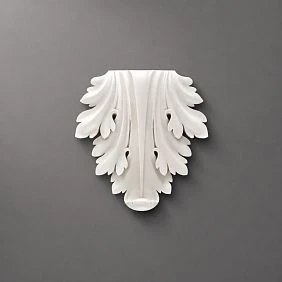
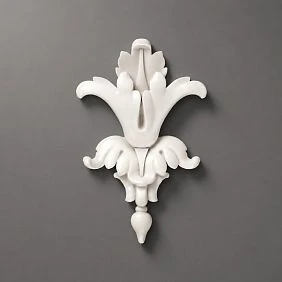
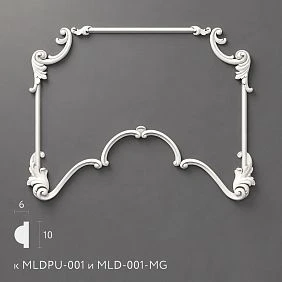
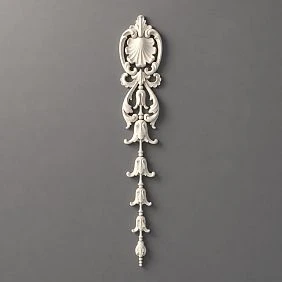
Смотреть весь Каталог продукции
Wall Sconces Reveal the Relief of Molding
Decorative molding is three-dimensional.
Its projecting edges, curved surfaces, beads, and steps interact with light.
When illumination crosses the profile from the side, one portion becomes brighter while another casts a shadow.
The eye interprets those differences as depth.
Even a shallow molding can become visually expressive under carefully positioned lighting.
A stronger profile creates more pronounced shadows.
A fine profile produces a subtler effect.
Neither is universally better.
The appropriate choice depends on the desired atmosphere.
Получить консультацию
Lighting Establishes a Focal Point
A wall containing several decorative frames needs visual hierarchy.
If every panel has identical ornament and illumination, the composition may become repetitive.
A strategically positioned wall sconce can identify the most important area.
For example, a large central wall frame may contain artwork.
Two sconces positioned symmetrically beside that frame reinforce the focal point.
Alternatively, a smaller sconce centered inside one decorative panel can create a more intimate composition.
Decorative Trim Connects Lighting to Furniture
A sconce positioned beside a bed has a functional relationship to the headboard and nightstand.
A molding frame can reinforce that relationship.
The frame might align with the outer edge of the nightstand or another deliberate furniture reference.
The same principle applies to a sofa, console table, desk, or dining room sideboard.
Instead of treating wall lighting as an independent object, the design integrates it with the room's architectural and furniture layout.
Choosing Polyurethane Molding for a Wall Sconce Composition
Not every molding profile produces the same visual result.
The face width, projection, decorative shape, and relationship to the light fixture are important.
For an American interior, the first decision should be whether the composition is intended to appear minimal, traditional, or highly ornamental.
A simple rectangular frame usually requires a restrained profile.
A formal classical wall may accommodate a deeper stepped molding or decorative corner accents.
For these applications, STAVROS offers polyurethane molding in several architectural cross-sections.
Thin Polyurethane Molding: Subtle Architectural Lines
A thin profile works well when the wall sconce should remain the dominant feature.
The STAVROS MLDPU-001 polyurethane molding has a narrow, semicircular cross-section.
Its listed dimensions are:
| Specification | MLDPU-001 |
|---|---|
| Face width | 0.39 in |
| Projection | 0.24 in |
| Stock length | 102.36 in |
| Material | Polyurethane |
The fine raised line can define a decorative frame without creating heavy shadows.
This makes it useful for considering compact bedrooms, modern living rooms, and restrained wall treatments.
For a wall with a small ceramic or metal sconce, narrow molding may provide a more balanced relationship than a large ornamental profile.
A tone-on-tone finish can make the architectural detail even subtler.
Medium Polyurethane Molding: A Defined Decorative Frame
For a stronger architectural effect, consider the STAVROS MLDPU-002 polyurethane wall molding.
Its listed dimensions are:
| Specification | MLDPU-002 |
|---|---|
| Face width | 0.87 in |
| Projection | 0.43 in |
| Stock length | 102.36 in |
| Material | Polyurethane |
The profile has a stepped cross-section with a central rounded element.
It produces more visible shadow lines than the narrower MLDPU-001.
This makes it an option for neoclassical wall panels, traditional bedrooms, and living rooms featuring a symmetrical pair of sconces.
A profile of this scale can establish a clear decorative frame without necessarily competing with the fixture.
Wide Architectural Molding: Stronger Wall Relief
The STAVROS MLDPU-003 polyurethane molding offers a broader profile.
Its approximate dimensions are:
Face width: 1.38 inches
Projection: 0.47 inches
Stock length: 102.36 inches
Material: polyurethane
This molding creates a more prominent architectural line.
It may be appropriate for larger wall compositions, formal interiors, or rooms with higher ceilings.
However, wide molding should be selected carefully.
A small sconce surrounded by a broad, deeply relieved frame may appear disproportionately delicate.
The fixture and molding should support one another visually.
Choosing Between Narrow, Medium and Wide Profiles
| Design situation | Profile to consider | Intended effect |
|---|---|---|
| Compact modern bedroom | MLDPU-001 | Fine geometric outline |
| Transitional living room | MLDPU-002 | Clearly defined architectural frame |
| Formal neoclassical wall | MLDPU-002 or MLDPU-003 | Stronger shadow and relief |
| Small wall between doors | MLDPU-001 | Reduced visual weight |
| Large accent wall with prominent sconces | MLDPU-003 | More substantial decorative geometry |
These are design suggestions, not mandatory combinations.
The final selection should be evaluated with the actual fixture dimensions and room proportions.
Six Wall Sconce Molding Layouts That Work in American Homes
There is no single arrangement that works for every room.
The most successful layout responds to the available wall area, furniture, lighting function, and architectural style.
Six configurations provide a useful starting point.
Layout 1: A Wall Sconce Centered Inside a Molding Frame
This is one of the simplest ways to create an architectural lighting feature.
A rectangular frame is installed on the wall.
The sconce is positioned within the frame, generally along its vertical centerline.
The frame defines the decorative field.
The sconce provides illumination and becomes its focal point.
The arrangement works well beside beds, above selected console tables, and in hallways with repeated wall panels.
Illustrative frame proportions:
| Fixture scale | Possible frame width | Possible frame height |
|---|---|---|
| Compact sconce | 18–24 in | 28–36 in |
| Medium sconce | 24–32 in | 36–48 in |
| Large decorative sconce | 30–42 in | 42–60 in |
These dimensions are preliminary design ranges.
They are not building-code requirements or manufacturer recommendations.
The actual frame must accommodate the fixture's full outline, installation hardware, intended light distribution, and required clearances.
A tall candle-style sconce may need a different frame from a wide horizontal uplight.
The mounting plate must also have a suitable flat supporting surface.
Decorative molding should not interfere with the fixture's mounting assembly.
Layout 2: Two Sconces Flanking a Large Central Frame
This approach creates a symmetrical architectural composition.
A large central molding frame is positioned on the wall.
Two matching sconces are installed outside the frame, one on each side.
The sconces visually support the central decorative field.
This works particularly well with a mirror, framed artwork, fireplace composition, or large wall panel.
The most important measurement is the relationship between the sconces and the central feature.
Both lights should be aligned according to a common horizontal reference.
Their spacing should relate to the frame width and the size of the wall.
For a living room, this arrangement can feel more formal than placing the sconces inside separate individual frames.
Layout 3: Matching Bedside Sconces Inside Two Vertical Frames
A bedroom offers one of the strongest applications for wall molding with sconces.
Instead of using freestanding bedside lamps, a pair of wall lights can be incorporated into two decorative frames.
Each frame defines an individual bedside area.
The headboard remains the center of the overall composition.
This can be useful when nightstands are small or when the design calls for a hotel-inspired appearance.
The sconces should be positioned for actual use, not merely for visual symmetry.
If they provide reading light, the beam should reach the intended reading position without excessive glare.
Adjustable reading sconces may require more clear space than fixed decorative fixtures.
The molding layout should accommodate their movement.
Layout 4: A Sconce Between Two Vertical Molding Panels
In this configuration, the light is positioned in the open wall area between two adjacent decorative frames.
The fixture becomes a visual separator.
This arrangement can work well in hallways, studies, and long living room walls.
The frames establish a repeating rhythm.
The sconce interrupts that rhythm in a deliberate way.
When illuminated, the fixture may cast light onto the inner edges of the neighboring panels.
This can create a compelling sense of depth.
However, the light distribution must be evaluated.
A fixture with a narrow forward beam may illuminate the room without noticeably affecting the molding.
Layout 5: A Sconce Above a Decorative Polyurethane Onlay
This is a more ornamental approach.
A decorative applique is positioned on an appropriate flat area of the wall.
The sconce is mounted separately above it.
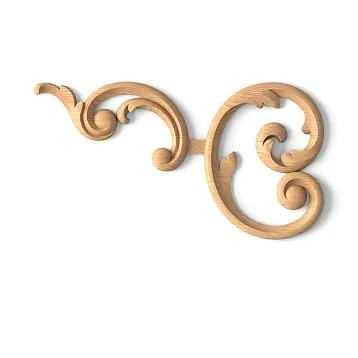
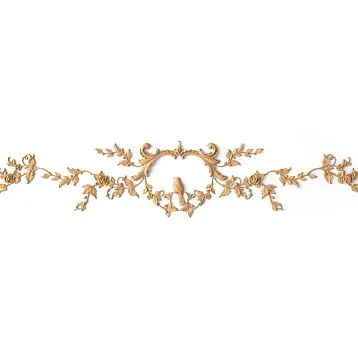
The applique may introduce a floral, classical, or geometric motif.
The result resembles a small architectural composition rather than a conventional lighting installation.
This approach works best when the fixture and ornament have compatible visual styles.
A restrained metal sconce may pair well with a small geometric or floral accent.
A large classical candelabra-style sconce may require more substantial surrounding decoration.
STAVROS offers polyurethane decorative onlays and appliques for selected architectural wall compositions.
The onlay is a decorative component, not an electrical mounting plate or junction-box cover.
Layout 6: A Repeating Hallway Wall Panel System
Long hallways provide opportunities for rhythmic lighting compositions.
A series of equally spaced molding panels can organize the walls.
Sconces may be installed at selected intervals.
For example, a corridor could use four decorative panels with sconces associated with two of them.
This can create a more restrained effect than placing a fixture inside every panel.
The appropriate arrangement depends on the hallway width, length, ceiling height, and lighting requirements.
Circulation clearances are particularly important.
In accessibility-regulated environments, protruding wall fixtures may be subject to specific limits.
The lighting layout should never create a hazard or obstruct passage.
Wall Sconce Height: How High Should You Mount the Fixtures?
There is no single universal mounting height for every wall sconce.
The appropriate height depends on its function and the physical shape of the fixture.
A bedside reading light is different from a decorative hallway uplight.
A wall washer is different from a shaded traditional sconce.
The height must also be measured consistently.
The mounting-box center, fixture center, and bottom of the shade are not necessarily the same point.
Typical Starting Heights
The following ranges can be used as preliminary design references for residential interiors.
They are not mandatory installation heights.
| Application | Preliminary mounting reference |
|---|---|
| General living room wall sconce | Center around 60–72 in above finished floor |
| Hallway decorative sconce | Center around 60–72 in, adjusted for circulation and glare |
| Bedside reading sconce | Based on mattress, headboard and seated reading position |
| Sconce beside a mirror | Based on mirror dimensions, user height and fixture light distribution |
| Wall light over a console | Based on tabletop height, fixture dimensions and desired visual spacing |
| Home office reading sconce | Based on the actual chair or work position |
A fixture may need to be mounted outside these ranges.
The correct location should be tested with its actual dimensions and intended illumination pattern.
Bedside Reading Sconces
A bedside sconce should be positioned according to the person using the bed.
Consider the mattress height, thickness of the pillows, reading posture, and direction of light.
A conventional decorative sconce may provide pleasant ambient illumination without providing adequate task lighting for reading.
If reading is the primary purpose, choose a fixture designed for that function.
Before finalizing the electrical location, create a mockup at the bedside.
A temporary cardboard outline representing the fixture can help assess clearances and reach.
Hallway Sconces
Hallway lights need special attention because people pass close to the wall.
The fixture should not create an uncomfortable obstacle.
For buildings and spaces covered by ADA accessibility requirements, certain wall-mounted objects with leading edges more than 27 inches and not more than 80 inches above the finished floor are limited to a 4-inch projection into circulation paths.
Those requirements are particularly relevant to commercial, hospitality, and other covered environments.
They should not be confused with a universal rule for every private single-family residence.
Mirror and Vanity Sconces
Sconces placed beside a mirror should be evaluated for how they illuminate the face.
Fixtures installed too high or too far to one side can produce unflattering shadows.
The mirror width, fixture dimensions, and intended task should guide placement.
For bathroom installations, the fixture's suitability for the exposure conditions and applicable electrical requirements must also be considered.
How Much Clearance Should There Be Between a Sconce and Wall Molding?
The molding frame needs enough interior space for the fixture to appear balanced.
But visual spacing is only one consideration.
The fixture may have required clearances from surrounding materials.
These must take priority.
Visual Clearance
For conceptual planning, a few inches of visible wall between the sconce and molding may be desirable.
A compact fixture may look comfortable with approximately 4–6 inches of visual separation.
A larger fixture may benefit from more.
These are aesthetic starting points, not electrical or thermal clearances.
The correct spacing should be confirmed against the fixture's actual dimensions and instructions.
Fixture Backplates
The backplate should sit on an appropriate mounting surface.
A raised polyurethane molding profile should not prevent the backplate from seating correctly.
If the proposed decorative frame crosses the fixture's mounting area, revise the layout.
Do not modify the fixture backplate to accommodate decorative trim.
Swing-Arm Fixtures
Adjustable swing-arm sconces require additional space.
Their moving components may extend beyond the decorative frame.
The molding should not interfere with adjustment or normal operation.
Evaluate the complete movement envelope before installing the trim.
Heat and Light Distribution
Some fixtures direct significant light or heat toward nearby surfaces.
The manufacturer's required clearances and lamp specifications must be followed.
LED lighting often offers advantages in efficiency and heat management, but that does not eliminate the need for suitable fixture installation.
Do not assume that any polyurethane trim can be placed immediately against any luminaire.
Wall Molding and Lighting: How Light Changes the Appearance of Relief
One of the most compelling reasons to combine wall sconces and architectural trim is the way light reveals texture.
A smooth wall reflects light differently from a wall with raised profiles.
The geometry of the molding changes the pattern of highlights and shadows.
Grazing Light
Grazing light travels close to the wall surface.
It can emphasize small projections and recesses.
A shallow architectural profile may become more prominent when illuminated from the side.
For decorative wall frames, this effect can be attractive.
However, grazing light also reveals imperfect seams, uneven filler, and surface irregularities.
The more dramatic the lighting, the more carefully the trim should be installed and finished.
Upward-Facing Sconces
An upward-facing sconce may direct light toward the upper wall and ceiling.
This can help emphasize a crown molding or other architectural transition.
Its effect on a lower wall frame may be less pronounced.
Choose the molding layout according to the actual light distribution.
Downward-Facing Sconces
A downward-facing fixture can create a defined pool of light.
It may highlight a decorative onlay or the lower portion of a wall panel.
This can be especially effective above a console or in a formal entry.
Up-and-Down Wall Lights
Fixtures with both upward and downward beams create a distinctive vertical pattern.
They can work well with simple geometric frames.
However, their strong light distribution may compete with heavily ornamental trim.
For this combination, restrained moldings are often a more balanced choice.
Diffused Decorative Sconces
A shaded wall sconce may distribute light more softly.
Instead of creating strong highlights on the molding, it gives the surrounding wall a gentle glow.
This is often suitable for bedrooms and relaxed living rooms.
Warm vs. Cool Light
For many residential bedrooms and living rooms, warm-white lighting around 2700–3000 K can create a comfortable atmosphere.
This is a common design preference rather than a mandatory specification.
The actual choice should consider the room's materials, paint colors, and intended use.
A warm light may complement cream-colored walls and traditional trim.
A cooler or more neutral light may emphasize a different material palette.
Where accurate color appearance matters, evaluate the fixture's color-rendering performance as well as its color temperature.
Real STAVROS Products for a Wall Sconce Molding Design
A useful architectural design should be supported by actual product dimensions.
For a wall sconce composition, the most important products are typically the straight molding, optional corner details, and selected decorative accents.
Polyurethane Molding for Frames
STAVROS MLDPU-001 and MLDPU-002 are suitable profiles to evaluate for different frame scales.
MLDPU-001 creates a fine line.
MLDPU-002 provides a more prominent stepped profile.
The wider MLDPU-003 is an option for larger architectural frames.
Browse polyurethane wall trim and architectural molding to compare their profiles and technical drawings.
Ornamental Corners
For a more elaborate frame, decorative corner components can introduce classical detail.
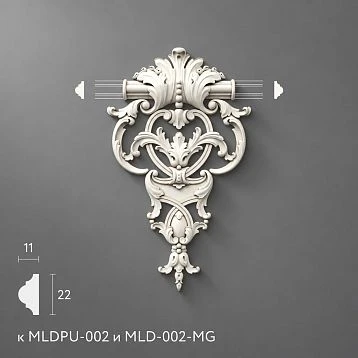
The STAVROS MLDPU-2U-2.1R right ornamental corner is a directional polyurethane accent intended for the MLDPU-002 and related MLD-002-MG molding systems.
Its listed dimensions are approximately 7.87 × 5.31 × 0.79 inches.
A corresponding left-hand version is also available.
These accents may be used in coordinated frame compositions where the ornamental orientation and product compatibility are correct.
They should not be confused with electrical accessories.
Smaller Decorative Accents
A more compact ornamental option is the NPU-436.1L polyurethane molding accent.
This component belongs to the decorative system associated with MLDPU-002.
It can be considered when a large corner ornament would be visually excessive.
The selected accent should relate to the fixture's style and the overall frame dimensions.
Floral and Classical Onlays
For decorative features above or below a wall sconce, explore ornamental polyurethane onlays.
A small floral ornament may help establish a neoclassical composition.
A more substantial onlay can provide stronger visual emphasis in a formal interior.
However, the onlay should not obscure the lighting fixture's required mounting area or service access.
Beaded Molding, Rope Molding and Ornamental Trim With Wall Sconces
A decorative frame does not have to be completely plain.
Repeating patterns can add texture and historical character.
However, ornamental trim should be selected according to the size and style of the light fixture.
Beaded Molding
Beaded molding creates a repeating sequence of small rounded elements.
The STAVROS KPU-105 profile measures approximately:
Face width: 0.43 inches
Projection: 0.24 inches
Stock length: 39.37 inches
Material: polyurethane
This profile can add delicate ornament to selected straight borders.
In a room with classical wall sconces, beaded trim may reinforce the traditional decorative language.
However, the repeating pattern must be considered when planning corner joints.
Rope Molding
Rope molding introduces a twisted or braided ornamental pattern.
STAVROS KPU-125 is a narrow polyurethane decorative strip measuring approximately 0.35 × 0.20 × 39.37 inches.
This can be used as an accent within suitable decorative compositions.
Its twisted pattern may be more appropriate for traditional interiors than for minimalist rooms.
Ornate Molding
Ornate molding includes more elaborate sculpted profiles.
Floral ornament, acanthus leaves, and repeating classical motifs can complement traditional candle-style sconces.
But two highly expressive elements can compete visually.
If the fixture has elaborate metalwork, crystals, or sculpted detailing, a simpler molding may provide a stronger overall composition.
Choosing the Visual Hierarchy
A useful design principle is to establish one primary element.
If the sconce is the focal point, use relatively restrained molding.
If the wall panel is the dominant architectural feature, choose a simpler fixture.
When both elements are highly decorative, control their proportions and spacing carefully.
Bedroom Wall Sconce Molding Ideas
The bedroom is one of the most natural locations for a combination of decorative molding and wall sconces.
The headboard wall provides a clear focal point.
Bedside lighting creates functional requirements.
The architectural treatment can connect those two needs.
Symmetrical Bedside Panels
A pair of vertical molding frames can define the areas beside the bed.
Each frame may contain a sconce.
The composition should be centered relative to the bed and headboard.
However, perfect symmetry in the molding does not always require identical furniture on both sides.
A thoughtfully planned room can accommodate slight functional differences while maintaining an overall visual balance.
One Large Frame Behind the Headboard
An alternative is to create one large decorative panel behind the bed.
The sconces may be positioned outside the frame.
This emphasizes the headboard as the primary visual element.
The sconces become secondary accents.
For a room with a large upholstered bed, this approach may be more appropriate than two small frames competing with the headboard.
Modern Bedroom With Minimal Trim
A restrained bedroom may use one narrow molding outline or a simple pair of vertical lines.
The sconces provide the visual focus.
The molding is painted in the same color as the wall.
This can create a subtle architectural effect without introducing elaborate classical decoration.
Practical Bedside Considerations
Verify that the fixture does not interfere with the headboard.
If it has an adjustable arm, confirm its range of movement.
Consider how the light falls on pillows and the reading position.
Provide a convenient control location.
The aesthetic layout should be finalized together with the actual lighting function.
Living Room Wall Molding With Sconces
Living rooms often have large wall surfaces that benefit from architectural definition.
Wall sconces can support several types of decorative composition.
Sconces Beside a Sofa
Two wall sconces may be positioned near the ends of a sofa or around a central decorative feature.
The exact placement should account for the sofa width, arm height, and normal seating positions.
Avoid locating a protruding fixture where it may be struck when someone stands up.
The molding may be arranged as a large central frame or a series of smaller panels.
Sconces Around a Mirror
A large mirror can become the central point of a living room wall.
Molding establishes an architectural frame around it.
Sconces on either side provide additional visual emphasis.
The fixtures should be positioned to manage reflections and glare.
A mirror can multiply the apparent brightness of a light source.
A fixture that is comfortable on a painted wall may produce unwanted glare when reflected in glass.
Sconces Near a Fireplace
A fireplace creates a strong architectural center.
A pair of wall sconces can reinforce symmetry around the fireplace surround or an artwork above the mantel.
However, heat exposure must be considered.
Do not mount ordinary polyurethane decorative trim or electrical fixtures where fireplace temperatures exceed their permitted conditions.
The fireplace, mantel, surrounding materials, and lighting equipment must meet their applicable installation requirements.
Long Living Room Walls
A long wall may benefit from repeating decorative frames.
Sconces can be positioned between selected panels.
The objective is to create rhythm without overloading the surface.
Lighting every frame is not necessarily the best choice.
Leaving some panels unlit may establish a more deliberate hierarchy.
Hallway and Entryway Wall Sconce Ideas
An entryway establishes the first architectural impression of a home.
A wall sconce can provide welcoming illumination.
Molding frames can introduce order and refinement.
Entry Console Composition
A console table can be positioned beneath a decorative wall frame.
A wall sconce may be centered within the frame or placed above an ornamental accent.
The composition should relate to the console width.
A fixture centered on the wall but unrelated to the furniture may appear visually disconnected.
Mirror With Matching Sconces
A mirror flanked by two sconces creates a familiar classical arrangement.
The molding may frame the mirror or define the surrounding wall.
Pay attention to reflections and viewing height.
The decorative frame must not interfere with the mirror's attachment or electrical installation.
Narrow Hallways
For a narrow hall, fixture projection is particularly important.
Select the sconce for the actual circulation space.
A shallow fixture may be more appropriate than one with a large projecting shade.
In buildings subject to accessibility standards, relevant protruding-object requirements must be respected.
Decorative molding should also remain clear of required pathways and door operation.
Dining Room and Home Office Compositions
Wall sconces can support both formal and functional spaces.
Dining Room
In a dining room, two sconces may flank a sideboard, painting, or central decorative panel.
The light can create a comfortable evening atmosphere.
A molding frame gives the composition an architectural boundary.
Warm light and restrained ornamental detail may complement traditional dining furniture.
A more geometric frame can work in a contemporary dining space.
Home Office
In a home office, decorative molding can add depth to a wall behind a desk or reading chair.
A wall sconce may provide task or accent lighting.
The fixture should be chosen according to its functional role.
A decorative uplight may not provide sufficient illumination for reading.
A directed reading light may be more useful beside a chair.
For a formal home office, darker wall colors and tone-on-tone molding can create a sophisticated background.
Metallic accents may be used selectively.
STAVROS Wall Decor Collections for Lighting Compositions
STAVROS provides coordinated wall decor collections for different architectural styles.
These can serve as starting points for designing a wall with sconces.
However, they should not be assumed to include the lighting fixture or electrical components.
Some decorative sets combine polyurethane ornaments with primed MDF molding.
Always check the exact contents.
Neoclassic Collection
The STAVROS Neoclassic wall decor collection uses structured architectural panels and classical ornamental accents.
It is suitable for consideration in symmetrical living rooms, formal bedrooms, and decorative hallways.
The arrangement may include vertical accents or framed wall panels.
Sconces can be planned around these compositions, subject to the available mounting space and fixture dimensions.
Neoclassic Light Collection
The Neoclassic Light collection offers more restrained decorative wall compositions.
Its products combine selected polyurethane decorative elements with primed MDF profiles.
This can be an attractive starting point for transitional interiors.
A simple wall sconce may complement the restrained ornament.
However, the complete wall layout and electrical mounting locations still need to be planned separately.
Japandi Collection
The STAVROS Japandi wall decor collection emphasizes restrained architectural geometry.
It can be considered for calm modern interiors with natural colors and simple lighting fixtures.
A small ceramic wall sconce, matte metal uplight, or another understated design may work well with minimal molding.
Avoid adding excessive floral ornament.
The objective is balance between the wall surface, light, and decorative detail.
Versailles Light Collection
The Versailles Light collection offers classical decorative wall treatments with more expressive relief.
These may complement traditional metal, glass, or candle-style sconces in suitably proportioned rooms.
Because the decorative elements are more elaborate, the position of the fixture should be established carefully.
The lighting can emphasize the ornament without visually competing with it.
Versailles Collection
For formal interiors, the STAVROS Versailles wall decor collection offers richer ornamental compositions.
For example, the CPU-5-7 decorative wall kit measures approximately 11.81 × 90.55 inches and includes a combination of primed MDF molding and polyurethane decorative elements.
Its narrow vertical format is better considered as a decorative architectural accent rather than automatically as a frame for a large sconce.
The fixture may be more effectively positioned beside the decorative composition.
That distinction illustrates why ready-made wall decor should be evaluated according to real dimensions rather than used as a universal fixture surround.
How to Calculate Polyurethane Molding for Two Wall Sconces
A practical design needs a reliable material calculation.
Consider a bedroom with two matching wall sconces.
Each sconce will be centered inside a decorative rectangular frame.
The design uses STAVROS MLDPU-002 polyurethane molding.
Project Dimensions
Assume the following illustrative frame dimensions:
Frame width: 24 inches
Frame height: 42 inches
Number of frames: 2
Selected molding: MLDPU-002
Stock length: 102.36 inches
The frame dimensions must be measured consistently, such as to the outside long points of the finished mitered pieces.
The calculation should be based on those actual cutting dimensions.
Calculate One Frame
A rectangular frame requires two vertical pieces and two horizontal pieces.
The formula is:
Frame perimeter = 2 × width + 2 × height
For one frame:
2 × 24 + 2 × 42 = 48 + 84
Total = 132 inches
132 ÷ 12 = 11 linear feet.
Calculate Two Frames
For two identical frames:
132 × 2 = 264 inches.
264 ÷ 12 = 22 linear feet.
This is the net installed molding length.
Calculate Stock Lengths
Each MLDPU-002 strip measures 102.36 inches.
The theoretical minimum number of strips is:
264 ÷ 102.36 = 2.58.
Rounded up:
3 full strips.
But the cutting plan must also demonstrate that the individual pieces fit.
Prepare the Cut List
For two frames, the project needs:
| Finished piece | Quantity | Total length |
|---|---|---|
| Vertical molding, 42 in | 4 | 168 in |
| Horizontal molding, 24 in | 4 | 96 in |
| Total | 8 pieces | 264 in |
A feasible preliminary cutting plan is:
| Stock strip | Cuts | Unused length before saw kerf |
|---|---|---|
| Strip 1 | 42 + 42 in | 18.36 in |
| Strip 2 | 42 + 42 in | 18.36 in |
| Strip 3 | 24 + 24 + 24 + 24 in | 6.36 in |
This produces all eight molding pieces from three stock lengths.
Normal saw-kerf allowances fit within the remaining length, but the actual cut sequence and miter orientation should be verified before cutting.
What About Decorative Corner Pieces?
If the design includes ornamental overlays, their quantity must be calculated separately.
Two rectangular frames contain eight corner positions.
However, not every frame needs decorative corners.
For certain coordinated systems, left-hand and right-hand pieces are supplied separately.
Their orientation and compatibility should be confirmed from the manufacturer.
Adhesive and Finishing Materials
The project also requires approved molding adhesive, compatible joint treatment, and paint or primer where needed.
Their quantities should be calculated from the manufacturers' coverage instructions.
Do not assume that a fixed number of adhesive cartridges is sufficient for every profile.
The actual bonding surfaces and installation method determine consumption.
A Complete Bedroom Layout: Fixture Position and Frame Proportions
Let's apply the previous calculation to a practical bedroom composition.
Assume the room has an 8-foot ceiling.
The two molding frames measure 24 inches wide and 42 inches high.
Each sconce has a nominal overall width of approximately 7 inches and a height of 16 inches.
Establish the Frame Position
For illustration, position each frame with its lower outside edge 39 inches above the finished floor.
The top edge becomes:
39 + 42 = 81 inches.
With a 96-inch ceiling, the remaining distance to the ceiling is:
96 − 81 = 15 inches.
This provides a visible upper margin.
The actual design should also account for any crown molding or other ceiling details.
Locate the Sconce
Suppose the sconce's visual center is placed 60 inches above the floor.
A 16-inch-high fixture centered at that point extends approximately from 52 to 68 inches.
That leaves roughly 13 inches above and below the fixture within the 39–81-inch frame, before accounting for the molding face width and other details.
Horizontally, a 7-inch-wide fixture centered within a 24-inch frame leaves:
24 − 7 = 17 inches.
Divided equally:
8.5 inches of nominal space on each side.
This is a balanced geometric starting point.
It is not a claim that the fixture has satisfied all manufacturer-required clearances.
Verify the Actual Bedside Function
Before finalizing this arrangement, check the mattress height, headboard, nightstand, user position, and fixture beam.
A 60-inch centerline may be visually suitable but may not provide ideal reading illumination for every bed.
Adjust as necessary.
The lighting function should take priority over maintaining a particular decorative measurement.
Check the Electrical Mounting Area
The fixture's mounting box and backplate must be correctly positioned.
The molding frame must remain clear of the required mounting hardware.
Any electrical work should be planned and performed in accordance with the applicable electrical code and fixture instructions.
Electrical Safety: What the Original Decorating Advice Often Gets Wrong
Architectural molding and electrical wiring should be designed as coordinated systems, but they serve different purposes.
A polyurethane decorative profile is not a substitute for approved electrical equipment.
Do Not Hide Wiring Splices Behind Decorative Molding
A decorative strip cannot be treated as a code-approved enclosure for electrical connections.
Splices and junctions require appropriate electrical boxes or other specifically approved wiring methods.
Those enclosures must remain accessible as required by the applicable electrical code.
A permanently glued molding or ornamental onlay should not conceal a junction box in a way that prevents required access.
Do Not Use an Ordinary Polyurethane Onlay as a Junction-Box Cover
A decorative applique may visually resemble a medallion or mounting block.
But unless a product is specifically designed and approved for the relevant electrical application, it should not replace a listed electrical box, cover, or fixture mounting component.
The light fixture needs to be supported according to its manufacturer's instructions.
Plan Electrical Work Before Decorative Installation
The fixture locations should be established at the design stage.
Where hardwired sconces are used, a qualified electrician can determine the appropriate wiring, boxes, switching, and mounting arrangements.
The decorative frames can then be positioned around those confirmed locations.
This avoids cutting through newly installed molding to relocate a light.
Do Not Drill Into Unknown Wall Areas
Before installing decorative components, identify the possible locations of electrical wiring, plumbing, and other concealed services.
Blind drilling can cause damage or create safety hazards.
The mounting method should be appropriate for the substrate and known wall conditions.
Respect Fixture Instructions
Some sconces require particular mounting orientations, lamp types, or distances from surrounding materials.
Do not modify those requirements to accommodate the decorative design.
If the fixture and molding cannot coexist safely, revise the layout or choose another product.
Commercial and Hospitality Installations
In hotels, public hallways, and other regulated environments, additional accessibility and building-code considerations may apply.
Wall sconces are specifically relevant to protruding-object requirements.
Decorative elements should also preserve required corridor width, fixture servicing, and applicable fire and life-safety provisions.
For U.S. projects, local authorities and qualified design professionals should confirm the requirements that apply to the particular building.
Installation Sequence: Lighting and Molding Without Rework
A well-organized installation minimizes unnecessary cutting and remodeling.
The correct sequence depends on whether the room is being built, fully renovated, or decorated after electrical work has already been completed.
For a typical hardwired wall sconce installation, the following process is a useful framework.
Step 1: Develop the Complete Wall Elevation
Draw the wall with the furniture in place.
Include the intended sconces, molding frames, artwork, mirrors, switches, outlets, and other important features.
Record dimensions from a consistent reference.
This reveals potential conflicts before work begins.
Step 2: Confirm the Light Fixtures
Select the actual fixture model.
Obtain its dimensional drawing.
Record the overall width, height, projection, backplate size, and mounting requirements.
Do not plan the molding around a generic sconce silhouette if the final fixture may be different.
Step 3: Establish Electrical Locations
Coordinate mounting-box positions and the electrical design.
For hardwired installations, have the electrical portion performed by an appropriately qualified professional.
Confirm that the fixture can be mounted and serviced as required.
Step 4: Prepare the Wall
Complete any necessary wall repairs or permitted electrical installation work.
The wall surface should be stable, dry, and suitable for the selected molding adhesive.
Check the finish and substrate requirements.
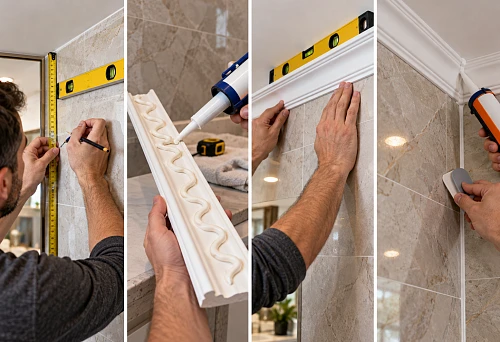
Step 5: Mark the Molding Layout
Use a suitable level and measuring tools.
Establish the frame dimensions and common reference lines.
For symmetrical arrangements, verify that matching frames share the intended dimensions and alignment.
Do not simply measure from different room corners independently.
Existing walls may not be perfectly square.
Step 6: Cut and Dry-Fit the Molding
Prepare the cut list.
Cut the profiles according to the intended joint geometry.
Dry-fit the pieces against the wall.
Check miter joints and clearance around the fixture mounting location.
Confirm that decorative corners fit the correct molding series.
Step 7: Install the Decorative Profiles
Use a manufacturer-approved adhesive system.
Apply it according to the product requirements.
Install the molding in a controlled sequence.
Temporary supports may be necessary while the adhesive cures.
Do not assume that all polyurethane profiles require identical bonding methods.
Step 8: Finish the Joints
After the molding is secured, inspect the corners and transitions.
Use compatible fillers or joint compounds where specified.
Remove excess material carefully.
Avoid damaging the profile's relief.
Step 9: Prime and Paint
Check whether the profile is factory-primed.
Apply compatible finishing products according to the instructions.
For tone-on-tone designs, the wall and molding may be painted to achieve a consistent appearance.
Allow the finish to dry and cure as appropriate.
Step 10: Install and Test the Sconces
Have the sconces installed and connected according to their electrical requirements.
Test the lighting under actual nighttime conditions.
Check glare, shadow distribution, and the appearance of the architectural relief.
The final effect should be evaluated with the fixtures illuminated, not only under daylight.
Paint Colors and Finishes for Wall Sconce Molding
The finish changes how architectural molding interacts with light.
Two identical molding frames can create different impressions depending on color and sheen.
Tone-on-Tone Painting
Painting the molding and wall the same color creates a restrained architectural effect.
The relief becomes visible through light and shadow.
This is particularly useful for bedrooms, transitional interiors, and modern living rooms.
Warm white, cream, taupe, muted green, and soft gray can all work depending on the design.
The finish should be compatible with the actual molding product.
White Molding Against a Colored Wall
This creates a stronger outline.
A deep blue or green wall with white molding can produce a traditional appearance.
Wall sconces with a complementary metal finish may emphasize the composition.
However, high-contrast molding makes alignment errors more visible.
Accurate installation becomes especially important.
Dark Molding on a Dark Wall
Deep colors can create a dramatic architectural backdrop.
Black, charcoal, navy, and dark green provide opportunities for subdued relief.
The sconce can become the brightest focal point.
Under warm light, the molding's shape may appear through subtle highlights.
Metallic Decorative Accents
Gold, bronze, copper, and other metallic-looking finishes may be used on selected ornaments.
The effect is most successful when applied with restraint.
For example, a small floral applique may receive a metallic accent while the primary molding remains painted in the wall color.
Use compatible decorative coatings.
Test their appearance under the actual sconces before finishing the entire installation.
Common Mistakes When Combining Sconces and Decorative Wall Molding
Installing the Fixture Before Designing the Wall
If the electrical location is chosen without considering the molding, the fixture may end up in an awkward position.
A better approach is to develop the complete wall design before finalizing the mounting location.
Letting the Sconce Overlap the Frame
A fixture backplate that crosses a raised molding profile can prevent proper mounting and create a visually awkward joint.
Plan sufficient space around the fixture.
Intentional overlap should be part of an approved, engineered assembly, not an improvised installation.
Using a Frame That Is Too Small
A narrow frame can make a large fixture appear cramped.
Consider the full fixture dimensions, not merely its backplate.
Using a Frame That Is Too Large
A very small fixture inside a vast empty panel may lose visual emphasis.
The frame should relate to the fixture and surrounding wall.
However, large negative space can also be an intentional design choice.
The composition should be evaluated as a whole.
Installing Paired Sconces at Different Heights
Unintended misalignment is especially visible in symmetrical designs.
Use a common reference line.
Verify the actual mounting centers before installation.
Mixing Incompatible Molding Profiles
A corner ornament from one molding family may not match another profile.
Check cross-sections, dimensions, and product compatibility.
Ignoring Light Distribution
A beautiful fixture may cast light in an unexpected direction.
The result can create glare or overly strong shadows.
Evaluate its optical characteristics before choosing the decorative arrangement.
Overdecorating the Wall
Rich ornamental molding and elaborate wall sconces can compete for attention.
Choose which component should dominate.
Treating Decorative Moldings as Electrical Raceway
Ordinary polyurethane trim is not automatically an approved wiring channel.
Do not conceal unprotected wiring or inaccessible electrical connections behind decorative profiles.
Buying Without a Cutting Plan
Total linear footage is not the same as the number of stock lengths required.
Prepare the individual cutting list before ordering.
What to Buy for a Wall Sconce Molding Project
The decorative order should be based on the final wall elevation.
The lighting and electrical components should be specified separately.
Decorative Materials
The project may require:
Straight polyurethane molding profiles
Compatible decorative corner elements
Selected ornamental onlays
Optional coordinated wall decor kits
Approved molding adhesive
Compatible joint-finishing materials
Primer and paint where required
Lighting Components
The lighting specification should identify:
Actual wall sconce model
Fixture dimensions
Light distribution and intended use
Appropriate lamp or integrated light source
Required mounting equipment
Applicable electrical box and wiring method
Switching or dimming requirements
These components are not interchangeable with decorative architectural products.
Choosing Between Individual Profiles and Kits
Buying individual molding gives greater control over frame dimensions.
This approach is useful when sconces must be centered within a particular width or when the room has unusual wall proportions.
A coordinated wall decor kit can simplify the selection of ornamental details.
However, the kit's dimensions must be checked against the proposed light fixture.
The selected kit may need to be positioned beside a sconce rather than around it.
STAVROS Products by Project Type
| Project goal | STAVROS product category |
|---|---|
| Simple geometric wall frames | Polyurethane Moldings |
| Ornamental borders | Decorative Polyurethane Trim |
| Corner accents and frame decoration | Molding Decor |
| Floral and classical appliques | Polyurethane Onlays |
| Coordinated decorative wall compositions | Wall Decor Collections |
For U.S. purchasing, verify current product availability, freight costs, import requirements, and shipping terms before placing an order.
The English-language STAVROS catalog provides dimensions in inches and pricing in U.S. dollars, but this should not be interpreted as confirmation of domestic U.S. stock or delivery.
Frequently Asked Questions About Wall Sconces and Molding
Can You Install a Wall Sconce Inside Picture-Frame Molding?
Yes. A wall sconce can be positioned within a decorative molding frame when the fixture is mounted correctly, has the required clearance, and the molding does not interfere with its backplate or service access.
What Molding Is Best for Wall Sconces?
The best profile depends on the fixture and room. Narrow polyurethane molding may work well in modern interiors. A stepped profile can provide stronger architectural definition in traditional or neoclassical rooms.
What Is Picture-Frame Molding?
Picture-frame molding is decorative trim applied to a wall to create rectangular or other framed outlines. It adds architectural depth without necessarily installing full raised wall panels.
How High Should Wall Sconces Be Mounted?
Height depends on the fixture's function, dimensions, and location. General decorative sconces are often evaluated with their center around 60–72 inches above the floor, but bedside reading lights and mirror sconces may require different placement.
Can Wall Sconces Be Installed Above a Bed?
They can be installed in an appropriate position, but clearance, glare, headboard geometry, intended use, and secure mounting must be considered. Adjustable reading fixtures require additional movement space.
Should Wall Sconces Be Centered in the Molding Frame?
Centering is a common starting point for symmetrical compositions. However, certain designs may intentionally position a fixture above or below the geometric center to achieve better visual balance or illumination.
Can Two Sconces Be Installed on Either Side of a Large Decorative Frame?
Yes. This is a common symmetrical arrangement. The fixtures should relate to the central frame, furniture, and surrounding architectural elements.
What Is the Best Molding for a Neoclassical Wall?
A coordinated profile with restrained but visible relief is a strong starting point. STAVROS MLDPU-002 and MLDPU-003 offer different scales for classical or neoclassical decorative wall compositions.
Can Polyurethane Molding Be Painted the Same Color as the Wall?
Yes, when the selected molding and coating are compatible. Tone-on-tone finishes emphasize architectural relief through light and shadow instead of contrasting color.
Does Polyurethane Molding Need Primer?
Some polyurethane products are factory-primed. Others may require preparation. Follow the manufacturer's instructions and use a compatible coating system.
Can I Hide Electrical Wiring Behind Polyurethane Molding?
Ordinary decorative polyurethane molding is not automatically an approved electrical raceway. Electrical wiring and splices must use methods and equipment permitted by the applicable code. Junction boxes must remain accessible as required.
Can a Decorative Polyurethane Onlay Cover a Wall Sconce Junction Box?
Not unless it is part of a specifically approved electrical installation. Ordinary decorative onlays should not substitute for listed electrical boxes, covers, or fixture mounting equipment.
Are Wall Sconces With Molding Suitable for Hallways?
Yes, but fixture projection and circulation clearances matter. For buildings subject to ADA requirements, wall-mounted objects in specified height ranges may be limited to a 4-inch projection into circulation paths.
Can Decorative Wall Molding Be Used in a Japandi Interior?
Yes, when the design remains restrained. Simple profiles, limited ornament, subtle color, and carefully selected lighting may suit a Japandi-inspired space.
How Much Molding Do I Need for Two Sconce Frames?
Measure the width and height of each frame, calculate its perimeter, and multiply by the number of frames. Then prepare a cutting plan using the selected stock length. In the 24 × 42-inch example above, two frames require 22 linear feet and can be cut from three 102.36-inch STAVROS MLDPU strips.
Is Beaded Molding Suitable for a Wall Sconce Frame?
Beaded molding can work in selected traditional decorative compositions. However, its repeating pattern requires careful joint planning, and its visual character should complement the fixture.
Can I Add Decorative Corners to a Wall Sconce Frame?
Yes, provided the corner elements are compatible with the molding profile and correctly positioned. STAVROS offers decorative corners associated with specific molding families.
Are STAVROS Wall Decor Kits Made Entirely From Polyurethane?
Not always. Some coordinated wall decor kits combine polyurethane ornamental elements with primed MDF molding. Check each kit's component list and material specifications.
Does STAVROS Sell Wall Sconces?
The products discussed here are architectural molding and decorative wall components. This guide does not establish that STAVROS supplies the electrical light fixtures. Sconces and their approved mounting equipment should be selected separately.
Where Can I Buy Polyurethane Molding for Wall Sconce Decoration?
You can browse the STAVROS polyurethane molding collection, compare decorative trim molding, and explore wall decor collections for coordinated architectural treatments.
Verify exact dimensions, product compatibility, and purchasing terms before ordering.
Conclusion: Make Wall Lighting Part of the Architecture
A wall sconce can be beautiful by itself.
But when lighting is coordinated with architectural molding, it becomes part of something larger.
A simple rectangular frame gives the fixture a clear visual setting. A pair of sconces can establish symmetry around a mirror or central panel. A narrow decorative profile can introduce depth without distracting from the light. More elaborate ornaments can create the atmosphere of a traditional or neoclassical interior.
The effect depends on proportion and planning.
The fixture should be selected according to its actual purpose.
The molding should relate to the fixture's dimensions and style.
The lighting position should work with the furniture and wall geometry.
Electrical equipment must remain correctly installed, supported, and accessible.
STAVROS offers polyurethane wall molding, ornamental decorative trim, molding corner accents, polyurethane onlays, and coordinated wall decor collections that can be incorporated into carefully planned interior compositions.
For the most reliable result, begin with a complete wall elevation.
Choose the lighting fixture.
Verify its mounting location and electrical requirements.
Establish the molding layout.
Calculate the materials using actual stock lengths.
Install and finish the architectural details.
Then evaluate the completed design under the intended lighting conditions.
The best wall sconce composition is not simply a light surrounded by decoration. It is an architectural arrangement in which lighting, relief, proportion, and the room itself work together.